
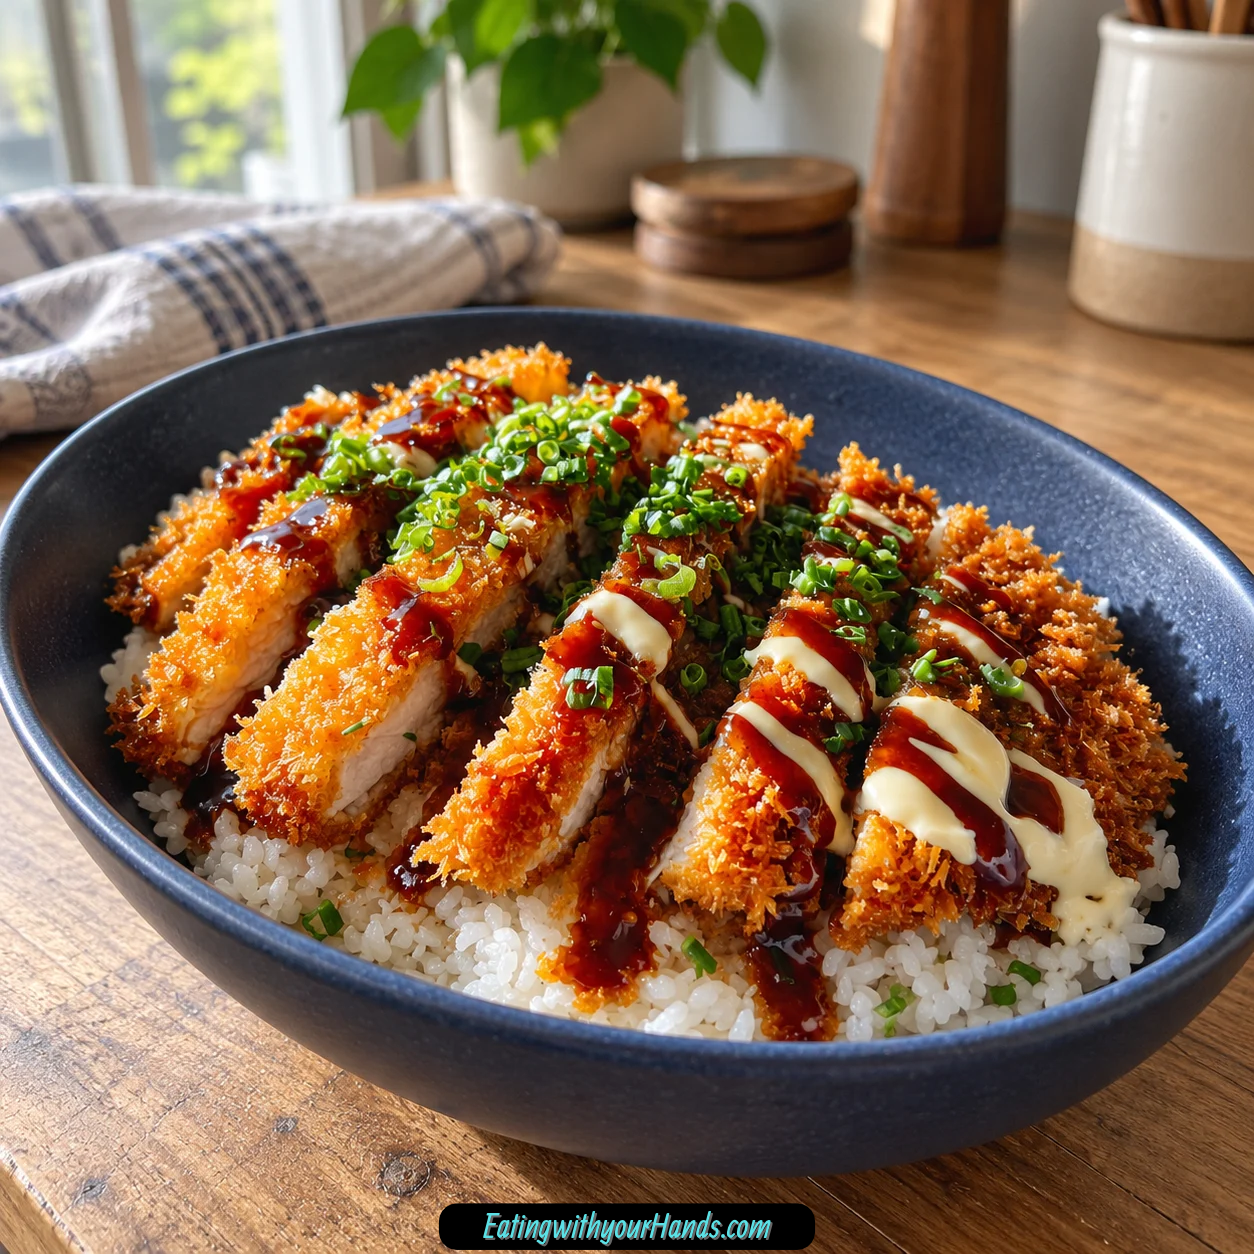

There are meals I remember because they were beautiful, and others I remember because one bite completely rewired what I thought simple food could taste like. Japanese Katsu Bowls belong to that second category for me, with crisp golden breading giving way to juicy meat, fluffy rice underneath, and that unmistakable tangy-sweet tonkatsu sauce running across the top.
I first fell for that combination years ago at a tiny eatery in Tokyo. The moment I cut through the crunchy coating and tasted the meat with the glossy sauce and warm rice, I understood why such a straightforward dish could become something you crave again and again.
That memory is exactly what I try to recreate when I make these bowls at home. The ingredients are uncomplicated, but the contrast between textures and flavors makes the finished meal feel much more special than the effort suggests.
The panko crust is the part that immediately grabs your attention. It fries into a deeply golden shell that stays light and crisp instead of becoming dense, and underneath it the chicken or pork remains tender.
Then there is the rice, quietly doing its job beneath everything else. It gives the cutlet somewhere soft and warm to land while soaking up just enough tonkatsu sauce to make every spoonful feel complete.
The sauce is what pulls the entire bowl together. Its tangy sweetness cuts through the richness of the fried cutlet and keeps the dish from feeling heavy.
I also love how practical these bowls are for a weeknight. Once the meat is pounded, seasoned, breaded, and fried, dinner can be on the table in about 30 minutes.
That combination of speed and comfort has made this one of the meals my family asks for regularly. Whether I use chicken or pork, the reaction is always the same: everyone starts eating quietly, then someone asks if there is enough for seconds.
Table of Contents
- Why You’ll Love These Japanese Katsu Bowls
- Ingredients for Japanese Katsu Bowls
- Chicken or Pork
- Why Panko Is So Important
- The Role of Flour and Egg
- Seasoning the Cutlets
- Choosing the Oil
- Why Tonkatsu Sauce Makes the Bowl
- Japanese Mayo as an Optional Finish
- Equipment You’ll Need
- How to Make Japanese Katsu Bowls with Tonkatsu Sauce
- Step 1: Flatten the Meat Evenly
- Step 2: Season Both Sides
- Step 3: Set Up the Breading Station
- Step 4: Coat With Flour
- Step 5: Dip Into the Egg
- Step 6: Press Into the Panko
- Step 7: Build Extra Crunch
- Step 8: Heat the Oil
- Step 9: Fry Without Crowding
- Step 10: Cook the First Side
- Step 11: Flip and Finish Frying
- Step 12: Drain the Cutlets
- Step 13: Rest Before Slicing
- Step 14: Build the Bowls
- Step 15: Finish and Serve
- How to Keep the Breading From Falling Off
- Why Medium Heat Works Best
- The Importance of Letting the Cutlets Rest
- Serving With Shredded Cabbage
- Serving With Miso Soup
- Pickled Ginger for Brightness
- How to Make the Bowl Look Restaurant-Style
- Pork Katsu Variation
- Gluten-Free Variation
- Eggplant Katsu Variation
- Tofu Katsu Variation
- Baking Instead of Frying
- Homemade Tonkatsu Sauce Option
- Why Regular Breadcrumbs Aren’t Ideal
- Storage
- Reheating in the Oven
- Quick Refry Method
- Frequently Asked Questions
- Nutrition Information
- The Katsu Bowl I Keep Coming Back To
- Japanese Katsu Bowls with Tonkatsu Sauce
Why You’ll Love These Japanese Katsu Bowls
The first reason is the crunch. Panko breadcrumbs create the kind of crisp coating that gives every bite a satisfying crackle before you reach the juicy meat inside.
The second reason is speed. You can move from a few basic ingredients to a complete bowl in about 30 minutes, which makes this far easier than the finished dish looks.
The flavor is bold without being complicated. Salt, pepper, garlic powder, panko, rice, and tonkatsu sauce are enough to create a meal that feels layered and deeply satisfying.
You also get flexibility with the protein. Chicken breasts work beautifully, while pork chops give you another classic direction.
The bowl format makes serving easy. Slice the cutlet, lay it over warm rice, drizzle with sauce, and finish with Japanese mayo or a fresh garnish if you like.
Best of all, the recipe is easy to repeat. Once you have made the breading station and frying process once, the whole rhythm becomes something you can practically do from memory.
Ingredients for Japanese Katsu Bowls
The ingredient list is simple, and each part has a clear purpose. The meat provides the centerpiece, panko gives the signature crust, and rice and tonkatsu sauce complete the bowl.
- 2 boneless, skinless chicken breasts, or pork chops
- 1 cup all-purpose flour
- 2 large eggs, beaten
- 2 cups panko breadcrumbs
- 1 teaspoon salt
- ½ teaspoon black pepper
- ½ teaspoon garlic powder
- ½ cup vegetable oil
- 2 cups cooked white rice
- ¼ cup tonkatsu sauce
- 2 tablespoons Japanese mayo, optional
- Chopped parsley or green onions, for garnish
Short-grain white rice is especially good when you have it. Its soft, slightly sticky texture creates a comforting base for the crisp cutlet.
The breading station uses three separate layers. Flour gives the egg something to hold onto, the beaten egg helps the panko adhere, and panko creates the final crunchy shell.
Chicken or Pork
Chicken breasts make an easy weeknight version. Their mild flavor gives the panko and tonkatsu sauce plenty of room to stand out.
Pork chops can be used when you want a more traditional tonkatsu-style bowl. The process is the same, though thicker pork may require slightly more cooking time.
Whichever meat you choose, the key is even thickness. Pounding it to about ½ inch helps the cutlet cook at a consistent rate from edge to center.
Uneven meat creates problems because thin sections can overcook while thick sections remain underdone. Taking a minute to flatten the cutlets solves much of that before frying even begins.
Why Panko Is So Important
Panko is not just another breadcrumb in this recipe. Its light, flaky texture is what gives the cutlet that signature crispness.
Regular breadcrumbs produce a denser coating. They also tend to absorb moisture more quickly once the sauce is added.
Two cups of panko give you enough to coat both cutlets generously. Pressing the crumbs onto the surface helps build a complete shell without leaving bare spots.
Do not crush the panko into fine crumbs. Its irregular flakes are exactly what create the crisp, airy texture.
The Role of Flour and Egg
The 1 cup all-purpose flour is the first breading layer. It dries the surface slightly and creates something the egg can cling to.
The 2 beaten eggs come next. Whisk them until no obvious streaks remain so the coating is smooth and consistent.
After the egg, the panko has a sticky surface to attach to. That three-stage system is what keeps the crust firmly connected to the meat.
Shake off excess flour and let excess egg drip away. Too much of either can create weak, uneven breading.
Seasoning the Cutlets
The meat is seasoned with 1 teaspoon salt, ½ teaspoon black pepper, and ½ teaspoon garlic powder. Those amounts give the cutlets flavor before the sauce ever touches them.
Season both sides evenly. A gentle rub with your fingers helps the seasoning stay in place during breading.
The garlic powder is subtle but useful. It adds another savory note without competing with the tonkatsu sauce.
Do not skip the basic seasoning just because sauce will be added later. A well-seasoned cutlet tastes better all the way through.
Choosing the Oil
The recipe uses ½ cup vegetable oil. This is enough to create a shallow frying environment in a large pan.
Heat the oil over medium until it reaches about 350°F. A thermometer makes this much easier to control.
If the oil is too cool, the breading can absorb more oil and become heavy. If it is too hot, the crust may brown before the meat has finished cooking.
A breadcrumb dropped into properly heated oil should sizzle immediately. That quick test is useful even when you are also checking with a thermometer.
Why Tonkatsu Sauce Makes the Bowl
Tonkatsu sauce is where the bowl gets its signature tangy-sweet finish. The recipe uses ¼ cup for serving.
Drizzle it over the sliced cutlet rather than drowning the entire bowl. This keeps the panko crisp while still giving each bite plenty of sauce.
Bulldog tonkatsu sauce is a favorite option. It gives the dish the familiar balance of sweetness and tang that works so well with fried meat.
If tonkatsu sauce is unavailable, a quick alternative can be made from ketchup, Worcestershire sauce, soy sauce, and sugar. The result is not identical, but it can work when you need a substitute.
Japanese Mayo as an Optional Finish
Two tablespoons Japanese mayo can be added after the bowls are assembled. Its creamy texture gives the dish another rich layer.
A small dollop or drizzle is enough. The tonkatsu sauce should still remain the main finishing sauce.
Japanese mayo works especially well with the crunchy cutlet. It softens some of the sharpness from the tonkatsu sauce without covering it.
This ingredient is optional. The bowls are complete even without it.
Equipment You’ll Need
A large heavy-bottomed pan is ideal for frying. Cast iron works particularly well because it holds heat steadily.
You will also need a meat mallet or rolling pin. Either can flatten the cutlets to an even ½-inch thickness.
Three shallow bowls are useful for the flour, egg, and panko. Setting them up in a line keeps the breading process organized.
A wire rack or paper towels help drain the fried cutlets. Chopsticks or a wide spatula can be used for turning them carefully in the oil.
How to Make Japanese Katsu Bowls with Tonkatsu Sauce
The process becomes much easier when everything is prepared before frying begins. Pound and season the meat, arrange the breading station, heat the oil, and have the cooked rice ready for serving.
Step 1: Flatten the Meat Evenly
Place each chicken breast or pork chop between two sheets of plastic wrap or parchment paper. This keeps the work surface cleaner while you pound the meat.
Use a meat mallet or rolling pin to flatten each piece to about ½ inch thick. Work from the center outward so the thickness becomes as even as possible.
Do not pound so aggressively that the meat tears. The goal is an even cutlet that will cook quickly and consistently.
Step 2: Season Both Sides
Remove the meat from the wrapping and lay it on a clean surface. Season both sides with the salt, black pepper, and garlic powder.
Rub the seasoning gently into the surface. This helps it stay evenly distributed while the cutlet moves through the breading station.
Keep the seasoned meat nearby while you prepare the coating bowls. Once breading starts, you will want everything within easy reach.
Step 3: Set Up the Breading Station
Place the all-purpose flour in the first shallow bowl. Pour the beaten eggs into the second and the panko breadcrumbs into the third.
Arrange the bowls in that exact order. Moving from flour to egg to panko keeps the process smooth and reduces unnecessary mess.
A helpful trick is to keep one hand mostly for the dry ingredients and the other for the egg. This prevents your fingers from becoming heavily coated with sticky breading.
Step 4: Coat With Flour
Place one seasoned cutlet into the flour. Turn it until both sides are completely covered.
Lift the cutlet and shake off the excess. You want a thin, even layer rather than thick patches of flour.
Too much flour can interfere with the egg layer. A light coating gives the breading better structure.
Step 5: Dip Into the Egg
Transfer the floured cutlet into the beaten egg. Coat both sides completely.
Lift it and let the extra egg drip back into the bowl. Excess liquid can make the panko clump unevenly.
Check the edges as well as the flat surfaces. Complete egg coverage helps the crumbs adhere everywhere.
Step 6: Press Into the Panko
Lay the egg-coated cutlet in the panko. Cover the top with more crumbs and press gently but firmly.
Flip the cutlet and press again. This helps the panko create a full, textured coating.
Make sure the edges are covered too. Bare sections can brown differently from the rest of the cutlet.
Step 7: Build Extra Crunch
For an especially crisp coating, press the panko onto the cutlet a second time. The goal is not a wet second breading cycle, but a firm reinforcement of the crumb layer.
Let the breaded cutlet sit briefly while you prepare the second one. This gives the coating a moment to settle onto the surface.
Repeat the flour, egg, and panko process with the remaining meat. Keep both cutlets ready near the stove.
Step 8: Heat the Oil
Pour the ½ cup vegetable oil into a large heavy-bottomed skillet. Heat it over medium until it reaches about 350°F.
Use a thermometer when possible. Stable oil temperature is one of the biggest factors in getting a crisp crust.
A breadcrumb should sizzle immediately when dropped into the oil. If it sits quietly, the pan needs more time.
Step 9: Fry Without Crowding
Carefully lower one breaded cutlet into the hot oil. If the pan is large enough to hold both without crowding, you can fry them together, but cooking one at a time is perfectly fine.
Leave enough space around each cutlet for oil to circulate. Crowding can drop the temperature and make the crust less crisp.
Once the cutlet is in the pan, resist the urge to move it immediately. Let the coating begin setting against the hot oil.
Step 10: Cook the First Side
Fry for about 3–4 minutes on the first side. The underside should become deep golden brown.
Avoid checking too early. Moving the cutlet before the breading has set can cause sections of panko to pull away.
Once the crust looks firm and golden, prepare to flip. Use a wide spatula or chopsticks carefully.
Step 11: Flip and Finish Frying
Turn the cutlet in one controlled motion. Fry the second side for another 3–4 minutes.
Watch the color closely. The panko should become evenly golden without darkening too far.
Pork may require adjustment when the cutlet is thicker. Keep the even-thickness preparation in mind so the center cooks along with the crust.
Step 12: Drain the Cutlets
Lift the cooked cutlets from the skillet. Transfer them to a wire rack or paper towels.
A rack allows air to move underneath and helps preserve the crust. Paper towels can also absorb excess oil effectively.
Do not immediately cover the cutlets. Trapped steam can soften the panko.
Step 13: Rest Before Slicing
Let the cutlets rest for about 2 minutes. This short pause helps keep the inside juicy when you cut into them.
Do not let them sit so long that the crust loses its heat. Two minutes is enough before slicing.
Use a sharp knife and cut each cutlet into neat strips. Keep the slices together so they are easy to fan over the rice.
Step 14: Build the Bowls
Divide the 2 cups cooked white rice between serving bowls. Spread it into an even base.
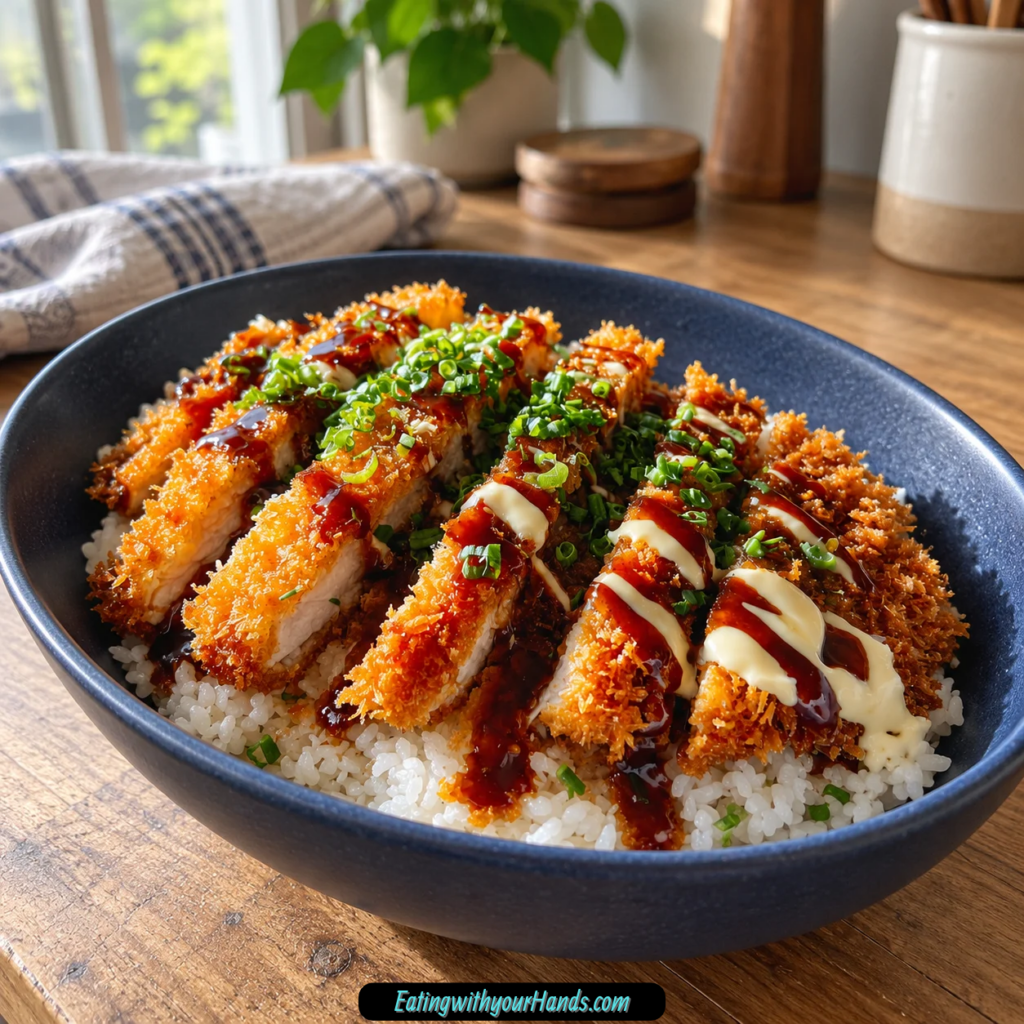
Place the sliced katsu over the rice at a slight angle. Fanning the slices makes the bowl easy to eat and gives it a polished presentation.
Drizzle tonkatsu sauce across the cutlet. Add Japanese mayo if desired.
Step 15: Finish and Serve
Sprinkle chopped parsley or green onions over the bowl. Sesame seeds can also be used as a finishing touch.
Serve immediately while the cutlet is still crisp and the rice is warm. The first few minutes give you the strongest contrast between crunchy coating, juicy meat, soft rice, and sauce.
How to Keep the Breading From Falling Off
One common problem starts with too much flour. Shake off the excess before dipping the cutlet into egg.
The second problem is oil that is not hot enough. Breaded meat needs immediate heat so the crust begins setting quickly.
The third issue is moving the cutlet too early. Leave it undisturbed for at least the first 1–2 minutes.
Pressing the panko firmly before frying also helps. The crumbs should feel attached rather than loosely sitting on the surface.
Why Medium Heat Works Best
Medium heat gives the oil enough energy to crisp the panko while still allowing the meat to cook. Very high heat can brown the breading too quickly.
The thermometer target is about 350°F. Try to stay close to that throughout frying.
Adding a cold cutlet can lower the oil temperature temporarily. Let the pan recover before adding another piece if needed.
Consistent heat produces more consistent color. It also keeps the coating from turning greasy.
The Importance of Letting the Cutlets Rest
Cutting immediately after frying can release more juices onto the board. A brief 2-minute rest lets the meat settle first.
That short pause also gives you time to arrange the rice and sauces. By the time the bowl is ready, the cutlet can be sliced cleanly.
Do not rest under foil. Steam trapped around the crust works against crispness.
Leave the cutlet uncovered on the rack or plate. It will stay hot enough for serving.
Serving With Shredded Cabbage
A small mound of shredded cabbage brings freshness and crunch. It contrasts especially well with the rich fried cutlet.
Place the cabbage beside the rice or next to the katsu. Keeping it separate preserves its crisp texture.
The mild vegetable flavor does not compete with the tonkatsu sauce. Instead, it gives your palate something fresh between bites.
This simple addition can make the bowl feel more complete. It also adds another texture without requiring much extra preparation.
Serving With Miso Soup
A side of miso soup turns the bowl into a more complete meal. Its warm, savory character fits naturally beside rice and katsu.
Serve the soup separately. The contrast between broth and crispy cutlet makes the meal feel more varied.
You do not need an elaborate assortment of sides. Katsu, rice, cabbage, and soup already create a satisfying combination.
Keep the bowl as the main attraction. The soup should support rather than overwhelm it.
Pickled Ginger for Brightness
Bright pickled ginger can be served beside the bowl. Its sharp, tangy flavor cuts through the fried coating and sauce.
Use it as a small side rather than piling it directly onto the cutlet. This allows each bite to stay distinct.
The color also adds contrast to the plate. A small amount can make the bowl look especially inviting.
Take a bite between pieces of katsu when you want something brighter. The flavor refreshes the meal without changing the main dish.
How to Make the Bowl Look Restaurant-Style
Slice the cutlet just before serving. Keep the strips close together so you can transfer them neatly.
Fan the slices over the rice at a slight angle. This shows off the crisp crust and keeps the presentation organized.
Drizzle the tonkatsu sauce in thin zigzags across the meat. Add a small amount of Japanese mayo if using.
Finish with green onion, parsley, or sesame seeds. The garnish should add freshness rather than hide the cutlet.
Pork Katsu Variation
Pork chops can replace the chicken breasts. Pound them to an even thickness just as you would chicken.
The breading process remains flour, egg, and panko. Fry until the exterior is deep golden and the pork is cooked through.
Thicker pork may require more cooking time. Keeping the cutlet close to ½ inch helps maintain the quick cooking style.
Serve over rice with tonkatsu sauce. This version moves the bowl closer to a classic tonkatsu experience.
Gluten-Free Variation
Use gluten-free panko instead of regular panko. Check the flour as well and replace it with an appropriate gluten-free option.
The breading process remains the same. Coat, fry, drain, rest, and slice.
Keep an eye on browning because gluten-free coatings may behave a little differently. The goal remains a crisp golden shell.
Serve with the same rice and toppings that suit your needs. Make sure any sauces used also fit your dietary requirements.
Eggplant Katsu Variation
Thick slices of eggplant can take the place of meat for a vegetarian version. The breading method stays the same.
Coat the slices in flour, egg, and panko. Fry until the exterior is golden and crisp.
Serve the eggplant over rice with tonkatsu sauce. The crunchy coating still provides the main textural appeal.
Keep the slices thick enough to remain substantial. Thin pieces can become too soft beneath the breading.
Tofu Katsu Variation
Firm tofu is another vegetarian option. Use thick pieces that can withstand breading and frying.
Coat each piece in the same flour, egg, and panko sequence. Press the panko on carefully so it adheres well.
Fry until the outside becomes golden and crisp. The contrast between crunchy coating and soft tofu gives the bowl its appeal.
Serve over rice with tonkatsu sauce. Garnish just as you would the chicken version.
Baking Instead of Frying
For a lighter version, preheat the oven to 400°F. Arrange the breaded cutlets on a wire rack.
Spritz the cutlets with oil before baking. This encourages more browning on the panko.
Bake for about 20 minutes, flipping halfway through. The coating will not become quite as crunchy as the fried version.
Using the rack keeps air circulating beneath the cutlet. That helps prevent the bottom from becoming soft.
Homemade Tonkatsu Sauce Option
When bottled tonkatsu sauce is unavailable, a quick alternative can be mixed from ketchup, Worcestershire sauce, soy sauce, and sugar. Stir until the flavors combine into a sweet-tangy sauce.
The result will not taste exactly like bottled tonkatsu sauce. It still gives you a practical option when you want to finish the bowls without a specialty sauce.
Drizzle it lightly over the katsu. Keep enough crust exposed to preserve the crunch.
Taste before adding a large amount. The sauce should complement the fried cutlet rather than overwhelm it.
Why Regular Breadcrumbs Aren’t Ideal
Regular breadcrumbs create a finer, denser coating. That changes the texture significantly.
Panko is lighter and flakier, which is what gives katsu its signature crunch. The difference becomes especially noticeable after sauce is added.
If panko is absolutely unavailable, roughly processed stale bread can create a coarser texture closer to what you want. Avoid turning it into fine crumbs.
The goal is irregular flakes. Those pieces fry into a crispier shell.
Storage
Store leftover cutlets separately from the rice and sauce. Moisture is the enemy of the panko crust.
Place the cutlets in an airtight container and refrigerate for up to 2 days. Keep the rice and sauce in their own containers.
Do not assemble leftover bowls before storage. Sauce sitting on the crust will soften it.
Rebuild the bowl only after reheating. That gives you a much better texture.
Reheating in the Oven
Preheat the oven or toaster oven to 350°F. Place the cutlet inside and warm for about 5 minutes.
This gentle dry heat helps revive the crust. It also warms the meat without making the coating rubbery.
Avoid the microwave when possible. Microwave reheating quickly softens the panko.
Slice after reheating if the cutlet was stored whole. Then place it over freshly warmed rice.
Quick Refry Method
A quick 30-second fry in fresh oil can help restore crispness. Use this method when you want the closest result to freshly cooked katsu.
Keep the oil hot and work quickly. The cutlet is already cooked, so the goal is simply to refresh the crust.
Drain again before serving. Let excess oil fall away before placing the meat over rice.
This method is more hands-on than oven reheating. The payoff is a particularly crisp exterior.
Frequently Asked Questions
Can I Bake the Katsu Instead of Frying?
Yes. Bake the breaded cutlets at 400°F on a wire rack for about 20 minutes.
Flip halfway through and spritz with oil before baking. The crust will be less crunchy than fried katsu but still enjoyable.
Can I Use Pork Instead of Chicken?
Yes. Pork chops work well and create a classic tonkatsu-style version.
Pound them to an even thickness before breading. Adjust cooking time if the pork is thicker.
Why Did My Breading Fall Off?
Too much flour can prevent the layers from bonding properly. Shake off the excess before dipping in egg.
Oil that is too cool or moving the cutlet too soon can also cause problems. Let the first side fry undisturbed for at least 1–2 minutes.
Can I Use Regular Breadcrumbs?
Panko is strongly preferred. Its flaky texture creates the distinctive crisp coating.
Regular breadcrumbs tend to become denser and softer. Coarsely processed stale bread is a better emergency alternative.
Where Can I Find Tonkatsu Sauce?
Asian grocery stores often carry bottled tonkatsu sauce. Bulldog is a favorite option.
A quick substitute can be made with ketchup, Worcestershire sauce, soy sauce, and sugar. It will not be identical but can work when needed.
Can I Make This Vegetarian?
Yes. Thick slices of eggplant or firm tofu can replace the chicken or pork.
Use the same breading method. Fry until the outside becomes golden and crisp.
How Do I Keep the Katsu Crispy?
Drain it on a wire rack and avoid covering it. Add the sauce only when you are ready to serve.
For leftovers, store the cutlets separately from rice and sauce. Reheat with dry heat rather than the microwave.
Nutrition Information
The nutritional profile varies depending on whether you use chicken or pork, how much oil the breading absorbs, the type of rice, and the amount of sauce served. Portion size will also affect the final values.
The dish provides protein from the chicken or pork alongside carbohydrates from the white rice. The fried coating and optional Japanese mayo add additional richness.
Using eggplant or tofu changes the nutritional balance. Baking instead of frying also produces a different result from the standard skillet method.
The bowl is meant to be a satisfying combination of crisp protein, warm rice, and sauce. Serve it in portions that suit your appetite and preferred sides.
The Katsu Bowl I Keep Coming Back To
Whenever I make these bowls, I still think about that first crisp bite in Tokyo. It was not an elaborate plate, but the combination of juicy meat, panko, rice, and sauce was so balanced that it stayed with me long after the meal ended.
That is what I try to preserve at home. I do not want unnecessary complication getting between me and the part that matters most: a properly crisp cutlet served while it is still hot.
The breading station has become almost automatic now. Flour, egg, panko, then straight toward the skillet once the oil is ready.
I still watch the first side carefully because that is where patience pays off. Leaving the cutlet alone long enough for the crust to set is one of those small habits that makes the final result noticeably better.
Then comes the rest, the slicing, and my favorite moment when the knife passes through the crust. You can hear that little crackle before the tender meat underneath appears.
The bowl itself is simple. Warm rice first, katsu arranged across the top, tonkatsu sauce in thin lines, and a little green onion or parsley if I have it.
Sometimes I add shredded cabbage and miso soup when I want the full meal to feel more complete. Other nights, the cutlet, rice, and sauce are more than enough.
My family rarely needs convincing either way. Once the smell of frying panko reaches the rest of the house, people tend to appear in the kitchen without being called.
That is probably the best proof of why this recipe has stayed in regular rotation. It feels special enough to satisfy a restaurant craving, yet the entire bowl can still come together in about 30 minutes.
Japanese Katsu Bowls with Tonkatsu Sauce remind me that some of the most memorable meals are built from very simple contrasts. Crisp against tender, rich against tangy, hot cutlet against soft rice—that is the kind of combination I never seem to get tired of.
Japanese Katsu Bowls with Tonkatsu Sauce

Crispy, savory, and deeply satisfying, these Japanese Katsu Bowls layer golden breaded chicken or pork over warm white rice with rich tonkatsu sauce. Optional Japanese mayo and a simple parsley or green onion garnish finish each bowl with extra flavor and a fresh touch.
Recipe Details
- Prep Time: 15 minutes
- Cook Time: 15 minutes
- Total Time: 30 minutes
- Course: Main Dish
- Cuisine: Japanese
- Servings: 2 servings
- Calories: 650 kcal
Ingredients
For the Katsu
- 2 boneless skinless chicken breasts or pork chops
- 1 teaspoon salt
- ½ teaspoon black pepper
- ½ teaspoon garlic powder
- 1 cup all-purpose flour
- 2 large eggs beaten
- 2 cups panko breadcrumbs
- ½ cup vegetable oil for frying
For the Bowls
- 2 cups cooked white rice
- ¼ cup tonkatsu sauce store-bought or homemade
- 2 tablespoon Japanese mayo optional
- Chopped parsley or green onions for garnish
Instructions
Step 1: Prepare the Chicken or Pork
Pound the chicken breasts or pork chops until they are an even thickness.
Season both sides with salt, black pepper, and garlic powder.
Step 2: Coat in Flour
Place the all-purpose flour where it is easy to use for breading.
Coat each seasoned piece of meat thoroughly in the flour.
Step 3: Dip in Egg
Dip each flour-coated piece into the beaten eggs.
Make sure the surface is evenly covered before moving on to the panko.
Step 4: Add the Panko Coating
Press the meat firmly into the panko breadcrumbs.
Coat all sides completely so the exterior can become crisp during frying.
Step 5: Heat the Oil
Heat the vegetable oil in a pan over medium heat.
Allow the oil to warm before adding the breaded meat.
Step 6: Fry Until Golden
Fry the breaded chicken or pork until golden brown and cooked through.
Adjust the frying time according to the thickness of the meat.
Step 7: Drain and Slice
Transfer the fried katsu to paper towels to drain excess oil.
Slice the cooked meat into strips for serving.
Step 8: Assemble the Bowls
Divide the cooked white rice between 2 bowls.
Arrange the sliced katsu over the rice.
Step 9: Add the Sauces
Drizzle the katsu with tonkatsu sauce.
Add Japanese mayo if desired.
Step 10: Garnish and Serve
Finish with chopped parsley or green onions.
Serve while the katsu is still warm and crisp.
Notes
- You can substitute chicken with pork chops.
- For extra crispiness, double-coat with egg and panko.
- Adjust frying time based on meat thickness.
Serving Suggestions
Serve Japanese Katsu Bowls immediately after assembling so the breaded chicken or pork keeps its crisp coating. The warm rice creates a simple base for the crunchy katsu, tonkatsu sauce, and optional Japanese mayo.
This recipe makes 2 servings and can be prepared with either boneless skinless chicken breasts or pork chops. Finish each bowl with chopped parsley or green onions for a fresh garnish.
For an extra-crispy coating, dip the meat again in egg and panko before frying.
Storage
For the best texture, keep the fried katsu separate from the rice and sauces until serving.
Chicken or Pork Tip
Use 2 boneless skinless chicken breasts or pork chops.
Pound the meat to an even thickness before seasoning and breading.
Seasoning Tip
Season with 1 teaspoon salt, ½ teaspoon black pepper, and ½ teaspoon garlic powder.
Panko Tip
Use 2 cups panko breadcrumbs for the crisp outer coating.
Double-coat with egg and panko if you want extra crunch.
Frying Tip
Use ½ cup vegetable oil and fry over medium heat until the meat is golden brown and cooked through.
Adjust the cooking time depending on the thickness of the chicken or pork.
Rice Tip
Use 2 cups cooked white rice and divide it between 2 bowls.
Tonkatsu Sauce Tip
Drizzle ¼ cup tonkatsu sauce over the sliced katsu.
Store-bought or homemade sauce can be used.
Japanese Mayo Tip
Add 2 tablespoon Japanese mayo if desired.
Garnish Tip
Finish with chopped parsley or green onions before serving.

Fernando is the creator and writer behind the food blog Eating with your Hands. Living and working in cities like Paris, Barcelona, and Berlin, and being married to a Canadian foodie, has given Fernando a passion and interest in food and inspired him to run EWYH.