
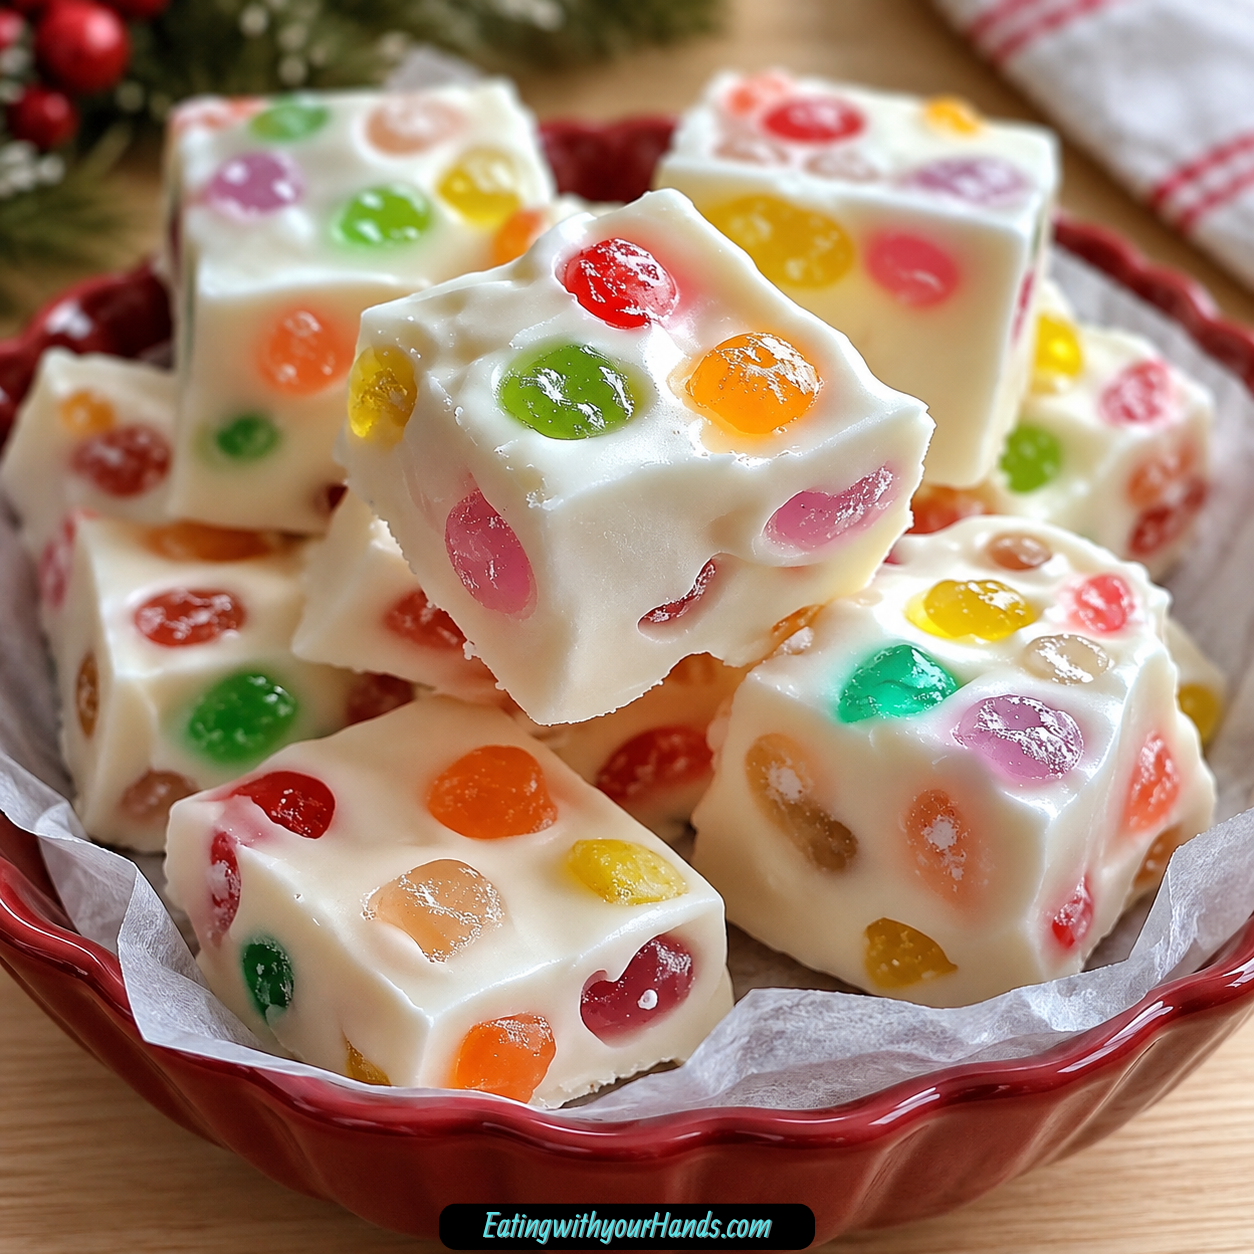
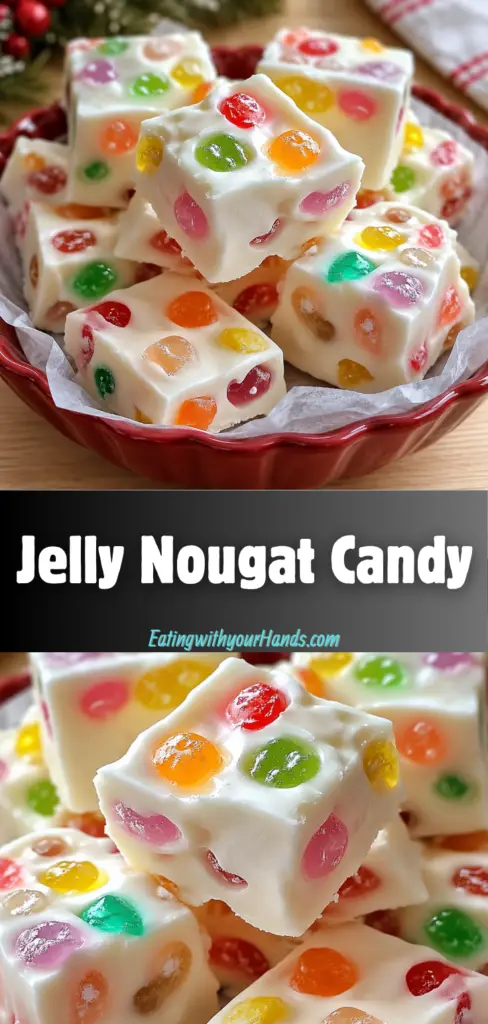
Jelly Nougat Candy is one of those cheerful little sweets that feels like it belongs on a holiday dessert tray, tucked beside fudge, truffles, cookies, and all the old-fashioned treats people reach for first. It is soft, creamy, chewy, colorful, and wonderfully nostalgic, with bright pieces of gummy candy folded into a sweet white chocolate marshmallow base.
This candy has a retro charm that makes it feel special without being difficult. It looks playful, tastes sweet and creamy, and has that soft nougat-like texture that makes every square feel like a tiny bite of celebration.
There is no baking involved, which makes this recipe especially helpful during busy seasons. You only need a few ingredients, a microwave-safe bowl, an 8×8-inch pan, parchment paper, and enough patience to let the candy chill until firm.
The base starts with white chocolate chips and unsalted butter. They melt together into a smooth, glossy mixture that gives the candy its creamy sweetness and rich texture.
Mini marshmallows create the soft nougat-like body of the candy. Once stirred into the hot white chocolate mixture, they melt down into a thick, creamy base that holds everything together.
The chopped gummy candies bring the fun. Gumdrops, jelly beans, or fruit jellies can all work beautifully, adding pops of color and chewy texture in every piece.
This Jelly Nougat Candy is perfect for Christmas trays, Easter baskets, birthday parties, bake sales, family gatherings, or any day when you want a no-bake treat that feels bright and happy. It is simple, colorful, make-ahead friendly, and easy to package for gifting.
What makes it even better is how customizable it can be. Red and green gummies make it festive for Christmas, pastel jelly beans make it perfect for Easter, and cinnamon gumdrops can bring a cozy holiday twist.
The whole recipe depends on timing and preparation. Once the marshmallows melt, the mixture begins to firm up quickly, so having the chopped gummies and prepared pan ready makes the process much smoother.
When chilled and sliced, the candy becomes neat little squares or rectangles with creamy white edges and colorful centers. It is the kind of sweet that looks charming on a platter and disappears faster than expected.
Table of Contents
- Why You’ll Love This Jelly Nougat Candy
- Recipe Details
- Ingredients
- For the Jelly Nougat Candy
- Optional Candy Choices
- Optional Serving and Gifting Ideas
- Optional Texture and Flavor Ideas
- Ingredient Notes
- Optional Swaps, Variations, and Serving Ideas
- Classic Jelly Nougat Candy
- Gumdrop Jelly Nougat Candy
- Jelly Bean Nougat Candy
- Fruit Jelly Nougat Candy
- Christmas Jelly Nougat Candy
- Easter Jelly Nougat Candy
- Cinnamon Gumdrop Nougat Candy
- Small Gummy Piece Nougat
- Chunky Gummy Nougat
- Vanilla Candy Melt Nougat
- Holiday Dessert Tray Candy
- Candy Box Gift Squares
- Truffle and Fudge Dessert Assortment
- Cool Room Temperature Serving
- Chilled Candy Squares
- Why This Recipe Works
- Directions
- Step 1: Prepare the Baking Pan
- Step 2: Chop the Gummy Candies
- Step 3: Choose the Gummy Size
- Step 4: Set Up Your Tools
- Step 5: Combine White Chocolate and Butter
- Step 6: Microwave in Short Bursts
- Step 7: Stir Until Smooth and Glossy
- Step 8: Add the Mini Marshmallows
- Step 9: Melt the Marshmallows Completely
- Step 10: Fold in the Gummy Candies
- Step 11: Avoid Overmixing
- Step 12: Transfer to the Pan
- Step 13: Spread Evenly
- Step 14: Chill Until Firm
- Step 15: Lift the Candy From the Pan
- Step 16: Cut Into Pieces
- Step 17: Serve or Wrap
- Step 18: Store Properly
- Serving Ideas
- Storage
- Freezing
- Make-Ahead
- Helpful Notes for Best Results
- Variations
- Troubleshooting
- The Mixture Hardened Too Fast
- The Marshmallows Did Not Melt Smoothly
- The White Chocolate Became Too Thick
- The Gummies Melted or Tore
- The Candy Is Sticky When Cutting
- The Pieces Stick Together
- The Candy Softened on the Tray
- The Gummies Became Hard After Freezing
- The Candy Looks Uneven in the Pan
- The Cuts Are Messy
- Frequently Asked Questions
- Why This Recipe Works So Well
- Final Thoughts
- Jelly Nougat Candy
Why You’ll Love This Jelly Nougat Candy
This candy is no-bake and fuss-free. It is perfect for busy days when you want a homemade treat without turning on the oven.
It has quick preparation with minimal hands-on time. Most of the waiting happens while the candy chills in the refrigerator.
It has a fun, colorful appearance. Kids and adults both love the bright gummy pieces scattered through the creamy base.
It is easy to customize with different gummy candies. Gumdrops, jelly beans, fruit jellies, holiday colors, and seasonal candies all create different looks.
It is a great make-ahead treat for holidays and parties. You can chill it, slice it, store it, and serve it when needed.
It has a soft, chewy texture with creamy sweetness. The white chocolate, butter, marshmallows, and gummies create a nostalgic candy-shop style bite.
Recipe Details
Jelly Nougat Candy is a no-bake candy recipe. It sets in the refrigerator instead of baking in the oven.
The recipe uses an 8×8-inch baking pan. The pan should be lined with parchment paper, with a little overhang for easy removal.
Lightly greasing the pan can also work if parchment paper is not available. Parchment makes lifting and slicing easier.
The candy needs to chill for at least 2 hours. It should be fully firm before slicing.
The base uses 2 cups white chocolate chips. Good-quality white chocolate gives the smoothest flavor and melt.
The recipe includes 2 tablespoons unsalted butter. Butter adds richness and helps keep the candy soft.
The nougat-like texture comes from 1 package, 10 oz, mini marshmallows. Mini marshmallows melt more easily than large marshmallows.
The colorful pieces come from 1 ½ cups chopped gummy candies. Gumdrops, jelly beans, or fruit jellies all work beautifully.
The white chocolate chips and butter are melted in a large microwave-safe bowl. They should be microwaved in 30-second intervals and stirred well after each burst.
The mixture should become fully melted, smooth, and glossy. After that, the mini marshmallows are stirred in until melted.
If needed, the mixture can be microwaved for an additional 15 to 20 seconds. Stir carefully until thick and creamy.
The chopped gummy candies should be folded in quickly with a silicone spatula. The candy begins to firm as it cools.
Once mixed, the candy is spread evenly into the prepared pan. It should be moved quickly while still soft.
After chilling, the candy is lifted out with the parchment paper and cut into squares or rectangles with a sharp knife. Lightly greasing the blade between cuts helps create smoother edges.
Ingredients
For the Jelly Nougat Candy
- 2 cups white chocolate chips
- 2 tablespoons unsalted butter
- 1 package (10 oz) mini marshmallows
- 1 ½ cups gummy candies, chopped
Optional Candy Choices
- Gumdrops
- Jelly beans
- Fruit jellies
- Cinnamon gumdrops
- Pastel jelly beans
- Red and green gummies
Optional Serving and Gifting Ideas
- Holiday cookie trays
- Christmas trays
- Easter baskets
- Birthday parties
- Wax paper
- Cellophane
- Chocolate truffles
- Fudge
Optional Texture and Flavor Ideas
- Smaller gummy pieces
- Larger gummy chunks
- Vanilla-flavored candy melts
Ingredient Notes
White chocolate chips create the creamy candy base. Good-quality white chocolate gives the smoothest melt and the best flavor.
Unsalted butter adds richness. It also helps keep the candy soft instead of becoming too firm.
Mini marshmallows are important for the nougat-like texture. They melt easily into the warm white chocolate mixture and help create the thick, creamy body of the candy.
Chopped gummy candies add color, chewiness, and fun. Gumdrops, jelly beans, or fruit jellies all work well.
Smaller gummy pieces distribute more evenly through the candy. This gives every square little pops of color.
Larger gummy chunks create a bolder, chewier bite. This gives the candy a more playful texture.
Cinnamon gumdrops can add a holiday twist. Their warm flavor makes the candy feel especially festive.
Pastel jelly beans are lovely for Easter. They give the candy a soft, springtime look.
Red and green gummies are perfect for Christmas trays. They make the candy look instantly festive.
Vanilla-flavored candy melts can be used for a similar effect. White chocolate is traditional, but candy melts give another option.
Optional Swaps, Variations, and Serving Ideas
Classic Jelly Nougat Candy
Make the candy with white chocolate chips, unsalted butter, mini marshmallows, and chopped gummy candies. This gives it the creamy, chewy, colorful texture that makes it so nostalgic.
Chill until firm before slicing. Serve chilled or at cool room temperature.
Gumdrop Jelly Nougat Candy
Use chopped gumdrops for the gummy pieces. Gumdrops give the candy a classic, old-fashioned look.
Cut them into smaller pieces if you want the color to spread evenly. Larger pieces give a chewier bite.
Jelly Bean Nougat Candy
Use chopped jelly beans. This creates a colorful candy that works especially well for Easter baskets or spring gatherings.
Pastel jelly beans give a soft seasonal look. Bright jelly beans make the candy more playful.
Fruit Jelly Nougat Candy
Use fruit jellies for a soft, chewy texture. Choose your favorite colors and flavors.
Fruit jellies make the candy look cheerful and bright. Chop them before folding them into the mixture.
Christmas Jelly Nougat Candy
Use red and green gummies. This gives the candy a festive Christmas look.
Add the pieces quickly before the mixture firms. The finished squares look beautiful on holiday trays.
Easter Jelly Nougat Candy
Use pastel jelly beans. This makes the candy perfect for Easter baskets and spring dessert boards.
The soft colors look pretty against the white chocolate base. Cut into small squares for easy serving.
Cinnamon Gumdrop Nougat Candy
Use cinnamon gumdrops for a holiday twist. They add a warm flavor to the creamy candy.
This variation feels cozy and festive. It is a fun change from fruity gummies.
Small Gummy Piece Nougat
Chop the gummy candies into small pieces. Smaller pieces distribute more evenly.
This gives every bite a little color and chew. It also makes slicing cleaner.
Chunky Gummy Nougat
Leave the gummy candies in larger chopped pieces. This creates a bolder chew.
The pieces will be more noticeable in each square. This is a good choice if you want the gummies to stand out.
Vanilla Candy Melt Nougat
Use vanilla-flavored candy melts for a similar effect. The flavor and texture may be a little different from white chocolate.
This can be useful when you want a smooth melting option. Keep the method the same.
Holiday Dessert Tray Candy
Add Jelly Nougat Candy to holiday cookie trays. It brings color and chewy texture beside cookies and bars.
The candy looks especially pretty when cut into neat squares. It makes the tray feel more festive.
Candy Box Gift Squares
Wrap individual pieces in wax paper or cellophane. This makes them easy to gift.
Wrapped pieces look charming in candy boxes. They also stay neat when shared.
Truffle and Fudge Dessert Assortment
Pair Jelly Nougat Candy with chocolate truffles or fudge. The colorful nougat makes the dessert assortment more interesting.
It adds a chewy, creamy texture beside richer chocolate candies. The contrast makes the platter prettier.
Cool Room Temperature Serving
Serve the candy at cool room temperature. It will be soft and chewy without being too warm.
Avoid letting it sit in heat. This candy softens quickly at warm temperatures.
Chilled Candy Squares
Serve the candy chilled for the firmest texture. This is helpful for parties, trays, and warm kitchens.
Keep it refrigerated until close to serving time. Chilled candy slices and handles more cleanly.
Why This Recipe Works
Jelly Nougat Candy works because it turns four simple ingredients into a soft, chewy, colorful no-bake treat. White chocolate chips, butter, marshmallows, and gummy candies each bring an important texture.
White chocolate creates the creamy base. It melts into a sweet, smooth mixture.
Butter adds richness and helps the candy stay soft. It also makes the base feel less stiff.
Mini marshmallows melt into the warm chocolate mixture and create the nougat-like texture. They make the candy thick, creamy, and chewy.
Gummy candies add color and texture. They make every square look festive and playful.
The 8×8-inch pan gives the candy a good thickness. It creates pieces that are easy to slice into squares or rectangles.
Parchment paper makes removal easier. The overhang lets you lift the candy out once it is firm.
Working quickly matters. Once the marshmallows melt, the mixture begins to set as it cools.
Chilling for at least 2 hours helps the candy firm fully. Clean slicing is much easier after the candy has set.
A sharp knife creates neater pieces. Lightly greasing the blade between cuts helps create smoother edges.
Directions
Step 1: Prepare the Baking Pan
Line an 8×8-inch baking pan with parchment paper. Leave a little overhang on the sides so you can lift the candy out later.
If parchment paper is not available, lightly greasing the pan can also work. Parchment is especially helpful for clean removal.
Step 2: Chop the Gummy Candies
Chop 1 ½ cups gummy candies before you begin melting anything. Gumdrops, jelly beans, or fruit jellies all work beautifully.
This step should be done ahead because the candy mixture sets quickly. Having the gummies ready makes the process much easier.
Step 3: Choose the Gummy Size
Cut the gummies smaller if you want them evenly distributed. Smaller pieces create more color throughout every slice.
Leave them in larger chopped chunks if you want a bolder, chewier bite. Either texture works, depending on your preference.
Step 4: Set Up Your Tools
Have a silicone spatula ready. This makes folding the gummies into the sticky mixture easier.
Keep the prepared pan close by. Once the mixture is ready, you will need to transfer it quickly.
Step 5: Combine White Chocolate and Butter
Add 2 cups white chocolate chips and 2 tablespoons unsalted butter to a large microwave-safe bowl. The bowl should be large enough to hold the marshmallows and gummies later.
The butter helps the white chocolate melt into a richer, softer base. Using a large bowl gives you room to stir.
Step 6: Microwave in Short Bursts
Microwave the white chocolate and butter in 30-second intervals. Stir well after each burst.
Do not rush this step. Stirring between intervals helps the mixture melt evenly and reduces the chance of overheating.
Step 7: Stir Until Smooth and Glossy
Continue microwaving and stirring until the mixture is fully melted. It should look smooth, glossy, and creamy.
Make sure no solid pieces of white chocolate remain. A smooth base gives the candy the best texture.
Step 8: Add the Mini Marshmallows
Stir 1 package, 10 oz, mini marshmallows into the hot white chocolate mixture. Mix carefully so the marshmallows begin to melt.
Mini marshmallows melt easily because they are small. They create the soft nougat-like texture.
Step 9: Melt the Marshmallows Completely
Keep stirring until the marshmallows are fully melted and the mixture looks thick and creamy. If needed, microwave for an additional 15 to 20 seconds.
Stir carefully after heating. The mixture should be smooth enough to hold the gummy candies evenly.
Step 10: Fold in the Gummy Candies
Quickly add the chopped gummy candies to the bowl. Use the silicone spatula to fold them in gently.
Work fast because the mixture starts to firm as it cools. Be gentle so the gummies stay intact.
Step 11: Avoid Overmixing
Fold only until the gummies are evenly distributed. Do not keep stirring longer than necessary.
Overmixing can make the mixture harder to spread. It may also pull too much on the gummy pieces.
Step 12: Transfer to the Pan
Pour the candy mixture into the prepared 8×8-inch pan. Use the spatula to scrape the bowl well.
Move quickly while the mixture is still soft. It will become harder to spread as it cools.
Step 13: Spread Evenly
Spread the mixture into an even layer. Press and smooth it gently with the spatula.
Try to reach the corners of the pan. An even layer makes the candy pieces more uniform after slicing.
Step 14: Chill Until Firm
Place the pan in the refrigerator. Chill for at least 2 hours, or until fully firm.
Do not slice too early. The candy needs time to set so it can cut cleanly.
Step 15: Lift the Candy From the Pan
Use the parchment paper overhang to lift the firm candy out of the pan. Place it on a cutting board.
If the pan was greased instead of lined, loosen the edges carefully before removing. Work gently so the candy does not tear.
Step 16: Cut Into Pieces
Use a sharp knife to cut the candy into squares or rectangles. Lightly grease the blade between cuts for smoother edges.
Wipe the knife as needed. Clean cuts make the candy look prettier on trays and in gift boxes.
Step 17: Serve or Wrap
Serve the candy chilled or at cool room temperature. You can also wrap individual squares in wax paper or cellophane for gifting.
Keep the candy away from heat. Warm temperatures can make it soften quickly.
Step 18: Store Properly
Place the candy in an airtight container. Store it in the refrigerator for up to 10 days.
Place parchment paper between layers to prevent sticking. Freezing is not recommended because the gummies can become hard and lose their chewy texture once thawed.
Serving Ideas
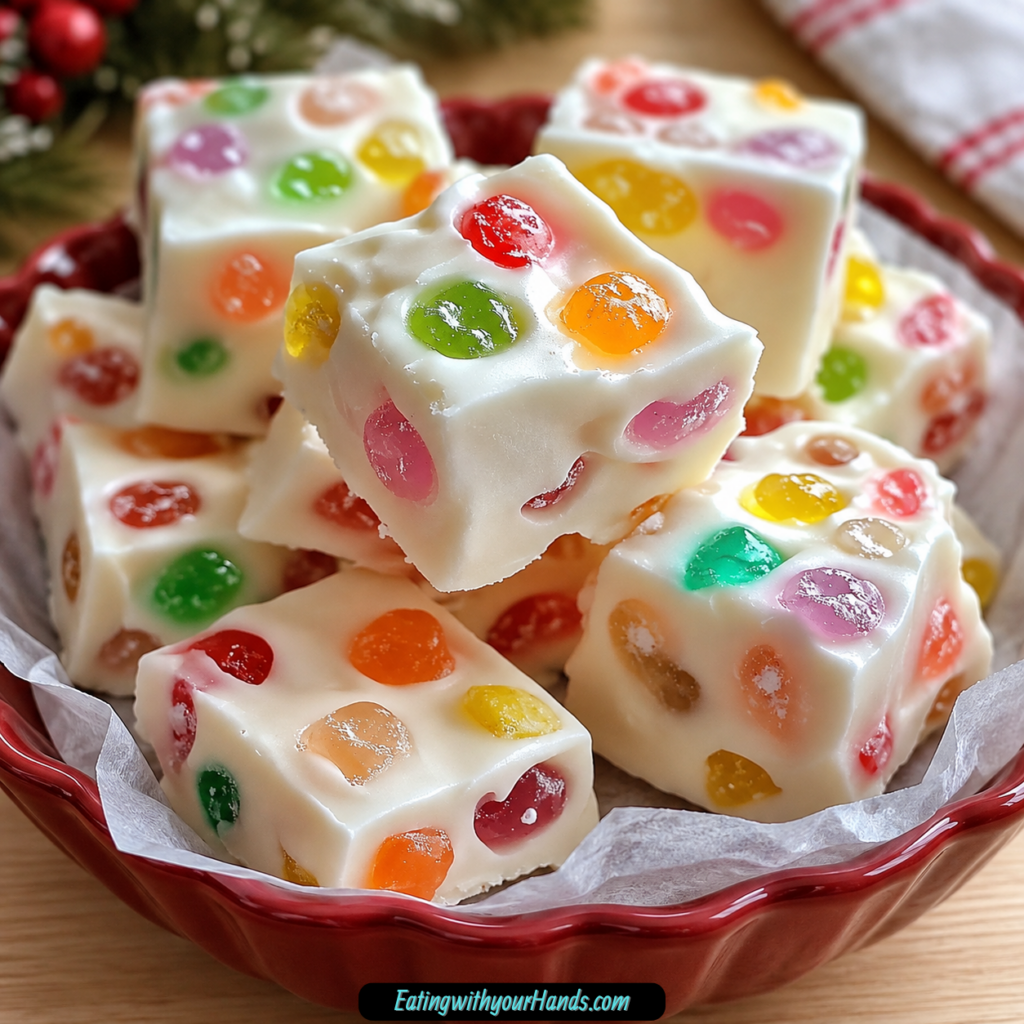
Jelly Nougat Candy can be served chilled or at cool room temperature. It should stay firm enough to pick up but soft enough to enjoy.
Add it to holiday cookie trays for a pop of color. The bright gummy pieces stand out beautifully beside cookies, bars, and fudge.
This candy is also lovely for Christmas trays. Red and green gummies make it look festive without extra decorating.
For Easter, use pastel jelly beans. The soft colors make the candy perfect for baskets and spring dessert plates.
Birthday parties are another fun place to serve it. The colorful pieces make the candy cheerful and playful.
Wrap individual squares in wax paper or cellophane for gifting. This gives the candy an old-fashioned shop-style feel.
Pair it with chocolate truffles or fudge for a dessert assortment. The creamy, chewy nougat gives contrast beside richer chocolate treats.
Keep the pieces small if serving on a large tray. Bite-size squares are easy for guests to pick up and enjoy.
Storage
Store Jelly Nougat Candy in an airtight container in the refrigerator. It will keep for up to 10 days.
Use parchment paper between layers. This helps prevent the pieces from sticking together.
Keep the candy chilled if possible. It softens quickly at warm temperatures.
Do not leave it near heat or direct sun. The white chocolate base can become too soft.
If serving for a party, place it out shortly before guests arrive. Return leftovers to the refrigerator after serving.
Wrapped pieces should also be kept cool. This helps them hold their shape and texture.
Freezing
Freezing Jelly Nougat Candy is not recommended. The gummies can become hard and lose their chewy texture once thawed.
The candy is best stored in the refrigerator instead. Keep it airtight and chilled for up to 10 days.
If you need to make it ahead, prepare it a few days before serving. The refrigerator storage time makes planning easy.
Do not rely on freezing for long-term storage. The texture of the gummies is part of what makes the candy enjoyable.
The white chocolate and marshmallow base is creamy and soft when properly chilled. Freezing may change that eating experience.
For best results, make the candy, chill it, slice it, and serve it within the refrigerator storage window.
Make-Ahead
Jelly Nougat Candy is a great make-ahead treat. It needs at least 2 hours to chill, so preparing it early is helpful.
You can make it a day or two before serving. Store it in an airtight container in the refrigerator.
Cut the candy into squares or rectangles after it is fully firm. Store the pieces with parchment paper between layers.
If gifting, wrap individual pieces in wax paper or cellophane after slicing. Keep the wrapped candy cool.
This candy is especially useful for holidays and parties because it does not require baking. You can prepare it ahead and save oven space.
Have everything ready before melting the white chocolate. The make-ahead process starts with good preparation.
Helpful Notes for Best Results
Work quickly once the marshmallows are melted. The mixture sets fast as it cools.
Have the gummies chopped and the pan ready before you begin. This makes the process smoother.
Use a silicone spatula for folding. It helps move through the sticky mixture without tearing the gummy candies.
Do not overmix after adding the gummies. Fold only until the pieces are evenly distributed.
Use smaller gummy pieces for even distribution. Use larger chunks for a bolder, chewier bite.
If using large marshmallows instead of mini, cut them into smaller pieces so they melt evenly. Mini marshmallows are easier for this recipe.
Avoid sour gummies. Their flavor can clash with the sweetness of the candy.
Use a sharp knife for slicing. Lightly grease the blade between cuts for clean edges.
Variations
Classic Jelly Nougat Candy
Make the candy with white chocolate chips, unsalted butter, mini marshmallows, and chopped gummy candies. This creates the creamy, chewy base with colorful pieces throughout.
Chill until firm before slicing. Serve chilled or at cool room temperature.
Gumdrop Nougat Candy
Use gumdrops for the gummy candy pieces. Gumdrops give the candy a classic look and chewy texture.
Choose different colors for a bright finish. Chop them before folding into the mixture.
Jelly Bean Nougat Candy
Use jelly beans for a fun, colorful version. This works especially well for Easter.
Pastel jelly beans make the candy look soft and seasonal. Chop them so they spread through the base.
Fruit Jelly Nougat Candy
Use fruit jellies for a chewy fruit flavor. Choose your favorite colors.
Fruit jellies look beautiful in the creamy white base. Cut them into pieces before folding.
Christmas Jelly Nougat Candy
Use red and green gummies. This makes the candy perfect for Christmas trays.
The colors show clearly once sliced. Wrap pieces in cellophane for gifting if desired.
Easter Jelly Nougat Candy
Use pastel jelly beans. This gives the candy a springtime look.
It is a sweet addition to Easter baskets. Cut into small squares for easy serving.
Cinnamon Gumdrop Nougat Candy
Use cinnamon gumdrops for a holiday twist. They give the candy a warmer flavor.
This variation feels festive and nostalgic. The spicy sweetness pairs with the creamy base.
Small-Cut Gummy Candy
Chop the gummies into smaller pieces. This makes them distribute more evenly.
Each square will have little colorful pieces throughout. This also helps with cleaner slicing.
Chunky Gummy Candy
Cut the gummies into larger chunks. This creates a bolder chew.
The candy will have bigger pops of color. This version feels extra playful.
Vanilla Candy Melt Nougat
Use vanilla-flavored candy melts for a similar effect. The flavor and texture may differ slightly from white chocolate.
Melt carefully and stir often. Continue with the same method.
Wrapped Candy Squares
Wrap individual pieces in wax paper or cellophane. This makes them easy to give as gifts.
The wrapped squares look charming and old-fashioned. Keep them cool until serving.
Dessert Assortment Candy
Serve Jelly Nougat Candy with fudge or chocolate truffles. The creamy, colorful candy adds variety.
It gives the dessert table a different texture. The colors make the platter feel more festive.
Troubleshooting
The Mixture Hardened Too Fast
White chocolate cools quickly. Make sure the gummies are chopped and the pan is prepared before melting begins.
Work swiftly once the marshmallows are melted. Transfer the mixture to the pan while it is still soft.
The Marshmallows Did Not Melt Smoothly
The mixture may need a little more heat. Microwave for an additional 15 to 20 seconds if needed.
Stir carefully after heating. The goal is a thick, creamy mixture.
The White Chocolate Became Too Thick
It may have cooled too much or been overheated. Microwave in short intervals and stir well each time.
Work gently and avoid long microwave bursts. Short heating helps protect the texture.
The Gummies Melted or Tore
The mixture may have been too hot, or the gummies may have been stirred too much. Fold gently with a silicone spatula.
Add the gummies quickly after the marshmallow mixture is ready. Do not overmix.
The Candy Is Sticky When Cutting
The candy may need more chilling time. Refrigerate until fully firm.
Use a sharp knife and lightly grease the blade between cuts. This helps create smoother edges.
The Pieces Stick Together
Place parchment paper between layers. This prevents the candy from sticking in storage.
Keep the candy chilled. Warm candy becomes softer and stickier.
The Candy Softened on the Tray
The room may be too warm. This candy softens quickly at warm temperatures.
Serve it chilled or at cool room temperature. Return leftovers to the refrigerator.
The Gummies Became Hard After Freezing
Freezing is not recommended for this candy. Gummies can become hard and lose their chewy texture after thawing.
Store the candy in the refrigerator instead. It keeps well for up to 10 days.
The Candy Looks Uneven in the Pan
The mixture may have started to firm before spreading. Work quickly after adding the gummies.
Use a spatula to smooth the top as soon as the mixture goes into the pan. Press gently into the corners.
The Cuts Are Messy
Use a sharp knife. Lightly grease the blade between cuts.
Wipe the knife as needed. Clean cuts make the candy look better for serving and gifting.
Frequently Asked Questions
Can I freeze Jelly Nougat Candy?
Freezing is not recommended. The gummies can become hard and lose their chewy texture once thawed.
Store the candy in the refrigerator instead. It keeps well in an airtight container for up to 10 days.
Why did my mixture harden too fast?
White chocolate cools quickly. Have the gummy candies chopped and the pan prepared before melting begins.
Once the marshmallows are melted, work quickly. Fold in the gummies and spread the mixture right away.
Can I use large marshmallows instead of mini?
Yes, large marshmallows can be used. Cut them into smaller pieces so they melt evenly.
Mini marshmallows are easier because they melt faster. If using large ones, stir carefully.
What gummies work best?
Gumdrops, jelly beans, and fruit slices work well. Choose gummies with colors and flavors you enjoy.
Avoid sour gummies. Their flavor can clash with the sweetness of the candy.
How do I get clean cuts?
Use a sharp knife. Lightly grease the blade between cuts for smoother edges.
Make sure the candy is fully firm before slicing. Chilling for at least 2 hours helps.
Can I make this candy ahead of time?
Yes, this candy is great for making ahead. Store it in an airtight container in the refrigerator for up to 10 days.
Use parchment paper between layers to prevent sticking. Keep it chilled until serving.
What can I use instead of white chocolate chips?
Vanilla-flavored candy melts can be used for a similar effect. The flavor and texture may vary slightly.
White chocolate is traditional for this candy. Use good-quality white chocolate for the smoothest flavor and melt.
How should I serve Jelly Nougat Candy?
Serve it chilled or at cool room temperature. Add it to holiday trays, Easter baskets, birthday party dessert tables, or candy gift boxes.
You can wrap individual squares in wax paper or cellophane. It also pairs nicely with truffles or fudge.
Why This Recipe Works So Well
Jelly Nougat Candy works so well because it is simple, colorful, and full of texture. The creamy base and chewy candy pieces make each bite feel nostalgic and fun.
White chocolate chips create the sweet base. When melted with butter, they become smooth, glossy, and rich.
Butter helps soften the texture. It keeps the candy from feeling too firm or stiff.
Mini marshmallows melt into the warm white chocolate mixture. This creates the nougat-like body of the candy.
Gummy candies bring color and chew. They turn a simple white candy base into something festive and eye-catching.
The recipe is no-bake, which makes it easy for busy days. The refrigerator does the work of setting the candy.
The 8×8-inch pan gives the candy enough thickness to slice into neat squares or rectangles. Parchment paper makes removal easier.
Working quickly is important because the mixture firms as it cools. Prepared ingredients make the process smoother.
The candy stores well in the refrigerator for up to 10 days. That makes it useful for holidays, parties, gifting, and dessert trays.
The recipe is flexible too. Gumdrops, jelly beans, fruit jellies, cinnamon gumdrops, pastel jelly beans, red and green gummies, small pieces, larger chunks, vanilla candy melts, wax paper, cellophane, truffles, and fudge all give this candy different ways to fit the occasion.
Most of all, Jelly Nougat Candy works because it feels joyful. It is creamy, chewy, colorful, old-fashioned, easy to share, and simple enough to make whenever a sweet little treat would brighten the day.
Final Thoughts
Jelly Nougat Candy is a no-bake sweet made with white chocolate chips, unsalted butter, mini marshmallows, and chopped gummy candies. The mixture is melted, stirred until creamy, folded with colorful gummies, spread into an 8×8-inch pan, chilled until firm, and sliced into squares or rectangles.
Serve it chilled or at cool room temperature on holiday cookie trays, Christmas trays, Easter baskets, birthday party tables, or dessert assortments with truffles and fudge. With its quick no-bake method, cheerful colors, creamy nougat-like texture, chewy gummy pieces, make-ahead convenience, and 10-day refrigerator storage, this candy is a nostalgic treat that brings bright sweetness to any gathering.
Jelly Nougat Candy
Colorful, chewy, creamy, and easy to chill into neat little squares, this Jelly Nougat Candy is a playful no-bake treat made with white chocolate chips, mini marshmallows, butter, and chopped gummy candies. The mixture comes together quickly, sets in the refrigerator, and makes a bright homemade candy for holidays, dessert trays, or sweet edible gifts.
Recipe Details
- Prep Time: 10 minutes
- Cook Time: 5 minutes
- Chilling Time: 2 hours
- Total Time: 2 hours 15 minutes
- Calories: 250 kcal
Ingredients
For the Jelly Nougat Candy
- 1 ½ cups gummy candies chopped (gumdrops or jelly beans)
- 1 package 10 oz mini marshmallows
- 2 tablespoons unsalted butter
- 2 cups white chocolate chips
Instructions
Step 1: Prepare the Pan
Line an 8×8-inch baking pan with parchment paper, or lightly grease it. This gives the candy a prepared surface so it can set into a firm block and lift out more easily before cutting.
Make sure the pan is ready before melting anything. Once the marshmallow mixture is smooth, it begins setting quickly.
Step 2: Melt the White Chocolate and Butter
Add the white chocolate chips and unsalted butter to a large microwave-safe bowl. Microwave the mixture in 30-second intervals, stirring after each round, until it becomes melted and smooth.
Pause to stir between intervals instead of heating it all at once. This helps the white chocolate melt more evenly with the butter.
Step 3: Add the Marshmallows
Stir the mini marshmallows into the melted white chocolate mixture. Keep mixing until the marshmallows are completely melted and fully combined.
The mixture should look creamy and thick. Work steadily here, because the candy base can begin to firm as it cools.
Step 4: Fold in the Gummy Candies
Add the chopped gummy candies to the bowl and fold them in quickly. Stir gently so the gummy pieces stay visible and do not break down too much.
Use gumdrops or jelly beans as listed. Avoid sour gummies, because they may clash with the sweetness of the candy.
Step 5: Spread Into the Pan
Pour the nougat mixture into the prepared 8×8-inch pan. Spread it into an even layer with a spatula.
Move quickly but carefully while smoothing the top. A silicone spatula is helpful for folding in the gummies gently without tearing them.
Step 6: Chill Until Firm
Refrigerate the pan for at least 2 hours, or until the candy is firm. The chilling time helps the nougat set enough to slice cleanly.
Do not cut the candy before it has fully firmed. A properly chilled block will hold its shape better when portioned.
Step 7: Cut and Store
Cut the chilled candy into squares. Store the pieces in an airtight container.
Notes
- Work quickly once the marshmallows are melted, because the mixture sets fast.
- Use a silicone spatula to gently fold in gummies without tearing them.
- Store in the refrigerator for best texture and shape.
- Avoid sour gummies, as they may clash with the sweetness of the candy.
- Not freezer-friendly; gummies can harden when frozen.
Serving Suggestions
Serve Jelly Nougat Candy chilled after it has set firmly in the refrigerator. The creamy white chocolate-marshmallow base and chewy gummy pieces make each square colorful, sweet, and fun for dessert trays or homemade gift boxes.
This candy works especially well for holidays because the chopped gumdrops or jelly beans create bright pops of color in every piece. Cut it into neat squares once firm, then keep the pieces chilled until they are ready to serve.
For the best texture, use the refrigerator rather than the freezer. The candy is not freezer-friendly because the gummies can harden when frozen.
Storage
How to Store
Store the candy in an airtight container in the refrigerator. This helps it keep the best texture and shape.
Freezing Note
Do not freeze this candy. The gummies can harden when frozen, so refrigeration is the better storage method.
Setting Tip
Refrigerate for at least 2 hours, or until firm. Cutting too early can make the candy difficult to portion cleanly.
Gummy Tip
Fold the chopped gummy candies in gently so they stay intact. A silicone spatula can help prevent the gummy pieces from tearing.
Flavor Tip
Avoid sour gummies. Their tart coating may clash with the sweetness of the white chocolate, butter, and marshmallow base.
Working Tip
Work quickly after the marshmallows melt. The nougat mixture sets fast, so the gummy candies need to be folded in and spread into the pan without delay.

Fernando is the creator and writer behind the food blog Eating with your Hands. Living and working in cities like Paris, Barcelona, and Berlin, and being married to a Canadian foodie, has given Fernando a passion and interest in food and inspired him to run EWYH.