
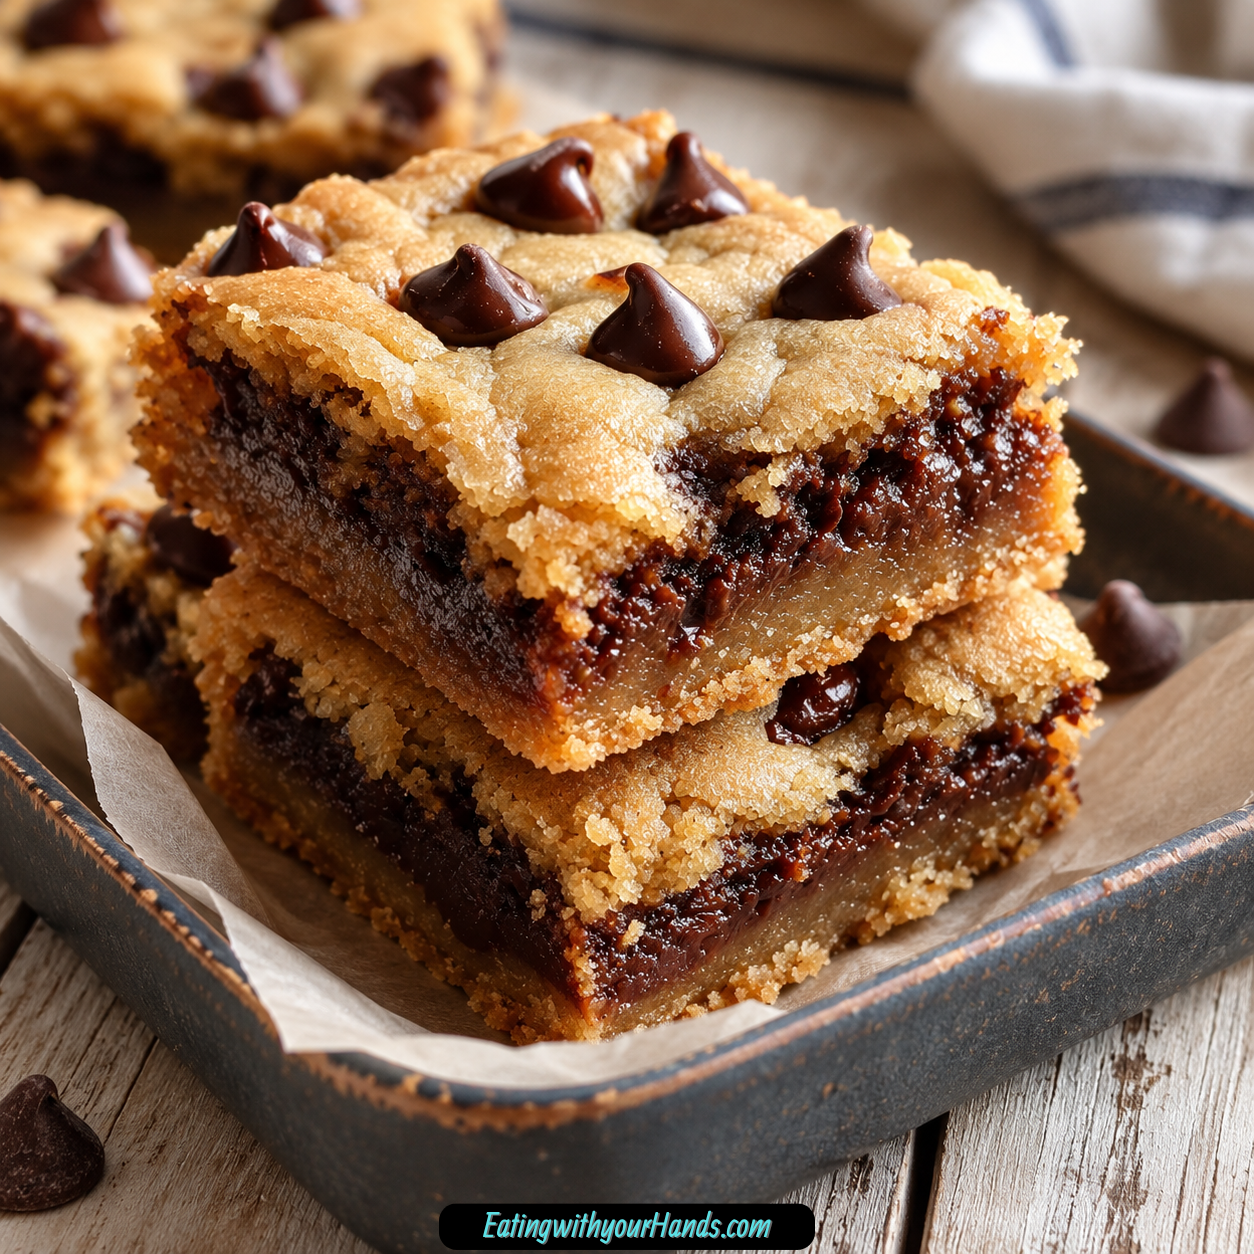
Lazy Chocolate Chip Cookie Bars are the dessert you make when the craving for warm chocolate chip cookies is real, but the patience for scooping dough, rotating pans, and waiting through multiple batches is completely gone. They give you chewy edges, soft centers, and melty chocolate in every bite, all with one bowl, one pan, and a boxed cake mix doing most of the work.
This is the kind of recipe that feels like a small kitchen shortcut with a big reward. Instead of measuring flour, baking soda, and extra dry ingredients, yellow cake mix becomes the base for a thick cookie bar dough that bakes into soft, sweet squares.
The prep is wonderfully low-effort. Melted butter, eggs, cake mix, and chocolate chips come together in minutes, then the dough gets pressed into a 9×13-inch pan and baked until the edges turn golden and the center looks set but still soft.
These bars are especially useful for busy days. They are perfect for after-school snacks, last-minute potlucks, easy party desserts, quick chocolate cravings, or those evenings when homemade cookies sound amazing but a full cookie session does not.
They also have that nostalgic cookie-bar texture that makes people come back for seconds. The edges get a little chewy, the middle stays tender, and the chocolate chips melt into the dough just enough to make each square feel rich.
What makes them even better is how flexible they are. You can keep them classic with semi-sweet chocolate chips, make them colorful with M&Ms, add nuts for crunch, swirl in peanut butter, or turn them into double chocolate bars with devil’s food cake mix.
Lazy Chocolate Chip Cookie Bars are simple, fast, sweet, and wonderfully dependable. They are the kind of dessert that asks for very little and gives back a pan full of warm chocolate chip comfort.
Table of Contents
- Why You’ll Love Lazy Chocolate Chip Cookie Bars
- Recipe Details
- Ingredients
- Ingredient Notes
- Optional Swaps, Variations, Add-Ins, and Serving Ideas
- Classic Lazy Chocolate Chip Cookie Bars
- M&M Cookie Bars
- Peanut Butter Chip Cookie Bars
- Peanut Butter Swirl Cookie Bars
- Walnut Chocolate Chip Cookie Bars
- Pecan Chocolate Chip Cookie Bars
- White Chocolate Cookie Bars
- White Chocolate Cranberry Bars
- Double Chocolate Cookie Bars
- Gluten-Free Cookie Bars
- Dairy-Free Cookie Bars
- Sugar-Free Dark Chocolate Bars
- Sweet-Salty Pretzel Bars
- Warm Cookie Bar Sundaes
- Why This Recipe Works
- Directions
- Step 1: Preheat the Oven
- Step 2: Prepare the Baking Pan
- Step 3: Melt the Butter
- Step 4: Add Eggs to the Bowl
- Step 5: Mix Eggs and Butter
- Step 6: Add the Cake Mix
- Step 7: Stir Into a Thick Dough
- Step 8: Fix Dry Dough if Needed
- Step 9: Add the Chocolate Chips
- Step 10: Transfer Dough to the Pan
- Step 11: Press the Dough Evenly
- Step 12: Add Extra Chocolate on Top
- Step 13: Bake the Bars
- Step 14: Bake Slightly Less for Gooier Bars
- Step 15: Cool Before Cutting
- Step 16: Cut Into Squares
- Step 17: Serve and Enjoy
- Step 18: Store the Leftovers
- Serving Ideas
- Storage
- Freezing
- Make-Ahead
- Helpful Notes for Best Results
- Variations
- Classic Lazy Chocolate Chip Cookie Bars
- M&M Cookie Bars
- Peanut Butter Chip Bars
- Peanut Butter Swirl Bars
- Walnut Cookie Bars
- Pecan Cookie Bars
- White Chocolate Cookie Bars
- White Chocolate Cranberry Bars
- Double Chocolate Cookie Bars
- Gluten-Free Cookie Bars
- Dairy-Free Cookie Bars
- Sugar-Free Dark Chocolate Bars
- Sweet-Salty Pretzel Bars
- Egg-Free Flax Bars
- Small Batch Cookie Bars
- Troubleshooting
- Frequently Asked Questions
- Why This Recipe Works So Well
- Final Thoughts
- Lazy Chocolate Chip Cookie Bars
Why You’ll Love Lazy Chocolate Chip Cookie Bars
These bars are seriously easy. You only need one bowl, four main ingredients, and no complicated technique.
They start with boxed cake mix. That means no measuring flour, baking soda, or other dry cookie ingredients.
They are perfect for emergency dessert moments. Surprise guests, sudden chocolate cravings, and last-minute gatherings are all covered.
They have classic cookie-bar texture. The edges are chewy, the centers are soft, and the chocolate melts into every bite.
They are kid-friendly. The dough is easy to stir, press, and sprinkle with extra chocolate chips.
They are endlessly customizable. M&Ms, peanut butter chips, nuts, white chocolate, cranberries, pretzels, and different cake mixes can all work.
Recipe Details
This recipe bakes at 350°F (175°C). Use a 9×13-inch baking pan for the full batch.
The pan should be sprayed with nonstick cooking spray or rubbed with butter. This helps the bars release cleanly.
The recipe uses 1 stick butter, which is ½ cup or 113g. Melt it before mixing.
The butter can be salted or unsalted. Both work well in this recipe.
The recipe uses 2 large eggs. Large eggs are important because extra-large eggs can make the batter too wet.
The dry base is 1 box yellow cake mix, about 15.25 oz or 432g. Avoid the kind with pudding already added because it can make the texture strange.
The chocolate is 1 bag semi-sweet chocolate chips, 12 oz or 340g. You can reserve a small handful to sprinkle on top before baking.
The bars bake for about 25 minutes. For extra gooey bars, bake closer to 22 minutes.
Let the bars cool before cutting. About 30 minutes helps them set enough to slice neatly.
Ingredients
For the Lazy Chocolate Chip Cookie Bars
- 1 stick butter, ½ cup or 113g, melted
- 2 large eggs
- 1 box yellow cake mix, about 15.25 oz or 432g
- 1 bag semi-sweet chocolate chips, 12 oz or 340g
Optional Swaps, Add-Ins, and Serving Ideas
- Nonstick cooking spray
- Extra butter for greasing
- Vanilla ice cream
- M&Ms
- Peanut butter chips
- Peanut butter swirl
- Chopped walnuts
- Chopped pecans
- White chocolate chips
- Dried cranberries
- Devil’s food cake mix
- Gluten-free yellow cake mix
- Vegan butter
- Dairy-free chocolate chips
- Sugar-free cake mix
- Dark chocolate chips
- Crushed pretzels
- Milk
- Flax eggs
- Parchment paper
Ingredient Notes
Melted butter gives these bars richness and helps turn the cake mix into a thick cookie dough. Melt it in short microwave bursts so it does not get too hot.
Let the melted butter cool for a minute before mixing it with the eggs. Hot butter can start cooking the eggs, and that is not the texture you want.
Large eggs are important for structure and moisture. Extra-large eggs may make the dough too wet.
Yellow cake mix is the shortcut that makes this recipe so easy. It gives the bars sweetness, structure, and a soft cookie-like base.
Any regular brand of yellow cake mix can work. Store brand or name brand both bake up well.
Avoid yellow cake mix with pudding already added. It can make the bars bake with an odd texture.
Semi-sweet chocolate chips are classic. They bring enough chocolate without making the bars overly sweet.
You can use the whole bag of chocolate chips. For a prettier top, save a small handful and sprinkle them over the dough before baking.
Nonstick spray or butter keeps the bars from sticking. Greasing the pan is worth the extra few seconds.
A plastic knife can help cut cooled bars cleanly. It glides through with less sticking.
Optional Swaps, Variations, Add-Ins, and Serving Ideas
Classic Lazy Chocolate Chip Cookie Bars
Use melted butter, large eggs, yellow cake mix, and semi-sweet chocolate chips. This gives the full simple cookie bar version.
Bake until the edges are golden and the center is set but soft. Cool before slicing.
M&M Cookie Bars
Swap half the chocolate chips for colorful M&Ms. This makes the bars fun for birthdays, holidays, and kid-friendly desserts.
The colors show beautifully on top. Reserve a few to press into the surface before baking if desired.
Peanut Butter Chip Cookie Bars
Add ½ cup peanut butter chips along with the chocolate chips. This gives the bars a chocolate-peanut butter flavor.
Do not overload the dough with too many add-ins. Keep the total around 2 cups so the bars hold together.
Peanut Butter Swirl Cookie Bars
Swirl peanut butter over the top before baking. Use a light hand so the dough still bakes evenly.
The peanut butter adds richness. It also makes the bars look more special.
Walnut Chocolate Chip Cookie Bars
Add ½ cup chopped walnuts. They bring crunch and a slightly earthy flavor.
Walnuts pair well with chocolate chips. Keep the pieces small.
Pecan Chocolate Chip Cookie Bars
Add ½ cup chopped pecans. The pecans make the bars taste warmer and nuttier.
This variation works especially well for people who like crunch in cookie bars. Use chopped pieces for even distribution.
White Chocolate Cookie Bars
Use white chocolate chips instead of semi-sweet chocolate chips. The bars become sweeter and creamier.
You can also use half white chocolate and half semi-sweet. This gives a pretty contrast.
White Chocolate Cranberry Bars
Add dried cranberries with white chocolate chips. The cranberries bring a tart contrast.
This version looks festive. Keep the add-ins balanced so the bars set properly.
Double Chocolate Cookie Bars
Use devil’s food cake mix instead of yellow cake mix. Keep the chocolate chips.
This makes the bars rich and extra chocolatey. They are especially good for serious chocolate cravings.
Gluten-Free Cookie Bars
Use a gluten-free yellow cake mix. The method stays the same.
King Arthur’s and Bob’s Red Mill versions have worked well in this type of swap. Texture may vary slightly depending on the mix.
Dairy-Free Cookie Bars
Use vegan butter and dairy-free chocolate chips. Country Crock plant butter and Enjoy Life chocolate chips are good options.
Check that the cake mix fits your needs. Bake as directed.
Sugar-Free Dark Chocolate Bars
Use a sugar-free cake mix and dark chocolate chips. The bars will be less sweet.
They still satisfy a chocolate craving. The texture may change slightly.
Sweet-Salty Pretzel Bars
Mix in crushed pretzels for a sweet-salty combo. The pretzels add crunch.
Do not add too many or the dough can become hard to press. Keep total add-ins around 2 cups.
Warm Cookie Bar Sundaes
Serve slightly warm bars with vanilla ice cream. This is especially good when the chocolate is still melty.
A corner piece works beautifully for this. Serve right away.
Why This Recipe Works
This recipe works because boxed cake mix already contains the dry base needed for a quick cookie bar dough. Butter and eggs turn it into something thick, rich, and sliceable.
The melted butter blends easily and adds moisture. It also gives the bars that buttery cookie flavor.
The eggs help the bars hold together. They also keep the centers soft.
The dough is thick because it is meant to bake into bars, not cake. It should hold its shape when pressed into the pan.
Chocolate chips bring the classic cookie flavor. Semi-sweet chips balance the sweetness of the cake mix.
Baking in a 9×13-inch pan means the whole batch bakes at once. There is no scooping dough or baking multiple trays.
Letting the bars cool matters. Warm bars are soft and can fall apart when cut too soon.
The recipe is flexible because the base is simple. Add-ins can change the flavor while the basic method stays the same.
Directions
Step 1: Preheat the Oven
Preheat the oven to 350°F (175°C). Let it fully heat while you prepare the dough.
A properly heated oven helps the bars bake evenly. This also helps the edges turn golden without drying out the center.
Step 2: Prepare the Baking Pan
Grab a 9×13-inch baking pan. Spray it with nonstick cooking spray or rub it lightly with butter.
Do not skip greasing the pan. These bars are easier to remove when the pan is well prepared.
Step 3: Melt the Butter
Melt 1 stick butter, which is ½ cup or 113g. Use 30-second microwave bursts until just melted.
The butter should be liquid but not boiling hot. Let it cool for a minute before adding it to the eggs.
Step 4: Add Eggs to the Bowl
Crack 2 large eggs into a large mixing bowl. Use large eggs, not extra-large.
Large eggs give the right texture. Extra-large eggs can make the batter too wet.
Step 5: Mix Eggs and Butter
Pour the slightly cooled melted butter into the bowl with the eggs. Stir until fully combined.
The mixture may look slightly frothy. That is completely fine.
Step 6: Add the Cake Mix
Add the full box of yellow cake mix to the bowl. Use a regular 15.25 oz or 432g box.
Do not worry if it looks dry at first. It will come together as you stir.
Step 7: Stir Into a Thick Dough
Stir until a thick dough forms. This may take a little effort because the dough is supposed to be stiff.
The dough should hold its shape when scooped with a spoon. If it seems dry, let it sit for a minute so the butter can absorb.
Step 8: Fix Dry Dough if Needed
If the dough is still crumbly after resting, add milk 1 tablespoon at a time. Stir after each addition.
Only add enough milk to bring it together. The dough should stay thick, not loose.
Step 9: Add the Chocolate Chips
Fold in the 12 oz or 340g bag of semi-sweet chocolate chips. Mix until the chips are evenly distributed.
If desired, reserve a small handful of chocolate chips for the top. This makes the bars look extra chocolatey.
Step 10: Transfer Dough to the Pan
Spoon the dough into the prepared 9×13-inch pan. Spread it across the pan.
The dough will be thick. Take your time pressing it into an even layer.
Step 11: Press the Dough Evenly
Wet your fingers slightly and press the dough into the corners. The water helps keep the dough from sticking to your hands.
You can also spray a spatula with cooking spray and use that to spread the dough. Even thickness helps the bars bake properly.
Step 12: Add Extra Chocolate on Top
Sprinkle any reserved chocolate chips over the top. Press them gently into the dough.
This step is optional. It makes the finished bars look prettier.
Step 13: Bake the Bars
Bake for 25 minutes. The edges should be golden brown, and the center should look set but still slightly soft.
Do not wait until the top is completely brown. The bars continue to cook as they cool.
Step 14: Bake Slightly Less for Gooier Bars
For extra gooey bars, bake closer to 22 minutes. The center should still be soft.
Let them cool completely in the pan. The residual heat helps them finish setting.
Step 15: Cool Before Cutting
Let the bars cool for about 30 minutes before cutting. This is important for clean squares.
If you cut too early, the bars may fall apart. Warm spoonfuls are delicious, but neat squares need cooling time.
Step 16: Cut Into Squares
Use a plastic knife if you have one. It glides through the bars with less sticking.
Cut into your preferred square size. Smaller squares are great because the bars are rich.
Step 17: Serve and Enjoy
Serve the bars at room temperature or slightly warm. Add vanilla ice cream if serving them warm.
They are also delicious with a glass of cold milk. The chocolate chips soften beautifully when warmed.
Step 18: Store the Leftovers
Store leftover bars in an airtight container at room temperature for about 5 days. Use parchment between layers if stacking.
To rewarm, microwave a bar for 10 to 15 seconds or heat in a 300°F oven for 5 minutes. Freeze individual bars if you want longer storage.
Serving Ideas
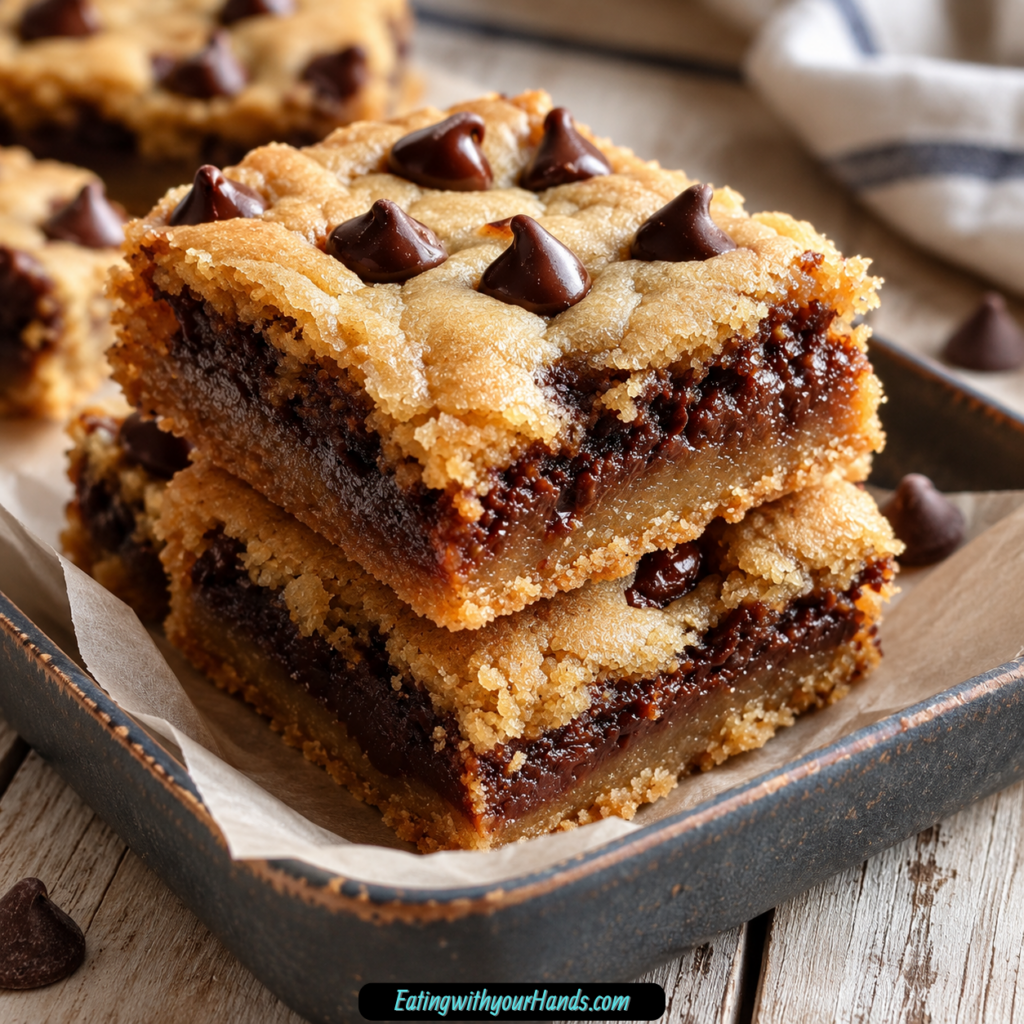
Serve Lazy Chocolate Chip Cookie Bars slightly warm. The chocolate chips become soft and melty again.
Add a scoop of vanilla ice cream for an easy dessert. This turns a simple bar into a warm cookie sundae.
Serve them at room temperature with a glass of cold milk. This is the classic cookie-bar pairing.
Cut them into small squares for parties. They are rich, so small pieces still satisfy.
Crumble a bar over yogurt for a sweet breakfast-style treat. It is playful and delicious.
Pack them for after-school snacks. They are sturdy enough to travel well.
Bring them to potlucks. A full 9×13-inch pan gives plenty to share.
Serve corner pieces to anyone who loves chewy edges. The center pieces are softer.
Storage
Store the bars in an airtight container at room temperature. They stay fresh for about 5 days.
Let the bars cool completely before storing. Warm bars can create steam and soften the texture.
If stacking, place parchment paper between layers. This prevents sticking.
Keep the container sealed. This helps the bars stay soft.
Do not refrigerate unless you prefer a firmer texture. Room temperature works well.
To make them taste warm again, microwave for 10 to 15 seconds. The chocolate will soften.
For a more oven-fresh texture, warm them in a 300°F oven for 5 minutes. Serve right away.
Freezing
These bars freeze beautifully. Wrap individual bars tightly in plastic wrap.
Then wrap them in foil. Freeze for up to 3 months.
Thaw at room temperature when ready to eat. This keeps the texture soft.
You can also microwave a frozen or thawed bar briefly when the craving hits. Use short bursts so it does not overheat.
Freezing individual bars makes portioning easy. You can grab one at a time.
Use parchment if freezing several together. This helps separate them later.
Let bars cool fully before wrapping. Warm bars should never go into the freezer.
Make-Ahead
Lazy Chocolate Chip Cookie Bars are great for make-ahead dessert. Bake them earlier in the day and let them cool completely.
Cut them into squares once cool. Store covered at room temperature until serving.
You can make them a day before a potluck. The texture stays soft and chewy.
If making several batches, let each pan cool before cutting. Cutting too soon can make messy squares.
For longer make-ahead storage, freeze individual bars. Thaw as needed.
These bars also work well for lunchbox treats. Wrap squares individually once cooled.
Make-ahead bars are especially helpful for busy weeks. A simple pan can cover snacks, dessert, and last-minute sharing.
Helpful Notes for Best Results
Do not overbake the bars. They may look slightly underdone at 25 minutes, but they firm as they cool.
If you wait until the top looks fully done in the oven, the bars may turn dry. Pull them when the center is set but soft.
Spread the dough evenly in the pan. Uneven dough bakes unevenly.
Wet fingers make pressing easier. Cooking spray on a spatula also helps.
Do not overmix the batter. Stir only until combined.
If your bars turn cakey, the batter may have been overmixed or the eggs may have been too large. Use large eggs and mix gently.
Keep total add-ins around 2 cups. Too many extras can make the bars fall apart.
Measure chocolate with your heart if you love extra chocolate, but avoid overloading the dough too much.
Variations
Classic Lazy Chocolate Chip Cookie Bars
Use melted butter, large eggs, yellow cake mix, and semi-sweet chocolate chips. This is the easiest version.
Bake until the edges are golden and the center is soft-set. Cool before cutting.
M&M Cookie Bars
Replace half the chocolate chips with M&Ms. This adds color and crunch.
These are great for birthdays and holidays. Use seasonal colors if desired.
Peanut Butter Chip Bars
Add ½ cup peanut butter chips with the chocolate chips. This creates a chocolate-peanut butter flavor.
Keep the total add-ins around 2 cups. The bars will hold together better.
Peanut Butter Swirl Bars
Swirl peanut butter on top before baking. Use a knife to gently create ribbons.
Do not mix it fully into the dough. A visible swirl looks pretty and tastes rich.
Walnut Cookie Bars
Add ½ cup chopped walnuts. They add crunch and balance the sweetness.
Chop them small. This helps them spread evenly through the dough.
Pecan Cookie Bars
Add ½ cup chopped pecans. Pecans give a buttery crunch.
This version tastes especially cozy. Serve slightly warm.
White Chocolate Cookie Bars
Use white chocolate chips instead of semi-sweet chocolate chips. The bars become sweeter and creamier.
You can also use half white chocolate and half semi-sweet chocolate. That gives a balanced flavor.
White Chocolate Cranberry Bars
Add dried cranberries with white chocolate chips. The tart fruit balances the sweetness.
This version looks pretty on a dessert tray. Keep add-ins moderate.
Double Chocolate Cookie Bars
Use devil’s food cake mix instead of yellow cake mix. Keep the chocolate chips.
These bars are dangerously rich. Cut them into smaller squares if desired.
Gluten-Free Cookie Bars
Use a gluten-free yellow cake mix. The method stays the same.
The texture can vary by brand. Let the bars cool fully before cutting.
Dairy-Free Cookie Bars
Use vegan butter and dairy-free chocolate chips. This creates a dairy-free version.
Country Crock plant butter and Enjoy Life chocolate chips are good options. Check your cake mix too.
Sugar-Free Dark Chocolate Bars
Use sugar-free cake mix and dark chocolate chips. The bars will be less sweet.
The texture may be slightly different. Bake until just set.
Sweet-Salty Pretzel Bars
Mix in crushed pretzels. They give a crunchy, salty contrast.
This variation is addictive. Keep the pretzel pieces small.
Egg-Free Flax Bars
Use flax eggs if needed. Mix 1 tablespoon ground flax with 3 tablespoons water per egg.
The texture will be slightly denser. The bars still taste delicious.
Small Batch Cookie Bars
Halve the recipe and bake in an 8×8-inch pan. Bake for about 20 minutes.
This is a good option when you want fewer bars. Check the center before removing.
Troubleshooting
The Dough Seems Too Dry
Let the dough sit for 5 minutes. Sometimes the butter needs time to absorb into the cake mix.
If it is still crumbly, add 1 tablespoon milk at a time. Stop once the dough comes together.
The Dough Is Hard to Spread
The dough is meant to be thick. Wet your fingers and press it into the pan.
You can also spray a spatula with cooking spray. This keeps the dough from sticking.
The Bars Turned Out Cakey
The batter may have been overmixed, or extra-large eggs may have been used. Use large eggs.
Stir only until everything is combined. Do not beat the dough.
The Bars Are Dry
They may have been overbaked. Pull them when the edges are golden and the center looks set but still soft.
The bars continue baking as they cool. Do not wait until the top is completely brown.
The Bars Fell Apart When Cut
They were probably too warm. Let them cool about 30 minutes before slicing.
Use a plastic knife if possible. It helps cut cleaner squares.
The Middle Looks Underdone
The center should look set but slightly soft. It firms as the bars cool.
For gooier bars, 22 minutes can work. Cool completely before cutting.
The Bars Stuck to the Pan
The pan may not have been greased enough. Use nonstick spray or butter.
You can also use parchment paper for easier lifting. Grease or line before adding dough.
The Chocolate Chips Sank or Clumped
The dough may not have been mixed evenly. Fold the chips through the stiff dough until distributed.
Reserve some chips for the top if you want a prettier finish. Press lightly before baking.
The Bars Are Too Sweet
Use dark chocolate chips or a sugar-free cake mix variation next time. You can also cut smaller squares.
Nuts or pretzels help balance sweetness. Try walnuts, pecans, or crushed pretzels.
The Frozen Bars Taste Dry
They may not have been wrapped tightly enough. Wrap in plastic wrap and then foil.
Thaw at room temperature. Warm briefly to soften the chocolate.
Frequently Asked Questions
Can I use another cake mix besides yellow?
Yes, other cake mixes can work. Devil’s food cake mix makes rich double chocolate bars.
White cake mix also works as a blank base for add-ins. Avoid mixes with pudding already added because they can make the texture strange.
How do I make the bars extra gooey?
Bake them slightly less, about 22 minutes. Let them cool completely in the pan so they set.
Do not reduce the chocolate chips. The chocolate helps make the bars feel gooey.
Can I make these without eggs?
Yes, flax eggs can work in a pinch. Use 1 tablespoon ground flax mixed with 3 tablespoons water per egg.
The texture will be slightly denser. The bars will still taste good.
Why did my bars turn out cakey?
The batter may have been overmixed, or extra-large eggs may have been used. Stir only until combined.
Use 2 large eggs. Do not beat the batter like cake batter.
Can I halve the recipe?
Yes, use an 8×8-inch pan and bake for about 20 minutes. Check the center before removing.
This makes a smaller batch. The texture should still be chewy.
My dough seems too dry. What should I do?
Let it sit for 5 minutes first. The melted butter may need time to absorb.
If it is still crumbly, add 1 tablespoon milk at a time until the dough comes together. Keep it thick.
How long do these bars last?
They stay fresh in an airtight container at room temperature for about 5 days. Use parchment between layers if stacking.
They can also be frozen for up to 3 months. Wrap individually for best results.
What should I serve with them?
Serve warm bars with vanilla ice cream. You can also serve them at room temperature with milk.
They are great for potlucks, lunchboxes, after-school snacks, and quick desserts. Small squares are perfect for sharing.
Why This Recipe Works So Well
Lazy Chocolate Chip Cookie Bars work because cake mix gives the dough a reliable base. Butter and eggs turn that base into a thick, cookie-like dough.
The melted butter adds richness and helps the bars stay chewy. The eggs bind everything together.
Semi-sweet chocolate chips give classic cookie flavor. They melt into the dough and make every square taste familiar and comforting.
The 9×13-inch pan lets the whole batch bake at once. This is what makes the recipe feel so much easier than regular cookies.
The dough is stiff because it is meant to bake into bars. Pressing it evenly helps every piece bake the same way.
Cooling is key. The bars firm up as they rest, which makes clean cutting possible.
The recipe is also flexible. Many add-ins work as long as the total amount stays around 2 cups.
Most of all, these bars work because they deliver homemade cookie flavor with very little effort. They are warm, chocolatey, chewy, and exactly the kind of dessert that saves the day.
Final Thoughts
Lazy Chocolate Chip Cookie Bars are made with melted butter, large eggs, yellow cake mix, and semi-sweet chocolate chips. The dough comes together in one bowl, presses into a 9×13-inch pan, and bakes into chewy, soft-centered cookie bars with melty chocolate in every bite.
Serve them slightly warm with vanilla ice cream, enjoy them at room temperature with milk, store them airtight for about 5 days, or freeze individual bars for up to 3 months. With their 350°F bake, 10-minute prep, 25-minute baking time, 22-minute gooey option, 30-minute cooling time, 10-to-15-second microwave reheat, 300°F oven reheat, and variations like M&Ms, peanut butter chips, peanut butter swirl, walnuts, pecans, white chocolate, cranberries, devil’s food cake mix, gluten-free cake mix, vegan butter, dairy-free chocolate chips, sugar-free cake mix, dark chocolate chips, pretzels, flax eggs, and a small 8×8-inch batch, these cookie bars are easy, flexible, and wonderfully satisfying.
Lazy Chocolate Chip Cookie Bars
Soft, chewy, buttery, and packed with chocolate chips, these Lazy Chocolate Chip Cookie Bars turn yellow cake mix into an easy dessert bar with very little prep. Melted butter, eggs, cake mix, and semi-sweet chocolate chips bake together in a 9×13-inch pan for a simple American-style treat that slices into 12 bars.
Recipe Details
- Prep Time: 10 minutes
- Cook Time: 25 minutes
- Total Time: 35 minutes
- Course: Dessert
- Cuisine: American
- Servings: 12 bars
Ingredients
For the Cookie Bars
- 1 bag semi-sweet chocolate chips 12 oz / 340 g
- 1 box yellow cake mix approx. 15.25 oz / 432 g
- 2 eggs large
- 1 stick butter ½ cup or 113 g, melted
Instructions
Step 1: Prepare the Oven and Pan
Preheat the oven to 350°F (175°C). Grease a 9×13-inch baking pan.
Make sure the pan is evenly coated before adding the dough. This helps the cookie bars release more easily after baking.
Step 2: Mix the Butter and Eggs
In a large bowl, mix the melted butter and eggs until combined. Stir until the eggs are blended smoothly into the butter.
The melted butter helps create a rich, soft cookie bar texture. Use 2 large eggs as listed.
Step 3: Add the Cake Mix
Add the yellow cake mix and stir until a thick dough forms. The mixture should come together into a dense cookie-style dough.
Use 1 box yellow cake mix, approximately 15.25 oz / 432 g. Mix only until the cake mix is fully incorporated.
Step 4: Fold in the Chocolate Chips
Fold in the semi-sweet chocolate chips. Stir gently until the chips are evenly distributed throughout the dough.
Use 1 bag semi-sweet chocolate chips, 12 oz / 340 g. Make sure the chocolate chips are spread through the dough so every bar gets plenty of chocolate.
Step 5: Spread the Dough
Spread the dough evenly in the prepared 9×13-inch baking pan. Press or smooth it into an even layer from corner to corner.
The dough will be thick, so spread it carefully. Keeping the layer even helps the bars bake consistently.
Step 6: Bake the Bars
Bake for 25 minutes, or until the edges are golden brown. The edges should look set and lightly golden when the bars are ready.
Remove the pan from the oven once the bars are baked through. Let them cool before cutting.
Step 7: Cool and Slice
Let the cookie bars cool before cutting into bars. Slice into 12 bars once they are firm enough to cut cleanly.
Cooling helps the bars hold their shape. Serve once sliced.
Notes
- Store bars in an airtight container for up to 5 days.
Serving Suggestions
Serve Lazy Chocolate Chip Cookie Bars after they have cooled and been sliced into 12 bars. The yellow cake mix, melted butter, eggs, and semi-sweet chocolate chips create a soft, chewy dessert with classic chocolate chip cookie flavor in bar form.
These bars work well for quick desserts, snack trays, lunchbox treats, potlucks, or simple family baking. Since the dough is spread into one pan, they are easier than scooping individual cookies.
For the cleanest slices, let the bars cool before cutting. This helps the chocolate chip cookie bar texture set and keeps the edges neat.
Storage
How to Store
Store bars in an airtight container for up to 5 days. Make sure the bars are cooled before storing.
Cake Mix Tip
Use 1 box yellow cake mix, approximately 15.25 oz / 432 g. Stir it into the butter and eggs until a thick dough forms.
Butter Tip
Use 1 stick butter, ½ cup or 113 g, melted. Mix it with the eggs before adding the cake mix.
Chocolate Chip Tip
Use 1 bag semi-sweet chocolate chips, 12 oz / 340 g. Fold them in after the dough comes together.
Pan Tip
Grease a 9×13-inch baking pan before adding the dough. Spread the dough evenly so the bars bake consistently.
Baking Tip
Bake at 350°F (175°C) for 25 minutes, or until the edges are golden brown. Let cool before cutting into bars.

Fernando is the creator and writer behind the food blog Eating with your Hands. Living and working in cities like Paris, Barcelona, and Berlin, and being married to a Canadian foodie, has given Fernando a passion and interest in food and inspired him to run EWYH.