
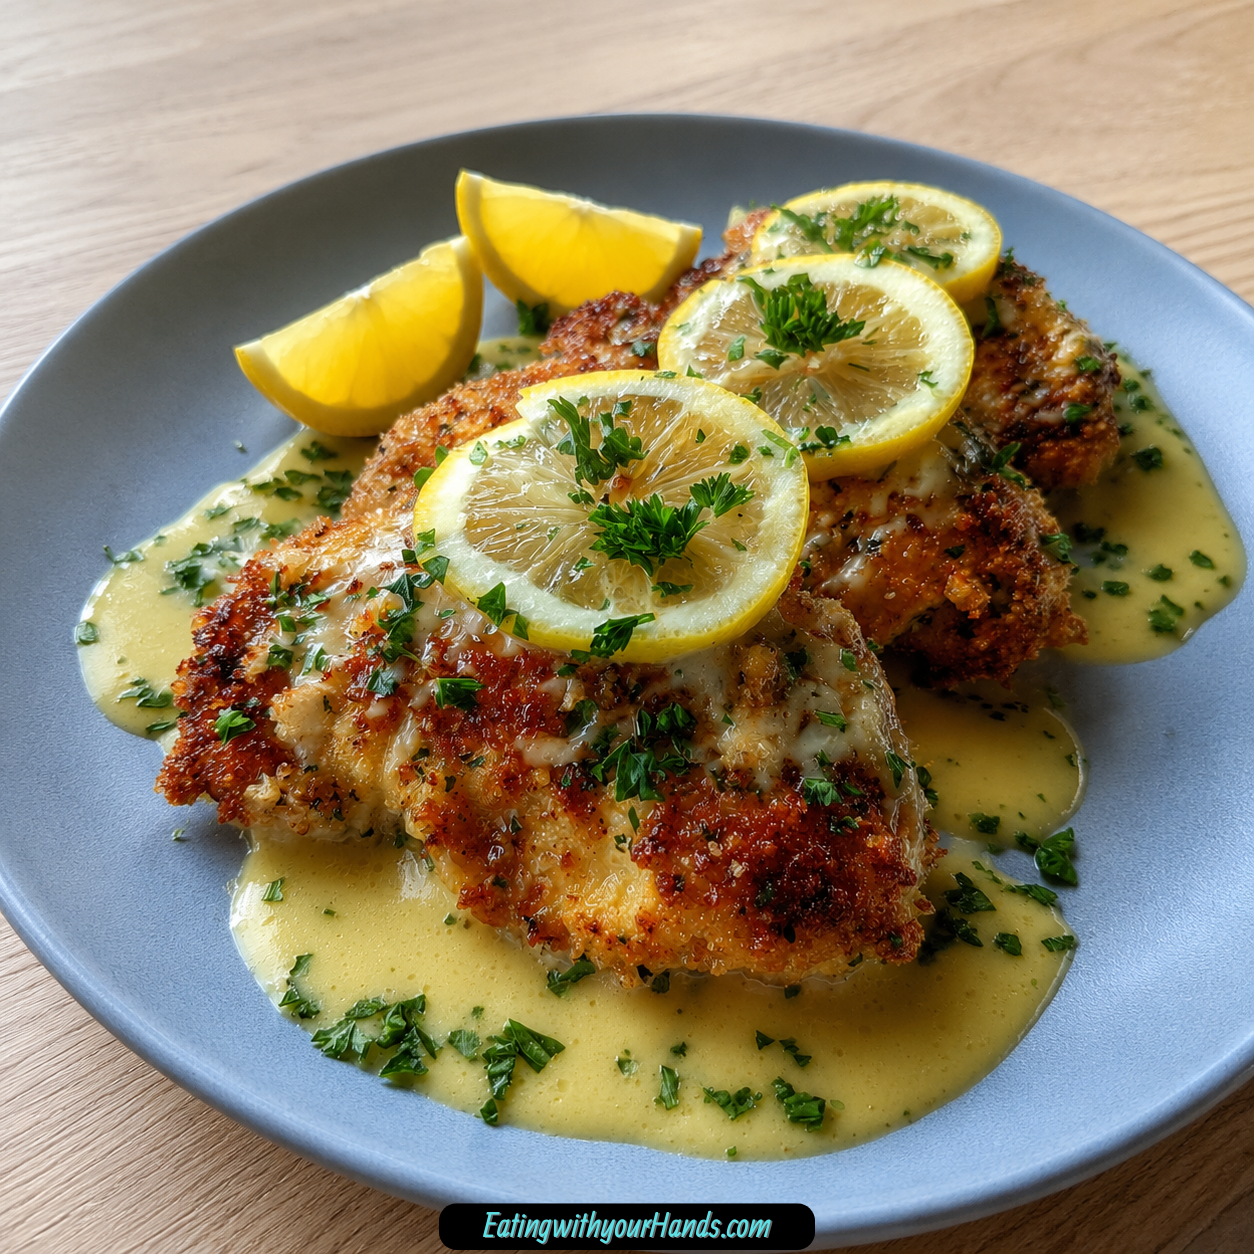
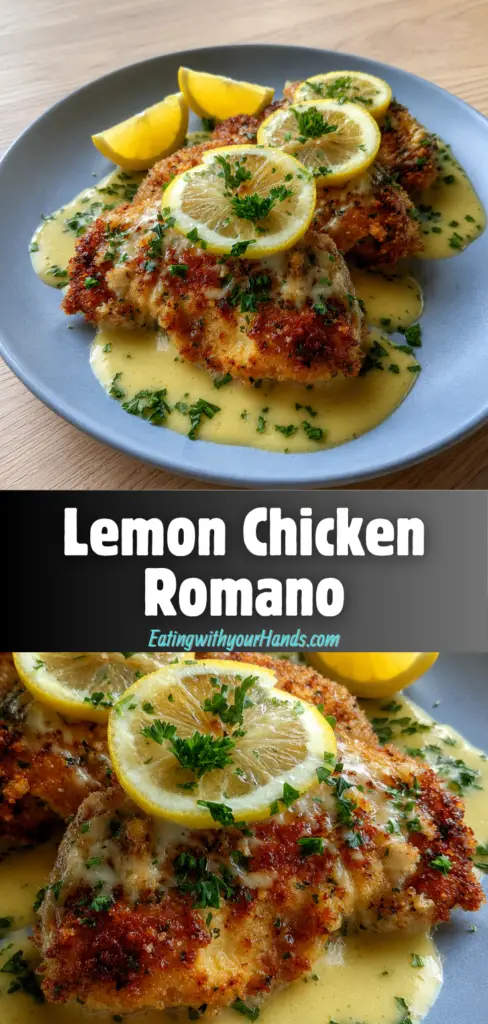
Some recipes feel bright before they even reach the plate. Lemon Chicken Romano is one of those dishes, the kind of dinner that fills the kitchen with the scent of fresh lemon, warm cheese, and golden chicken sizzling in a pan.
It feels comforting, but not heavy. It has the crisp, savory coating you want from a satisfying chicken dinner, yet the lemon sauce keeps everything lively and fresh.
This recipe brings together tender boneless chicken breasts, a simple flour and egg coating, grated Romano cheese, and a quick pan sauce made with fresh lemon juice, chicken broth, butter, olive oil, and parsley. The result is a dish that tastes special enough for company but simple enough for a weeknight.
The chicken cooks until golden on the outside and juicy inside. Then it is finished with a bright lemon sauce that catches all the browned bits in the pan and turns them into flavor.
It is the kind of meal that makes the table feel a little warmer. Serve it with lemon wedges, a simple green salad, garlic mashed potatoes, creamy risotto, or anything that can soak up that zesty sauce.
Table of Contents
- What Is Lemon Chicken Romano?
- Why This Recipe Works
- Recipe Overview
- Why You’ll Love Lemon Chicken Romano
- Ingredients You’ll Need
- Ingredient Notes
- Directions
- Step 1: Prepare Your Workspace
- Step 2: Check the Chicken Breasts
- Step 3: Season the Flour
- Step 4: Beat the Eggs
- Step 5: Prepare the Romano Cheese
- Step 6: Coat the Chicken in Flour
- Step 7: Dip the Chicken in Egg
- Step 8: Press the Chicken Into Romano Cheese
- Step 9: Repeat With the Remaining Chicken
- Step 10: Let the Coating Set Briefly
- Step 11: Heat the Pan
- Step 12: Add the Chicken to the Pan
- Step 13: Cook the First Side
- Step 14: Flip and Cook the Second Side
- Step 15: Rest the Cooked Chicken
- Step 16: Add Lemon Juice to the Pan
- Step 17: Add Chicken Broth
- Step 18: Simmer the Sauce
- Step 19: Return the Chicken to the Pan
- Step 20: Add Fresh Parsley
- Step 21: Serve With Lemon Wedges
- Pro Tips for the Best Lemon Chicken Romano
- Variations
- Serving Suggestions
- Storage Tips
- Freezing Instructions
- Make-Ahead Instructions
- Common Mistakes to Avoid
- Helpful Notes
- Frequently Asked Questions
- Final Thoughts
- Lemon Chicken Romano
What Is Lemon Chicken Romano?
Lemon Chicken Romano is an Italian-inspired chicken dish made with boneless, skinless chicken breasts coated in flour, egg, and grated Romano cheese. The chicken is pan-cooked until golden and finished with a fresh lemon sauce.
The flavor is rich and bright at the same time. Romano cheese creates a savory crust, while lemon juice and chicken broth create a light sauce that balances the richness.
The dish takes about 35 minutes from start to finish. You need 15 minutes for prep and about 20 minutes for cooking.
It is a wonderful recipe for family dinners, casual entertaining, or nights when you want something cozy but not complicated. The steps are easy to follow, and the ingredients are simple.
Why This Recipe Works
The flour helps the egg stick to the chicken. The egg helps the Romano cheese cling to the surface.
Together, the layers create a coating that turns golden and flavorful in the pan. The Romano cheese adds a salty, sharp, savory taste that makes the crust stand out.
Cooking the chicken in olive oil and butter gives the crust richness. The butter adds flavor, while the olive oil helps with cooking.
The lemon sauce is made in the same pan, which means it picks up all the browned bits left behind by the chicken. Those little bits add depth to the sauce.
Fresh parsley finishes the dish with color and freshness. Lemon wedges on the side allow each person to add more citrus if they like.
Recipe Overview
Prep Time: 15 minutes
Cook Time: 20 minutes
Total Time: 35 minutes
Servings: 4 people
This recipe makes 4 servings. It is designed for 4 boneless, skinless chicken breasts.
The chicken is coated and cooked in a pan for about 6 to 7 minutes per side. The internal temperature should reach 165°F.
Why You’ll Love Lemon Chicken Romano
You will love this recipe because it feels elegant without being difficult. The chicken has a crisp cheese coating, and the lemon sauce gives it a fresh, lively finish.
It is quick to prepare. With only 15 minutes of prep time, it works well for busy evenings.
It uses pantry-friendly ingredients. Flour, eggs, cheese, lemon juice, broth, butter, and olive oil come together beautifully.
It is beginner-friendly. The steps are easy to understand, and the recipe does not require complicated techniques.
It is also wonderful for gatherings. The bright lemon flavor and golden coating make it feel special on the table.
You can prepare the chicken ahead of time, too. Coating the chicken in advance makes dinner easier when the day gets busy.
Ingredients You’ll Need
For the Chicken
4 pieces boneless, skinless chicken breasts
For the Coating
1 cup all-purpose flour
1 teaspoon salt
½ teaspoon black pepper
2 large eggs, beaten
½ cup grated Romano cheese
For the Sauce
¼ cup olive oil
¼ cup fresh lemon juice
¼ cup chicken broth
2 tablespoons butter
2 tablespoons fresh parsley, chopped
For Serving
Lemon wedges, as needed
Ingredient Notes
Boneless, skinless chicken breasts are the base of this dish. If they are thick, pounding them to an even thickness helps them cook evenly.
All-purpose flour creates the first coating layer. It helps the egg cling to the chicken.
Salt and black pepper season the flour mixture. This keeps the chicken flavorful from the first layer.
Beaten eggs act as the binder. They help the Romano cheese stick to the chicken.
Romano cheese gives the dish its signature flavor. It is sharp, savory, and delicious when cooked into a crust.
Olive oil helps cook the chicken and gives the outside a golden finish. It works well with the butter.
Fresh lemon juice is essential for the sauce. Bottled lemon juice can work in a pinch, but fresh lemon gives the brightest taste.
Chicken broth gives the sauce body. It balances the lemon juice and helps create a savory pan sauce.
Butter adds richness to the sauce. It softens the acidity of the lemon and makes the finish smoother.
Fresh parsley adds color and freshness. It gives the final dish a simple but beautiful garnish.
Lemon wedges are served on the side for extra brightness. They are especially nice for anyone who loves a bold citrus finish.
Directions
Step 1: Prepare Your Workspace
Start by clearing your counter and gathering all the ingredients. This recipe moves smoothly when the flour, eggs, cheese, chicken, and sauce ingredients are ready before cooking begins.
Set out a cutting board, a shallow bowl for the flour mixture, another bowl for the eggs, and a plate for the Romano cheese. You will also need a frying pan, tongs, and a meat thermometer if you have one.
Having everything ready helps you coat the chicken without rushing. It also keeps the cooking process calm and enjoyable.
Step 2: Check the Chicken Breasts
Place the 4 boneless, skinless chicken breasts on a cutting board. Look at the thickness of each piece.
If the chicken breasts are thick or uneven, gently pound them to a more even thickness. This helps them cook at the same rate.
Even chicken breasts are easier to cook properly. They are less likely to burn outside before the center is done.
Step 3: Season the Flour
In a mixing bowl, combine 1 cup all-purpose flour, 1 teaspoon salt, and ½ teaspoon black pepper. Stir until the salt and pepper are evenly distributed.
This flour mixture creates the first coating layer. It also seasons the chicken before the cheese goes on.
Do not skip seasoning the flour. This is one of the easiest ways to make the whole dish taste balanced.
Step 4: Beat the Eggs
Crack 2 large eggs into a separate bowl. Beat them until the yolks and whites are fully combined.
The eggs help the Romano cheese stick to the chicken. Without the egg layer, the cheese coating may not adhere as well.
Keep the egg bowl close to the flour bowl. You will move the chicken from flour to egg to cheese.
Step 5: Prepare the Romano Cheese
Place ½ cup grated Romano cheese in another shallow dish or plate. Spread it out so it is easy to coat the chicken.
Romano cheese adds a sharp, savory flavor to the crust. It is what gives this recipe its special character.
If needed, Parmesan or Pecorino Romano can be used as a substitute. The flavor will change slightly, but the dish will still be delicious.
Step 6: Coat the Chicken in Flour
Take one chicken breast and place it into the flour mixture. Coat both sides completely.
Gently shake off any excess flour. You want a thin, even coating rather than a thick layer.
The flour helps the egg cling better. This creates the foundation for a crispier crust.
Step 7: Dip the Chicken in Egg
Move the floured chicken breast into the beaten eggs. Turn it so both sides are coated.
Let any extra egg drip back into the bowl. Too much egg can make the coating heavy.
The chicken should look lightly coated and ready for the cheese layer. Repeat gently so the flour does not come off.
Step 8: Press the Chicken Into Romano Cheese
Place the egg-coated chicken into the grated Romano cheese. Press gently so the cheese adheres to the surface.
Turn the chicken and coat the other side. Make sure the cheese is spread evenly.
This cheese layer will become golden and flavorful in the pan. Take your time so each piece is well coated.
Step 9: Repeat With the Remaining Chicken
Repeat the flour, egg, and Romano cheese process with the remaining chicken breasts. Place the coated pieces on a plate.
Try to keep the coating even on all pieces. This helps them cook with a similar texture.
If some cheese falls off, gently press it back onto the chicken. A little unevenness is fine.
Step 10: Let the Coating Set Briefly
Let the coated chicken sit for a few minutes before cooking. This helps the layers settle.
A short rest can make the coating less likely to slide off in the pan. It also gives you time to prepare the oil and butter.
This step is small, but it can improve the final crust. It is especially helpful for a cheese-coated chicken recipe.
Step 11: Heat the Pan
Place a frying pan over medium heat. Add ¼ cup olive oil and 2 tablespoons butter.
Let the butter melt into the oil. The mixture should become hot and lightly bubbly.
Do not use heat that is too high. Romano cheese can brown quickly, so medium heat is best.
Step 12: Add the Chicken to the Pan
Carefully place the coated chicken breasts into the hot pan. Do not crowd them too tightly.
If your pan is small, cook in batches. Crowding can lower the heat and make the crust less crisp.
You should hear a gentle sizzle when the chicken touches the pan. That sound means the coating is beginning to cook.
Step 13: Cook the First Side
Cook the chicken for about 6 to 7 minutes on the first side. Let it become golden brown before flipping.
Avoid moving the chicken too much while it cooks. Letting it sit helps the crust form.
If the chicken browns too quickly, reduce the heat slightly. The goal is golden outside and cooked through inside.
Step 14: Flip and Cook the Second Side
Carefully flip each chicken breast. Cook the second side for another 6 to 7 minutes.
The coating should become golden and crisp. The chicken should cook through evenly.
Use a meat thermometer to check the internal temperature. The chicken should reach 165°F.
Step 15: Rest the Cooked Chicken
Once the chicken is cooked through, transfer it to a plate. Let it rest while you make the sauce.
Resting helps keep the chicken juicy. It also allows the crust to settle.
Do not wipe out the pan. The browned bits at the bottom are full of flavor and will help make the sauce.
Step 16: Add Lemon Juice to the Pan
Pour ¼ cup fresh lemon juice into the same pan. The lemon juice will loosen the browned bits from the bottom.
Use a spoon or spatula to scrape gently. Those bits add savory depth to the sauce.
The lemon scent will become bright and fragrant. This is where the dish starts to come together.
Step 17: Add Chicken Broth
Pour in ¼ cup chicken broth. Stir it together with the lemon juice.
The broth balances the acidity of the lemon. It also gives the sauce a fuller flavor.
Let the mixture come to a gentle simmer. Keep the heat moderate.
Step 18: Simmer the Sauce
Let the sauce simmer for a few minutes until it slightly reduces and thickens. It should become more concentrated but still spoonable.
Stir occasionally as it simmers. This keeps the flavor evenly blended.
If desired, you can add a pinch of lemon zest for a stronger lemon aroma. This is optional but lovely.
Step 19: Return the Chicken to the Pan
Place the cooked chicken breasts back into the pan. Spoon the lemon sauce over each piece.
Let the chicken warm briefly in the sauce. This helps the crust absorb some flavor without becoming soggy.
Be gentle when moving the chicken. You want to preserve the Romano crust.
Step 20: Add Fresh Parsley
Sprinkle 2 tablespoons chopped fresh parsley over the chicken. This gives the dish color and freshness.
Parsley also helps balance the richness of the cheese and butter. It makes the final plate feel bright.
Add it near the end so it stays fresh and green.
Step 21: Serve With Lemon Wedges
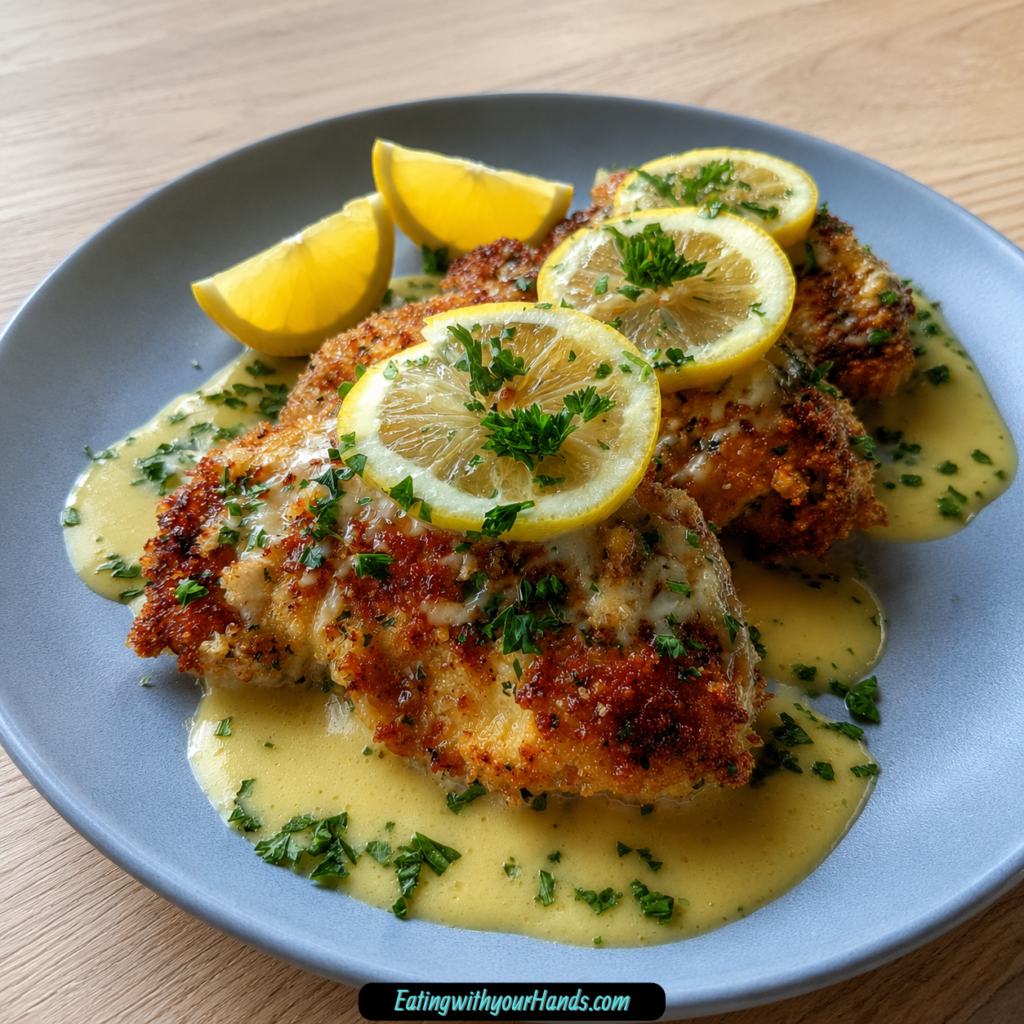
Transfer the Lemon Chicken Romano to plates. Serve with lemon wedges on the side.
The extra lemon lets each person adjust the brightness. Some may want just a little, while others may love a bigger citrus finish.
Serve immediately while the crust is warm and the sauce is fresh.
Pro Tips for the Best Lemon Chicken Romano
Pound thick chicken breasts to an even thickness. This helps them cook evenly and stay juicy.
Season the flour well. The coating should have flavor from the beginning.
Let the coated chicken rest for a few minutes before cooking. This helps the crust set.
Cook over medium heat. Too much heat can burn the cheese before the chicken is done.
Use fresh lemon juice whenever possible. It makes the sauce taste brighter and cleaner.
Check the chicken temperature. The internal temperature should reach 165°F.
Variations
Herb-Infused Lemon Chicken Romano
Add fresh herbs like thyme or rosemary to the flour mixture. This gives the coating an aromatic twist.
Use a light hand with herbs so they do not overpower the lemon and Romano cheese. The goal is to enhance the dish, not change it completely.
Seasonal Citrus Version
Substitute lime or orange juice for the lemon juice. This creates a different citrus flavor.
Lime gives a sharper finish, while orange creates a slightly sweeter sauce. Both options keep the dish bright.
Gluten-Free Lemon Chicken Romano
Use almond flour or gluten-free breadcrumbs in place of all-purpose flour. This makes the coating more suitable for gluten-free needs.
Keep in mind that the texture may change slightly. The flavor will still be delicious.
Oven-Baked Lemon Chicken Romano
Bake the coated chicken at 400°F for 20 to 25 minutes for a healthier option. This reduces the need for pan frying.
The crust may be slightly different from the skillet version. Still, it is a good option when you want a more hands-off method.
Cheese Variations
Try Parmesan or Pecorino Romano for different flavor profiles. Parmesan is slightly milder, while Pecorino Romano can be sharper and saltier.
Romano remains the classic choice for this recipe. Still, substitutions can work well when needed.
Capers in the Sauce
Add capers to the sauce for a salty kick. They pair beautifully with lemon and chicken.
Use a small amount so the sauce stays balanced. Capers can be strong, so a little goes a long way.
Serving Suggestions
Lemon Chicken Romano is delicious served hot from the pan. The crust is best when fresh and warm.
For a comforting plate, serve it with garlic mashed potatoes. The potatoes soak up the lemon sauce beautifully.
A simple green salad is a lighter option. It balances the richness of the chicken and cheese.
Creamy risotto also pairs well with this dish. It makes the meal feel elegant and cozy.
You can plate the chicken on a bed of fresh greens for a bright presentation. Add parsley and lemon wedges for color.
A light Italian salad is another great pairing. It keeps the meal fresh and balanced.
Storage Tips
Store leftovers in an airtight container in the refrigerator for up to 3 days. Let the chicken cool before sealing.
To help avoid moisture buildup, do not close the container while the chicken is still very hot. Letting it cool slightly protects the crust.
The coating may soften after refrigeration. Reheating in a skillet can help bring back some crispness.
Freezing Instructions
You can freeze Lemon Chicken Romano for up to 2 months. Allow the cooked chicken to cool completely first.
Place it in an airtight freezer-safe container. Separate layers with parchment if needed.
To reheat, thaw overnight in the refrigerator. Warm gently in a skillet over low heat to help maintain the coating.
Make-Ahead Instructions
You can prepare the chicken coating ahead of time. You can also coat the chicken breasts in advance.
Store the coated chicken in the refrigerator for up to 24 hours before cooking. This makes dinner faster on a busy evening.
When ready to cook, remove the chicken from the refrigerator and cook as directed. Keep an eye on the temperature and cook until it reaches 165°F.
The sauce is best made fresh in the same pan after cooking the chicken. That way, it captures the browned bits from the crust.
Common Mistakes to Avoid
Overcooking the Chicken
Chicken breasts can dry out if cooked too long. Use a meat thermometer and cook until the internal temperature reaches 165°F.
If your chicken breasts are very thick, pound them thinner before cooking. This helps prevent overcooked edges and undercooked centers.
Skipping the Flour Coating
Do not skip the flour layer. It helps the egg and cheese adhere to the chicken.
Without flour, the Romano coating may slide off or cook unevenly. The flour creates structure.
Not Letting the Coating Set
Let the coated chicken rest for a few minutes before cooking. This helps the layers hold together.
If you coat the chicken and immediately move it too much, the crust may loosen. A short rest makes a difference.
Using Bottled Lemon Juice
Fresh lemon juice gives the best flavor. Bottled lemon juice can work in a pinch, but it will not taste as bright.
Because lemon is a main flavor in this recipe, freshness matters. Use fresh lemons when possible.
Cooking on Heat That Is Too High
High heat can brown the cheese crust too quickly. The outside may burn before the chicken is cooked through.
Medium heat gives the chicken time to cook while the crust turns golden. Adjust the heat if needed.
Forgetting to Scrape the Pan
The browned bits in the pan are full of flavor. Scrape them into the sauce after adding lemon juice and broth.
This step helps create a richer sauce. It is one of the best parts of pan-cooked chicken dishes.
Helpful Notes
If you cannot find Romano cheese, Parmesan works as a great alternative. The flavor will be slightly different but still savory and delicious.
For a dairy-free version, use a dairy-free cheese alternative and olive oil. The texture may vary, but the method can still work.
If the coating seems too thick, lightly dust the chicken with flour before dipping. This can help balance the layers.
Add capers to the sauce if you like a salty, briny flavor. They pair naturally with lemon.
Fresh parsley is best added at the end. It keeps the dish bright and fresh.
Serve with lemon wedges for extra citrus. This lets everyone adjust their own plate.
Frequently Asked Questions
Can I Freeze Lemon Chicken Romano?
Yes, Lemon Chicken Romano can be frozen. Let the cooked chicken cool completely, then place it in an airtight freezer-safe container.
It can be frozen for up to 2 months. For best results, thaw overnight in the refrigerator and reheat gently in a skillet over low heat.
Can I Substitute the Romano Cheese?
Yes, you can substitute Romano cheese with Parmesan or Pecorino Romano. The flavor will be slightly different.
Parmesan is a little milder, while Pecorino Romano can be sharper. Either one can still work well in the coating.
Can I Make This Gluten-Free?
Yes, you can use almond flour or gluten-free breadcrumbs instead of all-purpose flour. This will make the coating gluten-free.
The texture may change a little depending on what you use. Still, the dish should remain flavorful.
How Do I Store Leftovers?
Store leftovers in an airtight container in the refrigerator for up to 3 days. Let the chicken cool before sealing.
To reheat, warm gently in a skillet. This helps keep the coating better than microwaving.
Can This Recipe Be Made Ahead?
Yes, you can prepare and coat the chicken breasts ahead of time. Store them in the refrigerator for up to 24 hours before cooking.
When ready to serve, cook the chicken and make the sauce fresh. This gives you the best texture and flavor.
What Should I Serve With Lemon Chicken Romano?
This dish pairs well with garlic mashed potatoes, creamy risotto, fresh greens, or a simple Italian salad. Lemon wedges on the side are also recommended.
You can keep the meal light or make it heartier depending on the occasion.
How Do I Keep the Coating Crispy?
Let the coated chicken rest before cooking. Cook over medium heat and avoid overcrowding the pan.
For leftovers, reheat in a skillet instead of the microwave. This helps restore some of the crust.
Final Thoughts
Lemon Chicken Romano is the kind of recipe that feels bright, comforting, and generous all at once. The chicken is tender, the Romano cheese crust is savory and golden, and the lemon sauce brings everything together with a fresh finish.
It is easy enough for weeknights but lovely enough for a family dinner or special gathering. The ingredients are simple, yet the final dish feels thoughtful and full of flavor.
I love how this recipe brings contrast to the plate. The chicken is crisp and rich, while the sauce is light and zesty.
Serve it warm with lemon wedges, parsley, and your favorite side dish. Whether you choose salad, risotto, or mashed potatoes, this Lemon Chicken Romano is the kind of meal that invites everyone to slow down, gather close, and enjoy something made with care.
Lemon Chicken Romano

This Lemon Chicken Romano is a bright, savory Italian-inspired dinner made with tender chicken breasts coated in a crisp Romano cheese crust. A simple lemon pan sauce with chicken broth, butter, and fresh parsley adds a zesty finish that keeps the dish fresh and flavorful.
Recipe Information
- Prep Time: 15 minutes
- Cook Time: 20 minutes
- Total Time: 35 minutes
- Course: Dinner
- Cuisine: Italian
- Servings: 4 people
- Calories: 450 kcal
Equipment
- Frying pan
- Mixing bowl
Ingredients
For the Chicken
- 4 pieces boneless, skinless chicken breasts
Creates the tender, protein-rich base for this Romano-crusted dish.
For the Coating
- ½ cup grated Romano cheese
Adds salty, sharp flavor and helps create a flavorful crust. - 2 large eggs
Help the coating stick to the chicken. - 1 teaspoon salt
Seasons the flour mixture and enhances the chicken flavor. - 1 cup all-purpose flour
Creates the first coating layer for the chicken. - ½ teaspoon black pepper
Adds mild warmth and balances the saltiness.
For the Sauce
- ¼ cup chicken broth
Adds savory depth and helps form the lemon sauce. - 2 tablespoons fresh parsley, chopped
Adds freshness and color before serving. - ¼ cup olive oil
Used to cook the chicken until golden. - 2 tablespoons butter
Adds richness and helps round out the lemon sauce. - ¼ cup fresh lemon juice
Gives the sauce its bright, zesty flavor.
For Serving
- As needed pieces lemon wedges
Served on the side for extra citrus flavor.
Instructions
- In a mixing bowl, stir together the all-purpose flour, salt, and black pepper.
- In a separate bowl, beat the eggs until smooth.
- Coat each chicken breast in the seasoned flour mixture.
- Dip the floured chicken into the beaten eggs.
- Press the chicken into the grated Romano cheese so the cheese coats the surface well.
- Heat the olive oil and butter in a frying pan over medium heat.
- Add the coated chicken breasts to the pan.
- Cook for 6 to 7 minutes on each side, or until the chicken is golden brown and cooked through.
- Remove the chicken from the pan and set it aside.
- In the same pan, add the fresh lemon juice and chicken broth.
- Simmer for a few minutes, stirring to loosen any flavorful browned bits from the pan.
- Return the chicken to the pan and spoon the lemon sauce over the top.
- Garnish with chopped fresh parsley.
- Serve warm with lemon wedges on the side.
Notes
- For extra flavor, marinate the chicken in lemon juice and spices before cooking.
- Serve with pasta, rice, roasted vegetables, or a fresh salad.
- Add more lemon juice if you prefer a brighter, tangier sauce.

Fernando is the creator and writer behind the food blog Eating with your Hands. Living and working in cities like Paris, Barcelona, and Berlin, and being married to a Canadian foodie, has given Fernando a passion and interest in food and inspired him to run EWYH.