
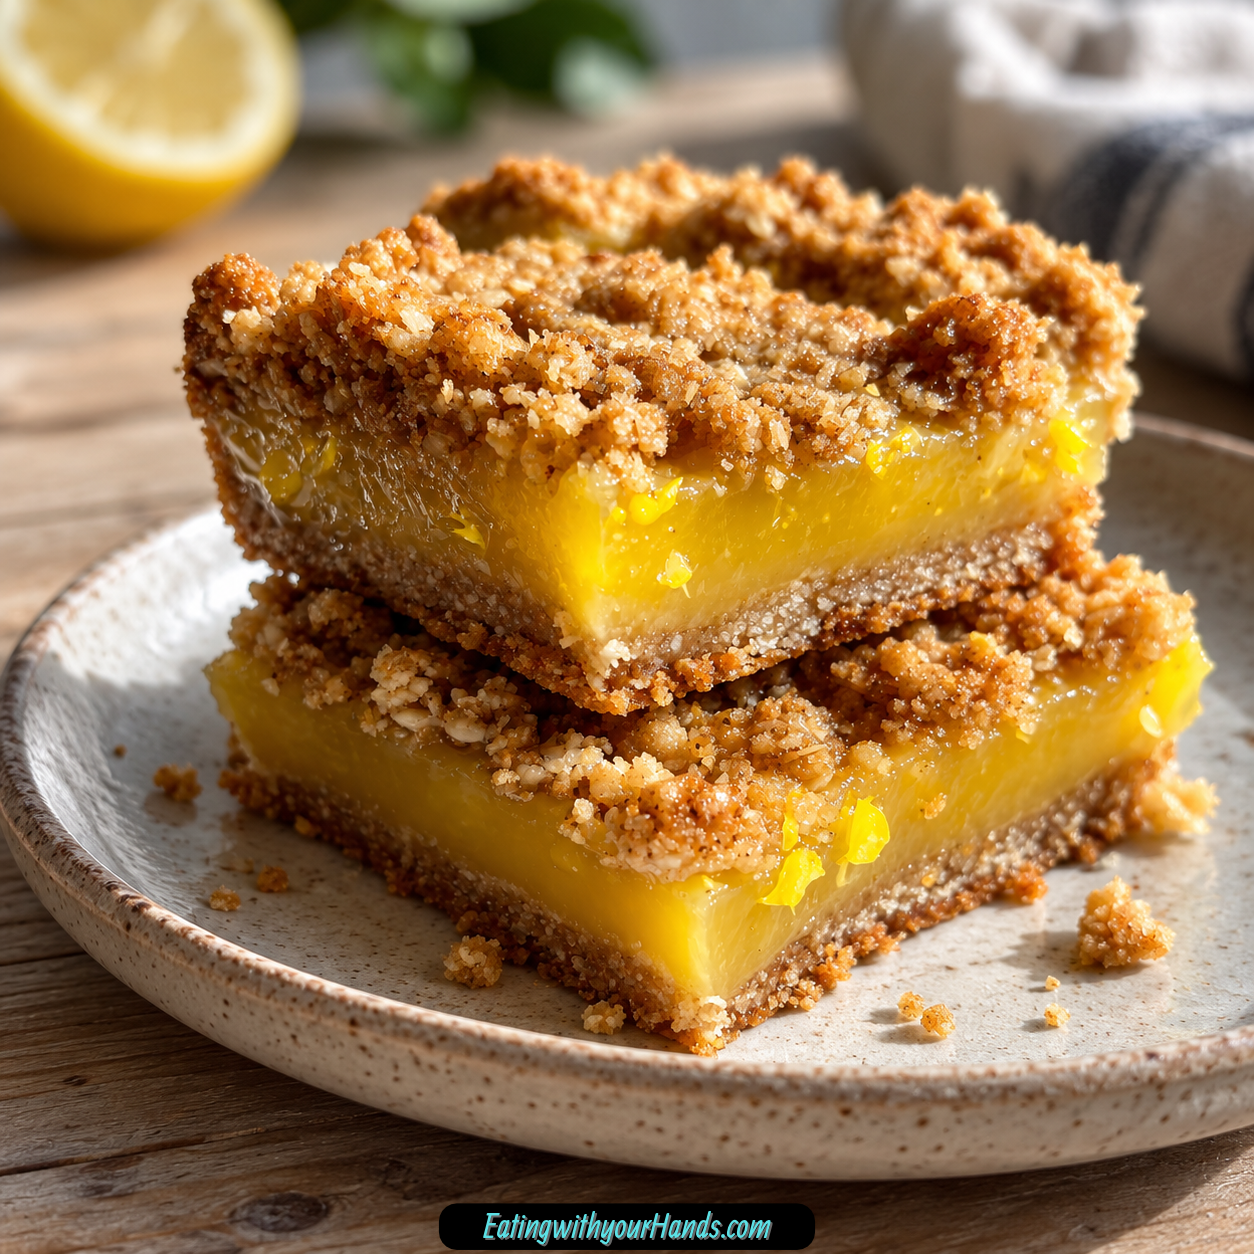

There are desserts that taste sweet, and then there are desserts that seem to wake up your whole palate with the very first bite. These Lemon Oatmeal Crumble Bars do exactly that, pairing a buttery oat crust with a bright, tart lemon center and a golden crumble that gives every square just enough crunch.
I have been making versions of these bars for years, ever since my neighbor Mrs. Thompson showed up at my first apartment with a pan of something remarkably similar. I still remember taking that first bite and being surprised by how much contrast could fit into such a small square.
The crust was rich and buttery, but the lemon filling kept it from feeling heavy. The oat crumble had just enough texture to make every bite interesting, and the sharp citrus flavor made the whole dessert feel brighter than a typical bar.
That combination stayed with me. Over time, I kept returning to the idea, testing small adjustments until I found the balance of sweet, buttery, tart, and crumbly that I wanted.
Fresh lemon juice became one of the details I refused to compromise on. Its bright flavor gives the filling the kind of fresh acidity that makes these bars taste lively instead of simply sweet.
The oats matter just as much. When they bake into the brown sugar mixture, they create a rustic texture that feels halfway between a cookie crumble and an old-fashioned oat bar.
These are the bars I bring when I need something easy enough for a casual afternoon but special enough for a potluck or gift. They travel well, look beautiful once cut into neat squares, and somehow always seem to disappear faster than I expect.
They are also the kind of dessert I crave with coffee. Something about the tart lemon layer against the buttery crumble makes one small square feel especially satisfying in the middle of the afternoon.
Table of Contents
- Why You’ll Love These Lemon Oatmeal Crumble Bars
- Ingredients for Lemon Oatmeal Crumble Bars
- Why Fresh Lemon Juice Matters
- The Role of Lemon Zest
- Old-Fashioned Oats vs. Quick Oats
- Why Room-Temperature Butter Matters
- Equipment You’ll Need
- How to Make Lemon Oatmeal Crumble Bars
- Step 1: Preheat the Oven and Prepare the Pan
- Step 2: Cream the Butter and Brown Sugar
- Step 3: Add the Vanilla and Dry Ingredients
- Step 4: Check the Crumble Texture
- Step 5: Press the Bottom Crust
- Step 6: Make the Lemon Filling
- Step 7: Add the Lemon Layer
- Step 8: Add the Remaining Crumble
- Step 9: Bake Until Golden
- Step 10: Cool Completely Before Cutting
- How to Know When the Bars Are Done
- Why Cooling Is Essential
- Tips for the Best Lemon Oatmeal Crumble Bars
- Toasting the Oats
- Blueberry Variation
- Coconut Variation
- White Chocolate Variation
- Gluten-Free Variation
- Dairy-Free Variation
- How to Prevent a Soggy Bottom Crust
- How to Get Clean Slices
- Can You Double the Recipe?
- Make-Ahead Instructions
- Storage
- Freezing Lemon Oatmeal Crumble Bars
- Microwave Reheating
- Oven Reheating
- Frequently Asked Questions
- Nutritional Information
- The Lemon Bars That Still Remind Me of My First Apartment
- Lemon Oatmeal Crumble Bars
Why You’ll Love These Lemon Oatmeal Crumble Bars
The first thing to love is the contrast between the layers. The bottom is firm and buttery, the middle is smooth and lemony, and the top stays loose enough to create that classic crumble texture.
They are also very simple to make. You do not need specialty equipment or complicated pastry techniques, and the same oat mixture becomes both the crust and topping.
The lemon filling is especially easy. Sweetened condensed milk, fresh lemon juice, and zest are whisked together until smooth, creating a bright center without requiring a cooked curd.
The recipe is also easy to adapt. Blueberries, toasted coconut, lime zest, and even white chocolate chips can take the bars in a different direction while keeping the same base.
And because the bars need time to cool, they are naturally well suited to making ahead. In fact, the flavors can feel even more settled the next day.
Ingredients for Lemon Oatmeal Crumble Bars
The recipe is divided into two simple parts: the oat crust and topping, and the lemon filling. Most of the work happens with pantry ingredients, which is one reason these bars are so useful when you want a dessert without making a long shopping list.
For the Crust and Topping
- 7 tablespoons (99g) unsalted butter, softened to room temperature
- ¾ cup (150g) light or dark brown sugar, packed
- 1 teaspoon vanilla extract
- 1 cup (125g) all-purpose flour
- 1 teaspoon baking powder
- ¼ teaspoon salt
- 1 cup (85g) old-fashioned oats or quick oats
Dark brown sugar brings a slightly deeper molasses flavor, while light brown sugar creates a milder sweetness. Either works well, so use the one that suits the flavor you prefer.
The butter should be soft enough to cream smoothly but still cool to the touch. If it is too cold, it will not blend properly; if it is overly soft, the mixture can become looser than intended.
For the Lemon Filling
- 1 can (14 ounces) full-fat sweetened condensed milk
- 6 tablespoons (90ml) fresh lemon juice
- 1 tablespoon lemon zest
About 2 juicy lemons can provide the 6 tablespoons of juice. The zest comes from about 1 lemon, so zest before juicing to make the job much easier.
Full-fat sweetened condensed milk gives the filling its rich, smooth texture. The lemon juice and zest then cut through that sweetness and create the sharp citrus flavor that defines the bars.
Why Fresh Lemon Juice Matters
Fresh lemon juice gives the filling its most important flavor. Bottled lemon juice may be convenient, but it does not provide the same bright, fresh character.
The filling only has a few ingredients, so every one of them stays noticeable. That makes fresh citrus especially valuable here.
Squeeze enough juice to measure 6 tablespoons, which is about 90ml. If the lemons are especially juicy, about 2 may be enough.
Zest before cutting and squeezing. Trying to grate a lemon that has already been squeezed is far more awkward and much less efficient.
The Role of Lemon Zest
Lemon zest adds a different kind of citrus flavor than juice alone. The juice gives acidity, while the zest brings more concentrated aroma.
Only 1 tablespoon is needed. That small amount is enough to make the filling smell and taste more intensely lemony.
Use the colored outer peel and avoid digging deeply into the white pith. The zest should blend into the filling rather than dominate it with bitterness.
The combination of fresh juice and zest is what gives the center its bright, sunny character. Both are simple ingredients, but together they make the filling feel complete.
Old-Fashioned Oats vs. Quick Oats
Both old-fashioned oats and quick oats can work in the crumble mixture. Either one gives the bars a better texture than instant oats.
Old-fashioned oats provide more visible chew and structure. Quick oats make the crumble slightly finer while still maintaining enough texture to feel like an oat topping.
Instant oats are not ideal because they break down too much during baking. The result can lose the rustic texture that makes these bars so satisfying.
Choose whichever of the two recommended oat styles you already have. The rest of the method stays the same.
Why Room-Temperature Butter Matters
Softened butter is easier to cream with brown sugar. That process creates a more even mixture before the flour and oats are added.
Cold butter resists blending and can leave the crust mixture uneven. Overly soft butter can create the opposite problem and make the crumble too loose.
You want butter that gives under gentle pressure but still feels slightly cool. That texture is ideal for combining smoothly with the sugar.
Once creamed, the butter and brown sugar form the foundation for both layers of crumble. Getting that first stage right helps everything else come together more easily.
Equipment You’ll Need
An 8×8-inch baking pan is the main piece of equipment. You will also need two mixing bowls, a spoon or hand mixer, measuring cups and spoons, and a whisk.
A wooden spoon works perfectly well for the butter mixture if you do not want to use an electric mixer. The process simply takes a little longer by hand.
A measuring cup is also useful for pressing the crust firmly into the pan. Its flat bottom helps create an even base.
No specialty baking tools are required. That simplicity is one of the reasons this dessert is so approachable.
How to Make Lemon Oatmeal Crumble Bars
The process is easiest when you think of it as three parts: prepare the oat mixture, whisk the lemon filling, then layer and bake. The same crumble mixture handles both the bottom crust and the topping, which keeps the recipe pleasantly simple.
Step 1: Preheat the Oven and Prepare the Pan
Preheat the oven to 350°F (175°C). Grease an 8×8-inch baking pan so the finished bars release more easily once cooled.
Make sure the oven has enough time to heat fully before the assembled bars go in. Even baking helps the bottom crust set while the crumble turns golden.
Set the prepared pan near your work area. Once the crust mixture is ready, you will use part of it immediately.
Step 2: Cream the Butter and Brown Sugar
Place the 7 tablespoons softened unsalted butter and ¾ cup packed brown sugar in a large bowl. Beat or stir until the mixture looks lighter and fluffier.
With a hand mixer, this takes about 2 minutes. With a wooden spoon, allow about 3–4 minutes.
The mixture does not need to become perfectly airy like cake batter. You simply want the butter and sugar evenly blended before the vanilla and dry ingredients are added.
Step 3: Add the Vanilla and Dry Ingredients
Stir in 1 teaspoon vanilla extract. Then add 1 cup all-purpose flour, 1 teaspoon baking powder, and ¼ teaspoon salt.
Mix only until the dry ingredients are incorporated. Avoid working the mixture longer than necessary because this is a crumble, not a kneaded dough.
Add the 1 cup oats and fold until evenly distributed. The finished mixture should look crumbly but hold together when pressed between your fingers.
Step 4: Check the Crumble Texture
Take a small amount of the mixture and squeeze it gently. It should form a clump when compressed but still break apart easily.
If it seems too dry to hold together, add another tablespoon of butter. If it seems overly wet, add a small sprinkle of flour.
Make only small adjustments. The goal is a crumble that can be pressed into a firm bottom crust while still remaining loose enough for the topping.
Step 5: Press the Bottom Crust
Take about two-thirds of the oat mixture and transfer it to the prepared 8×8-inch pan. Spread it evenly across the bottom.
Press firmly with your fingers or the bottom of a measuring cup. The crust should feel compact and sturdy rather than loosely scattered.
Work into the corners so the thickness stays consistent. This firm base helps prevent the bottom from crumbling when the bars are sliced.
Step 6: Make the Lemon Filling
In a separate bowl, combine the 14-ounce can sweetened condensed milk, 6 tablespoons fresh lemon juice, and 1 tablespoon lemon zest. Whisk until completely smooth.
Continue mixing until there are no streaks of condensed milk or concentrated lemon juice. The filling should look glossy and uniform.
Do not rush this stage. Properly combining the ingredients helps prevent separation during baking.
Step 7: Add the Lemon Layer
Pour the lemon filling over the pressed crust. Use a spoon or spatula to spread it evenly all the way across the surface.
Work gently so the crust beneath stays intact. The filling should form a smooth layer from edge to edge.
Do not press into the lemon mixture. Let it sit naturally over the compact crust.
Step 8: Add the Remaining Crumble
Sprinkle the remaining one-third of the oat mixture over the lemon filling. Scatter it evenly so every bar will have some golden crumble on top.
Do not press this layer down. The loose texture is what allows it to stay crumbly and crisp as it bakes.
Leave some natural variation in the size of the pieces. A few larger clusters mixed with smaller crumbs give the topping a more rustic texture.
Step 9: Bake Until Golden
Place the pan in the preheated oven and bake for 25–30 minutes. Watch for golden edges and a top that looks lightly crisp.
The lemon layer may still jiggle slightly when the pan comes out. That is normal because the filling continues setting as the bars cool.
Do not keep baking simply because the center looks a little soft. Overbaking can take away some of the tender, creamy quality of the filling.
Step 10: Cool Completely Before Cutting
Let the bars cool completely in the pan for about 2 hours. This gives the lemon filling time to firm enough for clean slices.
Cutting too soon can cause the center to smear or ooze out. The flavor may still be delicious, but the bars will not hold their shape as neatly.
For especially sharp cuts, place the cooled pan in the refrigerator for about 30 minutes before slicing. The colder filling becomes even easier to portion.

How to Know When the Bars Are Done
The crumble should look golden, especially around the edges. The surface will also appear slightly crisp rather than pale and soft.
The center does not need to look completely firm. A little jiggle is expected because the filling finishes setting during cooling.
Use the topping as one of your main visual cues. Once it has developed good color and the edges look baked, the bars are likely ready.
Trust the cooling process. The filling changes noticeably as it returns to room temperature.
Why Cooling Is Essential
Cooling is not just about making the bars easier to handle. It is part of the texture-building process.
The lemon filling is still soft when it first comes out of the oven. As the pan cools, that layer becomes more stable and sliceable.
About 2 hours gives the bars time to set properly. The wait may feel long, but it makes a major difference in presentation.
A short 30-minute chill after cooling can make the cuts even cleaner. This is especially useful when the bars are being served at a gathering.
Tips for the Best Lemon Oatmeal Crumble Bars
Use fresh lemon juice for the brightest flavor. With such a simple filling, freshness is easy to taste.
Zest the lemon before juicing it. This makes the preparation faster and avoids trying to hold a slippery, squeezed lemon.
Keep the butter properly softened. The crumble behaves best when the butter creams easily but is not melted or greasy.
Do not skip the cooling period. The bars need time before they can be cut into neat squares.
And for even more oat flavor, consider toasting the oats before mixing. That optional step gives them a noticeably nuttier aroma.
Toasting the Oats
Spread the oats on a baking sheet and toast at 350°F for 5–7 minutes. Watch closely and remove them once they smell nutty and lightly toasted.
Let them cool before adding to the crumble mixture. Hot oats could affect the butter texture if mixed immediately.
This step is completely optional. The standard bars still work perfectly well with untoasted oats.
When you have a few extra minutes, though, the toasted flavor can make the crumble feel especially rich. It is a small change that brings more depth without changing the recipe structure.
Blueberry Variation
Fresh blueberries pair naturally with lemon. Gently fold ½ cup fresh blueberries into the lemon filling before pouring it over the crust.
Mix carefully so the berries stay intact. You want pockets of fruit rather than a crushed purple filling.
The blueberries add little bursts of juiciness throughout the lemon layer. Their sweetness softens some of the citrus sharpness.
Keep the rest of the recipe unchanged. The same crust, crumble, and baking method still apply.
Coconut Variation
For a more tropical version, mix ¼ cup toasted coconut into the crumble topping. This adds another layer of texture and a slightly different sweetness.
Lime zest can also be added with the lemon for an even brighter citrus profile. Keep the lemon as the main flavor and treat the lime as an accent.
The coconut works especially well when toasted. Its nuttier flavor blends naturally with oats and brown sugar.
This variation changes the mood of the dessert without requiring a completely different method. The same basic layering and baking process still works.
White Chocolate Variation
White chocolate chips can be added to the crumble when you want something sweeter and richer. The creamy sweetness contrasts strongly with the tart lemon filling.
Use them as an optional addition rather than replacing the other ingredients. Scatter them through the topping for little pockets of sweetness.
This version is especially good for people who prefer a less puckery lemon dessert. The white chocolate softens the overall flavor without removing the citrus.
Gluten-Free Variation
A 1:1 gluten-free flour blend can replace the all-purpose flour. Use the same 1-cup quantity.
The remaining ingredients can stay the same. The oats should still be old-fashioned or quick oats rather than instant.
Expect the texture to vary somewhat depending on the flour blend. The overall layering and method remain unchanged.
Dairy-Free Variation
Plant-based butter can replace the unsalted butter. Coconut condensed milk can replace the full-fat sweetened condensed milk.
These substitutions change the flavor slightly but still allow the lemon to remain the main focus. The coconut condensed milk can give the filling a more tropical background.
Keep the same quantities unless otherwise required by the specific product you are using. The assembly and baking method stay the same.
How to Prevent a Soggy Bottom Crust
The first important step is pressing the bottom layer firmly into the pan. A loose base is more likely to crumble and feel soft underneath the filling.
Use the bottom of a measuring cup to create even pressure. Work especially carefully around the corners and edges.
Cooling completely is equally important. The filling needs time to set before the crust reaches its final texture.
Do not judge the base while the bars are still hot. Everything firms as the pan cools.
How to Get Clean Slices
Cool the bars for about 2 hours before cutting. If you want especially neat edges, refrigerate the pan for 30 minutes afterward.
Use a sharp knife and cut straight down rather than sawing back and forth. Wipe the blade between cuts if the lemon filling begins sticking.
The colder the filling, the cleaner the slices will be. This is especially helpful for potlucks or gift boxes where appearance matters.
If you are serving the bars casually at home, slightly softer edges are not a problem. The flavor remains the same.
Can You Double the Recipe?
Yes. Use a 9×13-inch pan for a double batch.
The larger amount may need an additional 5–10 minutes of baking. Watch the crumble topping for golden color rather than relying only on the clock.
The center should still be allowed to cool completely before cutting. A larger pan needs the same patience after baking as the standard batch.
This option is especially useful for parties, potlucks, or neighbor gifts. One larger batch gives you significantly more pieces without changing the basic technique.
Make-Ahead Instructions
These bars are well suited to advance preparation. They can actually taste even better the next day as the lemon and brown sugar flavors settle together.
Bake and cool completely before storing. Leave the bars uncut until closer to serving if you want the cleanest possible edges.
The crumble stays crisp when stored properly. Keeping the bars covered also prevents the surface from drying.
This makes them especially convenient for events. You can finish the baking the day before and simply slice when needed.
Storage
Store the bars in an airtight container at room temperature for up to 5 days. Keep them covered well so the crumble stays fresh.
If stacking multiple layers, use parchment between them. This helps protect the topping and keeps the bars from sticking to one another.
The bars can be enjoyed at room temperature straight from storage. Their texture remains soft in the center with a firmer oat base.
Freezing Lemon Oatmeal Crumble Bars
Wrap individual cooled bars in parchment paper. Place the wrapped pieces inside a freezer bag and freeze for up to 2 months.
Individual wrapping makes it easy to remove only one or two pieces at a time. It also protects the crumble from sticking together.
The frozen bars can be warmed for a softer, gooier texture. Choose either the microwave or oven method depending on how much time you have.
Microwave Reheating
Place one frozen bar on a microwave-safe plate. Heat for about 15 seconds.
The lemon filling becomes softer and gooier as it warms. Check the center before adding any extra time.
Do not overheat. A brief warming is enough to revive the soft texture without making the crumble overly soggy.
Oven Reheating
Warm a bar in a 300°F oven for about 5 minutes. This method gives the topping a better chance of staying crisp.
Serve once the center is warm and the crumble smells freshly baked again. The contrast between warm lemon filling and oat topping is especially comforting.
This is my preferred method when I have a few extra minutes. It brings the texture closer to that just-baked experience.
Frequently Asked Questions
Can I Use Instant Oats?
Instant oats are not recommended. They break down too much during baking and reduce the oat texture.
Use old-fashioned oats or quick oats instead. Both give the crumble enough chew and structure.
Why Is My Bottom Crust Soggy?
The bottom layer may not have been pressed firmly enough. Make sure it is compact before pouring over the filling.
Cooling time also matters. Let the bars cool completely so the lemon layer can set properly.
Can I Double the Recipe?
Yes. Use a 9×13-inch pan instead of an 8×8-inch pan.
You may need an additional 5–10 minutes of baking. Watch for a golden crumble top as the main cue.
Why Did My Lemon Filling Separate?
The condensed milk and lemon juice may not have been fully incorporated. Whisk until the filling is completely smooth with no streaks.
Also make sure the sweetened condensed milk is still good to use. Properly combined ingredients create a much more even filling.
Can I Make the Bars Ahead?
Yes. They can taste even better the next day.
Store them properly and wait to cut until closer to serving if clean edges matter. The crumble holds up well when covered.
Can I Use Quick Oats?
Yes. Quick oats are an approved option.
They create a slightly finer texture than old-fashioned oats but still work well. Avoid instant oats instead.
Can I Add Blueberries?
Yes. Fold ½ cup fresh blueberries gently into the lemon filling.
Keep the remaining quantities and baking method the same. The berries add juicy sweetness without taking over the lemon flavor.
Nutritional Information
One bar contains approximately 220 calories. The exact amount can vary depending on the butter, condensed milk, oats, flour, sugar, and exact size of each piece.
Blueberries, coconut, white chocolate, dairy-free substitutions, or gluten-free ingredients will all change the final numbers. Larger or smaller cuts will also affect the calorie amount.
No additional numerical protein, fat, carbohydrate, sugar, fiber, or sodium values are specified. The 220-calorie estimate is therefore the main nutritional reference for a standard bar.
The Lemon Bars That Still Remind Me of My First Apartment
Every time I make these bars, I still think about that pan Mrs. Thompson carried over when I had barely settled into my first apartment. At the time, I was more focused on unpacking boxes than collecting recipes, but that dessert somehow stayed in my memory.
Maybe it was the contrast that made it so memorable. The filling was sharp enough to wake up every bite, while the crumble tasted warm and familiar in the way brown sugar and butter always seem to.
Years later, I found myself chasing that feeling in my own kitchen. Batch after batch taught me that the best version was not the most complicated one.
Fresh lemon mattered more than extra ingredients. A properly golden oat topping mattered more than decorative finishing touches, and enough cooling time mattered more than my impatience.
Eventually the recipe became something I stopped thinking of as an experiment. It turned into the version I could bring to a potluck without worry or slide into a container for a new neighbor.
It also became one of my favorite small comforts. A square beside afternoon coffee can turn an ordinary break into something that feels a little more special.
Some days I make the bars completely classic. Other days blueberries go into the filling, coconut finds its way into the crumble, or a few white chocolate chips make the topping sweeter.
But I always come back to the original balance. Tart lemon, sweet condensed milk, buttery brown sugar, and textured oats already give the bars everything they need.
That is why Lemon Oatmeal Crumble Bars have remained in my baking rotation for so long. They are bright enough to feel cheerful, rich enough to feel like a real treat, and simple enough that I never need a special occasion to make another batch.
Lemon Oatmeal Crumble Bars

Bright, buttery, and perfectly balanced between sweet and tangy, these Lemon Oatmeal Crumble Bars layer a creamy lemon filling between a soft oat crust and golden crumble topping. Fresh lemon juice and zest bring a lively citrus flavor, while brown sugar, vanilla, and oats give every bar a cozy, crumbly finish.
Recipe Details
- Prep Time: 15 minutes
- Cook Time: 25 minutes
- Total Time: 40 minutes
- Course: Dessert
- Cuisine: American
- Servings: 12 bars
- Calories: 220 kcal
Ingredients
For the Crust & Topping
- 1 cup 85g old-fashioned oats or quick oats, not instant
- ¼ teaspoon salt
- 1 teaspoon baking powder
- 1 cup 125g all-purpose flour, spooned & leveled
- 1 teaspoon vanilla extract
- ¾ cup 150g light or dark brown sugar, packed
- 7 tablespoons 99g unsalted butter, softened to room temperature
For the Lemon Filling
- 1 tablespoon lemon zest from about 1 lemon
- 6 tablespoons 90ml lemon juice, from about 2 lemons
- 1 can 14 ounces full-fat sweetened condensed milk
Instructions
Step 1: Prepare the Oven and Pan
Preheat the oven to 350°F (175°C).
Grease an 8×8-inch baking pan and set it aside while you prepare the oat mixture.
Step 2: Start the Crumble Mixture
In a bowl, combine the softened unsalted butter, packed brown sugar, and vanilla extract.
Mix until the mixture becomes creamy and evenly blended.
Step 3: Add the Dry Ingredients
Add the all-purpose flour, baking powder, and salt.
Mix until everything is combined into a soft crumble-style mixture.
Step 4: Stir in the Oats
Add the old-fashioned oats or quick oats.
Stir until the oats are evenly distributed throughout the mixture.
Step 5: Form the Bottom Crust
Take two-thirds of the oat mixture and press it firmly into the bottom of the prepared baking pan.
Spread it evenly from edge to edge to create a consistent base for the lemon filling.
Step 6: Make the Lemon Filling
In another bowl, whisk together the full-fat sweetened condensed milk, lemon juice, and lemon zest.
Continue whisking until the filling is smooth and the citrus is evenly incorporated.
Step 7: Add the Lemon Layer
Pour the lemon filling over the prepared oat crust.
Spread it evenly so the filling reaches the edges of the pan.
Step 8: Add the Crumble Topping
Sprinkle the remaining oat mixture over the lemon layer.
Distribute the crumble evenly across the surface without pressing it down.
Step 9: Bake
Bake for 25–30 minutes, or until the top is golden brown.
Remove the pan from the oven once the crumble has developed a warm golden color.
Step 10: Cool Completely
Let the bars cool completely before cutting.
Once fully cooled, slice into 12 bars.
Notes
- Store bars in an airtight container for up to 5 days.
- Use fresh lemon juice for the best flavor.
- For a crispier topping, toast the oats lightly before mixing.
Serving Suggestions
Serve Lemon Oatmeal Crumble Bars after they have cooled completely so the lemon layer and oat base can set properly. The creamy citrus filling, buttery crust, and crumbly oat topping create a satisfying contrast between soft, bright, and slightly crisp textures.
This recipe makes 12 bars, making it easy to portion for dessert trays, family gatherings, or everyday treats. Fresh lemon juice gives the filling its brightest flavor.
For a little more crunch, lightly toast the oats before adding them to the crumble mixture. Either old-fashioned oats or quick oats can be used, as long as they are not instant.
Storage
Store the bars in an airtight container for up to 5 days.
Butter Tip
Use 7 tablespoons 99g unsalted butter softened to room temperature.
Mix it with the brown sugar and vanilla until creamy before adding the dry ingredients.
Brown Sugar Tip
Use ¾ cup 150g packed light or dark brown sugar.
Either option works in the crust and crumble mixture.
Oat Tip
Use 1 cup 85g old-fashioned oats or quick oats, not instant.
Toast the oats lightly before mixing if you want a crispier topping.
Flour Tip
Use 1 cup 125g all-purpose flour that has been spooned and leveled.
Lemon Juice Tip
Use 6 tablespoons 90ml fresh lemon juice, about the amount from 2 lemons.
Lemon Zest Tip
Use 1 tablespoon lemon zest, about the amount from 1 lemon.
Filling Tip
Whisk the sweetened condensed milk, lemon juice, and lemon zest until smooth before spreading over the crust.
Baking Tip
Bake at 350°F (175°C) for 25–30 minutes, until golden brown.
Cooling Tip
Cool completely before cutting into 12 bars.

Fernando is the creator and writer behind the food blog Eating with your Hands. Living and working in cities like Paris, Barcelona, and Berlin, and being married to a Canadian foodie, has given Fernando a passion and interest in food and inspired him to run EWYH.