
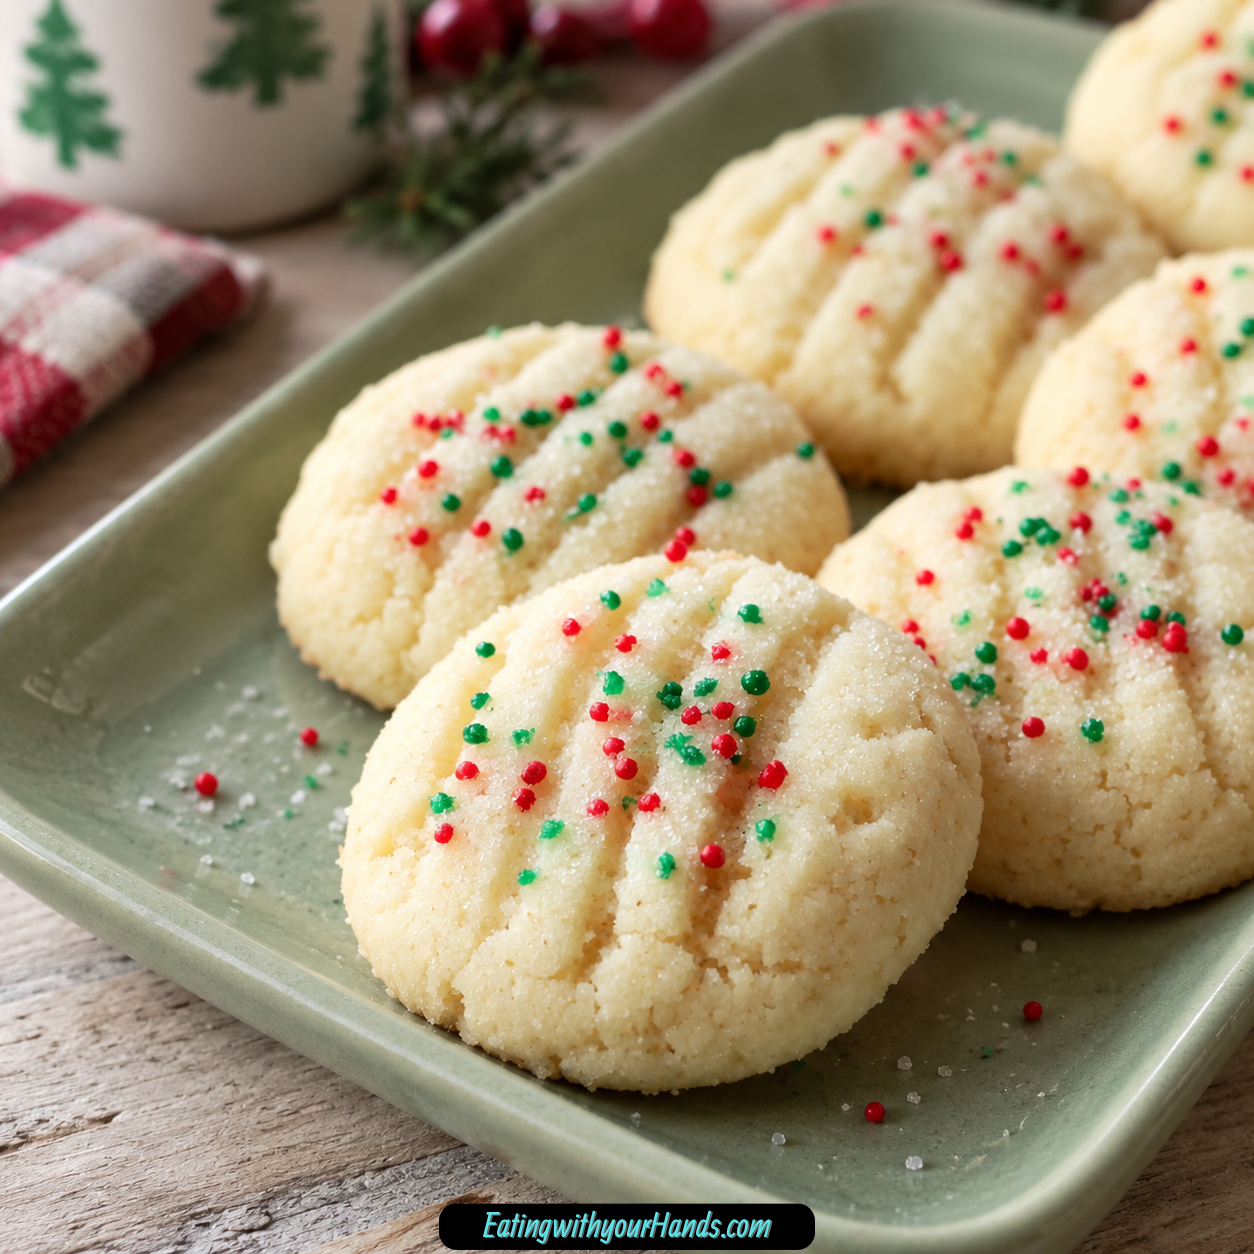
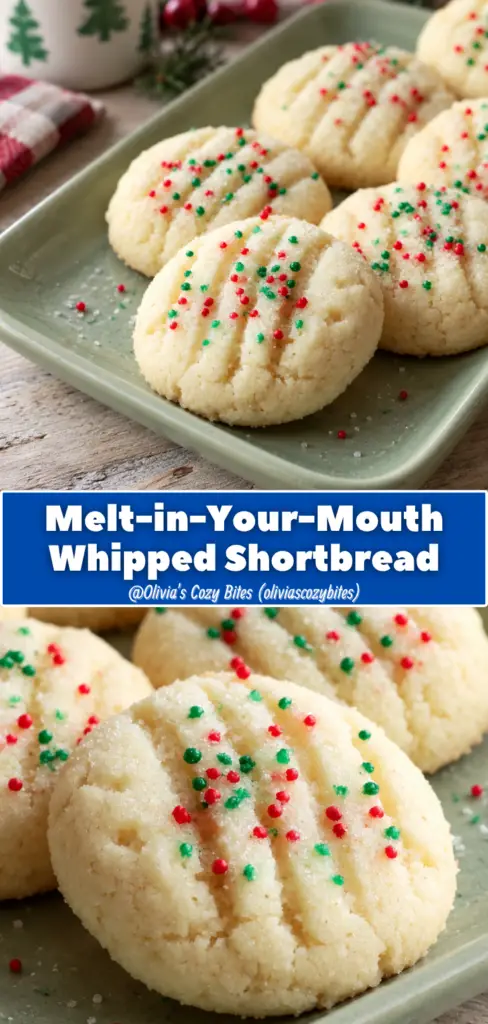
Melt-in-Your-Mouth Whipped Shortbread is the kind of cookie that feels almost too delicate to be real. It is buttery, pale, tender, lightly sweet, and so airy that each bite seems to soften away the moment it reaches your tongue.
These are not heavy shortbread cookies, and they are not meant to be crisp or chewy. They are the soft, whipped kind, made with very soft butter, powdered sugar, flour, cornstarch, vanilla, and a little festive sprinkle of holiday nonpareils if you want that classic Christmas tray look.
What makes these cookies special is the texture. The butter and powdered sugar are whipped for several minutes until the mixture turns very pale, fluffy, and noticeably lighter.
That extra whipping time is not just a small detail. It is the heart of the cookie, the reason the dough feels soft and cloud-like before it ever reaches the oven.
Cornstarch is the other quiet little secret. It gives the cookies their delicate crumb and helps create that melt-in-your-mouth finish that makes whipped shortbread so memorable.
The flavor is simple and buttery. Vanilla adds warmth, powdered sugar keeps the sweetness smooth, and the short bake keeps the tops pale while the bottoms become lightly golden.
These cookies are beautiful for Christmas cookie trays, edible gifts, holiday tins, tea plates, and quiet moments when you want something sweet but not overwhelming. They feel elegant without needing difficult decoration.
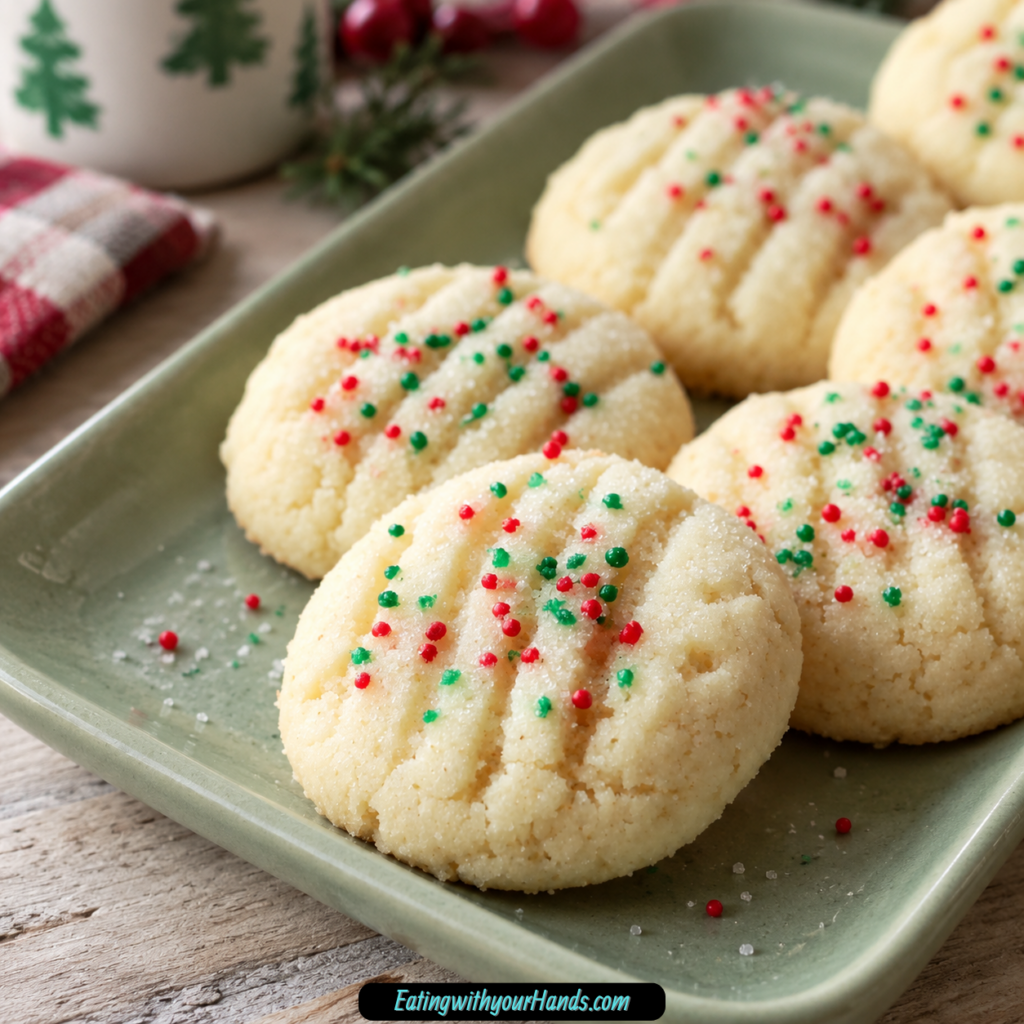
A light press with a fork gives them classic shortbread ridges, and red and green nonpareils make them festive. Once completely cooled, they are tender, delicate, and ready to tuck beside gingerbread, chocolate cookies, coffee, tea, or hot cocoa.
Melt-in-Your-Mouth Whipped Shortbread is a simple recipe with a big payoff. It proves that butter, sugar, flour, cornstarch, and patience can create something that feels almost magical.
Table of Contents
- Why You’ll Love This Melt-in-Your-Mouth Whipped Shortbread
- Recipe Details
- Ingredients
- For the Whipped Shortbread Cookies
- Ingredient Notes
- Optional Swaps, Variations, Add-Ins, and Serving Ideas
- Classic Vanilla Whipped Shortbread
- Almond Whipped Shortbread
- Lemon Whipped Shortbread
- Chocolate-Dipped Whipped Shortbread
- Holiday Sprinkle Shortbread
- Plain Whipped Shortbread
- Tea Cookie Plate
- Coffee Pairing
- Hot Cocoa Pairing
- Christmas Cookie Tray
- Edible Gift Tins
- Beginner-Friendly Shortbread
- Why This Recipe Works
- Directions
- Step 1: Preheat the Oven
- Step 2: Prepare the Baking Sheet
- Step 3: Soften the Butter Properly
- Step 4: Whip the Butter
- Step 5: Add the Powdered Sugar Gradually
- Step 6: Whip for 5 to 7 Minutes
- Step 7: Add the Vanilla
- Step 8: Sift the Dry Ingredients
- Step 9: Add the Dry Ingredients Slowly
- Step 10: Mix Just Until Combined
- Step 11: Scoop the Dough
- Step 12: Add Fork Marks
- Step 13: Add Holiday Nonpareils
- Step 14: Bake Carefully
- Step 15: Cool on the Baking Sheet
- Step 16: Transfer to a Wire Rack
- Step 17: Serve the Cookies
- Step 18: Store or Freeze
- Serving Ideas
- Storage
- Freezing
- Make-Ahead
- Helpful Notes for Best Results
- Variations
- Troubleshooting
- Frequently Asked Questions
- Why This Recipe Works So Well
- Final Thoughts
- Melt-in-Your-Mouth Whipped Shortbread
Why You’ll Love This Melt-in-Your-Mouth Whipped Shortbread
These cookies are unbelievably light and tender. Their delicate texture truly melts in your mouth.
They use simple pantry ingredients with a big payoff. Butter, powdered sugar, flour, cornstarch, vanilla, and sprinkles are all you need.
They are perfect for holidays, especially Christmas cookie trays. The pale cookies and red and green nonpareils look festive and classic.
They are not overly sweet. The gentle sweetness lets the butter flavor shine.
They are easy to customize. Almond extract, lemon zest, melted chocolate, or festive sprinkles can all give them a different personality.
They are beginner-friendly with clear, forgiving steps. The most important part is taking enough time to whip the butter and sugar properly.
Recipe Details
Melt-in-Your-Mouth Whipped Shortbread bakes at 325°F (160°C). The baking time is 15 to 18 minutes.
The cookies are baked on a parchment-lined baking sheet. Parchment helps prevent sticking and supports even baking.
The tops should stay pale. The cookies are ready when the edges are set and the bottoms are lightly golden.
Overbaking can ruin the delicate texture. These cookies are meant to stay light, tender, and soft.
The recipe uses 1 cup, or 227g, softened butter. The butter should be very soft but not melted.
The sugar is ½ cup, or 60g, powdered sugar. Powdered sugar is key to the soft, smooth texture and should not be replaced with granulated sugar.
The dry ingredients are 1½ cups, or 190g, all-purpose flour and ½ cup, or 65g, cornstarch. They are sifted together to keep the dough light and lump-free.
The dough is flavored with 1 teaspoon vanilla extract. It adds warmth and enhances the buttery flavor.
Holiday nonpareils, such as red and green sprinkles, are optional. They add a festive look for Christmas cookie trays.
The butter and powdered sugar are whipped for 5 to 7 minutes. This step creates the pale, fluffy, airy base that gives the cookies their signature texture.
The dough is shaped with a teaspoon or small cookie scoop. The cookies are spaced about 2 inches apart and lightly pressed with a fork.
Ingredients
For the Whipped Shortbread Cookies
- 1 cup (227g) butter, softened
- ½ cup (60g) powdered sugar
- 1 ½ cups (190g) all-purpose flour
- ½ cup (65g) cornstarch
- 1 teaspoon vanilla extract
- Holiday nonpareils (red and green sprinkles)
Ingredient Notes
Butter is the star of this recipe. Very soft butter whips easily and creates the airy texture that makes these cookies special.
Salted or unsalted butter both work. The most important thing is the texture of the butter, not whether it is salted.
The butter should be very soft but not melted. Melted butter will not whip the same way and can change the cookie texture.
Powdered sugar dissolves smoothly into the butter. It keeps the cookies delicate instead of grainy.
Granulated sugar should not be used in place of powdered sugar. Powdered sugar is key to the soft, smooth texture.
All-purpose flour provides structure. It helps the cookies hold together without making them heavy.
Cornstarch is essential. It gives the cookies their signature melt-in-your-mouth crumb.
Do not skip the cornstarch. It is the reason the cookies melt instead of simply crumble.
Vanilla extract adds warmth. It also enhances the buttery flavor.
Holiday nonpareils are optional. Red and green sprinkles make the cookies look festive and classic for Christmas.
Optional Swaps, Variations, Add-Ins, and Serving Ideas
Classic Vanilla Whipped Shortbread
Use vanilla extract as written for a buttery, classic shortbread flavor. This version is simple, delicate, and timeless.
The vanilla supports the butter without overpowering it. It is perfect for cookie trays and gifting.
Almond Whipped Shortbread
Swap vanilla for almond extract. This gives the cookies a bakery-style twist.
Almond extract changes the flavor while keeping the same soft texture. It is a lovely option for holiday tins.
Lemon Whipped Shortbread
Add finely grated lemon zest. This brings a bright citrus note to the buttery cookies.
The lemon zest should be finely grated so it blends into the dough. It makes the cookies feel fresh and fragrant.
Chocolate-Dipped Whipped Shortbread
Dip half of each cooled cookie in melted chocolate. This creates a richer version.
Let the cookies cool completely before dipping. Their delicate texture needs gentle handling.
Holiday Sprinkle Shortbread
Top the cookies with red and green holiday nonpareils before baking. This gives them a festive Christmas look.
The sprinkles add color without making the cookies difficult to decorate. They are perfect for holiday cookie trays.
Plain Whipped Shortbread
Skip the sprinkles for a simple, elegant cookie. The pale tops and fork marks are classic on their own.
This version is lovely with tea or coffee. It lets the butter flavor stay at the center.
Tea Cookie Plate
Serve these cookies with tea. Their gentle sweetness and delicate texture make them perfect for a quiet cup.
They are light enough to enjoy without feeling heavy. This is one of the prettiest ways to serve them.
Coffee Pairing
Pair the cookies with coffee. The buttery flavor works beautifully with a warm cup.
Because the cookies are not overly sweet, coffee balances them nicely. Serve once completely cooled.
Hot Cocoa Pairing
Serve these shortbread cookies with hot cocoa. The delicate texture contrasts with the rich drink.
This is a cozy holiday pairing. It works well for Christmas movie nights or dessert trays.
Christmas Cookie Tray
Add these cookies to holiday cookie trays beside gingerbread or chocolate cookies. Their pale, buttery look gives contrast.
The tender texture also balances stronger flavors. They bring softness and elegance to the tray.
Edible Gift Tins
Pack these cookies gently in tins for edible gifts. Place parchment paper between layers to protect their delicate structure.
They look beautiful with holiday sprinkles. Keep them away from heat so they do not soften too much.
Beginner-Friendly Shortbread
This recipe is friendly for beginners because the steps are clear. The biggest key is not rushing the whipping step.
Whip the butter and powdered sugar for the full 5 to 7 minutes. That patience creates the texture.
Why This Recipe Works
Melt-in-Your-Mouth Whipped Shortbread works because the method builds air into the butter before the cookies bake. Whipping the butter and powdered sugar for 5 to 7 minutes creates a pale, fluffy base.
Powdered sugar keeps the texture smooth and delicate. It blends into the butter without leaving graininess.
Cornstarch changes the crumb. It makes the cookies tender and gives them that melt-away texture.
Sifting the flour and cornstarch keeps the dough light. It also helps prevent lumps.
Mixing the dry ingredients in gently protects the whipped texture. The dough should be soft, fluffy, and able to hold its shape.
The low baking temperature helps the cookies bake gently. At 325°F, the tops can stay pale while the bottoms become lightly golden.
The shortbread ridges are created with a fork. Pressing lightly gives the classic look without flattening the cookies too much.
The cookies also need proper cooling. They are delicate when warm, so a short rest on the baking sheet helps them firm before moving.
Directions
Step 1: Preheat the Oven
Preheat your oven to 325°F (160°C). Let the oven heat fully before baking the cookies.
This gentle temperature helps the cookies bake without browning too much on top. The tops should stay pale for the best whipped shortbread look.
Step 2: Prepare the Baking Sheet
Line a baking sheet with parchment paper. This helps prevent sticking and supports even baking.
Set the prepared baking sheet aside while you make the dough. The dough is soft, so having the pan ready makes shaping easier.
Step 3: Soften the Butter Properly
Make sure 1 cup (227g) butter is very soft but not melted. It should whip easily with an electric mixer.
Butter that is too cold will not incorporate enough air. Melted butter will not create the same airy cookie texture.
Step 4: Whip the Butter
Place the softened butter in a large bowl. Beat it with an electric mixer on medium-high speed until completely smooth and creamy.
Take your time with this first mixing step. The butter should look soft, spreadable, and ready to hold air.
Step 5: Add the Powdered Sugar Gradually
Gradually add ½ cup (60g) powdered sugar to the whipped butter. Add it slowly so it blends smoothly.
Powdered sugar keeps the cookies delicate. Do not use granulated sugar, because it will not create the same smooth texture.
Step 6: Whip for 5 to 7 Minutes
Continue beating the butter and powdered sugar for 5 to 7 minutes. The mixture should become very pale, fluffy, and noticeably lighter in texture.
This is the most important step in the recipe. The long whipping time is what gives the cookies their cloud-like quality.
Step 7: Add the Vanilla
Mix in 1 teaspoon vanilla extract. Beat just until the vanilla is incorporated.
The vanilla adds warmth and enhances the buttery flavor. Do not overmix longer than needed after adding it.
Step 8: Sift the Dry Ingredients
In a separate bowl, sift together 1½ cups (190g) all-purpose flour and ½ cup (65g) cornstarch. Sifting helps keep the dough light and lump-free.
Cornstarch is essential for the melt-in-your-mouth crumb. Do not skip it.
Step 9: Add the Dry Ingredients Slowly
Slowly add the sifted flour and cornstarch to the whipped butter mixture. Mix on low speed.
Low speed helps protect the airy texture. Add the dry ingredients gradually so the dough comes together gently.
Step 10: Mix Just Until Combined
Mix only until the dough is combined. Stop as soon as the flour and cornstarch disappear into the butter mixture.
The dough should be soft, fluffy, and able to hold its shape. Avoid overmixing.
Step 11: Scoop the Dough
Use a teaspoon or small cookie scoop to drop rounded mounds of dough onto the prepared baking sheet. Space them about 2 inches apart.
Uniform size helps the cookies bake evenly. A small cookie scoop also gives the cookies a consistent appearance.
Step 12: Add Fork Marks
Lightly press each mound with a fork to create classic shortbread ridges. Do not press too hard.
The goal is to mark the top, not flatten the dough completely. Keeping the dough airy helps protect the tender texture.
Step 13: Add Holiday Nonpareils
Sprinkle the tops with red and green holiday nonpareils if using. Add just enough for a festive touch.
The sprinkles are optional but perfect for a classic holiday look. They make the cookies beautiful for Christmas trays.
Step 14: Bake Carefully
Bake for 15 to 18 minutes. The edges should be set, and the bottoms should be lightly golden.
The tops should stay pale. Overbaking will ruin the delicate texture.
Step 15: Cool on the Baking Sheet
Let the cookies cool on the baking sheet for 5 minutes. They are delicate when hot and need a short rest.
This helps them firm enough to move. Do not rush this step.
Step 16: Transfer to a Wire Rack
Carefully transfer the cookies to a wire rack. Let them cool completely.
The texture fully sets once the cookies are cool. They are best enjoyed after cooling completely.
Step 17: Serve the Cookies
Serve the cooled cookies with tea, coffee, or hot cocoa. They are delicate, buttery, and lightly sweet.
They also work beautifully on holiday cookie trays. Pair them with gingerbread or chocolate cookies for contrast.
Step 18: Store or Freeze
Store the cookies in an airtight container at room temperature for up to 5 days. Place parchment paper between layers to protect their delicate structure.
Freeze baked cookies for up to 2 months if needed. Thaw at room temperature before serving and avoid warm environments that can soften them too much.
Serving Ideas
Melt-in-Your-Mouth Whipped Shortbread is best enjoyed once completely cooled. That is when the texture fully sets and the cookies become delicate and tender.
Serve them with tea for a quiet, cozy treat. Their gentle sweetness makes them a natural match for a warm cup.
Coffee also pairs beautifully with these cookies. The buttery flavor and soft texture feel comforting beside a hot mug.
Hot cocoa makes them feel especially holiday-ready. This pairing is lovely for Christmas movie nights or winter gatherings.
Add them to holiday cookie trays alongside gingerbread or chocolate cookies. Their pale color, fork marks, and festive sprinkles create a nice contrast.
They also make beautiful edible gifts. Pack them gently in tins and use parchment paper between layers to protect them.
Serve them plain when you want the butter flavor to shine. Serve them sprinkled when you want a classic Christmas look.
These cookies are delicate, so handle them carefully when arranging them. Their texture is part of their charm.
Storage
Store Melt-in-Your-Mouth Whipped Shortbread in an airtight container at room temperature. They will keep for up to 5 days.
Let the cookies cool completely before storing. Warm cookies can become too soft in a sealed container.
Place parchment paper between layers. This protects their delicate structure.
Keep the container away from heat. Warm environments can soften the cookies too much.
These cookies are best handled gently. Their melt-in-your-mouth crumb is tender and delicate.
Freezing
Baked whipped shortbread cookies can be frozen for up to 2 months. Let them cool completely first.
Place them in a freezer-safe container with parchment paper between layers. This helps prevent breakage.
Thaw the cookies at room temperature before serving. Handle them gently once thawed.
Freezing is helpful for holiday planning. You can prepare them ahead and bring them out when you need a delicate cookie tray addition.
Make-Ahead
The dough can be made ahead. If chilled, let it soften slightly before scooping.
Because the dough is whipped and soft, it is easier to shape when it is not too firm. A slightly softened chilled dough will scoop more cleanly.
Baked cookies can also be made ahead and stored at room temperature for up to 5 days. Keep them airtight and protect them with parchment between layers.
For longer planning, freeze baked cookies for up to 2 months. Thaw at room temperature before serving.
Avoid storing the cookies in warm places. Heat can soften them too much and affect their delicate texture.
Helpful Notes for Best Results
Butter temperature matters. The butter should be very soft but not melted.
Very soft butter whips easily and incorporates air. This helps create the light texture.
Do not rush the whipping step. The 5 to 7 minutes of whipping butter and powdered sugar are what make these cookies special.
Cornstarch is essential. It is the reason these cookies melt instead of crumble.
Sift the flour and cornstarch. This keeps the dough light and lump-free.
Mix the dry ingredients in on low speed. Stop as soon as the dough is combined.
Do not press too hard with the fork. The cookies should keep their airy shape.
Do not overbake. The tops should stay pale, with set edges and lightly golden bottoms.
Use a cookie scoop for uniform size. Uniform cookies bake more evenly and look consistent.
Variations
Vanilla Whipped Shortbread
Use vanilla extract for the classic version. It gives the cookies warmth and enhances the butter flavor.
This version is simple and timeless. It is perfect for tea, coffee, gifting, and holiday trays.
Almond Whipped Shortbread
Swap the vanilla for almond extract. This gives the cookies a bakery-style flavor.
The texture remains light and tender. Only the flavor changes.
Lemon Whipped Shortbread
Add finely grated lemon zest. This gives the cookies a fresh citrus note.
The lemon makes the buttery cookie feel brighter. It is a lovely variation for winter or spring trays.
Chocolate-Dipped Shortbread
Dip half of each cooled cookie in melted chocolate. This adds richness and makes the cookies look special.
Make sure the cookies are fully cooled first. Their delicate structure needs gentle handling.
Holiday Nonpareil Shortbread
Top each cookie with red and green holiday nonpareils before baking. This gives them a classic Christmas look.
The sprinkles add color without changing the delicate flavor too much. They are festive and easy.
Plain Butter Shortbread
Skip the sprinkles and keep the cookies plain. This lets the butter flavor stand out.
The fork marks still give the cookies a classic look. They feel simple and elegant.
Gift Tin Shortbread
Pack cooled cookies gently into tins. Place parchment paper between layers.
This protects the cookies from breaking. It also makes them beautiful for edible gifts.
Tea-Time Shortbread
Serve the cookies with tea. Their delicate texture makes them perfect for a quiet cup.
This is one of the best ways to enjoy their light sweetness. Let them cool fully before serving.
Hot Cocoa Shortbread
Serve them with hot cocoa for a cozy treat. The light cookies contrast nicely with the rich drink.
This pairing is especially nice during the holidays. Add sprinkles for a festive look.
Troubleshooting
The Cookies Are Dense
The butter and powdered sugar were most likely not whipped long enough. Whip them for 5 to 7 minutes until very pale and fluffy.
This step creates the light texture. Do not rush it.
The Cookies Are Grainy
Granulated sugar may have been used instead of powdered sugar. Powdered sugar is key to the soft, smooth texture.
Use ½ cup (60g) powdered sugar. It dissolves smoothly into the butter.
The Cookies Spread Too Much
The butter may have been melted instead of very soft. The dough should be soft but able to hold its shape.
The cookies spread very little when the dough is well whipped and properly mixed. Keep the dough fluffy and do not overwork it.
The Cookies Did Not Hold Their Shape
The dough may have been too warm or mixed too much after the dry ingredients were added. Mix on low speed only until combined.
The dough should be soft, fluffy, and able to hold its shape. Scoop gently and bake as directed.
The Cookies Browned on Top
They may have baked too long. The tops should stay pale.
Bake just until the edges are set and the bottoms are lightly golden. Overbaking ruins the delicate texture.
The Cookies Crumbled Too Much
Cornstarch may have been skipped or the cookies may have been overbaked. Cornstarch is essential for the melt-in-your-mouth crumb.
Let the cookies cool on the baking sheet for 5 minutes before moving them. They are fragile while hot.
The Dough Is Too Firm After Chilling
Let chilled dough soften slightly before scooping. This makes it easier to portion.
The dough should be soft enough to scoop but still able to hold shape. Do not force very cold dough.
The Fork Flattened the Cookies Too Much
Press lightly with the fork. The goal is to create ridges, not flatten the cookie.
Keeping the mound slightly raised helps protect the airy texture. Use a gentle touch.
The Cookies Are Too Sweet
These cookies are gently sweet by design. The butter flavor should shine.
Avoid adding extra sugar beyond the powdered sugar in the dough. Sprinkles can add a little sweetness if used.
The Cookies Became Too Soft in Storage
They may have been stored in a warm environment. Avoid heat because warm temperatures can soften them too much.
Store in an airtight container at room temperature. Use parchment between layers.
Frequently Asked Questions
The butter and powdered sugar were most likely not whipped long enough. The mixture needs 5 to 7 minutes of beating until very pale, fluffy, and lighter in texture.
This whipping step is what gives the cookies their cloud-like quality. It should not be rushed.
Can I use granulated sugar instead of powdered sugar?
No, powdered sugar is key to the soft, smooth texture. Granulated sugar will not create the same delicate result.
Use ½ cup (60g) powdered sugar. It dissolves smoothly into the butter.
They spread very little. They mostly hold their shape, especially when the dough is well whipped.
Do not press the fork too hard. Light fork marks help them keep their airy shape.
Can I make the dough ahead of time?
Yes, the dough can be made ahead. If chilled, let it soften slightly before scooping.
The dough should be easy to portion. Very cold dough may be too firm to scoop neatly.
No, they are gently sweet. The flavor lets the butter shine.
The powdered sugar keeps the sweetness smooth and delicate. Sprinkles add a festive touch but are optional.
Can I use salted butter?
Yes, salted or unsalted butter both work. The recipe allows either.
The most important thing is that the butter is very soft but not melted. Proper texture matters most.
Why is cornstarch important?
Cornstarch gives the cookies their signature melt-in-your-mouth crumb. It is the secret ingredient behind the delicate texture.
Do not skip it. Without cornstarch, the cookies will not have the same melt-away feel.
Store them in an airtight container at room temperature for up to 5 days. Place parchment paper between layers.
Avoid heat because warm environments can soften them too much. Handle the cookies gently.
Why This Recipe Works So Well
Melt-in-Your-Mouth Whipped Shortbread works so well because it depends on technique as much as ingredients. The ingredient list is simple, but the whipping step transforms the dough.
Very soft butter is able to hold air when beaten. That air helps create the light, delicate texture.
Powdered sugar blends smoothly into the butter. It keeps the cookie crumb soft instead of grainy.
Whipping the butter and powdered sugar for 5 to 7 minutes makes the mixture pale, fluffy, and lighter. This is what gives the cookies their airy, cloud-like quality.
Flour gives the cookies structure. It helps them hold together.
Cornstarch makes the crumb delicate. It is what creates the melt-in-your-mouth feeling.
Vanilla extract brings warmth and enhances the butter flavor. Since the cookies are not overly sweet, the butter and vanilla really matter.
Sifting the dry ingredients keeps the dough light. Mixing on low speed protects the whipped texture.
Light fork marks create the classic shortbread look. A gentle press keeps the cookies from becoming too flat.
Baking at 325°F keeps the cookies pale and delicate. The bottoms become lightly golden while the tops stay soft-looking and light.
Cooling on the baking sheet for 5 minutes gives the cookies time to firm. Moving them too soon can break their fragile structure.
The recipe also works because it is flexible. Vanilla, almond extract, lemon zest, melted chocolate, holiday sprinkles, plain tops, gift tins, tea pairings, coffee pairings, and hot cocoa all fit naturally.
Most of all, these cookies work because they feel special without being complicated. They are buttery, tender, delicate, lightly sweet, and perfect for any moment that calls for a soft little cookie that melts away.
Final Thoughts
Melt-in-Your-Mouth Whipped Shortbread is a delicate butter cookie made with very soft butter, powdered sugar, all-purpose flour, cornstarch, vanilla extract, and optional holiday nonpareils. The butter and powdered sugar are whipped for 5 to 7 minutes until pale and fluffy, then sifted flour and cornstarch are mixed in gently before the dough is scooped, marked with a fork, decorated, and baked at 325°F for 15 to 18 minutes.
Serve these cookies completely cooled with tea, coffee, or hot cocoa, or add them to holiday trays and edible gift tins. With their simple ingredients, essential cornstarch crumb, cloud-like whipped texture, gentle sweetness, pale tops, lightly golden bottoms, and freezer-friendly storage, these whipped shortbread cookies are a tender little holiday treasure worth making again and again.
Melt-in-Your-Mouth Whipped Shortbread

Delicate, buttery, pale, and incredibly tender, these Melt-in-Your-Mouth Whipped Shortbread cookies are made for holiday trays, gifting boxes, and quiet moments when a classic cookie feels just right. The dough is whipped until light and fluffy, then finished with red and green holiday nonpareils for a simple festive touch.
Recipe Details
- Prep Time: 15 minutes
- Cook Time: 18 minutes
- Total Time: 33 minutes
- Servings: 24 cookies
- Calories: 150 kcal
Ingredients
For the Whipped Shortbread Cookies
- Holiday nonpareils red and green sprinkles, for topping
- 1 teaspoon vanilla extract
- ½ cup 65g cornstarch
- 1 ½ cups 190g all-purpose flour
- ½ cup 60g powdered sugar
- 1 cup 227g butter, very soft (salted or unsalted)
Instructions
Step 1: Prepare the Baking Sheet
Heat the oven to 325°F (160°C). Line a baking sheet with parchment paper so the tender cookies can be lifted more easily after baking.
Step 2: Whip the Butter First
Place the very soft butter in a large bowl. Beat it with an electric mixer on medium-high speed until it turns smooth and creamy.
The butter should be soft enough to whip easily, but it should not be melted. This texture helps the dough become airy without turning greasy.
Step 3: Build the Fluffy Base
Add the powdered sugar gradually instead of all at once. Continue whipping for 5-7 minutes, until the mixture becomes very pale, fluffy, and light.
This long whipping step is what gives the cookies their delicate texture. Take the time to let the butter and powdered sugar become soft and cloudlike before moving on.
Step 4: Add the Vanilla
Mix in the vanilla extract just until combined. Keep this step brief so the whipped butter mixture stays light.
Step 5: Sift the Dry Ingredients
In a separate bowl, sift together the all-purpose flour and cornstarch. Sifting helps the dry ingredients blend smoothly into the whipped butter mixture.
Step 6: Make the Dough
Add the sifted dry ingredients to the butter mixture on low speed. Mix only until the dough comes together.
Do not keep mixing once the flour and cornstarch are incorporated. A gentle finish helps protect the soft, melt-in-your-mouth crumb.
Step 7: Portion the Cookies
Drop rounded spoonfuls of dough onto the prepared baking sheet. Leave about 2 inches of space between each cookie so they have room to bake evenly.
Step 8: Add Fork Marks and Sprinkles
Lightly press each cookie with a fork to create fork marks. Sprinkle the tops with holiday nonpareils before baking.
Step 9: Bake Until Set
Bake for 15-18 minutes, until the edges are set and the bottoms are lightly golden. The tops should remain pale, so avoid baking them until they darken.
Step 10: Cool Carefully
Let the cookies cool on the baking sheet for 5 minutes. Transfer them to a wire rack and let them cool completely.
Notes
- Whip the butter and powdered sugar thoroughly to create the light, airy texture.
- The butter should be very soft, but not melted, for the best result.
- Cornstarch is essential for the signature melt-in-your-mouth crumb, so do not omit it.
- Avoid overbaking; the cookies should stay pale on top.
- Store in an airtight container with parchment between layers to protect their delicate texture.
Serving Suggestions
Serve these Melt-in-Your-Mouth Whipped Shortbread cookies once they have cooled completely. Their buttery flavor, pale tops, lightly golden bottoms, and airy crumb make them especially lovely for holiday trays and gifting.
The red and green holiday nonpareils give the cookies a festive finish without making the recipe complicated. They are delicate cookies, so arrange them gently if serving on a platter or packing them into a box.
Storage
How to Store
Store the cookies in an airtight container with parchment between layers. This helps protect their delicate texture and keeps the fork-marked tops from being damaged.
Best Texture Tip
Whip the butter and powdered sugar for the full 5-7 minutes. The mixture should look very pale, fluffy, and light before the dry ingredients are added.
Butter Tip
Use butter that is very soft but not melted. Melted butter changes the texture, while very soft butter whips smoothly into the powdered sugar.
Cornstarch Tip
Do not omit the cornstarch. It is key to the signature melt-in-your-mouth crumb.
Baking Tip
Bake just until the edges are set and the bottoms are lightly golden. The cookies should remain pale on top, so avoid overbaking them.

Fernando is the creator and writer behind the food blog Eating with your Hands. Living and working in cities like Paris, Barcelona, and Berlin, and being married to a Canadian foodie, has given Fernando a passion and interest in food and inspired him to run EWYH.