
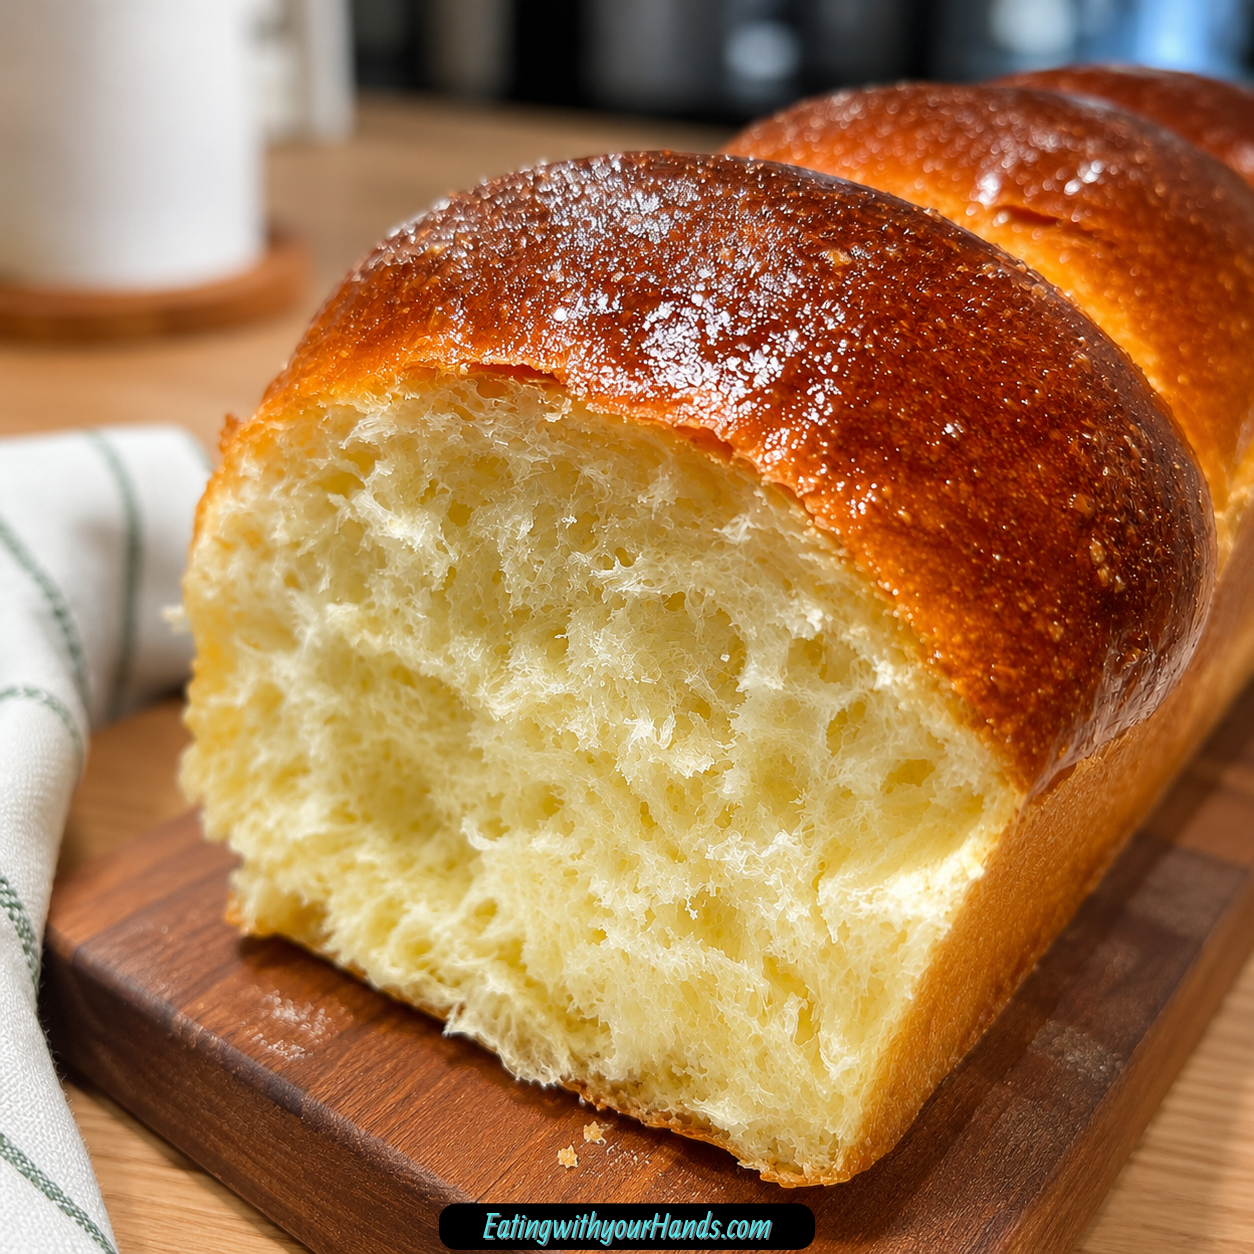
There are breads I enjoy, and then there is milk brioche, the kind of loaf that can make me stop after the first bite and wonder how something so soft can still feel so rich. Its crumb is tender enough to pull apart in delicate layers, the crust turns beautifully golden, and there is just enough sweetness to make an ordinary slice feel like a small treat.
I have been baking this version for years, ever since a pastry instructor in Paris suggested one simple change that completely transformed the way I thought about brioche. Instead of relying on water, I started using milk and cream, and that shift gave the dough a softness and richness that immediately felt different.
The first successful loaf made an impression on me that never really faded. It came out golden, fragrant, and so tender that the inside almost seemed to melt when I pulled a piece apart.
That is still the texture I chase every time I make it. I want the bread to feel cloud-soft rather than chewy, buttery without being heavy, and sweet enough to taste special while still being versatile enough for breakfast, brunch, sandwiches, or a late-night slice.
My family has become very good at recognizing when this brioche is in the oven. Somehow, the last piece always becomes the most contested one, which probably explains why I rarely have to worry about leftovers for long.
The recipe is also much more flexible than the finished loaf might suggest. You can turn the dough into a traditional loaf, divide it into rolls, braid it, twist it into a turban shape, or shape it into tear-and-share pieces for a table centerpiece.
What keeps me returning to it is that none of those shapes require complicated pastry technique. The dough needs good ingredients, steady kneading, enough time to rise, and a little patience before slicing.
That combination makes the bread feel impressive without making the process intimidating. Even my 8-year-old has helped knead the dough, which says a lot about how approachable the basic method can be.
Table of Contents
- Why You’ll Love This Milk Brioche
- Ingredients for Milk Brioche
- Why Heavy Cream Is So Important
- Milk Makes the Crumb Softer
- Why Room-Temperature Ingredients Help
- All-Purpose Flour Keeps the Bread Tender
- Sugar Adds Gentle Sweetness
- Understanding the Yeast Options
- Salt Keeps the Flavor Balanced
- How to Make Milk Brioche
- Step 1: Bring the Wet Ingredients Toward Room Temperature
- Step 2: Combine the Wet Ingredients
- Step 3: Combine the Flour, Sugar, Yeast, and Salt
- Step 4: Mix Until a Shaggy Dough Forms
- Step 5: Knead for 8–10 Minutes
- Step 6: Let the Dough Complete Its First Rise
- Step 7: Gently Deflate and Shape the Dough
- Step 8: Complete the Second Rise
- Step 9: Brush With Egg Wash and Bake
- Step 10: Brush With Simple Syrup and Cool Briefly
- 12 Secrets to the Softest Milk Brioche
- 1. Use Heavy Cream
- 2. Use Milk Instead of Water
- 3. Start With Room-Temperature Ingredients
- 4. Stay With All-Purpose Flour
- 5. Knead Long Enough
- 6. Use a Rest When the Dough Fights Back
- 7. Let the First Rise Fully Double
- 8. Deflate Gently
- 9. Give the Second Rise Time
- 10. Watch the Crust Closely
- 11. Brush With Simple Syrup While Warm
- 12. Give It 10 Minutes Before Eating
- How to Shape Milk Brioche
- Making Brioche Rolls
- Making a Braided Brioche
- How to Tell When the Dough Has Risen Enough
- What to Do if the Kitchen Is Too Cold
- What to Do if the Yeast Seems Inactive
- Making Milk Brioche Ahead
- Serving Warm With Salted Butter
- Toasting With Raspberry Jam
- Turning Leftovers Into French Toast
- Using Brioche for Bread Pudding
- How to Store Milk Brioche
- How to Freeze Milk Brioche
- Reheating Frozen Brioche in the Oven
- Reheating in the Microwave
- Why Day-Old Brioche Is Still Worth Keeping
- Frequently Asked Questions
- Can I Use Instant Yeast Instead of Active Dry Yeast?
- Can I Use Bread Flour?
- Can I Replace the Milk?
- Can I Replace Sugar With Honey?
- Why Didn’t My Dough Rise?
- How Long Should the First Rise Take?
- How Long Is the Second Rise?
- What if the Brioche Browns Too Quickly?
- Why Use Simple Syrup After Baking?
- Can I Make the Dough Ahead?
- How Long Does Brioche Keep?
- Milk Brioche Nutritional Information
- The Brioche That Turned Ordinary Moments Into Something Special
- Milk Brioche Recipe
Why You’ll Love This Milk Brioche
The texture is the first reason this bread stands apart. Milk and heavy cream create a very soft crumb that feels much more delicate than a firmer everyday loaf.
The flavor is equally appealing. Sugar gives the dough a gentle sweetness, the cream adds richness, and the egg helps the loaf feel more luxurious without turning it into dessert.
It is also unusually adaptable. One batch can become a sandwich loaf, breakfast rolls, braided bread, knots, or another shape that suits the occasion.
The finished bread looks beautiful with very little decoration. A brushed egg wash gives the crust a glossy golden appearance, while simple syrup applied after baking adds another layer of shine and a whisper of sweetness.
Another reason I love it is how well it moves from one meal to another. Thick warm slices can be eaten with salted butter, toasted pieces can carry raspberry jam, and leftovers can become French toast or bread pudding.
Most importantly, the process rewards patience rather than perfection. The dough does not have to look like it came from a professional bakery to taste extraordinary.
Ingredients for Milk Brioche
Every ingredient has a specific role in this dough, which is why I like to keep the basic formula close to the way it was originally taught to me. The combination of cream, milk, egg, flour, yeast, sugar, and salt is what gives this brioche its soft structure and rich flavor.
Wet Ingredients
- ⅔ cup heavy cream, room temperature
- 1 cup + 1 tablespoon milk
- 1 large egg, room temperature
The heavy cream is an essential part of the recipe and provides much of the richness associated with this version. The milk contributes additional softness, while the egg adds richness and structure.
Dry Ingredients
- ⅓ cup sugar, granulated or caster
- 4 cups all-purpose flour
- 1 tablespoon active dry yeast
- 1½ teaspoons salt
For an even softer version, ½ cup of the all-purpose flour can be replaced with cake flour. Bread flour is not recommended because the resulting brioche can become too chewy.
For the Egg Wash
- 1 beaten egg
- 1 teaspoon water
The egg wash is brushed over the shaped and risen dough immediately before baking. It gives the finished crust a glossy, golden appearance.
For the Simple Syrup Finish
- 1 tablespoon sugar
- 1 tablespoon hot water
The simple syrup goes on after baking. It softens the crust slightly and leaves the loaf with a beautiful shine.
Why Heavy Cream Is So Important
The ⅔ cup heavy cream is one of the ingredients that defines this particular brioche. It brings a level of richness that would be difficult to reproduce by simply increasing another liquid.
That is why I treat the cream as non-negotiable. Other substitutions can work around the edges of the recipe, but removing this component changes the character of the bread too much.
The cream should be at room temperature before mixing. Cold cream does not blend into the dough as smoothly.
Bringing it closer to the temperature of the other ingredients also helps the dough come together more evenly. The goal is a cohesive mixture rather than cold pockets of fat working against the yeast and flour.
Milk Makes the Crumb Softer
The recipe uses 1 cup plus 1 tablespoon milk. Whole milk creates the richest version, although other milk can work.
Oat milk is one substitution that has been used when necessary. The bread can still work, although the crust may not brown as beautifully.
The milk is one of the reasons the dough stays so tender. It replaces the plain-water character of a more basic bread and helps create the soft texture that made this version memorable to me in the first place.
That Paris suggestion to use milk and cream instead of water changed everything about the finished loaf. What came out of the oven felt more delicate, more tender, and far more suited to the kind of brioche I wanted.
Why Room-Temperature Ingredients Help
The heavy cream and egg are both specifically called for at room temperature. This makes the mixing process smoother.
Ingredients that are very cold can resist blending into a soft dough. Bringing them closer to the same temperature helps everything combine more naturally.
The result should be a dough that begins shaggy and gradually becomes smoother through kneading. There is no need to panic if the initial mixture looks rough.
Brioche develops through handling and rest. The first bowl is only the beginning of that transformation.
All-Purpose Flour Keeps the Bread Tender
Four cups all-purpose flour create the main structure of the dough. It provides enough strength to hold the loaf together without pushing the crumb too far toward chewiness.
For even more softness, ½ cup of the all-purpose flour can be swapped for cake flour. That variation keeps the overall flour amount the same while changing the texture slightly.
Bread flour is not recommended here. It can make the brioche chewier than intended.
The goal is not a firm artisan-style bite. This bread should remain delicate, soft, and almost cloud-like inside.
Sugar Adds Gentle Sweetness
The dough uses ⅓ cup granulated or caster sugar. That amount gives the brioche a noticeable sweetness without turning it into cake.
Honey can replace the sugar using ¼ cup honey. When making that substitution, the other liquids should be reduced slightly, although no exact adjustment is specified.
The standard sugar version remains the most direct approach. Granulated or caster sugar both work within the original formula.
The simple syrup applied after baking contributes another light touch of sweetness. Together, the dough sugar and glaze create a loaf that feels special while still working with savory or sweet toppings.
Understanding the Yeast Options
The recipe calls for 1 tablespoon active dry yeast. Instant yeast can also be used.
When using instant yeast, it can go directly into the flour. That makes it the simpler option for anyone who wants to avoid a separate proofing step.
If you ever suspect your yeast is inactive, one troubleshooting method is to test it in warm milk with a pinch of sugar. If it does not bubble within 5 minutes, the yeast may no longer be active.
Good yeast matters because both rises depend on it. A loaf that barely expands will never develop the same airy texture as dough that properly doubles and puffs.
Salt Keeps the Flavor Balanced
The dough includes 1½ teaspoons salt. Fine sea salt is preferred because it blends evenly.
The salt helps balance the sweetness of the sugar and dairy-rich dough. Without it, the bread could taste flat even though the ingredient list contains plenty of richness.
Distributing the salt well matters. It should become part of the dough rather than sitting in concentrated pockets.
The finished loaf should taste gently sweet, buttery, and rounded. Salt helps bring those elements into balance.
How to Make Milk Brioche
The process is not difficult, but it does ask for time. Mixing, kneading, two rises, shaping, baking, glazing, and cooling each play a role in creating the final cloud-soft crumb.
Step 1: Bring the Wet Ingredients Toward Room Temperature
Before mixing, make sure the ⅔ cup heavy cream and large egg are at room temperature. Measure the 1 cup plus 1 tablespoon milk and have it ready as well.
Set out the flour, sugar, yeast, and salt so the entire dough can be mixed without interruptions. Having everything measured first makes it easier to focus on the dough itself.
If your kitchen is particularly cool, remember that rise times may move more slowly. The dough needs a comfortable environment to expand properly.
Do not warm the ingredients aggressively. The goal is simply to avoid starting with refrigerator-cold cream and egg.
Step 2: Combine the Wet Ingredients
Place the heavy cream, milk, and egg in a large mixing bowl. Stir until the egg begins to disappear into the dairy mixture.
The mixture does not need to be whipped. You only need the wet ingredients to become reasonably uniform before the dry ingredients go in.
This is one of the nice things about the method. Everything can begin together in one bowl without a complicated sequence.
Once the wet ingredients are mixed, set the bowl aside briefly while you prepare the flour mixture. The dough will come together quickly from this point.
Step 3: Combine the Flour, Sugar, Yeast, and Salt
In another bowl, combine the 4 cups all-purpose flour, ⅓ cup sugar, 1 tablespoon yeast, and 1½ teaspoons salt. If using instant yeast, it can be mixed directly with the flour.
If you are making the softer cake-flour variation, replace ½ cup of the all-purpose flour with cake flour. Keep the overall quantity at 4 cups.
Mix the dry ingredients so the yeast, sugar, and salt are distributed throughout the flour. This prevents one area of the dough from receiving a concentrated amount of any single ingredient.
Once combined, begin bringing the dry and wet mixtures together. Expect the dough to look rough at first.
Step 4: Mix Until a Shaggy Dough Forms
Add the dry ingredients to the wet mixture and stir until a rough dough begins forming. Do not expect a smooth ball immediately.
At this point, the mixture may look uneven and shaggy. That is normal.
Continue combining until there are no large pockets of completely dry flour. The dough should hold together enough to move onto a work surface.
Avoid adding unnecessary extra ingredients just because the dough does not look perfect yet. The kneading stage is what changes its texture.
Step 5: Knead for 8–10 Minutes
Turn the dough onto a lightly floured work surface. Begin kneading with steady, repeated motions.
Continue for about 8–10 minutes. The dough should gradually become smoother and stop clinging heavily to your hands.
If the dough seems to fight back or becomes difficult to work, stop and let it rest for about 5 minutes. That brief pause allows the dough to relax before you continue.
Return to kneading afterward. By the end, the surface should look much smoother than it did at the beginning.
This is one of the moments where patience matters more than force. The goal is a supple dough, not a dough that has been aggressively handled into submission.
Step 6: Let the Dough Complete Its First Rise
Lightly grease a clean bowl and place the kneaded dough inside. Cover it with a damp towel.
Let the dough rise until it doubles in size, usually about 1–1½ hours. The exact pace can vary depending on the warmth of your kitchen and the activity of the yeast.
Choose a spot without strong drafts. A comfortably warm environment gives the dough a better chance to rise steadily.
If the room is cold, a slightly warmed oven can be used as a proofing space. A turned-off oven with the light on is another suggested option.
Do not move on simply because the clock says enough time has passed. The more important sign is that the dough has visibly doubled.
Step 7: Gently Deflate and Shape the Dough
Once the first rise is complete, gently deflate the dough. There is no need to aggressively punch it.
Move the dough to a clean surface and decide on your final shape. You can create a traditional loaf, rolls, a braid, knots, or another simple form.
Handle the dough firmly enough to shape it but not so much that all the softness is worked out. The idea is to organize the dough for its final rise.
Place the shaped dough into its baking vessel or arrange the pieces as needed. Leave enough room for another noticeable increase in volume.
Step 8: Complete the Second Rise
Cover the shaped dough and let it rise again for about 45–60 minutes. It should become visibly puffier and rounder.
A gentle poke can help you judge readiness. The dough should spring back slowly rather than immediately bouncing back.
This rise is what gives the shaped loaf its final lightness before baking. Rushing it can leave the bread denser.
If your kitchen is cool, allow the dough the time it needs. Again, the appearance of the dough matters more than forcing the process to match an exact minute.
Step 9: Brush With Egg Wash and Bake
Preheat the oven to 350°F. Make the egg wash by beating 1 egg with 1 teaspoon water.
Brush the risen dough gently with the egg wash. Cover the surface evenly without pressing down on the delicate loaf.
Bake for 25–30 minutes. The top should become deeply golden and the loaf should sound hollow when tapped.
If the surface begins browning too quickly, tent it with foil after about 15 minutes. This protects the crust while allowing the interior to finish baking.
An oven thermometer can be helpful if your oven temperature is unreliable. Even baking depends on knowing that the oven is actually close to 350°F.
Step 10: Brush With Simple Syrup and Cool Briefly
While the brioche is still warm, combine 1 tablespoon sugar with 1 tablespoon hot water to make the simple syrup. Stir until the sugar dissolves.
Brush the syrup over the warm crust. It gives the surface a glossy appearance while keeping the crust softer and adding a light sweetness.
Let the brioche rest for at least 10 minutes before tearing into it. The waiting may feel difficult once the smell fills the kitchen, but that short pause is worth it.
After that, slice or pull apart and serve. Warm milk brioche is one of those simple pleasures that needs almost nothing else.
12 Secrets to the Softest Milk Brioche
1. Use Heavy Cream
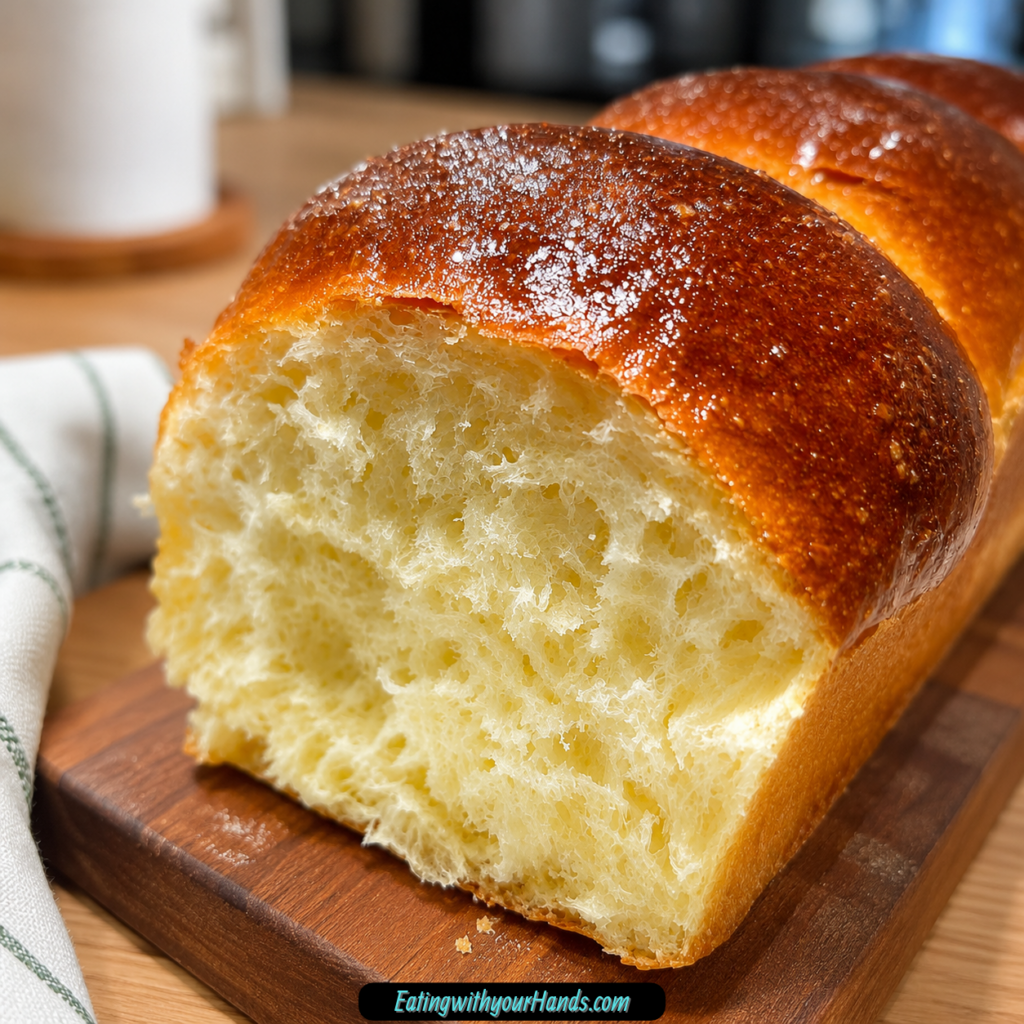
Heavy cream is one of the defining ingredients in this recipe. It creates the richness that gives the crumb its signature softness.
Do not remove it if you want the classic result. This is one ingredient I consider essential rather than optional.
2. Use Milk Instead of Water
Milk is part of what transformed this brioche for me in the first place. Replacing water with milk and cream created the softer loaf I had been trying to achieve.
Whole milk gives the richest result. Other milk can work, but the finished crust and flavor may change.
3. Start With Room-Temperature Ingredients
Room-temperature cream and egg blend more easily into the dough. Very cold ingredients can make the mixture slower to come together.
This is a small detail, but it helps the dough begin more evenly. A smooth beginning makes the rest of the process easier.
4. Stay With All-Purpose Flour
All-purpose flour provides the right balance of structure and tenderness. Bread flour can make the brioche too chewy.
For extra softness, replace only ½ cup with cake flour. That small change keeps the bread delicate.
5. Knead Long Enough
Eight to 10 minutes of kneading gives the dough time to become smooth. Stopping too soon can leave it rough and less cohesive.
Watch the texture rather than the clock alone. The dough should stop sticking aggressively to your hands.
6. Use a Rest When the Dough Fights Back
If the dough becomes difficult during kneading, stop for about 5 minutes. Letting it rest can make the next round of handling easier.
This is not wasted time. It is simply part of working with the dough rather than forcing it.
7. Let the First Rise Fully Double
The first rise usually takes around 1–1½ hours. What matters most is reaching roughly double the original size.
If the dough has barely changed, do not rush forward. A cold room or weak yeast may be slowing it down.
8. Deflate Gently
After the first rise, treat the dough carefully. Gently deflating it is enough.
There is no need for aggressive punching in the standard method. Keep the dough soft while preparing it for shaping.
9. Give the Second Rise Time
The shaped dough needs another 45–60 minutes. It should look fuller and more rounded before going into the oven.
Use the poke test as an additional cue. Slow spring-back is the sign described for properly risen dough.
10. Watch the Crust Closely
Bake at 350°F for 25–30 minutes. If the crust becomes dark too quickly, tent it with foil after 15 minutes.
That protects the surface from overbrowning. The interior still needs enough time to finish.
11. Brush With Simple Syrup While Warm
The syrup is more than decoration. It keeps the crust soft and leaves a polished finish.
Use equal amounts of sugar and hot water. Brush it on while the bread is still warm.
12. Give It 10 Minutes Before Eating
Fresh brioche smells almost impossible to resist, but a short rest helps the loaf settle. Wait about 10 minutes before slicing or pulling it apart.
That little pause also makes handling easier. Then the bread is ready for butter, jam, or simply eating as it is.
How to Shape Milk Brioche
The dough can be shaped according to the way you plan to serve it. A traditional loaf is the simplest option for slicing.
For a classic loaf, tuck the edges underneath so the upper surface becomes smooth. Place it into the prepared loaf shape for the second rise.
For rolls, divide the dough into 12 pieces. Roll each portion into a tight ball before arranging them for proofing and baking.
A three-strand braid creates a more decorative loaf. Divide the dough, roll it into three ropes, and braid them together without pulling too tightly.
You can also twist the dough into a turban-style shape. The main advice is not to become so focused on visual perfection that you overwork the dough.
Imperfections are completely acceptable here. Brioche does not need to look machine-made to taste wonderful.
Making Brioche Rolls
Dividing the dough into 12 pieces creates soft individual rolls. This is especially convenient for breakfast or a tear-and-share table.
Roll each piece into a smooth ball. Try to keep the portions reasonably even so they rise and bake at a similar pace.
Arrange them with room to expand. During the second rise, the balls should become noticeably puffier.
Brush with egg wash before baking just as you would a full loaf. Finish with simple syrup afterward for the same glossy surface.
Making a Braided Brioche
A braid turns the same dough into something more decorative. Divide the dough into three sections and roll them into ropes.
Braid the ropes gently. Avoid stretching so aggressively that the dough becomes thin or uneven.
Tuck the ends neatly when finished. Then allow the shaped braid to complete the second rise.
Brush with egg wash and bake at the same stated temperature. Watch the surface as it colors and use foil if needed.
How to Tell When the Dough Has Risen Enough
The first rise focuses on volume. The dough should roughly double.
The second rise is more about visible puffiness and response. The shaped dough should look noticeably fuller.
A gentle poke should spring back slowly. If it snaps back immediately, it may need more time.
If the dough barely rises at all, consider yeast activity and room temperature. Those are the two troubleshooting areas specifically associated with weak rise in this recipe.
What to Do if the Kitchen Is Too Cold
A cool room can slow fermentation. This does not necessarily mean the recipe has failed.
One option is a slightly warmed oven used as a proofing box. Another is a turned-off oven with the light on.
The goal is gentle warmth, not baking heat. The dough still needs time rather than direct cooking.
Watch the size of the dough rather than becoming overly attached to the timer. A slower rise can still produce a good loaf if the yeast is active.
What to Do if the Yeast Seems Inactive
If the dough barely changes during rising, the yeast may be weak or old. Testing it can help.
Place the yeast in warm milk with a pinch of sugar. If it does not bubble within 5 minutes, it may no longer be active.
This check can save you from spending hours waiting on dough that will never properly rise. It is especially useful when using an older package of yeast.
Room temperature matters too. Do not assume the yeast is dead until you also consider whether the dough has simply been sitting somewhere too cold.
Making Milk Brioche Ahead
The dough can be prepared in advance. After the first rise, deflate it, wrap it tightly, and refrigerate overnight.
The next day, let the dough come back toward room temperature before shaping. No fixed amount of time is specified, so judge it by the feel and temperature of the dough.
Once ready, shape it as desired. Then allow the second rise before applying egg wash and baking.
This overnight option can be helpful when you want fresh brioche in the morning without starting the entire process at sunrise. It also gives you another way to fit the recipe around a busy schedule.
Serving Warm With Salted Butter
One of my favorite ways to eat this brioche is also the simplest. Cut a thick slice while the loaf is still slightly warm and spread it with salted butter.
The butter softens immediately into the crumb. That extra bit of salt makes the gentle sweetness of the bread even more noticeable.
This is the kind of serving method that reminds me why the basic loaf does not need elaborate toppings. Good brioche can feel complete with almost nothing.
Serve it at breakfast, brunch, or whenever the loaf happens to come out of the oven. There is no wrong time for the first warm slice.
Toasting With Raspberry Jam
Lightly toasted brioche develops a different texture while keeping the interior soft. Raspberry jam makes a particularly nice topping.
The seeds add a little texture against the smooth crumb. The tart berry flavor also contrasts with the buttery sweetness of the bread.
Toast only enough to bring back some crispness. You do not want to dry the slice out.
Spread with jam while warm. The combination works beautifully for breakfast or an afternoon snack.
Turning Leftovers Into French Toast
Leftover brioche makes especially decadent French toast. The soft, rich slices already bring plenty of flavor to the dish.
This is one of my favorite ways to use bread that has passed its absolute freshest point. Instead of feeling like leftovers, it becomes something completely new.
The original bread is already soft and gently sweet. That makes it a natural base for a richer breakfast.
No exact French toast method is specified here. The important point is that leftover brioche works beautifully for it.
Using Brioche for Bread Pudding
Bread pudding is another excellent destination for leftover slices. The tender crumb absorbs the custardy mixture especially well.
The richness of the brioche gives the dessert a more luxurious base. Even day-old bread can become something worth looking forward to.
This is also a useful way to avoid wasting slices that have begun drying out. Instead of trying to make them taste fresh again, turn them into a different dessert.
Again, no separate bread pudding formula is required. The brioche itself is the ingredient that makes the transformation worthwhile.
How to Store Milk Brioche
Store the cooled brioche in an airtight container or ziplock bag at room temperature. It will keep for about 2 days.
Seal it well so the soft crumb does not dry out too quickly. The bread is best when protected from open air.
If the loaf begins feeling less fresh on the second day, toasting is a good option. It can bring back some of the texture that makes brioche enjoyable.
Use the room-temperature storage method when you know the loaf will be eaten quickly. For longer periods, freezing is the better choice.
How to Freeze Milk Brioche
For longer storage, slice the brioche and wrap the pieces in foil. Freeze for up to 1 month.
Freezing individual slices makes it easier to remove only what you need. You do not have to thaw an entire loaf for one serving.
Keep the slices wrapped during storage. This helps protect the crumb.
When ready to eat, the bread can be reheated directly from frozen. There is no need to wait for a full thaw.
Reheating Frozen Brioche in the Oven
Place frozen slices in a 300°F oven. Heat for about 5–8 minutes.
The oven brings back more of the fresh-baked exterior texture. It is the preferred method when you have a few extra minutes.
Check the bread toward the end of the heating period. You want it warm rather than dried out.
Serve immediately once reheated. Add butter, jam, or another topping while the slices are still warm.
Reheating in the Microwave
The microwave works when speed matters. Heat in 10-second bursts.
Check the slice after each burst. This prevents overheating.
The texture will not be exactly the same as oven reheating. The oven does a better job of restoring some exterior crispness.
Still, the microwave can be useful in a pinch. It is especially convenient when reheating only one slice.
Why Day-Old Brioche Is Still Worth Keeping
Brioche may become less soft after sitting, but that does not mean it is finished. Day-old slices are excellent toasted.
The heat changes the texture and brings back some of the pleasure of a fresh loaf. Butter or jam can make the revived slice feel completely satisfying.
French toast and bread pudding are also natural uses. Rich bread adapts especially well to recipes that add moisture back into it.
So do not discard the loaf simply because it has passed its softest moment. There are still several excellent ways to enjoy it.
Frequently Asked Questions
Can I Use Instant Yeast Instead of Active Dry Yeast?
Yes. Instant yeast can be used in place of active dry yeast.
Add it directly with the flour and skip the separate proofing step. This is the faster yeast option.
Can I Use Bread Flour?
Bread flour is not recommended for this version. It can make the brioche chewier than intended.
All-purpose flour is the preferred choice. Replace ½ cup with cake flour if you want an even softer result.
Can I Replace the Milk?
Oat milk can be used when necessary. The crust may not brown as beautifully.
Whole milk gives the richest standard result. Keep the heavy cream in the recipe.
Can I Replace Sugar With Honey?
Yes. Use ¼ cup honey instead of the sugar.
Reduce the other liquids slightly. No exact reduction amount is specified.
Why Didn’t My Dough Rise?
The yeast may be inactive or the room may be too cold. Both can slow or stop the rise.
Test yeast in warm milk with a pinch of sugar if needed. If it does not bubble within 5 minutes, it may be dead.
How Long Should the First Rise Take?
The first rise usually takes about 1–1½ hours. The dough should approximately double.
Use the size of the dough as your main guide. Cooler kitchens may require more patience.
How Long Is the Second Rise?
Allow approximately 45–60 minutes. The shaped dough should become visibly puffier.
A gentle poke should spring back slowly. That is another sign it is ready for baking.
What if the Brioche Browns Too Quickly?
Tent the top with foil after about 15 minutes. Continue baking until the loaf is finished.
This protects the crust from becoming too dark. Keep the oven at 350°F.
Why Use Simple Syrup After Baking?
The simple syrup gives the crust shine. It also helps keep the surface softer and adds a little sweetness.
Brush it onto the warm loaf. Rewarm leftover syrup slightly before using again if needed.
Can I Make the Dough Ahead?
Yes. After the first rise, deflate the dough, wrap it tightly, and refrigerate overnight.
Let it return toward room temperature before shaping. Continue with the second rise and bake as usual.
How Long Does Brioche Keep?
At room temperature, store it airtight for about 2 days. For longer storage, freeze sliced brioche for up to 1 month.
Reheat frozen slices at 300°F for 5–8 minutes. Microwave reheating can also be done in 10-second bursts.
Milk Brioche Nutritional Information
This brioche gets much of its richness from milk, heavy cream, and egg. Those ingredients are also part of what creates the tender texture that defines the loaf.
The egg and milk contribute protein, while the cream and sugar contribute to the bread’s richness and gentle sweetness. Exact nutritional totals depend on the specific ingredients and how the loaf is divided.
No fixed calorie, fat, carbohydrate, protein, or sodium values are provided for individual servings. Portion size and ingredient choices therefore determine the final numbers.
Substitutions such as oat milk, honey, or cake flour can also change the nutritional profile. The classic version remains centered on milk, cream, egg, sugar, all-purpose flour, yeast, and salt.
The Brioche That Turned Ordinary Moments Into Something Special
I still think about the moment my pastry instructor suggested replacing water with milk and cream. It sounded like a small adjustment, but the first loaf showed me how much that choice could change the character of bread.
The crumb came out softer than the versions I had been making before. It was tender enough to pull apart almost like a cloud, yet still sturdy enough to slice and toast.
That texture became the reason I kept returning to the recipe. Sunday brunch suddenly felt more special when a warm loaf sat on the table, and even a midnight slice could feel like its own tiny celebration.
Over the years, I have shaped the dough in different ways and served it with different toppings. Rolls, loaves, braids, butter, raspberry jam, French toast, and bread pudding have all found their place.
The basic dough is still the part I love most. Milk and cream give it that softness, the egg and sugar bring richness, and enough patient kneading and rising turn a shaggy beginning into something beautifully light.
There is also something comforting about how forgiving it feels. The loaf does not need to be perfectly symmetrical, and a braid does not need to look professionally sculpted to be delicious.
I have watched my own family hover near the kitchen waiting for it to cool. I have also watched the last slice mysteriously disappear faster than anyone admits.
That is why Milk Brioche: 12 Secrets to the World’s Softest Bread has remained one of the breads I return to again and again. It asks for a little time and patience, but in return it gives you a golden, tender loaf that can turn breakfast, brunch, dessert, or a simple late-night snack into something worth slowing down for.
Milk Brioche Recipe

Soft, fluffy, and enriched with milk, cream, and egg, this Milk Brioche has a tender crumb and a rich, delicate flavor. A light egg wash gives the loaf a golden finish, while simple syrup brushed on after baking adds a glossy surface.
Recipe Details
- Prep Time: 20 minutes
- Cook Time: 30 minutes
- Total Time: 2 hours 50 minutes
- Course: Bread
- Cuisine: French
- Servings: 1 loaf
- Calories: 200 kcal
Ingredients
For the Brioche Dough
- ⅔ cup heavy cream at room temperature
- 1 cup milk plus 1 tablespoon, at room temperature; you can use whole, 1%, or 2% milk
- 1 large egg at room temperature
- ⅓ cup sugar
- 4 cups all-purpose flour or use a combination of ½ cup cake flour and 3 ½ cups bread flour
- 1 tablespoon active dry yeast or instant yeast
- 1 ½ teaspoons salt
For the Egg Wash
- 1 beaten egg
- 1 teaspoon water
For the Simple Syrup
- 1 tablespoon sugar
- 1 tablespoon hot water
Instructions
Step 1: Mix the Dough
Combine the heavy cream, milk, egg, sugar, flour, yeast, and salt in a bowl.
Mix until the ingredients come together into a dough.
Step 2: Knead Until Smooth
Knead the dough until it becomes smooth and elastic.
Continue working the dough until it develops an even texture.
Step 3: Let the Dough Rise
Cover the dough and allow it to rise until doubled in size.
Give it enough time to expand fully before shaping.
Step 4: Shape the Brioche
Shape the risen dough into your desired brioche form.
Arrange it so it is ready for the final rise.
Step 5: Let It Rise Again
Allow the shaped dough to rise a second time.
Let it become noticeably puffy before baking.
Step 6: Preheat the Oven
Preheat the oven to 350°F (175°C).
Prepare the egg wash while the oven heats.
Step 7: Apply the Egg Wash
Mix 1 beaten egg with 1 teaspoon water.
Brush the mixture over the surface of the brioche.
Step 8: Bake
Bake the brioche for about 25–30 minutes.
Remove it from the oven once the loaf is golden brown.
Step 9: Brush with Simple Syrup
Dissolve 1 tablespoon sugar in 1 tablespoon hot water.
Brush the simple syrup over the brioche while it is still warm for a glossy finish.
Step 10: Cool and Serve
Let the brioche cool before slicing.
Serve once the loaf has had time to set.
Notes
- Use room temperature ingredients for best results.
- Adjust baking time based on your oven and the size of your brioche.
- Store in an airtight container to keep it fresh.
Serving Suggestions
Serve Milk Brioche after it has cooled enough to slice cleanly. Its soft crumb, rich dairy flavor, golden crust, and glossy syrup finish make it a tender bread for serving by the slice.
This recipe makes 1 loaf. The final shape can be adjusted to your preferred brioche form before the second rise.
Storage
Store the brioche in an airtight container to help keep it fresh.
Dairy Tip
Use ⅔ cup heavy cream and 1 cup plus 1 tablespoon milk at room temperature.
Whole, 1%, or 2% milk can be used.
Flour Tip
Use 4 cups all-purpose flour.
Alternatively, combine ½ cup cake flour with 3 ½ cups bread flour.
Yeast Tip
Use 1 tablespoon active dry yeast or instant yeast.
Rising Tip
Allow the dough to rise until doubled in size before shaping.
Let the shaped brioche rise again until puffy.
Egg Wash Tip
Combine 1 beaten egg with 1 teaspoon water.
Brush it over the loaf before baking.
Baking Tip
Bake at 350°F (175°C) for about 25–30 minutes.
Adjust the baking time according to your oven and the size of the brioche.
Simple Syrup Tip
Dissolve 1 tablespoon sugar in 1 tablespoon hot water.
Brush the syrup over the warm loaf for a glossy finish.

Fernando is the creator and writer behind the food blog Eating with your Hands. Living and working in cities like Paris, Barcelona, and Berlin, and being married to a Canadian foodie, has given Fernando a passion and interest in food and inspired him to run EWYH.