
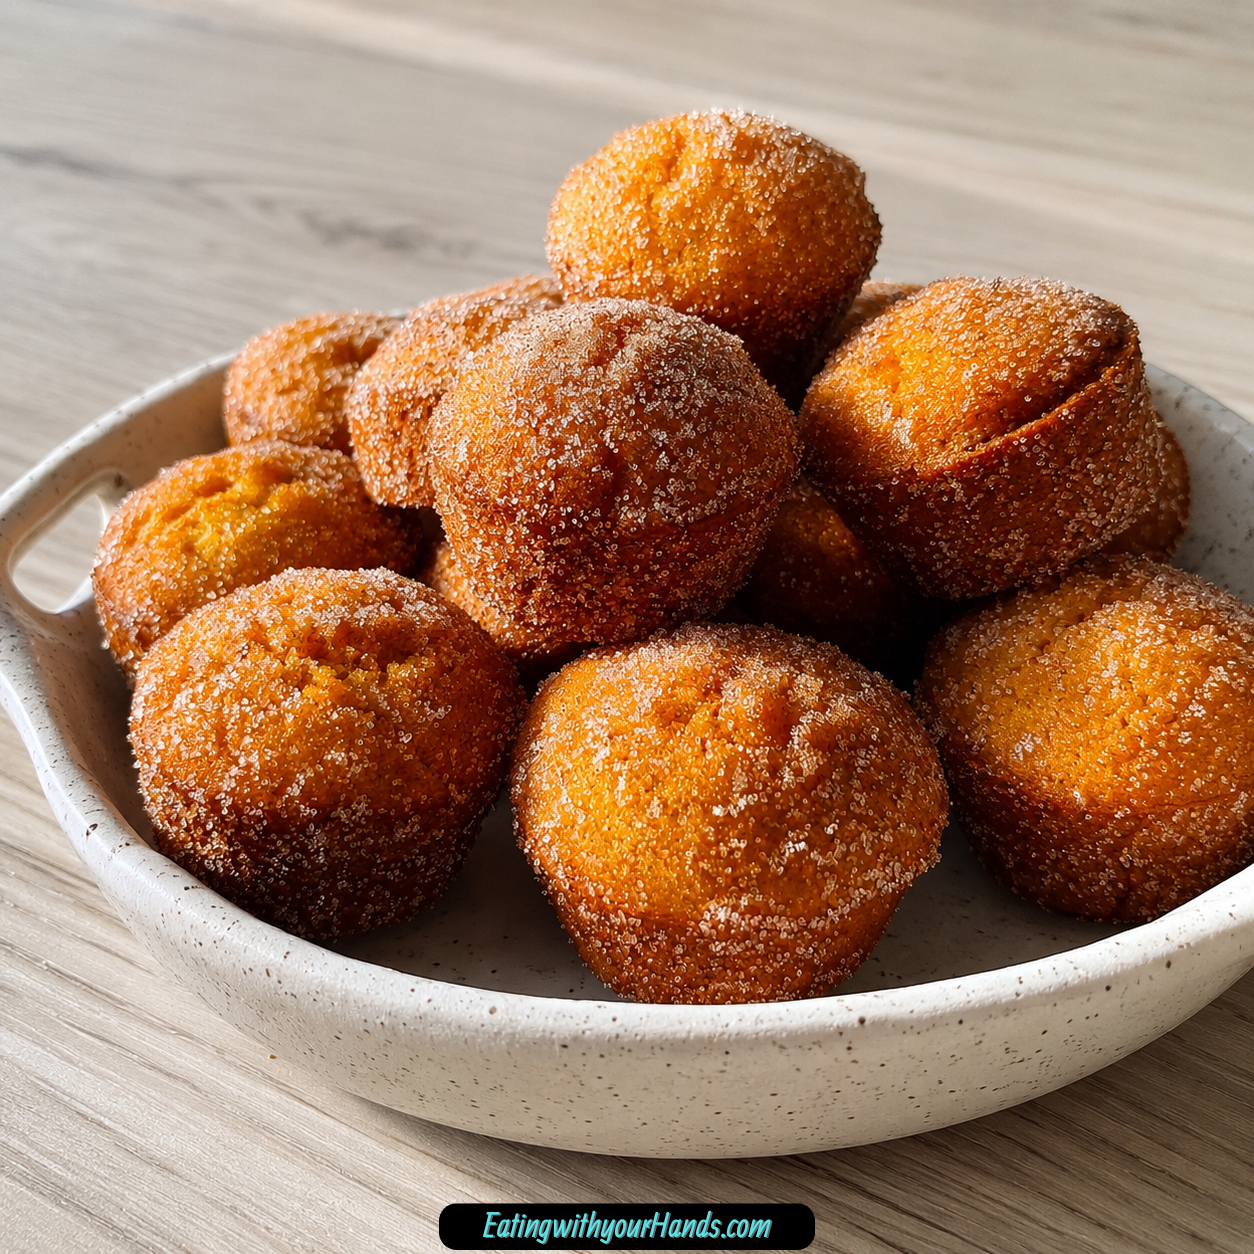
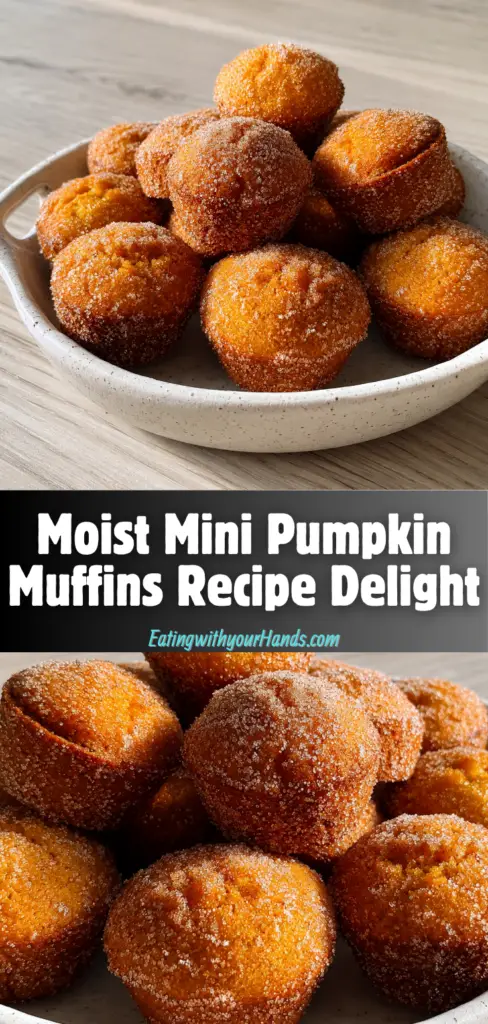
There is something about a batch of mini pumpkin muffins that makes a kitchen feel instantly warmer. Maybe it is the smell of cinnamon and cloves drifting from the oven, or maybe it is the way those tiny muffins look so cheerful and inviting once they are coated in cinnamon sugar.
These Moist Mini Pumpkin Muffins are the kind of fall treat that disappears almost too quickly. They are small enough to enjoy in one or two bites, soft enough to feel tender and cozy, and sweet enough to satisfy a craving without feeling like a heavy dessert.
What makes them especially hard to resist is the cinnamon sugar coating. The muffins themselves are moist and warmly spiced, but that buttery cinnamon sugar finish gives each one a sweet little crunch that makes the whole bite feel complete.
I love recipes like this because they are easy to make and even easier to share. They work for breakfast, brunch, afternoon snacks, lunchboxes, holiday tables, or the kind of last-minute gathering where you want something homemade but not stressful.
Pumpkin puree is the real reason these muffins stay so tender. It brings moisture, color, and that unmistakable fall flavor that makes every bite taste like the season.
The spices do the rest of the work. Cinnamon, ginger, allspice, nutmeg, and cloves create a warm, cozy flavor that makes the muffins smell incredible while they bake.
And because they are mini, they feel especially fun. You can set them out on a platter, pack them into a container, or sneak one with coffee while telling yourself it barely counts.
Table of Contents
- Why You’ll Love These Mini Pumpkin Muffins
- What Makes These Mini Pumpkin Muffins So Moist
- Recipe Details
- Ingredients for Mini Pumpkin Muffins
- Before You Start Baking
- Directions for Moist Mini Pumpkin Muffins
- Step 1: Preheat the Oven
- Step 2: Prepare the Mini Muffin Tin
- Step 3: Combine the Flour and Leavening
- Step 4: Add the Warm Spices
- Step 5: Add the Salt
- Step 6: Mix the Melted Butter and Sugars
- Step 7: Add the Egg
- Step 8: Stir in the Pumpkin Puree
- Step 9: Add the Milk
- Step 10: Combine the Wet and Dry Ingredients
- Step 11: Avoid Overmixing
- Step 12: Fill the Mini Muffin Cups
- Step 13: Bake the Muffins
- Step 14: Prepare the Cinnamon Sugar Coating
- Step 15: Let the Muffins Cool Briefly
- Step 16: Dip the Muffin Tops in Butter
- Step 17: Roll in Cinnamon Sugar
- Step 18: Let the Coated Muffins Set
- Tips for Perfect Mini Pumpkin Muffins
- Mini Pumpkin Muffin Variations
- Serving Ideas
- Storage Tips
- Freezing Notes
- Helpful Notes for Best Results
- Frequently Asked Questions
- Final Thoughts
- Mini Pumpkin Muffins
Why You’ll Love These Mini Pumpkin Muffins
These mini pumpkin muffins are the kind of recipe that feels simple but still gives you a big payoff. They use basic pantry ingredients, come together quickly, and bake into soft little muffins with a sweet cinnamon sugar finish.
The texture is one of the best parts. Thanks to the pumpkin puree, the muffins stay moist and tender without feeling dense or heavy.
The size also makes them easy to love. Mini muffins are perfect for sharing, snacking, and serving at gatherings because people can grab one without needing a plate or fork.
Then there is the coating. Dipping warm muffin tops in melted butter and rolling them in cinnamon sugar turns a simple pumpkin muffin into something that tastes almost like a fall doughnut bite.
They are also flexible enough for different occasions. Serve them warm with coffee, pack them into lunchboxes, set them out at a holiday brunch, or freeze a batch for later.
This recipe is also easy enough for beginner bakers. The steps are straightforward, and the most important rule is simply not to overmix the batter.
What Makes These Mini Pumpkin Muffins So Moist
Pumpkin puree is the ingredient that gives these muffins their soft, moist crumb. It adds moisture to the batter while also giving the muffins a warm orange color and classic pumpkin flavor.
The melted butter adds richness and helps the muffins feel tender. Because it is slightly cooled before mixing, it blends smoothly into the sugars without scrambling the egg or making the batter greasy.
Brown sugar also helps with moisture. It gives the muffins a deeper sweetness and supports that soft texture you want in a fall muffin.
Milk keeps the batter smooth and scoopable. Using milk at room temperature helps it blend more evenly with the butter, egg, pumpkin, and sugars.
The key is balancing moisture with structure. Flour, baking powder, and egg help the muffins rise and hold together, while pumpkin, butter, and milk keep them soft.
Recipe Details
- Recipe Name: Moist Mini Pumpkin Muffins Recipe Delight
- Recipe Style: Mini pumpkin muffins with cinnamon sugar coating
- Oven Temperature: 375°F (190°C)
- Bake Time: 15 to 20 minutes
- Muffin Pan: Mini muffin tin
- Best Texture: Moist, tender, lightly spiced, and cinnamon-sugar coated
- Room Temperature Storage: Up to 3 days in an airtight container
- Refrigerator Storage: About 1 week
- Freezer Storage: Up to 3 months
- Best Served: Warm or at room temperature
Ingredients for Mini Pumpkin Muffins
These muffins use simple ingredients, but each one plays an important role. The dry ingredients create structure and spice, while the wet ingredients bring moisture, sweetness, and pumpkin flavor.
For the Muffins
You need 1 3/4 cups all-purpose flour. This gives the muffins their structure and helps them hold their mini shape after baking.
You need 1 1/2 teaspoons baking powder. This helps the muffins rise and keeps them from baking up too heavy.
You need 1 teaspoon ground cinnamon. Cinnamon is the main warm spice and gives the muffins that classic fall flavor.
You need 1/2 teaspoon ground ginger. Ginger adds warmth and a gentle brightness that keeps the spice blend from tasting flat.
You need 1/2 teaspoon ground allspice. Allspice adds a deeper cozy note and helps round out the flavor.
You need 1/4 teaspoon ground nutmeg. Nutmeg brings a soft, aromatic warmth that works beautifully with pumpkin.
You need 1/4 teaspoon ground cloves. Cloves are strong and fragrant, so a small amount gives the muffins depth without overpowering them.
You need 1/2 teaspoon salt. Salt balances the sweetness and makes the pumpkin and spices taste more complete.
You need 4 tablespoons unsalted butter, melted and slightly cooled. Butter adds richness and helps create a soft, flavorful muffin.
You need 1/2 cup packed light brown sugar. Brown sugar adds sweetness, moisture, and a warmer flavor than granulated sugar alone.
You need 1/4 cup granulated sugar. Granulated sugar gives clean sweetness and helps balance the brown sugar.
You need 1 large egg, at room temperature. The egg binds the batter and gives the muffins structure.
You need 1 cup canned pumpkin puree. Make sure it is 100% pure pumpkin, not pumpkin pie filling.
You need 1/2 cup milk, at room temperature. Milk helps loosen the batter and keeps the muffins tender.
For the Cinnamon Sugar Coating
You need 4 tablespoons unsalted butter, melted. This helps the cinnamon sugar cling to the warm muffins.
You need 1/2 cup granulated sugar. This creates the sweet coating on the outside of each muffin.
You need 1 teaspoon ground cinnamon. Cinnamon gives the coating its warm spice and signature fall flavor.
Before You Start Baking
Before mixing the batter, make sure the butter, egg, and milk are ready. The butter should be melted and slightly cooled, while the egg and milk should be at room temperature.
Room temperature ingredients blend more smoothly. This helps the batter come together without overmixing, which is important for tender muffins.
It is also important to use canned pumpkin puree, not pumpkin pie filling. Pumpkin pie filling already contains added sweeteners and spices, which would change the flavor and balance of this recipe.
A mini muffin tin is the right pan for this recipe. The small cups help create those poppable little muffins that bake quickly and coat beautifully.
You can grease the muffin tin well or use paper liners. Liners make cleanup easier, while greasing the pan gives the muffins a more direct baked edge.
Directions for Moist Mini Pumpkin Muffins
Step 1: Preheat the Oven
Preheat your oven to 375°F, or 190°C. Starting with a fully heated oven helps the mini muffins rise properly and bake evenly.
Because these muffins are small, they bake quickly. A steady oven temperature helps them set without drying out.
Step 2: Prepare the Mini Muffin Tin
Grease a mini muffin tin well or line it with paper liners. Make sure every cup is prepared so the muffins release easily after baking.
If you use liners, cleanup will be easier and the muffins will look cute and tidy. If you grease the pan, make sure the sides and bottoms of the cups are coated.
Step 3: Combine the Flour and Leavening
In a large bowl, add the all-purpose flour and baking powder. Whisk them together to help distribute the baking powder evenly.
This step matters because uneven baking powder can cause some muffins to rise differently than others. A quick whisk helps create a more consistent batch.
Step 4: Add the Warm Spices
Add the ground cinnamon, ground ginger, ground allspice, ground nutmeg, and ground cloves to the flour mixture. Whisk everything together until the spices are evenly blended into the dry ingredients.
This is where the pumpkin spice flavor begins. Even distribution is important so every mini muffin has the same cozy flavor.
Step 5: Add the Salt
Add the salt to the dry mixture and whisk again briefly. Salt may seem small, but it helps balance the sugars and deepen the spice flavor.
Without salt, the muffins can taste sweet but slightly dull. That tiny amount makes the flavor feel more complete.
Step 6: Mix the Melted Butter and Sugars
In a separate bowl, combine the melted and slightly cooled butter, packed light brown sugar, and granulated sugar. Stir until the mixture looks well combined.
The butter helps dissolve some of the sugar and creates a rich base for the wet ingredients. Brown sugar may leave the mixture looking a little thick, which is normal.
Step 7: Add the Egg
Add the room temperature egg to the butter and sugar mixture. Mix well until the egg is fully incorporated.
This helps bind the batter later. Mixing the egg in thoroughly now prevents streaks of egg from remaining in the final batter.
Step 8: Stir in the Pumpkin Puree
Add the canned pumpkin puree to the wet ingredients. Stir until the mixture is smooth and evenly orange.
The pumpkin is what gives the muffins their moisture, flavor, and color. Make sure it is blended well before adding the milk.
Step 9: Add the Milk
Pour in the room temperature milk and stir until combined. The mixture may look slightly loose or a little uneven, but that is okay.
Milk helps create a batter that is scoopable and moist. Using it at room temperature helps it combine more smoothly with the butter and pumpkin.
Step 10: Combine the Wet and Dry Ingredients
Pour the dry ingredients into the wet ingredients. Stir gently until just combined.
This is one of the most important steps in the recipe. Stop mixing as soon as you no longer see dry streaks of flour.
Step 11: Avoid Overmixing
A few small lumps in the batter are completely fine. Overmixing can make the muffins tough instead of soft and tender.
Muffin batter does not need to be perfectly smooth. Gentle mixing is what keeps the texture light and moist.
Step 12: Fill the Mini Muffin Cups
Spoon the batter into the prepared mini muffin tin, filling each cup about 3/4 full. A small cookie scoop makes this step neat and helps keep the muffins even.
Even portions help the muffins bake at the same rate. Try not to overfill the cups, because the muffins need space to rise.
Step 13: Bake the Muffins
Place the mini muffin tin in the preheated oven. Bake for 15 to 20 minutes.
The muffins are done when a toothpick inserted into the center comes out clean. Because ovens can vary, begin checking near the lower end of the baking time.
Step 14: Prepare the Cinnamon Sugar Coating
While the muffins bake, melt the butter for the coating and place it in a small bowl. In another small bowl, stir together the granulated sugar and ground cinnamon.
Having the coating ready before the muffins come out makes the process easier. The muffins should still be warm when you coat them, so timing matters.
Step 15: Let the Muffins Cool Briefly
When the muffins are done, remove them from the oven and let them cool for about 5 minutes. They should still be warm, but not so hot that they fall apart when handled.
This short cooling time is the sweet spot. If they are too hot, they may be too delicate, but if they cool too much, the coating will not stick as well.
Step 16: Dip the Muffin Tops in Butter
Take each warm mini muffin and dip the top into the melted butter. You only need enough butter to help the cinnamon sugar cling.
Work gently so the muffins stay intact. The warm tops will absorb just enough butter to make the coating taste rich and delicious.
Step 17: Roll in Cinnamon Sugar
After dipping in butter, roll or press the muffin top into the cinnamon sugar mixture. Make sure the top is coated well.
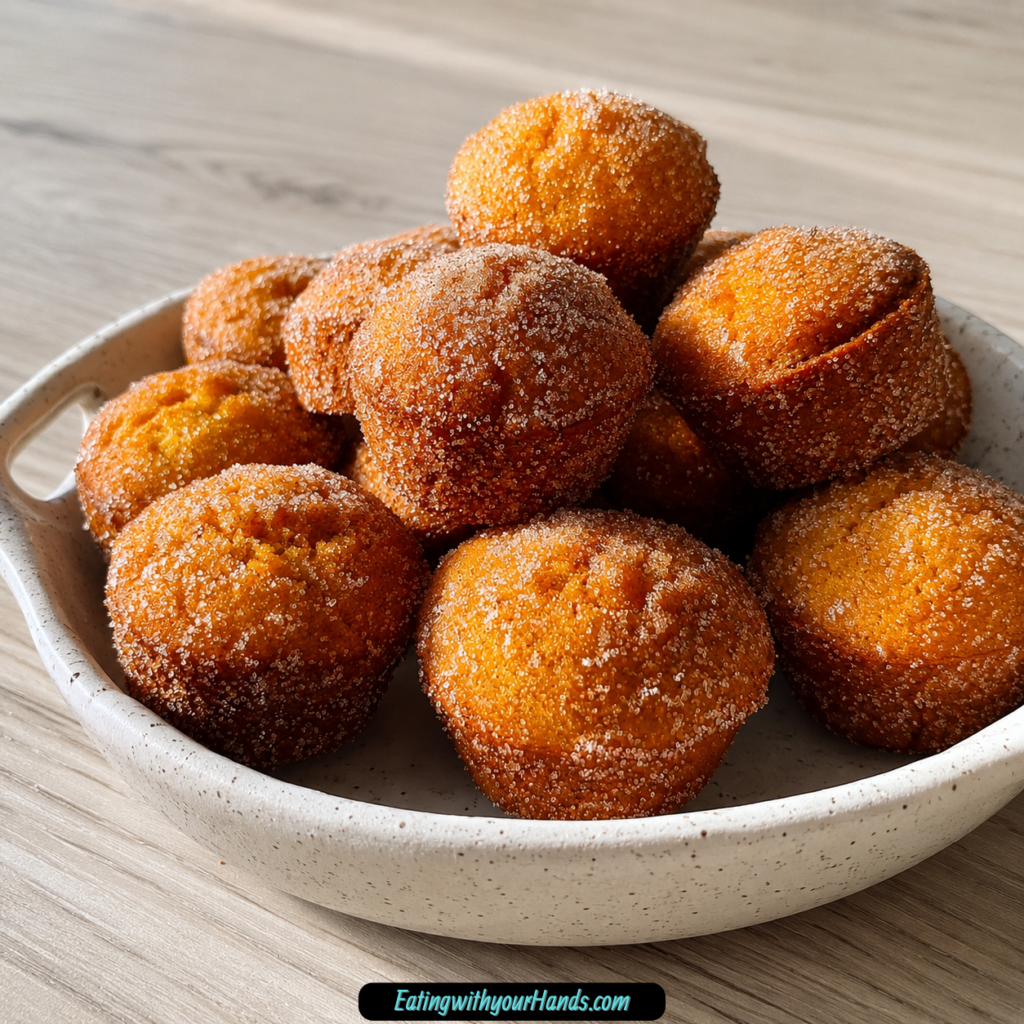
This is the step that turns the muffins into something extra special. The sweet cinnamon topping adds a light crunch and a cozy finish.
Step 18: Let the Coated Muffins Set
Place the coated muffins on a rack or plate and let them sit for a few minutes. The cinnamon sugar will settle onto the buttery tops as the muffins continue cooling.
They can be served warm or at room temperature. Warm is especially lovely because the muffins are soft and fragrant.
Tips for Perfect Mini Pumpkin Muffins
Do not overmix the batter. Stir only until the dry ingredients are incorporated, because too much mixing can make the muffins tough.
Use 100% pure pumpkin puree. Pumpkin pie filling is not the same and would change the sweetness and spice balance.
Let the melted butter cool slightly before adding it to the sugars. Hot butter can affect the egg once it is added, and slightly cooled butter blends more smoothly.
Use room temperature egg and milk. This helps the wet mixture come together more evenly and supports a better muffin texture.
Watch the bake time closely. Mini muffins can go from perfectly moist to slightly dry faster than standard muffins.
Coat the muffins while they are warm. Warm tops help the butter and cinnamon sugar stick better.
Mini Pumpkin Muffin Variations
These muffins are delicious as written, but they also leave room for fun changes. The base is simple and warmly spiced, which makes it easy to add mix-ins or adjust for different needs.
For a gluten-free version, swap the all-purpose flour for a 1:1 gluten-free blend. The original recipe notes that this type of blend is the best choice for substitution.
For a dairy-free version, almond milk or oat milk can be used in place of regular milk. This keeps the batter moist while adjusting the dairy ingredient.
Chocolate chips are a great mix-in. Pumpkin and chocolate work beautifully together, and the chocolate adds a sweeter, richer bite.
Chopped pecans or walnuts add crunch. They also bring a nutty flavor that pairs nicely with the pumpkin spices.
Dried cranberries add a tart surprise. Their brightness helps balance the sweetness of the muffins and the cinnamon sugar coating.
For a cream cheese swirl, mix 4 ounces softened cream cheese with 2 tablespoons sugar and 1/2 teaspoon vanilla. Dollop it onto the batter before baking for a richer variation.
Serving Ideas
These mini pumpkin muffins are wonderful warm with coffee in the morning. Their small size makes them feel like a cozy little breakfast treat without being too much.
They are also perfect for brunch tables. A bowl or platter of mini muffins looks inviting, and guests can easily take one or two.
For lunchboxes, they make a sweet little snack. Because they are small, they are easy to pack and easy to eat.
They also fit beautifully into holiday gatherings. Their cinnamon sugar coating makes them feel festive without needing frosting or decoration.
For a casual snack, enjoy them at room temperature. They stay soft and flavorful, especially when stored properly.
Storage Tips
Store leftover mini pumpkin muffins in an airtight container at room temperature for up to 3 days. This helps keep them moist and protects the cinnamon sugar coating.
If you want them to last longer, refrigerate them for about a week. Let them come to room temperature before serving, or warm them briefly for a softer texture.
A quick 10-second warm-up in the microwave can bring back that fresh, cozy feel. This is especially helpful if the muffins have been refrigerated.
For longer storage, freeze the muffins. Wrap them individually in plastic wrap and place them in a freezer bag for up to 3 months.
When ready to enjoy, thaw them at room temperature. You can also warm them for a few seconds in the microwave.
Freezing Notes
Let the muffins cool completely before freezing. Freezing warm muffins can create extra moisture inside the wrapping.
Wrapping them individually makes it easier to grab only what you need. It also helps protect the muffins from freezer dryness.
If you stack them in a freezer bag, place parchment paper between layers. This helps prevent the cinnamon sugar coating from sticking too much.
The muffins can be thawed at room temperature. A short microwave warm-up helps restore softness quickly.
Helpful Notes for Best Results
Pumpkin puree can vary in moisture from brand to brand. If your batter seems thicker than expected, add 1 tablespoon of milk at a time until it becomes scoopable.
Do not add too much milk at once. The batter should be thick enough to hold shape in the muffin tin, not thin like cake batter.
You can adjust the spices slightly to suit your taste. If you love cinnamon, add an extra pinch, and if cloves are not your favorite, you can leave them out.
The cinnamon sugar coating works best when the muffins are warm but not fragile. Waiting about 5 minutes after baking gives them enough time to firm up while still holding the coating well.
A small cookie scoop makes the process cleaner and faster. It also helps the muffins bake evenly because the portions are similar.
Frequently Asked Questions
Can I Freeze These Mini Pumpkin Muffins?
Yes, these mini pumpkin muffins freeze very well. Let them cool completely, then place them in a freezer bag with parchment paper between layers.
They can be frozen for up to 3 months. Thaw them at room temperature or microwave briefly when you are ready to enjoy them.
Can I Use Fresh Pumpkin Instead of Canned?
Yes, fresh pumpkin can be used, but it takes more preparation. Roast and puree the pumpkin first, then drain it well.
Fresh pumpkin tends to be wetter than canned pumpkin. Draining it helps keep the muffin batter from becoming too loose.
My Batter Seems Thick. Is That Normal?
Yes, the batter can be thick because pumpkin puree varies in moisture. If it seems too stiff to scoop, add milk 1 tablespoon at a time.
Do not thin it too much. The batter should still feel like muffin batter, not pourable cupcake batter.
Can I Make These Gluten-Free?
Yes, you can use a 1:1 gluten-free flour blend in place of the all-purpose flour. This keeps the substitution simple and close to the original recipe.
Keep an eye on texture and bake time. Gluten-free blends can behave slightly differently, but the recipe is designed to stay flexible.
Can I Make These Dairy-Free?
Yes, almond milk or oat milk can replace the regular milk. This is the dairy-free swap included in the original variation notes.
The melted butter is also part of the recipe and coating, so choose your substitutions according to your needs. The milk swap alone works beautifully for the batter.
Can I Add Chocolate Chips?
Yes, chocolate chips make a delicious addition. Fold in a handful before portioning the batter into the mini muffin tin.
Chocolate adds extra sweetness and richness. It pairs especially well with pumpkin and warm spices.
Can I Add Nuts?
Yes, chopped pecans or walnuts work well. They add crunch and a deeper, nutty flavor.
Keep the pieces small so they fit nicely into the mini muffins. Large pieces can make the muffins harder to portion evenly.
Final Thoughts
Moist Mini Pumpkin Muffins are one of those recipes that make fall baking feel easy, cozy, and instantly rewarding. They are soft, warmly spiced, sweetly coated, and small enough to disappear by the handful.
The pumpkin puree keeps the muffins tender, while the cinnamon, ginger, allspice, nutmeg, and cloves bring all the flavor you want in a fall treat. The cinnamon sugar coating adds that final buttery sweetness that makes every bite feel special.
What I love most is how useful this recipe is. You can make it for breakfast, brunch, snacks, lunchboxes, gatherings, or just a quiet moment with coffee.
It is simple enough for a busy day and charming enough for a holiday table. That is the kind of recipe that earns a place in the seasonal baking rotation.
Once you make them, it is easy to understand why mini pumpkin muffins have such staying power. They are cozy, easy, poppable, and full of the kind of flavor that makes people reach for another before the first one is even gone.
Mini Pumpkin Muffins

These Mini Pumpkin Muffins are soft, warmly spiced, and finished with a sweet cinnamon sugar coating. Each bite has cozy pumpkin flavor, tender texture, and a lightly buttery topping that makes them extra special. They are perfect for fall baking, dessert trays, lunchbox treats, or a simple homemade snack. Since they bake in mini size, they are easy to serve, easy to share, and just the right size for a sweet little pumpkin treat.
Recipe Details
- Prep Time: 15 minutes
- Cook Time: 20 minutes
- Total Time: 35 minutes
- Course: Dessert
- Cuisine: American
- Servings: 12 muffins
Ingredients
For the cinnamon sugar coating:
- ½ cup granulated sugar
- 4 tablespoon unsalted butter melted
- 1 teaspoon ground cinnamon
For the muffins:
- 1 cup canned pumpkin puree
- ½ cup milk at room temperature
- 4 tablespoon unsalted butter melted and slightly cooled
- 1 large egg at room temperature
- ½ cup packed light brown sugar
- ¼ cup granulated sugar
- 1 ¾ cups all-purpose flour
- 1 ½ teaspoon baking powder
- ½ teaspoon ground ginger
- ¼ teaspoon ground nutmeg
- ½ teaspoon ground allspice
- ¼ teaspoon ground cloves
- 1 teaspoon ground cinnamon
- ½ teaspoon salt
Instructions
Step 1: Prepare the Oven and Pan
Preheat the oven to 375°F (190°C). Grease a mini muffin tin or line it with paper liners so the muffins release easily after baking.
Step 2: Combine the Dry Ingredients
In a large bowl, whisk together the all-purpose flour, baking powder, ground cinnamon, ground ginger, ground allspice, ground nutmeg, ground cloves, and salt until evenly mixed.
Step 3: Mix the Wet Ingredients
In another bowl, stir together the melted butter, packed light brown sugar, and granulated sugar until combined. Add the egg and mix well, then stir in the canned pumpkin puree and milk.
Step 4: Make the Batter
Add the dry ingredients to the wet ingredients. Stir gently until just combined, being careful not to overmix the batter.
Step 5: Fill the Muffin Tin
Spoon the batter into the prepared mini muffin tin, filling each cup about ¾ full.
Step 6: Bake the Muffins
Bake for 15-20 minutes, or until a toothpick inserted into the center of a muffin comes out clean.
Step 7: Add the Cinnamon Sugar Coating
Let the muffins cool slightly. Dip the tops in melted butter, then roll them in the cinnamon sugar mixture until coated.
Notes
Store the muffins in an airtight container at room temperature for up to 3 days.
Serving Suggestions
- Hot coffee
- Chai tea
- Cold milk
- Apple cider
- Brunch platters
- Holiday dessert trays
- Cream cheese spread
Storage
How to Store
Keep the muffins in an airtight container at room temperature for up to 3 days, as noted in the original recipe.
How to Reheat
Warm the muffins briefly before serving if you prefer a softer, fresh-baked texture.
Best Texture Tip
Coat the muffins while they are still slightly warm so the melted butter helps the cinnamon sugar cling to the tops.

Fernando is the creator and writer behind the food blog Eating with your Hands. Living and working in cities like Paris, Barcelona, and Berlin, and being married to a Canadian foodie, has given Fernando a passion and interest in food and inspired him to run EWYH.