
There is a certain kind of holiday recipe that does more than fill a plate. It fills the house with a smell that makes people stop in the doorway, breathe in, and remember why homemade desserts feel different from anything bought in a store.
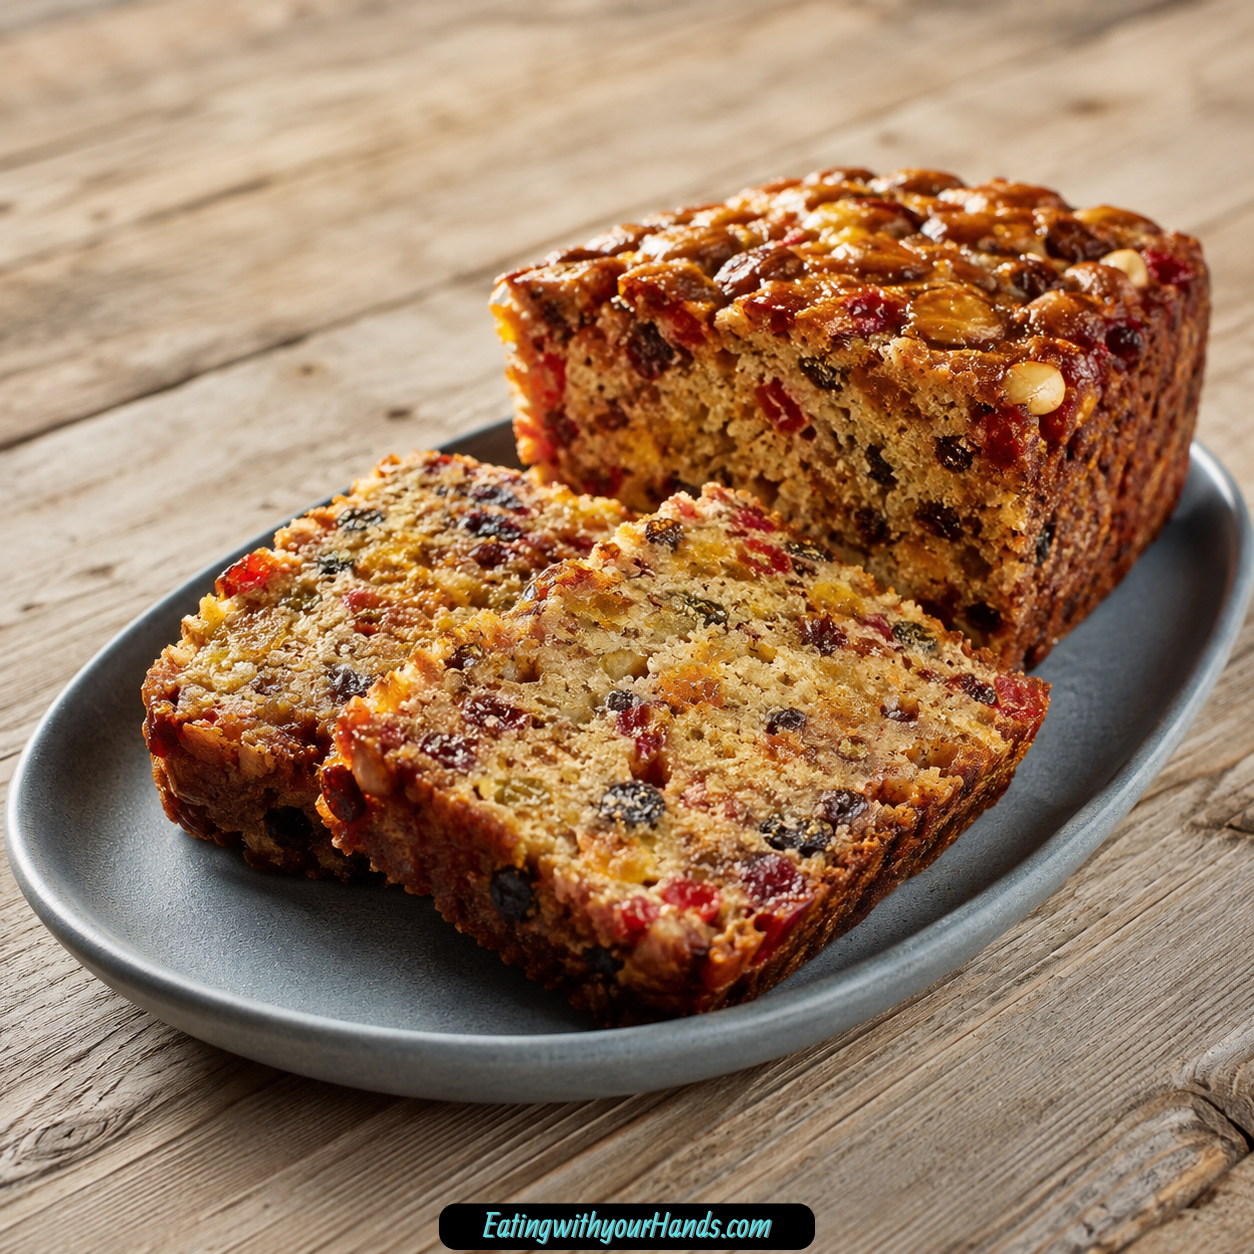
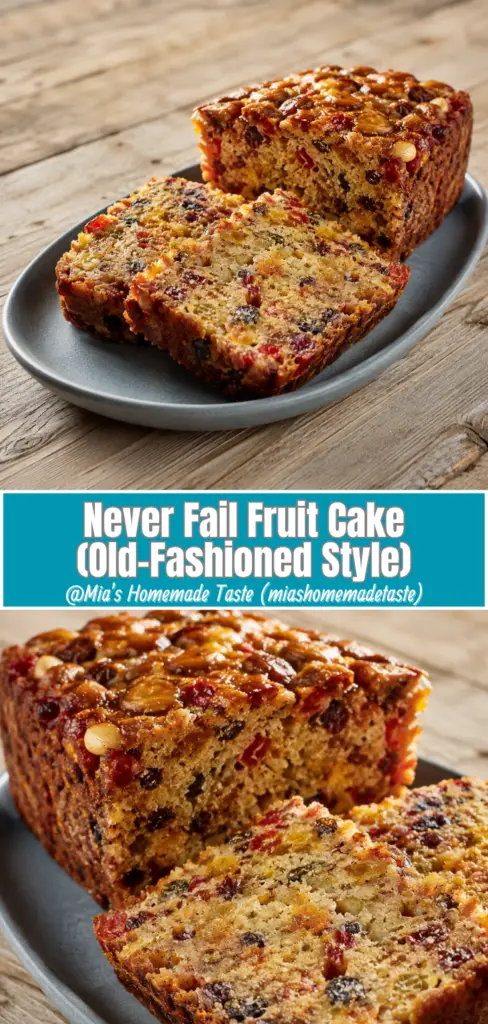
This Never Fail Fruit Cake has that kind of presence. It is rich with dried fruit, gently deepened with molasses, brightened with orange juice, and finished with chopped pecans for texture in every slice.
It is an old-fashioned style fruit cake, but not the dry or overly heavy kind that makes people hesitate. This version is dense in the comforting way, tender through the center, sweet without being overwhelming, and full of holiday flavor without needing alcohol.
The batter comes together with simple pantry ingredients, then bakes slowly in a 9×5-inch loaf pan until the top is golden and slightly cracked. Once cooled, the cake slices into sturdy, fruit-packed pieces that taste even better after resting for a day or two.
That make-ahead quality is one of the reasons this recipe feels so dependable. It gives the flavors time to deepen, the texture time to settle, and the baker a little breathing room before the holiday table gets busy.
Table of Contents
- Why You’ll Love This Never Fail Fruit Cake
- Recipe Details
- Ingredients
- Optional Flavor and Finishing Ideas
- The Old-Fashioned Comfort Behind This Fruit Cake
- Why This Fruit Cake Is Called Never Fail
- Directions
- Step 1: Preheat the Oven
- Step 2: Prepare the Loaf Pan
- Step 3: Measure the Dry Ingredients
- Step 4: Whisk the Dry Ingredients
- Step 5: Add the Mixed Dried Fruit
- Step 6: Add the Chopped Pecans
- Step 7: Prepare the Eggs
- Step 8: Add the Orange Juice
- Step 9: Add the Softened Butter
- Step 10: Add the Molasses
- Step 11: Combine the Wet and Dry Mixtures
- Step 12: Mix Only Until Combined
- Step 13: Fill the Prepared Pan
- Step 14: Smooth the Top
- Step 15: Bake the Fruit Cake
- Step 16: Watch for the Correct Doneness
- Step 17: Cool in the Pan
- Step 18: Transfer to a Wire Rack
- Step 19: Let the Flavors Settle
- How to Serve
- Storage
- Make-Ahead Tips
- Helpful Notes for Best Results
- Flavor Variations
- Troubleshooting
- Frequently Asked Questions
- Why This Fruit Cake Is Perfect for the Holidays
- Final Thoughts
- Never Fail Fruit Cake – Old-Fashioned Style
Why You’ll Love This Never Fail Fruit Cake
This fruit cake is loved because it is reliable. The recipe is designed to turn out moist, rich, and full of fruit every time.
It is packed with mixed dried fruit and chopped pecans. Every slice has sweetness, chewiness, and crunch instead of large stretches of plain cake.
The ingredients are easy to understand and beginner-friendly. Flour, sugar, baking powder, salt, dried fruit, pecans, eggs, orange juice, butter, and molasses come together in a simple method.
The flavor has that old-fashioned holiday depth. Molasses brings richness, while orange juice adds moisture and a bright citrus note.
This cake is also alcohol-free. It works well for families, gatherings, and anyone who wants a traditional fruit cake flavor without using spirits.
It stores beautifully and can be made ahead. The cake actually tastes better after sitting for a day or two, which makes it especially practical for Christmas, Thanksgiving, and festive gatherings.
Recipe Details
- Recipe name: Never Fail Fruit Cake (Old-Fashioned Style)
- Oven temperature: 325°F (163°C)
- Pan size: 9×5-inch loaf pan
- Baking time: 1 hour 15 minutes to 1 hour 30 minutes
- Cooling time in pan: About 15 minutes
- Main flavor notes: Dried fruit, pecans, orange juice, molasses
- Alcohol required: No
- Room temperature storage: Up to 1 week
- Refrigerator storage: Up to 3 weeks
- Freezer storage: Up to 3 months
- Make-ahead note: Best after resting a day or two
Ingredients
- 2 cups flour
- 1½ cups sugar
- ½ teaspoon baking powder
- 1 teaspoon salt
- 32 oz mixed dried fruit
- 1 cup chopped pecans
- 3 large eggs
- ½ cup orange juice
- ¼ cup softened butter
- ¼ cup molasses
Optional Flavor and Finishing Ideas
- Soak dried fruit in orange juice overnight, then drain excess liquid before adding to the batter
- Substitute walnuts for pecans
- Brush the top with warm apricot jam after baking
- Brush the top with a sugar glaze after baking
- Add cinnamon
- Add nutmeg
- Add allspice
- Serve with powdered sugar
- Serve with whipped cream
- Serve with brandy butter
- Serve with hot tea, coffee, or mulled cider
The Old-Fashioned Comfort Behind This Fruit Cake
Old-fashioned fruit cake has a reputation for being a holiday dessert with history. It is the kind of cake people remember seeing wrapped carefully, sliced slowly, and served with something warm to drink.
This version keeps that nostalgic feeling while staying approachable. There is no alcohol, no complicated aging process, and no difficult technique hidden in the instructions.
The cake begins with a dry mixture of flour, sugar, baking powder, and salt. The dried fruit and pecans are stirred into that mixture before the wet ingredients are added, which helps keep them distributed throughout the cake.
The wet mixture is simple but flavorful. Eggs bind the batter, orange juice adds moisture and brightness, softened butter gives richness, and molasses brings the old-fashioned depth that makes the cake taste warm and familiar.
Once the wet and dry mixtures come together, the batter will be thick. That thickness is normal because the cake is loaded with dried fruit and nuts.
As it bakes, the loaf becomes golden on top and slightly cracked. That crack is part of the charm, giving the fruit cake a rustic homemade look.
Why This Fruit Cake Is Called Never Fail
A recipe earns the phrase “never fail” by being dependable. This cake is built from simple proportions and clear steps, which makes it friendly even for someone baking fruit cake for the first time.
One of the most important steps is coating the dried fruit and pecans in the dry ingredients. This helps suspend them throughout the batter instead of letting them sink to the bottom.
Another key step is gentle mixing. Once the wet ingredients are added to the dry ingredients, the batter only needs to be combined until no dry flour remains.
The baking time also allows the cake to set slowly. At 325°F (163°C), the loaf bakes for 1 hour 15 minutes to 1 hour 30 minutes, giving the dense batter enough time to cook through without becoming dry too quickly.
Cooling matters as well. Letting the cake rest in the pan for about 15 minutes helps the structure set before it is transferred to a wire rack.
Each step is simple, but together they create a fruit cake that is moist, sliceable, flavorful, and sturdy enough to store well.
Directions
Step 1: Preheat the Oven
Preheat your oven to 325°F (163°C). This lower baking temperature is important because fruit cake is dense and needs time to bake through evenly.
Starting with a fully preheated oven helps the loaf bake properly from the beginning. The cake has a long baking window, so a steady temperature helps protect the texture.
While the oven heats, gather all of your ingredients. Once the batter comes together, you will want the pan ready and waiting.
Step 2: Prepare the Loaf Pan
Grease and flour a 9×5-inch loaf pan. Make sure the bottom and sides are coated so the finished cake can release more easily.
You can also line the pan with parchment paper for easier removal. This is a helpful option if you want to lift the cooled cake out more cleanly.
If using parchment, press it into the pan so it fits snugly. Leave enough overhang to help lift the cake later if desired.
Step 3: Measure the Dry Ingredients
Measure 2 cups flour, 1½ cups sugar, ½ teaspoon baking powder, and 1 teaspoon salt. Add them to a large mixing bowl.
Use all-purpose flour, spooned and leveled, for best measuring accuracy. Too much flour can make the cake heavier than intended.
The sugar gives the cake classic sweetness, while the baking powder adds just enough lift. The salt balances the sweet dried fruit and deep molasses flavor.
Step 4: Whisk the Dry Ingredients
Whisk the flour, sugar, baking powder, and salt until well blended. This step helps distribute the baking powder and salt evenly.
Even distribution matters because the batter is thick and full of fruit. Once the fruit and wet ingredients are added, it becomes harder to correct uneven dry ingredients.
Take a moment to break up any small sugar or flour clumps. A smooth dry mixture helps the batter come together more evenly.
Step 5: Add the Mixed Dried Fruit
Add 32 oz mixed dried fruit to the bowl with the dry ingredients. The fruit can include raisins, cherries, pineapple, dates, or other combinations you like.
Stir the dried fruit into the flour mixture until the pieces are coated. This is an important step because it helps prevent the fruit from sinking during baking.
Make sure the fruit is distributed throughout the dry mixture. You want every slice of cake to have fruit in it.
Step 6: Add the Chopped Pecans
Add 1 cup chopped pecans to the bowl. Stir them into the dry mixture along with the dried fruit.
The pecans add crunch and balance the sweetness of the fruit. They also make the cake feel more textured and festive.
If desired, pecans can be toasted for extra flavor. Walnuts may also be used as a substitute if you prefer them or have them on hand.
Step 7: Prepare the Eggs
In a separate bowl, beat 3 large eggs thoroughly. The eggs help bind the fruit cake together and add richness.
Beating them before adding the other wet ingredients helps them mix more evenly. This is especially useful because the batter will be thick once combined.
The eggs should look smooth and uniform before you continue. Then they are ready to be mixed with the orange juice, butter, and molasses.
Step 8: Add the Orange Juice
Pour ½ cup orange juice into the bowl with the beaten eggs. Stir until combined.
The orange juice adds moisture and a citrus brightness to the cake. It also works beautifully with the dried fruit and molasses.
This ingredient helps keep the cake from tasting flat or overly heavy. It brings a fresh note into an otherwise deep and rich batter.
Step 9: Add the Softened Butter
Add ¼ cup softened butter to the wet mixture. Stir or beat until it is combined as smoothly as possible.
The butter adds richness without making the cake greasy. The recipe uses just enough to support the flavor and texture.
Softened butter mixes more easily than cold butter. If small bits remain, continue stirring until the wet mixture looks more cohesive.
Step 10: Add the Molasses
Add ¼ cup molasses to the wet ingredients. Mix until the liquid becomes golden brown and glossy.
Molasses is what gives this fruit cake its old-fashioned depth. It adds moisture, richness, and a darker sweetness.
Make sure it is fully blended into the eggs, orange juice, and butter. The wet mixture should look smooth and well combined before it is added to the dry ingredients.
Step 11: Combine the Wet and Dry Mixtures
Gradually add the wet ingredients to the dry ingredients. Pour slowly and begin stirring gently with a wooden spoon or spatula.
The batter will be thick because it contains a large amount of dried fruit and pecans. That is expected for this style of fruit cake.
Stir from the bottom of the bowl so the flour mixture is fully incorporated. Work patiently so all of the dry ingredients are moistened.
Step 12: Mix Only Until Combined
Continue stirring until no dry flour remains. Do not overmix the batter.
Overmixing can make the cake tougher. The goal is simply to bring the wet ingredients, dry ingredients, fruit, and nuts together.
Once everything is incorporated, stop stirring. The batter should look thick, fruit-filled, and evenly mixed.
Step 13: Fill the Prepared Pan
Pour the thick batter into the prepared 9×5-inch loaf pan. Use a spatula or the back of a spoon to guide it into the corners.
Because the batter is dense, it may not flow easily on its own. Spread it gently so the loaf shape is even.
Make sure the batter is distributed from end to end. This helps the cake bake more evenly.
Step 14: Smooth the Top
Smooth the top of the batter with the back of a spoon or spatula. This gives the loaf a more even surface before baking.
The top does not need to be perfectly flat. A rustic surface is natural for an old-fashioned fruit cake.
Still, smoothing the batter helps prevent one area from baking much higher or lower than another. It also makes the finished loaf easier to slice.
Step 15: Bake the Fruit Cake
Place the loaf pan in the preheated 325°F (163°C) oven. Bake for 1 hour 15 minutes to 1 hour 30 minutes.
Begin checking for doneness at 1 hour 15 minutes. The recipe notes that moisture matters, so do not overbake.
The cake is done when a toothpick inserted into the center comes out clean. The top should be golden and slightly cracked.
Step 16: Watch for the Correct Doneness
A clean toothpick is the main doneness sign. Insert it into the center of the cake, where the batter takes longest to bake.
The top should look set, golden, and lightly cracked. This surface crack is normal and gives the loaf a classic homemade look.
If the toothpick comes out with wet batter, continue baking and check again. If it comes out clean, remove the cake from the oven.
Step 17: Cool in the Pan
Let the fruit cake cool in the pan for about 15 minutes. This short rest helps the structure settle.
Fruit cake is dense and full of pieces, so it benefits from cooling before being moved. Removing it too soon could cause it to break.
Set the pan on a heat-safe surface while it rests. After 15 minutes, the cake should be ready to transfer.
Step 18: Transfer to a Wire Rack
Gently remove the cake from the pan and transfer it to a wire rack. If you used parchment paper, lift carefully using the overhang.
Let the cake cool completely on the rack. This allows air to circulate around it and prevents the bottom from becoming overly soft.
Do not slice the cake while it is still hot. Cooling helps the crumb set and makes cleaner slices possible.
Step 19: Let the Flavors Settle
Once the cake is fully cooled, you can serve it, but it becomes even better after resting. The recipe notes that fruit cake tastes better after sitting a day or two.
During that time, the flavors deepen and the texture improves. This is one reason fruit cake is such a good make-ahead dessert.
Wrap and store it properly if you plan to serve it later. The resting time turns a good fruit cake into a more flavorful one.
How to Serve
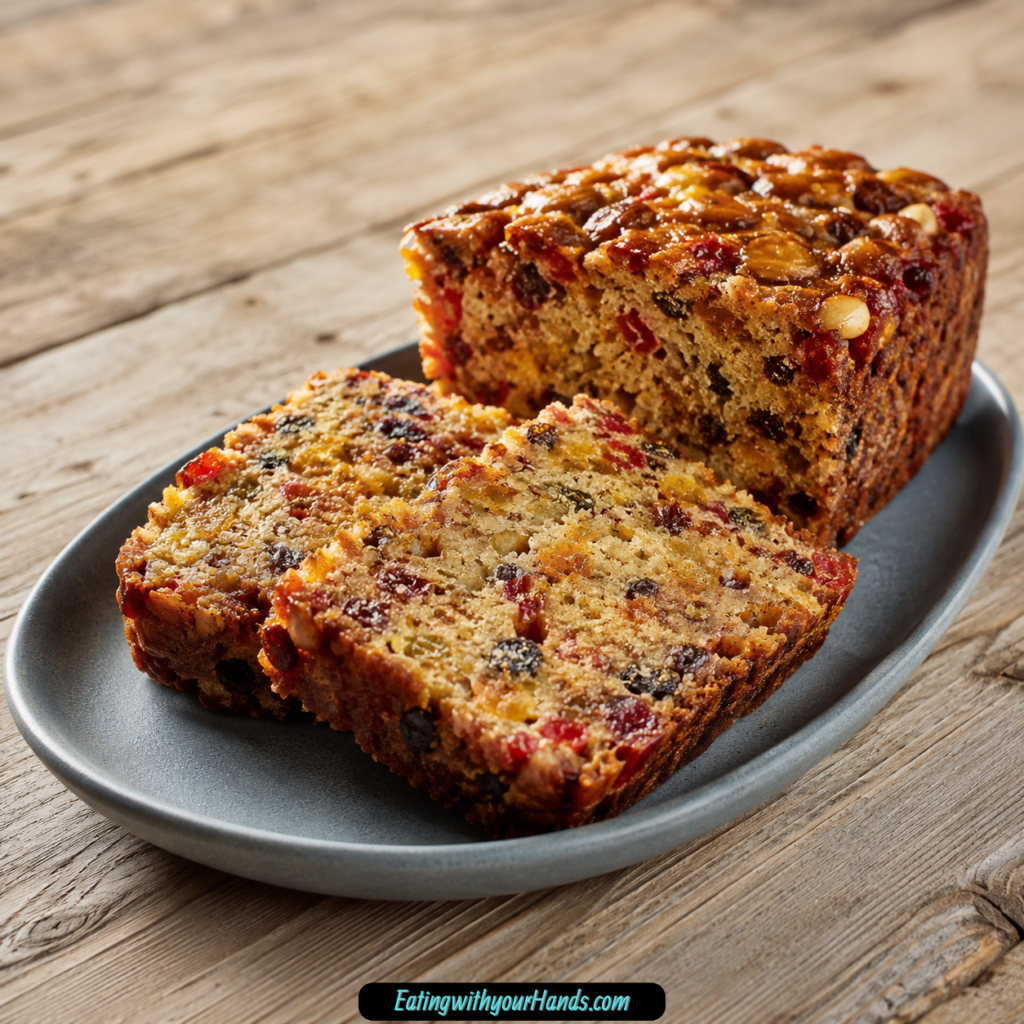
Slice the fruit cake and serve it plain for a simple old-fashioned dessert. The dried fruit, pecans, orange juice, and molasses give it enough flavor to stand on its own.
For a pretty finish, dust the slices lightly with powdered sugar. This adds a simple holiday look without changing the cake.
Serve slices with hot tea, coffee, or mulled cider. Warm drinks pair well with the dense, fruit-filled texture.
For special occasions, add whipped cream. A soft dollop gives the cake a lighter contrast.
Brandy butter is another serving option included in the original notes. It can make the cake feel more festive for a holiday table.
Storage
At room temperature, wrap the fruit cake in parchment paper and place it in an airtight container. It stores well for up to 1 week.
In the refrigerator, the cake keeps for up to 3 weeks. Let it come to room temperature before serving for the best texture.
For freezer storage, wrap the cake tightly in plastic wrap and foil. Freeze for up to 3 months.
Thaw frozen fruit cake overnight in the refrigerator. This slow thaw helps preserve the texture.
Make-Ahead Tips
Fruit cake is one of the best make-ahead desserts because it improves after resting. The recipe notes that the flavor deepens and the texture gets better after a day or two.
Bake the cake a few days before you plan to serve it if possible. This gives the molasses, orange juice, dried fruit, and nuts time to settle together.
Once the cake has cooled completely, wrap it properly and store it according to your serving schedule. Room temperature, refrigerator, and freezer storage are all options.
This make-ahead flexibility is especially helpful during the holidays. You can finish dessert before the busiest cooking day arrives.
Helpful Notes for Best Results
Soaking the dried fruit in orange juice overnight can add even more flavor. Drain any excess liquid before adding the fruit to the batter.
Both pecans and walnuts work well. Use your favorite or whichever one you have available.
Do not overbake the cake. Begin checking for doneness at 1 hour 15 minutes because the inside should stay moist.
For a pretty finish, brush the top with warm apricot jam or a sugar glaze after baking. This gives the loaf a more polished look.
For a warm spiced version, add cinnamon, nutmeg, or allspice. These spices can deepen the holiday flavor.
Flavor Variations
Orange-Soaked Fruit Version
For more flavor, soak the dried fruit in orange juice overnight. This gives the fruit extra moisture and brightness.
Drain the excess liquid before adding the fruit to the dry ingredients. This keeps the batter balanced.
Walnut Fruit Cake
Walnuts can be used instead of pecans. They provide crunch and work well with the dried fruit and molasses.
Use the same amount as the pecans. The method stays the same.
Glazed Fruit Cake
After baking, brush the top with warm apricot jam or a sugar glaze. This gives the loaf a shiny, finished appearance.
Use this option when serving the cake for a special occasion. It makes the top look more elegant without changing the base recipe.
Warm Spiced Fruit Cake
Add cinnamon, nutmeg, or allspice for a spiced version. These flavors fit naturally with the fruit, molasses, and orange juice.
Use this variation when you want a warmer holiday flavor. The cake will still keep its old-fashioned character.
Troubleshooting
Why Did My Fruit Sink?
The fruit and nuts may not have been coated in the dry mixture before the wet ingredients were added. Stirring them into the flour mixture helps suspend them evenly.
Make sure the dried fruit and pecans are well distributed before adding the wet ingredients. This helps prevent sinking during baking.
Why Is My Cake Dry?
The cake may have been overbaked. Begin checking for doneness at 1 hour 15 minutes.
The toothpick should come out clean, but the cake should still be moist inside. Do not bake longer than needed.
Why Is My Batter So Thick?
Fruit cake batter is naturally thick because it contains a large amount of dried fruit and nuts. This is normal.
Use a wooden spoon or spatula to stir gently. Spread the batter into the pan rather than expecting it to pour like a thinner cake batter.
Why Should the Cake Rest Before Serving?
The recipe notes that fruit cake tastes better after sitting a day or two. The flavors deepen and the texture improves.
Resting gives the dried fruit, orange juice, molasses, and pecans time to settle together. This makes each slice taste more developed.
Frequently Asked Questions
Can I Use Different Fruits in This Fruit Cake?
Yes, you can use raisins, dried cranberries, chopped dates, dried apricots, cherries, pineapple, or any combination you like. The recipe is flexible with the fruit mixture.
Use 32 oz mixed dried fruit total. Keeping the amount the same helps preserve the structure of the cake.
Does This Fruit Cake Need Alcohol?
No, this is an alcohol-free fruit cake. It is made with orange juice and molasses for flavor and moisture.
That makes it a good choice for families and anyone avoiding spirits. It still has a rich, old-fashioned flavor.
How Do I Keep the Fruit From Sinking?
Mix the dried fruit and nuts with the flour mixture before adding the wet ingredients. This helps suspend them evenly throughout the cake.
Do not skip this step. It is one of the most important techniques in the recipe.
Can I Double This Recipe?
Yes, you can double the ingredients and divide the batter between two loaf pans. Adjust the baking time slightly as needed.
Test each loaf for doneness with a toothpick. The cakes are done when the toothpick inserted into the center comes out clean.
Can I Bake This in a Bundt Pan?
Yes, this cake can be baked in a bundt pan. Check for doneness at 1 hour 20 minutes.
Because pan shape can affect baking time, use the toothpick test. The cake should be fully baked in the center.
Can I Bake This in Mini Loaf Pans?
Yes, mini loaf pans can be used. Bake for 35 to 45 minutes.
Begin checking near the earlier end of the range. Smaller loaves bake faster than one large loaf.
Can I Make This Cake Ahead?
Yes, and it is actually recommended. The cake tastes better after sitting a day or two.
Bake it a few days before serving, let it cool completely, then wrap and store it properly. This makes holiday planning much easier.
Why This Fruit Cake Is Perfect for the Holidays
This fruit cake has all the qualities that make a holiday dessert useful. It stores well, travels well, improves after resting, and slices cleanly once cooled.
It also feels nostalgic without being complicated. The molasses, orange juice, dried fruit, and pecans give it that classic festive flavor.
Because it is alcohol-free, it is easy to share with a wider group. It can be served at Christmas, Thanksgiving, or any festive gathering.
It also makes a thoughtful homemade gift. Wrapped properly, it keeps well and feels personal.
A loaf of fruit cake on the counter can make the whole kitchen feel prepared for the season. It is simple, sturdy, and full of old-fashioned comfort.
Final Thoughts
Never Fail Fruit Cake (Old-Fashioned Style) is a holiday classic built on dependable ingredients and simple steps. With flour, sugar, baking powder, salt, mixed dried fruit, pecans, eggs, orange juice, softened butter, and molasses, it bakes into a moist, rich loaf filled with texture and flavor.
The cake is dense yet tender, sweet but balanced, and packed with fruit and nuts in every slice. It does not need alcohol to feel festive, and it does not need complicated preparation to turn out beautifully.
The key details are simple: coat the fruit and nuts in the dry mixture, combine the wet ingredients until glossy, stir gently, avoid overmixing, bake at 325°F (163°C), and begin checking at 1 hour 15 minutes. Let the cake cool properly, then give it time to rest if you can.
Whether you serve it plain, dusted with powdered sugar, topped with whipped cream, paired with hot tea, or wrapped as a homemade gift, this fruit cake brings old-fashioned holiday warmth to the table. It is the kind of recipe that earns its name by being reliable, comforting, and worth making again year after year.
Never Fail Fruit Cake – Old-Fashioned Style
This old-fashioned fruit cake is dense, moist, and filled with dried fruit, chopped pecans, molasses, and bright orange flavor. The rich texture and deep holiday spices make it a comforting classic for seasonal gatherings. It is a dependable make-ahead dessert for Christmas, Thanksgiving, or homemade gifting, with a sturdy crumb that stores and freezes well.
Recipe Details
- Prep Time: 15 minutes
- Cook Time: 1 hour 30 minutes
- Total Time: 1 hour 45 minutes
- Servings: 12
- Calories: 320 kcal
Ingredients
- 32 oz mixed dried fruit raisins, cherries, pineapple, etc.
- 1 cup chopped pecans
- 2 cups all-purpose flour
- 1½ cups sugar
- ½ teaspoon baking powder
- 1 teaspoon salt
- 3 large eggs
- ½ cup orange juice
- ¼ cup molasses
- ¼ cup softened butter
Instructions
Step 1: Prepare the Oven and Pan
Preheat the oven to 325°F (163°C). Grease and flour a 9×5-inch loaf pan.
Step 2: Combine the Dry Ingredients
In a large bowl, mix the all-purpose flour, sugar, baking powder, and salt until evenly blended.
Step 3: Coat the Fruit and Pecans
Add the mixed dried fruit and chopped pecans to the dry ingredients. Stir until the fruit and nuts are well coated.
Step 4: Mix the Wet Ingredients
In a separate bowl, beat the eggs. Add the orange juice, softened butter, and molasses, then mix until combined.
Step 5: Make the Batter
Pour the wet mixture into the bowl with the dry ingredients. Stir gently until the batter is just combined.
Step 6: Fill the Loaf Pan
Transfer the batter to the prepared loaf pan and smooth the top into an even layer.
Step 7: Bake the Fruit Cake
Bake for 1 hour 15 minutes to 1 hour 30 minutes, or until a toothpick inserted into the center comes out clean.
Step 8: Cool Completely
Let the cake cool in the pan for 15 minutes. Transfer it to a wire rack and allow it to cool completely before storing or slicing.
Notes
For the best texture, wrap the cooled cake in parchment and keep it in an airtight container.
For extra moisture, soak the dried fruit in orange juice overnight before making the batter.
Cinnamon or nutmeg may be added for a warmer flavor.
The cake freezes well for up to 3 months. Thaw it overnight before serving.
Serving Suggestions
- Serve thin slices with hot coffee or tea.
- Add the cake to a Christmas or Thanksgiving dessert table.
- Pair with whipped cream for a simple finishing touch.
- Package individual loaves or slices for holiday gifts.
- Serve alongside fresh orange slices or seasonal fruit.
Storage
How to Store
Wrap the completely cooled fruit cake in parchment and place it in an airtight container to help preserve its moisture and texture.
How to Freeze
Wrap the cooled cake securely and store it in a freezer-safe container for up to 3 months.
How to Thaw
Thaw the frozen cake overnight before slicing and serving.
Best Texture Tip
Allow the cake to cool completely before wrapping it. Soaking the dried fruit in orange juice overnight can also help produce an especially moist texture.

Fernando is the creator and writer behind the food blog Eating with your Hands. Living and working in cities like Paris, Barcelona, and Berlin, and being married to a Canadian foodie, has given Fernando a passion and interest in food and inspired him to run EWYH.