
Some recipes feel like they belong to quiet afternoons, the kind where the kitchen is warm, the counter is a little messy, and something sweet is coming together without any rush. No Bake Chocolate Oatmeal Bars have that kind of comfort built into every chewy, chocolatey bite.
They remind me of the simple treats that made ordinary days feel special. The smell of butter and brown sugar melting together, the richness of chocolate chips softening into the oats, and the creamy peanut butter tying everything together all create a dessert that feels nostalgic and deeply comforting.
What makes these bars so lovable is how little they ask from you. There is no oven, no complicated technique, and no long wait for baking.
You simply melt, stir, press, chill, and slice. In just 15 minutes of prep time, you can have a pan of sweet, chewy oatmeal chocolate bars ready to set in the refrigerator.
Table of Contents
- What Are No Bake Chocolate Oatmeal Bars?
- Why This Recipe Feels So Comforting
- Recipe Overview
- Why You’ll Love No Bake Chocolate Oatmeal Bars
- Ingredients You’ll Need
- Ingredient Notes
- Directions
- Step 1: Gather the Ingredients
- Step 2: Prepare the Baking Dish
- Step 3: Soften the Butter
- Step 4: Pack the Brown Sugar
- Step 5: Add Butter and Brown Sugar to the Saucepan
- Step 6: Melt Until Smooth and Bubbly
- Step 7: Remove From Heat
- Step 8: Stir in the Vanilla Extract
- Step 9: Add the Rolled Oats
- Step 10: Add the Chocolate Chips
- Step 11: Add the Peanut Butter
- Step 12: Mix Until Fully Combined
- Step 13: Add Optional Reserved Chocolate Chips
- Step 14: Transfer the Mixture to the Dish
- Step 15: Press the Mixture Firmly
- Step 16: Smooth the Top
- Step 17: Add Optional Toppings
- Step 18: Chill the Bars
- Step 19: Lift the Bars From the Dish
- Step 20: Slice Into 12 Bars
- Step 21: Add a Chocolate Drizzle
- Step 22: Serve the Bars
- Pro Tips for the Best No Bake Chocolate Oatmeal Bars
- Variations
- Serving Suggestions
- Storage Tips
- Freezing Instructions
- Make-Ahead Instructions
- Common Mistakes to Avoid
- Helpful Notes
- Frequently Asked Questions
- Final Thoughts
- No Bake Chocolate Oatmeal Bars
What Are No Bake Chocolate Oatmeal Bars?
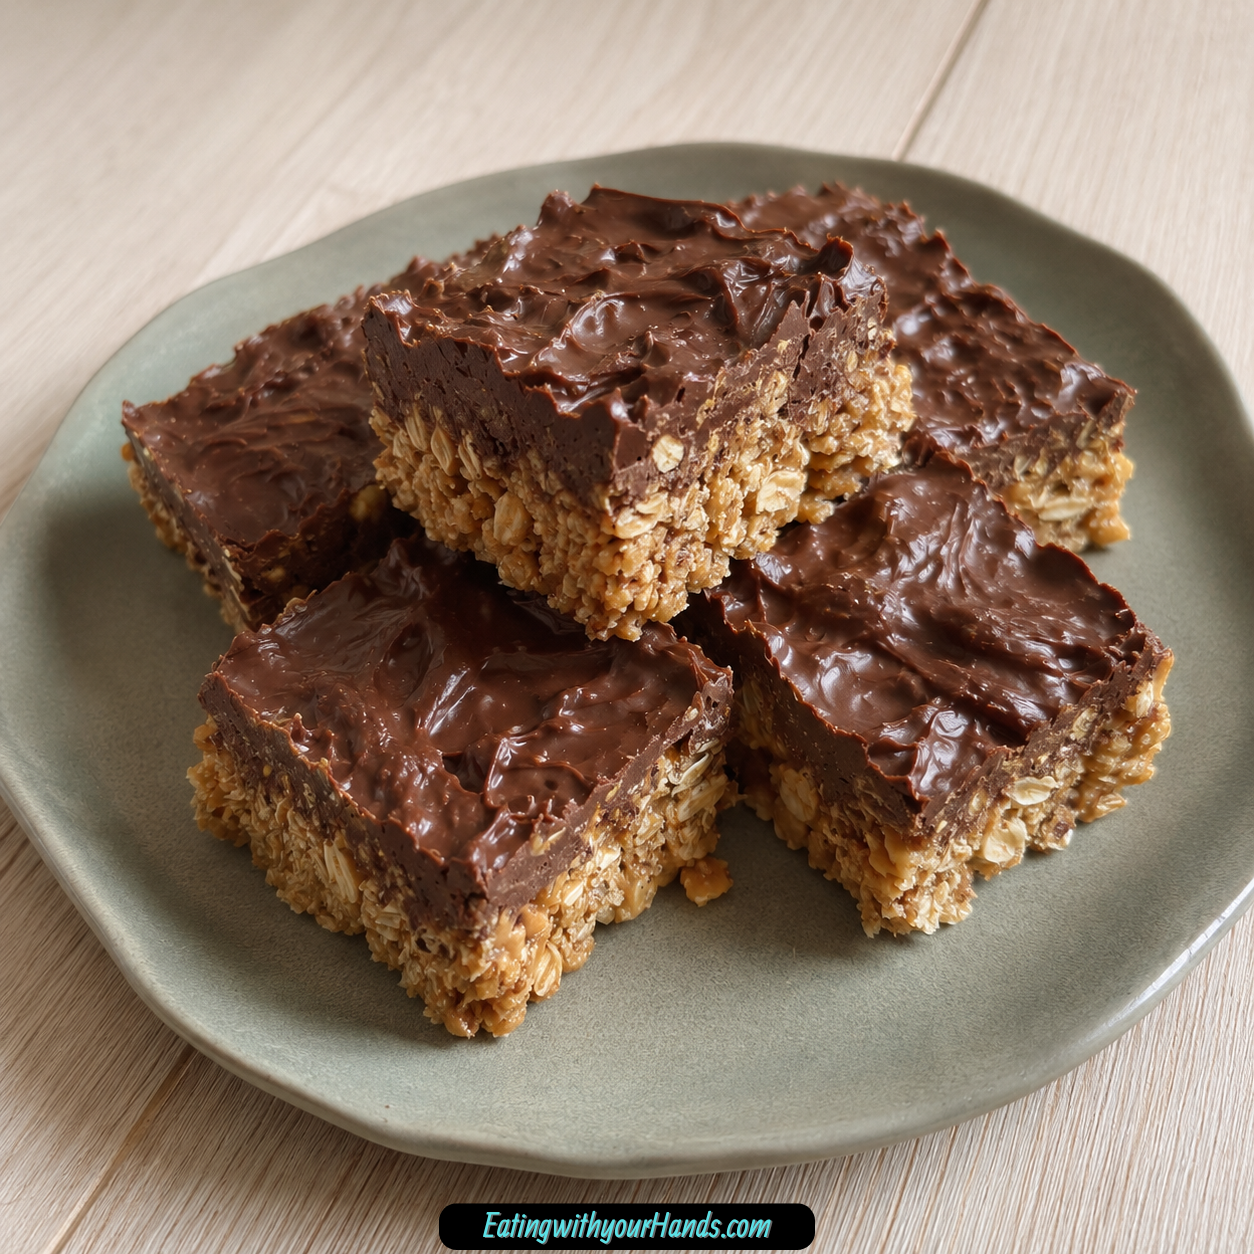
No Bake Chocolate Oatmeal Bars are easy refrigerator-set dessert bars made with butter, brown sugar, vanilla extract, rolled oats, chocolate chips, and peanut butter. The mixture is warmed on the stovetop, pressed into a dish, chilled until firm, and cut into bars.
They are soft, chewy, sweet, and rich with chocolate-peanut butter flavor. The oats give them structure and a hearty texture, while the chocolate and peanut butter make them feel indulgent.
Because they require no baking, they are perfect for busy days, warm weather, beginner cooks, or anyone who wants a homemade treat without turning on the oven. They are also easy to make ahead, which makes them practical for snacks, lunchbox treats, gatherings, and quick desserts.
These bars are loved by both kids and adults because they taste familiar and comforting. They are simple, but that simplicity is exactly what makes them feel like a classic.
Why This Recipe Feels So Comforting
There is something timeless about the combination of chocolate, oats, and peanut butter. It is sweet, cozy, and satisfying without feeling overly complicated.
The brown sugar and butter melt together into a warm, rich base that coats the oats. This gives the bars a soft chew and a deep sweetness.
The chocolate chips melt slightly into the mixture, creating pockets of chocolate throughout the bars. The peanut butter adds creaminess and helps bring everything together.
These bars also feel comforting because they are easy to share. A square of chocolate oatmeal goodness served with milk, tea, or coffee can turn a simple afternoon into something memorable.
Recipe Overview
Prep Time: 15 minutes
Cook Time: 0 minutes
Total Time: 15 minutes
Servings: 12 bars
This recipe takes only 15 minutes of hands-on time. The bars do need to chill for at least 1 hour so they can set properly, but there is no baking required.
The recipe makes 12 bars, which is perfect for a small gathering, weekly snacks, or a family dessert. You can cut them into squares or rectangles depending on how you want to serve them.
Why You’ll Love No Bake Chocolate Oatmeal Bars
You will love these bars because they come together quickly. In just 15 minutes, the mixture is ready to press into the pan.
The ingredients are simple pantry staples. Butter, brown sugar, vanilla, rolled oats, chocolate chips, and peanut butter create a classic flavor without needing anything fancy.
This recipe is beginner-friendly. You do not need baking skills, a mixer, or special equipment.
They are perfect for gatherings because they are easy to slice, serve, and transport. They make a great treat for parties, picnics, family get-togethers, or casual snack trays.
They are also make-ahead friendly. You can prepare them in advance and keep them chilled for quick snacks or desserts throughout the week.
Ingredients You’ll Need
1 cup butter: Softened for easy melting.
½ cup brown sugar: Packed for richer sweetness.
1 teaspoon vanilla extract: Adds a warm, aromatic flavor.
3 cups rolled oats: Use old-fashioned oats for the best texture.
1 cup semisweet or dark chocolate chips: Choose high-quality chocolate for a richer taste.
½ cup peanut butter: Creamy or crunchy, depending on your preference.
Ingredient Notes
Butter creates the rich base of the bars. It melts with the brown sugar and helps coat the oats.
Brown sugar gives the bars deeper sweetness than white sugar. Make sure it is packed into the measuring cup so the bars have the right flavor and texture.
Vanilla extract adds warmth. It makes the chocolate and peanut butter taste fuller and more rounded.
Rolled oats are important for texture. Old-fashioned oats give the bars a chewy structure that holds together well.
Chocolate chips bring richness and sweetness. Semisweet chocolate gives a classic flavor, while dark chocolate creates a deeper taste.
Peanut butter adds creaminess and helps bind the bars. Creamy peanut butter gives a smooth texture, while crunchy peanut butter adds little bits of texture.
For a nut-free version, sunflower seed butter can be used instead of peanut butter. If needed, use gluten-free oats and nut-free chocolate chips to adjust the recipe for allergies.
Directions
Step 1: Gather the Ingredients
Start by gathering the butter, brown sugar, vanilla extract, rolled oats, chocolate chips, and peanut butter. Measure everything before you begin.
This recipe moves quickly once the butter and sugar are melted, so it helps to have each ingredient ready. You do not want to stop in the middle to search for oats or peanut butter.
Place the ingredients near the stovetop and set out your mixing tools. A medium saucepan, spatula, measuring cups, and a 9×9-inch baking dish will make the process smooth.
Step 2: Prepare the Baking Dish
Grease a 9×9-inch baking dish with butter or line it with parchment paper. Parchment paper is especially helpful because it allows you to lift the bars out easily after chilling.
If you use parchment, leave a little overhang on the sides. This creates handles for removing the set bars from the dish.
Preparing the dish before cooking the mixture is important. Once the oatmeal mixture is ready, you will want to press it into the pan right away.
Step 3: Soften the Butter
Use 1 cup of butter that has been softened for easy melting. You can leave it at room temperature for about 30 minutes.
If you need to soften it quickly, microwave it for 10 to 15 seconds until just softened or barely melted. Avoid overheating it too much before it goes into the saucepan.
Soft butter melts more evenly with the brown sugar. This helps create a smooth base for the bars.
Step 4: Pack the Brown Sugar
Measure ½ cup brown sugar and pack it firmly into the measuring cup. This ensures you get the right amount of sweetness.
Brown sugar gives the bars a deeper, warmer flavor. Packing it properly helps the mixture taste rich and balanced.
Level off the top after packing. This keeps the measurement accurate.
Step 5: Add Butter and Brown Sugar to the Saucepan
Place the butter and packed brown sugar into a medium saucepan. Set the saucepan over medium heat.
As the butter melts, the brown sugar will begin to dissolve into it. Stir constantly so the mixture becomes smooth.
Do not rush this step with very high heat. Medium heat gives you better control and helps prevent scorching.
Step 6: Melt Until Smooth and Bubbly
Continue stirring the butter and brown sugar until the mixture is smooth and bubbly. It should look glossy and fully combined.
This step creates the sweet base that coats the oats. If the butter and sugar are not melted properly, the bars may not hold together as well.
Keep stirring gently but steadily. You want the mixture to come together without burning.
Step 7: Remove From Heat
Once the butter and brown sugar mixture is smooth and bubbly, remove the saucepan from the heat. Set it on a heat-safe surface.
Removing it from the heat prevents the mixture from cooking too long. You want it warm enough to blend with the other ingredients, but not overheated.
The rest of the ingredients will be stirred in quickly while the mixture is still warm. This helps the chocolate chips soften slightly.
Step 8: Stir in the Vanilla Extract
Add 1 teaspoon vanilla extract to the warm butter and sugar mixture. Stir until fully incorporated.
The vanilla adds a warm aroma and enhances the sweetness of the bars. It also blends beautifully with chocolate and peanut butter.
Stir right away so the vanilla spreads evenly through the mixture. This gives the whole batch a better flavor.
Step 9: Add the Rolled Oats
Add 3 cups rolled oats to the saucepan. Stir until the oats are coated in the warm butter and brown sugar mixture.
Use old-fashioned rolled oats for the best texture. Quick oats can make the bars too soft or mushy.
The oats should look glossy and evenly coated. This coating is what helps the bars become chewy and structured after chilling.
Step 10: Add the Chocolate Chips
Add 1 cup semisweet or dark chocolate chips to the saucepan. Stir them into the warm oat mixture.
The chocolate chips will begin to melt slightly from the heat. This creates little ribbons of chocolate throughout the bars.
If you prefer a chunkier texture, reserve a handful of chocolate chips to sprinkle on top later. This gives the finished bars visible chocolate pieces.
Step 11: Add the Peanut Butter
Add ½ cup peanut butter to the saucepan. Stir until it blends into the oats and chocolate.
The peanut butter adds creaminess and helps the mixture hold together. It also gives the bars their rich, nutty flavor.
Use creamy peanut butter for a smoother bar or crunchy peanut butter for more texture. Both options work well.
Step 12: Mix Until Fully Combined
Continue stirring until the oats, chocolate, and peanut butter are evenly combined. The mixture should be thick, sticky, and chocolatey.
Make sure there are no dry pockets of oats. Every part of the mixture should be coated.
This step is important for bars that hold together nicely. A well-mixed base creates a better final texture.
Step 13: Add Optional Reserved Chocolate Chips
If you reserved a handful of chocolate chips, sprinkle them into the mixture now or save them for the top. This creates a chunkier, more chocolate-forward texture.
If adding them into the warm mixture, they may soften slightly. If adding them on top, they will stay more visible.
This step is optional, but it makes the bars feel a little more special. Extra chocolate always adds charm.
Step 14: Transfer the Mixture to the Dish
Pour the oatmeal mixture into the prepared 9×9-inch baking dish. Use a spatula to scrape all of it from the saucepan.
Spread the mixture toward the corners. It will be thick, so take your time.
Try to create an even layer across the entire dish. This helps the bars set evenly and slice neatly.
Step 15: Press the Mixture Firmly
Use a spatula or your hands to press the mixture firmly into the dish. Make sure it is compacted well.
This step helps the bars hold their shape when cut. If the mixture is not pressed firmly enough, the bars may crumble.
Dampen your hands slightly if the mixture sticks. This makes pressing much easier.
Step 16: Smooth the Top
After pressing the mixture down, smooth the top with a spatula. Try to make the surface even.
A smooth top makes the bars look cleaner once sliced. It also helps any optional drizzle or topping sit nicely.
Press into the corners especially well. The edges should be just as compact as the center.
Step 17: Add Optional Toppings
For extra texture, sprinkle shredded coconut, chopped nuts, or reserved chocolate chips over the top. Press them gently into the surface.
This step is optional, but it lets you customize the bars. A topping can make them look more inviting.
You can also add a pinch of sea salt for a sweet-salty finish. It enhances the chocolate flavor beautifully.
Step 18: Chill the Bars
Place the dish in the refrigerator and chill for at least 1 hour. This allows the bars to set properly.
Chilling is what gives the bars their structure. Without enough time in the fridge, they may be too soft to cut cleanly.
Be patient with this step. A fully chilled bar will have a better texture and cleaner edges.
Step 19: Lift the Bars From the Dish
Once the bars are set, remove them from the refrigerator. If you used parchment paper, lift the bars out using the overhanging edges.
Place the slab on a cutting board. This makes slicing easier and cleaner.
If you greased the dish instead of using parchment, carefully cut the bars directly in the pan. Use a sharp knife for best results.
Step 20: Slice Into 12 Bars
Cut the chilled mixture into 12 equal squares or rectangles. Use a sharp knife for clean edges.
If the knife sticks, wipe it between cuts. This helps the bars look neat.
You can cut them smaller for bite-sized snacks or larger for a more generous dessert. The recipe is flexible.
Step 21: Add a Chocolate Drizzle
For a fun presentation, drizzle melted chocolate over the bars before or after cutting. This makes them look more polished.
The drizzle adds extra chocolate flavor and a pretty finish. It is optional, but it makes the bars feel special for gatherings.
Let the drizzle set before stacking or storing. This helps prevent smearing.
Step 22: Serve the Bars
Serve the bars chilled or slightly softened. They are delicious as a snack, dessert, or afternoon treat.
Pair them with a glass of milk, a warm cup of tea, or coffee. The chocolate and oats make them especially satisfying.
Keep any bars you are not serving in the refrigerator. They hold their shape best when chilled.

Pro Tips for the Best No Bake Chocolate Oatmeal Bars
Use old-fashioned rolled oats for the best chewy texture. Quick oats can make the bars too soft.
Melt the butter and brown sugar fully. A smooth base helps the bars hold together.
Press the mixture firmly into the dish. This prevents crumbly bars.
Let the bars chill completely before cutting. Clean slices need proper setting time.
Use high-quality chocolate chips for richer flavor. Simple recipes taste best when the main ingredients are good.
Variations
Add 1 teaspoon cinnamon for a warm flavor twist. It pairs beautifully with oats and chocolate.
Sprinkle in a pinch of sea salt to enhance the chocolate flavor. This creates a sweet-salty balance.
Incorporate dried cranberries during the fall for a seasonal touch. They add chewiness and a bit of tart flavor.
Add pumpkin spice for a cozy autumn variation. It gives the bars a warm, seasonal aroma.
Top with shredded coconut or chopped nuts for extra texture. These toppings make the bars feel more layered.
Use almond butter or sunflower seed butter instead of peanut butter. This changes the flavor and can help with nut-free needs.
Swap in dairy-free chocolate chips for a vegan-style treat, depending on your other ingredient choices. Make sure all ingredients match the dietary need.
Serving Suggestions
Serve No Bake Chocolate Oatmeal Bars as a quick snack or simple dessert. They are easy to grab from the refrigerator whenever you want something sweet.
They are also great for gatherings because they can be cut ahead of time and arranged on a platter. Their chewy texture makes them easy to serve without utensils.
For a richer presentation, drizzle melted chocolate over the top. This makes them look more like a finished dessert.
Pair them with milk for a classic treat. A warm cup of tea also works beautifully for an afternoon snack.
You can serve them chilled for a firmer bite or let them sit briefly at room temperature for a softer texture. Both ways are delicious.
Storage Tips
Store the bars in an airtight container in the refrigerator for up to 1 week. Keeping them chilled helps them stay firm and fresh.
If stacking the bars, place parchment paper between layers. This prevents sticking and keeps the tops clean.
The bars may soften if left out too long. Return them to the refrigerator if they begin to lose their shape.
For best flavor and texture, enjoy them cold or slightly softened. They are easy to keep ready for quick snacks.
Freezing Instructions
These bars can be frozen for up to 3 months. Wrap them tightly in plastic wrap or place them in an airtight container.
If freezing multiple bars together, separate layers with parchment paper. This makes it easier to remove one at a time.
Thaw the bars in the refrigerator overnight before serving. This helps them soften gradually while keeping their texture.
Freezing is a great option if you want to make a batch ahead for future snacks. They are convenient and easy to portion.
Make-Ahead Instructions
No Bake Chocolate Oatmeal Bars are perfect for making ahead. You can prepare them a day or two in advance and store them in the refrigerator.
They actually benefit from chilling because the texture becomes firmer and easier to slice. This makes them ideal for parties or busy weeks.
If making ahead for a gathering, wait to add any chocolate drizzle until closer to serving if you want the freshest look. Otherwise, fully assemble and chill until needed.
Keep them covered so they do not absorb refrigerator odors. An airtight container works best.
Common Mistakes to Avoid
Not melting the butter and brown sugar properly can affect the texture. Make sure the mixture is smooth and combined.
Using quick oats instead of rolled oats can make the bars mushy. Old-fashioned rolled oats give the best chew.
Not pressing the mixture firmly can lead to crumbly bars. Compact the mixture well in the dish.
Cutting too soon can create messy edges. Chill the bars fully before slicing.
Skipping parchment paper can make removal harder. It is not required, but it makes the process easier.
Helpful Notes
You can swap peanut butter for almond butter or sunflower seed butter. This changes the flavor and can make the bars more allergy-friendly.
If the mixture seems too crumbly, add a touch of honey or maple syrup to help bind it. Add only a small amount so the texture does not become too sticky.
Mini marshmallows or dried fruits can be added for extra sweetness and texture. Fold them in gently.
Use nut-free chocolate chips if you are accommodating nut allergies. Also make sure your oats are gluten-free if needed.
For a dairy-free version, choose dairy-free chocolate chips and make sure the butter substitute works well in no-bake bars. The flavor and texture may vary slightly.
Frequently Asked Questions
Can No Bake Chocolate Oatmeal Bars Be Frozen?
Yes, these bars can be frozen. Wrap them tightly in plastic wrap or place them in an airtight container.
They will keep well in the freezer for up to 3 months. When ready to enjoy, thaw them in the refrigerator overnight.
Can Ingredients Be Substituted?
Yes, the ingredients can be substituted. Peanut butter can be replaced with almond butter or sunflower seed butter.
You can also use honey or maple syrup in place of brown sugar if you prefer a different sweetener. Keep in mind that this may slightly change the texture.
How Should I Store Leftovers?
Store leftover bars in an airtight container in the refrigerator. They will stay fresh for up to 1 week.
For the best taste and texture, keep them chilled until you are ready to eat. They hold together better when cold.
Can This Recipe Be Made Ahead?
Yes, this recipe is excellent for making ahead. Prepare the bars a day or two in advance and keep them refrigerated.
They are convenient for busy days because you can grab a bar whenever you need a quick snack or dessert.
Why Are My Bars Crumbly?
The mixture may not have been pressed firmly enough into the dish. Compacting it well helps the bars hold together.
The mixture may also need a little more binding. If it seems too dry, a small touch of honey or maple syrup can help.
Why Are My Bars Too Soft?
The bars may not have chilled long enough. Refrigerate them for at least 1 hour before cutting.
They may also soften if left at room temperature for too long. Store them in the refrigerator for the best structure.
What Oats Should I Use?
Old-fashioned rolled oats are best for this recipe. They give the bars a chewy, sturdy texture.
Quick oats can make the bars too soft or mushy. Rolled oats create a better bite.
Final Thoughts
No Bake Chocolate Oatmeal Bars are the kind of recipe that proves simple treats can be the most memorable. With butter, brown sugar, vanilla, rolled oats, chocolate chips, and peanut butter, you can create a chewy, sweet, chocolatey dessert without turning on the oven.
They come together quickly, chill beautifully, and slice into bars that are perfect for snacks, gatherings, lunchboxes, or quiet afternoons at home. Their soft texture and rich flavor make them comforting in the most familiar way.
What makes this recipe so special is its ease. You can make it with pantry staples, no baking skills, and very little time, yet the result feels homemade and full of warmth.
Share them with family, serve them with a glass of milk or a cup of tea, and let these simple bars become one of those recipes you return to again and again. Every bite is sweet, chewy, chocolatey, and full of the cozy comfort that makes no-bake desserts so beloved.
No Bake Chocolate Oatmeal Bars

These No Bake Chocolate Oatmeal Bars are quick, rich, chewy, and easy to prepare without turning on the oven. Made with rolled oats, butter, brown sugar, chocolate chips, peanut butter, and vanilla, they are a simple snack or sweet treat that sets beautifully in the refrigerator.
Recipe Information
- Prep Time: 15 minutes
- Total Time: 15 minutes
- Course: Snack
- Cuisine: American
- Servings: 12 bars
- Calories: 200 kcal
Ingredients
For the Bars
- 3 cups rolled oats
Give the bars a chewy texture and hearty oat base. - 1 teaspoon vanilla extract
Adds warm flavor and helps round out the sweetness. - ½ cup peanut butter
Adds creaminess, nutty flavor, and helps bind the bars together. - 1 cup butter
Creates a rich base and helps the mixture set. - 1 cup semisweet or dark chocolate chips
Adds deep chocolate flavor throughout the bars. - ½ cup brown sugar, packed
Sweetens the bars and adds a light caramel-like flavor.
Instructions
- Add the butter and packed brown sugar to a saucepan.
- Melt them together over medium heat, stirring until the mixture is smooth.
- Remove the saucepan from the heat.
- Stir in the vanilla extract, rolled oats, chocolate chips, and peanut butter.
- Mix until everything is fully combined and evenly coated.
- Press the mixture firmly into a greased baking dish.
- Refrigerate until the bars are set and firm enough to slice.
- Cut into bars and serve.
Notes
- Store these bars in the refrigerator for up to one week.
- Press the mixture firmly into the dish so the bars hold their shape when sliced.
- Use semisweet chocolate chips for a sweeter flavor or dark chocolate chips for a richer taste.

Fernando is the creator and writer behind the food blog Eating with your Hands. Living and working in cities like Paris, Barcelona, and Berlin, and being married to a Canadian foodie, has given Fernando a passion and interest in food and inspired him to run EWYH.