
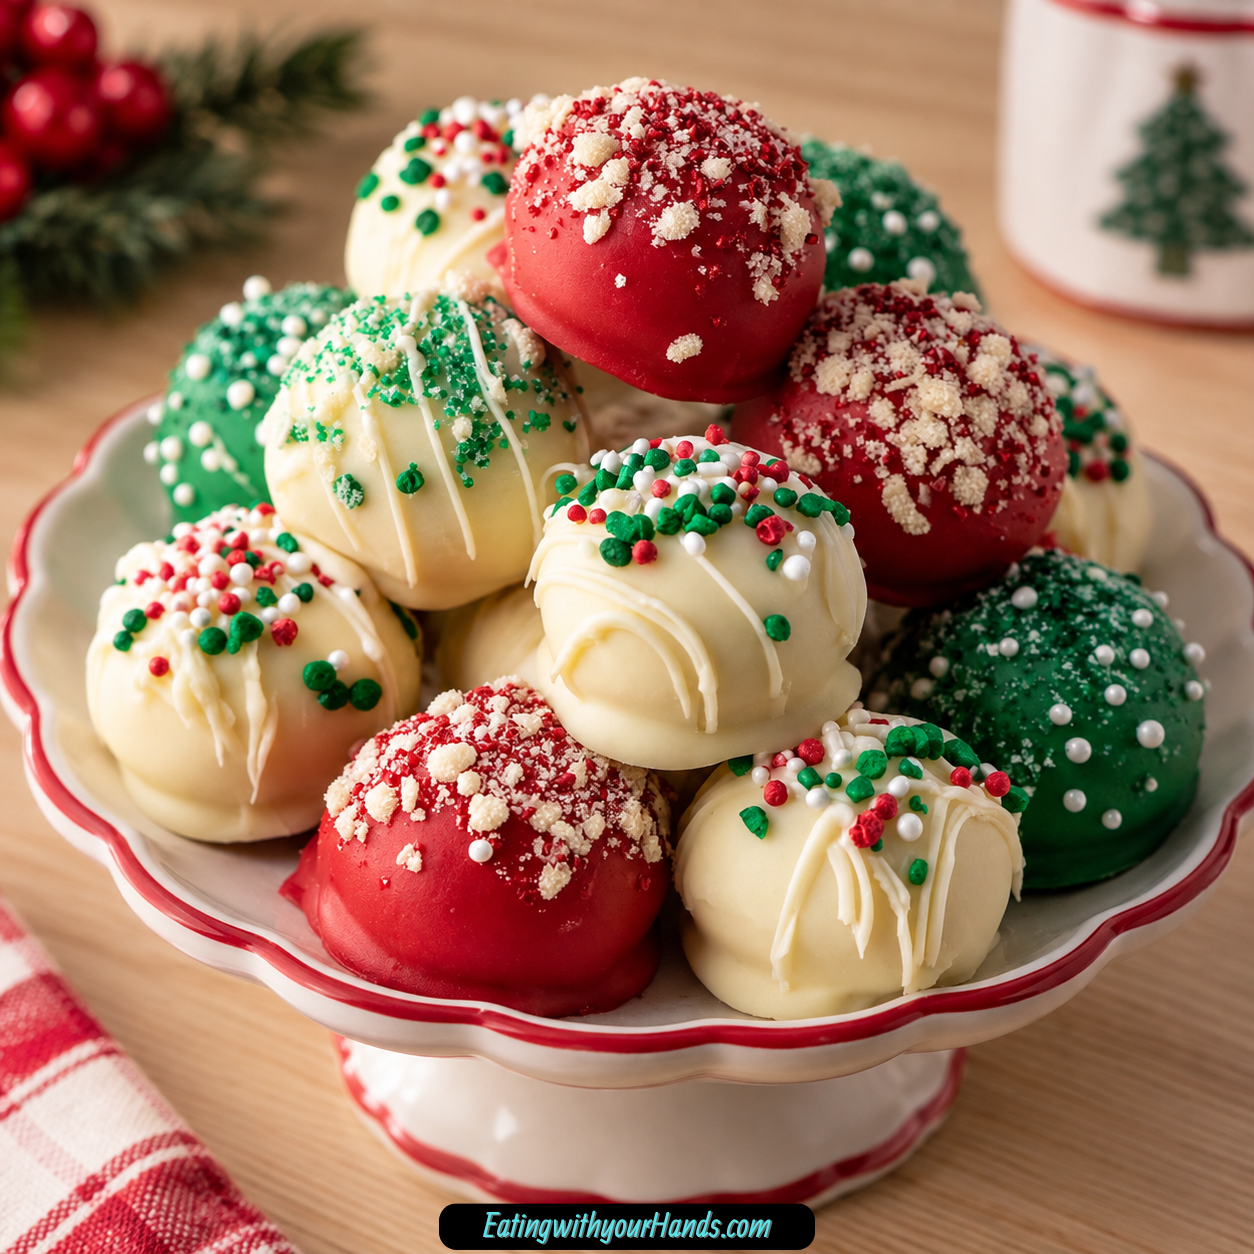
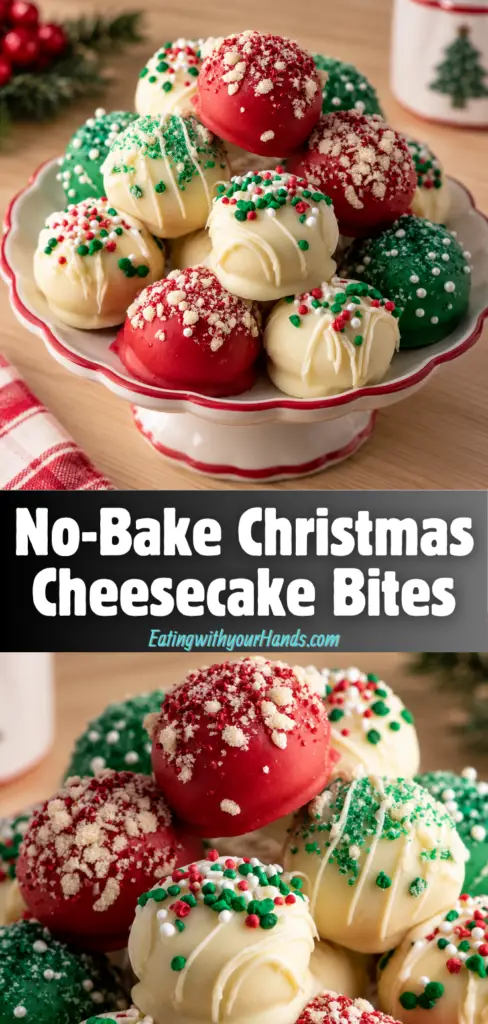
No-Bake Christmas Cheesecake Bites are the kind of little holiday treat that makes December feel instantly sweeter. They are creamy in the center, coated in smooth white chocolate or almond bark, decorated with red and green candy melts, and finished with holiday sprinkles for a cheerful Christmas look.
These bites are perfect for the season when the kitchen is busy, the oven is already working hard, and there are still gifts to wrap, trays to fill, and family moments to enjoy. They feel homemade and festive without asking for a complicated baking day.
The filling starts with softened cream cheese, powdered sugar, graham cracker crumbs, vanilla extract, and a pinch of salt. Once mixed together, it becomes a soft dough-like cheesecake mixture that can be rolled into bite-size balls.
After freezing, each cheesecake ball is dipped into melted white chocolate or almond bark. That firm coating creates a sweet shell around the creamy center, giving every bite a lovely contrast.
The red and green candy melts bring the holiday color. You can dip halfway, drizzle, or decorate them in a playful way before adding sprinkles.
No-Bake Christmas Cheesecake Bites are perfect for cookie trays, holiday parties, edible gift boxes, dessert platters, or cozy nights at home with hot cocoa. They are beginner-friendly, make-ahead friendly, and impressive enough to stand out on a holiday table.
Table of Contents
- Why You’ll Love These No-Bake Christmas Cheesecake Bites
- Recipe Details
- Ingredients
- Ingredient Notes
- Optional Swaps, Variations, Add-Ins, and Serving Ideas
- Why This Recipe Works
- Directions
- Step 1: Prepare the Baking Sheet
- Step 2: Soften the Cream Cheese
- Step 3: Beat the Cream Cheese
- Step 4: Add the Powdered Sugar
- Step 5: Add the Graham Cracker Crumbs
- Step 6: Add the Vanilla Extract
- Step 7: Add the Salt
- Step 8: Mix Until Fully Combined
- Step 9: Scoop the Filling
- Step 10: Roll into 1-Inch Balls
- Step 11: Place on the Baking Sheet
- Step 12: Freeze the Cheesecake Balls
- Step 13: Prepare the White Chocolate or Almond Bark
- Step 14: Melt in Short Intervals
- Step 15: Stir Until Smooth
- Step 16: Let Very Cold Bites Sit Briefly If Needed
- Step 17: Dip the First Cheesecake Bite
- Step 18: Return to the Parchment
- Step 19: Continue Dipping
- Step 20: Prepare the Candy Melts
- Step 21: Add Red Candy Melt Decoration
- Step 22: Add Green Candy Melt Decoration
- Step 23: Use Drizzle If Preferred
- Step 24: Add Holiday Sprinkles Immediately
- Step 25: Let the Coating Begin to Set
- Step 26: Refrigerate Until Firm
- Step 27: Arrange for Serving
- Step 28: Serve Chilled
- Step 29: Pair with Coffee
- Step 30: Pair with Hot Cocoa
- Step 31: Pair with Milk
- Step 32: Store in the Refrigerator
- Step 33: Stack with Parchment
- Step 34: Freeze for Later
- Step 35: Thaw Before Serving
- Serving Ideas
- Storage
- Freezing
- Make-Ahead
- Helpful Notes for Best Results
- Variations
- Troubleshooting
- Frequently Asked Questions
- Can I make No-Bake Christmas Cheesecake Bites ahead of time?
- Why did my chocolate coating crack?
- Can I use chocolate chips instead of almond bark?
- Can I skip the candy melts?
- Are these safe to freeze?
- How long do they last in the refrigerator?
- What size should I roll the bites?
- What should I serve them with?
- Why This Recipe Works So Well
- Final Thoughts
- No-Bake Christmas Cheesecake Bites
Why You’ll Love These No-Bake Christmas Cheesecake Bites
These bites require no baking. That makes them perfect for busy holiday schedules when you want something special without turning on the oven.
They have a creamy cheesecake center with a sweet chocolate shell. The inside stays soft and rich, while the outside sets into a smooth coating.
They look festive with classic red and green colors. Candy melts and sprinkles make them holiday-ready with very little effort.
They are easy to make ahead and store. You can keep them in the refrigerator for several days or freeze them for later.
They are great for cookie trays, parties, and edible gifts. Their small size makes them easy to serve and easy to package.
They are kid-friendly and fun to decorate. Rolling, dipping, drizzling, and sprinkling can turn the recipe into a cheerful holiday kitchen project.
Recipe Details
No-Bake Christmas Cheesecake Bites are a chilled no-bake dessert. The filling is mixed, rolled, frozen, dipped, decorated, and refrigerated until set.
The cheesecake center is made with 8 oz softened cream cheese, 1 cup powdered sugar, 1½ cups graham cracker crumbs, 1 teaspoon vanilla extract, and a pinch of salt.
The coating uses 12 oz white chocolate or almond bark, melted until smooth. Almond bark sets more firmly than white chocolate chips.
Red and green candy melts add the Christmas color. The bites can be dipped halfway or drizzled for a decorative effect.
Holiday sprinkles are added immediately while the coating is still wet. This helps the sprinkles stick before the chocolate sets.
The cheesecake balls should be rolled into 1-inch balls. They are placed on a parchment-lined baking sheet before freezing.
The balls must freeze for at least 30 minutes before dipping. This step is essential because it helps prevent melting during the coating process.
After decorating, the bites are refrigerated until the chocolate coating is firm. This usually takes about 20 minutes.
Store the finished bites in an airtight container in the refrigerator for up to 5 days. If stacking them, place parchment paper between the layers to prevent sticking.
They can also be frozen for up to 1 month. Thaw them in the refrigerator before serving.
Ingredients
For the Cheesecake Filling
- 8 oz cream cheese, softened
- 1 cup powdered sugar
- 1½ cups graham cracker crumbs
- 1 teaspoon vanilla extract
- Pinch of salt
For the Coating and Decoration
- 12 oz white chocolate or almond bark, melted
- Red and green candy melts
- Holiday sprinkles
Ingredient Notes
Softened cream cheese creates the creamy cheesecake center. Room-temperature cream cheese is important because it helps the filling become smooth without lumps.
Powdered sugar sweetens the cheesecake mixture. It also helps the filling firm up enough to roll into balls.
Graham cracker crumbs add structure and classic cheesecake flavor. They help turn the cream cheese mixture into a soft dough-like consistency.
Vanilla extract enhances the overall sweetness and depth of flavor. It gives the filling a warm, familiar dessert taste.
A pinch of salt balances the sweetness beautifully. It keeps the cheesecake bites from tasting flat.
White chocolate or almond bark creates the sweet outer coating. Almond bark sets more firmly than white chocolate chips.
Red and green candy melts give the bites a festive holiday look. They can be used for dipping or drizzling.
Holiday sprinkles add decoration and extra cheer. They should be added while the coating is still wet so they stick properly.
Optional Swaps, Variations, Add-Ins, and Serving Ideas
Almond Bark Cheesecake Bites
Use almond bark for the coating if you want a firmer set. The helpful notes mention that almond bark sets more firmly than white chocolate chips.
This is a great option for cookie trays and gift boxes. A firm coating helps the bites hold their shape.
White Chocolate Cheesecake Bites
Use white chocolate for the coating. It creates a sweet shell around the cheesecake filling.
If using chocolate chips instead of almond bark, the FAQ notes that you can add 1 teaspoon coconut oil to help the chocolate melt smoothly. This makes dipping easier.
Red and Green Half-Dipped Bites
Dip half the bites into melted red candy melts and the other half into green candy melts. This creates a bright Christmas look.
You can dip them halfway for a clean decorative effect. The colors make the bites look festive on a platter.
Drizzled Christmas Cheesecake Bites
Instead of dipping with candy melts, drizzle colored chocolate over the white coating. This gives the bites a decorative finish.
The FAQ notes that you can skip candy melts completely if desired. Sprinkles alone or colored chocolate drizzle can still make them pretty.
Sprinkle-Only Cheesecake Bites
Skip the candy melts and decorate with sprinkles alone. This is a simple option if you want fewer coating steps.
Add the sprinkles while the white chocolate is still wet. That way, they stick before the coating sets.
Themed Cheesecake Bites
Customize the sprinkles for different holidays or themes. This makes the same recipe easy to adapt beyond Christmas.
Different sprinkle colors can change the whole look. The cheesecake center and coating method stay the same.
Gift Box Cheesecake Bites
Place the finished bites in festive gift boxes. They make a sweet edible gift for the holidays.
Keep them chilled until gifting and serving. Their small size makes them easy to arrange neatly.
Cupcake Liner Presentation
Tuck each bite into a festive cupcake liner. This gives them a polished presentation.
Cupcake liners also help keep the bites separated. They are useful for trays, parties, and gift boxes.
Holiday Platter Serving
Arrange the chilled bites on a holiday platter. The red, green, white, and sprinkles make the plate look cheerful.
Serve them cold so the filling stays firm and creamy. They pair well with coffee, hot cocoa, or milk.
Hot Cocoa Pairing
Serve these cheesecake bites with a mug of hot cocoa. The creamy center and sweet coating feel especially cozy beside cocoa.
This pairing is perfect for a quiet holiday night. It also works well for younger guests.
Coffee Pairing
Serve the bites with coffee. The sweetness of the coating and cheesecake filling pairs nicely with a warm drink.
This makes them a lovely dessert for adults at gatherings. They are small enough to enjoy with a cup.
Milk Pairing
Serve with a glass of milk for younger guests. The milk balances the sweetness.
This is a simple, family-friendly serving idea. It works well for cookie trays and holiday dessert tables.
Why This Recipe Works
No-Bake Christmas Cheesecake Bites work because they turn classic cheesecake flavors into a small, chilled, easy-to-serve treat. The cream cheese gives the center richness, while the graham cracker crumbs give structure.
The powdered sugar sweetens and firms the mixture. It helps the filling hold its shape once rolled.
Freezing the cheesecake balls before dipping is essential. It helps the bites stay firm and prevents them from melting into the warm coating.
The white chocolate or almond bark creates a smooth shell. Once set, it protects the creamy center and gives the bites a clean finish.
The candy melts and sprinkles make the bites festive. They add the classic red and green holiday color without complicated decorating.
Refrigerating the bites after dipping lets the coating firm up. This usually takes about 20 minutes.
The recipe also works because it stores well. The bites can be refrigerated for up to 5 days or frozen for up to 1 month.
Directions
Step 1: Prepare the Baking Sheet
Line a baking sheet with parchment paper. This gives the cheesecake bites a clean surface while they freeze and set.
Parchment also makes it easier to lift the bites after dipping. Keep the baking sheet nearby before mixing the filling.
Step 2: Soften the Cream Cheese
Use 8 oz cream cheese, softened. Room-temperature cream cheese ensures a smooth, creamy filling.
Do not start with cold cream cheese if you want the smoothest texture. Soft cream cheese blends more easily and helps prevent lumps.
Step 3: Beat the Cream Cheese
Place the softened cream cheese in a large bowl. Beat it until smooth and creamy.
Make sure there are no lumps before moving on. This step sets the texture for the whole filling.
Step 4: Add the Powdered Sugar
Add 1 cup powdered sugar to the cream cheese. The powdered sugar sweetens the filling and helps it firm up.
Mix until the sugar is fully combined. Scrape the bowl if needed so no dry pockets remain.
Step 5: Add the Graham Cracker Crumbs
Add 1½ cups graham cracker crumbs. These crumbs give the filling structure and classic cheesecake flavor.
Mix them into the cream cheese mixture. The filling will begin to thicken into a soft dough-like texture.
Step 6: Add the Vanilla Extract
Add 1 teaspoon vanilla extract. Vanilla enhances the overall sweetness and depth of flavor.
Mix until the vanilla is evenly blended. The filling should smell sweet and creamy.
Step 7: Add the Salt
Add a pinch of salt. This balances the sweetness beautifully.
Even a small amount helps the filling taste more complete. Mix it in evenly.
Step 8: Mix Until Fully Combined
Continue mixing until all the filling ingredients are fully combined. The mixture should resemble a soft, dough-like consistency.
It should be firm enough to scoop and roll. If it looks uneven, mix a little longer.
Step 9: Scoop the Filling
Scoop out small portions of the cheesecake mixture. Aim for bite-size amounts.
Keeping the portions similar helps the bites look neat. It also makes dipping easier later.
Step 10: Roll into 1-Inch Balls
Roll each portion into a 1-inch ball. Use your hands to gently shape the mixture.
Do not worry if they are not perfectly round. They will smooth out once dipped.
Step 11: Place on the Baking Sheet
Place each cheesecake ball on the parchment-lined baking sheet. Leave a little space between them.
This prevents the balls from sticking together. It also makes them easier to pick up for dipping.
Step 12: Freeze the Cheesecake Balls
Place the baking sheet in the freezer. Freeze the cheesecake balls for at least 30 minutes.
This step is essential. Firm balls are much easier to dip and are less likely to melt.
Step 13: Prepare the White Chocolate or Almond Bark
Set out 12 oz white chocolate or almond bark. Place it in a microwave-safe bowl.
This will become the main coating. Almond bark sets more firmly than white chocolate chips.
Step 14: Melt in Short Intervals
Microwave the white chocolate or almond bark in 30-second intervals. Stir between each interval.
Continue until the coating is melted and smooth. Do not rush the melting process.
Step 15: Stir Until Smooth
After the final heating interval, stir well. The coating should be smooth enough for dipping.
If it thickens while dipping, reheat gently. This helps keep the coating easy to work with.
Step 16: Let Very Cold Bites Sit Briefly If Needed
If the cheesecake bites are extremely cold, let them sit out for a minute before dipping. The FAQ notes that very cold bites can cause the chocolate coating to crack.
Do not let them soften too much. They should still be firm enough to dip cleanly.
Step 17: Dip the First Cheesecake Bite
Use a fork or dipping tool to lower one frozen cheesecake ball into the melted white chocolate or almond bark. Coat it fully.
Lift it carefully from the bowl. Let the excess chocolate drip off.
Step 18: Return to the Parchment
Place the dipped cheesecake bite back onto the parchment-lined baking sheet. Set it down gently.
Repeat with the remaining cheesecake balls. Work steadily so the coating stays smooth.
Step 19: Continue Dipping
Dip each frozen cheesecake ball into the melted coating. Allow excess chocolate to drip off each one.
If the coating becomes too thick, warm it gently again. Smooth coating makes the bites look better.
Step 20: Prepare the Candy Melts
Melt the red and green candy melts. These will add the festive color.
Use them while the white chocolate coating is still wet if dipping into the candy melts. You can also use them for drizzling.
Step 21: Add Red Candy Melt Decoration
Dip some of the bites into the melted red candy melts. You can dip them halfway for a decorative effect.
The red color gives the bites a Christmas look. Let any excess drip off before setting them down.
Step 22: Add Green Candy Melt Decoration
Dip the remaining bites into melted green candy melts. You can also drizzle the green coating over the tops.
The green color balances the red. Together, the colors make the bites holiday-ready.
Step 23: Use Drizzle If Preferred
Instead of dipping, drizzle the red and green candy melts over the white coating. This gives a more delicate decorative effect.
Drizzling also works if you want to use less candy melt coating. The bites still look festive.
Step 24: Add Holiday Sprinkles Immediately
Immediately sprinkle holiday sprinkles over the tops. Work quickly so the sprinkles stick before the coating sets.
This is the decoration step that gives the bites extra cheer. Add as much or as little as you like.
Step 25: Let the Coating Begin to Set
Leave the decorated bites on the parchment-lined baking sheet. The coating will start to firm.
Keep them spaced apart so they do not touch. This helps the decoration stay neat.
Step 26: Refrigerate Until Firm
Place the baking sheet in the refrigerator. Chill until the chocolate coating is firm.
This usually takes about 20 minutes. The bites should feel set before serving or storing.
Step 27: Arrange for Serving
Once the coating is firm, arrange the bites on a holiday platter. You can also place them in festive cupcake liners.
Cupcake liners make the presentation look polished. They also help keep each bite separate.
Step 28: Serve Chilled
Serve No-Bake Christmas Cheesecake Bites chilled. The filling should be firm and creamy.
Cold bites have the best texture. They also hold their coating and decoration nicely.
Step 29: Pair with Coffee
Serve the cheesecake bites with coffee if desired. The sweet coating and creamy filling pair well with a warm drink.
This is a lovely option for holiday parties. It makes the bites feel like a small dessert treat.
Step 30: Pair with Hot Cocoa
Serve with hot cocoa for a cozy holiday pairing. This works especially well for family nights.
The cocoa makes the bites feel even more festive. It is a sweet pairing for winter evenings.
Step 31: Pair with Milk
Serve with a glass of milk for younger guests. Milk balances the sweetness.
This is a simple and kid-friendly option. It works well for cookie trays.
Step 32: Store in the Refrigerator
Place leftover cheesecake bites in an airtight container. Store them in the refrigerator for up to 5 days.
Keep them chilled so the filling stays firm. Do not leave them sitting out for long periods.
Step 33: Stack with Parchment
If stacking the bites, place parchment paper between layers. This helps prevent sticking.
The coating and decorations will stay neater. It is especially helpful for storing multiple batches.
Step 34: Freeze for Later
Freeze the cheesecake bites for up to 1 month. Place them in a freezer-safe airtight container.
They freeze very well and thaw beautifully in the refrigerator. This makes them a fantastic make-ahead option.
Step 35: Thaw Before Serving
Thaw frozen bites in the refrigerator before serving. Keep them chilled as they thaw.
Once thawed, serve cold. The filling should return to a creamy but firm texture.
Serving Ideas
No-Bake Christmas Cheesecake Bites are best served chilled. The filling stays firm and creamy, while the coating holds its shape.
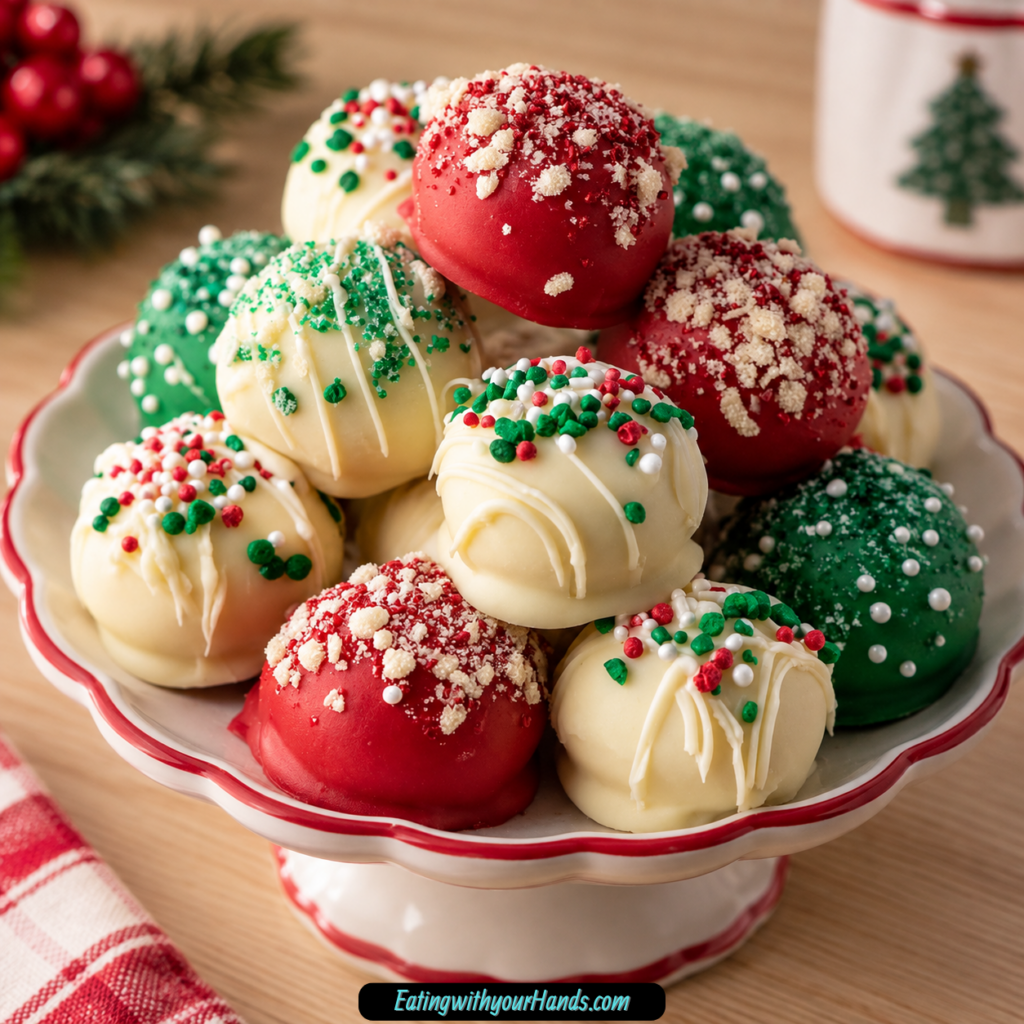
Arrange them on a holiday platter for parties. The white coating, red and green decoration, and sprinkles make them look festive with very little effort.
You can also place them in festive cupcake liners. This gives the bites a polished look and makes them easier to pick up.
These bites are perfect for cookie trays. Their small size makes them easy to tuck between cookies and other holiday sweets.
They are also wonderful for gift boxes. The coating helps them look neat, and the sprinkles add cheerful color.
Serve them with coffee, hot cocoa, or milk. Each pairing works for a different kind of holiday moment, from grown-up gatherings to cozy family nights.
Storage
Store No-Bake Christmas Cheesecake Bites in an airtight container in the refrigerator. They will keep for up to 5 days.
If stacking, place parchment paper between layers to prevent sticking. This helps protect the coating and decoration.
Keep the bites chilled until serving. The cheesecake filling tastes best when firm and cold.
Freezing
These cheesecake bites can be frozen for up to 1 month. Place them in an airtight container before freezing.
They thaw beautifully in the refrigerator. Let them thaw while chilled rather than at room temperature for the best texture.
Freezing makes them a fantastic make-ahead option for busy holiday weeks. Prepare them ahead and pull them out when needed.
Make-Ahead
No-Bake Christmas Cheesecake Bites are perfect for making several days in advance. Store them in the refrigerator until ready to serve.
They can also be frozen for up to 1 month. Thaw them in the refrigerator before placing them on a platter or into gift boxes.
This make-ahead flexibility is one of the best parts of the recipe. It helps you create something festive without adding stress to the day of your gathering.
Helpful Notes for Best Results
Always use room-temperature cream cheese for the smoothest texture. Cold cream cheese can leave lumps in the filling.
Freeze the cheesecake balls thoroughly before dipping. At least 30 minutes in the freezer helps them stay firm.
Almond bark sets more firmly than white chocolate chips. This can be helpful if you want a cleaner coating.
If the chocolate thickens while dipping, reheat it gently. Smooth melted coating makes dipping easier.
You can customize the sprinkles for different holidays or themes. The same cheesecake bite method can work beyond Christmas.
Use food-safe gloves for cleaner dipping if desired. This can make rolling and handling the bites easier.
If the chocolate coating cracks, the bites may have been extremely cold. Let them sit out for a minute before dipping.
If using chocolate chips instead of almond bark, add 1 teaspoon coconut oil to help the chocolate melt smoothly. This helps the coating become easier to dip.
Variations
White Chocolate Cheesecake Bites
Use melted white chocolate for the coating. It creates a sweet shell around the creamy cheesecake center.
This version is classic and simple. Add red and green candy melts or sprinkles for decoration.
Almond Bark Cheesecake Bites
Use almond bark instead of white chocolate. Almond bark sets more firmly than white chocolate chips.
This can make the bites easier to store and serve. It is especially helpful for holiday platters.
Red and Green Dipped Cheesecake Bites
Dip half of the bites into red candy melts and the other half into green candy melts. You can dip them halfway for a festive look.
This creates strong holiday color. The bites will stand out on a cookie tray.
Drizzled Christmas Cheesecake Bites
Drizzle red and green candy melts over the white coating. This gives the bites a decorative effect.
Drizzling is a nice option if you want a lighter color finish. It also looks playful and festive.
Sprinkle Cheesecake Bites
Skip the candy melts and decorate with sprinkles alone. This keeps the process simpler.
Add the sprinkles while the coating is wet. They will stick as the chocolate sets.
Colored Chocolate Cheesecake Bites
If skipping candy melts, drizzle with colored chocolate instead. This keeps the festive look.
The FAQ notes that colored chocolate drizzle works as an alternative. Use it for a decorative finish.
Themed Cheesecake Bites
Customize the sprinkles for different holidays or themes. This makes the recipe flexible.
Use different sprinkle colors and shapes. The cheesecake center and coating method can stay the same.
Gift Box Cheesecake Bites
Pack the finished bites into gift boxes. They make a sweet edible holiday gift.
Keep them chilled before gifting. Thaw in the refrigerator first if they were frozen.
Troubleshooting
The Cheesecake Filling Has Lumps
Make sure the cream cheese is softened to room temperature. Beat it until smooth before adding the other filling ingredients.
Do not move on while lumps are visible. Smooth cream cheese creates the best filling.
The Filling Is Too Soft to Roll
The mixture should resemble a soft, dough-like consistency. Make sure the powdered sugar and graham cracker crumbs are fully mixed in.
If the filling is difficult to handle, freeze the rolled portions once shaped. The recipe relies on chilling and freezing for firmness.
The Balls Are Not Perfectly Round
Do not worry if the balls are not perfectly round. They will smooth out once dipped.
Aim for 1-inch balls. Similar sizing helps them look neat after coating.
The Bites Melt While Dipping
Freeze the cheesecake balls for at least 30 minutes before dipping. This step is essential to prevent melting.
Work with firm bites. If they soften too much, return them to the freezer briefly before continuing.
The Coating Is Too Thick
If the chocolate thickens while dipping, reheat it gently. Stir until smooth again.
Melt the coating in 30-second intervals and stir between each. This helps prevent overheating.
The Chocolate Coating Cracks
This can happen if the bites are extremely cold. Let them sit out for a minute before dipping.
They should still be firm, but not icy-hard. This helps reduce cracking.
The Sprinkles Do Not Stick
Sprinkle immediately while the coating is still wet. If the coating sets first, the sprinkles will not attach well.
Work quickly after dipping or drizzling. Decorate a few at a time if needed.
The Candy Melts Set Too Quickly
Decorate while the coating is still wet. Have the sprinkles ready before dipping.
If needed, reheat the candy melts gently. Smooth melted candy melts are easier to drizzle or dip.
The Bites Stick Together in Storage
Place parchment paper between layers if stacking. This helps prevent sticking.
Store in an airtight container in the refrigerator. Keep the coating protected.
The Bites Need to Be Made Ahead
Make them several days in advance and store in the refrigerator. They keep for up to 5 days.
You can also freeze them for up to 1 month. Thaw in the refrigerator before serving.
Frequently Asked Questions
Can I make No-Bake Christmas Cheesecake Bites ahead of time?
Yes, these bites are perfect for making several days in advance. Store them in the refrigerator until you are ready to serve.
They also freeze well for up to 1 month. Thaw them in the refrigerator before serving.
Why did my chocolate coating crack?
The coating can crack if the bites are extremely cold. Let them sit out for a minute before dipping.
They should still be firm enough to dip. The short rest helps prevent the coating from reacting to the cold center.
Can I use chocolate chips instead of almond bark?
Yes, chocolate chips can be used instead of almond bark. Add 1 teaspoon coconut oil to help the chocolate melt smoothly.
The texture of the coating may vary. Almond bark sets more firmly than white chocolate chips.
Can I skip the candy melts?
Yes, you can skip the candy melts. Decorate with sprinkles alone or drizzle with colored chocolate.
The bites will still look festive. Add decorations while the coating is wet.
Are these safe to freeze?
Yes, these bites freeze very well. They thaw beautifully in the refrigerator.
Store them in an airtight container and freeze for up to 1 month. Serve chilled after thawing.
How long do they last in the refrigerator?
They can be stored in an airtight container in the refrigerator for up to 5 days. Keep them chilled for the best texture.
If stacking them, place parchment paper between layers. This prevents the coating from sticking.
What size should I roll the bites?
Roll the cheesecake mixture into 1-inch balls. This creates small, easy-to-serve bites.
Do not worry if they are not perfectly round. They will look smoother after dipping.
What should I serve them with?
Serve No-Bake Christmas Cheesecake Bites with coffee, hot cocoa, or milk. They also work beautifully on cookie trays, holiday platters, and in gift boxes.
Serve them chilled. The filling should be firm and creamy.
Why This Recipe Works So Well
No-Bake Christmas Cheesecake Bites work so well because they take the flavor of cheesecake and turn it into a small, festive, no-bake treat. The cream cheese filling is rich, smooth, and easy to shape.
The powdered sugar sweetens the filling while helping it firm up. Graham cracker crumbs give the mixture structure and a classic cheesecake-style taste.
Vanilla extract and salt make the filling taste balanced. The vanilla adds warmth, while the salt keeps the sweetness from feeling flat.
Freezing the balls before dipping makes the process easier. Firm cheesecake balls hold their shape when dipped into warm melted coating.
The white chocolate or almond bark shell gives every bite a smooth outside. Almond bark sets especially firmly, which can help with serving and storing.
The red and green candy melts make the bites look like Christmas. Sprinkles add the final cheerful touch.
The recipe is also flexible. White chocolate, almond bark, chocolate chips with coconut oil, candy melts, colored chocolate drizzle, sprinkles, themed decorations, cupcake liners, gift boxes, coffee, hot cocoa, and milk all give you ways to serve or adapt the bites.
Most of all, these cheesecake bites work because they are festive without being fussy. They are creamy, sweet, colorful, make-ahead friendly, freezer-friendly, and perfect for the busy joy of the holiday season.
Final Thoughts
No-Bake Christmas Cheesecake Bites are festive bite-size treats made with softened cream cheese, powdered sugar, graham cracker crumbs, vanilla extract, salt, white chocolate or almond bark, red and green candy melts, and holiday sprinkles. They are rolled into 1-inch balls, frozen for at least 30 minutes, dipped, decorated, and chilled until the coating is firm.
Serve them cold on holiday platters, cookie trays, dessert boards, in cupcake liners, or tucked into festive gift boxes. With their creamy cheesecake center, sweet chocolate shell, make-ahead storage, and cheerful red and green finish, these no-bake bites bring simple holiday joy to every little piece.
No-Bake Christmas Cheesecake Bites
Creamy, festive, sweet, and fun to decorate, these No-Bake Christmas Cheesecake Bites feature a soft cheesecake center made with cream cheese, powdered sugar, graham cracker crumbs, vanilla, and a pinch of salt. Each bite is dipped in white chocolate or almond bark, finished with red and green candy melts, and decorated with holiday sprinkles for a cheerful Christmas dessert.
Recipe Details
- Prep Time: 20 minutes
- Chill Time: 30 minutes
- Total Time: 50 minutes
- Servings: 24 bites
- Calories: 180 kcal
Ingredients
For the Cheesecake Bites
- 8 oz cream cheese softened
- 1 cup powdered sugar
- 1½ cups graham cracker crumbs
- 1 teaspoon vanilla extract
- Pinch of salt
For the Coating and Decoration
- 12 oz white chocolate or almond bark melted
- Red candy melts
- Green candy melts
- Holiday sprinkles
Instructions
Step 1: Beat the Cream Cheese
In a large bowl, beat the softened cream cheese until smooth. Make sure the cream cheese is fully softened so the mixture blends evenly.
Step 2: Make the Cheesecake Mixture
Add powdered sugar, graham cracker crumbs, vanilla extract, and salt. Mix until a dough-like consistency forms.
Step 3: Shape the Bites
Roll the mixture into 1-inch balls and place them on a parchment-lined baking sheet. Keep the bites evenly sized so they chill and coat more neatly.
Step 4: Freeze Until Firm
Freeze for at least 30 minutes to firm up. This helps the cheesecake balls hold their shape before dipping.
Step 5: Melt the White Chocolate or Almond Bark
Melt white chocolate or almond bark in 30-second microwave intervals, stirring until smooth. Continue only until the coating is melted and ready for dipping.
Step 6: Dip the Cheesecake Balls
Dip each cheesecake ball into melted white chocolate and return it to the baking sheet. Coat each bite evenly before adding the colored candy melts.
Step 7: Add the Red and Green Coating
Dip half the bites into red candy melts and the other half into green candy melts while the coating is still wet. This gives the bites their festive Christmas color.
Step 8: Decorate with Sprinkles
Decorate with holiday sprinkles. Add them while the coating is still wet so they stick to the bites.
Step 9: Chill Before Serving
Refrigerate until chocolate is set and bites are firm before serving.
Notes
- Use room-temperature cream cheese for smooth mixing.
- Freeze cheesecake balls well before dipping to prevent melting.
- Almond bark sets firmer than white chocolate chips.
- Store in an airtight container in the refrigerator for up to 5 days.
Serving Suggestions
Serve these No-Bake Christmas Cheesecake Bites chilled after the chocolate has set and the bites are firm. The creamy cheesecake center, graham cracker crumbs, white chocolate or almond bark coating, red and green candy melts, and holiday sprinkles make them festive enough for Christmas dessert trays.
These bites work well for holiday parties, cookie boxes, dessert platters, or make-ahead Christmas treats. Keep them cold until serving so the coating stays set and the cheesecake centers stay firm.
Storage
How to Store
Store the bites in an airtight container in the refrigerator for up to 5 days. Keep them chilled so the cheesecake centers and chocolate coating stay firm.
Chill Time Tip
Freeze the cheesecake balls for at least 30 minutes before dipping. Refrigerate again until the chocolate is set and the bites are firm before serving.
Cream Cheese Tip
Use room-temperature cream cheese for smooth mixing. Fully softened cream cheese helps the powdered sugar, graham cracker crumbs, vanilla extract, and salt blend into a dough-like consistency.
Coating Tip
Almond bark sets firmer than white chocolate chips. Melt the white chocolate or almond bark in 30-second microwave intervals, stirring until smooth.
Decorating Tip
Add holiday sprinkles while the coating is still wet. Dip half the bites into red candy melts and the other half into green candy melts for the red-and-green Christmas finish.

Fernando is the creator and writer behind the food blog Eating with your Hands. Living and working in cities like Paris, Barcelona, and Berlin, and being married to a Canadian foodie, has given Fernando a passion and interest in food and inspired him to run EWYH.