
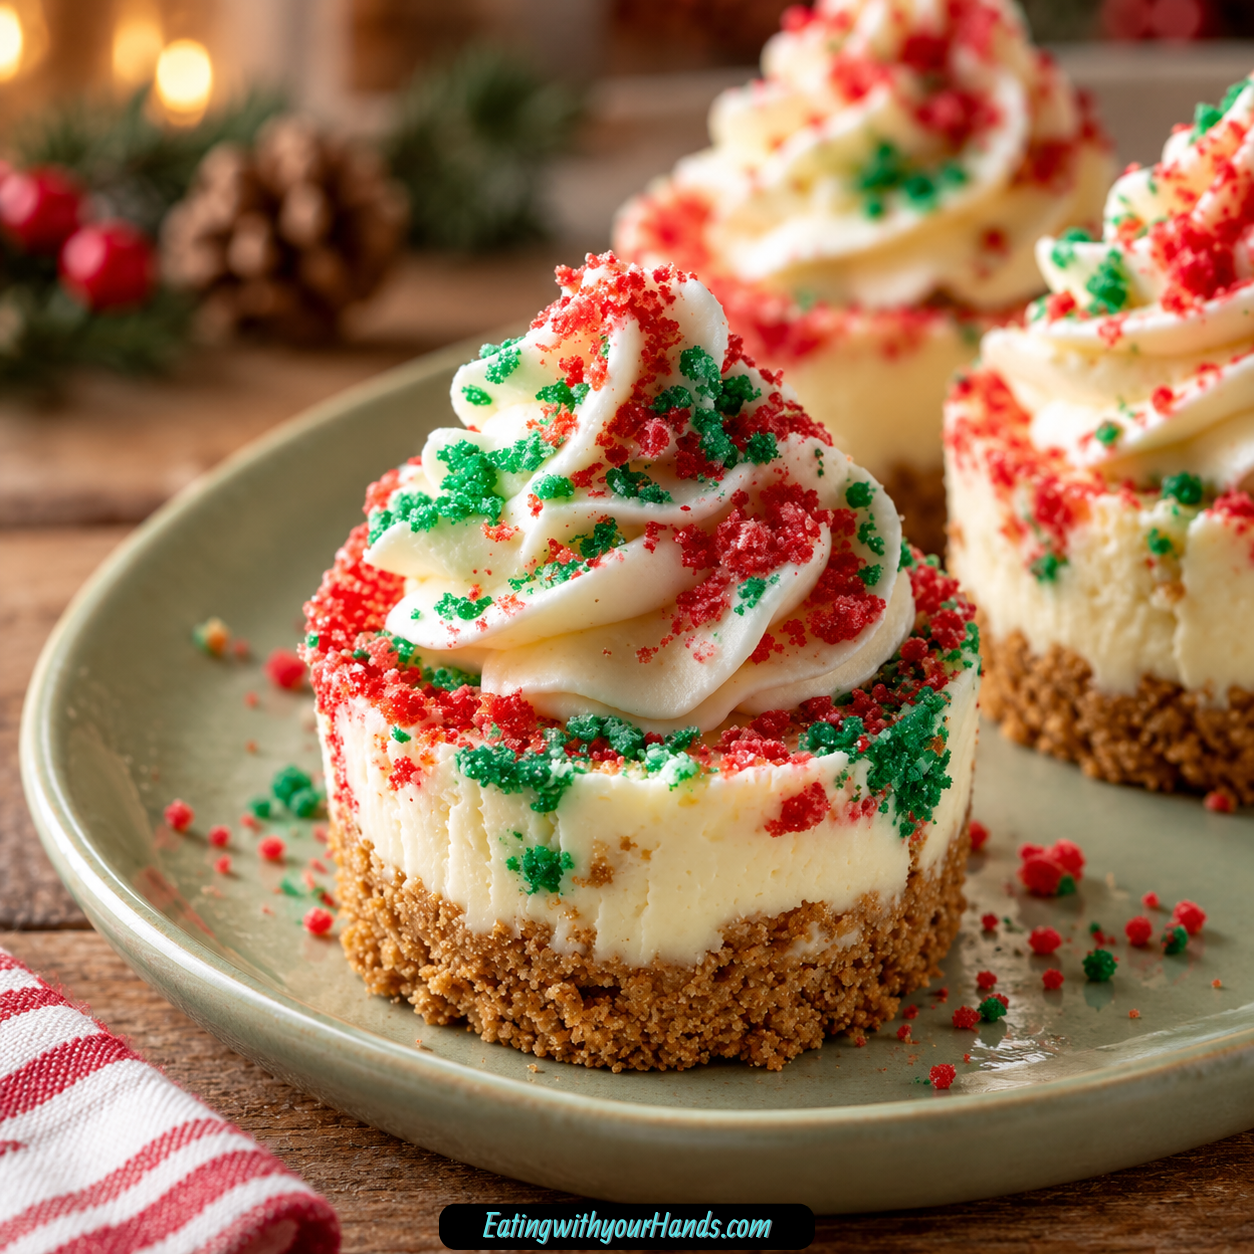
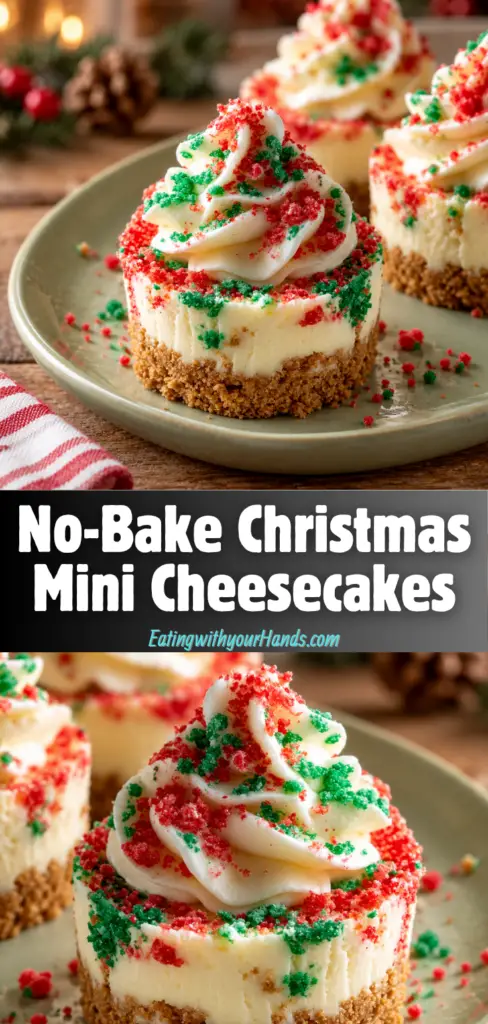
No-Bake Christmas Mini Cheesecakes are the kind of little holiday dessert that makes a table feel instantly more cheerful. They have a buttery graham cracker crust, a light and creamy cheesecake filling, and festive red and green sprinkles that make every bite feel ready for Christmas.
These mini cheesecakes are simple, sweet, and wonderfully practical during the busiest season of the year. When the oven is already full of cookies, roasts, casseroles, or holiday sides, a chilled no-bake dessert feels like a gift.
The crust is made with graham cracker crumbs, melted butter, and a little granulated sugar. It presses into mini cheesecake molds or cupcake liners and chills while the filling comes together.
The filling is soft, fluffy, and mousse-like. Cream cheese and powdered sugar create the cheesecake base, while whipped heavy cream and vanilla make it airy and smooth.
The decoration is joyful without being difficult. A shower of red and green sprinkles turns each mini cheesecake into a Christmas treat, and crushed candy canes can add a peppermint crunch if you want extra holiday sparkle.
What I love most about these is how easy they are to serve. Everyone gets an individual portion, which makes them perfect for parties, cookie exchanges, neighbor gifts, holiday platters, or Christmas dinner dessert.
They also need chilling time, so they are naturally make-ahead friendly. You can prepare them the night before, let the refrigerator do the work, and decorate right before serving.
No-Bake Christmas Mini Cheesecakes are sweet enough to feel special but light enough to enjoy after a big meal. They are creamy, cute, festive, and exactly the kind of dessert that makes December feel a little more magical.
Table of Contents
- Why You’ll Love These No-Bake Christmas Mini Cheesecakes
- Recipe Details
- Ingredients
- Ingredient Notes
- Optional Swaps, Variations, Add-Ins, and Serving Ideas
- Classic No-Bake Christmas Mini Cheesecakes
- Digestive Biscuit Mini Cheesecakes
- Vanilla Wafer Crust Cheesecakes
- Gingerbread Cookie Crust Cheesecakes
- Candy Cane Mini Cheesecakes
- Sprinkle Party Mini Cheesecakes
- White Chocolate Swirl Cheesecakes
- Mini Chocolate Chip Cheesecakes
- Dairy-Free-Style Mini Cheesecakes
- 8×8-Inch Cheesecake Bars
- Christmas Dessert Platter
- Cupcake Stand Cheesecakes
- Neighbor Gift Cheesecakes
- Why This Recipe Works
- Directions
- Step 1: Prepare the Molds or Liners
- Step 2: Make the Crust Mixture
- Step 3: Portion the Crust
- Step 4: Press the Crust Firmly
- Step 5: Chill the Crusts
- Step 6: Beat the Cream Cheese
- Step 7: Add the Powdered Sugar
- Step 8: Chill the Cream Bowl if Needed
- Step 9: Whip the Heavy Cream
- Step 10: Fold the Mixtures Together
- Step 11: Fill the Molds
- Step 12: Smooth the Tops
- Step 13: Chill Until Set
- Step 14: Decorate Before Serving
- Step 15: Serve Chilled
- Step 16: Store Leftovers
- Step 17: Freeze for Later
- Serving Ideas
- Storage
- Freezing
- Make-Ahead
- Helpful Notes for Best Results
- Variations
- Classic No-Bake Christmas Mini Cheesecakes
- Digestive Biscuit Mini Cheesecakes
- Vanilla Wafer Mini Cheesecakes
- Gingerbread Cookie Mini Cheesecakes
- Candy Cane Christmas Cheesecakes
- White Chocolate Swirl Cheesecakes
- Mini Chocolate Chip Cheesecakes
- Dairy-Free-Style Mini Cheesecakes
- 8×8-Inch No-Bake Cheesecake Squares
- Extra Sprinkle Mini Cheesecakes
- Peppermint Sprinkle Cheesecakes
- Giftable Mini Cheesecakes
- Troubleshooting
- Frequently Asked Questions
- Can I freeze these No-Bake Christmas Mini Cheesecakes?
- What if I do not have graham crackers?
- How long do these need to chill?
- Can I make these in a large pan instead of minis?
- How do I know when the whipped cream is ready?
- Can kids help make these?
- How long do they last in the fridge?
- Do these need reheating?
- Why This Recipe Works So Well
- Final Thoughts
- No-Bake Christmas Mini Cheesecakes
Why You’ll Love These No-Bake Christmas Mini Cheesecakes
These mini cheesecakes do not need an oven. That makes them ideal when holiday baking has already taken over the kitchen.
They are festive and fun. Red and green sprinkles add cheerful Christmas color with almost no effort.
They are kid-friendly. The steps are simple, and little hands can help press crusts, sprinkle toppings, or add crushed candy canes.
They are make-ahead friendly. The cheesecakes need at least 4 hours of chilling, so preparing them the night before works beautifully.
They are served in individual portions. That makes them perfect for parties, dessert trays, and gifting.
They are light and creamy. The whipped filling has a soft, mousse-like texture that feels dreamy and smooth.
Recipe Details
This is a no-bake recipe. The cheesecakes set in the refrigerator instead of baking in the oven.
The crust is made with 1 ½ cups graham cracker crumbs, 6 tablespoons melted butter, and 2 tablespoons granulated sugar. Digestive biscuits can also be used.
The crust mixture is pressed into mini cheesecake molds or cupcake liners. Use about 2 tablespoons of crumb mixture for each mini cheesecake.
The filling uses 8 oz, or 225g, softened cream cheese. Let the cream cheese sit at room temperature so it mixes smoothly.
The filling also uses 1 cup powdered sugar, 1 cup cold heavy cream, and 1 teaspoon vanilla extract. The heavy cream should be very cold so it whips properly.
The whipped cream is beaten separately with vanilla until stiff peaks form. Then it is gently folded into the cream cheese mixture.
The filled molds chill for at least 4 hours. Overnight chilling is best for a firm texture and deeper flavor.
Decorate just before serving. Red and green sprinkles add Christmas color, while crushed candy canes are optional for peppermint crunch.
Store the mini cheesecakes in an airtight container in the refrigerator for up to 5 days. They can also be frozen individually wrapped for up to 2 months.
Ingredients
For the Crust
- 1 ½ cups graham cracker crumbs
- 6 tablespoons melted butter
- 2 tablespoons granulated sugar
For the Cheesecake Filling
- 8 oz cream cheese, 225g, softened
- 1 cup powdered sugar
- 1 cup cold heavy cream
- 1 teaspoon vanilla extract
For Decorating
- Red and green sprinkles
- Crushed candy canes, optional
Optional Swaps, Add-Ins, and Variations
- Digestive biscuits
- Vanilla wafers
- Gingerbread cookies
- Melted white chocolate
- Mini chocolate chips
- Plant-based cream cheese
- Whipped topping substitutes
Ingredient Notes
Graham cracker crumbs create the classic sweet crust. They are easy to press into molds and give the cheesecakes a buttery base.
Digestive biscuits can be used instead of graham crackers. They give the crust a slightly different flavor but still work well.
Vanilla wafers are another crust option. They make the base sweeter and softer in flavor.
Gingerbread cookies can be used for a more festive crust. They add warm holiday spice.
Melted butter binds the crumbs together. Unsalted butter is best, but salted butter works in a pinch.
Granulated sugar adds a little sweetness to the crust. It also helps the crumbs taste more dessert-like.
Cream cheese gives the filling its cheesecake flavor. Full-fat cream cheese gives the richest and creamiest texture.
Powdered sugar sweetens the filling while keeping it smooth. It dissolves easily into the cream cheese.
Cold heavy cream is important for the whipped texture. The colder the cream, the better it whips.
Vanilla extract gives the filling a cozy, comforting flavor. It supports the cream cheese without overpowering it.
Red and green sprinkles make the mini cheesecakes instantly festive. Add them close to serving so they look bright.
Crushed candy canes are optional. They add peppermint flavor, crunch, and Christmas sparkle.
Optional Swaps, Variations, Add-Ins, and Serving Ideas
Classic No-Bake Christmas Mini Cheesecakes
Make the recipe with graham cracker crumbs, melted butter, granulated sugar, cream cheese, powdered sugar, heavy cream, vanilla, and red and green sprinkles. This gives the classic creamy no-bake cheesecake flavor with a festive finish.
Chill the cheesecakes for at least 4 hours before decorating. Overnight chilling gives the best set.
Digestive Biscuit Mini Cheesecakes
Use digestive biscuits instead of graham crackers. Crush them finely before mixing with butter and sugar.
The flavor will be slightly different but still delicious. Press the crumbs firmly for a sturdy base.
Vanilla Wafer Crust Cheesecakes
Use crushed vanilla wafers for the crust. This gives the mini cheesecakes a sweeter, cookie-like base.
Keep the melted butter and sugar the same. Chill the crust before adding filling.
Gingerbread Cookie Crust Cheesecakes
Use crushed gingerbread cookies for a more festive flavor. This adds warm spice to the creamy filling.
The gingerbread base pairs beautifully with sprinkles and candy canes. It makes the dessert feel extra seasonal.
Candy Cane Mini Cheesecakes
Top each cheesecake with crushed candy canes just before serving. This gives a peppermint crunch.
Add the candy canes at the end so they stay crisp. They also add pretty red-and-white color.
Sprinkle Party Mini Cheesecakes
Use red and green sprinkles generously on top. They make the dessert cheerful and kid-friendly.
Decorate right before serving for the brightest look. Some sprinkles can bleed if added too early.
White Chocolate Swirl Cheesecakes
Swirl melted white chocolate into the filling for variety. Add it gently so the filling stays smooth and light.
This makes the cheesecakes a little richer. Chill thoroughly before serving.
Mini Chocolate Chip Cheesecakes
Top the cheesecakes with mini chocolate chips. This adds little bites of chocolate.
You can use them with sprinkles or instead of candy canes. They make the dessert more playful.
Dairy-Free-Style Mini Cheesecakes
Use plant-based cream cheese and whipped topping substitutes. The texture and flavor may change slightly.
Chill well before serving. The structure depends on the substitutes used.
8×8-Inch Cheesecake Bars
Make the recipe in an 8×8-inch pan lined with parchment paper. Press the crust into the bottom, add the filling, and chill as usual.
Slice into squares before serving. This is a good option if you do not want individual portions.
Christmas Dessert Platter
Arrange the mini cheesecakes on a holiday platter. Add sprinkles or crushed candy canes right before serving.
They look beautiful next to cookies, candies, and other chilled desserts. Keep them cold until serving.
Cupcake Stand Cheesecakes
Serve the mini cheesecakes on a cupcake stand. The individual portions look especially cute this way.
Use mini cupcake liners for easy serving. They also add a festive touch.
Neighbor Gift Cheesecakes
Place chilled mini cheesecakes in small containers for gifting. Keep them refrigerated until delivery.
These are sweet individual treats for neighbors or friends. Add sprinkles after chilling for the best look.
Why This Recipe Works
This recipe works because each layer is simple but important. The crust gives structure, the cream cheese gives flavor, and the whipped cream gives the filling lightness.
The crust mixture should resemble wet sand. That texture helps it press firmly into the molds.
Pressing the crust down firmly matters. A loose crust can crumble when the cheesecakes are lifted or eaten.
Softened cream cheese blends more smoothly with powdered sugar. This prevents lumps in the filling.
Cold heavy cream whips into stiff peaks. Those peaks are what make the filling mousse-like and airy.
Folding the whipped cream gently into the cream cheese mixture keeps the filling light. Overmixing can deflate the whipped cream.
The long chill gives the cheesecakes time to firm up. At least 4 hours is needed, and overnight is best.
Decorating right before serving keeps the sprinkles bright and the candy canes crisp. This gives the prettiest presentation.
Directions
Step 1: Prepare the Molds or Liners
Set out mini cheesecake molds or cupcake liners. Place the liners in a muffin pan if using them.
This helps the mini cheesecakes keep their shape while chilling. It also makes serving easier later.
Step 2: Make the Crust Mixture
In a medium bowl, combine 1 ½ cups graham cracker crumbs, 6 tablespoons melted butter, and 2 tablespoons granulated sugar. Stir until the crumbs are evenly coated.
The mixture should look like wet sand. It should clump slightly when pressed.
Step 3: Portion the Crust
Add about 2 tablespoons of the crumb mixture to each mini cheesecake mold or cupcake liner. Try to divide it evenly.
Even crust portions help the cheesecakes look neat. Each mini cheesecake should have a firm base.
Step 4: Press the Crust Firmly
Use the back of a spoon to press the crumbs down firmly and evenly. Compact the crumbs into the bottom of each mold.
A firm crust holds together better after chilling. Do not leave the crumbs loose.
Step 5: Chill the Crusts
Place the crusts in the refrigerator while you make the filling. This helps the butter firm up.
A chilled crust gives the filling a better foundation. It also helps the layers stay separate.
Step 6: Beat the Cream Cheese
In a large mixing bowl, beat 8 oz softened cream cheese with an electric mixer until smooth and fluffy. Scrape down the sides of the bowl as needed.
The cream cheese should be soft before mixing. This creates a smoother filling.
Step 7: Add the Powdered Sugar
Gradually add 1 cup powdered sugar to the cream cheese. Beat until fully combined and creamy.
Add the sugar slowly so it blends evenly. The mixture should look smooth, thick, and sweet.
Step 8: Chill the Cream Bowl if Needed
Use a separate chilled bowl for the heavy cream if possible. The cream should also be very cold.
Cold tools and cold cream help the cream whip properly. This gives the filling better volume.
Step 9: Whip the Heavy Cream
Add 1 cup cold heavy cream and 1 teaspoon vanilla extract to the chilled bowl. Beat until stiff peaks form.
This may take a few minutes. The cream should hold its shape when the beaters are lifted.
Step 10: Fold the Mixtures Together
Add the whipped cream to the cream cheese mixture. Fold gently with a spatula using light motions.
Do not beat aggressively. Gentle folding keeps the filling airy and smooth.
Step 11: Fill the Molds
Spoon or pipe the filling over each chilled crust. Fill each mold evenly.
Piping gives a neater look, while spooning works just as well. Both methods taste the same.
Step 12: Smooth the Tops
Use a spatula or the back of a spoon to smooth the tops. Try to make each mini cheesecake level.
Smooth tops make decorating easier. They also look nicer on a platter.
Step 13: Chill Until Set
Refrigerate the mini cheesecakes for at least 4 hours. Overnight chilling is even better.
This time helps them firm up and develop their creamy texture. Do not rush the chilling step.
Step 14: Decorate Before Serving
Just before serving, top each mini cheesecake with red and green sprinkles. Add crushed candy canes if desired.
Decorating at the end keeps the toppings looking fresh. Candy canes also stay crunchier.
Step 15: Serve Chilled
Serve the cheesecakes straight from the refrigerator. They are best cold and firm.
Arrange them on a holiday platter or cupcake stand. Keep them chilled until serving time.
Step 16: Store Leftovers
Place leftovers in an airtight container and refrigerate for up to 5 days. Keep them covered.
No reheating is needed. Serve directly from the fridge.
Step 17: Freeze for Later
Wrap individual cheesecakes and place them in a container. Freeze for up to 2 months.
Thaw in the refrigerator overnight before serving. Decorate after thawing if possible.
Serving Ideas
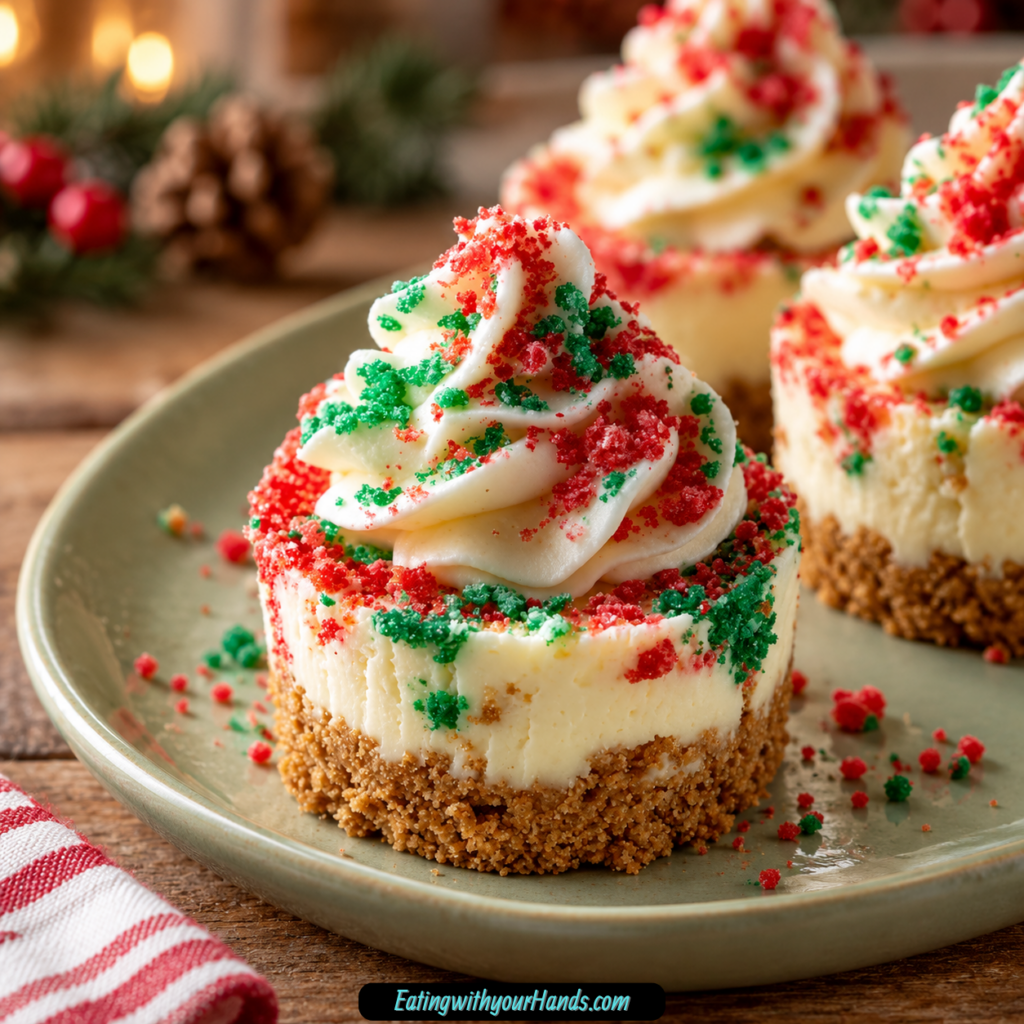
Serve No-Bake Christmas Mini Cheesecakes chilled on a holiday platter. The red and green sprinkles make them festive without extra decorating work.
A cupcake stand makes them look especially pretty. The individual portions are easy for guests to grab.
Serve them after Christmas dinner as a light, creamy dessert. They feel sweet and special without being too heavy.
Add crushed candy canes right before serving for peppermint crunch. The texture adds a fun holiday finish.
For cookie exchanges, place the cheesecakes in mini cupcake liners. They look neat and are easier to handle.
For gifts, pack individual cheesecakes in small containers and keep them refrigerated. They make a sweet holiday surprise.
Serve them with other Christmas treats like cookies, candy, and chilled desserts. Their creamy texture is a nice contrast.
Keep them cold until serving. The filling holds its shape best when chilled.
Storage
Store the mini cheesecakes in an airtight container in the refrigerator. They keep for up to 5 days.
Keep them chilled until ready to serve. The filling is soft and creamy, so cold storage is important.
If stacking is necessary, be gentle and use a protective layer if possible. The tops can be delicate.
Add sprinkles or crushed candy canes just before serving if you want the cleanest look. Some toppings may soften over time.
No reheating is needed. These cheesecakes are meant to be served cold.
If using cupcake liners, leave the cheesecakes in the liners during storage. This helps them stay neat.
Keep strong-smelling foods away from the container. The filling can pick up refrigerator odors.
For best presentation, decorate close to serving time. The cheesecakes themselves can be made ahead.
Freezing
These no-bake mini cheesecakes are freezer friendly. Wrap each cheesecake individually and place them in a container.
Freeze for up to 2 months. This makes them useful for holiday planning.
Thaw in the refrigerator overnight before serving. Do not thaw at room temperature if you want the best texture.
For the prettiest result, freeze without sprinkles or candy canes if possible. Add toppings after thawing.
The filling may be slightly softer after thawing, but it should still taste creamy and delicious. Keep chilled until serving.
Use airtight wrapping to prevent freezer odor. Individual wrapping also makes portioning easier.
Label the container if desired. This helps you use them within the 2-month window.
Make-Ahead
No-Bake Christmas Mini Cheesecakes are excellent for making ahead because they need time to chill. Prepare them the night before for the easiest schedule.
Make the crusts, fill the molds, and refrigerate until set. Decorate right before serving.
Overnight chilling gives the best texture. The filling firms up and becomes easier to serve.
If making for a party, keep the cheesecakes covered in the refrigerator. Transfer them to a platter shortly before guests arrive.
You can also freeze them ahead for up to 2 months. Thaw overnight in the fridge.
Mini cupcake liners make make-ahead storage simpler. They keep each portion separated.
If using crushed candy canes, wait until serving time to add them. This keeps the crunch fresh.
Helpful Notes for Best Results
Use full-fat cream cheese for the richest, creamiest texture. It gives the filling the best structure and flavor.
Soften the cream cheese before beating. Cold cream cheese can leave lumps.
Use very cold heavy cream. Cold cream whips better and creates a more stable filling.
Do not overmix when folding in the whipped cream. Gentle folding keeps the filling light.
Press the crust firmly into each mold or liner. A firm base helps the mini cheesecakes hold together.
Mini cupcake liners make cleanup easy. They also add a festive touch.
Chill for at least 4 hours. Overnight chilling gives the firmest texture.
Decorate close to serving time. Sprinkles and candy canes look best when fresh.
Variations
Classic No-Bake Christmas Mini Cheesecakes
Use graham cracker crumbs, melted butter, granulated sugar, cream cheese, powdered sugar, cold heavy cream, vanilla, and red and green sprinkles. This gives the classic creamy holiday mini cheesecake.
Chill for at least 4 hours. Serve cold.
Digestive Biscuit Mini Cheesecakes
Use digestive biscuits instead of graham crackers. Crush them finely before mixing with butter.
The crust will have a slightly different flavor. It still works beautifully.
Vanilla Wafer Mini Cheesecakes
Use crushed vanilla wafers for the crust. This gives the base a sweet cookie flavor.
Press the crust firmly before chilling. The filling remains the same.
Gingerbread Cookie Mini Cheesecakes
Use crushed gingerbread cookies for a more festive crust. This gives the dessert warm holiday flavor.
Top with sprinkles or crushed candy canes. The gingerbread makes them feel extra Christmas-ready.
Candy Cane Christmas Cheesecakes
Top the cheesecakes with crushed candy canes. Add them right before serving.
They bring peppermint crunch and holiday color. This variation looks beautiful on a platter.
White Chocolate Swirl Cheesecakes
Swirl melted white chocolate into the filling. Do this gently so the filling stays airy.
The white chocolate makes the filling richer. Chill well before serving.
Mini Chocolate Chip Cheesecakes
Top the cheesecakes with mini chocolate chips. They add a fun chocolate bite.
You can use them with sprinkles for extra decoration. Keep the cheesecakes chilled.
Dairy-Free-Style Mini Cheesecakes
Use plant-based cream cheese and whipped topping substitutes. The flavor and texture may be different.
Chill thoroughly before serving. The set may depend on the products used.
8×8-Inch No-Bake Cheesecake Squares
Use an 8×8-inch pan lined with parchment paper. Press in the crust, add the filling, and chill as usual.
Slice into squares before serving. This is useful if you do not have mini molds.
Extra Sprinkle Mini Cheesecakes
Add more red and green sprinkles on top. Keep the topping cheerful and colorful.
Decorate right before serving. This keeps the colors bright.
Peppermint Sprinkle Cheesecakes
Use both sprinkles and crushed candy canes. This gives color, crunch, and peppermint flair.
Add the candy canes last. They stay crisp that way.
Giftable Mini Cheesecakes
Place each cheesecake in a liner and chill until firm. Pack in individual containers.
Keep refrigerated until gifting. These make sweet neighbor or party treats.
Troubleshooting
The Filling Is Lumpy
The cream cheese may not have been soft enough. Let it sit at room temperature before beating.
Beat the cream cheese until smooth before adding powdered sugar. Scrape the bowl often.
The Filling Is Too Loose
The heavy cream may not have been whipped to stiff peaks. It should hold its shape when the beaters are lifted.
The cheesecakes may also need more chilling time. Chill at least 4 hours or overnight.
The Filling Lost Its Airiness
The whipped cream may have been overmixed into the cream cheese. Fold gently with a spatula.
Light motions help keep the filling mousse-like. Do not beat the combined mixture hard.
The Crust Is Crumbly
The crust may not have been pressed firmly enough. Use the back of a spoon to compact it.
Make sure the crumbs are evenly coated with melted butter. The mixture should resemble wet sand.
The Crust Is Too Greasy
There may be too much butter or the crumbs may not be evenly mixed. Stir thoroughly before pressing.
Chill the crusts while making the filling. This helps the butter firm up.
The Cheesecakes Are Hard to Remove
Use mini cupcake liners for easier removal. They make serving and cleanup simple.
If using molds, chill thoroughly before unmolding. A firm cheesecake releases more cleanly.
The Sprinkles Bleed Color
Sprinkles can bleed if added too early. Add them just before serving.
This keeps the tops bright and fresh. It also prevents streaks.
The Candy Canes Got Sticky
Crushed candy canes can soften in the refrigerator. Add them right before serving.
This keeps the peppermint topping crunchy. Store plain cheesecakes and decorate later.
The Cheesecakes Are Too Soft After Freezing
Thaw them in the refrigerator overnight. Keep them cold until serving.
The texture may be slightly different after freezing, but they should still taste creamy. Decorate after thawing.
The Filling Tastes Too Sweet
Serve smaller portions or add crushed candy canes only lightly. The tang of cream cheese helps balance the sweetness.
You can also use a gingerbread cookie crust for a spiced contrast. Keep the filling measurements the same.
Frequently Asked Questions
Can I freeze these No-Bake Christmas Mini Cheesecakes?
Yes, wrap them individually and store them in an airtight container in the freezer for up to 2 months. Thaw them in the refrigerator before serving.
For the best look, add sprinkles or crushed candy canes after thawing. This keeps the toppings fresh.
What if I do not have graham crackers?
You can use crushed digestive biscuits, vanilla wafers, or gingerbread cookies. Each option gives the crust a slightly different flavor.
Crush them finely before mixing with butter and sugar. Press firmly into the molds or liners.
How long do these need to chill?
They need at least 4 hours in the refrigerator. Overnight chilling is best for a firmer texture and better flavor development.
Do not rush the chill time. The filling needs time to set.
Can I make these in a large pan instead of minis?
Yes, use an 8×8-inch pan lined with parchment paper. Press in the crust, add the filling, and chill as usual.
Slice into squares before serving. This is an easy option when you do not want individual molds.
How do I know when the whipped cream is ready?
The whipped cream is ready when stiff peaks hold their shape as the beaters are lifted. It should look fluffy and stable.
Do not stop too early. Soft whipped cream can make the filling too loose.
Can kids help make these?
Yes, these are very kid-friendly. Kids can help press the crust, add sprinkles, and decorate with candy canes.
An adult should handle the mixer and any final assembly steps as needed. The no-bake method keeps the recipe simple.
How long do they last in the fridge?
They last up to 5 days in an airtight container in the refrigerator. Keep them chilled until serving.
For the best appearance, decorate close to serving. Sprinkles and candy canes look freshest that way.
Do these need reheating?
No, these cheesecakes do not need reheating. Serve them straight from the refrigerator.
They are meant to be chilled. The cold texture keeps the filling firm and creamy.
Why This Recipe Works So Well
No-Bake Christmas Mini Cheesecakes work so well because they combine a firm buttery crust with an airy cream cheese filling. The contrast makes every small portion feel satisfying.
The crust works because melted butter binds the graham cracker crumbs. Granulated sugar adds a little extra sweetness.
The filling works because softened cream cheese blends smoothly with powdered sugar. This creates a thick cheesecake base without baking.
Whipped heavy cream makes the filling lighter. It turns the texture from dense to fluffy and mousse-like.
Vanilla gives the filling warmth. It makes the cheesecakes taste cozy and balanced.
The chill time is essential. The refrigerator firms the crust and filling so the cheesecakes hold their shape.
The mini format makes serving easy. Every guest gets an individual dessert, and no slicing is needed.
The decorations are simple but effective. Red and green sprinkles and optional crushed candy canes bring instant Christmas charm.
Most of all, this recipe works because it feels festive without stress. It is easy, pretty, make-ahead friendly, and perfect for a busy holiday kitchen.
Final Thoughts
No-Bake Christmas Mini Cheesecakes are made with a graham cracker crumb crust, melted butter, granulated sugar, softened cream cheese, powdered sugar, cold heavy cream, vanilla extract, red and green sprinkles, and optional crushed candy canes. The crust is pressed into mini molds or cupcake liners, the whipped cheesecake filling is spooned or piped on top, and the cheesecakes are chilled until firm.
Serve them straight from the refrigerator on a holiday platter, cupcake stand, or dessert table. With their no-bake method, creamy mousse-like filling, festive sprinkles, make-ahead convenience, freezer-friendly storage, and individual portions, these mini cheesecakes bring a sweet little sparkle to Christmas celebrations.
No-Bake Christmas Mini Cheesecakes
Creamy, festive, colorful, and easy to make ahead, these No-Bake Christmas Mini Cheesecakes are sweet holiday treats with a buttery graham cracker crust and a fluffy cream cheese filling. Red and green sprinkles and optional crushed candy canes give each mini cheesecake a cheerful Christmas finish without needing the oven.
Recipe Details
- Prep Time: 20 minutes
- Chill Time: 4 hours
- Total Time: 4 hours 20 minutes
- Servings: 8 mini cheesecakes
- Calories: 320 kcal
Ingredients
For the No-Bake Christmas Mini Cheesecakes
- Optional: Crushed candy canes
- Red and green sprinkles
- 1 teaspoon vanilla extract
- 1 cup cold heavy cream
- 1 cup powdered sugar
- 8 oz 225g cream cheese, softened
- 2 tablespoon granulated sugar
- 6 tablespoon melted butter
- 1 ½ cups graham cracker crumbs
Instructions
Step 1: Make the Crumb Crust
Mix the graham cracker crumbs, melted butter, and granulated sugar in a bowl until fully combined. The mixture should look evenly moistened and crumbly.
Press the crumb mixture into mini cheesecake molds or cupcake liners. Chill the crusts while you prepare the creamy filling.
Step 2: Beat the Cream Cheese
Beat the softened cream cheese until smooth. Add the powdered sugar and mix until the filling base becomes creamy.
Use full-fat cream cheese for the best texture, as noted. Let the cream cheese come to room temperature before mixing so it blends more easily.
Step 3: Whip the Heavy Cream
In a separate bowl, whip the cold heavy cream with the vanilla extract until stiff peaks form. The whipped cream should be thick enough to hold its shape.
Keeping the heavy cream cold helps it whip properly. Once stiff peaks form, it is ready to fold into the cream cheese mixture.
Step 4: Combine the Filling
Gently fold the whipped cream into the cream cheese mixture until smooth. Use a light hand so the filling stays airy and creamy.
Keep folding only until the mixture is fully blended. The filling should look smooth enough to spoon or pipe over the crusts.
Step 5: Fill the Mini Cheesecakes
Spoon or pipe the filling into the molds over the chilled crusts. Divide the filling evenly among the 8 mini cheesecakes.
Smooth the tops if needed so they set neatly. The mini cheesecakes should be filled before the long chill.
Step 6: Chill Until Set
Chill for at least 4 hours, or overnight, until set. This gives the crust and filling time to firm into no-bake mini cheesecakes.
Do not rush the chilling step. The cheesecakes need to be fully set before decorating and serving.
Step 7: Decorate and Serve
Decorate with red and green sprinkles before serving. Add optional crushed candy canes if desired.
Serve chilled so the filling stays firm and creamy. The festive toppings should be added after the cheesecakes have set.
Notes
- Use full-fat cream cheese for best texture.
- Let cream cheese come to room temp before mixing.
- Can be frozen up to 2 months. Thaw in fridge.
- Substitute graham crackers with digestive biscuits or vanilla wafers.
Serving Suggestions
Serve No-Bake Christmas Mini Cheesecakes chilled after they have set for at least 4 hours. The creamy filling, buttery graham cracker crust, and bright red and green sprinkles make them perfect for holiday dessert trays and Christmas gatherings.
Decorate with crushed candy canes if you want an extra festive finish. Add the decorations before serving so the tops stay colorful and fresh-looking.
These mini cheesecakes are also a good make-ahead dessert because they can chill overnight. Serve them cold straight from the fridge for the best no-bake texture.
Storage
How to Store
The recipe does not provide a specific refrigerator storage duration, so no exact fridge storage time is added here.
Freezer Tip
These mini cheesecakes can be frozen up to 2 months. Thaw in the fridge before serving.
Cream Cheese Tip
Use full-fat cream cheese for the best texture. Let it come to room temp before mixing so the filling turns smooth.
Crust Tip
Substitute graham crackers with digestive biscuits or vanilla wafers if desired. Keep the crust method the same with melted butter and granulated sugar.
Chilling Tip
Chill for at least 4 hours or overnight until set. This helps the mini cheesecakes hold their shape.
Decorating Tip
Use red and green sprinkles for the Christmas look. Optional crushed candy canes can be added before serving for extra holiday flair.

Fernando is the creator and writer behind the food blog Eating with your Hands. Living and working in cities like Paris, Barcelona, and Berlin, and being married to a Canadian foodie, has given Fernando a passion and interest in food and inspired him to run EWYH.