
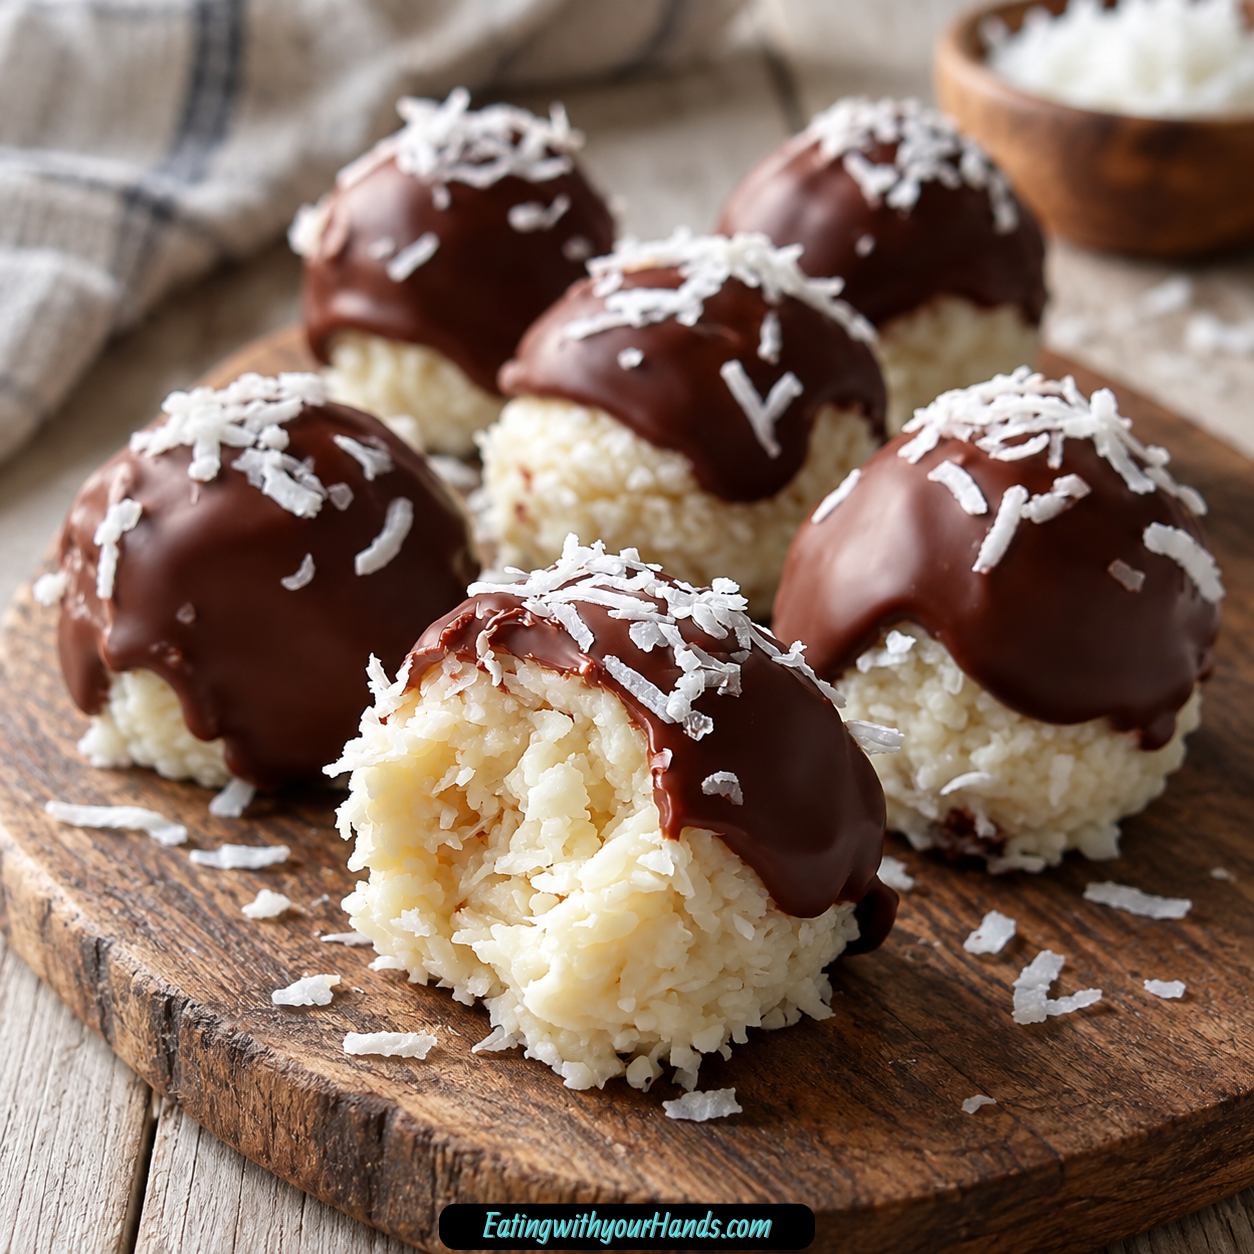
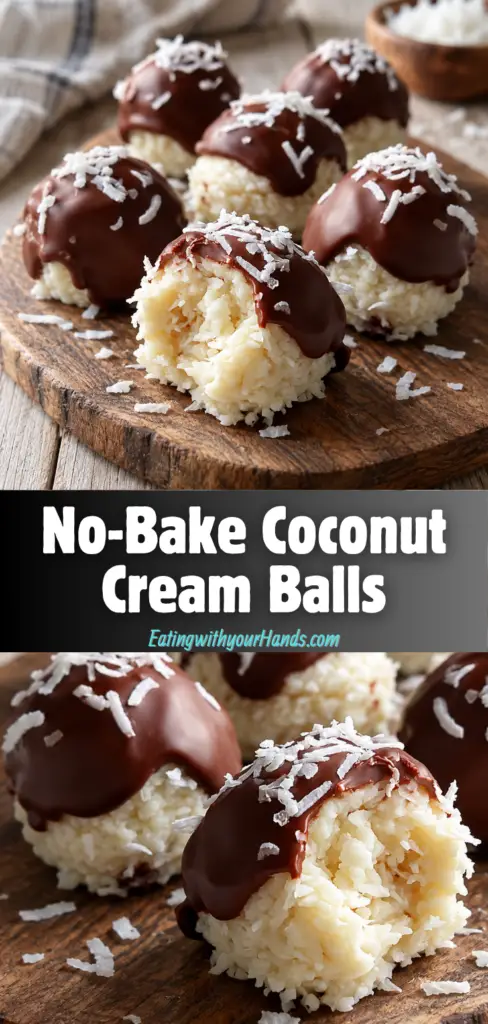
No-Bake Coconut Cream Balls are the kind of sweet little treat that proves a dessert does not need an oven to feel special. They are creamy in the center, full of coconut flavor, coated in smooth melted chocolate, and simple enough to make whenever a quick dessert craving shows up.
These coconut balls have a nostalgic charm that feels right at home on holiday trays, potluck tables, dessert buffets, and quiet afternoons when you want something sweet without making a full batch of cookies or cake. They are made with shredded coconut, sweetened condensed milk, vanilla, powdered sugar, optional chopped nuts, and melted chocolate.
The texture is what makes them so irresistible. The coconut filling is soft, sticky, sweet, and creamy, while the chocolate shell adds a smooth coating that makes each bite feel like a small homemade candy.
This recipe is especially helpful when you need a dessert that can be made ahead. The coconut mixture is rolled into 1-inch balls, chilled until firm, dipped in chocolate, and chilled again until the coating sets.
There is no baking, no complicated equipment, and no long waiting time beyond the chilling steps. It is the kind of recipe that feels forgiving, beginner-friendly, and easy to enjoy.
These No-Bake Coconut Cream Balls are also easy to customize. You can use sweetened or unsweetened coconut, white chocolate or semi-sweet chocolate, chopped almonds, pecans, or cashews, and even different flavor add-ins like almond extract, lemon zest, or a pinch of sea salt.
They are wonderful chilled straight from the refrigerator, but they are also tasty at room temperature. Just remember that chocolate softens in warm temperatures, so keeping them cool is best when serving or transporting them.
Whether you make them for holidays, last-minute guests, gifting, or a simple family dessert, these coconut cream balls bring a sweet, creamy, homemade feeling to the table. They are easy to roll, easy to share, and very easy to reach for again.
Table of Contents
- Why You’ll Love These No-Bake Coconut Cream Balls
- Recipe Details
- Ingredients
- For the Coconut Cream Filling
- For the Chocolate Coating
- Optional Nuts
- Optional Variations and Add-Ins
- Ingredient Notes
- Optional Swaps, Variations, Add-Ins, and Serving Ideas
- Classic No-Bake Coconut Cream Balls
- Sweetened Coconut Cream Balls
- Unsweetened Coconut Cream Balls
- White Chocolate Coconut Balls
- Semi-Sweet Chocolate Coconut Balls
- Dark Chocolate Coconut Balls
- Milk Chocolate Coconut Balls
- Nutty Coconut Cream Balls
- Almond Coconut Balls
- Pecan Coconut Balls
- Cashew Coconut Balls
- Dairy-Free Coconut Cream Balls
- Vegan Chocolate Coconut Balls
- Almond Extract Coconut Balls
- Lemon Coconut Balls
- Sea Salt Coconut Balls
- Wafer Crunch Coconut Balls
- Plain Coconut Cream Balls
- Coconut-Rolled Cream Balls
- Festive Topped Coconut Balls
- Mini Cupcake Liner Serving
- Dessert Platter Serving
- Holiday Gift Box Serving
- Why This Recipe Works
- Directions
- Step 1: Prepare the Tray
- Step 2: Add the Coconut
- Step 3: Add the Sweetened Condensed Milk
- Step 4: Add Vanilla and Powdered Sugar
- Step 5: Add Optional Nuts
- Step 6: Mix Into a Sticky Dough
- Step 7: Adjust If Too Sticky
- Step 8: Scoop the Filling
- Step 9: Roll Into Balls
- Step 10: Chill the Rolled Balls
- Step 11: Prepare the Chocolate
- Step 12: Melt the Chocolate
- Step 13: Dip the First Coconut Ball
- Step 14: Remove Excess Chocolate
- Step 15: Return to the Tray
- Step 16: Add Optional Decorations
- Step 17: Chill Again
- Step 18: Serve and Enjoy
- Serving Ideas
- Storage
- Freezing
- Make-Ahead
- Helpful Notes for Best Results
- Variations
- Classic No-Bake Coconut Cream Balls
- White Chocolate Coconut Cream Balls
- Semi-Sweet Chocolate Coconut Balls
- Dark Chocolate Coconut Balls
- Milk Chocolate Coconut Balls
- Dairy-Free Coconut Cream Balls
- Unsweetened Coconut Version
- Almond Coconut Cream Balls
- Pecan Coconut Cream Balls
- Cashew Coconut Cream Balls
- Lemon Coconut Cream Balls
- Sea Salt Coconut Cream Balls
- Wafer Crunch Coconut Balls
- Plain Coconut Balls
- Extra Coconut-Coated Balls
- Troubleshooting
- Frequently Asked Questions
- Can I freeze No-Bake Coconut Cream Balls?
- What if the mixture is too sticky to roll?
- Can I make these without chocolate?
- Can I use different types of chocolate?
- How can I keep the chocolate coating smooth?
- How long do these coconut balls last?
- Can I make them dairy-free?
- What should I serve with No-Bake Coconut Cream Balls?
- Why This Recipe Works So Well
- Final Thoughts
- No-Bake Coconut Cream Balls
Why You’ll Love These No-Bake Coconut Cream Balls
These coconut cream balls require no oven. They are perfect for warm weather, busy days, or quick treats when you do not want to bake.
They are beginner-friendly. The mixture is forgiving, easy to shape, and simple to adjust if it feels too sticky.
They use only a handful of ingredients. Shredded coconut, sweetened condensed milk, vanilla, powdered sugar, optional nuts, and chocolate are all you need.
They are great for make-ahead desserts. You can prepare them before parties, holidays, potlucks, or gifting.
They are easy to customize. Nuts, dark chocolate, festive toppings, extracts, citrus zest, sea salt, or extra coconut can all change the flavor.
They are kid-approved and fun to make. Little hands can help roll the coconut mixture into balls or add toppings before the chocolate sets.
Recipe Details
No-Bake Coconut Cream Balls are made without baking. The recipe relies on mixing, rolling, chilling, dipping, and setting.
The coconut mixture uses 2 ½ cups shredded coconut. Sweetened or unsweetened coconut both work, though sweetened coconut gives a richer flavor.
The binder is 1 cup sweetened condensed milk. It holds the mixture together and adds creamy sweetness.
The flavor includes ½ teaspoon vanilla extract. Pure vanilla gives the best aroma, but imitation vanilla works if needed.
The mixture also includes 1 cup powdered sugar. This helps thicken the filling and balance the flavor.
Chopped nuts are optional. Use ½ cup chopped almonds, pecans, or cashews if you want crunch.
The coating uses 8 oz melted white chocolate or semi-sweet chocolate. White chocolate makes the balls sweeter, while semi-sweet gives a nice contrast.
The rolled coconut balls should be chilled for 30 minutes before dipping. This helps them hold their shape in the melted chocolate.
After dipping, the coated coconut balls should chill again for about 20 minutes. The chocolate should be firm and shiny before serving.
Store them in an airtight container in the refrigerator for up to 7 days. They can also be frozen for up to 2 months and thawed in the refrigerator before serving.
Ingredients
For the Coconut Cream Filling
- 2 ½ cups shredded coconut
- 1 cup sweetened condensed milk
- ½ teaspoon vanilla extract
- 1 cup powdered sugar
- ½ cup chopped nuts, optional
For the Chocolate Coating
- 8 oz white chocolate or semi-sweet chocolate, melted
Optional Nuts
- Almonds
- Pecans
- Cashews
Optional Variations and Add-Ins
- Dairy-free sweetened condensed coconut milk
- Vegan chocolate
- Unsweetened coconut
- Semi-sweet chocolate
- Dark chocolate
- Almond extract
- Lemon zest
- Pinch of sea salt
- Crushed wafer cookies
- Extra shredded coconut
- Milk chocolate
- Festive toppings
Ingredient Notes
Shredded coconut is the main ingredient in the filling. Sweetened coconut gives a richer, sweeter flavor, while unsweetened coconut helps reduce sweetness.
Sweetened condensed milk binds the coconut mixture together. It also adds the creamy sweetness that makes the center soft and rich.
Vanilla extract gives the filling a warm aroma. Pure vanilla is ideal, but imitation vanilla works in a pinch.
Powdered sugar helps thicken the mixture. It also balances the coconut and condensed milk.
Chopped nuts are optional, but they add a wonderful crunch. Almonds, pecans, and cashews all work well.
White chocolate makes the coconut balls taste sweeter and more like coconut truffles. It also gives the outside a bright, creamy appearance.
Semi-sweet chocolate gives a stronger contrast to the sweet coconut filling. It is a good choice if you want the dessert less sugary.
Dark chocolate can also be used if you prefer a richer flavor. It balances the creamy coconut center beautifully.
Dairy-free sweetened condensed coconut milk and vegan chocolate can be used for a dairy-free version. The flavor and texture may vary, but the recipe stays simple.
Extra shredded coconut can be used instead of chocolate if you want to leave them plain. Rolling the balls in coconut gives them a soft, snowy look.
Optional Swaps, Variations, Add-Ins, and Serving Ideas
Classic No-Bake Coconut Cream Balls
Make the coconut balls with shredded coconut, sweetened condensed milk, vanilla, powdered sugar, optional chopped nuts, and melted chocolate. This gives the recipe its creamy coconut center and smooth chocolate shell.
Serve chilled for the best texture. The chocolate coating should be firm, and the filling should be soft and sweet.
Sweetened Coconut Cream Balls
Use sweetened shredded coconut for a richer flavor. This version tastes extra dessert-like.
It works beautifully with semi-sweet chocolate. The slight contrast keeps the sweetness balanced.
Unsweetened Coconut Cream Balls
Use unsweetened shredded coconut if you want to reduce sweetness. This makes the coconut flavor more natural.
Pair it with semi-sweet or dark chocolate for an even more balanced result. This is a good option for those who prefer less sugar.
White Chocolate Coconut Balls
Coat the coconut balls in melted white chocolate. This makes them sweeter and more like creamy coconut truffles.
White chocolate looks especially pretty for holidays and dessert trays. Add extra coconut or festive toppings before it sets.
Semi-Sweet Chocolate Coconut Balls
Use semi-sweet chocolate for the coating. It gives the dessert a nice contrast against the sweet coconut center.
This version is rich without feeling too heavy. It is a great everyday option.
Dark Chocolate Coconut Balls
Use dark chocolate if you want a bolder flavor. It balances the filling and gives the balls a more intense chocolate finish.
Dark chocolate works especially well with unsweetened coconut. It creates a less sweet version.
Milk Chocolate Coconut Balls
Use milk chocolate for a softer, sweeter coating. This version is very family-friendly.
It works well when serving kids or anyone who enjoys a creamy chocolate flavor. Keep the balls chilled so the coating stays firm.
Nutty Coconut Cream Balls
Add ½ cup chopped nuts to the filling. Almonds, pecans, or cashews bring crunch and extra flavor.
Chop the nuts finely enough so the balls still roll smoothly. The texture should be pleasant, not too chunky.
Almond Coconut Balls
Use chopped almonds in the filling. Almonds add a crisp crunch and a mild nutty flavor.
You can also try almond extract as a flavor variation. Use it carefully so it does not overpower the coconut.
Pecan Coconut Balls
Add chopped pecans for a softer, buttery crunch. Pecans pair nicely with coconut and chocolate.
This version feels especially good for holidays. The flavor is rich and warm.
Cashew Coconut Balls
Use chopped cashews for a creamy nut flavor. Cashews blend nicely into the coconut filling.
They add crunch without being too sharp. This variation works well with white chocolate.
Dairy-Free Coconut Cream Balls
Use dairy-free sweetened condensed coconut milk and vegan chocolate. This creates a dairy-free version.
The coconut milk makes the filling especially coconut-forward. Chill well so the balls stay firm.
Vegan Chocolate Coconut Balls
Use vegan chocolate for the coating. Pair it with dairy-free sweetened condensed coconut milk if needed.
The method stays the same. Roll, chill, dip, and set.
Almond Extract Coconut Balls
Add almond extract for a stronger nutty aroma. This works well with white chocolate or semi-sweet chocolate.
Use a small amount. Almond flavor can become strong quickly.
Lemon Coconut Balls
Add lemon zest to the filling. Lemon brightens the coconut and makes the dessert taste fresher.
This variation is lovely for spring, summer, or any time you want a lighter flavor. It pairs well with white chocolate.
Sea Salt Coconut Balls
Add a pinch of sea salt to the filling. Salt balances the sweetness and deepens the flavor.
This works especially well with semi-sweet or dark chocolate. A little goes a long way.
Wafer Crunch Coconut Balls
Mix crushed wafer cookies into the filling for texture. This creates a crunchier coconut center.
Use a modest amount so the mixture still rolls well. The wafers should support the texture, not dry it out.
Plain Coconut Cream Balls
Skip the chocolate coating if desired. Leave the balls plain or roll them in extra shredded coconut.
This version is simpler and still delicious. It also avoids the dipping step.
Coconut-Rolled Cream Balls
Roll the shaped balls in extra shredded coconut instead of dipping in chocolate. This creates a soft, snowy finish.
Chill until firm before serving. This variation is quick and pretty.
Festive Topped Coconut Balls
Decorate the chocolate coating before it sets. Use coconut, nuts, sprinkles, or a drizzle of extra melted chocolate.
This makes the coconut balls party-ready. It is a simple way to dress them up for holidays.
Mini Cupcake Liner Serving
Place each coconut ball in a mini cupcake liner. This makes them look neat and elegant.
It also makes them easier to serve at parties. Guests can pick them up without touching the chocolate.
Dessert Platter Serving
Arrange the balls on a pretty dessert platter. They look beautiful beside cookies, truffles, and other no-bake sweets.
Keep the platter chilled until serving. Chocolate can soften in warm temperatures.
Holiday Gift Box Serving
Pack the coconut balls into holiday boxes. They make lovely homemade gifts.
Separate layers with parchment if stacking. Keep them cool during transport.
Why This Recipe Works
No-Bake Coconut Cream Balls work because the ingredients create a soft, sweet filling that firms up when chilled. The shredded coconut gives texture, the condensed milk binds, and the powdered sugar thickens.
The filling is easy to adjust. If it feels too sticky, a little more coconut or powdered sugar can help.
Chilling before dipping is important. A cold coconut ball holds its shape much better in melted chocolate.
The melted chocolate creates a firm shell around the creamy coconut center. This contrast makes the dessert feel more finished.
Using a fork to dip each ball helps create an even coating. Tapping off excess chocolate prevents pooling on the parchment.
The second chill sets the chocolate. After about 20 minutes, the coating should be firm and shiny.
This recipe is also forgiving because it does not depend on baking time. The texture comes from mixing and chilling.
It works for make-ahead desserts because the balls store well. They keep in the refrigerator for up to 7 days and freeze for up to 2 months.
Directions
Step 1: Prepare the Tray
Line a tray or baking sheet with parchment paper. This gives the coconut balls a nonstick surface for chilling and dipping.
Keep the tray close to your workspace. Once the balls are rolled, you can place them directly onto the parchment.
Step 2: Add the Coconut
Place 2 ½ cups shredded coconut in a large mixing bowl. Use sweetened coconut for a richer flavor or unsweetened coconut for a less sweet version.
Make sure the bowl is large enough for stirring. The mixture will become sticky once the condensed milk is added.
Step 3: Add the Sweetened Condensed Milk
Pour in 1 cup sweetened condensed milk. This ingredient binds the coconut and gives the filling creamy sweetness.
Scrape the measuring cup well so all of it goes into the bowl. It is important for the texture.
Step 4: Add Vanilla and Powdered Sugar
Add ½ teaspoon vanilla extract and 1 cup powdered sugar. The vanilla gives aroma, while the powdered sugar thickens the mixture.
Stir gently at first so the powdered sugar does not fly out of the bowl. Then mix more firmly as the filling comes together.
Step 5: Add Optional Nuts
If using nuts, add ½ cup chopped almonds, pecans, or cashews. Stir them evenly into the coconut mixture.
The nuts add crunch and flavor. Skip them if you want a nut-free version.
Step 6: Mix Into a Sticky Dough
Mix everything until the ingredients form a sticky, uniform dough. There should be no dry pockets of coconut or powdered sugar.
The mixture should hold together when pressed. If it seems too loose, it will firm up after chilling.
Step 7: Adjust If Too Sticky
If the mixture is too sticky to roll, add 1 or 2 extra tablespoons of shredded coconut or powdered sugar. Mix again.
You can also chill the mixture for 10 minutes before rolling. This makes it easier to handle.
Step 8: Scoop the Filling
Scoop out about 1 tablespoon of the coconut mixture. Use similar amounts for each ball so they look even.
A tablespoon-sized scoop makes the balls easy to eat. It also helps them chill and coat evenly.
Step 9: Roll Into Balls
Roll each portion between your palms to create smooth 1-inch balls. If the mixture sticks, dip your fingertips in warm water.
Work gently but firmly. The balls should be compact enough to hold their shape.
Step 10: Chill the Rolled Balls
Place the rolled balls on the parchment-lined tray. Refrigerate for 30 minutes.
This first chill helps them firm up before dipping. It also makes the chocolate coating process much easier.
Step 11: Prepare the Chocolate
Place 8 oz white chocolate or semi-sweet chocolate in a microwave-safe bowl. Use the chocolate you prefer.
White chocolate gives extra sweetness, while semi-sweet chocolate creates more contrast. Both work well.
Step 12: Melt the Chocolate
Microwave the chocolate in 30-second intervals, stirring between each interval. Continue until silky and smooth.
Do not overheat the chocolate. If it gets too hot, it may seize or turn clumpy.
Step 13: Dip the First Coconut Ball
Use a fork to dip one chilled coconut ball into the melted chocolate. Turn it gently until fully coated.
Lift it out with the fork. Let the extra chocolate drip back into the bowl.
Step 14: Remove Excess Chocolate
Gently tap the fork on the edge of the bowl. This removes excess chocolate and helps prevent pooling on the parchment paper.
A thinner, even coating looks neater. It also sets more smoothly.
Step 15: Return to the Tray
Place the coated coconut ball back onto the parchment paper. Repeat with the remaining balls.
Work steadily so the chocolate stays melted. If it thickens, warm it briefly again.
Step 16: Add Optional Decorations
If decorating with coconut, nuts, sprinkles, or extra chocolate drizzle, add toppings before the coating sets. This helps them stick.
You can keep the balls simple or make them festive. Both options are delicious.
Step 17: Chill Again
Refrigerate the coated coconut balls for 20 minutes. The chocolate shell should become firm and shiny.
Do not serve too early if the coating is still soft. The second chill gives the balls their finished texture.
Step 18: Serve and Enjoy
Serve the coconut cream balls chilled straight from the refrigerator or at room temperature. They are delicious both ways.
If serving at a party, keep them cool until needed. Chocolate can soften quickly in warm temperatures.
Serving Ideas
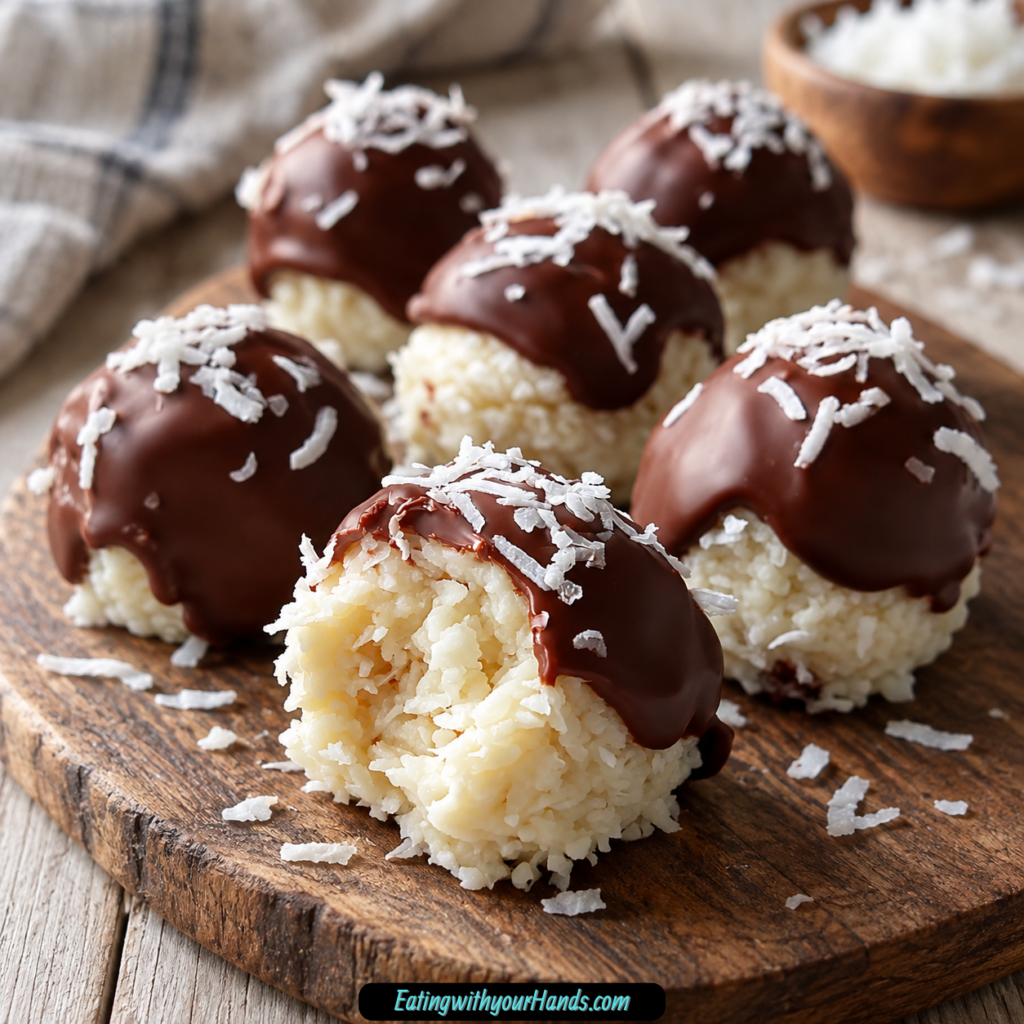
Serve No-Bake Coconut Cream Balls chilled on a pretty dessert platter. The chocolate coating stays firm, and the coconut center tastes creamy and cool.
They make wonderful additions to cookie trays. Their round shape adds variety beside bars, cookies, and truffles.
For holiday boxes, place each ball in a mini cupcake liner. This keeps them neat and makes them look gift-ready.
For dessert buffets, arrange them in rows or small clusters. Add a little extra coconut or chocolate drizzle on top for decoration.
They are also lovely for potlucks. Because they are bite-sized, guests can take one without needing a plate and fork.
Serve them with coffee, tea, or another simple drink. Their sweet coconut flavor pairs well with warm beverages.
If using white chocolate, add a sprinkle of coconut for a snowy look. If using semi-sweet or dark chocolate, a drizzle of white chocolate can make them look more polished.
Keep them cool when transporting. Warm temperatures can soften the chocolate coating.
Storage
Store No-Bake Coconut Cream Balls in an airtight container in the refrigerator. They will keep for up to 7 days.
The refrigerator keeps the chocolate firm and the filling fresh. It is the best place for storing them after dipping.
If stacking the balls, place parchment paper between layers. This helps protect the chocolate coating.
Keep the container sealed tightly. This prevents the coconut balls from drying out.
Avoid warm temperatures. Chocolate can soften quickly if the room is too warm.
If serving outdoors or transporting them, keep them cool as long as possible. Bring them out close to serving time.
Freezing
No-Bake Coconut Cream Balls freeze well for up to 2 months. Place them in an airtight freezer-safe container.
Make sure the chocolate coating is fully set before freezing. This helps protect the finish.
Use parchment paper between layers if needed. This keeps the chocolate from sticking.
Thaw the coconut balls in the refrigerator before serving. This helps maintain the best texture.
Do not thaw them too quickly in a warm place. The chocolate may soften too much.
Once thawed, keep them refrigerated until ready to serve. They taste best chilled or cool.
Make-Ahead
These coconut cream balls are excellent for make-ahead dessert planning. You can prepare them a day or several days before a party.
Store them in the refrigerator for up to 7 days. Keep them covered so they stay fresh.
For longer planning, freeze them for up to 2 months. Thaw in the refrigerator before serving.
You can also roll the coconut mixture ahead, chill the balls, and dip them later. This breaks the recipe into smaller steps.
If making them for gifting, wait until the chocolate is fully firm before packaging. Mini cupcake liners help keep them tidy.
This make-ahead quality makes the recipe especially useful for holidays. A batch can be ready long before guests arrive.
Helpful Notes for Best Results
Use sweetened coconut if you want a richer, sweeter flavor. Use unsweetened coconut if you prefer less sweetness.
Mix the filling until it becomes sticky and uniform. The ingredients should hold together when rolled.
If the mixture sticks to your hands, dip your fingertips in warm water. This makes rolling easier.
If the mixture is too sticky, add 1 or 2 tablespoons shredded coconut or powdered sugar. Then chill for 10 minutes before rolling.
Chill the balls before dipping. This helps them stay round in the melted chocolate.
Melt chocolate slowly in 30-second intervals. Stir each time to keep it smooth.
Do not overheat chocolate. Overheated chocolate may seize.
Tap off extra chocolate after dipping. This prevents thick puddles around the base of each ball.
Variations
Classic No-Bake Coconut Cream Balls
Use shredded coconut, sweetened condensed milk, vanilla, powdered sugar, optional nuts, and melted chocolate. This creates the classic creamy coconut center and chocolate shell.
Chill before dipping and chill again after coating. Serve cool for the best texture.
White Chocolate Coconut Cream Balls
Use melted white chocolate for coating. This makes the balls sweeter and creamier.
White chocolate gives them a pretty look. Add shredded coconut on top if desired.
Semi-Sweet Chocolate Coconut Balls
Use semi-sweet chocolate for the coating. This balances the sweetness of the filling.
It is a great choice when using sweetened coconut. The contrast keeps the dessert from tasting too sugary.
Dark Chocolate Coconut Balls
Use dark chocolate for a richer, more balanced flavor. It works especially well with unsweetened coconut.
This variation feels a little more grown-up. Add a pinch of sea salt if desired.
Milk Chocolate Coconut Balls
Use milk chocolate for a softer chocolate flavor. This version is especially kid-friendly.
It tastes sweet and creamy. Keep chilled so the coating stays firm.
Dairy-Free Coconut Cream Balls
Use dairy-free sweetened condensed coconut milk and vegan chocolate. This creates a dairy-free version.
The coconut flavor may be stronger. Chill well before serving.
Unsweetened Coconut Version
Use unsweetened shredded coconut to reduce sweetness. Pair with semi-sweet or dark chocolate for balance.
This version is still creamy but less sugary. It is a great option if you prefer a more restrained dessert.
Almond Coconut Cream Balls
Add chopped almonds to the filling. They bring crunch and a mild nutty flavor.
You can also add almond extract for more aroma. Use it sparingly.
Pecan Coconut Cream Balls
Add chopped pecans for a buttery crunch. Pecans taste wonderful with coconut and chocolate.
This variation is great for holiday trays. Chop the nuts small enough to roll smoothly.
Cashew Coconut Cream Balls
Add chopped cashews. They give the filling a creamy nut flavor.
Cashews work well with white chocolate or semi-sweet chocolate. They add texture without overpowering the coconut.
Lemon Coconut Cream Balls
Add lemon zest to the filling. It gives the coconut balls a bright flavor.
This variation tastes fresh and cheerful. It is a nice option for spring or summer.
Sea Salt Coconut Cream Balls
Add a pinch of sea salt. It balances sweetness and makes the chocolate taste richer.
This is especially good with dark chocolate. Use just enough to enhance the flavor.
Wafer Crunch Coconut Balls
Mix in crushed wafer cookies for extra texture. This creates a slightly crisp filling.
Use enough to add crunch without drying out the mixture. The balls still need to roll easily.
Plain Coconut Balls
Skip the chocolate coating. Serve them plain or roll them in extra coconut.
This version is quicker and lighter. Chill well before serving.
Extra Coconut-Coated Balls
Roll the shaped balls in extra shredded coconut. This creates a soft coconut coating instead of chocolate.
It is a simple no-chocolate option. It also looks pretty on a dessert platter.
Troubleshooting
The Mixture Is Too Sticky to Roll
Add an extra tablespoon or two of shredded coconut or powdered sugar. Mix again until the dough is easier to handle.
You can also chill the mixture for 10 minutes before rolling. Cold filling is less sticky.
The Mixture Is Too Dry
The ingredients may not be mixed long enough. Stir until the sweetened condensed milk fully coats the coconut.
If needed, press the mixture together with your hands. It should form a sticky dough.
The Balls Are Losing Their Shape
They may need more chilling time. Refrigerate the rolled balls for 30 minutes before dipping.
Make sure each ball is compact when rolled. Loose balls can flatten or break apart.
The Chocolate Is Too Thick
The chocolate may be cooling. Warm it briefly in the microwave and stir well.
Dip one ball at a time. Tap off excess chocolate to keep the coating smooth.
The Chocolate Seized
The chocolate may have overheated. Melt it in 30-second intervals and stir each time.
Avoid overheating. Smooth chocolate should look silky, not clumpy.
The Chocolate Is Pooling on the Tray
Too much chocolate may be left on each ball. Tap the fork on the edge of the bowl before placing the ball down.
A thinner coating looks cleaner. It also sets more evenly.
The Coating Is Soft
The chocolate may need more chilling time. Refrigerate for 20 minutes or until firm and shiny.
Warm room temperatures can soften chocolate. Keep the balls cool.
The Balls Taste Too Sweet
Use unsweetened coconut next time. You can also choose semi-sweet or dark chocolate for the coating.
A pinch of sea salt can help balance the sweetness. Add carefully.
The Balls Need More Texture
Add chopped nuts or crushed wafer cookies. Almonds, pecans, cashews, or wafer crumbs can all add crunch.
Chop add-ins small enough so the balls still roll smoothly. Too-large pieces can make shaping harder.
The Balls Are Hard to Transport
Keep them chilled before transporting. Use a container with parchment between layers.
Avoid warm temperatures. Chocolate can soften quickly.
Frequently Asked Questions
Can I freeze No-Bake Coconut Cream Balls?
Yes, No-Bake Coconut Cream Balls freeze beautifully for up to 2 months. Store them in an airtight freezer-safe container.
Thaw them in the refrigerator before serving. This helps keep the texture smooth and the chocolate firm.
What if the mixture is too sticky to roll?
Add 1 or 2 extra tablespoons of shredded coconut or powdered sugar. Then chill the mixture for 10 minutes before rolling.
You can also dip your fingertips in warm water while shaping. This helps prevent sticking.
Can I make these without chocolate?
Yes, you can leave them plain or roll them in extra coconut instead. They will still taste sweet and creamy.
Chill them well before serving. The coconut coating gives them a simple finish.
Can I use different types of chocolate?
Yes, white, milk, semi-sweet, or dark chocolate all work well. Choose based on your preferred sweetness level.
White chocolate makes them sweeter, while dark chocolate gives a richer balance. Semi-sweet is a nice middle option.
How can I keep the chocolate coating smooth?
Make sure the balls are chilled before dipping. Cold balls hold their shape better and coat more neatly.
Tap off excess chocolate on the edge of the bowl. This prevents pooling on the parchment paper.
How long do these coconut balls last?
They last up to 7 days in an airtight container in the refrigerator. Keep them chilled for the best texture.
They can also be frozen for up to 2 months. Thaw in the refrigerator before serving.
Can I make them dairy-free?
Yes, use dairy-free sweetened condensed coconut milk and vegan chocolate. This makes the recipe dairy-free.
The flavor may become more coconut-forward. Chill well so the balls stay firm.
What should I serve with No-Bake Coconut Cream Balls?
Serve them chilled on a dessert platter, cookie tray, holiday box, or dessert buffet. Mini cupcake liners make them look elegant.
They are also great with coffee, tea, or other simple drinks. Keep them cool until serving.
Why This Recipe Works So Well
No-Bake Coconut Cream Balls work so well because each ingredient has a clear role. The shredded coconut gives texture, the condensed milk binds, the powdered sugar thickens, and the chocolate coating makes each bite feel complete.
The filling is easy to mix by hand. It becomes sticky and rollable without baking.
The first chill firms the coconut balls. This makes them much easier to dip in melted chocolate.
The chocolate coating adds contrast. A firm shell around a creamy coconut center makes the dessert satisfying.
The recipe is also flexible. Sweetened coconut, unsweetened coconut, white chocolate, semi-sweet chocolate, dark chocolate, milk chocolate, nuts, lemon zest, almond extract, sea salt, and wafer crumbs can all change the flavor.
The storage options make it practical too. The balls keep for 7 days in the refrigerator and up to 2 months in the freezer.
They are especially useful for holidays and parties because they can be made ahead. You can roll, dip, chill, and serve without last-minute baking.
Most of all, these coconut cream balls work because they are simple but still feel special. They taste like a homemade candy, look pretty on a platter, and disappear quickly wherever they are served.
Final Thoughts
No-Bake Coconut Cream Balls are sweet coconut treats made with shredded coconut, sweetened condensed milk, vanilla extract, powdered sugar, optional chopped nuts, and melted white chocolate or semi-sweet chocolate. The filling is mixed into a sticky dough, rolled into 1-inch balls, chilled, dipped in chocolate, chilled again, and served once the shell is firm.
Serve them chilled on a dessert platter, in mini cupcake liners, inside holiday gift boxes, or as part of a cookie tray. With their no-bake method, simple ingredients, make-ahead storage, freezer-friendly texture, creamy coconut center, and flexible chocolate coating options, these coconut cream balls are an easy dessert worth keeping in your regular sweet-treat rotation.
No-Bake Coconut Cream Balls
Creamy, sweet, coconut-packed, and dipped in melted chocolate, these No-Bake Coconut Cream Balls are simple bite-sized treats made without turning on the oven. Shredded coconut, sweetened condensed milk, powdered sugar, vanilla, optional chopped nuts, and white chocolate or semi-sweet chocolate come together into a chilled dessert that works beautifully for holidays, parties, or last-minute sweet trays.
Recipe Details
- Prep Time: 15 minutes
- Chill Time: 35 minutes
- Total Time: 50 minutes
- Servings: 15 balls
- Calories: 180 kcal
Ingredients
For the Coconut Cream Balls
- 8 oz white chocolate or semi-sweet chocolate melted
- ½ cup chopped nuts optional
- 1 cup powdered sugar
- ½ teaspoon vanilla extract
- 1 cup sweetened condensed milk
- 2 ½ cups shredded coconut
Instructions
Step 1: Mix the Coconut Dough
In a large bowl, combine the shredded coconut, sweetened condensed milk, vanilla extract, powdered sugar, and optional chopped nuts. Stir everything together until the ingredients are evenly blended.
The mixture should become thick and sticky. This texture helps the coconut balls hold their shape once rolled.
Step 2: Shape Into Balls
Roll the coconut mixture into 1-inch balls. Place each ball on a parchment-lined tray as you work.
If the mixture sticks to your hands, dip your fingers in warm water as noted. This makes rolling easier and helps the balls form more neatly.
Step 3: Chill Until Firm
Refrigerate the coconut balls for 30 minutes, or until firm. This first chill helps them hold together before they are dipped in chocolate.
Do not rush this step. Firm coconut balls are easier to coat and less likely to fall apart in the melted chocolate.
Step 4: Melt the Chocolate
Melt the white chocolate or semi-sweet chocolate in a microwave-safe bowl. Heat in 30-second intervals, stirring after each interval, until the chocolate is smooth.
Stirring between intervals helps the chocolate melt evenly. The coating should be smooth enough to cover each chilled coconut ball.
Step 5: Dip the Coconut Balls
Dip each chilled coconut ball into the melted chocolate. Return the coated balls to the parchment-lined tray.
Coat each piece fully so the coconut filling is covered. Work gently so the balls keep their round shape.
Step 6: Chill Until Set
Refrigerate the dipped coconut balls again for 20 minutes, or until the chocolate is fully set. Once firm, serve them chilled or at room temperature.
Notes
- Dip fingers in warm water to prevent sticking while rolling.
- Store in an airtight container in the refrigerator for up to 1 week.
- Freeze for up to 2 months; thaw in the fridge before serving.
- For dairy-free: use vegan condensed milk and dairy-free chocolate.
Serving Suggestions
Serve No-Bake Coconut Cream Balls chilled or at room temperature once the chocolate coating has fully set. The creamy coconut center and chocolate shell make them easy to place on dessert trays, holiday platters, or party tables.
Use white chocolate for a sweeter, lighter-looking coating or semi-sweet chocolate for a deeper chocolate finish. If you want extra texture, include the optional chopped nuts in the coconut mixture before rolling.
These treats are especially convenient because they are no-bake and portioned into 15 balls. Keep them cold until ready to serve if you want the coating to stay firm.
Storage
How to Store
Store the coconut cream balls in an airtight container in the refrigerator for up to 1 week. Keep them covered so the chocolate coating and coconut filling stay fresh.
Freezer Tip
Freeze for up to 2 months. Thaw in the fridge before serving.
Rolling Tip
Dip your fingers in warm water to prevent sticking while shaping the coconut mixture. This helps the sticky dough roll into smoother 1-inch balls.
Chocolate Tip
Melt the chocolate in 30-second intervals, stirring until smooth. Use either white chocolate or semi-sweet chocolate as listed.
Dairy-Free Tip
For dairy-free, use vegan condensed milk and dairy-free chocolate. Keep the rest of the recipe the same.
Chilling Note
The metadata lists Chill Time as 35 minutes, while the method includes 30 minutes before dipping and 20 minutes after dipping. Follow the chilling steps in the method so the centers firm up and the chocolate fully sets.

Fernando is the creator and writer behind the food blog Eating with your Hands. Living and working in cities like Paris, Barcelona, and Berlin, and being married to a Canadian foodie, has given Fernando a passion and interest in food and inspired him to run EWYH.