
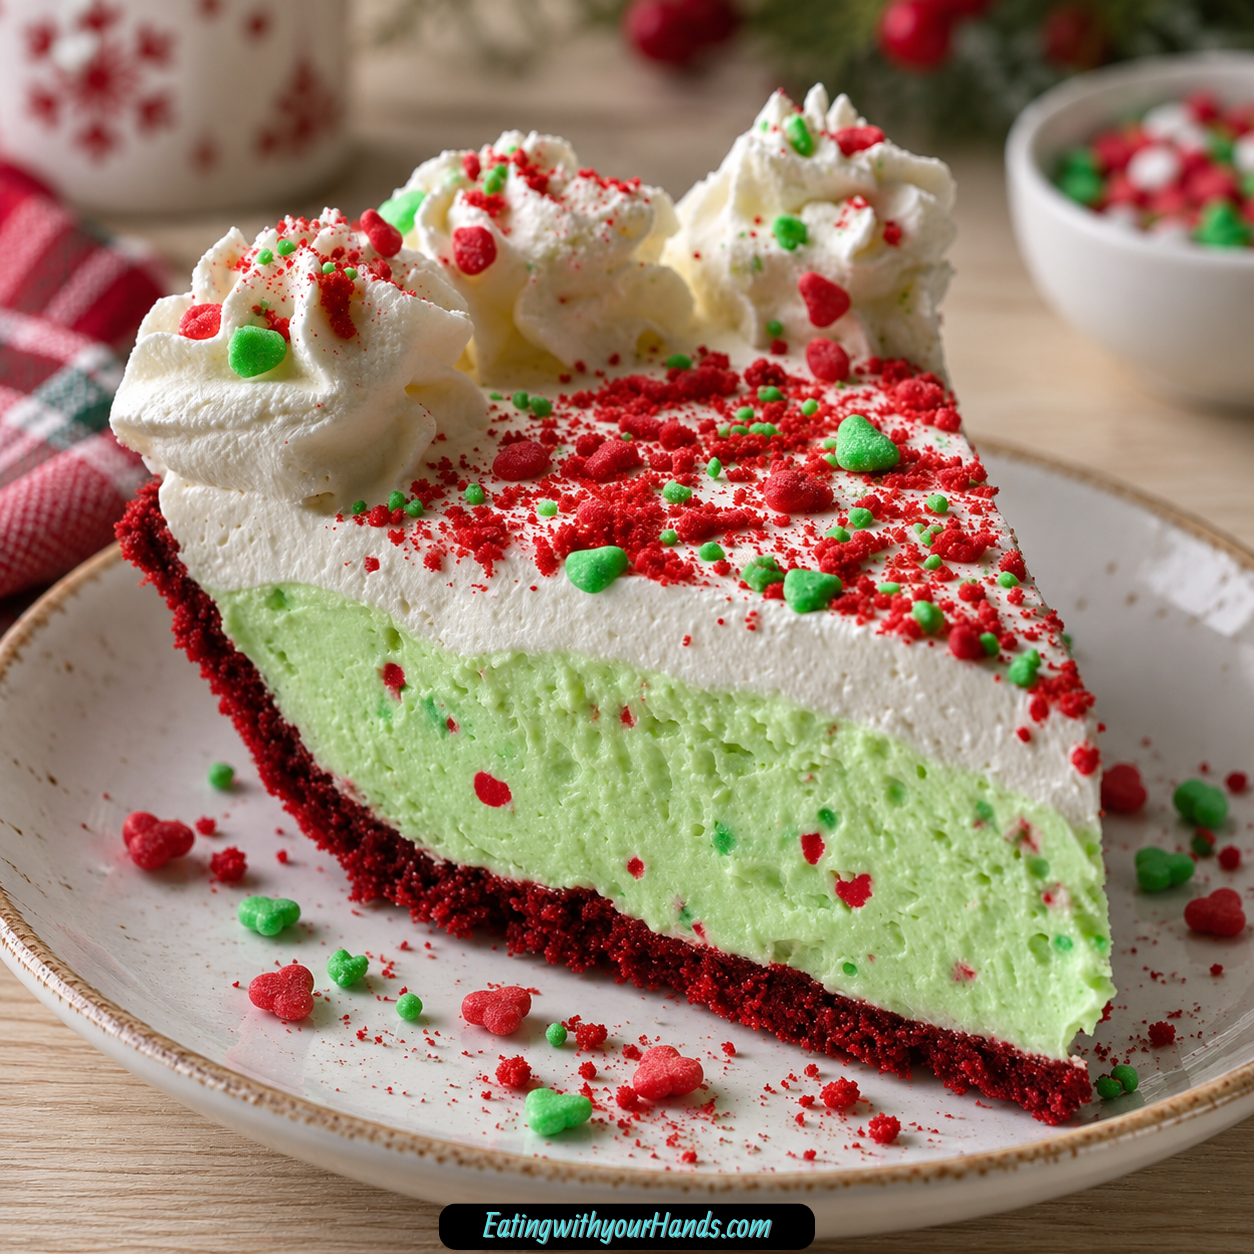
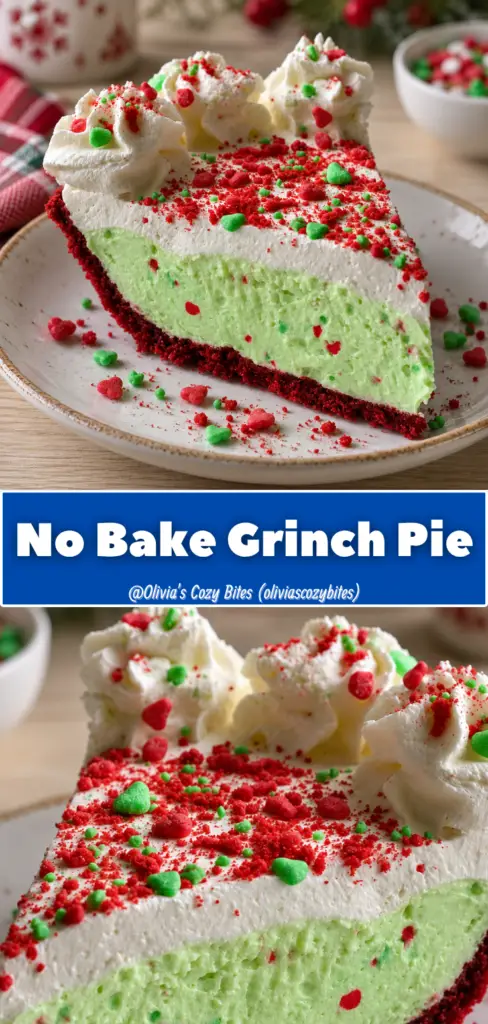
No Bake Grinch Pie is the kind of Christmas dessert that makes people smile before the first slice ever reaches a plate. It is bright green, creamy, playful, chilled, and decorated with red heart sprinkles that make the whole pie feel cheerful and full of holiday mischief.
This is a dessert made for busy December days, when the kitchen is already full of plans and the oven may not have a free minute. With an Oreo pie crust, white chocolate pudding, cold milk, Cool-Whip, green food coloring, sanding sugar, and heart sprinkles, the pie comes together without baking at all.
The look is part of the fun. That bold Grinch-green filling instantly stands out on a dessert table, especially once the top is scattered with sparkly green sugar and red hearts.
The texture is just as inviting. The filling is smooth, light, cool, and creamy, while the Oreo crust gives each bite a chocolatey base that balances the sweetness.
This pie feels festive without being difficult. It is simple enough for kids to help decorate, but cute enough to serve at Christmas parties, classroom treats, potlucks, or holiday movie nights.
The no-bake method also makes it a wonderful make-ahead dessert. Once the layers are spread into the crust and decorated, the pie chills until set, which makes slicing easier and gives the filling time to firm.
A dessert like this belongs to the fun side of holiday baking. It does not need fancy piping, complicated frosting, or a long ingredient list to become the centerpiece of the table.
No Bake Grinch Pie is creamy, bright, sweet, easy, and full of Christmas personality. It is the kind of pie that brings a little laughter to the dessert table and somehow disappears faster than expected.
Table of Contents
- Why You’ll Love This No Bake Grinch Pie
- Recipe Details
- Ingredients
- For the Pie
- Ingredient Notes
- Optional Swaps, Variations, Add-Ins, and Serving Ideas
- Graham Cracker Crust Grinch Pie
- Chocolate Cookie Crust Grinch Pie
- Stabilized Whipped Cream Version
- Regular Green Food Coloring Version
- Extra Heart Sprinkle Slices
- Crushed Candy Cane Topping
- Christmas Party Dessert
- Holiday Movie Night Pie
- Potluck Dessert
- Classroom Treat Style
- Make-Ahead Christmas Dessert
- Why This Recipe Works
- Directions
- Step 1: Prepare the Mixing Bowl
- Step 2: Add the Pudding Mix and Milk
- Step 3: Whisk the Pudding Base
- Step 4: Fold in the Cool-Whip
- Step 5: Add the Neon Green Color
- Step 6: Deepen the Green Shade
- Step 7: Fill the Oreo Crust
- Step 8: Make the Fluffy Top Layer
- Step 9: Spread the Top Layer
- Step 10: Add the Green Sanding Sugar
- Step 11: Add the Mini Red Heart Sprinkles
- Step 12: Add the Large Red Heart Sprinkles
- Step 13: Chill the Pie
- Step 14: Slice Cleanly
- Step 15: Garnish and Serve
- Step 16: Store Leftovers
- Serving Ideas
- Storage
- Freezing
- Make-Ahead
- Helpful Notes for Best Results
- Variations
- Troubleshooting
- Frequently Asked Questions
- Why This Recipe Works So Well
- Final Thoughts
- No Bake Grinch Pie
Why You’ll Love This No Bake Grinch Pie
This pie requires no baking. It is perfect for the holiday hustle because the oven stays off from start to finish.
The bright festive colors wow guests instantly. The green filling and red heart sprinkles make it unmistakably Christmas-ready.
The texture is creamy and light. White chocolate pudding and Cool-Whip create a smooth, fluffy filling.
It is kid-friendly and fun to make together. Decorating the top with sanding sugar and heart sprinkles is an easy job for little helpers.
It is a perfect make-ahead dessert. The pie needs chilling time, so it works beautifully when prepared in advance.
It is great for Christmas parties, movie nights, and potlucks. The playful look makes it a natural holiday table favorite.
Recipe Details
No Bake Grinch Pie starts with 1 Oreo pie crust. The chocolatey crust balances the sweet, creamy green filling.
The filling uses 1 box white chocolate pudding, 3.9 oz. This gives the pie its smooth, rich flavor and helps create structure.
The pudding is whisked with 2 cups cold 2% milk. Cold milk is essential because warm milk will not allow the pudding to thicken properly.
The pudding and milk are whisked for about 2 minutes. The mixture should become thickened and smooth.
Half a container of Cool-Whip is folded into the pudding mixture. This adds lightness and fluff to the filling.
The color comes from 2 to 3 drops neon green gel food coloring and 1 to 2 drops green food coloring. The color should be added gradually until the filling becomes a bright Grinch-green shade.
The green pudding mixture is poured into the Oreo pie crust. The top is smoothed gently with a spatula.
The remaining Cool-Whip is folded into any remaining pudding mixture to create a fluffy top layer. This layer is spread carefully over the pie.
The decoration uses ½ cup green sanding sugar, ½ cup mini red heart sprinkles, and ½ cup large red heart sprinkles. The hearts represent the Grinch’s growing heart and add festive flair.
The pie must chill for at least 4 hours or until fully set. Chilling helps the layers firm and makes slicing easier.
Ingredients
For the Pie
- 1 Oreo pie crust
- 1 box white chocolate pudding (3.9 oz)
- 2 cups 2% milk (cold)
- ½ container Cool-Whip
- 2-3 drops neon green gel food coloring
- 1-2 drops green food coloring
- ½ cup green sanding sugar
- ½ cup mini red heart sprinkles
- ½ cup large red heart sprinkles
Ingredient Notes
The Oreo pie crust gives the dessert a chocolatey base. That dark crust looks striking against the bright green filling.
White chocolate pudding creates the smooth, rich flavor and structure of the pie. It is the creamy foundation that helps the dessert set.
Cold 2% milk is important for thickening the pudding properly. Warm milk will not give the same set.
Cool-Whip adds lightness and fluff. It makes the pudding filling softer, airier, and easier to spread.
Neon green gel food coloring gives the pie its signature bold Grinch-green color. A little goes a long way, so it should be added gradually.
Regular green food coloring helps deepen and balance the green shade. Use 1 to 2 drops as needed.
Green sanding sugar adds sparkle and texture to the topping. It makes the pie look extra festive.
Mini red heart sprinkles represent the Grinch’s growing heart. They bring the playful holiday theme to the surface of the pie.
Large red heart sprinkles add dimension and extra festive flair. Using both mini and large hearts makes the decoration look more lively.
Optional Swaps, Variations, Add-Ins, and Serving Ideas
Graham Cracker Crust Grinch Pie
Use a graham cracker crust instead of the Oreo crust if desired. This gives the pie a lighter crust flavor.
The green filling and red heart sprinkles still make the pie festive. The texture and overall style remain simple and no-bake.
Chocolate Cookie Crust Grinch Pie
A chocolate cookie crust also works great. It keeps the same chocolatey balance as the Oreo crust.
This option is helpful if you want a similar base with a slightly different cookie flavor. The filling still stays creamy and bright.
Stabilized Whipped Cream Version
Homemade stabilized whipped cream can be used instead of Cool-Whip. It works well in the filling.
Cool-Whip holds its shape longer, so it is still a strong choice for make-ahead serving. Use stabilized whipped cream if that is your preference.
Regular Green Food Coloring Version
If neon green gel food coloring is not available, regular green food coloring can be used. Add a bit more for brightness.
Add the color slowly. It is easier to deepen the shade than to fix a green that becomes too dark.
Extra Heart Sprinkle Slices
Garnish individual slices with extra heart sprinkles. This adds a festive touch right before serving.
It is a simple way to make each plate feel special. Kids especially love the extra hearts.
Crushed Candy Cane Topping
Sprinkle crushed candy canes on top for a minty holiday twist. This adds extra crunch.
Use this idea if you want a little more holiday texture. It is optional and works best as a finishing touch.
Christmas Party Dessert
Serve this pie at Christmas parties. The bright color and red hearts make it stand out right away.
It works well as a centerpiece dessert. The playful look makes guests notice it before slicing.
Holiday Movie Night Pie
No Bake Grinch Pie is perfect for holiday movie nights. The theme fits beautifully with a cozy Christmas viewing.
Serve it chilled and sliced. Add extra heart sprinkles to individual slices if desired.
Potluck Dessert
Bring this pie to a potluck. It is easy to make ahead and easy to transport while chilled.
Keep it covered until serving. Slice with a clean knife for the neatest pieces.
Classroom Treat Style
This pie can work for classroom treats or kid-friendly holiday gatherings. The bright green color feels fun and playful.
Decorating the top can be a kid-approved activity. Little helpers can sprinkle the sugar and hearts.
Make-Ahead Christmas Dessert
Make the pie a day in advance for best convenience. Up to 24 hours ahead is ideal for texture and flavor.
The pie needs at least 4 hours to set. Preparing it early makes serving much easier.
Why This Recipe Works
No Bake Grinch Pie works because it turns simple ingredients into a festive dessert with almost no effort. The pudding gives structure, the Cool-Whip adds fluff, and the Oreo crust gives contrast.
Cold milk is the key to thick pudding. Without cold milk, the filling will not set properly.
Folding in Cool-Whip keeps the filling airy. Gentle folding helps maintain the creamy, fluffy texture.
Food coloring creates the signature look. Adding it gradually helps control the final shade of green.
The Oreo crust balances the sweet filling. The chocolate flavor keeps the pie from tasting one-note.
The sanding sugar and heart sprinkles add texture, sparkle, and personality. They turn a simple pudding pie into a holiday-themed dessert.
Chilling is essential. At least 4 hours in the refrigerator helps the layers firm and makes clean slicing possible.
The pie also works because it is make-ahead friendly. It can be prepared the day before a party, movie night, or holiday gathering.
Directions
Step 1: Prepare the Mixing Bowl
Set out a large mixing bowl for the pudding base. Make sure it is roomy enough for whisking and folding.
This pie comes together quickly once the pudding begins thickening. Having the bowl ready keeps the process smooth.
Step 2: Add the Pudding Mix and Milk
Add 1 box white chocolate pudding, 3.9 oz, to the large mixing bowl. Pour in 2 cups cold 2% milk.
The milk must be cold. Warm milk will not allow the pudding to thicken properly.
Step 3: Whisk the Pudding Base
Whisk the pudding mix and cold milk for about 2 minutes. The mixture should become thickened and smooth.
Keep whisking until there are no dry pudding streaks. This creates the creamy structure for the pie.
Step 4: Fold in the Cool-Whip
Gently fold half of the Cool-Whip into the pudding mixture. Use a spatula and light strokes.
Folding keeps the filling airy and smooth. Avoid stirring too aggressively because the filling should stay fluffy.
Step 5: Add the Neon Green Color
Add 2 to 3 drops neon green gel food coloring to the filling. Mix gently until the color begins to spread.
Add the color a few drops at a time. Food coloring is powerful, and gradual coloring gives better control.
Step 6: Deepen the Green Shade
Add 1 to 2 drops green food coloring. Mix until the filling reaches a bright Grinch-green color.
The goal is a bold, playful holiday green. Stop once the color looks balanced and festive.
Step 7: Fill the Oreo Crust
Pour the green pudding mixture evenly into the Oreo pie crust. Spread it gently from the center toward the edges.
Smooth the top with a spatula. Try not to press too firmly into the crust.
Step 8: Make the Fluffy Top Layer
Fold the remaining Cool-Whip into any remaining pudding mixture. Mix gently so the layer stays light.
This creates a softer, fluffy top layer for the pie. It also gives the surface a creamy finish.
Step 9: Spread the Top Layer
Spread the fluffy layer carefully over the top of the pie. Use slow, gentle strokes with a spatula.
Take your time so the top looks neat. Smooth layers help the pie look more polished when decorated.
Step 10: Add the Green Sanding Sugar
Sprinkle ½ cup green sanding sugar evenly over the top layer. Cover the surface lightly and evenly.
The sanding sugar adds sparkle and texture. It makes the pie look bright and festive.
Step 11: Add the Mini Red Heart Sprinkles
Scatter ½ cup mini red heart sprinkles over the surface. Spread them across the pie so every slice gets some hearts.
The mini hearts bring the Grinch-inspired theme to life. They also add color contrast against the green filling.
Step 12: Add the Large Red Heart Sprinkles
Scatter ½ cup large red heart sprinkles across the top. Use them to add dimension and extra festive flair.
The mix of mini and large hearts makes the decoration more playful. It gives the pie a cheerful holiday look.
Step 13: Chill the Pie
Place the pie in the refrigerator. Chill for at least 4 hours or until fully set.
This step helps the layers firm up. It also makes slicing much easier.
Step 14: Slice Cleanly
Serve the pie chilled for the best texture. Use a sharp knife to cut slices.
Wipe the blade between cuts for cleaner slices. This keeps the green filling and crust looking neat.
Step 15: Garnish and Serve
Garnish individual slices with extra heart sprinkles if desired. This gives each serving an extra festive touch.
Serve the pie for Christmas parties, classroom treats, holiday movie nights, or potlucks. Keep it chilled until serving.
Step 16: Store Leftovers
Cover leftover pie and store it in the refrigerator. Keep it chilled for up to 3 days.
Freezing is not recommended. Pudding-based pies can separate when thawed.
Serving Ideas
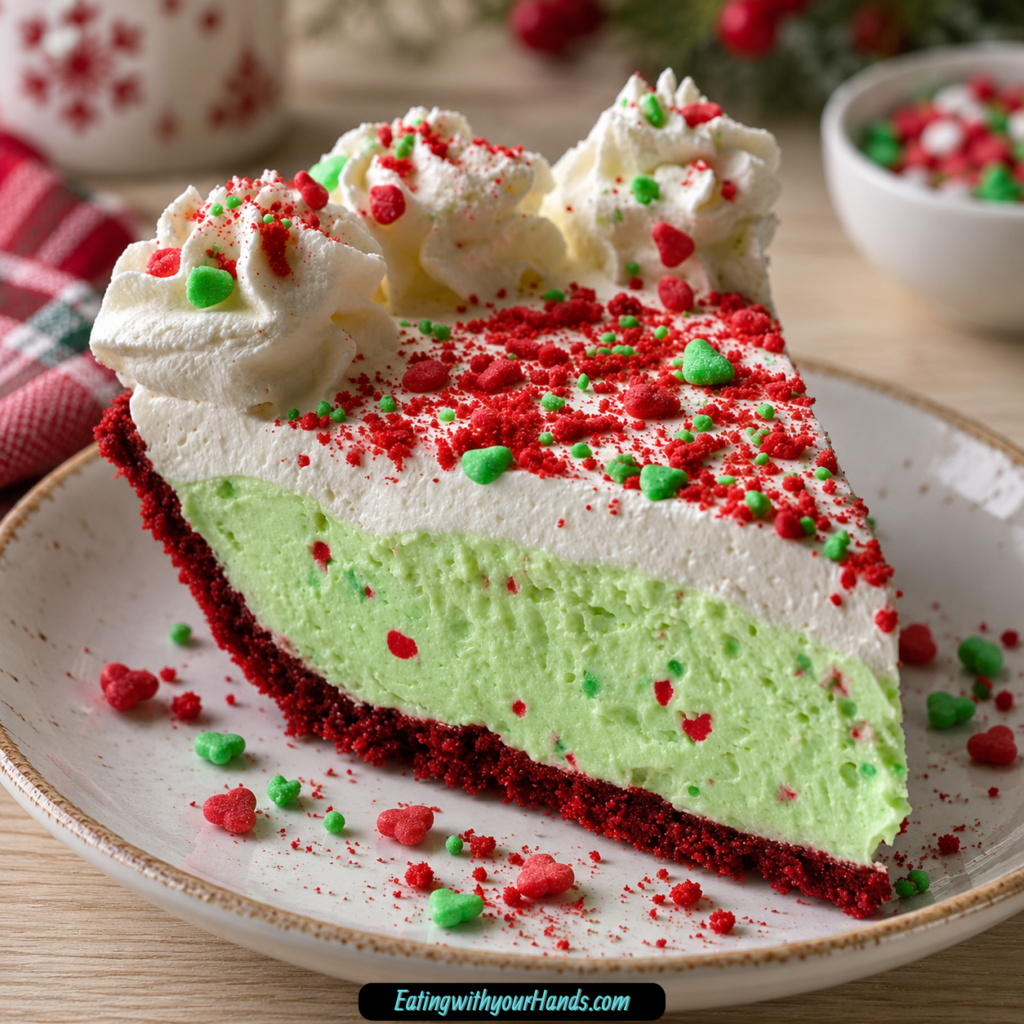
No Bake Grinch Pie should be served chilled. The cold texture keeps the filling creamy, light, and sliceable.
Use a sharp knife for slicing. Wiping the blade between cuts helps create cleaner pieces.
Add extra heart sprinkles to individual slices for a playful finishing touch. This makes each plate look festive and fun.
This pie is perfect for Christmas parties. Its bright green color makes it stand out instantly on a dessert table.
It is also a great choice for classroom treats. The fun color and heart decorations are kid-friendly and cheerful.
Holiday movie nights are another perfect occasion. A chilled slice of Grinch pie fits right into a cozy Christmas evening.
Serve it at potlucks when you need a make-ahead dessert. It can chill until ready to serve.
The Oreo crust gives each slice a chocolatey base. The creamy filling keeps the dessert light and sweet.
Storage
Store No Bake Grinch Pie covered in the refrigerator. It will keep for up to 3 days.
Because the filling is pudding-based and creamy, the pie should stay chilled. Cover it carefully so the top decorations stay protected.
This pie is ideal to make a day in advance. Up to 24 hours ahead gives the pie time to set while keeping the texture fresh.
Do not leave the pie at room temperature for long periods. Serve chilled and return leftovers to the refrigerator.
Freezing
Freezing is not recommended for No Bake Grinch Pie. Pudding-based pies can separate when thawed.
For the best texture, keep the pie refrigerated instead. Serve within 3 days.
If making ahead, prepare the pie up to 24 hours in advance. This gives you a set, sliceable dessert without risking texture changes from freezing.
The refrigerator is the best storage method. It keeps the filling smooth, light, and creamy.
Make-Ahead
No Bake Grinch Pie is a perfect make-ahead dessert. It needs at least 4 hours in the refrigerator, so preparing it ahead makes sense.
For best texture and flavor, make it up to 24 hours in advance. This gives the filling time to set fully.
Keep the pie covered while it chills. This helps protect the decorations and keeps the filling fresh.
If serving for a party, slice it only when ready. Clean slices look best when the pie is cold and fully set.
This make-ahead quality makes it great for Christmas gatherings, potlucks, classroom treats, and movie nights. The dessert is ready when you need it.
Helpful Notes for Best Results
Cold milk is key. Warm milk will not allow the pudding to thicken properly.
Add food coloring gradually. It is easier to deepen the green color than to fix an overly dark filling.
Use gentle folding when adding Cool-Whip. This keeps the filling smooth and airy.
Take your time spreading the layers. Smooth layers give the pie a neater presentation.
Chill for at least 4 hours. The pie needs time to set before slicing.
Use a sharp knife for serving. Wipe the blade between cuts for cleaner slices.
Decorating the pie is a fun job for little helpers. Kids can add sanding sugar and heart sprinkles.
For extra crunch, sprinkle crushed candy canes on top for a minty holiday twist. This is optional.
Variations
Classic Oreo Grinch Pie
Use the Oreo pie crust as written. The chocolatey base balances the sweet, creamy filling.
This version gives the pie a bold color contrast. The dark crust makes the green filling stand out.
Graham Cracker Grinch Pie
Use a graham cracker crust instead of Oreo. This gives the pie a lighter, sweeter crust flavor.
The filling and decorations remain the same. It is an easy crust swap.
Chocolate Cookie Crust Grinch Pie
Use a chocolate cookie crust if preferred. This keeps the pie chocolatey and festive.
It works especially well with the white chocolate pudding filling. The crust stays simple and no-bake.
Stabilized Whipped Cream Grinch Pie
Use homemade stabilized whipped cream instead of Cool-Whip. This can work well in the filling.
Cool-Whip holds its shape longer. Choose based on the texture and make-ahead needs you prefer.
Regular Green Grinch Pie
Use regular green food coloring if neon green gel is not available. Add a bit more for brightness.
Mix slowly and check the color as you go. The goal is a bright, playful green.
Extra Heart Sprinkle Grinch Pie
Add extra heart sprinkles to each slice before serving. This makes every piece look festive.
Use mini hearts, large hearts, or both. The hearts are the most playful decoration.
Candy Cane Crunch Grinch Pie
Add crushed candy canes on top for a minty holiday twist. This gives the pie extra crunch.
Use this variation when you want a stronger Christmas candy feel. It is optional and festive.
Movie Night Grinch Pie
Serve this pie for a Christmas movie night. The theme feels playful and cozy.
Keep it chilled until serving. Add extra heart sprinkles for fun.
Party Tray Grinch Pie
Slice the pie and serve it on a holiday dessert table. The color makes it easy to notice.
Wipe the knife between cuts for the neatest slices. Serve cold for the best structure.
Troubleshooting
The Pudding Did Not Thicken
The milk may not have been cold enough. Cold milk is essential for proper thickening.
Whisk the pudding and milk for about 2 minutes. The mixture should become smooth and thickened.
The Filling Looks Too Dark Green
Food coloring may have been added too quickly. Add color gradually a few drops at a time.
Next time, stop once the filling reaches a bright Grinch-green shade. Food coloring is powerful.
The Filling Is Not Bright Enough
Add a bit more green food coloring if neon green gel is not available. Regular green food coloring works, but it may need more for brightness.
Mix well after each drop. This helps you control the final color.
The Pie Looks Messy on Top
Take your time spreading the layers. Use gentle strokes with a spatula.
Add decorations evenly. Green sanding sugar and heart sprinkles can help make the surface look festive.
The Slices Are Not Clean
The pie may not have chilled long enough. Chill for at least 4 hours or until fully set.
Use a sharp knife and wipe the blade between cuts. This helps keep the slices neat.
The Pie Is Too Soft
It may need more chilling time. Refrigerate until the filling is fully set.
Make sure cold milk was used when preparing the pudding. Proper thickening begins with cold milk.
The Pie Separated After Freezing
Freezing is not recommended. Pudding-based pies can separate when thawed.
Store the pie covered in the refrigerator instead. Serve within 3 days.
The Crust Crumbled While Slicing
Use a sharp knife and cut gently. Make sure the pie is fully chilled before slicing.
A chilled pie is easier to cut. Wipe the knife between slices for a cleaner result.
The Pie Is Too Sweet
The chocolate crust helps balance the creamy filling. Serve smaller slices if desired.
The light, airy texture also helps keep the dessert from feeling too heavy. Keep the pie chilled for best balance.
The Cool-Whip Layer Deflated
The filling may have been stirred too aggressively. Fold gently with a spatula.
Light strokes help preserve fluffiness. Avoid overmixing once the Cool-Whip is added.
Frequently Asked Questions
Can I use homemade whipped cream instead of Cool-Whip?
Yes, stabilized whipped cream works well. It can be used in place of Cool-Whip.
Cool-Whip holds its shape longer, which makes it helpful for make-ahead pies. Choose the option that fits your serving plan.
What if I can’t find neon green gel food coloring?
Regular green food coloring works. Add a bit more if you need extra brightness.
Add it slowly and mix well between drops. This helps you avoid making the green too dark.
Can I use a different pie crust?
Yes, a graham cracker crust or chocolate cookie crust works great. The Oreo pie crust gives a chocolatey base, but other crusts can be used.
Keep the filling and chilling method the same. The pie will still be no-bake.
How far in advance can I make this pie?
Up to 24 hours ahead is ideal for best texture and flavor. The pie needs at least 4 hours to set.
Make it the day before a gathering if needed. Keep it covered in the refrigerator.
Is this pie very sweet?
It is sweet, but the light, airy filling and chocolate crust help balance it. The chilled texture also keeps it feeling creamy rather than heavy.
Serve smaller slices if you want a lighter dessert portion. Extra heart sprinkles can be added to individual slices for more festive fun.
How long does the pie need to chill?
The pie should chill for at least 4 hours. It needs to be fully set before slicing.
Chilling makes the layers firmer. It also helps the pie hold cleaner slices.
Can I freeze No Bake Grinch Pie?
Freezing is not recommended. Pudding-based pies can separate when thawed.
Store it covered in the refrigerator instead. It will keep for up to 3 days.
Can kids help make this pie?
Yes, this pie is kid-friendly and fun to make together. Decorating with sanding sugar and heart sprinkles is a great task for little helpers.
An adult can handle the mixing and slicing. The decorating step makes the pie feel playful and festive.
Why This Recipe Works So Well
No Bake Grinch Pie works so well because it turns simple ingredients into a dessert that is both easy and memorable. The flavor is creamy and sweet, while the decoration makes it feel joyful and festive.
The Oreo crust gives the pie a chocolatey base. That chocolate flavor balances the white chocolate pudding filling.
The white chocolate pudding gives the pie structure. When whisked with cold 2% milk, it thickens into a smooth base.
Cool-Whip lightens the filling. Folding it in gently makes the texture fluffy instead of heavy.
The food coloring creates the playful holiday look. Neon green gel gives brightness, while regular green food coloring deepens the shade.
Green sanding sugar adds sparkle and texture. Red heart sprinkles add the Grinch-inspired detail that makes the pie charming.
The chilling time is what makes the pie sliceable. At least 4 hours in the refrigerator allows the layers to firm.
The pie also works because it is make-ahead friendly. Preparing it up to 24 hours ahead makes holiday serving easier.
The recipe is flexible too. Graham cracker crust, chocolate cookie crust, stabilized whipped cream, regular green food coloring, extra heart sprinkles, and crushed candy canes all work as simple variations.
Most of all, this pie works because it feels fun. It is bright, creamy, cold, festive, and easy enough to make during the busiest part of the holiday season.
Final Thoughts
No Bake Grinch Pie is a bright, festive holiday dessert made with an Oreo pie crust, white chocolate pudding, cold 2% milk, Cool-Whip, neon green gel food coloring, green food coloring, green sanding sugar, mini red heart sprinkles, and large red heart sprinkles. The pudding is whisked with cold milk, folded with Cool-Whip, colored Grinch-green, layered into the crust, decorated with sparkling sugar and hearts, and chilled for at least 4 hours until fully set.
Serve it chilled at Christmas parties, potlucks, classroom treats, or holiday movie nights. With its no-bake method, creamy filling, chocolate crust, make-ahead convenience, playful green color, and cheerful red heart decorations, No Bake Grinch Pie is a sweet holiday dessert that brings instant joy to the table.
No Bake Grinch Pie
Bright, creamy, playful, and full of Christmas character, this No Bake Grinch Pie turns white chocolate pudding, Cool-Whip, green food coloring, an Oreo pie crust, sanding sugar, and red heart sprinkles into a festive chilled dessert. With its bold Grinch-green filling and cheerful heart-topped finish, it is an easy make-ahead pie for holiday parties, kids’ treats, and Christmas dessert tables.
Recipe Details
- Prep Time: 10 minutes
- Chill Time: 4 hours
- Total Time: 4 hours 10 minutes
- Servings: 8
- Calories: 320 kcal
Ingredients
For the No Bake Grinch Pie
- ½ cup large red heart sprinkles
- ½ cup mini red heart sprinkles
- ½ cup green sanding sugar
- 1 -2 drops green food coloring
- 2 -3 drops neon green gel food coloring
- ½ container Cool-Whip
- 2 cups 2% milk cold
- 1 box 3.9 oz white chocolate pudding mix
- 1 Oreo pie crust
Instructions
Step 1: Start the Pudding Filling
In a large bowl, whisk the white chocolate pudding mix with cold milk according to package directions. Continue until the pudding has thickened enough to hold a creamy shape.
Step 2: Make the Filling Fluffy
Gently fold in half of the Cool-Whip. Use a light folding motion so the pudding stays smooth, soft, and creamy instead of becoming heavy.
Step 3: Tint the Pie Filling
Add the neon green gel food coloring and green food coloring a few drops at a time. Mix gradually until the filling reaches a bright Grinch-green color.
Step 4: Fill the Oreo Crust
Pour the green pudding mixture evenly into the Oreo pie crust. Smooth the top so the filling sits in an even layer inside the crust.
Step 5: Add the Fluffy Top Layer
Fold the remaining Cool-Whip into any remaining pudding mixture. Spread this mixture over the pie to create a soft, fluffy top layer.
Step 6: Decorate the Top
Sprinkle the green sanding sugar evenly across the top of the pie. Add the mini red heart sprinkles and large red heart sprinkles for the festive Grinch-style finish.
Step 7: Chill Until Set
Refrigerate for at least 4 hours, or until fully set, before serving. The pie needs this chill time so the filling firms up for cleaner slices.
Notes
- Cold milk helps the pudding thicken properly.
- Add the food coloring little by little so the green shade does not become too dark.
- This pie is best made a day ahead for easier slicing and maximum flavor.
- For extra holiday crunch, crushed candy canes can be sprinkled on top with the hearts.
- Store leftovers covered in the refrigerator for up to 3 days.
Serving Suggestions
Serve this No Bake Grinch Pie well chilled, after it has had at least 4 hours in the refrigerator to set. The Oreo pie crust, creamy white chocolate pudding filling, bright green color, and red heart sprinkles make it a fun Christmas dessert for parties, kids’ tables, and holiday gatherings.
For the cleanest slices, make the pie a day ahead as noted. Add the green sanding sugar, mini red heart sprinkles, and large red heart sprinkles over the top for a festive finish, and use crushed candy canes with the hearts if you want extra holiday crunch.
Storage
How to Store
Store leftovers covered in the refrigerator for up to 3 days. Keep the pie chilled so the pudding layer and fluffy topping stay set.
Make-Ahead Tip
This pie is best made a day ahead for easy slicing and maximum flavor. The extra refrigerator time helps the no-bake filling become firmer before serving.
Pudding Tip
Always use cold milk so the pudding thickens properly. Warm or room-temperature milk is not used in this recipe.
Color Tip
Add food coloring gradually to control the final shade. A few drops at a time makes it easier to reach a bright Grinch-green color without going too dark.
Topping Tip
Sprinkle green sanding sugar evenly over the top, then decorate with mini and large red heart sprinkles. For extra holiday crunch, add crushed candy canes on top with the hearts.

Fernando is the creator and writer behind the food blog Eating with your Hands. Living and working in cities like Paris, Barcelona, and Berlin, and being married to a Canadian foodie, has given Fernando a passion and interest in food and inspired him to run EWYH.