
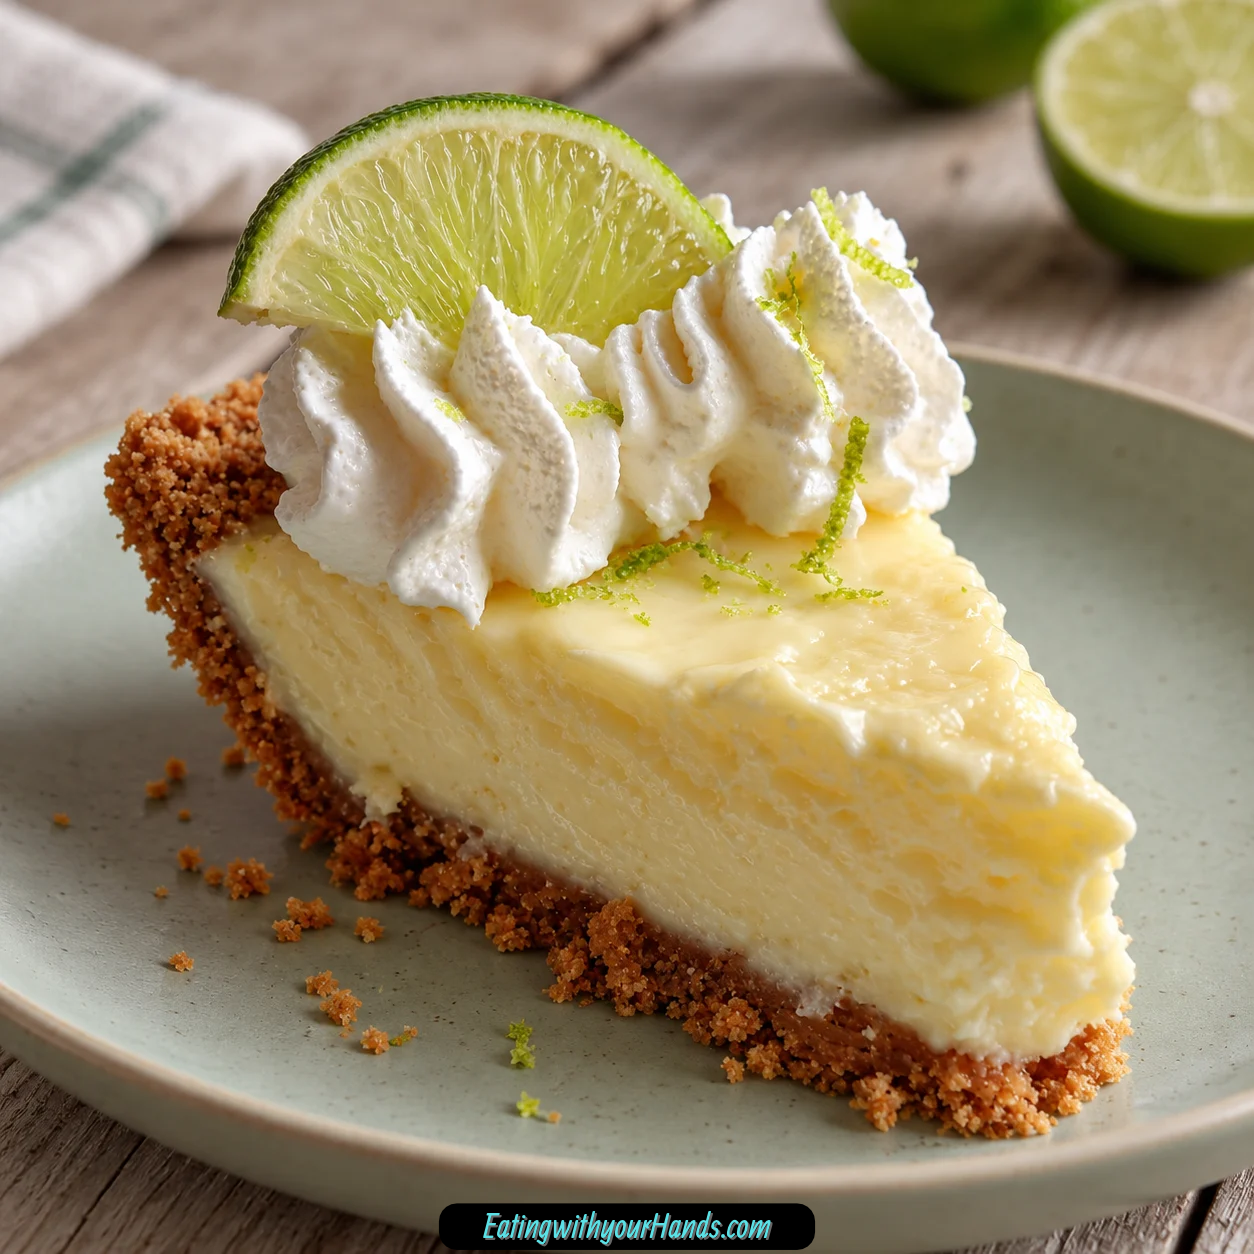

There are summer desserts that taste good, and then there are desserts that seem to change the temperature of the entire afternoon the moment you take a bite. These No-Bake Mini Key Lime Pies belong firmly in that second category, with a cool creamy filling, tart lime flavor, sweet graham cracker crust, and a soft cloud of whipped cream on top.
My attachment to key lime pie started during a beach vacation in Florida, when I tasted the real combination of sharp lime and sweet crumbly crust for the first time. That first chilled slice stayed in my mind long after the trip was over, and it eventually inspired these tiny individual versions that bring back the same sunny feeling without ever turning on the oven.
I especially love making them when the weather is too hot for baking. Everything stays cool from beginning to end, and the only real challenge is having enough patience to let the pies chill until the filling is properly set.
The mini format makes them even more fun. Instead of cutting one large pie and trying to serve clean slices, everyone gets an individual little dessert with its own crust, filling, whipped cream, and lime garnish.
They are also incredibly useful when company is coming. The active preparation takes about 15 minutes, so you can assemble them quickly and let the refrigerator do the rest of the work.
That is exactly why these became one of my favorite last-minute gathering desserts. Friends often assume I spent much longer making them, even though most of the time is simply waiting for the filling to become cold, creamy, and firm.
The first bite always brings me back to that beach afternoon. Tart key lime cuts through the richness of sweetened condensed milk, while the graham cracker base gives every spoonful the crunch that keeps the dessert from becoming one soft texture.
Then the whipped cream softens the citrus just enough. Add a thin lime slice on top, and a very simple no-bake dessert suddenly looks like something made for a summer party.
Table of Contents
- Why You’ll Love These No-Bake Mini Key Lime Pies
- Ingredients for No-Bake Mini Key Lime Pies
- Why Fresh Key Lime Juice Matters
- Why the Crust Needs to Chill
- Equipment You’ll Need
- How to Make No-Bake Mini Key Lime Pies
- How to Rescue Over-Whipped Cream
- Why Room-Temperature Condensed Milk Helps
- Tips for Perfect No-Bake Mini Key Lime Pies
- Key Lime Alternatives
- Coconut Graham Cracker Crust
- Dairy-Free Variation
- Cookie Crust Variations
- Adults-Only Rum Variation
- Making One Large Key Lime Pie
- Serving No-Bake Mini Key Lime Pies
- Party and Transportation Tips
- How to Store Mini Key Lime Pies
- Making the Pies Ahead
- Freezing No-Bake Mini Key Lime Pies
- What to Do if the Filling Seems Runny
- Frequently Asked Questions
- Nutritional Information
- The Dessert That Still Feels Like a Beach Vacation
- No-Bake Mini Key Lime Pies
Why You’ll Love These No-Bake Mini Key Lime Pies
The most obvious advantage is that there is absolutely no oven time. When the kitchen is already warm, a dessert that goes directly from mixing bowl to refrigerator feels like a small luxury.
The filling is another reason these pies disappear so quickly. Sweetened condensed milk and fresh key lime juice create a smooth, creamy center with enough tartness to keep every bite refreshing.
The graham cracker crust brings contrast. Melted butter binds the crumbs together while a small amount of sugar gives the base just enough sweetness to stand beside the tangy lime filling.
The individual portions also make serving beautifully simple. There is no slicing at the table, no fighting with a soft first piece, and no guessing whether one person got a dramatically larger serving than everyone else.
They are fast to assemble too. You can move from ingredients to filled mini pies in roughly 15 minutes, then refrigerate them until they are completely set.
That makes them especially practical for entertaining. You can finish the active work early, keep the pies chilled, and add whipped cream shortly before serving.
And perhaps the best part is the first cold bite. The tart lime cuts through richer meals beautifully, making the dessert feel both indulgent and surprisingly refreshing.
Ingredients for No-Bake Mini Key Lime Pies
The ingredient list is short, which means the quality and balance of each component matters. The dessert is built from three simple layers: graham cracker crust, key lime filling, and whipped cream topping.
For the Graham Cracker Crust
- 1 cup graham cracker crumbs, about 8 full sheets
- ¼ cup melted butter
- 2 tablespoons sugar
Crush the graham crackers finely enough that they can pack firmly into the mini pie cups. Unsalted butter is preferred so you have more control over the final flavor.
For the Key Lime Filling
- 1 (14-ounce) can sweetened condensed milk
- ⅓ cup key lime juice
- 1 teaspoon lime zest
Sweetened condensed milk is essential to this filling and should not be confused with evaporated milk. Fresh key lime juice gives the brightest flavor, while the zest strengthens both the aroma and the citrus character.
For the Whipped Cream Topping
- 1 cup heavy cream
- 2 tablespoons powdered sugar
- Lime slices, for garnish
Keep the heavy cream cold until you are ready to whip it. Chilling the bowl and beaters beforehand also makes it easier to reach firm peaks.
Why Fresh Key Lime Juice Matters
Fresh lime juice is one of the most important ingredients in these pies. Bottled juice can work when necessary, but it does not have the same bright, lively acidity as freshly squeezed key limes.
About 10–12 small key limes can provide the ⅓ cup juice needed for the standard filling. It takes a little more squeezing, but the difference in freshness is noticeable.
If key limes are unavailable, regular Persian limes can stand in. About 2 medium limes can provide enough juice, although the flavor will be slightly more tart and less floral.
When using Persian limes, add an extra teaspoon of zest to strengthen the citrus character. That extra aromatic layer helps the substitute feel closer to the intensity you want in a key lime dessert.
Why the Crust Needs to Chill
The graham cracker base may look ready as soon as it is pressed into the pans, but those first 10 minutes in the refrigerator matter. The cold gives the melted butter time to firm around the crumbs so the crust holds together more reliably once the filling is added.
Skipping that short chill can leave the crust loose and crumbly. The filling may also begin soaking into an unstable base before it has enough structure to support itself.
The texture should resemble wet sand when you first mix the crumbs, butter, and sugar. When pressed firmly, the mixture should hold its shape instead of falling apart immediately.
Compacting it well is just as important as chilling. A loosely pressed crust may taste good, but it is much more likely to crumble when you lift or eat the mini pies.
Equipment You’ll Need
You only need a few basic tools to make these no-bake desserts. Two mixing bowls, mini pie pans or cups, a whisk, and an electric mixer are enough for the entire process.
Four-inch mini tins work well, but disposable foil cups and ramekins can also be used. The exact presentation may change, but the same crust-and-filling method still works.
A hand mixer is completely sufficient for the whipped cream. There is no need to pull out a stand mixer unless that is simply the tool you prefer.
A zester is convenient for the lime peel, though the fine holes of a box grater work too. The goal is fine zest without large pieces of bitter white pith.
How to Make No-Bake Mini Key Lime Pies
The method works best when you prepare the crust first, let it chill while you mix the filling, and save the whipped cream for after the pies have fully set. The active work moves quickly, but each chilling stage has a purpose and should not be rushed.
Step 1: Prepare the Graham Cracker Crust
Place 1 cup graham cracker crumbs in a mixing bowl, then add ¼ cup melted butter and 2 tablespoons sugar. Stir until every crumb looks evenly moistened and the mixture resembles wet sand.
Test the texture by squeezing a small amount in your hand. If it holds together when compressed, the crust mixture is ready to divide among the mini pans.
Use about 2 tablespoons crust mixture for each mini pie as a general guide. Press the crumbs firmly into the bottom with the back of a spoon or your fingers so the base becomes compact and even.
Step 2: Chill the Mini Crusts
Transfer the prepared crusts to the refrigerator and chill them for 10 minutes. This short rest allows the butter to firm and helps the bases stay together once the creamy filling is added.
Do not skip this stage even if the crusts already look sturdy. A cold, compact base gives the finished pies a much cleaner texture than crumbs that have not had time to set.
While the crusts chill, move directly into preparing the lime filling. That way the 10-minute wait becomes useful rather than adding idle time to the recipe.
Step 3: Mix the Key Lime Filling
In a clean bowl, combine the 14-ounce can sweetened condensed milk, ⅓ cup fresh key lime juice, and 1 teaspoon lime zest. Begin whisking gently so the lime juice does not splash out of the bowl.
Continue until the mixture becomes completely smooth and evenly blended. You may notice it thickening slightly as the lime juice incorporates into the sweetened condensed milk.
Stop once the filling is uniform. Overmixing is unnecessary and can make the texture denser than the light, creamy result you want.
Step 4: Fill the Chilled Crusts
Remove the mini crusts from the refrigerator and check that they feel firmer than when first pressed. Divide the lime filling evenly among the prepared cups using a small ladle, spoon, or measuring cup.
Pour slowly so the crust stays intact and the filling remains inside the cups. Try to give each mini pie a similar amount so they chill and set at roughly the same rate.
Smooth the surfaces gently with the back of a spoon. You can also give the pans a very light shake to level the tops without disturbing the crust.
Step 5: Chill Until the Filling Is Firm
Place the filled mini pies in the refrigerator for at least 2 hours. This is the most important waiting period because the filling needs enough time to firm into a creamy, spoonable pie texture rather than remaining loose.
Do not shorten the chill just because the surface appears set. The center also needs time to become stable.
If the filling still seems runny after the initial chill, refrigerate the pies for another hour. Serving too early is one of the easiest ways to end up with a soft filling that behaves more like pudding than pie.
Step 6: Whip the Cream
About 10 minutes before whipping, place the mixing bowl and beaters in the refrigerator so they become cold. Once chilled, pour in 1 cup heavy cream and add 2 tablespoons powdered sugar.
Begin mixing on low speed, then gradually increase toward high. Watch the texture closely as the cream moves from liquid to soft peaks and then toward stiff peaks.
Stop when the peaks stand upright rather than folding over. Continuing much beyond that point can push the cream toward butter instead of the soft, fluffy topping you want.
Step 7: Top and Garnish the Mini Pies
Once the pies are fully chilled and firm, add whipped cream to each one. You can dollop it on with a spoon or pipe decorative swirls if you prefer a more polished presentation.
Finish each pie with a thin lime slice. Extra lime zest can also be scattered over the whipped cream when you want more color and citrus aroma.
Serve the pies cold from the refrigerator. Their cool temperature is part of the dessert’s appeal and keeps the creamy filling at its best texture.

How to Rescue Over-Whipped Cream
Whipped cream can move from perfect to overworked very quickly. Once stiff peaks form, stop mixing instead of assuming a few more seconds will make it even better.
If the cream has gone slightly too far, add another tablespoon of heavy cream. Fold it in gently rather than beating aggressively.
That small amount can help soften the texture. The goal is to bring the cream back toward a smooth, fluffy consistency before it separates further.
Cold tools also make the process easier to control. A chilled bowl and beaters give the heavy cream a better environment for forming stable peaks.
Why Room-Temperature Condensed Milk Helps
Sweetened condensed milk that is extremely cold can be harder to blend smoothly with lime juice. Letting the can sit out for about 30 minutes before mixing can make the filling easier to whisk.
This does not mean the finished pies should stay warm. The filling still needs a long refrigerator chill after assembly.
The same principle applies if you make a cream cheese variation. Very cold cream cheese can create lumps, so letting it soften first helps produce a smoother mixture.
The standard recipe itself does not require cream cheese. The base filling remains sweetened condensed milk, key lime juice, and zest.
Tips for Perfect No-Bake Mini Key Lime Pies
Freshly squeezed lime juice gives the brightest result. Squeeze the limes shortly before mixing so the citrus flavor stays as fresh as possible.
Do not skip the 10-minute crust chill. That brief refrigeration gives the butter time to firm and helps the crumb base resist becoming soggy.
Whip the cream only to stiff peaks. Once the tips stand upright and the beaters leave clear marks, stop before the mixture moves toward butter.
Give the pies the full 2-hour chill. The dessert may be quick to assemble, but the refrigerator time is what creates a properly set filling.
Serve them cold. Leaving the pies out too long softens the filling and takes away some of the refreshing quality that makes them especially good in warm weather.
Key Lime Alternatives
Regular Persian limes work when key limes are difficult to find. Use about 2 medium limes to provide the juice needed for the filling.
The flavor will be slightly different, with more direct tartness and less floral character. Add an extra teaspoon zest to make the lime presence stronger.
Fresh juice remains the preferred option. The filling is so simple that citrus flavor has nowhere to hide.
This substitution still gives you a delicious lime dessert. It simply moves the flavor slightly away from the traditional key lime profile.
Coconut Graham Cracker Crust
For a tropical variation, replace half of the graham cracker crumbs with toasted coconut flakes. The coconut adds another warm, toasty flavor that pairs naturally with lime.
Keep enough graham crumbs in the mixture to preserve the familiar pie-crust character. Mix the coconut with the melted butter and sugar just as you would the standard crumbs.
Press and chill the crusts in the same way. The coconut version should still receive the full 10-minute refrigerator rest before filling.
This variation gives the mini pies a stronger beach-dessert personality. Lime and coconut work together without changing the creamy center.
Dairy-Free Variation
Coconut condensed milk can replace regular sweetened condensed milk. Coconut oil can also replace the butter in the crust.
The coconut oil firms well when chilled, making it useful for a no-bake crumb base. Expect the overall flavor and texture to differ slightly from the standard version.
The coconut element naturally changes the personality of the dessert. It makes the lime filling feel even more tropical while still preserving the tart-and-sweet contrast.
Use the same general chilling method. The pies still need enough refrigerator time to become firm before serving.
Cookie Crust Variations
Graham crackers are not the only option for the base. Crushed vanilla wafers or shortbread cookies can both create a sweet, crisp foundation for the lime filling.
Gingersnaps add a much bolder twist. Their spicy flavor creates a stronger contrast with the cool tart filling.
Use the same general crumb-and-fat idea when adapting the crust. The finished texture should still resemble damp crumbs that hold together firmly when pressed.
Different cookies will change the sweetness and personality of the dessert. Choose one that complements the lime rather than overwhelming it.
Adults-Only Rum Variation
For a grown-up version, add 1 tablespoon lime-flavored or coconut-flavored rum to the filling. The rum adds another layer of tropical flavor without changing the basic character of the dessert.
Mix it into the sweetened condensed milk, lime juice, and zest until evenly distributed. Continue with the same filling and chilling process.
Keep this variation separate when serving children. The standard version remains completely satisfying without alcohol.
This option works especially well for adult gatherings. It turns a playful mini dessert into something a little more festive.
Making One Large Key Lime Pie
The recipe can be made as one large pie instead of individual portions. Use a 9-inch pie dish and press all the crust mixture across the bottom and slightly up the sides.
Add the filling just as you would for the mini pies. Smooth the surface and transfer the dish to the refrigerator.
A large pie needs at least 3 hours to chill properly. The greater depth means the center takes longer to firm than the smaller individual portions.
Do not rush the chilling stage. Cutting too early can leave you with a soft dessert that needs to be eaten with a spoon rather than clean slices.
Serving No-Bake Mini Key Lime Pies
These mini pies are best served directly from the refrigerator. The cold temperature keeps the filling silky and gives the lime flavor that refreshing quality that makes the dessert so good in summer.
Top each one with whipped cream shortly before serving. A thin lime slice gives the simplest presentation an instantly polished appearance.
For extra color, scatter a little additional zest over the top. Tiny mint leaves are another decorative option when you want a fresh green finish.
Try not to leave the pies sitting out for an hour before serving. They will still taste good, but the filling gradually loses some of its ideal chilled texture.
Party and Transportation Tips
Individual pies are already convenient for parties because no one needs to cut or serve slices. Keep them refrigerated until close to serving time whenever possible.
When transporting them, consider waiting to add the whipped cream until you arrive. A finished swirl can easily get flattened against a container lid during the trip.
Pack the whipped cream separately in a piping bag or another suitable container. Decorate the pies on-site for a cleaner final presentation.
The same approach works when preparing them ahead for a gathering. Chilled filled crusts travel more neatly than fully decorated pies.
How to Store Mini Key Lime Pies
Cover the pies tightly with plastic wrap or place them in airtight containers. Whipped cream absorbs refrigerator odors easily, so good coverage is especially important.
They are at their best within the first 24 hours. During that period, the crust remains at its crispest and the filling stays especially smooth.
The pies can still be kept in the refrigerator for up to 3 days. The crust will soften gradually, while the lime flavor becomes a little mellower.
By the second day, the filling can taste even more settled. The tradeoff is that the whipped cream may start weeping after day 2.
Making the Pies Ahead
The pies are very convenient for advance preparation. Assemble and chill the filled crusts, then add fresh whipped cream closer to the time you plan to serve them.
If you are serving them the next day, keeping the topping separate protects both the whipped cream texture and the appearance. The filling itself has time to mellow and develop while refrigerated.
Keep everything covered so refrigerator odors do not transfer into the dessert. Add the lime slices shortly before serving for the freshest look.
This approach makes entertaining much easier. The majority of the work is already finished before guests arrive.
Freezing No-Bake Mini Key Lime Pies
The pies can be frozen, but leave off the whipped cream topping. Freeze the filled crusts and add fresh whipped cream only after they have been thawed.
The filling becomes somewhat denser and slightly icier after freezing. It is still enjoyable, but it will not have exactly the same silky texture as a freshly refrigerated pie.
For the best frozen storage, keep them for no more than 1 month. Longer storage can make the filling increasingly icy.
Thaw overnight in the refrigerator before serving. Once thawed, decorate with freshly whipped cream and lime slices.
What to Do if the Filling Seems Runny
The first thing to check is chilling time. If the pies have not been refrigerated for at least 2 hours, give them another hour before deciding something is wrong.
Very watery lime juice can also contribute to a looser filling. Keep the juice undiluted and measure the intended ⅓ cup.
For a future batch, 1 teaspoon cornstarch can be added to the crust mixture to help absorb extra moisture. Keep this adjustment with the crust rather than changing the proportions of the lime filling.
Most importantly, do not serve immediately after assembly. This dessert depends on refrigeration to reach its finished consistency.
Frequently Asked Questions
Can I Use Bottled Lime Juice?
Yes, although fresh juice gives a brighter flavor. Bottled key lime juice can work when fresh key limes are not available.
Add an extra teaspoon lime zest when using bottled juice. The additional zest helps restore some of the citrus intensity that bottled juice can lack.
Can I Make One Large Pie?
Yes. Press all the crust mixture into a 9-inch pie dish and extend it slightly up the sides.
Add the filling and refrigerate for at least 3 hours. A large pie needs longer than the mini versions before it becomes firm enough for clean slices.
How Long Do the Mini Pies Last in the Refrigerator?
They are best within 24 hours. The crust is at its crispest during that first day.
Covered pies keep for up to 3 days. The whipped cream may begin weeping after day 2, so adding fresh topping at serving time is best when preparing them ahead.
Can I Freeze Them?
Yes. Freeze the filled crusts without whipped cream.
Keep them frozen for up to 1 month. Thaw overnight in the refrigerator and add fresh whipped cream before serving.
Why Is My Filling Still Runny?
The pies may simply need more refrigerator time. Chill for another hour before serving.
Make sure the lime juice was not diluted. The filling depends on the correct amount of concentrated juice and sufficient chilling.
Can I Use Regular Limes?
Yes. About 2 medium Persian limes can replace the key limes.
Add an extra teaspoon zest because the flavor is slightly different. The dessert will still be tart, creamy, and refreshing.
Can I Use Another Cookie for the Crust?
Yes. Vanilla wafers and shortbread cookies both work.
Gingersnaps create a spicier crust with a stronger flavor contrast. Choose the cookie according to how bold you want the base to taste.
Nutritional Information
Each mini pie contains approximately 320 calories. It also provides about 28g sugar, 18g fat, 11g saturated fat, 36g carbohydrates, 1g fiber, 5g protein, 150mg sodium, and 55mg cholesterol.
These values are estimates and can change depending on the exact brands and ingredients used. Crust substitutions, coconut condensed milk, rum, alternate cookies, or different portion sizes will all affect the final numbers.
The whipped cream contributes additional calories, with about 50 calories per tablespoon. The actual amount will depend on how generously each mini pie is topped.
For strict nutrition tracking, use the exact brands and quantities in your own batch. The values above are best treated as a practical estimate per mini pie.
The Dessert That Still Feels Like a Beach Vacation
I think the reason these little pies have stayed in my summer rotation is that they never feel like a compromise. They are quick and easy enough for a busy day, but the first cold bite still feels like a dessert worth slowing down for.
Every time I taste that combination of tart lime and sweet graham cracker crust, I am reminded of the first key lime pie I tried in Florida. The setting may be different now, but the flavor still brings back the same warm afternoon and that immediate realization that lime could make dessert feel this refreshing.
I also love how little effort the recipe asks from me. There is no hot oven, no complicated pastry, and no delicate baking schedule that can go wrong if I turn away for a minute.
Instead, I mix a crumb crust, whisk three filling ingredients together, and let the refrigerator finish the job. The hardest part is still exactly what it was the first time I made them at home: waiting long enough before reaching for one.
That wait becomes especially difficult once the whipped cream is ready. Cool lime filling, a compact graham base, fluffy cream, and a fresh lime slice make each tiny pie look far more elaborate than the process actually was.
They are just as useful for entertaining as they are for a quiet summer dessert. Guests get their own portions, there is no messy slicing, and I can decorate them just before serving so every pie looks fresh.
Sometimes I keep them completely classic. Other times coconut finds its way into the crust, gingersnaps replace graham crackers, or a little flavored rum turns the filling into something meant strictly for the adults.
But I always come back to the original combination. Sweetened condensed milk, fresh key lime juice, graham crackers, butter, sugar, and whipped cream do not need much help to become something memorable.
That is why these No-Bake Mini Key Lime Pies remain one of my favorite warm-weather desserts. They are cool, creamy, tart, sweet, simple enough for an ordinary afternoon, and still capable of taking me right back to that sunny Florida day with the very first bite.
No-Bake Mini Key Lime Pies

Bright, creamy, and wonderfully easy, these No-Bake Mini Key Lime Pies pair a buttery graham cracker crust with a smooth lime filling and fluffy whipped cream. With no oven required and a simple two-hour chill, they make a refreshing American dessert with plenty of citrus flavor in every bite.
Recipe Details
- Prep Time: 15 minutes
- Total Time: 2 hours 15 minutes
- Course: Dessert
- Cuisine: American
- Servings: 6 mini pies
- Calories: 320 kcal
Ingredients
For the Graham Cracker Crust
- 2 tablespoons sugar
- ¼ cup melted butter
- 1 cup graham cracker crumbs
For the Key Lime Filling
- 1 teaspoon lime zest
- ⅓ cup key lime juice
- 1 14-ounce can sweetened condensed milk
For the Whipped Cream Topping
- 2 tablespoons powdered sugar
- 1 cup heavy cream
For Garnish
- Lime slices for garnish
Instructions
Step 1: Make the Graham Cracker Crust
In a bowl, combine the graham cracker crumbs, melted butter, and sugar.
Mix until the crumbs are evenly moistened and can hold together when pressed.
Step 2: Form the Mini Crusts
Divide the graham cracker mixture among mini pie pans or cups.
Press the crumbs firmly into the bottoms to create an even crust layer.
Step 3: Chill the Crust if Desired
For a firmer crust, refrigerate the prepared crusts for 10 minutes before adding the filling.
This brief chill helps the butter firm up and gives the base a more structured texture.
Step 4: Prepare the Key Lime Filling
In another bowl, whisk together the sweetened condensed milk, key lime juice, and lime zest.
Continue whisking until the filling is smooth and evenly blended.
Step 5: Fill the Mini Pies
Pour the lime filling over the prepared graham cracker crusts.
Divide the mixture evenly among all 6 mini pies.
Step 6: Chill Until Set
Place the pies in the refrigerator for at least 2 hours.
Let them chill until the filling has had time to firm and the crust is fully settled.
Step 7: Make the Whipped Cream
Whip the heavy cream and powdered sugar together until stiff peaks form.
Keep whipping only until the cream is firm enough to hold its shape.
Step 8: Finish the Pies
Top each chilled mini pie with the whipped cream.
Garnish with lime slices before serving.
Notes
- Use fresh key lime juice for best flavor.
- Chill the crust for 10 minutes before adding the filling for a firmer texture.
- Store in the refrigerator for up to 3 days.
Serving Suggestions
Serve Irresistible No-Bake Mini Key Lime Pies chilled after the filling has set for at least 2 hours. The creamy lime center, buttery graham cracker crust, and lightly sweetened whipped cream create a refreshing dessert with a bright citrus finish.
This recipe makes 6 mini pies, making it easy to portion for parties, family desserts, or individual treats.
For the freshest lime flavor, use fresh key lime juice. Finish each pie with whipped cream and a lime slice just before serving.
Storage
Store the mini key lime pies in the refrigerator for up to 3 days.
Keep them chilled so the creamy filling stays firm and the whipped topping holds its texture.
Crust Tip
Use 1 cup graham cracker crumbs with ¼ cup melted butter and 2 tablespoons sugar.
Press the mixture firmly into the mini pie pans or cups before adding the filling.
Lime Tip
Use ⅓ cup key lime juice and 1 teaspoon lime zest.
Fresh key lime juice gives the filling the brightest flavor.
Filling Tip
Whisk the sweetened condensed milk, key lime juice, and lime zest until completely smooth before pouring over the crusts.
Whipped Cream Tip
Beat 1 cup heavy cream with 2 tablespoons powdered sugar until stiff peaks form.
Chilling Tip
Refrigerate the filled pies for at least 2 hours before topping and serving.
Garnish Tip
Finish each mini pie with a lime slice for a fresh citrus look.

Fernando is the creator and writer behind the food blog Eating with your Hands. Living and working in cities like Paris, Barcelona, and Berlin, and being married to a Canadian foodie, has given Fernando a passion and interest in food and inspired him to run EWYH.