
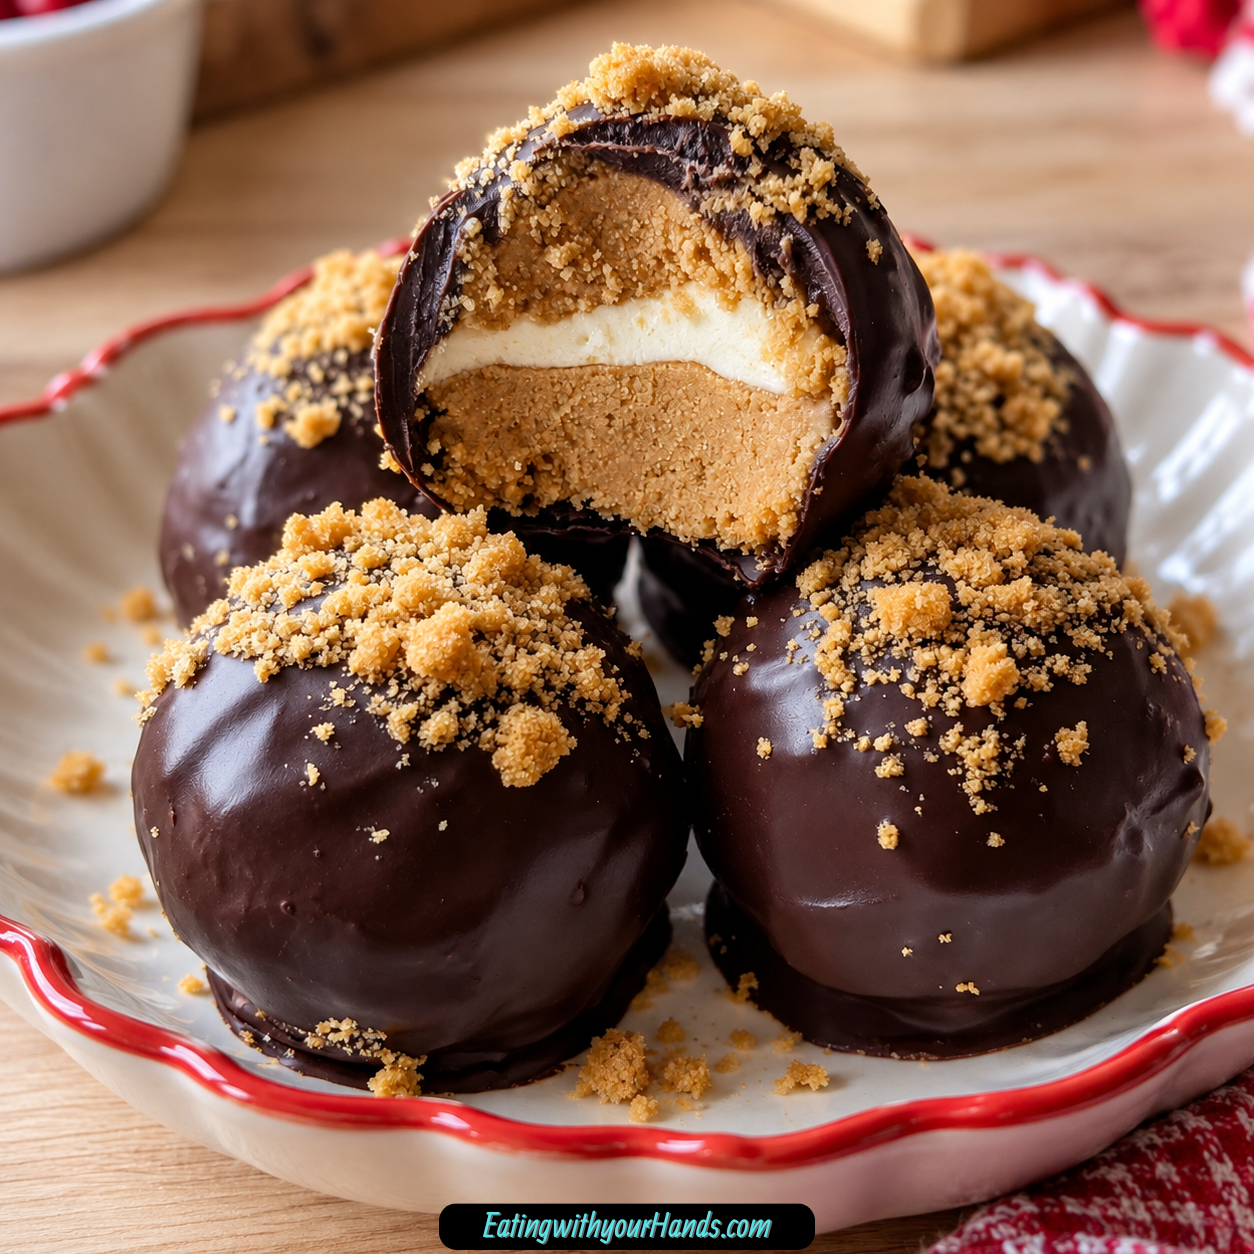
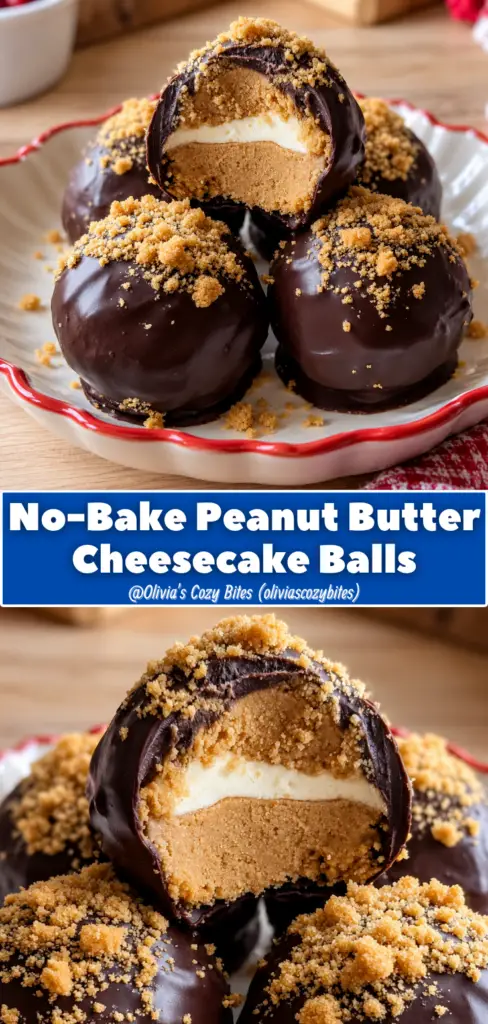
No-Bake Peanut Butter Cheesecake Balls Recipe is the kind of dessert that feels almost too easy for how good it tastes. These bite-sized treats are creamy, rich, sweet, peanut buttery, and soft in the middle, with the cozy flavor of cheesecake rolled into a fun little party-ready shape.
They are the dessert I think of when there is no time for baking but something sweet still needs to happen. No oven, no complicated crust, no long cooling time, and no fussy decorating are required.
The base is made with softened cream cheese, creamy peanut butter, powdered sugar, vanilla extract, and graham cracker crumbs. Everything mixes together into a thick, rollable filling that tastes like peanut butter cheesecake in one little bite.
The optional chocolate coating makes them feel even more special. Dip them halfway, coat them fully, drizzle them, or leave them plain and simple.
These cheesecake balls are perfect for warm days when turning on the oven sounds impossible. They are also wonderful during the holidays when the oven is already busy and every dessert tray needs one more easy treat.
They fit just about anywhere. Bring them to parties, serve them at backyard gatherings, tuck them into gift boxes, keep them in the fridge for late-night cravings, or freeze a batch for dessert emergencies.
What makes them especially lovable is their balance of ease and payoff. They look like something that took effort, but the work is mostly mixing, rolling, chilling, and maybe dipping in chocolate.
If you love peanut butter cups, cheesecake filling, and simple no-bake desserts, these No-Bake Peanut Butter Cheesecake Balls are going to feel like a small miracle. They are creamy, nostalgic, fun to make, and dangerously easy to reach for every time you open the refrigerator.
Table of Contents
- Why You’ll Love These No-Bake Peanut Butter Cheesecake Balls
- Recipe Details
- Ingredients
- Ingredient Notes
- Optional Swaps, Variations, Add-Ins, and Serving Ideas
- Classic No-Bake Peanut Butter Cheesecake Balls
- Chocolate-Dipped Peanut Butter Cheesecake Balls
- Dark Chocolate Peanut Butter Balls
- Cocoa-Dusted Cheesecake Balls
- Double Chocolate Peanut Butter Balls
- Mini Chocolate Chip Cheesecake Balls
- Chopped Peanut Cheesecake Balls
- Pretzel Crunch Peanut Butter Balls
- Toffee Peanut Butter Cheesecake Balls
- Caramel Drizzle Cheesecake Balls
- Almond Butter Cheesecake Balls
- Gluten-Free Peanut Butter Cheesecake Balls
- Dairy-Free-Style Cheesecake Balls
- Honey-Sweetened Twist
- Sea Salt Chocolate Balls
- Ice Cream Sundae Topping
- Why This Recipe Works
- Directions
- Step 1: Soften the Cream Cheese
- Step 2: Prepare the Crumbs
- Step 3: Combine the Cream Cheese and Peanut Butter
- Step 4: Add Powdered Sugar and Vanilla
- Step 5: Add the Graham Cracker Crumbs
- Step 6: Adjust the Texture if Needed
- Step 7: Chill the Mixture if Sticky
- Step 8: Scoop the Mixture
- Step 9: Roll Into Balls
- Step 10: Melt the Chocolate
- Step 11: Dip the Balls
- Step 12: Add Toppings Before Chocolate Sets
- Step 13: Chill the Cheesecake Balls
- Step 14: Serve Cold
- Step 15: Store Leftovers
- Step 16: Freeze for Later
- Serving Ideas
- Storage
- Freezing
- Make-Ahead
- Helpful Notes for Best Results
- Variations
- Classic No-Bake Peanut Butter Cheesecake Balls
- Chocolate-Dipped Cheesecake Balls
- Dark Chocolate Cheesecake Balls
- Cocoa Powder Truffle Balls
- Double Chocolate Peanut Butter Balls
- Mini Chocolate Chip Peanut Butter Balls
- Chopped Peanut Crunch Balls
- Pretzel Crunch Cheesecake Balls
- Toffee Peanut Butter Balls
- Caramel Drizzle Peanut Butter Balls
- Almond Butter Cheesecake Balls
- Gluten-Free Cookie Crumb Balls
- Dairy-Free-Style Cheesecake Balls
- Honey Peanut Butter Balls
- Troubleshooting
- Frequently Asked Questions
- Why This Recipe Works So Well
- Final Thoughts
- No-Bake Peanut Butter Cheesecake Balls
Why You’ll Love These No-Bake Peanut Butter Cheesecake Balls
These cheesecake balls are completely no-bake. You do not need to turn on the oven or wait for anything to bake.
They come together quickly. The hands-on work takes about 20 minutes before chilling.
They are rich and creamy. Cream cheese and peanut butter create a soft cheesecake-style center.
They are easy to customize. Chocolate, cocoa powder, crushed peanuts, pretzels, toffee bits, caramel, or cookie crumbs can all create new versions.
They are make-ahead friendly. The texture gets even better after chilling.
They are great for parties and gifts. The small size makes them easy to serve, pack, and share.
Recipe Details
This is a no-bake recipe. The cheesecake balls set in the refrigerator instead of the oven.
The base uses 8 oz softened cream cheese. Full-fat cream cheese gives the richest, smoothest texture.
The peanut butter amount is 1 cup creamy peanut butter. Smooth peanut butter such as Skippy or Jif gives consistent texture.
The sweetener is 1 cup powdered sugar. It blends smoothly into the cream cheese and peanut butter.
The flavoring is 1 teaspoon vanilla extract. It adds a gentle background flavor that makes the filling taste more complete.
The structure comes from 1.5 cups graham cracker crumbs. That is about 12 full sheets crushed fine.
Digestive biscuits can also be used. They give a slightly different flavor but still work well.
The optional coating is 1 cup melted chocolate. Semi-sweet chocolate chips or melting wafers work best.
For a shinier chocolate coating, add 1 teaspoon coconut oil to the melted chocolate. This is optional.
The balls are rolled into 1-inch pieces using about 1 tablespoon mixture each. They chill for at least 1 hour before serving.
Ingredients
For the Peanut Butter Cheesecake Balls
- 8 oz cream cheese, softened
- 1 cup creamy peanut butter
- 1 cup powdered sugar
- 1 teaspoon vanilla extract
- 1.5 cups graham cracker crumbs
Optional Chocolate Coating
- 1 cup melted chocolate
Optional Add-Ins, Toppings, and Swaps
- 1 teaspoon coconut oil
- Semi-sweet chocolate chips
- Melting wafers
- Digestive biscuits
- Cocoa powder
- Dark chocolate
- Mini chocolate chips
- Chopped peanuts
- Crushed pretzels
- Toffee bits
- Caramel drizzle
- Almond butter
- Gluten-free cookie crumbs
- Oreo-style cookies
- Coconut cream cheese
- Honey
- Milk
- Sea salt
Ingredient Notes
Cream cheese gives these no-bake balls their cheesecake flavor. Use softened cream cheese so it blends smoothly.
Full-fat cream cheese gives the best texture. It makes the filling rich, thick, and creamy.
Creamy peanut butter gives the dessert its main flavor. Smooth peanut butter keeps the mixture easy to roll.
Skippy or Jif-style peanut butter works especially well because the texture is consistent. Natural peanut butter can work, but it may make the mixture softer.
Powdered sugar sweetens the filling without leaving a grainy texture. It blends easily into the cream cheese and peanut butter.
Vanilla extract adds warmth. It gives the filling a more rounded flavor.
Graham cracker crumbs help the mixture hold together. They also bring a classic cheesecake crust flavor into every bite.
Digestive biscuits can be used instead of graham crackers. They make the flavor slightly different but still delicious.
Melted chocolate is optional but wonderful. It makes the cheesecake balls taste more like a fancy peanut butter cup.
Coconut oil can be added to the melted chocolate for shine. Use just 1 teaspoon so the coating stays smooth without becoming too thin.
Optional Swaps, Variations, Add-Ins, and Serving Ideas
Classic No-Bake Peanut Butter Cheesecake Balls
Make the recipe with cream cheese, peanut butter, powdered sugar, vanilla, and graham cracker crumbs. Roll into 1-inch balls and chill until firm.
This version is simple, creamy, and peanut buttery. It is perfect when you want the easiest possible treat.
Chocolate-Dipped Peanut Butter Cheesecake Balls
Dip each chilled ball halfway into melted chocolate. Let the excess drip off before placing the balls on a parchment-lined tray.
Semi-sweet chocolate chips or melting wafers work well. Add 1 teaspoon coconut oil for extra shine if desired.
Dark Chocolate Peanut Butter Balls
Use dark chocolate for dipping. The slightly bitter chocolate balances the sweet peanut butter filling.
This version feels a little more grown-up. It is great for dessert trays.
Cocoa-Dusted Cheesecake Balls
Roll the finished balls in cocoa powder instead of dipping them in chocolate. This gives them a truffle-like look.
The cocoa adds a slightly bittersweet finish. It also makes the balls look elegant.
Double Chocolate Peanut Butter Balls
Mix 1 tablespoon cocoa powder into the cheesecake base. This gives the filling a chocolate-peanut butter flavor.
You can still dip them in chocolate if desired. The flavor becomes richer.
Mini Chocolate Chip Cheesecake Balls
Stir mini chocolate chips into the mixture before rolling. They add little crunchy chocolate bites.
Keep the add-ins balanced so the mixture still rolls easily. Mini chips distribute better than large chips.
Chopped Peanut Cheesecake Balls
Stir chopped peanuts into the filling or sprinkle them over chocolate-dipped balls. They add crunch.
For the best texture, chop them small. Press them on before the chocolate sets.
Pretzel Crunch Peanut Butter Balls
Roll the finished balls in crushed pretzels. The salty crunch is a great contrast to the creamy filling.
This variation tastes sweet, salty, and fun. Serve soon after rolling for the crispest texture.
Toffee Peanut Butter Cheesecake Balls
Roll the balls in toffee bits or sprinkle toffee over the chocolate coating. The toffee adds buttery crunch.
This makes the dessert taste more candy-like. It is great for parties.
Caramel Drizzle Cheesecake Balls
Drizzle caramel over chocolate-dipped balls. This makes them look more decorated and adds extra sweetness.
Use a light drizzle. Too much caramel can make them sticky.
Almond Butter Cheesecake Balls
Use almond butter instead of peanut butter. The flavor will be different and may taste a little more like marzipan.
The texture may also vary depending on the almond butter. Adjust with crumbs if needed.
Gluten-Free Peanut Butter Cheesecake Balls
Use gluten-free cookie crumbs instead of graham cracker crumbs. Oreo-style gluten-free cookies can make them extra decadent.
Use the same amount of crumbs and adjust if the mixture feels too soft. Chill before rolling if needed.
Dairy-Free-Style Cheesecake Balls
Use coconut cream cheese in place of cream cheese. Because it is usually softer, add an extra tablespoon of crumbs.
The flavor and texture will be different. Chill well before serving.
Honey-Sweetened Twist
Replace some powdered sugar with honey, using ¼ cup honey. Expect the texture to be stickier.
Add extra crumbs if needed. Honey changes both sweetness and structure.
Sea Salt Chocolate Balls
After dipping in chocolate, sprinkle a tiny bit of sea salt over the top before the chocolate sets. This balances the sweetness.
A little salt goes a long way. It makes the chocolate and peanut butter taste stronger.
Ice Cream Sundae Topping
Crumble the cheesecake balls over vanilla ice cream. The creamy peanut butter filling and graham crumbs make a rich sundae topping.
This is a fun way to use imperfect or leftover pieces. Add chocolate drizzle if desired.
Why This Recipe Works
This recipe works because cream cheese and peanut butter create a thick, rich base. Powdered sugar sweetens it while keeping the texture smooth.
Graham cracker crumbs give the filling structure. They help the mixture hold its shape when rolled.
Vanilla adds a soft background flavor. It makes the peanut butter and cheesecake flavor taste more complete.
Chilling is essential. The mixture firms in the refrigerator and becomes easier to serve.
The optional chocolate coating adds structure and contrast. A thin chocolate shell pairs beautifully with the creamy filling.
The recipe is flexible because the base is simple. Once the texture is right, you can add coatings, mix-ins, and toppings.
Texture adjustments are easy. More crumbs firm the mixture, while a little milk or extra peanut butter softens it.
The balls are small, which makes them easy to share. They look pretty on a plate and are simple to grab at parties.
Directions
Step 1: Soften the Cream Cheese
Let 8 oz cream cheese sit at room temperature until softened. This helps it blend smoothly.
If you need to soften it quickly, use a short microwave burst of about 15 seconds. It should be soft, not melted.
Step 2: Prepare the Crumbs
Measure 1.5 cups graham cracker crumbs. If crushing whole graham crackers, crush about 12 full sheets until fine.
The crumbs should be small and even. Large pieces can make the balls harder to roll smoothly.
Step 3: Combine the Cream Cheese and Peanut Butter
Add the softened cream cheese and 1 cup creamy peanut butter to a large bowl. Use a stand mixer or hand mixer.
Mix on medium until smooth and creamy. Scrape down the sides of the bowl so everything blends evenly.
Step 4: Add Powdered Sugar and Vanilla
Add 1 cup powdered sugar and 1 teaspoon vanilla extract. Mix again until fully combined.
The mixture should look thick, smooth, and creamy. Scrape the bowl halfway through if needed.
Step 5: Add the Graham Cracker Crumbs
Add the graham cracker crumbs to the bowl. Mix on low until fully incorporated.
The mixture should hold together when pinched. It should be thick enough to roll into balls.
Step 6: Adjust the Texture if Needed
If the mixture is too sticky, add more crumbs 1 tablespoon at a time. If it feels too dry, add 1 teaspoon milk or a little extra peanut butter.
Adjust slowly. The goal is a soft but rollable dough.
Step 7: Chill the Mixture if Sticky
If the mixture is too soft to handle, refrigerate it for 15 minutes. This helps it firm up.
Chilling makes rolling much easier. It also keeps the balls neater.
Step 8: Scoop the Mixture
Scoop about 1 tablespoon of mixture for each ball. A cookie scoop helps make them even.
Even sizes look nicer and chill more consistently. A spoon also works.
Step 9: Roll Into Balls
Roll each portion between your palms into a 1-inch ball. If your hands get sticky, lightly dampen them with water.
Place each ball on a parchment-lined tray. Continue until all the mixture is rolled.
Step 10: Melt the Chocolate
If using chocolate, melt 1 cup chocolate in 30-second microwave bursts. Stir between each burst.
Stop when the chocolate is smooth. Add 1 teaspoon coconut oil if you want extra shine.
Step 11: Dip the Balls
Dip each ball halfway into the melted chocolate, or coat fully if desired. Let the excess chocolate drip off.
Place the dipped balls back on the parchment-lined tray. Work gently so they keep their shape.
Step 12: Add Toppings Before Chocolate Sets
If using sea salt, crushed peanuts, pretzels, or toffee bits, sprinkle them on while the chocolate is still soft. This helps the toppings stick.
Do not wait until the chocolate hardens. The toppings need a soft surface.
Step 13: Chill the Cheesecake Balls
Place the tray in the refrigerator for at least 1 hour. This firms the balls and helps the flavors settle.
Do not skip the chill time. The texture becomes much better after chilling.
Step 14: Serve Cold
Serve the cheesecake balls straight from the refrigerator. They hold their shape best when chilled.
Arrange on a plate with toothpicks or tiny forks if desired. They are easy to serve as bite-sized treats.
Step 15: Store Leftovers
Place leftovers in an airtight container. Refrigerate for up to 5 days.
The chocolate coating may lose a little shine, but the flavor remains delicious. Keep them chilled until serving.
Step 16: Freeze for Later
Freeze the balls on a tray first until firm, about 1 hour. Then transfer to a freezer bag.
Freeze for up to 2 months. Thaw in the refrigerator for about 1 hour before serving.
Serving Ideas
Serve No-Bake Peanut Butter Cheesecake Balls chilled on a pretty plate. Their bite-sized shape makes them easy to grab.
Add toothpicks or tiny forks for parties. This keeps serving neat and simple.
Pair them with coffee for adults. The rich peanut butter and cheesecake flavor tastes wonderful with a warm drink.
Serve them with cold milk for kids. The peanut butter and chocolate combination feels classic.
Add them to dessert platters with fresh berries. The berries bring freshness beside the rich cheesecake balls.
Crumble one over vanilla ice cream for a sundae-style treat. The creamy filling and graham crumbs make a great topping.
Pack them in a cute box as a hostess gift. Keep them chilled until ready to give.
Keep a small container in the refrigerator for sweet cravings. They are perfect when you want just one bite of dessert.
Storage
Store the cheesecake balls in an airtight container in the refrigerator. They keep well for up to 5 days.
Keep them chilled until serving. The filling is soft and creamy, so the refrigerator helps them hold shape.
If the balls are chocolate-coated, the chocolate may lose a little shine over time. The flavor will still be good.
Layer with parchment if stacking. This helps prevent sticking.
Do not leave them out for too long. They taste and hold best when cold.
If serving at a party, place out a smaller amount and refill from the fridge as needed. This keeps the rest firm.
Store strong-smelling foods away from them. Cream cheese-based desserts can absorb odors.
For the cleanest look, add delicate toppings close to serving when possible. Chocolate-dipped versions store better than loose crumb toppings.
Freezing
These cheesecake balls freeze beautifully. Place them on a tray first and freeze until firm, about 1 hour.
Once firm, transfer them to a freezer bag. This keeps them from sticking together.
Freeze for up to 2 months. They are perfect for make-ahead dessert planning.
Thaw in the refrigerator for about 1 hour before serving. Do not thaw in a warm place if you want them to keep their shape.
Chocolate-coated balls can be frozen too. The coating may look slightly different after thawing, but the flavor remains delicious.
Use parchment between layers if freezing in a container. This protects the shape and coating.
Label the freezer bag if desired. This helps you use them within the 2-month window.
Keep a few frozen for dessert emergencies. They thaw quickly and feel like a ready-made treat.
Make-Ahead
No-Bake Peanut Butter Cheesecake Balls are excellent for making ahead. They actually improve after chilling because the texture firms and the flavors settle.
You can make the mixture, roll the balls, and refrigerate them the day before serving. Dip them in chocolate before or after chilling.
If dipping in chocolate, let the coating set fully before storing. Use parchment to prevent sticking.
For longer planning, freeze the finished balls for up to 2 months. Thaw in the refrigerator before serving.
If making them for a party, roll them into even 1-inch balls. A cookie scoop helps with consistent portions.
Toppings like sea salt, peanuts, pretzels, or toffee should be added while chocolate is still soft. If adding a caramel drizzle, add it close to serving for the neatest look.
These are also good for gifting. Pack them in a container and keep chilled until delivery.
Helpful Notes for Best Results
Use softened cream cheese. Cold cream cheese can leave lumps in the mixture.
Full-fat cream cheese gives the richest texture. Low-fat versions may be softer or less creamy.
Use creamy peanut butter for the smoothest filling. Natural peanut butter can be oily and may need extra crumbs.
Do not skip the graham cracker crumbs. They help the mixture hold together.
If the mixture is sticky, chill it for 15 minutes. Add crumbs 1 tablespoon at a time if needed.
If the mixture is crumbly, add 1 teaspoon milk or extra peanut butter. Mix gently and check again.
Lightly dampen your hands when rolling. This helps prevent sticking.
Chill for at least 1 hour before serving. The texture becomes firmer and creamier.
Variations
Classic No-Bake Peanut Butter Cheesecake Balls
Use cream cheese, creamy peanut butter, powdered sugar, vanilla, and graham cracker crumbs. Roll into 1-inch balls and chill.
This version is simple and creamy. It tastes like peanut butter cheesecake in bite-sized form.
Chocolate-Dipped Cheesecake Balls
Dip the balls halfway or fully into melted chocolate. Use semi-sweet chocolate chips or melting wafers.
Add 1 teaspoon coconut oil for extra shine if desired. Let the chocolate set before serving.
Dark Chocolate Cheesecake Balls
Dip the balls in dark chocolate. The bittersweet flavor balances the sweet filling.
This variation feels slightly more elegant. It is great for parties.
Cocoa Powder Truffle Balls
Roll the balls in cocoa powder. This gives them a soft truffle-style finish.
The cocoa adds a slightly bitter contrast. Serve chilled.
Double Chocolate Peanut Butter Balls
Mix 1 tablespoon cocoa powder into the cheesecake base. This gives chocolate flavor inside the filling.
You can still dip the balls in chocolate. This version is rich and dessert-like.
Mini Chocolate Chip Peanut Butter Balls
Stir mini chocolate chips into the mixture before rolling. They add small chocolate crunches.
Keep the amount moderate so the balls hold together. Roll gently.
Chopped Peanut Crunch Balls
Add chopped peanuts to the mixture or sprinkle them over chocolate-dipped balls. They add texture.
Press toppings into the chocolate before it sets. This helps them stick.
Pretzel Crunch Cheesecake Balls
Roll the balls in crushed pretzels. This gives a salty crunch.
Serve soon after coating for the best texture. Pretzels can soften if stored too long.
Toffee Peanut Butter Balls
Roll the balls in toffee bits or sprinkle them over the chocolate coating. The toffee adds buttery sweetness.
This makes the dessert taste more candy-like. Keep chilled.
Caramel Drizzle Peanut Butter Balls
Drizzle caramel over the chocolate-coated balls. This creates a decorated finish.
Use a light drizzle so they are not too sticky. Add close to serving.
Almond Butter Cheesecake Balls
Use almond butter instead of peanut butter. The flavor will be different and more almond-like.
Adjust with crumbs if the mixture is soft. Chill before rolling.
Gluten-Free Cookie Crumb Balls
Use gluten-free cookie crumbs instead of graham cracker crumbs. Oreo-style cookie crumbs make them extra rich.
Use the same amount, then adjust texture if needed. Chill before serving.
Dairy-Free-Style Cheesecake Balls
Use coconut cream cheese. Add an extra tablespoon of crumbs because it is usually softer.
The texture and flavor will differ from the classic version. Chill thoroughly.
Honey Peanut Butter Balls
Use ¼ cup honey to replace some powdered sugar. Expect the mixture to be stickier.
Add extra crumbs if needed. The flavor becomes slightly more floral and sweet.
Troubleshooting
The Mixture Is Too Sticky
Chill it for 15 minutes before rolling. Cold filling is much easier to handle.
If it is still sticky, add graham cracker crumbs 1 tablespoon at a time. Mix until rollable.
The Mixture Is Too Dry
Add 1 teaspoon milk or a little extra peanut butter. Mix gently.
Do not add too much liquid at once. Small adjustments are best.
The Balls Will Not Hold Shape
The mixture may need more crumbs or more chilling time. Add crumbs slowly and refrigerate before rolling again.
Make sure the cream cheese was not melted. Softened is good, melted is too loose.
The Filling Has Lumps
The cream cheese may not have been soft enough. Let it soften fully before mixing.
Scrape the bowl while mixing. This helps everything blend smoothly.
The Natural Peanut Butter Made the Mixture Soft
Natural peanut butter can be oily. Drain off excess oil before using.
If the mixture is still soft, add an extra ¼ cup crumbs. Chill before rolling.
The Chocolate Coating Is Too Thick
Warm the chocolate gently and stir well. Add 1 teaspoon coconut oil if desired.
Do not overheat the chocolate. Heat in short 30-second bursts.
The Chocolate Coating Cracked
The balls may have been very cold when dipped, or the coating may have set too firmly. Drizzle more chocolate over the top.
Call the drizzle decorative. The flavor will still be great.
The Toppings Will Not Stick
Add toppings while the chocolate is still wet. Once chocolate sets, loose toppings will fall off.
Work in small batches if needed. Dip a few, top a few, then continue.
The Balls Flattened While Chilling
The mixture may have been too soft. Add more crumbs and chill before shaping.
Place them on parchment so they do not stick. Re-roll after chilling if needed.
They Taste Too Sweet
Use dark chocolate for dipping or roll in cocoa powder. A tiny sprinkle of sea salt can also balance sweetness.
You can also keep them plain without extra caramel or sweet toppings. The base is already rich.
Frequently Asked Questions
Can I freeze these No-Bake Peanut Butter Cheesecake Balls?
Yes, they freeze very well. Place them on a tray until firm, about 1 hour, then transfer them to a freezer bag.
They keep for up to 2 months. Thaw in the refrigerator for about 1 hour before serving.
Can I use natural peanut butter?
Yes, but natural peanut butter can be oilier and may make the mixture softer. Drain off excess oil first.
If the mixture is still soft, add an extra ¼ cup graham cracker crumbs. The flavor will still be delicious.
How long do these need to chill?
Chill them for at least 1 hour. This helps them firm up and gives the filling a better texture.
They can chill longer if needed. They are great for making ahead.
Can I make these without chocolate?
Yes, the chocolate coating is optional. The peanut butter cheesecake balls are delicious plain.
You can also roll them in cocoa powder, crushed peanuts, pretzels, toffee bits, or cookie crumbs. Choose the finish you like.
What can I use instead of graham cracker crumbs?
Digestive biscuits can be used. Gluten-free cookie crumbs also work for a gluten-free option.
Oreo-style cookie crumbs create a richer version. Adjust the texture if needed.
Can kids help make these?
Yes, this recipe is very kid-friendly. Kids can help scoop, roll, and decorate.
The mixture can be sticky, so lightly dampened hands help. Keep toppings ready for easy decorating.
Can I use almond butter?
Yes, almond butter works beautifully. The flavor will be different and more almond-forward.
The texture may vary depending on the almond butter. Add crumbs if the mixture is soft.
How do I make them look fancy?
Dip them in chocolate and sprinkle with sea salt, crushed peanuts, pretzels, or toffee before the chocolate sets. A caramel drizzle also makes them look special.
Serve them on a platter with tiny forks or toothpicks. They look elegant with very little effort.
Why This Recipe Works So Well
No-Bake Peanut Butter Cheesecake Balls work so well because the ingredients create a rich filling that is both creamy and sturdy. Cream cheese brings tang and body, peanut butter adds flavor and thickness, and graham cracker crumbs help the mixture hold shape.
Powdered sugar sweetens the base without making it gritty. It disappears into the cream cheese and peanut butter easily.
Vanilla gives the filling a subtle warmth. It rounds out the peanut butter flavor.
The graham cracker crumbs also bring cheesecake crust flavor directly into the filling. That is what makes each ball taste like a tiny cheesecake bite.
Chilling is what finishes the texture. The mixture firms up and becomes easier to serve.
The optional chocolate coating adds contrast. Soft peanut butter cheesecake filling and a thin chocolate shell make every bite feel more complete.
The recipe is also forgiving. If the mixture is sticky, add crumbs or chill it; if it is dry, add milk or peanut butter.
Most of all, this recipe works because it gives a party-ready dessert without baking. It is fast, flexible, make-ahead friendly, and always satisfying.
Final Thoughts
No-Bake Peanut Butter Cheesecake Balls Recipe is made with softened cream cheese, creamy peanut butter, powdered sugar, vanilla extract, graham cracker crumbs, and optional melted chocolate. The mixture is blended until smooth, adjusted until rollable, shaped into 1-inch balls, chilled until firm, and dipped or decorated however you like.
Serve them cold on dessert platters, pair them with coffee or milk, tuck them into gift boxes, or keep a freezer stash for last-minute cravings. With their creamy peanut butter cheesecake center, optional chocolate coating, no-bake method, 20-minute hands-on prep, 5-day refrigerator storage, and 2-month freezer option, these little bites are an easy dessert that feels far more special than the work involved.
No-Bake Peanut Butter Cheesecake Balls
Creamy, rich, sweet, and easy to make without turning on the oven, these No-Bake Peanut Butter Cheesecake Balls combine softened cream cheese, creamy peanut butter, powdered sugar, vanilla, and graham cracker crumbs into bite-sized dessert balls. A melted chocolate coating is optional, but it adds a smooth chocolate finish that pairs beautifully with the peanut butter cheesecake center.
Recipe Details
- Prep Time: 20 minutes
- Total Time: 20 minutes
- Course: Dessert
- Cuisine: American
- Servings: 12 balls
Ingredients
Optional Coating
- 1 cup melted chocolate for dipping
Cheesecake Balls
- 1.5 cups graham cracker crumbs or crushed digestive biscuits
- 1 teaspoon vanilla extract
- 1 cup powdered sugar
- 1 cup creamy peanut butter
- 8 oz cream cheese softened
Instructions
Step 1: Mix the Creamy Base
In a large bowl, combine the softened cream cheese, creamy peanut butter, powdered sugar, and vanilla extract. Mix until the filling becomes smooth and evenly blended.
The mixture should look thick, creamy, and fully combined before the crumbs are added. This creates the peanut butter cheesecake base for the dessert balls.
Step 2: Add the Crumbs
Add the graham cracker crumbs or crushed digestive biscuits to the bowl. Mix until they are fully incorporated into the peanut butter cream cheese mixture.
The crumbs help thicken the mixture so it can be rolled. Keep mixing only until the texture looks even throughout.
Step 3: Roll Into Balls
Roll the mixture into small balls, about 1-inch in diameter. Shape them as evenly as possible so the recipe makes 12 balls.
If the mixture feels soft, handle it gently while rolling. Keep the balls compact enough to hold their shape.
Step 4: Add the Optional Chocolate Coating
If using the melted chocolate, dip each ball into the chocolate. Place the dipped balls on a parchment-lined tray.
Let any excess chocolate drip off before setting the balls down. The coating is optional, so the cheesecake balls can also be served without dipping.
Step 5: Chill Before Serving
Refrigerate the peanut butter cheesecake balls for at least 1 hour before serving. This helps them firm up and hold their shape.
Serve chilled once the centers have set. If dipped in chocolate, the chilling time also helps the coating become firm.
Notes
- Store leftovers in an airtight container in the refrigerator for up to 5 days.
Serving Suggestions
Serve No-Bake Peanut Butter Cheesecake Balls chilled after they have refrigerated for at least 1 hour. The creamy peanut butter filling, sweet vanilla flavor, and graham cracker crumb texture make them easy dessert bites for parties, snack trays, or make-ahead treats.
Dip them in melted chocolate if you want a richer finish. The optional coating gives each ball a smooth outer layer while keeping the peanut butter cheesecake center soft and creamy.
This recipe makes 12 balls, so they are simple to portion and share. Serve them straight from the refrigerator for the best texture.
Storage
How to Store
Store leftovers in an airtight container in the refrigerator for up to 5 days. Keep them chilled so the cream cheese and peanut butter mixture stays firm.
Chilling Tip
Refrigerate for at least 1 hour before serving. This step helps the balls set properly, even though the listed Total Time is 20 minutes.
Crumb Tip
Use 1.5 cups graham cracker crumbs or crushed digestive biscuits. Mix them in fully so the balls hold together.
Peanut Butter Tip
Use 1 cup creamy peanut butter as listed. It blends smoothly with the softened cream cheese and powdered sugar.
Coating Tip
Use 1 cup melted chocolate for dipping if you want the optional coating. Place the dipped balls on a parchment-lined tray before chilling.
Shaping Tip
Roll the mixture into small balls about 1-inch in diameter. Keeping them similar in size helps the recipe portion neatly into 12 balls.

Fernando is the creator and writer behind the food blog Eating with your Hands. Living and working in cities like Paris, Barcelona, and Berlin, and being married to a Canadian foodie, has given Fernando a passion and interest in food and inspired him to run EWYH.