
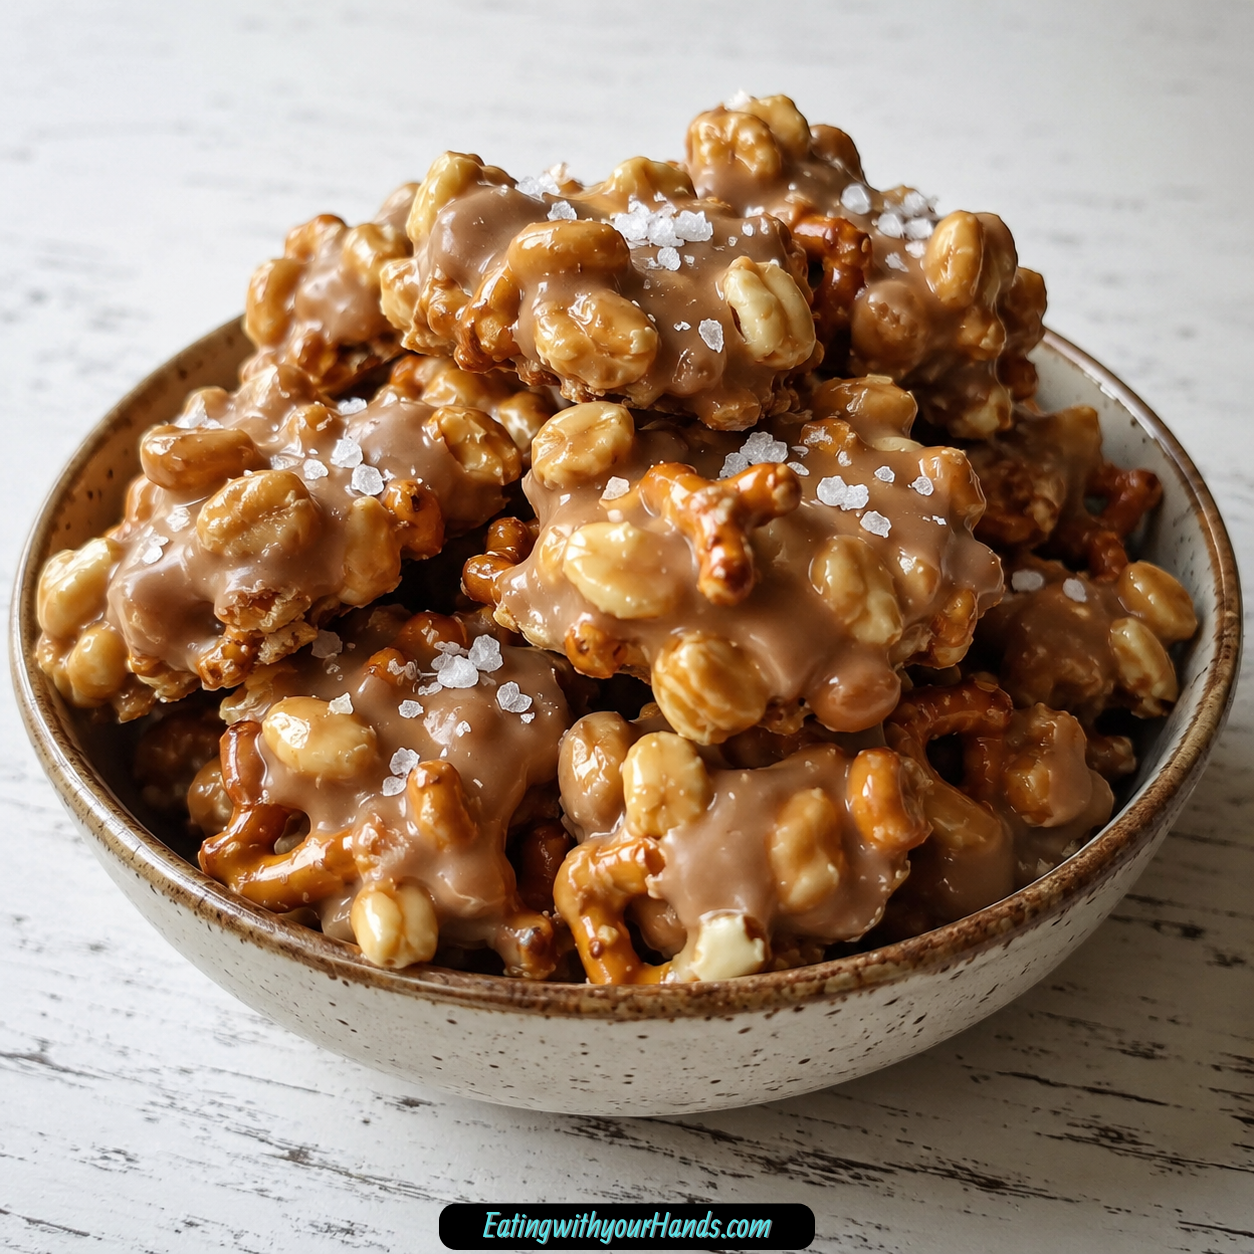
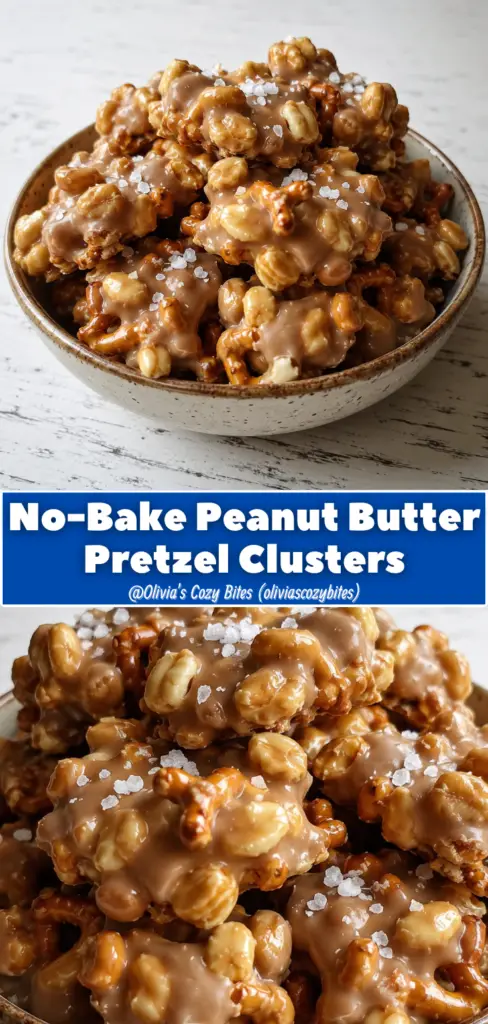
No-Bake Peanut Butter Pretzel Clusters are the kind of treat that feels almost too easy for how satisfying they are. They bring together creamy peanut butter, crunchy mini pretzels, sweet melted chocolate, optional peanuts, and a little flaky sea salt for a snack that hits every sweet, salty, crispy, and peanut-buttery note in one bite.
This is the recipe I think of when I want something homemade but do not want to turn on the oven. It has the energy of a holiday candy tray, a lunchbox treat, a late-night fridge snack, and a quick dessert all wrapped into one simple no-bake cluster.
What makes these little mounds so hard to resist is the contrast. The pretzels keep everything crisp and salty, the peanut butter makes the mixture rich and creamy, and the white chocolate wraps it all in a sweet shell that firms up beautifully after chilling.
They are also wonderfully low-stress. You melt the chocolate, stir together the pretzels and peanut butter, fold everything until glossy, scoop the mixture into clusters, sprinkle with sea salt if you like, and chill until firm.
No special baking skills are needed. This is the kind of recipe beginner cooks can make confidently, and it is simple enough for kids to help shape and decorate.
These clusters are great for gifting, parties, dessert platters, holiday treat boxes, or simply keeping in the refrigerator for the moment when a sweet-salty craving shows up. They are quick, customizable, freezer-friendly, and exactly the kind of easy treat that becomes a regular in the kitchen.
Table of Contents
- Why You’ll Love No-Bake Peanut Butter Pretzel Clusters
- A Sweet, Salty, Crunchy No-Bake Treat
- Recipe Details
- Ingredients for No-Bake Peanut Butter Pretzel Clusters
- Mini Pretzels
- Creamy Peanut Butter
- White Chocolate Chips
- Coconut Oil or Butter
- Chopped Peanuts
- Sea Salt Flakes
- Before You Start
- Directions for No-Bake Peanut Butter Pretzel Clusters
- Step 1: Line the Baking Sheet
- Step 2: Clear Refrigerator Space
- Step 3: Crush the Mini Pretzels
- Step 4: Measure the Pretzels
- Step 5: Add Chopped Peanuts If Using
- Step 6: Add the Peanut Butter
- Step 7: Stir Until Coated
- Step 8: Prepare the Chocolate
- Step 9: Microwave in 30-Second Intervals
- Step 10: Stir Until Smooth
- Step 11: Check the Chocolate Texture
- Step 12: Pour Chocolate Over the Pretzel Mixture
- Step 13: Fold Gently
- Step 14: Mix Until Thick and Glossy
- Step 15: Prepare to Scoop
- Step 16: Scoop the First Cluster
- Step 17: Continue Scooping
- Step 18: Adjust the Shape If Needed
- Step 19: Add Sea Salt Flakes
- Step 20: Add Other Optional Decorations
- Step 21: Transfer to the Refrigerator
- Step 22: Chill for at Least 1 Hour
- Step 23: Check for Firmness
- Step 24: Remove From the Baking Sheet
- Step 25: Serve Cold
- Step 26: Store the Leftovers
- Serving Ideas
- Storage Tips
- Freezing Tips
- Make-Ahead Tips
- Helpful Notes for Perfect Peanut Butter Pretzel Clusters
- Chocolate Variations
- Festive Add-Ins and Flavor Twists
- Nut-Free Option
- Troubleshooting No-Bake Peanut Butter Pretzel Clusters
- Frequently Asked Questions
- Final Thoughts
- No-Bake Peanut Butter Pretzel Clusters
Why You’ll Love No-Bake Peanut Butter Pretzel Clusters
You will love these No-Bake Peanut Butter Pretzel Clusters because they deliver big flavor with very little effort. The prep takes just 10 minutes, and there is no oven required.
The sweet and salty balance is the real reason they work so well. Peanut butter and pretzels already belong together, and the chocolate makes the combination feel like a real dessert.
The texture is also deeply satisfying. Every cluster has creamy peanut butter, crisp pretzel pieces, smooth chocolate coating, and optional chopped peanuts for even more crunch.
They are easy to customize. You can use white chocolate, milk chocolate, or dark chocolate, and you can add nuts, sprinkles, crushed candy canes, dried fruit, or a dark chocolate drizzle.
They are freezer-friendly, which makes them useful for planning ahead. Keep a stash in the freezer and you have a quick dessert emergency solution ready to go.
They are also perfect for gifting. Stack them in clear jars, tuck them into tins, or package them in small treat bags for an easy homemade gift that looks thoughtful without being complicated.
A Sweet, Salty, Crunchy No-Bake Treat
There is something especially satisfying about a no-bake dessert that still feels like a real treat. These peanut butter pretzel clusters do not need baking time, but they still have the flavor and texture of something made with care.
The mini pretzels create the salty crunch. Roughly crushing them gives the clusters different-sized pieces, so every bite has texture.
The creamy peanut butter turns the crushed pretzels into a thick, sticky base. It coats the pretzel pieces and helps everything hold together.
The melted white chocolate adds sweetness and a smooth finish. Once chilled, it helps the clusters set into firm little bites.
Optional coconut oil or butter can make the chocolate smoother as it melts. This is not required, but it helps create a nicer coating texture.
Sea salt flakes on top are optional, but they make the flavor pop. They also make the clusters look a little more polished and gift-worthy.
Recipe Details
- Recipe Name: No-Bake Peanut Butter Pretzel Clusters
- Recipe Style: No-bake sweet and salty peanut butter chocolate clusters
- Prep Time: 10 minutes
- Oven Required: No
- Yield Mentioned: Aim for 12 evenly sized clusters
- Main Texture: Creamy, crunchy, thick, glossy, and firm after chilling
- Main Flavors: Peanut butter, pretzels, white chocolate, optional peanuts, and sea salt
- Chocolate Options: White chocolate, milk chocolate, or dark chocolate
- Set Time: At least 1 hour in the refrigerator
- Best Served: Cold for the best texture
- Refrigerator Storage: Airtight container for up to 7 days
- Freezer Storage: Freeze for up to 2 months
- Thawing Tip: Eat straight from the freezer or thaw for 10 to 15 minutes for a softer bite
- Nut-Free Option: Use sunflower seed butter and skip chopped peanuts
- Optional Finish: Sea salt flakes, sprinkles, crushed candy canes, dried fruit, or melted dark chocolate drizzle
Ingredients for No-Bake Peanut Butter Pretzel Clusters
These clusters use just a handful of simple ingredients, but each one matters. The pretzels bring salt and crunch, the peanut butter creates richness, and the chocolate helps everything set into little bite-sized treats.
Mini Pretzels
You need 2 cups mini pretzels, roughly crushed. The pretzels provide crunch and that classic salty kick.
Rough crushing is important because you do not want pretzel dust. A mix of small pieces and slightly larger bits makes the clusters more interesting to eat.
You can crush the pretzels in a zip-top bag with a rolling pin. It is quick, easy, and honestly a little satisfying.
Creamy Peanut Butter
You need 1 cup creamy peanut butter. Use your favorite brand.
Creamy peanut butter gives the clusters a smooth, rich base. It coats the pretzels and helps bind the mixture together.
Natural peanut butter is not recommended unless it is a no-stir variety. Peanut butter that separates can make the mixture greasy or harder to set.
White Chocolate Chips
You need 1 1/2 cups white chocolate chips. White chocolate gives the clusters the sweetest finish.
The white chocolate melts and coats the peanut butter pretzel mixture. After chilling, it helps the clusters become firm enough to pick up.
You can substitute milk chocolate or dark chocolate chips. Milk chocolate will taste sweeter and more classic, while dark chocolate gives a richer flavor profile.
Coconut Oil or Butter
You need 1 tablespoon coconut oil or butter, optional. This helps create a smoother melted chocolate texture.
It is not required, but it can make the chocolate easier to stir and fold through the mixture. It also helps the coating look a little smoother once set.
Use whichever one you prefer if you choose to include it. The clusters will still work without it.
Chopped Peanuts
You need 1/2 cup chopped peanuts, optional. They add extra crunch and nutty flavor.
Peanuts make the clusters taste even more peanut-buttery. They also give another layer of texture beside the pretzels.
If you need a nut-free version, skip the chopped peanuts. The clusters will still be crunchy from the pretzels.
Sea Salt Flakes
You need sea salt flakes, optional, for topping. They enhance the sweet-salty balance and give the clusters a gourmet touch.
A small sprinkle goes a long way. The pretzels already bring salt, so the flakes should be used lightly.
Sea salt also adds visual appeal. It makes the clusters look finished and intentional.
Before You Start
Before mixing, line a baking sheet with parchment paper or a silicone mat. This prevents sticking and makes it easy to lift the clusters once they are set.
Roughly crush the mini pretzels before melting the chocolate. The recipe moves quickly once the chocolate is melted, so it helps to have the pretzels ready.
Measure the peanut butter and chopped peanuts if using. Having everything prepared makes the process smoother.
If using sea salt flakes, keep them nearby. They need to be sprinkled on top before the clusters fully set.
Make room in the refrigerator for the baking sheet. The clusters need at least 1 hour to chill and firm up.
Directions for No-Bake Peanut Butter Pretzel Clusters
Step 1: Line the Baking Sheet
Line a baking sheet with parchment paper or a silicone mat. This creates a nonstick surface for the clusters.
The clusters will be sticky before they set, so lining the pan is important. It also makes cleanup much easier.
Step 2: Clear Refrigerator Space
Before you start mixing, make sure the baking sheet will fit in your refrigerator. The clusters need to chill flat.
This step saves frustration later. Once the clusters are scooped, you do not want to tilt the tray or move things around too much.
Step 3: Crush the Mini Pretzels
Place the mini pretzels in a zip-top bag and roughly crush them with a rolling pin. You can also crush them gently by hand.
Do not crush them into fine crumbs. You want some texture so the clusters stay crunchy.
Step 4: Measure the Pretzels
Measure out 2 cups of roughly crushed mini pretzels. Place them in a large mixing bowl.
A large bowl gives you enough room to fold everything together later. The mixture becomes thick, so extra space helps.
Step 5: Add Chopped Peanuts If Using
Add the chopped peanuts to the bowl with the crushed pretzels if you are using them. Stir lightly to combine.
The peanuts add extra crunch and nutty flavor. If you are making a nut-free version, skip this ingredient completely.
Step 6: Add the Peanut Butter
Add 1 cup creamy peanut butter to the bowl with the crushed pretzels and optional peanuts. Use a spatula or spoon to begin mixing.
The peanut butter should coat the pretzel pieces. It creates a thick, sticky base that holds the clusters together.
Step 7: Stir Until Coated
Stir the peanut butter and pretzels until everything is well coated. The mixture should look thick and sticky.
Take your time with this step. The more evenly coated the pretzels are, the better the clusters will hold together.
Step 8: Prepare the Chocolate
Add the white chocolate chips to a microwave-safe bowl. Add the coconut oil or butter if you are using it.
The optional coconut oil or butter helps the chocolate melt more smoothly. If you skip it, the chocolate can still melt and coat the clusters.
Step 9: Microwave in 30-Second Intervals
Microwave the chocolate in 30-second intervals. Stir after each interval.
This slow method helps prevent overheating. White chocolate can seize if it gets too hot.
Step 10: Stir Until Smooth
Continue microwaving and stirring until the chocolate is fully melted and smooth. Stop heating as soon as it becomes pourable.
Do not keep microwaving after the chocolate is melted. Extra heat can make it clumpy or grainy.
Step 11: Check the Chocolate Texture
The melted chocolate should look smooth and glossy. If it looks thick but not burned, keep stirring before adding more heat.
Sometimes the residual warmth finishes melting the last few chips. Stirring often protects the chocolate.
Step 12: Pour Chocolate Over the Pretzel Mixture
Pour the melted chocolate over the peanut butter pretzel mixture. Use a spatula to scrape the bowl.
The chocolate will help bind the clusters and create a sweet coating. Pour it evenly over the mixture if possible.
Step 13: Fold Gently
Gently fold everything together with a spatula. Work from the bottom of the bowl to the top.
You want the chocolate to coat the peanut butter pretzel mixture without crushing the pretzel pieces too much. Gentle folding keeps the texture better.
Step 14: Mix Until Thick and Glossy
Continue folding until the mixture is fully coated. It should look thick, glossy, and sticky.
There should not be dry pretzel pieces at the bottom of the bowl. Scrape the sides and bottom as needed.
Step 15: Prepare to Scoop
Place the lined baking sheet close to the mixing bowl. Use a spoon or small cookie scoop for portioning.
A small cookie scoop makes more even clusters. A regular spoon works just fine if that is what you have.
Step 16: Scoop the First Cluster
Drop a portion of the mixture onto the lined baking sheet. Let it form a small mound.
Do not worry about making a perfect shape. These clusters are meant to look rustic and homemade.
Step 17: Continue Scooping
Continue scooping until you have about 12 evenly sized clusters. Space them slightly apart on the baking sheet.
The clusters will not spread like cookies, but a little space keeps them from sticking together. Similar sizes also help them chill evenly.
Step 18: Adjust the Shape If Needed
Use the spoon or your fingers to gently nudge any loose pieces back into place. Keep the mounds compact enough to hold together.
Rustic shapes are perfectly fine. The goal is a cluster that sets firmly and is easy to pick up.
Step 19: Add Sea Salt Flakes
If desired, sprinkle a few sea salt flakes on top of each cluster. Add them before the chocolate starts to set.
The salt enhances the sweet-salty flavor. It also gives each cluster a pretty finishing touch.
Step 20: Add Other Optional Decorations
If making these festive, add colored sprinkles, crushed candy canes, or other toppings before chilling. They need to stick to the surface while the chocolate is still soft.
You can also wait and drizzle melted dark chocolate later after the clusters set. That creates a different finished look.
Step 21: Transfer to the Refrigerator
Place the baking sheet in the refrigerator. Keep it level so the clusters hold their shape.
Do not cover tightly before they are set if it might smear the tops. Let them firm up first.
Step 22: Chill for at Least 1 Hour
Refrigerate the clusters for at least 1 hour. They should become firm and fully set.
The chill time is what turns the sticky mixture into solid clusters. Do not rush this step if you want the best texture.
Step 23: Check for Firmness
After 1 hour, gently touch one cluster. It should feel firm enough to lift from the parchment.
If it still feels soft, chill a little longer. Setting time can vary depending on the chocolate and peanut butter.
Step 24: Remove From the Baking Sheet
Once firm, lift the clusters from the parchment paper or silicone mat. They should release easily.
If any pieces stick, use a thin spatula to help. The lining should make removal simple.
Step 25: Serve Cold
Serve the clusters cold for the best texture. The chocolate stays firm, and the pretzels stay crisp.
Cold clusters have the best snap, chew, and crunch. They are especially good straight from the refrigerator.
Step 26: Store the Leftovers
Place leftover clusters in an airtight container. Store them in the refrigerator for up to 1 week.
Keeping them chilled helps them hold their shape. It also keeps the chocolate and peanut butter firm.
Serving Ideas
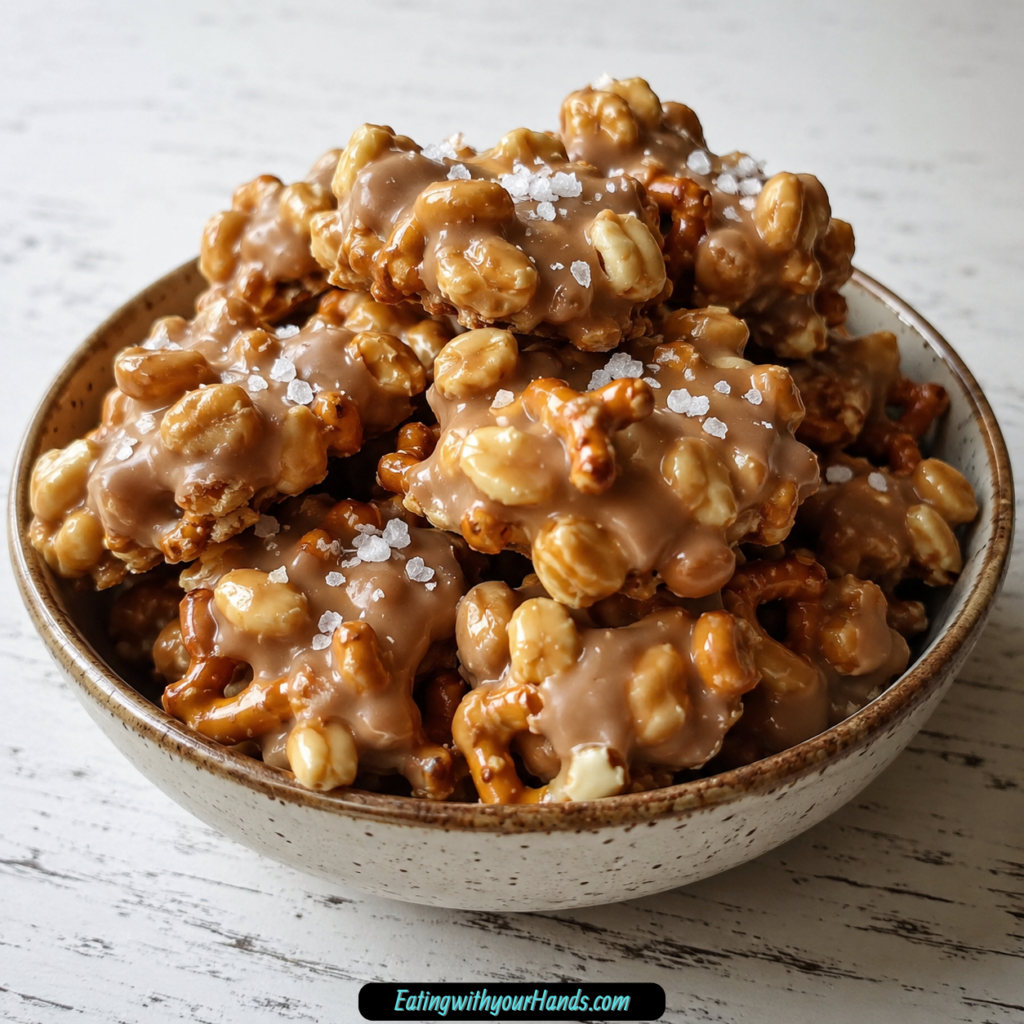
Serve these clusters cold for the best texture. The chocolate coating stays firm, while the peanut butter and pretzels give each bite a creamy crunch.
Add them to dessert platters. They look great beside cookies, bars, candies, and other small treats.
Pack them in lunchboxes for a quick treat. Keep them chilled until ready to pack if possible.
Stack them in clear jars or tins for gift-giving. Their rustic shape makes them look homemade in the sweetest way.
Place them in small treat bags or boxes for holidays. They are simple to package and easy to share.
Keep a few in the refrigerator for late-night cravings. They are small enough to grab quickly but satisfying enough to feel like dessert.
Storage Tips
Store the clusters in an airtight container in the refrigerator for up to 7 days. They are best kept cold.
The refrigerator helps the chocolate stay firm. It also keeps the clusters from becoming too soft.
If stacking them, place parchment paper between layers. This protects the toppings and keeps the clusters from sticking.
Do not leave them in a warm place for too long. The chocolate and peanut butter can soften.
Freezing Tips
To freeze, place the clusters on a tray first. Freeze until firm.
Once frozen, transfer the clusters to a zip-top bag. This keeps them from sticking together.
They will keep well in the freezer for up to 2 months. This makes them perfect for quick snacks or dessert emergencies.
Frozen clusters can be eaten straight from the freezer. You can also let them thaw for 10 to 15 minutes for a softer bite.
Make-Ahead Tips
These clusters are naturally make-ahead friendly because they need time to chill. You can make them a day before serving.
Store them in the refrigerator until needed. Keep them in an airtight container to protect texture.
If making them for gifts, prepare them ahead and keep them chilled until packaging. Use jars, tins, treat bags, or boxes.
For longer storage, freeze them and thaw only what you need. This is helpful for holidays or bulk gifting.
Helpful Notes for Perfect Peanut Butter Pretzel Clusters
Melt Chocolate Slowly
White chocolate can seize if it overheats. Microwave in 30-second intervals and stir each time.
Stop heating once it is smooth. Stirring often is the safest way to melt it properly.
Keep Moisture Away From Chocolate
Chocolate can become clumpy or grainy if it comes into contact with moisture. Use a dry bowl and dry utensils.
Even a small amount of water can affect the texture. Keep everything clean and dry.
Use No-Stir Peanut Butter If Natural
Natural peanut butter is not recommended unless it is a no-stir variety. Peanut butter that separates can make the clusters greasy or hard to set.
Creamy peanut butter gives the most reliable texture. Crunchy peanut butter can be used if you want more texture.
Crush Pretzels Roughly
Pretzels should be roughly crushed, not pulverized. You want pieces that give a real crunch.
A zip-top bag and rolling pin make this easy. It is also a fun step for kids to help with.
Do Not Worry About Perfect Shapes
Clusters are supposed to look rustic. Uneven mounds are part of their charm.
Focus on making them compact enough to hold together. Perfect circles are not necessary.
Add Salt Before Chilling
If using sea salt flakes, sprinkle them on before the clusters set. This helps the salt stick.
Use only a small amount. The pretzels already add saltiness.
Chocolate Variations
White chocolate gives the clusters their sweetest finish. It pairs well with salty pretzels and creamy peanut butter.
Milk chocolate can be used for a more classic candy-style flavor. It makes the clusters taste richer and more familiar.
Dark chocolate gives a deeper flavor profile. It balances the sweetness and makes the clusters taste a little more intense.
You can also drizzle melted dark chocolate over the finished clusters for a decorative touch. This is especially nice for holidays.
Choose the chocolate based on how sweet or rich you want the final treat to be. The recipe works with all three options.
Festive Add-Ins and Flavor Twists
Colored sprinkles can make these clusters feel cheerful and holiday-ready. Add them before chilling so they stick.
Crushed candy canes give a seasonal peppermint crunch. They are especially good for winter treat trays.
Chopped dried cranberries or raisins add a chewy element. They also boost the flavor and give contrast to the crunchy pretzels.
Crunchy peanut butter can be used instead of creamy peanut butter if you want more texture. It will make the clusters even more nutty.
You can also add chopped peanuts for the strongest peanut crunch. Keep them optional if serving guests with nut concerns.
Nut-Free Option
To make these clusters nut-free, use sunflower seed butter instead of peanut butter. Skip the chopped peanuts.
The flavor will change, but the sweet-salty-crunchy idea remains. Pretzels and chocolate still create a satisfying treat.
Make sure all ingredients fit your needs if serving someone with a nut allergy. The recipe itself offers the basic nut-free direction, but ingredient choices still matter.
For texture, rely on the pretzels and chocolate. They keep the clusters crunchy and sweet without peanuts.
Troubleshooting No-Bake Peanut Butter Pretzel Clusters
Why Is My Chocolate Clumpy or Grainy?
The chocolate may have overheated or come into contact with moisture. Melt slowly in 30-second intervals and stir often.
Use a dry bowl and dry utensils. White chocolate especially needs gentle handling.
Why Are My Clusters Not Setting?
The mixture may be too soft, or the peanut butter may have separated. Use creamy peanut butter or no-stir natural peanut butter for best results.
Chill the clusters longer if needed. They should firm up in the refrigerator.
Why Are My Clusters Greasy?
Natural peanut butter may have separated. That can make the mixture oily.
Use your favorite creamy peanut butter or a no-stir variety. This gives a more stable texture.
Why Are My Clusters Falling Apart?
The pretzels may not have been coated well enough, or the clusters may not have chilled long enough. Stir until everything is thick and glossy.
Also make the mounds compact when scooping. Then chill until fully firm.
Why Are My Pretzels Too Soft?
The clusters may have been stored too long or left at room temperature too long. Keep them refrigerated for the best crunch.
Make sure the container is airtight. This helps protect the pretzel texture.
Why Are the Clusters Too Sweet?
White chocolate gives the sweetest finish. Use milk or dark chocolate for a richer flavor profile.
You can also add sea salt flakes to balance the sweetness. A small sprinkle makes a big difference.
Frequently Asked Questions
Can I Make These Nut-Free?
Yes, use sunflower seed butter instead of peanut butter and skip the chopped peanuts. This keeps the clusters crunchy and sweet without peanut butter.
The flavor will be different, but the texture can still be satisfying. The pretzels and chocolate remain the main structure.
Can I Use Natural Peanut Butter?
It is not recommended unless it is a no-stir variety. Natural peanut butter can separate and make the mixture greasy or hard to set.
For the most reliable clusters, use creamy peanut butter. Crunchy peanut butter also works if you want more texture.
Do I Have to Use Coconut Oil?
No, coconut oil is optional. It simply helps the chocolate melt more smoothly and set with a nice finish.
Butter can also be used as the optional smoothing ingredient. You can skip both if preferred.
Why Is My Chocolate Clumpy or Grainy?
It may have overheated or touched moisture. Melt it slowly and stir often.
Use 30-second microwave intervals. White chocolate needs gentle heat.
Can I Double the Recipe?
Absolutely. Double all ingredients and use two trays if needed.
This is a great idea for parties, holiday prep, or bulk gifting. Just make sure you have enough refrigerator space.
Can I Use Milk or Dark Chocolate?
Yes, you can use milk or dark chocolate chips instead of white chocolate chips. Milk chocolate gives a classic sweet flavor, while dark chocolate tastes richer.
White chocolate gives the sweetest finish. Choose the version you like best.
How Long Do These Need to Chill?
They need at least 1 hour in the refrigerator. They should be firm and fully set before serving.
If they still feel soft, chill them longer. The final texture should be easy to pick up and bite into.
Can I Freeze Them?
Yes, freeze the clusters on a tray first, then transfer them to a zip-top bag. They keep well for up to 2 months.
Eat them straight from the freezer or thaw for 10 to 15 minutes for a softer bite. This makes them great for quick treats.
Final Thoughts
No-Bake Peanut Butter Pretzel Clusters are the kind of treat that proves simple ingredients can still feel special. With creamy peanut butter, crunchy pretzels, sweet chocolate, optional peanuts, and a little sea salt, every bite gives you that sweet-salty contrast people love.
They are quick to prepare, easy to scoop, and require no oven at all. After a short chill in the refrigerator, they turn into firm little clusters that are perfect for snacking, gifting, dessert trays, or late-night cravings.
The recipe is also flexible. Use white, milk, or dark chocolate, add chopped peanuts for crunch, skip the nuts for a nut-free version, or decorate with sprinkles, crushed candy canes, dried fruit, or a chocolate drizzle.
They store well in the refrigerator and freeze beautifully for later. That means you can make a batch now and keep a few ready for busy days, parties, or dessert emergencies.
Whether you serve them cold from the fridge, pack them in treat bags, stack them in tins, or sneak one straight from the freezer, these clusters are easy, crunchy, creamy, salty, sweet, and absolutely worth repeating.
No-Bake Peanut Butter Pretzel Clusters
No-Bake Peanut Butter Pretzel Clusters are crunchy, creamy, sweet, and salty all in one easy treat. Crushed mini pretzels are mixed with peanut butter, melted chocolate, and optional chopped peanuts for a simple dessert that sets in the refrigerator. This recipe is perfect when you want a quick no-bake snack for gifting, party trays, late-night cravings, or holiday treat boxes. The sea salt flakes on top add a little extra contrast and make each cluster taste even more balanced.
Recipe Details
- Prep Time: 10 minutes
- Cook Time: 5 minutes
- Chilling Time: 1 hour
- Total Time: 1 hour 15 minutes
- Servings: 12 clusters
- Calories: 180 kcal
Ingredients
- Sea salt flakes optional, for topping
- ½ cup chopped peanuts optional, for crunch
- 1 tablespoon coconut oil or butter optional, helps with melting
- 1½ cups white chocolate chips or semi-sweet/dark if preferred
- 1 cup creamy peanut butter
- 2 cups mini pretzels roughly crushed
Instructions
Step 1: Prepare the Baking Sheet
Line a baking sheet with parchment paper or a silicone mat so the clusters are easy to remove once firm.
Step 2: Melt the Chocolate
In a microwave-safe bowl, combine the white chocolate chips and coconut oil or butter. Microwave in 30-second intervals, stirring between each one, until the mixture is melted and smooth.
Step 3: Mix the Pretzel Base
In a large mixing bowl, stir together the roughly crushed mini pretzels, creamy peanut butter, and chopped peanuts if using.
Step 4: Add the Melted Chocolate
Pour the melted chocolate mixture over the pretzel mixture. Fold everything together until the pretzels are evenly coated.
Step 5: Shape the Clusters
Drop spoonfuls of the mixture onto the prepared baking sheet, leaving space between each cluster.
Step 6: Add Sea Salt
Sprinkle sea salt flakes over the tops if desired.
Step 7: Chill Until Firm
Refrigerate the clusters for at least 1 hour, or until firm.
Step 8: Serve or Store
Serve once set, or transfer the clusters to an airtight container and keep them in the fridge.
Notes
Use crunchy peanut butter for added texture.
White chocolate can be swapped for milk or dark chocolate.
For a firmer texture, freeze for 20 minutes instead of chilling.
Store in the fridge for up to 1 week or freeze for longer storage.
Serving Suggestions
- Hot coffee
- Cold milk
- Holiday candy trays
- Lunchbox treats
- Dessert gift boxes
- Movie night snack boards
- Vanilla ice cream
Storage
How to Store
Store the clusters in the fridge for up to 1 week in an airtight container, as noted in the original recipe.
How to Freeze
Freeze the clusters for longer storage. Let them sit briefly at room temperature before serving if they are very firm from the freezer.
Best Texture Tip
For a firmer texture, freeze the clusters for 20 minutes instead of chilling, as suggested in the original recipe.

Fernando is the creator and writer behind the food blog Eating with your Hands. Living and working in cities like Paris, Barcelona, and Berlin, and being married to a Canadian foodie, has given Fernando a passion and interest in food and inspired him to run EWYH.
Why don’t you have a printable recipe?