
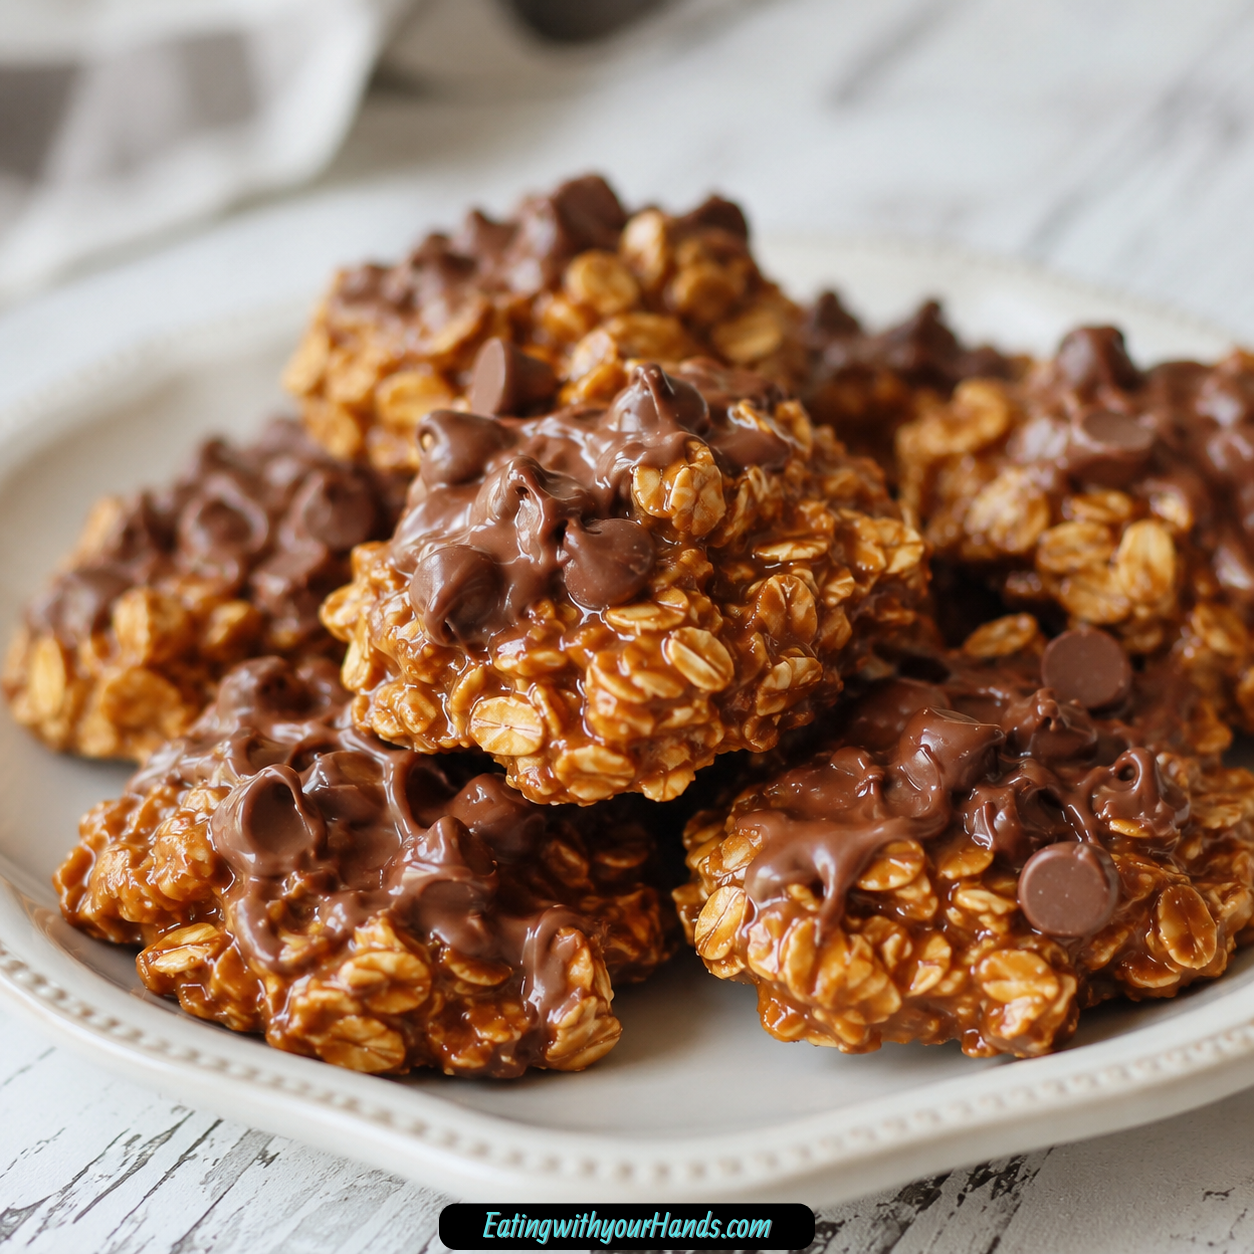
There are days when the thought of turning on the oven feels like too much, but the craving for something sweet does not care about the weather, the time, or the amount of energy left in the day. That is exactly where these No Bake Salted Caramel Cookies earn their place.
They are rich, chewy, sweet, salty, and full of caramel-style comfort without requiring a single minute of baking. A saucepan, a prepared surface, and a few pantry ingredients are all you need to make a batch of golden no-bake cookies that taste like a cross between caramel fudge and soft oatmeal cookie bites.
The flavor is built from granulated sugar, butter, evaporated milk, instant butterscotch pudding mix, quick oats, a dash of salt, semi-sweet chocolate chips, and toffee chips. Together, those ingredients create a cookie that sets into chewy mounds with little swirls of chocolate and crunchy bits of toffee throughout.
This is the kind of recipe that feels especially useful in the summer, when the kitchen is already warm and the oven can stay off. It is also perfect for potlucks, bake sales, party trays, holiday tins, care packages, or those late-night moments when a caramel craving shows up and refuses to leave.
Table of Contents
- Why You’ll Love No Bake Salted Caramel Cookies
- Recipe Details
- Ingredients
- Optional Add-Ins
- The Sweet and Salty Charm of These Cookies
- Why Quick Oats Matter
- Directions
- Step 1: Prepare Your Work Surface
- Step 2: Measure the Ingredients Ahead of Time
- Step 3: Add Sugar, Butter, and Evaporated Milk to the Saucepan
- Step 4: Melt and Combine the Caramel Base
- Step 5: Bring the Mixture to a Gentle Boil
- Step 6: Boil Undisturbed for 4 Full Minutes
- Step 7: Remove the Saucepan From the Heat
- Step 8: Add the Instant Butterscotch Pudding Mix
- Step 9: Add the Dash of Salt
- Step 10: Stir Until Smooth
- Step 11: Add the Quick Oats
- Step 12: Add the Semi-Sweet Chocolate Chips
- Step 13: Add the Toffee Chips
- Step 14: Drop the Cookies Onto the Prepared Surface
- Step 15: Shape the Cookies if Desired
- Step 16: Let the Cookies Cool at Room Temperature
- Step 17: Chill for a Firmer Texture
- Serving Suggestions
- Storage
- Transport Tips
- Helpful Notes for Best Results
- Optional Add-In Ideas
- Troubleshooting
- Frequently Asked Questions
- Why This Recipe Works for Hot Days
- Why These Cookies Are Great for Parties and Potlucks
- Final Thoughts
- No Bake Salted Caramel Cookies
Why You’ll Love No Bake Salted Caramel Cookies
These cookies are made without an oven, which makes them perfect for hot days or busy days when you want dessert quickly. The stovetop does the important work, and the cookies finish by cooling on wax paper or a silicone baking mat.
They are also simple to make. You only need a saucepan and a few basic prep steps, so the process feels approachable even if you do not bake often.
The texture is one of the best parts. Quick oats absorb the caramel mixture and help the cookies set into soft, chewy, cohesive bites.
The flavor has a sweet-salty balance that makes the cookies hard to stop eating. Butterscotch pudding mix, toffee chips, semi-sweet chocolate chips, butter, and a dash of salt all work together to create something rich and satisfying.
They also travel well once set. That makes them useful for cookie trays, potlucks, holiday gifts, party favors, and care packages.
Another reason to love them is how fast they come together. The original recipe gives a prep and cook time of about 20 minutes, with the cookies cooling afterward until set.
Recipe Details
- Recipe name: No Bake Salted Caramel Cookies
- Main method: Stovetop no-bake cookies
- Prep and cook time: About 20 minutes
- Boiling time: 4 full minutes
- Setting time: At least 1 hour at room temperature
- Faster setting option: Refrigerate after 20 to 30 minutes of cooling
- Best oats to use: Quick oats
- Room temperature storage: Up to 5 days
- Refrigerator storage: Up to 10 days
- Freezer storage: Up to 3 months
- Best for: Hot days, potlucks, bake sales, cookie platters, gifts, and quick caramel cravings
Ingredients
- 2 cups granulated sugar
- ¾ cup butter, 1 ½ sticks
- ⅔ cup evaporated milk
- 1 (3.4 oz) box instant butterscotch pudding mix
- 3 ½ cups quick oats
- Dash of salt
- 1 cup semi-sweet chocolate chips
- ½ cup toffee chips
Optional Add-Ins
- Chopped pretzels
- Sea salt flakes
- Mini marshmallows
The Sweet and Salty Charm of These Cookies
The best no-bake cookies usually have a little contrast. These salted caramel cookies lean into that idea with buttery sweetness, chewy oats, melty chocolate, crunchy toffee, and just enough salt to keep the flavor balanced.
The caramel base starts with sugar, butter, and evaporated milk. Those ingredients are cooked together until the mixture reaches a gentle boil, then boiled undisturbed for 4 full minutes.
That timing matters. The boil helps the mixture develop flavor and gives the cookies the structure they need to set properly once dropped onto the prepared surface.
The instant butterscotch pudding mix gives the cookies their deep caramel-like flavor. It also helps bind the mixture, making the final cookies chewy and rich.
The quick oats are what turn the warm caramel mixture into spoonable cookie mounds. They soak up the caramel base and create the classic no-bake texture.
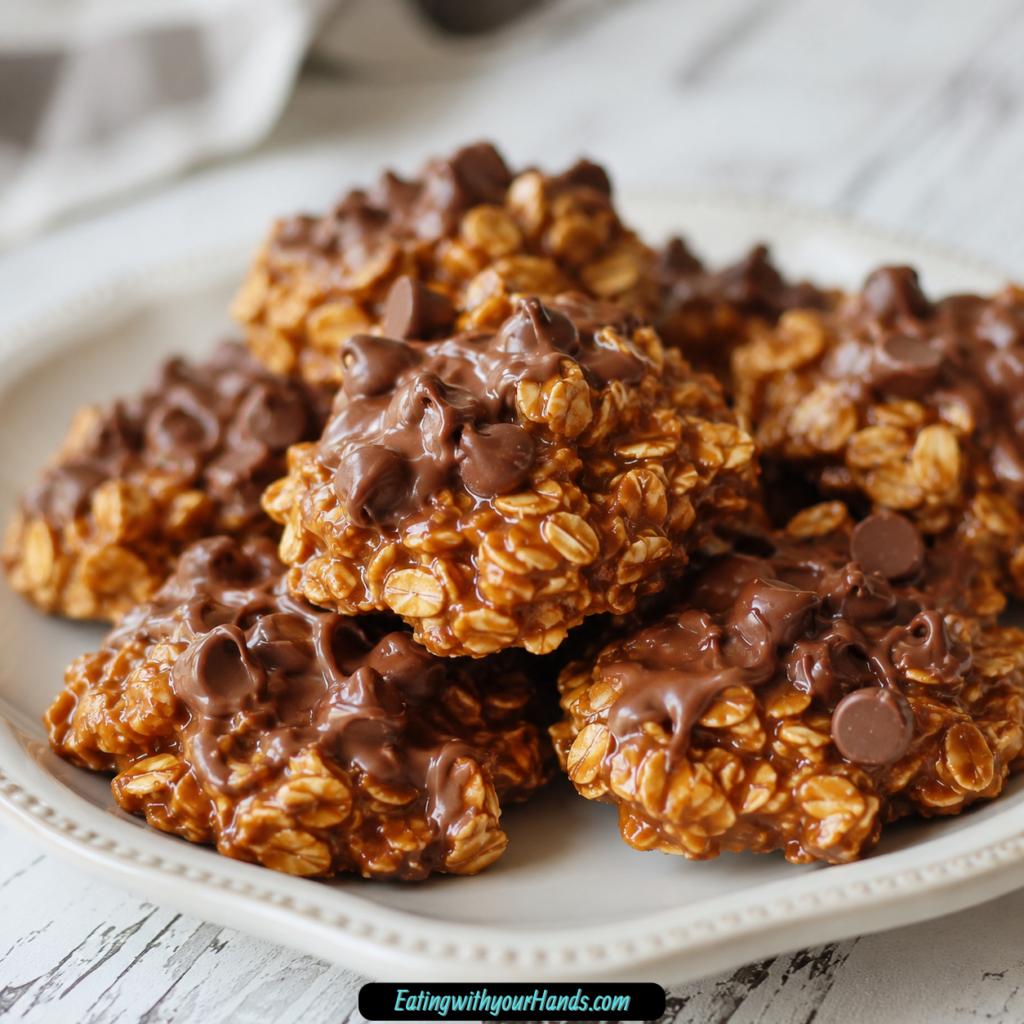
Semi-sweet chocolate chips add extra richness, while toffee chips add crunch and a deeper caramelized note. The chocolate softens slightly from the heat, creating little swirls throughout the cookies.
Why Quick Oats Matter
Quick oats are the best choice for this recipe because they absorb the caramel mixture evenly. They help create a soft, chewy cookie that holds together after setting.
Old-fashioned oats are not recommended. They may not bind as well and can lead to cookies that feel crumbly instead of cohesive.
This detail is especially important because the cookies do not bake in the oven. The texture depends on how well the oats absorb the hot mixture while everything is still warm.
Using the right oats helps the cookies set into neat mounds. It also keeps the bite soft and chewy instead of loose or dry.
Directions
Step 1: Prepare Your Work Surface
Before you start cooking the caramel base, lay out wax paper or a silicone baking mat on your countertop. This is where the cookie mixture will be dropped to cool and set.
This step should happen first because the recipe moves quickly once the caramel is hot. You will not want to stop and search for wax paper after the oats and chips have been stirred in.
Choose a flat surface with enough room for all the cookies. The mixture will be portioned into spoonfuls, so give yourself space to work comfortably.
Step 2: Measure the Ingredients Ahead of Time
Measure all of the ingredients before turning on the stove. This recipe depends on timing, especially once the caramel mixture begins to boil.
Have the granulated sugar, butter, evaporated milk, instant butterscotch pudding mix, quick oats, salt, chocolate chips, and toffee chips ready. Keeping everything close by makes the cooking process smoother.
This is not the kind of recipe where you want to pause for several minutes between steps. The warm mixture thickens as it cools, so preparation helps you move quickly and confidently.
Step 3: Add Sugar, Butter, and Evaporated Milk to the Saucepan
Place 2 cups granulated sugar in a large saucepan. Add ¾ cup butter, which equals 1 ½ sticks.
Pour in ⅔ cup evaporated milk. These three ingredients form the caramel base of the cookies.
Use a large enough saucepan so the mixture can bubble without spilling over. A little extra room in the pan makes stirring safer and easier.
Step 4: Melt and Combine the Caramel Base
Set the saucepan over medium heat. Stir constantly as the butter melts into the sugar and evaporated milk.
The mixture should gradually become smooth and combined. Keep stirring so the sugar, butter, and milk heat evenly.
Do not walk away during this step. The base needs steady attention before it reaches the boil.
Step 5: Bring the Mixture to a Gentle Boil
Continue cooking over medium heat until the mixture reaches a gentle boil. Watch the surface carefully so you know when the boiling begins.
Once it starts to boil gently, the next timing step becomes very important. The mixture needs to boil for 4 full minutes.
This boil is what helps the cookies set correctly later. If the mixture is not boiled long enough, the cookies may stay too soft.
Step 6: Boil Undisturbed for 4 Full Minutes
Once the mixture reaches a gentle boil, stop stirring. Let it boil undisturbed for 4 full minutes.
Use a timer if possible. Precision matters here because the original recipe specifically says the mixture must boil for 4 full minutes.
This step helps develop the deep caramel flavor. It also helps the mixture reach the right consistency so the cookies can set.
Do not shorten the boiling time. If the caramel is not hot enough or does not boil long enough, the cookies may not firm up properly.
Step 7: Remove the Saucepan From the Heat
After 4 full minutes, remove the saucepan from the heat. Set it on a heat-safe surface.
Move right into the next step while the mixture is still hot. The pudding mix needs to dissolve into the caramel base immediately.
Be careful while handling the saucepan. The caramel mixture will be extremely hot.
Step 8: Add the Instant Butterscotch Pudding Mix
Immediately stir in 1 (3.4 oz) box instant butterscotch pudding mix. Use instant pudding mix only.
Stir vigorously until the pudding mix fully dissolves into the hot caramel base. The mixture should become smooth and evenly blended.
Do not use cook-and-serve pudding mix. The original recipe states that it will not dissolve properly and may affect how the cookies set.
Step 9: Add the Dash of Salt
Add a dash of salt to the caramel mixture. Stir it in well so it spreads through the base.
The salt is small but important. It balances the sweetness from the sugar, butterscotch pudding, chocolate chips, and toffee chips.
This is what gives the cookies their salted caramel character. Without that little bit of salt, the flavor would taste much sweeter and less balanced.
Step 10: Stir Until Smooth
After adding the pudding mix and salt, continue stirring until the mixture looks smooth. There should be no dry pudding streaks.
The base should look thick, glossy, and well combined. This smoothness helps coat the oats evenly in the next step.
Work quickly but carefully. The caramel mixture will begin to thicken as it cools.
Step 11: Add the Quick Oats
Add 3 ½ cups quick oats to the saucepan. Stir quickly to coat them in the caramel mixture.
The oats need to be evenly distributed so each cookie has the right texture. Scrape along the bottom and sides of the pan as you stir.
Quick oats absorb the mixture and help bind the cookies. This is why they are preferred over old-fashioned oats in this recipe.
Step 12: Add the Semi-Sweet Chocolate Chips
Add 1 cup semi-sweet chocolate chips to the warm mixture. Stir them in quickly.
The heat will slightly melt the chocolate chips. This creates chocolate swirls throughout the caramel-oat mixture.
Do not worry if some chips remain partly whole while others melt. That variation gives the cookies a richer texture and appearance.
Step 13: Add the Toffee Chips
Add ½ cup toffee chips. Stir until they are evenly spread through the mixture.
The toffee chips add crunch and a deep caramelized flavor. They make the cookies feel more layered and special.
At this point, the mixture should be thick and ready to portion. Work promptly so it does not firm up too much in the saucepan.
Step 14: Drop the Cookies Onto the Prepared Surface
Use a tablespoon or small cookie scoop to drop spoonfuls of the mixture onto the prepared wax paper or silicone baking mat. Try to make the portions fairly even.
The cookies do not need to look perfect. No-bake cookies naturally have a rustic, homemade shape.
If the mixture starts to thicken while you work, continue scooping steadily. The goal is to portion the cookies before they set.
Step 15: Shape the Cookies if Desired
If you prefer a more uniform cookie shape, flatten each mound slightly with the back of a spoon. Do this while the mixture is still warm and flexible.
A light press is enough. You do not need to make them completely flat.
Leaving them as rounded mounds also works well. The shape is a matter of preference.
Step 16: Let the Cookies Cool at Room Temperature
Let the cookies cool at room temperature for at least 1 hour. This gives them time to firm up and hold their shape.
Do not try to move them too early. Warm no-bake cookies can be soft before they are fully set.
After an hour, they should be easier to lift from the wax paper or silicone mat. The texture should be chewy and stable.
Step 17: Chill for a Firmer Texture
For a firmer bite, transfer the cookies to the refrigerator after 20 to 30 minutes of cooling. This helps them set faster.
Refrigerating is optional, but it can be helpful if the kitchen is warm. It also gives the cookies a slightly firmer texture.
Once chilled, the cookies can be stored or served. They should hold their shape well after setting.
Serving Suggestions
Serve these cookies with cold milk for a classic sweet snack. The richness of the caramel, oats, chocolate, and toffee pairs beautifully with a cold drink.
Coffee is another great pairing. The slightly bitter edge of coffee balances the sweetness of the cookies.
These cookies also fit nicely on dessert platters. Place them alongside fudge, brownies, and truffles for a rich cookie tray.
For gifting, wrap them in cellophane bags. They work well for holiday gifts, party favors, and treat boxes.
They are also useful for potlucks and bake sales. Once set, they hold their shape well and are easy to transport.
Storage
Store the cookies in an airtight container at room temperature for up to 5 days. Make sure they are fully set before stacking or packing them.
For longer storage, keep them in the refrigerator for up to 10 days. Chilling also gives them a firmer texture.
The cookies can be frozen for up to 3 months. Freeze them in a single layer on a baking sheet first, then transfer them to a sealed bag.
Freezing in a single layer helps prevent the cookies from sticking together. Once frozen, they are easier to store in a bag or container.
Transport Tips
These cookies hold their shape well once set. That makes them ideal for bringing to events or mailing in care packages.
Before transporting, make sure the cookies are completely firm. Soft cookies may press together or lose their shape.
Pack them in layers with parchment paper between them if needed. This helps keep the cookies neat, especially for gifting or travel.
Helpful Notes for Best Results
Use quick oats for the best texture. Old-fashioned oats may not absorb the caramel evenly and can create crumbly cookies.
Measure the ingredients before starting. The recipe moves quickly once the caramel is hot, so having everything ready prevents stress.
Use real unsalted butter. Margarine may not set properly, and unsalted butter lets you control the salt level.
Boil the caramel mixture for the full 4 minutes. This timing is essential for flavor and setting.
Chill the cookies if you want them to set faster. Refrigeration gives them a firmer bite and helps them become easier to handle.
Optional Add-In Ideas
Chopped Pretzels
Chopped pretzels can add a salty crunch. They fit naturally with the salted caramel flavor.
Add them when stirring in the oats, chocolate chips, and toffee chips. This keeps them distributed throughout the cookies.
Sea Salt Flakes
Sea salt flakes can be used for extra salted caramel flavor. Sprinkle them lightly over the cookies before they fully set.
Use only a small amount. The recipe already includes a dash of salt, so the flakes should be a finishing touch.
Mini Marshmallows
Mini marshmallows can add a softer, sweeter texture. Stir them in with the other add-ins.
They make the cookies feel a little more playful. This option is especially fun for party trays or kid-friendly treats.
Troubleshooting
Why Didn’t My Cookies Set?
This usually happens if the caramel mixture was not boiled for the full 4 minutes or was not hot enough. Timing the boil precisely is important.
Once the mixture reaches a gentle boil, let it boil undisturbed for 4 full minutes. Do not guess the timing if you can use a timer.
Why Are My Cookies Crumbly?
The oats may not have absorbed the caramel evenly. This can happen if old-fashioned oats are used instead of quick oats.
Use quick oats for the best soft-chewy texture. They bind better and help create a cohesive cookie.
Why Are My Cookies Too Soft?
The caramel may not have cooked long enough. The 4-minute boil helps the mixture reach the right consistency.
You can also refrigerate the cookies for a firmer texture. Chilling helps them set faster and gives them a sturdier bite.
Why Did the Pudding Mix Not Dissolve?
Cook-and-serve pudding mix may not dissolve properly in this recipe. Instant butterscotch pudding mix is required.
Stir the instant pudding mix in immediately after removing the caramel from the heat. Stir vigorously until smooth.
Frequently Asked Questions
Can I Use Old-Fashioned Oats Instead of Quick Oats?
It is not recommended. Quick oats bind better and create a chewier, more cohesive texture.
Old-fashioned oats may not absorb the caramel mixture as evenly. This can make the cookies crumbly.
Can I Use Cook-and-Serve Pudding Mix?
No, instant pudding mix is required. Cook-and-serve pudding mix will not dissolve properly and may affect setting.
Use a 3.4 oz box of instant butterscotch pudding mix. This is an important part of the recipe.
Do I Need to Refrigerate These Cookies?
Not necessarily. The cookies can be stored at room temperature in an airtight container for up to 5 days.
Refrigerating will firm them up and extend their shelf life. Chilled cookies can be stored for up to 10 days.
Can I Skip the Chocolate Chips or Toffee?
Yes, but both add great texture and richness. The chocolate chips create soft swirls, while the toffee chips add crunch and caramelized flavor.
You can customize the cookies with your favorite add-ins. Chopped pretzels, sea salt flakes, or mini marshmallows are options from the recipe notes.
Why Didn’t My Cookies Set?
The caramel mixture may not have boiled for the full 4 minutes. It also may not have been hot enough.
Be sure to start timing once the mixture reaches a gentle boil. Let it boil undisturbed for 4 full minutes.
Can I Freeze These Cookies?
Yes, these cookies can be frozen for up to 3 months. Freeze them in a single layer on a baking sheet first.
After they are frozen, transfer them to a sealed bag. This helps them keep their shape and prevents sticking.
Are These Good for Gifting?
Yes, they are great for gifting because they set well and travel easily. Wrap them in cellophane bags or pack them into tins.
They also work well for cookie platters and care packages. Make sure they are fully set before packing.
Why This Recipe Works for Hot Days
No-bake cookies are especially useful when the weather is warm. You can make a sweet treat without heating up the kitchen with the oven.
The stovetop step is quick, and the cookies cool on the counter. This makes the recipe practical when baking feels inconvenient.
Even though the method is simple, the cookies still taste rich and indulgent. Butterscotch, toffee, chocolate, and salt give them plenty of flavor.
That is why this recipe is such a strong choice for summer cravings. It gives you dessert without making the kitchen feel hotter.
Why These Cookies Are Great for Parties and Potlucks
These cookies are easy to make in advance and easy to carry. Once they set, they hold their shape well.
They also offer a flavor that stands out on a dessert table. Salted caramel, chocolate, oats, and toffee make them feel different from basic cookies.
Because they do not require slicing, they are convenient for guests. People can pick up one cookie and keep moving.
They also look appealing in a casual, homemade way. The rounded mounds, chocolate swirls, and toffee bits make each piece look slightly different.
Final Thoughts
No Bake Salted Caramel Cookies are proof that a deeply satisfying dessert does not need an oven or a complicated process. With granulated sugar, butter, evaporated milk, instant butterscotch pudding mix, quick oats, salt, chocolate chips, and toffee chips, you can create chewy caramel cookies with rich flavor and very little cleanup.
The most important step is boiling the caramel mixture for 4 full minutes. That timing helps develop flavor and allows the cookies to set properly after they are dropped onto wax paper or a silicone baking mat.
These cookies are perfect for hot summer days, potlucks, bake sales, midnight cravings, holiday trays, gifts, and care packages. They are sweet, salty, chewy, rich, and easy to make again whenever a caramel craving hits.
Once cooled and set, they become sturdy enough to share and delicious enough to disappear quickly. Keep them at room temperature, chill them for a firmer bite, or freeze a batch for later, because this is the kind of no-bake recipe that earns a permanent place in the recipe tin.
No Bake Salted Caramel Cookies
These no-bake salted caramel cookies are chewy, rich, and perfectly balanced between sweet and salty. Butterscotch pudding gives them a deep caramel flavor, while chocolate chips and toffee chips add extra sweetness and texture. Because no oven is needed, this recipe is a convenient choice for warm days, quick dessert preparation, parties, or whenever you want an easy batch of indulgent cookies.
Recipe Details
- Prep Time: 10 minutes
- Cook Time: 10 minutes
- Cooling Time: 1 hour
- Total Time: 1 hour 20 minutes
- Servings: 24 cookies
- Calories: 280 kcal
Ingredients
- 3 ½ cups quick oats
- 1 cup semi-sweet chocolate chips
- ½ cup toffee chips
- 1 3.4 oz box instant butterscotch pudding mix
- 2 cups granulated sugar
- ¾ cup butter 1 ½ sticks, unsalted
- ⅔ cup evaporated milk
- Dash of salt to taste
Instructions
Step 1: Prepare the Work Surface
Line a flat surface or baking sheets with wax paper or a silicone mat.
Step 2: Heat the Sugar Mixture
Combine the granulated sugar, butter, and evaporated milk in a large saucepan.
Heat over medium, stirring constantly until the butter has completely melted.
Step 3: Boil for Four Minutes
Bring the mixture to a boil. Once boiling, let it cook without stirring for exactly 4 minutes.
Step 4: Add the Pudding Mix
Remove the saucepan from the heat. Stir in the instant butterscotch pudding mix and salt until the pudding mix is fully dissolved.
Step 5: Mix in the Oats and Chips
Add the quick oats, semi-sweet chocolate chips, and toffee chips.
Work quickly and stir until all the ingredients are evenly combined.
Step 6: Shape the Cookies
Drop spoonfuls of the mixture onto the prepared wax paper or silicone mat.
Flatten the tops slightly, if desired.
Step 7: Let the Cookies Set
Allow the cookies to cool at room temperature for 1 hour. For faster setting, place them in the refrigerator.
Notes
Quick oats provide the best chewy texture for these cookies.
Boil the sugar mixture for exactly 4 minutes so the cookies set properly after cooling.
Chill the finished cookies when you prefer a firmer texture or want to keep them fresh for longer.
For an extra salty finish, top the cookies with flaky sea salt before they cool.
Serving Suggestions
- Serve with cold milk or hot coffee.
- Add them to holiday cookie trays.
- Pack them into treat bags for homemade gifts.
- Serve alongside vanilla ice cream.
- Include them on a dessert board with fresh fruit and other cookies.
Storage
How to Store
Keep the cookies in an airtight container after they have completely set.
How to Refrigerate
Refrigerate the cookies for a firmer texture and longer storage.
How to Freeze
Arrange the cooled cookies in a freezer-safe airtight container, separating layers as needed to prevent sticking.
Best Texture Tip
Allow the cookies to set completely before stacking or storing them. Quick oats and the exact 4-minute boiling time help produce the intended chewy texture.

Fernando is the creator and writer behind the food blog Eating with your Hands. Living and working in cities like Paris, Barcelona, and Berlin, and being married to a Canadian foodie, has given Fernando a passion and interest in food and inspired him to run EWYH.