
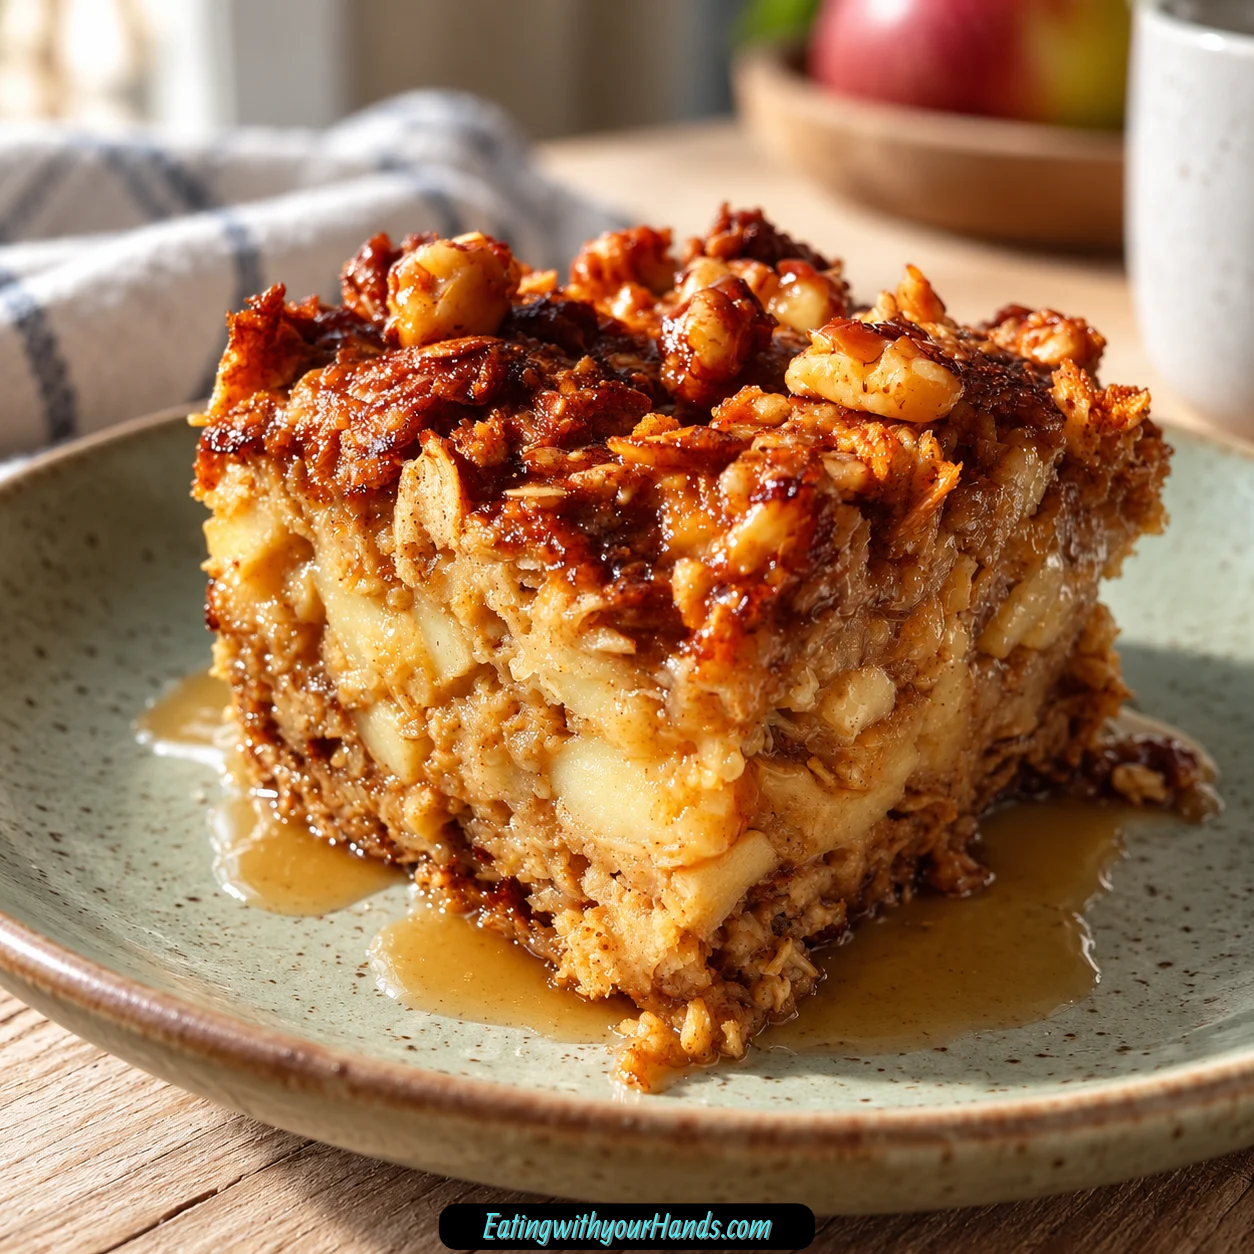

There is something about waking up to warm cinnamon and baked apples that makes even a rushed morning feel a little softer. This Oatmeal Apple Breakfast Bake became one of those dependable recipes for me during a particularly hectic school year when breakfast needed to be fast, filling, and actually enjoyable.
At the time, I desperately needed something I could prepare ahead and grab without thinking too hard before the day started. What began as a practical solution quickly turned into one of the breakfasts my family looked forward to most.
The texture is one of my favorite parts. Old-fashioned oats bake into something that sits somewhere between porridge and a soft breakfast cake, with enough chew to feel hearty and enough tenderness to stay cozy.
The apples soften into little sweet pockets throughout the pan. Cinnamon fills in the background with warmth, while maple syrup or honey brings just enough sweetness to make the bake feel special without turning breakfast into dessert.
It also has the kind of balance that works well early in the day. The oats, eggs, milk, and fruit make it satisfying enough to hold you over, while the overall texture stays light enough that you do not feel weighed down.
My kids started calling it “apple pie oatmeal,” which was probably the moment I knew this recipe had earned a permanent place in our routine. Anything that makes everyone voluntarily walk into the kitchen in the morning without being called twice is already doing something right.
Another reason I keep making it is how well it handles meal prep. Bake it once, cut it into portions, and you have a breakfast that can carry you through several mornings without tasting like a sad compromise.
The flavor even deepens overnight. The cinnamon, apple, oats, and maple syrup have more time to settle together, so the next-day squares often taste even better than the first ones straight from the pan.
Table of Contents
- Why You’ll Love This Oatmeal Apple Breakfast Bake
- Ingredients for Oatmeal Apple Breakfast Bake
- Why Old-Fashioned Oats Matter
- Choosing the Apple
- Equipment You’ll Need
- How to Make Oatmeal Apple Breakfast Bake
- How to Know When It’s Done
- Why the Resting Period Matters
- Tips for the Best Oatmeal Apple Breakfast Bake
- Dairy-Free Milk Options
- Pear Variation
- Vegan Flax Egg Option
- Nut-Free Options
- Seasonal Fruit Variations
- Serving Suggestions
- Serving It for Busy Mornings
- Storage at Room Temperature
- Refrigerator Storage
- How to Freeze Oatmeal Apple Breakfast Bake
- How to Reheat Refrigerated Portions
- How to Reheat Frozen Portions
- Frequently Asked Questions
- Nutrition Information
- The Breakfast That Made Busy Mornings Easier
- Oatmeal Apple Breakfast Bake
Why You’ll Love This Oatmeal Apple Breakfast Bake
This breakfast bake is hearty without being heavy. Old-fashioned oats provide that satisfying chewy base, while eggs and milk give the mixture enough structure to slice once it cools.
The apples make every piece feel naturally sweet and comforting. Depending on the variety you choose, you can lean more toward sweetness with Honeycrisp or add a sharper contrast with Granny Smith.
It is also one of the easiest breakfasts to prepare ahead. A full 8×8-inch pan can be baked, cooled, sliced, and stored so weekday mornings become much less chaotic.
The recipe adapts easily too. Pears, berries, different milk options, flax eggs, seeds, granola, and even seasonal fruit can all fit into the same basic idea.
That flexibility is especially helpful when you are using what is already in the refrigerator. The base stays familiar, but the finished bake can feel different from week to week.
And then there is the smell while it bakes. Cinnamon and apples have a way of making the kitchen feel warm before anyone has taken the first bite.
Ingredients for Oatmeal Apple Breakfast Bake
The ingredient list is divided into dry and wet components so the preparation stays simple. Measuring everything before you begin keeps the mixing stage quick and avoids having to search through the pantry halfway through.
Dry Ingredients
- 2 cups old-fashioned oats
- 1 teaspoon cinnamon
- ½ teaspoon baking powder
- ¼ teaspoon salt
- ¼ cup chopped walnuts or pecans, optional
Old-fashioned oats are important for the intended texture. Instant or quick oats become much softer and can turn the bake overly mushy.
The optional walnuts or pecans add crunch. They are not required, but they give each square another layer of texture against the tender apples and oats.
Wet Ingredients
- 1 ½ cups milk
- 2 large eggs
- ¼ cup maple syrup or honey
- 1 teaspoon vanilla extract
- 1 large apple, diced, about 1 cup
Any kind of milk can work. Whole milk, almond milk, coconut milk, oat milk, and cashew milk are all options, with unsweetened versions helping the apple and cinnamon stay more noticeable.
Honeycrisp is a favorite apple for sweetness and texture. Granny Smith adds more tartness, while Fuji becomes especially soft and caramel-like as it bakes.
Why Old-Fashioned Oats Matter
Old-fashioned oats hold their shape better during baking. They absorb enough liquid to become tender while still leaving the finished bake with visible texture.
Quick oats behave very differently. They break down faster and can create a softer, mushier result that feels more like baby food than a sliceable breakfast bake.
That is why the oats are one part of this recipe worth keeping consistent. Their structure is what helps create that middle ground between porridge and coffee cake.
If you truly need a smaller oat texture, pulsing old-fashioned oats briefly is a better option than reaching for instant packets. Even then, keep enough structure so the mixture does not turn overly soft.
Choosing the Apple
The recipe uses 1 large apple, diced to about 1 cup. Cutting the pieces small and even gives them enough time to soften during the 35–40 minute bake.
Honeycrisp works especially well when you want a sweet-tart balance. Granny Smith creates a more noticeable tartness, while Fuji softens into a sweeter, almost caramel-like texture.
Avoid oversized chunks because they can stay firmer than the oats around them. Pieces around pea size distribute more evenly and give you apple in more bites.
You can also combine two apple varieties. Half Honeycrisp and half Granny Smith creates a layered balance of sweet and tart.
Equipment You’ll Need
The equipment list is simple: an 8×8-inch baking dish, a medium or large mixing bowl, a whisk, measuring cups and spoons, plus a knife and cutting board. A fork can stand in for the whisk if needed, but the eggs should still be fully incorporated into the wet mixture.
An 8×8-inch dish works best because it gives the bake the intended thickness. Using a much larger pan spreads the mixture too thin and can make it dry more quickly.
A spatula is also useful for folding in the apples and nuts and smoothing the top before baking. Nothing specialized is required, which is part of what makes this such an easy meal-prep breakfast.
How to Make Oatmeal Apple Breakfast Bake
The process is straightforward, but the details matter for getting a bake that slices cleanly without becoming dry or mushy. The most important points are using old-fashioned oats, keeping the apple pieces even, mixing gently, and allowing the finished bake to rest before slicing.
Step 1: Preheat the Oven and Prepare the Baking Dish
Preheat the oven to 375°F (190°C) and grease an 8×8-inch baking dish. Butter or a light coating of oil both work well for preparing the pan.
Make sure the corners and sides are coated so the baked edges release cleanly. Using a similar-size oven-safe dish is fine, but a significantly larger pan can make the layer too thin and change the texture.
While the oven heats, set the eggs out if they are still cold. Room-temperature eggs blend more smoothly into the milk, maple syrup or honey, and vanilla.
Step 2: Dice the Apple Evenly
Core the large apple and cut it into small, even pieces until you have about 1 cup. Aim for pieces around pea size so they soften properly without disappearing completely into the oats.
Keeping the pieces similar in size also helps every portion bake at the same rate. Large chunks can stay crunchy while very tiny pieces can become difficult to notice.
Once diced, set the apple aside while you mix the liquid ingredients. If you are using two apple varieties, keep the total amount around the same 1-cup quantity.
Step 3: Whisk the Wet Ingredients
In a large mixing bowl, combine 1 ½ cups milk, 2 large eggs, ¼ cup maple syrup or honey, and 1 teaspoon vanilla extract. Whisk until the eggs are fully incorporated and the mixture looks even.
Do not rush this stage because streaks of unbeaten egg can create uneven texture in the finished bake. A smooth liquid base makes it easier for the oats to absorb moisture consistently.
Any approved milk option can be used here. Unsweetened plant-based milk keeps the cinnamon and apple flavors especially clear.
Step 4: Add the Dry Ingredients
Add 2 cups old-fashioned oats, 1 teaspoon cinnamon, ½ teaspoon baking powder, and ¼ teaspoon salt directly to the wet mixture. Stir only until everything is combined and the oats are evenly coated.
A few small uneven spots are fine as long as there are no large dry pockets. Overmixing is unnecessary and can work against the tender texture you want.
At this stage, the mixture will still look fairly loose. That is normal because the oats will absorb much of the liquid while the bake is in the oven.
Step 5: Fold in the Apple and Optional Nuts
Gently fold in the diced apple and the optional ¼ cup chopped walnuts or pecans. Use a spatula to distribute the pieces evenly without overworking the oat mixture.
Make sure the apples are spread throughout rather than settling in one section of the bowl. Even distribution means each square gets a good balance of oats, fruit, and any nuts you choose to use.
The mixture may still look more fluid than a typical cake batter. That is exactly what you want before baking because the oats need enough moisture to become tender.
Step 6: Transfer to the Pan and Bake
Pour the mixture into the prepared 8×8-inch baking dish and smooth the top gently. If you like, sprinkle a little extra cinnamon over the surface before the dish goes into the oven.
Bake at 375°F for 35–40 minutes, beginning to check around the 30-minute mark. The edges should look golden and should start pulling slightly away from the sides of the pan.
The center should barely jiggle when the dish is moved gently. A toothpick inserted near the middle should come out mostly clean, perhaps with a few moist crumbs, but not wet batter.
Step 7: Rest Before Slicing
Remove the baking dish from the oven and let it cool for at least 5–10 minutes before cutting. This short resting period allows the oats to finish setting and makes the bake easier to slice into neat squares.
Cutting immediately can leave you with a soft, spoonable texture instead of defined portions. The flavor also becomes a little more settled as the bake cools slightly.
For meal prep, let it cool completely before slicing and storing. Fully cooled portions hold together better in the refrigerator and freezer.

How to Know When It’s Done
The edges are one of the best visual cues. They should be golden and beginning to pull away slightly from the sides of the dish.
The center should still have a very slight jiggle but should not look liquid. That balance means the oats have set while the interior remains moist.
A toothpick can give you another clue. Moist crumbs are fine, but wet batter means the bake needs additional time.
Start checking around 30 minutes even though the usual range is 35–40 minutes. Ovens vary, and catching the bake at the right moment helps prevent dryness.
Why the Resting Period Matters
The 5–10 minute rest after baking is not just about avoiding a burned tongue. It gives the oats time to absorb the last of the moisture and firm enough for cleaner slices.
Cut too soon and the squares can collapse into a softer oatmeal texture. Letting the bake settle gives you the hearty sliceable consistency that makes it easy to meal prep.
The flavors also become more noticeable after a short rest. Cinnamon, apple, vanilla, and maple syrup feel more connected once the intense oven heat has settled.
For stored portions, cooling completely is even more important. Warm food sealed too early can create excess moisture inside the container.
Tips for the Best Oatmeal Apple Breakfast Bake
Use old-fashioned oats rather than quick or instant oats. Their larger texture is what keeps the finished bake chewy and tender instead of overly soft.
Dice the apple into small, even pieces. Pea-sized chunks are large enough to taste but small enough to become tender during baking.
Do not overbake. Pull the dish once the edges are golden, the center barely jiggles, and a toothpick shows moist crumbs rather than wet batter.
Let the pan rest before slicing. Those few minutes make the difference between neat squares and a delicious but messy spoonful.
For meal prep, consider doubling or tripling the recipe. Individual portions freeze well and can make busy mornings much easier.
Dairy-Free Milk Options
Almond milk, coconut milk, oat milk, and cashew milk can all replace dairy milk. Keep the amount at 1 ½ cups so the basic liquid-to-oat balance stays consistent.
Unsweetened varieties are especially useful because they allow the apple, cinnamon, and maple syrup or honey to remain the main flavors. Strongly flavored coffeehouse-style milks can shift the taste in a more dessert-like direction.
The recipe has worked successfully with several milk styles, so this is an easy place to adapt based on what you keep at home. Choose the option that fits your needs without changing the overall method.
Pear Variation
Ripe pears can replace the apple when you want something different. Bartlett pears become especially soft during baking, while Bosc pears hold their shape more firmly.
If the pears are very ripe and sweet, you can reduce the maple syrup slightly. No exact reduced quantity is specified, so adjust carefully according to sweetness.
Keep the fruit pieces small and even just as you would with the apple. The same 1-cup fruit target keeps the bake balanced.
Vegan Flax Egg Option
For each egg, mix 1 tablespoon ground flaxseed with 2.5 tablespoons water and let it sit for 5 minutes until thickened. Since the standard recipe uses 2 eggs, that means 2 tablespoons ground flaxseed mixed with 5 tablespoons water.
Use the thickened flax mixture in place of the regular eggs. The finished texture will be slightly denser but can still work well.
Pair the flax eggs with a plant-based milk for a vegan version. Almond milk and oat milk are especially good options.
Nut-Free Options
If nuts are not appropriate, sunflower seeds or pumpkin seeds can provide some crunch. Toasting them first makes the texture more noticeable in the finished bake.
Granola can also be sprinkled over the top before baking. This gives the surface extra texture without relying on walnuts or pecans.
Choose the nut-free option that best fits the situation. The bake still works perfectly well with no crunchy add-in at all.
Seasonal Fruit Variations
This breakfast bake can adapt to different fruit throughout the year. Berries, pears, and peaches are all mentioned as successful alternatives or additions.
The basic idea is to keep the liquid-to-dry balance reasonably similar. Too much juicy fruit can change the final texture, so keep additions thoughtful rather than overloading the pan.
Peaches and coconut milk create a particularly different version while still keeping the same oat-based structure. The recipe remains familiar but takes on a more summery character.
Serving Suggestions
This oatmeal bake is delicious warm straight from the pan. It also gives you plenty of room to add toppings depending on whether you want something simple or more indulgent.
Greek yogurt adds creamy tang and balances the sweetness. A drizzle of honey over the yogurt makes the top feel especially rich without changing the bake itself.
Warm maple syrup or extra honey can take the breakfast closer to dessert territory. Use as much or as little as you like.
Toasted coconut flakes add another layer of texture. They also pair naturally with cinnamon and fruit.
Fresh berries make the plate feel brighter. Raspberries are especially good when you want a tart contrast against the sweeter apples.
A pat of butter melting into a warm square gives the breakfast a nostalgic feel. It is simple, rich, and especially comforting on a cold morning.
Serving It for Busy Mornings
The bake can be cut into squares and eaten almost like finger food. That makes it especially useful when breakfast needs to leave the house with you.
Children can grab a square quickly without needing a bowl and spoon. Adults can do exactly the same when mornings are equally rushed.
For a softer breakfast, reheat a portion in a bowl and add a splash of cold milk. The contrast between warm oats and cool milk makes the texture especially comforting.
Meal prep becomes much easier when the entire pan is sliced before storage. Pre-portioned squares are faster to grab and reheat during the week.
Storage at Room Temperature
If the bake will be eaten within a few hours, simply cover the baking dish with foil. This works well for brunch or a morning when the pan is staying on the table.
Do not leave it sitting uncovered because the surface can dry. Keeping it covered helps preserve the tender texture.
For anything beyond a few hours, refrigeration is the better storage method. Let the bake cool first before moving it into longer storage.
Refrigerator Storage
Let the bake cool completely, which takes about 1 hour. Once cool, cover the dish tightly with plastic wrap or transfer the slices to an airtight container.
Store in the refrigerator for up to 4 days. The apples become softer and the cinnamon-and-fruit flavor becomes more pronounced as the bake sits.
For neat portions, slicing before refrigeration is especially useful. Chilled oatmeal bake can crumble more when you try to cut it after it has fully firmed.
A prepared container of individual squares makes weekday mornings much easier. You can remove exactly what you need without disturbing the rest.
How to Freeze Oatmeal Apple Breakfast Bake
Cool the bake completely before freezing. Cut it into individual portions, wrap each piece tightly in foil, and place the wrapped pieces inside a zip-top freezer bag.
Freeze for up to 3 months. Labeling the bag with the date makes it much easier to keep track of how long the portions have been stored.
Individual wrapping lets you take out one breakfast at a time. There is no need to thaw the whole pan when you only want a single serving.
The bake is especially useful for emergency breakfasts because it can be reheated from frozen. That convenience is one of the main reasons making an extra batch can be worthwhile.
How to Reheat Refrigerated Portions
Microwave a refrigerated portion for about 30 seconds. If it needs more time, continue heating briefly until warmed through.
A 350°F oven can also be used for about 10 minutes. This method takes longer but does a better job of reviving the slightly crisp top.
Choose the microwave when speed matters most. Use the oven when texture matters more than convenience.
How to Reheat Frozen Portions
Frozen portions can be thawed overnight in the refrigerator before reheating. They can also go directly into the microwave when you need breakfast quickly.
One method is to add about 30 extra seconds when microwaving straight from frozen. A splash of milk can help revive the softer texture if the square seems dry.
Another quick reheating note suggests starting with the usual 30 seconds and adding 10 more seconds when the portion is frozen. Because microwave strength and portion size vary, heat only until the center is warm.
Frequently Asked Questions
Can I Use Quick Oats Instead of Old-Fashioned Oats?
Old-fashioned oats are strongly preferred. Quick oats soften too much and can turn the breakfast bake mushy rather than giving you the hearty, chewy texture you want.
If you have old-fashioned oats but want them slightly smaller, pulse them briefly rather than switching to instant packets. Keep enough oat structure so the bake remains sliceable.
Is This Breakfast Bake Freezer-Friendly?
Yes. Cool the bake completely, cut it into portions, wrap each one tightly in foil, and place them together in a freezer bag.
Freeze for up to 3 months. Thaw overnight in the refrigerator or reheat from frozen when needed.
Can I Make It Vegan?
Yes. Replace the 2 eggs with 2 tablespoons ground flaxseed mixed with 5 tablespoons water and let the mixture thicken for 5 minutes.
Use a plant-based milk such as almond or oat milk. If nuts are a concern, omit the optional nuts or replace them with seeds.
Why Did My Bake Turn Out Dry?
Overbaking is one possible cause. Remove the bake when the center barely jiggles rather than waiting until every bit of movement disappears.
Incorrect oat measurement can also make the texture too dry. Spoon the oats into the measuring cup rather than compacting them heavily.
Pan size matters as well. An 8×8-inch dish gives the intended thickness, while a larger pan spreads the mixture too thin and can dry it faster.
What Is the Best Apple Variety?
Honeycrisp is a favorite because it balances sweetness and tartness while holding some structure. Granny Smith gives the bake a brighter tart flavor.
Fuji becomes softer and almost caramel-like. Mixing Honeycrisp and Granny Smith can create a particularly balanced combination.
Can I Add Berries?
Yes. Berries can be used as one of the fruit variations.
Keep the basic proportion of liquid and dry ingredients similar. Avoid adding so much fruit that the mixture becomes excessively wet.
Can I Use Honey Instead of Maple Syrup?
Yes. The recipe allows either ¼ cup maple syrup or honey.
Use the same amount. The flavor changes slightly depending on which sweetener you choose.
Nutrition Information
One serving is approximately 220 calories. It contains about 6g fat, including 1.5g saturated fat and 3.5g unsaturated fat.
Each serving also provides about 35g carbohydrates, 4g fiber, 12g sugar, 7g protein, and 150mg sodium. These values are estimates and will vary depending on the exact ingredients and substitutions used.
The values are based on full-fat dairy milk, Honeycrisp apple, and pure maple syrup. Different milk, fruit, sweeteners, nuts, seeds, or toppings will change the final numbers.
Adding honey, maple syrup, nut butter, nuts, or other toppings will also increase the nutrition beyond the base serving. Keep that in mind when customizing the finished breakfast.
The Breakfast That Made Busy Mornings Easier
I think this recipe earned its place in our kitchen because it solved a very real problem at exactly the right time. During that hectic school year, I needed breakfast to be something I could trust without standing at the stove every morning.
This bake gave me that freedom. I could prepare one pan, cut it into squares, and know there was something warm and satisfying waiting even when the morning felt rushed before it had properly started.
Over time, though, it became more than a convenience recipe. The smell of apples and cinnamon coming from the oven became one of those little signals that the day was beginning on a comforting note.
My family started expecting it. The same breakfast I had first made because I was short on time turned into something everyone genuinely wanted.
I love how uncomplicated it still feels. Oats, milk, eggs, apple, cinnamon, vanilla, and a little maple syrup or honey are ordinary ingredients, but together they create something that feels far more special than the list suggests.
Some weeks I keep it exactly the same. Other times pears, berries, plant-based milk, seeds, or a different topping make it feel new without changing what I love about it.
The texture always brings me back. It is soft but not mushy, hearty but not heavy, and just structured enough to cut into squares once it has rested.
That is why I still think of it as the breakfast equivalent of a warm hug. It is simple, reliable, cozy, and exactly the kind of thing I want waiting in the kitchen on a cold morning.
And when life becomes busy again, this is still one of the first recipes I come back to. A single pan gives me several mornings of apple-and-cinnamon comfort, and that kind of small kitchen victory never stops being useful.
Oatmeal Apple Breakfast Bake

Warm, cozy, and filled with tender apple and cinnamon flavor, this Oatmeal Apple Breakfast Bake turns old-fashioned oats into a hearty morning dish that is easy to prepare ahead. With milk or almond milk, maple syrup or honey, and optional walnuts or pecans, it is a flexible breakfast that works just as well for meal prep as it does for a slow morning at home.
Recipe Details
- Prep Time: 10 minutes
- Cook Time: 40 minutes
- Total Time: 50 minutes
- Course: Breakfast
- Cuisine: American
- Servings: 6 servings
- Calories: 220 kcal
Ingredients
For the Breakfast Bake
- ¼ cup chopped walnuts or pecans optional
- ¼ teaspoon salt
- ½ teaspoon baking powder
- 1 teaspoon cinnamon
- 1 teaspoon vanilla extract
- ¼ cup maple syrup or honey
- 2 eggs
- 1 large apple diced
- 1 ½ cups milk or almond milk for dairy-free
- 2 cups old-fashioned oats
Instructions
Step 1: Prepare the Oven and Baking Dish
Preheat the oven to 375°F (190°C).
Grease a baking dish and set it aside while you mix the oatmeal base.
Step 2: Make the Oat Mixture
In a bowl, combine the old-fashioned oats, milk or almond milk, eggs, maple syrup or honey, vanilla extract, cinnamon, baking powder, and salt.
Stir until the oats are evenly coated and the eggs, sweetener, and seasonings are well distributed.
Step 3: Add the Apple and Nuts
Fold the diced apple into the oat mixture.
Add the chopped walnuts or pecans if using, stirring gently so the fruit and nuts are spread throughout.
Step 4: Transfer to the Baking Dish
Pour the mixture into the greased baking dish.
Spread the oats and apple pieces evenly so the breakfast bake cooks consistently.
Step 5: Bake Until Set
Bake for 35–40 minutes, until the center is set and the top looks golden.
The finished bake should hold together while still keeping the soft texture of the oats and apples.
Step 6: Cool Slightly
Remove the baking dish from the oven and allow it to cool slightly before serving.
This short rest gives the baked oatmeal time to settle and makes it easier to portion.
Step 7: Serve
Divide into 6 servings.
Serve warm on its own or add yogurt or extra fruit if desired.
Notes
- Store leftovers in the fridge for up to 4 days.
- Reheat in the microwave or oven.
- Add yogurt or extra fruit for serving.
Serving Suggestions
Serve Irresistible Oatmeal Apple Breakfast Bake slightly warm after it has had a few minutes to settle. The oats, apple, cinnamon, vanilla, and maple syrup or honey create a comforting breakfast with a soft baked texture and naturally cozy flavor.
This recipe makes 6 servings, making it especially convenient for meal prep or family breakfasts. Yogurt or extra fruit can be added at serving time for a simple finishing touch.
For a dairy-free version, use almond milk instead of milk. Chopped walnuts or pecans can also be folded into the mixture when you want a little extra texture.
Storage
Store leftovers in the refrigerator for up to 4 days.
Reheat individual portions in the microwave or warm them in the oven before serving.
Oat Tip
Use 2 cups old-fashioned oats as the base of the breakfast bake.
Milk Tip
Use 1 ½ cups milk, or choose almond milk for the dairy-free option.
Apple Tip
Use 1 large diced apple and fold it into the oat mixture before baking.
Sweetener Tip
Use ¼ cup maple syrup or honey.
Either option blends into the oatmeal mixture with the eggs and vanilla.
Nut Tip
Add ¼ cup chopped walnuts or pecans if desired.
Both options are optional and can be folded in with the apple.
Baking Tip
Bake at 375°F (190°C) for 35–40 minutes, until set and golden.
Reheating Tip
Reheat leftovers in the microwave or oven.
Serving Tip
Add yogurt or extra fruit when serving if desired.

Fernando is the creator and writer behind the food blog Eating with your Hands. Living and working in cities like Paris, Barcelona, and Berlin, and being married to a Canadian foodie, has given Fernando a passion and interest in food and inspired him to run EWYH.