

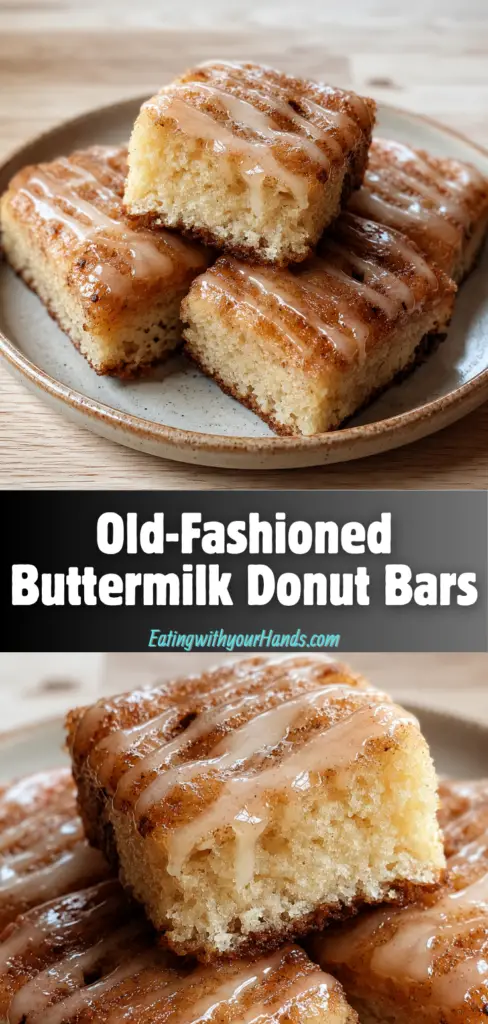
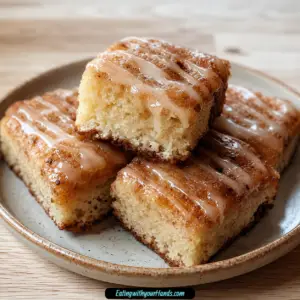
Some recipes feel like they belong to a quiet morning. Old-Fashioned Buttermilk Donut Bars have that kind of sweetness, the kind that makes the kitchen feel slower, warmer, and a little more special than usual.
These bars remind me of lazy Sunday mornings, when the day had not fully started yet and everyone seemed happy to linger around the table. The scent of vanilla, nutmeg, butter, and warm batter filling the kitchen has a way of making breakfast feel like a memory before the first bite is even taken.
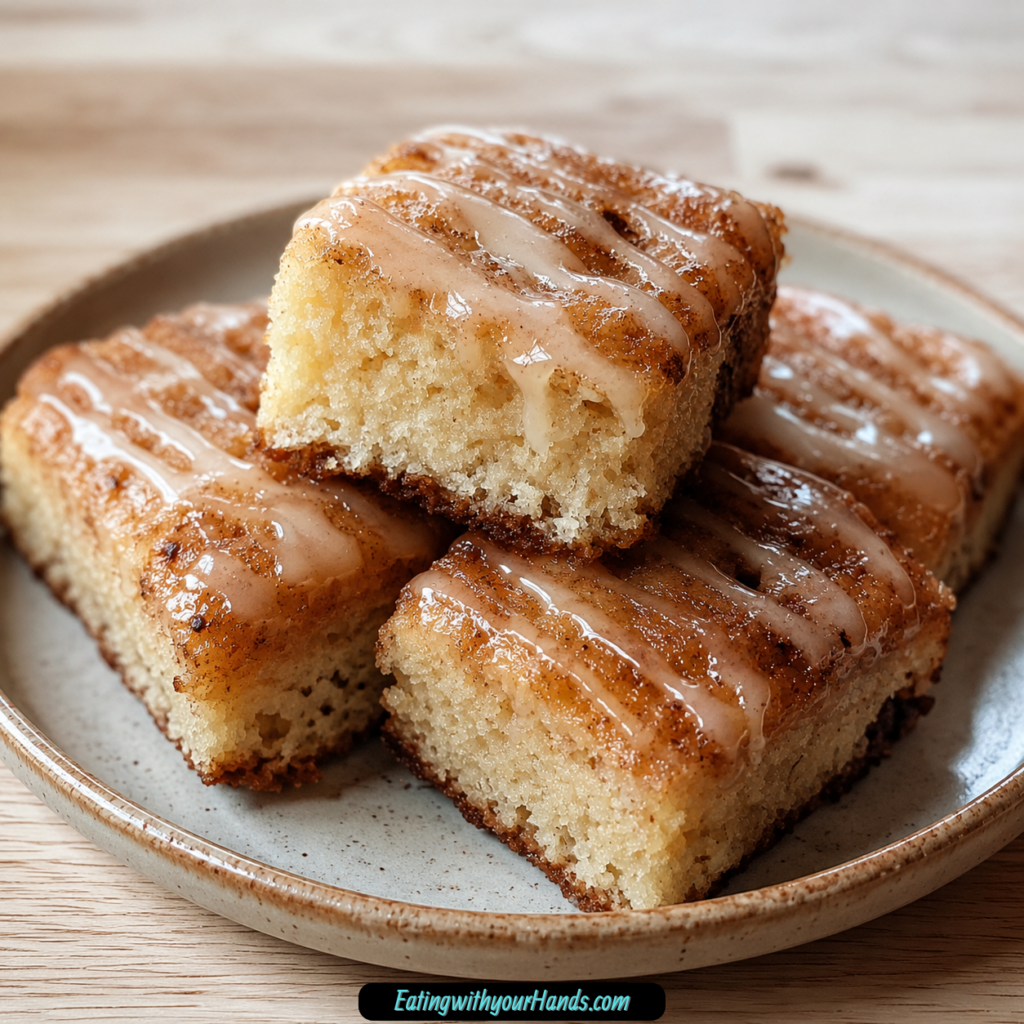
There is something wonderfully nostalgic about this recipe. It has the cozy flavor of an old-fashioned donut, but it is baked in a pan and cut into soft, tender bars instead of shaped and fried.
That makes it easier, more practical, and still deeply comforting. You get the warm spice, the buttery crumb, the tang from buttermilk, and the sweet maple-vanilla glaze without needing to stand over hot oil.
These Old-Fashioned Buttermilk Donut Bars are perfect for breakfast, brunch, dessert, or a sweet afternoon treat. They are simple enough for a regular morning, but they feel special enough to serve when family or guests are gathered around.
What I love most is the way the glaze drizzles over the bars and settles into every little corner. It turns a soft baked treat into something that feels generous, sweet, and completely worth slowing down for.
Table of Contents
- Why You’ll Love These Old-Fashioned Buttermilk Donut Bars
- Recipe Details
- Ingredients You’ll Need
- A Closer Look at the Ingredients
- The Nostalgic Flavor Behind These Donut Bars
- Directions
- Step 1: Preheat the Oven
- Step 2: Prepare the Baking Pan
- Step 3: Combine the Dry Ingredients
- Step 4: Cream the Butter and Sugar
- Step 5: Add the Eggs
- Step 6: Mix in the Vanilla
- Step 7: Begin Alternating the Dry Ingredients and Buttermilk
- Step 8: Continue Adding the Remaining Ingredients
- Step 9: Check the Batter Texture
- Step 10: Spread the Batter in the Pan
- Step 11: Bake the Donut Bars
- Step 12: Cool the Bars in the Pan
- Step 13: Melt the Butter for the Glaze
- Step 14: Whisk in the Powdered Sugar
- Step 15: Add Maple Syrup and Vanilla Bean Paste
- Step 16: Thin the Glaze Gradually
- Step 17: Let the Bars Cool Completely Before Glazing
- Step 18: Drizzle the Glaze Over the Bars
- Step 19: Slice Into Bars
- Step 20: Serve and Enjoy
- Helpful Tips for the Best Donut Bars
- Variations
- Serving Suggestions
- Storage Tips
- Freezing Instructions
- Make-Ahead Notes
- Frequently Asked Questions
- Final Thoughts
- Old-Fashioned Buttermilk Donut Bars
Why You’ll Love These Old-Fashioned Buttermilk Donut Bars
These donut bars are quick to prepare, with only about 20 minutes of prep time. That makes them a wonderful choice for busy mornings, relaxed weekends, or unexpected guests.
They use familiar pantry staples, so there is no need to hunt for unusual ingredients. Flour, baking powder, baking soda, nutmeg, salt, butter, sugar, eggs, vanilla, buttermilk, powdered sugar, maple syrup, and milk come together beautifully.
They are family-friendly in the best way. Kids love the sweet glaze, while adults appreciate the old-fashioned flavor and soft, buttery texture.
They are also freezer-friendly, which makes them useful beyond the day you bake them. You can make a double batch, freeze some, and have a homemade treat ready for another morning.
The flavor is versatile enough for many occasions. Serve them for brunch, enjoy them with coffee, offer them after dinner, or bring them out when the day needs a little sweetness.
These bars also feel nostalgic without being difficult. They carry the feeling of a classic donut shop treat, but the method is simple and approachable.
Recipe Details
- Recipe name: Old-Fashioned Buttermilk Donut Bars
- Texture: Tender, soft, buttery, and cake-like
- Flavor profile: Vanilla, nutmeg, maple, butter, and warm old-fashioned sweetness
- Prep time: About 20 minutes
- Bake time: 15-20 minutes
- Oven temperature: 350°F (175°C)
- Best pan: 9×13-inch baking pan
- Best served: Warm or at room temperature
- Storage: Airtight container at room temperature for up to 3 days
- Freezer-friendly: Yes, wrapped tightly for up to 1 month
- Best pairings: Coffee, tea, cold milk, or freshly squeezed orange juice
Ingredients You’ll Need
For the Donut Bars
- 2 ½ cups all-purpose flour
- 2 teaspoon baking powder
- 1 teaspoon baking soda
- ½ teaspoon ground nutmeg
- 1 teaspoon salt
- ½ cup unsalted butter, softened
- ¾ cup granulated sugar
- 2 large eggs
- 1 teaspoon vanilla extract
- ¾ cup buttermilk
For the Maple Vanilla Glaze
- ½ cup unsalted butter
- 1 ½ cups powdered sugar
- 2 tablespoon pure maple syrup
- 1 teaspoon vanilla bean paste
- 1-2 tablespoon milk
A Closer Look at the Ingredients
All-purpose flour gives these donut bars their structure. It creates a soft but sturdy crumb that can hold the glaze without falling apart.
Baking powder and baking soda work together to help the bars rise. They give the batter lift, making the finished texture tender instead of dense.
Ground nutmeg is one of the key flavors in an old-fashioned donut-style treat. Even a small amount gives the bars that familiar warm bakery flavor.
Salt balances the sweetness and helps the vanilla, butter, and maple stand out. Without it, the bars would taste flatter.
Softened unsalted butter gives the batter richness. Creaming it with sugar helps create a lighter texture.
Granulated sugar sweetens the bars and helps create a tender crumb. It also works with the butter to give the batter a soft, fluffy base.
Eggs help bind everything together. They add structure and richness while helping the bars bake up nicely.
Vanilla extract gives the batter warmth and sweetness. It pairs especially well with the nutmeg and buttermilk.
Buttermilk gives these bars their tender texture and slight tang. If you do not have buttermilk, you can make a substitute by adding 1 tablespoon vinegar or lemon juice to milk and letting it sit for 5 minutes.
The glaze begins with melted butter, which gives it richness. Powdered sugar makes it smooth and sweet.
Pure maple syrup adds a cozy flavor that feels perfect with the old-fashioned donut taste. Vanilla bean paste gives the glaze a deeper vanilla finish, though extra vanilla extract can be used instead.
Milk is added gradually to thin the glaze. This lets you control whether you want it thicker or more pourable.
The Nostalgic Flavor Behind These Donut Bars
Old-Fashioned Buttermilk Donut Bars are not trying to be flashy. Their charm comes from familiar flavors done well.
The nutmeg is gentle but important. It gives the bars that classic donut warmth without overpowering the vanilla or butter.
The buttermilk keeps the crumb soft and tender. It also gives the sweetness a little balance, so the bars do not taste one-dimensional.
The glaze brings everything together. Butter, powdered sugar, maple syrup, and vanilla create a sweet finish that feels rich without being complicated.
When the glaze drips over the cooled bars, it adds that bakery-style sweetness that makes each piece feel special. The bars are lovely on their own, but the glaze turns them into a treat people remember.
Directions
Step 1: Preheat the Oven
Preheat your oven to 350°F (175°C). Starting with a properly heated oven helps the donut bars bake evenly from edge to center.
If the oven is not fully preheated, the bars may rise unevenly or bake longer than expected. A steady oven temperature gives them the best chance of turning out fluffy and tender.
While the oven heats, prepare your baking pan and gather your ingredients. This makes the baking process smoother and more relaxed.
Step 2: Prepare the Baking Pan
Grease a 9×13-inch baking pan with butter or cooking spray. Make sure the bottom and sides are coated.
This helps the bars release more easily after baking. Since the texture is soft and cake-like, a well-greased pan makes serving much easier.
Set the prepared pan aside while you mix the batter. It will be ready when the batter is finished.
Step 3: Combine the Dry Ingredients
In a mixing bowl, add 2 ½ cups all-purpose flour, 2 teaspoon baking powder, 1 teaspoon baking soda, ½ teaspoon ground nutmeg, and 1 teaspoon salt. Whisk everything together until evenly combined.
This step helps distribute the leavening ingredients and spice throughout the flour. Even mixing means the bars will rise more consistently.
Do not skip the whisking. It may seem simple, but it keeps pockets of baking soda, baking powder, or salt from ending up in one bite.
Step 4: Cream the Butter and Sugar
In another bowl, add ½ cup softened unsalted butter and ¾ cup granulated sugar. Beat them together until the mixture becomes light, fluffy, and pale.
This usually takes about 2-3 minutes. The goal is to work air into the butter and sugar, which helps create a softer texture in the finished bars.
Make sure the butter is softened, not melted. Soft butter creams properly, while melted butter would change the texture of the batter.
Step 5: Add the Eggs
Add 2 large eggs to the butter and sugar mixture. Mix until they are fully incorporated.
The batter should become smoother and richer as the eggs blend in. If it looks slightly uneven at this stage, that is okay.
Eggs help give the bars structure. They also help the batter hold together once the buttermilk and dry ingredients are added.
Step 6: Mix in the Vanilla
Add 1 teaspoon vanilla extract to the wet mixture. Stir until the vanilla is evenly blended.
The vanilla adds warmth and sweetness to the batter. It also supports the old-fashioned flavor of the nutmeg.
This small ingredient makes a noticeable difference. It gives the bars a fuller aroma as they bake.
Step 7: Begin Alternating the Dry Ingredients and Buttermilk
Add about one-third of the dry ingredient mixture to the butter mixture. Mix gently just until it begins to combine.
Next, add about half of the buttermilk and mix again. The batter will start to loosen and become creamy.
Alternating the dry ingredients and buttermilk helps the batter come together smoothly. It also prevents overmixing, which can make baked goods tougher.
Step 8: Continue Adding the Remaining Ingredients
Add another third of the dry ingredients, followed by the remaining buttermilk. Mix gently after each addition.
Finish with the last portion of dry ingredients. Stir only until the batter is just combined.
A few small lumps are fine. Overmixing can make the bars less tender, so stop as soon as the flour disappears into the batter.
Step 9: Check the Batter Texture
The finished batter should be thick, soft, and spreadable. It should not be runny like a thin cake batter, but it should also not feel stiff.
If it looks slightly rustic, that is perfectly okay. These bars are meant to feel homemade and tender.
Scrape the sides and bottom of the bowl with a spatula. This ensures no dry flour is hiding at the bottom.
Step 10: Spread the Batter in the Pan
Pour or spoon the batter into the prepared 9×13-inch pan. Use a spatula to spread it evenly from corner to corner.
Try to smooth the top so the bars bake evenly. An even layer helps prevent one side from being thicker than the other.
Do not press the batter down too firmly. Just spread it gently until it fills the pan.
Step 11: Bake the Donut Bars
Place the pan in the preheated oven. Bake for 15-20 minutes.
The bars are done when a toothpick inserted in the center comes out clean or with just a few crumbs. The top should look set and lightly baked.
Avoid overbaking, because the bars are best when soft and tender. Start checking near the 15-minute mark.
Step 12: Cool the Bars in the Pan
Remove the pan from the oven and let the donut bars cool in the pan for about 10 minutes. This helps them firm up slightly before being moved or glazed.
The bars will be delicate when very hot. Giving them time to cool prevents breaking.
After 10 minutes, you can transfer them to a wire rack to cool completely if desired. You can also leave them in the pan if you plan to glaze and serve them from there.
Step 13: Melt the Butter for the Glaze
While the bars are cooling, prepare the glaze. Add ½ cup unsalted butter to a saucepan and melt it over medium heat.
Keep an eye on it as it melts. The original recipe calls for melted butter, not browned butter, though browning is listed as an optional richer variation.
Once the butter is fully melted, remove the saucepan from the heat. This keeps the glaze from becoming too hot or overcooked.
Step 14: Whisk in the Powdered Sugar
Add 1 ½ cups powdered sugar to the melted butter. Whisk until the mixture begins to smooth out.
Powdered sugar gives the glaze its sweetness and body. It dissolves more easily than granulated sugar, creating a silky finish.
Take your time whisking so there are no dry pockets. The glaze should begin looking thick and glossy.
Step 15: Add Maple Syrup and Vanilla Bean Paste
Whisk in 2 tablespoon pure maple syrup and 1 teaspoon vanilla bean paste. These two ingredients give the glaze its warm, sweet flavor.
The maple syrup adds depth, while the vanilla bean paste adds a rich vanilla note. If you do not have vanilla bean paste, extra vanilla extract can be used.
Stir until the glaze looks smooth. At this stage, it may be thick, which is why milk is added next.
Step 16: Thin the Glaze Gradually
Add 1 tablespoon milk and whisk well. If the glaze is still too thick, add another tablespoon slowly.
The glaze should be pourable but not watery. It needs to drizzle over the bars while still holding enough thickness to stay on top.
Add the milk gradually because a little can change the consistency quickly. It is easier to thin a glaze than to thicken it again.
Step 17: Let the Bars Cool Completely Before Glazing
Make sure the donut bars are completely cooled before adding the glaze. If they are too warm, the glaze may melt too quickly and slide off.
Cooling gives the glaze a better surface to cling to. It also helps the bars cut more cleanly.
If you love a softer, slightly melted glaze, you can glaze them while just barely warm. For the prettiest finish, wait until they are cool.
Step 18: Drizzle the Glaze Over the Bars
Place the cooled bars on a serving platter or keep them in the pan. Drizzle the glaze generously over the top.
Let the glaze fall naturally over the surface. It can cascade down the sides and settle into the edges.
You can use a spoon for a rustic drizzle or pour the glaze more evenly for a smoother finish. Either way, the bars should look sweet, glossy, and inviting.
Step 19: Slice Into Bars
Once glazed, cut the baked donut base into bars. Choose whatever size feels right for serving.
For brunch or dessert tables, smaller bars are easy to share. For a cozy breakfast treat, larger pieces feel generous.
Use a sharp knife for cleaner cuts. Wipe the knife between slices if the glaze is sticking.
Step 20: Serve and Enjoy
Serve the Old-Fashioned Buttermilk Donut Bars warm or at room temperature. Both ways are delicious.
They pair beautifully with coffee, tea, cold milk, or freshly squeezed orange juice. The glaze makes them sweet enough for dessert, but the tender crumb makes them perfect for breakfast or brunch.
Set them out on a platter with extra napkins nearby. The glaze is part of the joy, and a little sticky sweetness is expected.
Helpful Tips for the Best Donut Bars
Use softened butter for the batter. It should be soft enough to cream with sugar but not melted.
Do not overmix once the flour and buttermilk are added. Mixing too much can make the bars less tender.
Measure the flour carefully. Too much flour can make the bars dry instead of soft.
Check the bars early during baking. Since ovens can vary, they may be ready closer to 15 minutes.
Let the bars cool before glazing if you want the glaze to sit nicely on top. Warm bars will make the glaze thinner.
Add milk to the glaze slowly. This gives you full control over the final consistency.
Variations
For a chocolate twist, add ½ cup cocoa powder to the dry ingredients. This gives the bars a deeper dessert-style flavor.
For a fall-inspired version, incorporate seasonal spices like cinnamon or pumpkin spice. These flavors work beautifully with the nutmeg and maple glaze.
Use almond milk or coconut milk for a dairy-free adaptation. You can also use dairy-free butter alternatives if needed.
Add chopped nuts or chocolate chips to the batter for extra texture. This makes each bite a little more interesting.
For a lighter version, substitute half the butter with unsweetened applesauce. The texture will change slightly, but it can make the bars feel less rich.
For a deeper, caramel-like taste, substitute the granulated sugar with coconut sugar. This gives the bars a warmer sweetness.
Add a pinch of cinnamon to the batter to enhance the cozy flavor. It pairs nicely with the nutmeg.
Dress the bars up with sprinkles or a dusting of powdered sugar for special occasions. These small touches make them feel festive.
Serving Suggestions
Old-Fashioned Buttermilk Donut Bars are delightful warm or at room temperature. They fit easily into breakfast, brunch, dessert, or an afternoon coffee break.
Serve them on a pretty platter when you want them to feel special. The glaze already gives them a beautiful finish, so they do not need much decoration.
They pair beautifully with coffee. The slight bitterness of coffee balances the sweet glaze.
Tea is another lovely option, especially if you want something softer and more relaxed. A warm cup beside a glazed donut bar feels simple and comforting.
Cold milk is a classic pairing. It works especially well if you are serving these to kids or enjoying them as a sweet treat.
Freshly squeezed orange juice also fits the nostalgic breakfast feeling from the original story. The brightness of the juice balances the buttery sweetness.
Storage Tips
Store the donut bars in an airtight container at room temperature for up to 3 days. Keep them covered so they stay soft.
If stacking the bars, place a piece of parchment paper between layers. This helps protect the glaze.
The bars are best within the first couple of days, but they remain enjoyable when stored properly. The glaze may settle more as they sit.
Avoid leaving them uncovered for too long. Air can dry out the crumb and make the glaze lose its soft finish.
Freezing Instructions
These donut bars can be frozen for up to 1 month. Wrap them tightly in plastic wrap before placing them in an airtight container.
You can freeze them as a whole slab or in individual portions. Individual bars are convenient because you can thaw only what you need.
Let them thaw at room temperature before serving. You can also warm them briefly in the microwave for a quicker treat.
If you want the freshest glaze texture, you can freeze the bars before glazing and add the glaze after thawing. However, the original recipe notes that they reheat beautifully, so freezing glazed bars is also an option.
Make-Ahead Notes
These bars are a great make-ahead treat for brunch or busy mornings. You can bake them the day before and store them covered.
If making them ahead for guests, glaze them after they cool and keep them in an airtight container. This lets the glaze set while the bars stay soft.
You can also prepare the dry ingredients ahead of time. Whisk them together and store them covered until you are ready to bake.
The glaze is best made fresh because the consistency is easiest to adjust while warm. If it thickens too much, add milk gradually until it becomes pourable again.
Frequently Asked Questions
Can I Freeze Old-Fashioned Buttermilk Donut Bars?
Yes, these donut bars can be frozen. Wrap them tightly in plastic wrap or aluminum foil, then place them in an airtight container.
They will keep well in the freezer for up to 1 month. Thaw them at room temperature when you are ready to enjoy them.
How Can I Substitute Buttermilk?
If you do not have buttermilk, you can make a simple substitute. Add 1 tablespoon vinegar or lemon juice to milk and let it sit for about 5 minutes.
After it thickens slightly, use it in the recipe as the buttermilk. This keeps the bars tender and flavorful.
What If I Don’t Have Maple Syrup?
If you do not have maple syrup, honey or agave syrup can be used in the glaze. The sweetness will still work, though the flavor will be slightly different.
Corn syrup can also be used in a pinch. It will not have the same rich flavor as maple syrup, but it can help sweeten the glaze.
Can I Make These Donut Bars Gluten-Free?
Yes, you can make these bars gluten-free by using a 1:1 gluten-free flour blend. For the best texture, choose one that includes xanthan gum.
The rest of the ingredients can remain the same. The bars should still bake into a delightful treat.
Can I Make These Dairy-Free?
Yes, you can use almond milk or coconut milk for a dairy-free adaptation. You can also use a dairy-free butter alternative for both the batter and glaze.
If you have a nut allergy, choose a dairy-free butter alternative that is also nut-free. Always check labels when baking for dietary needs.
Can I Add Cinnamon?
Yes, a pinch of cinnamon can be added to the batter. It enhances the warmth of the nutmeg and gives the bars a cozier flavor.
You can also use pumpkin spice for a fall-inspired version. Just keep the seasoning balanced so it does not overpower the vanilla and maple.
Can I Add Chocolate Chips or Nuts?
Yes, chopped nuts or chocolate chips can be added to the batter. They give the bars more texture and make them feel a little more indulgent.
If using nuts, make sure no one you are serving has a nut allergy. You can also keep the bars plain and decorate the top instead.
How Do I Know When the Bars Are Done?
Insert a toothpick into the center of the bars. If it comes out clean or with just a few crumbs, they are done.
The top should look set, and the edges may pull slightly from the pan. Avoid baking too long so the bars stay tender.
Final Thoughts
Old-Fashioned Buttermilk Donut Bars are the kind of treat that makes a morning feel softer. They are simple, nostalgic, sweet, and filled with the cozy flavors of vanilla, nutmeg, butter, buttermilk, maple, and glaze.
What makes them special is not that they are complicated. It is the way a handful of familiar ingredients can turn into something that feels like a weekend ritual.
They are easy enough for a casual breakfast, pretty enough for brunch, and sweet enough to enjoy after dinner. They also store and freeze well, which makes them practical as well as comforting.
Most of all, these bars carry that feeling of gathering around the table before the day gets busy. One bite of the tender crumb and sweet glaze is enough to remind you why homemade treats have a way of becoming family memories.
Old-Fashioned Buttermilk Donut Bars
These Old-Fashioned Buttermilk Donut Bars are soft, tender, and full of classic bakery-style flavor. The buttermilk gives the bars a light, moist texture, while nutmeg adds that familiar old-fashioned donut taste. The finishing touch is a rich brown butter maple vanilla bean glaze that makes every bite sweet, buttery, and warm. They are perfect for dessert, brunch, coffee breaks, or a cozy homemade treat.
Recipe Details
- Prep Time: 20 minutes
- Cook Time: 15 minutes
- Total Time: 35 minutes
- Course: Dessert
- Cuisine: American
- Servings: 12 bars
- Calories: 250 kcal
Equipment
- Mixing bowl
- Baking pan
Ingredients
For the Glaze
- 1 teaspoon vanilla bean paste (or vanilla extract)
- ½ cup unsalted butter
- 1-2 tablespoon milk (for thinning, as needed)
- 2 tablespoon pure maple syrup
- 1 ½ cups powdered sugar
For the Donut Bars
- 1 teaspoon vanilla extract
- 2 teaspoon baking powder
- ¾ cup buttermilk
- ½ cup unsalted butter, softened
- ½ teaspoon ground nutmeg
- 2 large eggs
- 1 teaspoon baking soda
- ¾ cup granulated sugar
- 1 teaspoon salt
- 2 ½ cups all-purpose flour
Instructions
Step 1: Prepare the Oven and Pan
Preheat your oven to 350°F (175°C).
Grease a baking pan and set it aside.
Step 2: Mix the Dry Ingredients
In a mixing bowl, combine the all-purpose flour, baking powder, baking soda, ground nutmeg, and salt.
Stir until evenly mixed.
Step 3: Cream the Butter and Sugar
In another bowl, beat the softened unsalted butter with the granulated sugar until the mixture becomes light and fluffy.
Step 4: Add the Eggs and Vanilla
Add the eggs and vanilla extract to the butter mixture.
Mix well until everything is smooth and combined.
Step 5: Add the Buttermilk and Dry Mixture
Alternate adding the dry ingredients and the buttermilk to the butter mixture.
Mix just until combined. Avoid overmixing so the donut bars stay soft and tender.
Step 6: Bake the Donut Bars
Pour the batter into the prepared baking pan and spread it evenly.
Bake for 15-20 minutes, or until the bars are set and lightly golden.
Let the donut bars cool before glazing.
Step 7: Make the Brown Butter Maple Glaze
While the bars are baking or cooling, melt the unsalted butter for the glaze in a saucepan.
Continue cooking until the butter turns fragrant and lightly browned.
Add the powdered sugar, pure maple syrup, and vanilla bean paste.
Mix until smooth.
Add milk, as needed, to thin the glaze to your preferred consistency.
Step 8: Glaze and Serve
Once the donut bars are cool, drizzle the glaze over the top.
Let the glaze set slightly, then slice and serve.
Notes
You can adjust the thickness of the glaze by adding more or less milk.
Serving Suggestions
These buttermilk donut bars pair well with:
- Hot coffee
- Iced coffee
- Black tea
- Warm milk
- Fresh berries
- A brunch spread
Storage
How to Store
Store the donut bars in an airtight container at room temperature for short-term storage or in the refrigerator for longer freshness.
How to Serve Later
Let chilled bars sit at room temperature for a few minutes before serving so the texture softens slightly.

Fernando is the creator and writer behind the food blog Eating with your Hands. Living and working in cities like Paris, Barcelona, and Berlin, and being married to a Canadian foodie, has given Fernando a passion and interest in food and inspired him to run EWYH.