
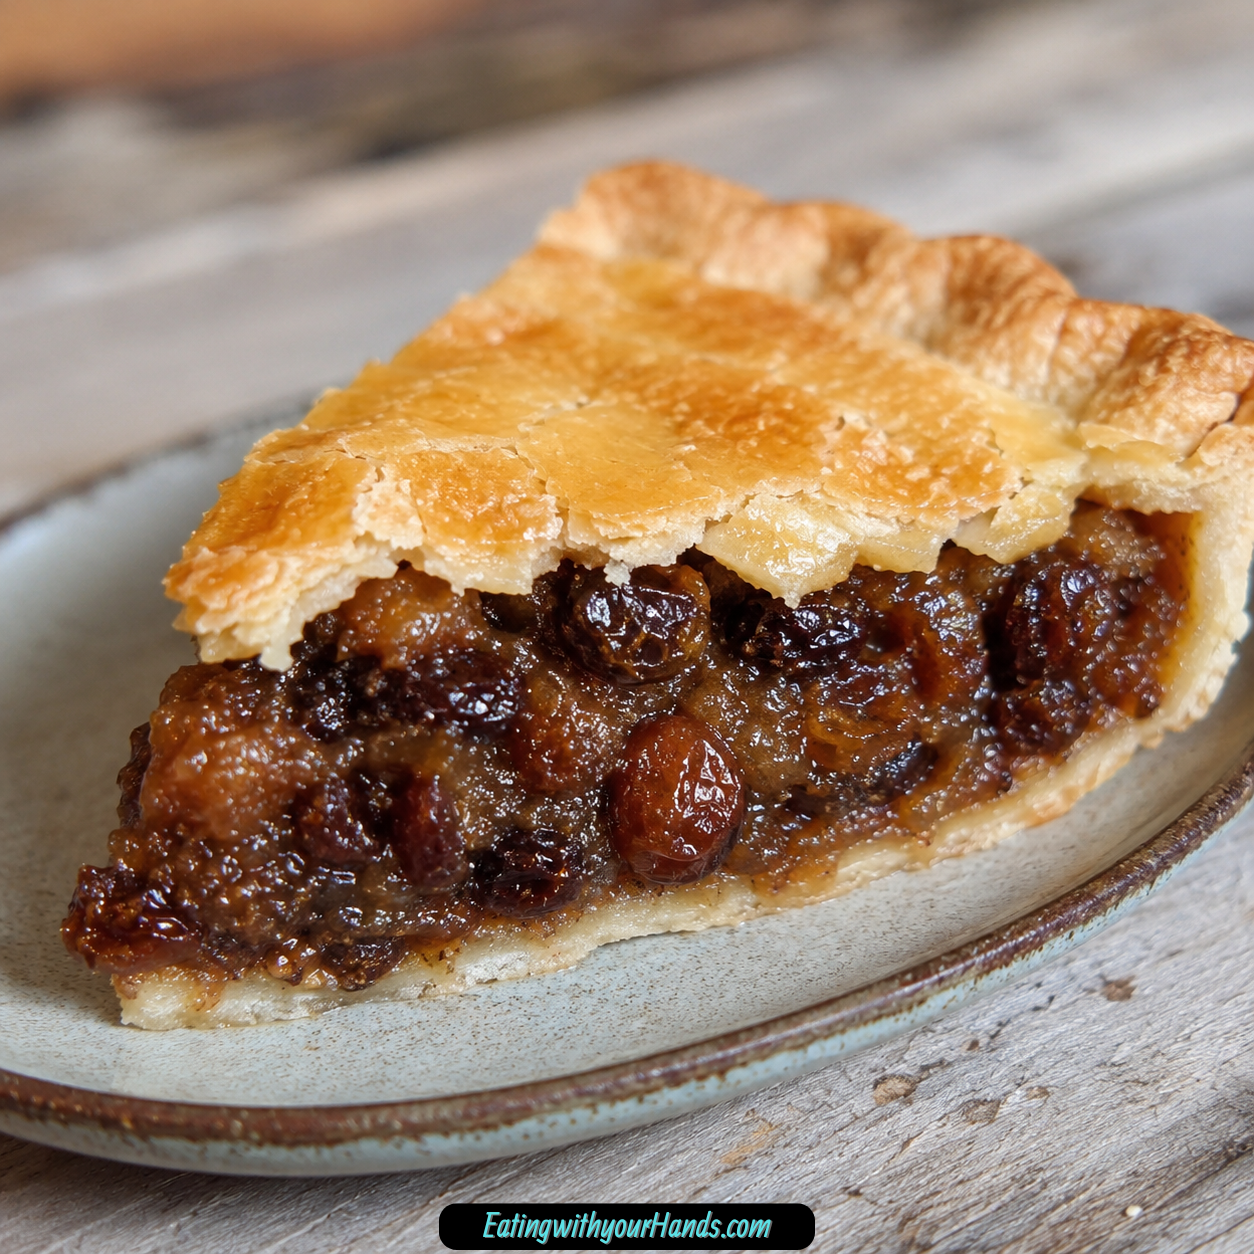
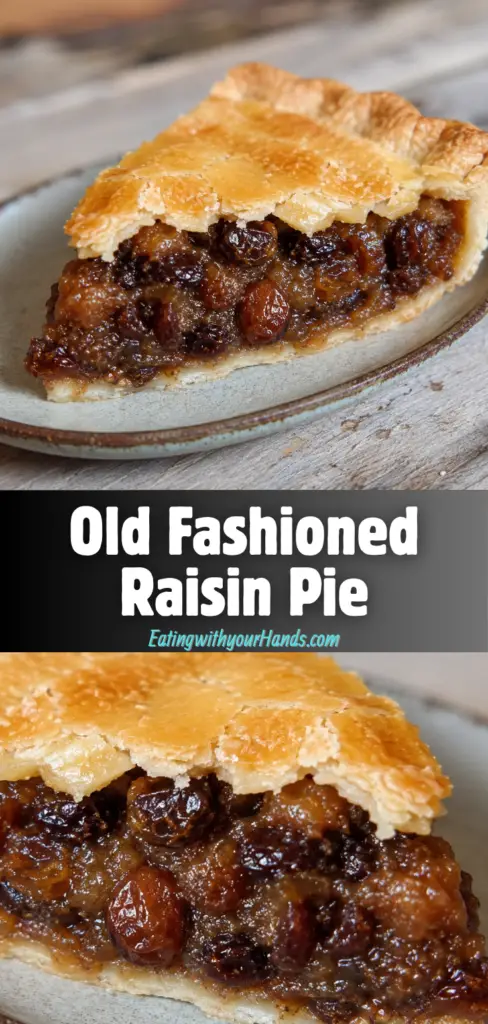
Old Fashioned Raisin Pie is one of those desserts that feels quiet at first, then surprises you with how deeply comforting it is. It is not flashy or modern-looking, but one bite of the soft plumped raisins, silky brown sugar filling, warm cinnamon, vanilla, lemon, and buttery pie crust tells you exactly why this recipe has stayed in family kitchens for generations.
This is a humble pantry pie with a long memory. It is often called funeral pie or desperation pie, names that speak to a time when fresh fruit was not always available and resourceful bakers turned simple dried fruit into something rich, sweet, and worth gathering around.
The filling begins with raisins simmered in water until they become tender and juicy. Brown sugar, cornstarch, cinnamon, and salt are added to thicken the mixture into a glossy, spiced filling, then lemon juice, butter, and vanilla finish it with brightness, richness, and warmth.
The recipe makes two 9-inch deep dish pies, which makes it perfect for holidays, family reunions, church suppers, Thanksgiving, Christmas, Easter, or any occasion where one pie might not be enough. It can also be halved if you want to bake only one.
This pie is old-fashioned in the best way. It proves that a dessert made from simple ingredients can still taste soulful, generous, and deeply satisfying.
Table of Contents
- Why You’ll Love Old Fashioned Raisin Pie
- Recipe Details
- Ingredients
- Optional Finishes, Add-Ins, and Serving Ideas
- The Nostalgic Story Behind Raisin Pie
- Why Plumping the Raisins Matters
- Why the Filling Becomes Silky
- Directions
- Step 1: Preheat the Oven
- Step 2: Prepare the Pie Shells
- Step 3: Place Pie Shells on a Baking Sheet
- Step 4: Combine Raisins and Water
- Step 5: Bring the Raisins to a Boil
- Step 6: Simmer the Raisins
- Step 7: Mix the Sugar and Thickener
- Step 8: Add the Sugar Mixture Gradually
- Step 9: Thicken the Filling
- Step 10: Watch for the Glossy Finish
- Step 11: Add the Lemon Juice
- Step 12: Add the Butter
- Step 13: Add the Vanilla
- Step 14: Let the Filling Cool Slightly
- Step 15: Divide the Filling
- Step 16: Add the Top Crust
- Step 17: Seal and Crimp the Edges
- Step 18: Add Egg Wash if Desired
- Step 19: Chill the Assembled Pies if Desired
- Step 20: Bake the Pies
- Step 21: Rotate Halfway Through Baking
- Step 22: Check for Doneness
- Step 23: Cool on a Wire Rack
- Step 24: Serve the Pie
- Serving Ideas
- Storage
- Freezing
- Make-Ahead Tips
- Helpful Notes for Best Results
- Variations
- Troubleshooting
- Frequently Asked Questions
- Why This Pie Belongs on Holiday Tables
- Why This Recipe Works So Well
- Final Thoughts
- Old Fashioned Raisin Pie
Why You’ll Love Old Fashioned Raisin Pie
This pie has rich, spiced flavor. Brown sugar, cinnamon, vanilla, butter, and lemon juice turn raisins into a warm, balanced filling.
It uses pantry-friendly ingredients. Raisins, water, brown sugar, cornstarch, spices, butter, vanilla, lemon juice, and pie shells are all simple and practical.
It is deeply nostalgic. The flavor feels connected to family tables, holiday meals, and old-style baking traditions.
It is perfect for special occasions. This pie belongs at Thanksgiving, Christmas, Easter, family reunions, and vintage dessert spreads.
It makes two pies. That makes it useful when baking for a crowd or preparing one pie to serve and one to save.
It is freezer-friendly. Fully baked pies can be cooled, wrapped tightly, and frozen for up to 3 months.
Recipe Details
- Recipe name: Old Fashioned Raisin Pie
- Also known as: Funeral pie or desperation pie
- Oven temperature: 375°F (190°C)
- Yield: Two 9-inch deep dish pies
- Raisin simmering time: 5 minutes
- Filling thickening time: About 5 to 8 minutes
- Baking time: 40 to 45 minutes
- Cooling time before serving: At least 2 hours
- Room temperature storage: Up to 2 days, loosely covered
- Refrigerator storage: Up to 5 days
- Freezer storage: Fully baked pies for up to 3 months
- Make-ahead option: Filling can be made 1 day ahead
- Doneness cue: Golden crust and filling bubbling at the edges
Ingredients
For the Raisin Filling
- 4 cups water
- 4 cups raisins
- 1 cup light brown sugar
- 5 tablespoons cornstarch
- ½ teaspoon cinnamon
- ½ teaspoon salt
- 2 teaspoons lemon juice
- 3 tablespoons butter, not margarine
- 1 teaspoon vanilla extract
For the Pie Shells
- 2, 9-inch deep dish pie shells
Optional Finishes, Add-Ins, and Serving Ideas
- Golden raisins
- Dark raisins
- Chopped walnuts
- Splash of rum
- Egg wash made with 1 egg beaten with 1 tablespoon milk
- Full top crust with slits
- Lattice crust
- Homemade pie crust
- Cold butter for homemade crust
- Bit of vinegar in homemade crust
- Whipped cream for serving
- Vanilla ice cream for serving
- Dried currants
- Chopped prunes
- Raisin-date mix
- Blind baking the bottom crust for 5 to 7 minutes
- Chilling assembled pies for 10 minutes before baking
The Nostalgic Story Behind Raisin Pie
Old Fashioned Raisin Pie has the kind of history that makes it feel different from fruit pies made with fresh berries or sliced apples. It belongs to a tradition of baking that valued thrift, patience, and the ability to make something beautiful from what was already on the shelf.
Raisins were useful because they could be stored when fresh fruit was scarce. With water, sugar, thickener, spice, and crust, they could become a filling that tasted rich and satisfying.
That is why this pie is sometimes called desperation pie. The name does not make it sound glamorous, but it explains its heart.
It is also called funeral pie in some traditions. A pie like this could be made from pantry staples and carried to gatherings when comfort was needed most.
The flavor is old-school, sweet, and deep. The raisins become plump and tender, the brown sugar adds warmth, and the cinnamon gives the filling a cozy spice.
This pie is not trying to compete with bright summer fruit. It is something quieter and more enduring, a dessert that feels like it has been waiting in the recipe box for someone to remember it.
Why Plumping the Raisins Matters
The first important step in this recipe is simmering the raisins with water. This softens them and helps them become juicy instead of chewy.
The recipe uses 4 cups raisins and 4 cups water. As they simmer, the raisins absorb moisture and swell.
This step is crucial for a moist filling. If the raisins are not properly plumped, the pie can feel dry or overly chewy.
Five minutes of gentle simmering is enough to begin that transformation. The raisins should look fuller and softer.
The water also becomes part of the filling. It carries the raisin flavor and gives the cornstarch something to thicken.
Do not rush this step. Properly softened raisins are the heart of Old Fashioned Raisin Pie.
Why the Filling Becomes Silky
The filling thickens with cornstarch. Five tablespoons cornstarch help turn the raisin mixture into a glossy, pudding-like filling.
The cornstarch is whisked with brown sugar, cinnamon, and salt before being added to the simmering raisins. This helps distribute it evenly.
Adding the dry mixture gradually while stirring constantly prevents lumps. The filling should become smooth, thick, and shiny.
The mixture needs to return to a gentle boil. That heat activates the cornstarch and gives the filling body.
After thickening, lemon juice, butter, and vanilla are stirred in off the heat. These final ingredients round out the flavor.
The butter gives richness and gloss, the vanilla adds warmth, and the lemon juice balances the sweetness. Together, they keep the filling from tasting flat.
Directions
Step 1: Preheat the Oven
Preheat your oven to 375°F (190°C). Let it fully heat before the pies go in.
A fully preheated oven helps the crust bake evenly and turn golden. It also helps the filling bubble properly at the edges.
Place the oven rack in the center position. This gives both pies steady heat while they bake.
Step 2: Prepare the Pie Shells
Have 2 unbaked 9-inch deep dish pie shells ready. They can be store-bought or homemade.
If making homemade crust, use cold butter and a bit of vinegar in the dough for extra flakiness and flavor. Keep the crust chilled until needed.
Deep dish shells are important because this recipe makes enough filling for two generous pies. Place the shells nearby while you prepare the filling.
Step 3: Place Pie Shells on a Baking Sheet
Set the two unbaked pie shells on a baking sheet. This catches any drips during baking.
Raisin filling can bubble at the edges as the pies bake. A baking sheet protects the oven and makes moving the pies easier.
Keep the sheet ready for assembly. Once the filling is done, you can divide it between the crusts right away.
Step 4: Combine Raisins and Water
In a large saucepan, combine 4 cups water and 4 cups raisins. Use high-quality seedless raisins.
Golden raisins or dark raisins both work equally well. Golden raisins give a lighter color and milder flavor, while dark raisins create a deeper look.
Stir the raisins into the water so they are evenly moistened. Place the saucepan over medium-high heat.
Step 5: Bring the Raisins to a Boil
Bring the raisin and water mixture to a boil over medium-high heat. Watch the pot as it heats.
The raisins will begin to swell slightly as the water warms. This is the start of the plumping process.
Once the mixture reaches a boil, reduce the heat. You do not want the raisins to boil aggressively for too long.
Step 6: Simmer the Raisins
Reduce the heat and simmer gently for 5 minutes. Stir occasionally.
During this time, the raisins become softer, fuller, and juicier. This step helps create the moist texture of the finished pie.
Do not skip or shorten this simmer. The filling depends on properly plumped raisins.
Step 7: Mix the Sugar and Thickener
While the raisins simmer, whisk together 1 cup light brown sugar, 5 tablespoons cornstarch, ½ teaspoon cinnamon, and ½ teaspoon salt in a medium mixing bowl.
The brown sugar gives the filling deep sweetness. The cornstarch thickens it, while cinnamon and salt bring warmth and balance.
Whisk until the mixture is even. This helps prevent cornstarch clumps later.
Step 8: Add the Sugar Mixture Gradually
Slowly add the brown sugar mixture to the simmering raisins. Stir constantly as you add it.
Gradual addition helps the cornstarch blend smoothly into the hot liquid. Constant stirring prevents lumps.
Do not dump the mixture all at once. A slow, steady addition gives the best texture.
Step 9: Thicken the Filling
Continue stirring as the raisin mixture heats and thickens. Let it reach a gentle boil.
The filling should become glossy and thick. This takes about 5 to 8 minutes.
You are looking for a pudding-like consistency. It should be thick enough to scoop but still soft enough to settle into the crust.
Step 10: Watch for the Glossy Finish
As the cornstarch activates, the filling will change from cloudy to shiny. That glossy look means it is thickening properly.
Keep stirring so the bottom does not stick. Raisin filling can thicken quickly once it starts.
When the mixture is thick and gently bubbling, it is ready for the finishing ingredients. Remove it from the heat.
Step 11: Add the Lemon Juice
Stir in 2 teaspoons lemon juice after removing the saucepan from the heat. Mix well.
The lemon juice brightens the sweetness. It helps balance the rich raisins and brown sugar.
This small amount makes the filling taste more complete. It should not make the pie taste lemony.
Step 12: Add the Butter
Add 3 tablespoons butter to the hot filling. Use butter, not margarine.
The butter will melt into the filling and give it a silky, glossy finish. It also adds richness.
Stir until the butter is fully melted. The filling should look smooth and shiny.
Step 13: Add the Vanilla
Stir in 1 teaspoon vanilla extract. Mix until evenly combined.
Vanilla brings warmth and aroma to the filling. It works beautifully with cinnamon and brown sugar.
At this point, the filling should smell rich, sweet, and spiced. Let it cool slightly before filling the crusts.
Step 14: Let the Filling Cool Slightly
Allow the raisin filling to cool slightly. It should still be warm but not so hot that it begins cooking the crust too early.
Slight cooling also makes the filling easier to handle. It should remain thick and scoopable.
Do not let it sit until fully cold unless making it ahead. For immediate baking, warm filling is fine as long as it is not blazing hot.
Step 15: Divide the Filling
Divide the raisin filling evenly between the two unbaked 9-inch deep dish pie shells. Use a spoon or ladle.
Spread the filling gently so it sits evenly in each shell. The filling should look thick and glossy.
Try to keep the filling level. Even filling helps the pies bake and slice better.
Step 16: Add the Top Crust
Top each pie with either a full crust or a lattice crust. A full crust should have slits cut for steam to escape.
A lattice crust gives a rustic homemade look. A full crust gives a more traditional covered pie style.
Either option works. Choose the look you like best.
Step 17: Seal and Crimp the Edges
Seal the top and bottom crusts together. Crimp the edges to prevent leaks.
A good seal keeps the filling inside as it bubbles. Take your time around the edges.
If using lattice, still make sure the strips are secured at the edges. This helps the crust hold its shape.
Step 18: Add Egg Wash if Desired
For a golden finish, brush the crust with an egg wash made from 1 egg beaten with 1 tablespoon milk. This step is optional.
Egg wash helps the crust brown and gives it a more polished look. Brush lightly.
Do not let egg wash pool around the edges. A thin coating is enough.
Step 19: Chill the Assembled Pies if Desired
Chill the assembled pies for 10 minutes before baking if you want the crust to hold its shape better. This is optional.
Chilling firms the fat in the crust. It can help the edges stay neat.
This step is especially helpful if your kitchen is warm or if the crust softened during assembly. A brief chill can make a difference.
Step 20: Bake the Pies
Place the baking sheet with the pies into the preheated oven. Bake at 375°F (190°C) for 40 to 45 minutes.
The crust should become golden brown. The filling should bubble at the edges.
Bubbling edges show that the filling has heated through properly. This also helps the filling set later.
Step 21: Rotate Halfway Through Baking
Rotate the pies halfway through the baking time. This helps them bake evenly.
Ovens often have hot spots. Rotating helps both pies brown more evenly.
Move carefully because the pies and baking sheet will be hot. Use oven mitts and avoid spilling filling.
Step 22: Check for Doneness
The pies are done when the crust is golden brown and the filling bubbles at the edges. The top should look fully baked.
If the crust still looks pale, bake a few minutes longer. Watch the edges so they do not over-brown.
The filling may look soft when hot. It will set more as it cools.
Step 23: Cool on a Wire Rack
Remove the pies from the oven and place them on a wire rack. Let them cool for at least 2 hours.
This cooling time is essential. The filling needs time to set properly.
If sliced too soon, the filling will be very soft. Patience gives cleaner slices.
Step 24: Serve the Pie
Serve the pie at room temperature or slightly warmed. Both are delicious.
Add whipped cream or vanilla ice cream if desired. The creamy topping pairs beautifully with the spiced raisin filling.
Use a sharp knife to cut slices once the pie has set. The filling should be thick, soft, and glossy.
Serving Ideas
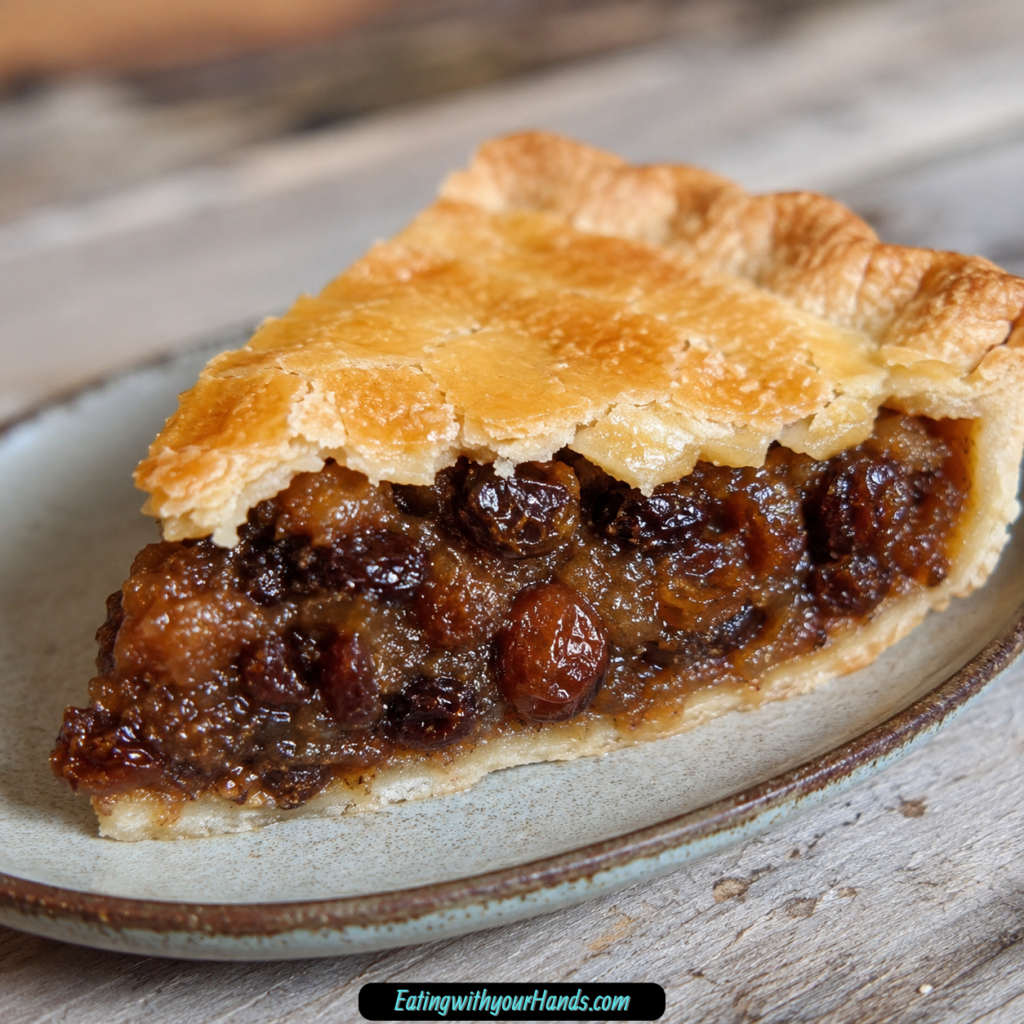
Old Fashioned Raisin Pie can be served plain because the filling is already rich and flavorful. The buttery crust and spiced raisin filling are enough on their own.
For a classic dessert plate, add whipped cream. The light creaminess balances the dense sweetness of the filling.
Vanilla ice cream is another wonderful pairing. It melts slightly against a warm slice and softens the deep raisin flavor.
Serve the pie at room temperature for cleaner slices. Warm slices are comforting but may be softer.
This pie belongs on holiday tables, especially Thanksgiving, Christmas, and Easter. It also fits beautifully at family reunions and traditional dessert spreads.
Storage
Store leftover pie loosely covered at room temperature for up to 2 days. Keep it in a cool spot.
For longer storage, refrigerate for up to 5 days. Cover gently so the crust does not dry out too much.
The filling will firm more in the refrigerator. Let slices sit briefly at room temperature if you prefer a softer texture.
You can warm slices gently before serving. Do not overheat, or the filling may loosen too much.
Freezing
Fully baked pies can be frozen. Cool the pies completely before wrapping.
Wrap tightly and freeze for up to 3 months. Good wrapping protects the crust and filling.
Thaw overnight in the refrigerator before serving. Warm gently if desired.
Freezing is helpful for holidays or busy occasions. You can bake ahead and still serve a traditional dessert later.
Make-Ahead Tips
The raisin filling can be made a day ahead. Store it in the refrigerator until ready to assemble the pies.
Let the filling warm slightly or stir it well before adding to the crusts if it has thickened in the refrigerator. It should be scoopable.
You can also assemble the pies and chill them for 10 minutes before baking. This helps the crust keep its shape.
If preparing for a gathering, bake early enough to allow the full 2-hour cooling time. Clean slices depend on that rest.
Helpful Notes for Best Results
Use seedless raisins. Golden or dark raisins both work, depending on the flavor and color you prefer.
Do not rush the raisin simmering step. Properly plumped raisins make the filling tender and moist.
Stir constantly when adding the cornstarch mixture. This helps keep the filling smooth.
Let the filling cool slightly before filling the crusts. It should be warm, thick, and scoopable.
Cool the baked pies for at least 2 hours before slicing. This is essential for a set filling.
If using very sweet raisins, reduce the sugar slightly to balance. Taste and adjust only with care.
Variations
Golden Raisin Pie
Use golden raisins for a milder flavor and lighter color. They create a softer-looking filling.
Golden raisins can taste slightly gentler than dark raisins. They work beautifully with vanilla and cinnamon.
Use the same measurements and method. The pie will still be rich and comforting.
Dark Raisin Pie
Use dark raisins for a deeper flavor and more traditional look. They create a bold, rich filling.
Dark raisins pair well with brown sugar and cinnamon. The flavor feels old-fashioned and full.
This version is especially nice for holiday tables. It has a classic, vintage appearance.
Walnut Raisin Pie
Add chopped walnuts to the filling for extra texture. Walnuts bring a nutty contrast to the soft raisins.
Use a moderate amount so the raisins remain the main feature. The nuts should support the filling, not take over.
This variation feels hearty and rustic. It works well with a lattice crust.
Rum Raisin Pie
Add a splash of rum for extra richness. This gives the filling a deeper flavor.
Use only enough to enhance the filling. The pie should still taste like raisin pie.
Rum pairs naturally with raisins, brown sugar, butter, and vanilla. It is a good option for special occasions.
Currant Pie Variation
Use dried currants in place of some or all of the raisins. Currants are smaller and bring a slightly different dried fruit flavor.
They will plump during simmering. Watch the texture as they cook.
This version still fits the old-fashioned pantry pie style. It gives a slightly different bite.
Prune and Raisin Pie
Use chopped prunes in combination with raisins. This creates a deeper dried fruit flavor.
Chop the prunes so they blend well into the filling. The texture should remain scoopable.
This variation is rich and old-world in feeling. It works best for people who love dried fruit desserts.
Raisin-Date Pie
Use a raisin-date mix for a sweeter, thicker filling. Dates add natural richness.
Chop the dates before adding them. This helps them soften and blend.
Since dates are sweet, consider the sweetness balance. The lemon juice remains important.
Lattice Crust Raisin Pie
Use a lattice crust for a rustic homemade look. The filling will show through the openings.
A lattice top also lets steam escape naturally. It looks beautiful once the filling bubbles.
Crimp the edges well. The strips should be secured to the bottom crust.
Full Crust Raisin Pie
Use a full top crust for a traditional covered pie. Cut slits for steam to escape.
The slits are important because the filling bubbles as it bakes. Steam needs a way out.
Brush with egg wash if you want a golden finish. The covered crust makes the pie feel classic.
Troubleshooting
Why Is My Filling Runny?
The filling may not have thickened long enough on the stove. It should become glossy and thick before going into the crust.
Make sure the mixture reaches a gentle boil after the cornstarch is added. Cornstarch needs heat to activate.
The pie also needs at least 2 hours to cool. Slicing too soon can make the filling seem runny.
Why Is My Filling Lumpy?
The cornstarch mixture may have been added too quickly or stirred too little. Add it gradually while stirring constantly.
Whisking the brown sugar, cornstarch, cinnamon, and salt before adding helps prevent clumps. Keep stirring as the filling thickens.
If small lumps form, continue stirring and try to smooth them out before filling the crusts. Prevention is easiest.
Why Are My Raisins Tough?
The raisins may not have simmered long enough. Simmer them gently for 5 minutes to plump them.
Using older or very dry raisins can also affect texture. High-quality seedless raisins give the best result.
Do not skip the water simmering step. It is what transforms the raisins into a tender filling.
Why Is My Bottom Crust Soggy?
The filling may have been too wet, or the bottom crust may need extra help. Blind baking the bottom crust for 5 to 7 minutes before filling can help.
Also make sure the filling is thick and scoopable before adding it to the shell. Thin filling can soak into the crust.
Baking on a hot sheet is not specified in the method, but placing the pies on a baking sheet helps manage drips. The crust should still bake until golden.
Why Did My Crust Lose Its Shape?
The crust may have become too warm before baking. Chill the assembled pies for 10 minutes before baking.
This helps the crust hold its shape. It is especially useful with homemade crust.
Crimp the edges firmly. A good seal also helps prevent leaks.
Why Is the Pie Too Sweet?
Raisins and brown sugar create a naturally sweet filling. Lemon juice helps balance it.
If using very sweet raisins, reduce the sugar slightly. This adjustment is mentioned as an option.
Serve with unsweetened whipped cream if desired. A less sweet topping can balance the pie.
Frequently Asked Questions
Can I Make This Pie With Other Dried Fruits?
Yes, dried currants, chopped prunes, or a raisin-date mix can work wonderfully. Raisins are traditional, but other dried fruits fit the same pantry-pie idea.
Adjust texture as needed by chopping larger fruits. The filling should remain thick and scoopable.
How Do I Prevent a Soggy Bottom Crust?
Blind baking the bottom crust for 5 to 7 minutes before filling can help. This gives the crust a head start.
Also make sure the filling is not too wet. It should be properly thickened before going into the crust.
Do I Have to Use Both Pies at Once?
No, the recipe makes two pies, but it can be halved if you only want one. Use half of each ingredient.
Baking one pie is a good option for smaller households. The full recipe is helpful for gatherings.
Is This Pie Very Sweet?
It has a deep, sweet flavor from raisins and brown sugar. The lemon juice helps balance that sweetness.
If your raisins are very sweet, reduce the sugar slightly. This keeps the filling from feeling too heavy.
Can I Serve This Warm Out of the Oven?
You can, but the filling will be quite soft. For clean slices, let the pie cool and set fully.
A 2-hour cooling time gives the filling a better texture. Slightly warmed slices after cooling work well.
Can I Freeze Raisin Pie?
Yes, fully baked pies can be cooled, wrapped tightly, and frozen for up to 3 months. Thaw overnight in the refrigerator.
Warm gently before serving if desired. Add whipped cream or ice cream after reheating.
Can I Use Golden Raisins?
Yes, golden raisins work just as well as dark raisins. They give a milder flavor and lighter color.
Use the same amount. The method does not change.
Can I Make the Filling Ahead?
Yes, the filling can be made a day ahead and stored in the refrigerator. Use it when ready to assemble the pies.
Stir before using. It should remain thick and scoopable.
Why This Pie Belongs on Holiday Tables
Old Fashioned Raisin Pie belongs on holiday tables because it feels tied to tradition. It may not be the brightest pie on the dessert spread, but it has a richness that draws people in.
Its flavor is warm and deep. Raisins, brown sugar, cinnamon, butter, vanilla, and lemon create a filling that feels comforting in colder months.
It also makes enough for sharing. Two 9-inch deep dish pies can serve a family gathering or holiday meal.
The pie can be made ahead and frozen. That makes it practical for busy celebrations.
Most importantly, it offers something different. Among pumpkin, apple, and pecan pies, raisin pie becomes a conversation starter.
Why This Recipe Works So Well
This recipe works because it treats raisins like fruit, not just an add-in. Simmering them in water makes them plump, tender, and juicy.
Brown sugar gives the filling caramel-like sweetness. Cinnamon adds warmth, and salt balances the flavor.
Cornstarch thickens the filling into a glossy, pudding-like texture. It helps the pie slice once cooled.
Lemon juice brightens the sweetness. Butter gives richness, and vanilla brings warmth.
The double-crust or lattice crust wraps the filling in classic pie comfort. Baking until bubbling ensures the filling is hot and fully set once cooled.
Final Thoughts
Old Fashioned Raisin Pie is a vintage dessert made from humble ingredients that become something deeply comforting. With water, raisins, light brown sugar, cornstarch, cinnamon, salt, lemon juice, butter, vanilla, and two 9-inch deep dish pie shells, it creates a sweet, spiced filling wrapped in golden crust.
The method is patient but simple. Simmer the raisins for 5 minutes, whisk the sugar and thickener mixture, stir it into the raisins, cook for 5 to 8 minutes until glossy and thick, finish with lemon juice, butter, and vanilla, then divide the filling between two pie shells.
Top each pie with a full crust or lattice, seal and crimp the edges, brush with egg wash if desired, and bake at 375°F (190°C) for 40 to 45 minutes. Let the pies cool on a wire rack for at least 2 hours before slicing so the filling can set.
Serve warm or at room temperature with whipped cream or vanilla ice cream, store loosely covered for up to 2 days at room temperature, refrigerate for up to 5 days, or freeze fully baked pies for up to 3 months. Whether you bake it for a holiday, reunion, family table, or simply to bring an old-fashioned dessert back into the kitchen, this raisin pie offers sweet history, silky filling, and the quiet comfort of a recipe that has lasted.
Old Fashioned Raisin Pie
Old fashioned raisin pie is a nostalgic dessert with a sweet, warmly spiced filling and a golden flaky crust. The raisins are simmered until plump and tender, then thickened with brown sugar, cinnamon, vanilla, butter, and lemon juice for a rich vintage-style pie filling. This heritage pie is a comforting choice for holidays, potlucks, family gatherings, or anytime you want to bring back a classic dessert with simple ingredients and deep homemade flavor.
Recipe Details
- Prep Time: 20 minutes
- Cook Time: 50 minutes
- Total Time: 1 hour 10 minutes
- Servings: 8
- Calories: 320 kcal
Ingredients
- 2, 9- inch deep dish pie shells
- 4 cups raisins
- 4 cups water
- 1 cup light brown sugar
- 5 tablespoons cornstarch
- ½ teaspoon cinnamon
- ½ teaspoon salt
- 3 tablespoons butter not margarine
- 2 teaspoons lemon juice
- 1 teaspoon vanilla extract
Instructions
Step 1: Preheat the Oven
Preheat the oven to 375°F (190°C).
Step 2: Plump the Raisins
In a large saucepan, bring the water and raisins to a boil.
Reduce the heat and simmer for 5 minutes, or until the raisins are plump.
Step 3: Mix the Dry Filling Ingredients
In a bowl, whisk together the light brown sugar, cornstarch, cinnamon, and salt until evenly combined.
Step 4: Thicken the Raisin Filling
Stir the sugar mixture into the saucepan with the raisins.
Cook, stirring constantly, until the filling thickens and reaches a gentle boil.
Step 5: Finish the Filling
Remove the saucepan from the heat.
Stir in the lemon juice, butter, and vanilla extract until the filling is smooth and the butter has melted.
Step 6: Fill the Pie Shells
Pour the raisin filling into the two unbaked 9-inch deep dish pie shells.
Step 7: Add the Top Crust
Cover each pie with a top crust or lattice.
Seal the edges, and cut slits in the top if using a full crust.
Step 8: Bake Until Golden
Bake for 40-45 minutes, or until the crust is golden and the filling is bubbling.
Step 9: Cool Before Serving
Cool the pie completely before serving so the filling has time to set.
Notes
Make sure the raisins are fully plumped so the filling stays moist and tender.
Use cold butter in homemade crusts for the best flaky texture.
The filling can be prepared one day in advance and stored in the refrigerator.
This pie freezes well. Wrap the cooled pie tightly and freeze for up to 3 months.
Serving Suggestions
- Serve with vanilla ice cream.
- Top each slice with whipped cream.
- Pair with hot coffee or black tea.
- Add to a Thanksgiving or Christmas dessert table.
- Serve slightly warm after cooling and setting for a cozy vintage dessert.
Storage
How to Store
Let the pie cool completely, then cover it tightly or transfer slices to an airtight container and refrigerate.
How to Make Ahead
Prepare the filling one day in advance and store it in the refrigerator until ready to assemble and bake the pies.
How to Freeze
Wrap the cooled pie tightly and freeze for up to 3 months. Thaw before serving.
Best Texture Tip
Allow the pie to cool completely before slicing. This gives the raisin filling enough time to set so each slice holds together neatly.

Fernando is the creator and writer behind the food blog Eating with your Hands. Living and working in cities like Paris, Barcelona, and Berlin, and being married to a Canadian foodie, has given Fernando a passion and interest in food and inspired him to run EWYH.