

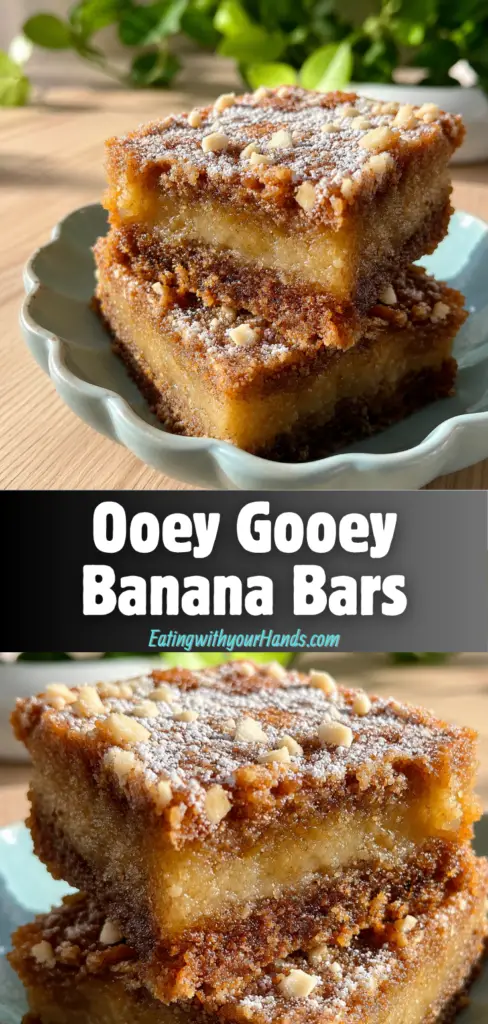
Ooey Gooey Banana Bars are the kind of dessert that feels humble in the best possible way. They are soft, sweet, moist, warmly spiced, and full of that familiar banana flavor that makes a kitchen smell instantly comforting.
This is the recipe you reach for when the bananas on the counter have gone a little too soft for snacking but are absolutely perfect for baking. Their sweetness deepens, their texture becomes easy to mash, and suddenly they are no longer something to throw away.
They become the heart of a cozy homemade treat.
There is something deeply nostalgic about banana desserts. Maybe it is because so many of us grew up watching someone in the family rescue overripe bananas and turn them into something warm from the oven.
These bars have that same feeling. They are simple, easy, and wonderfully forgiving, but they still taste like something made with care.
They are not fussy. They do not ask you to frost layers, chill dough, or use special equipment.
You mash, mix, spread, bake, cool, and slice. That is part of their charm.
The texture is where these banana bars really shine. They are soft and tender, with enough moisture from the ripe bananas, brown sugar, melted butter, and egg to make every bite feel rich and satisfying.
The cinnamon adds warmth without overpowering the banana. The vanilla rounds everything out, and the brown sugar gives the bars a deeper, almost caramel-like sweetness.
They are delicious plain, but they also leave room for creativity. You can add chocolate chips, nuts, dried fruit, coconut flakes, or even a drizzle of chocolate sauce when you want something extra.
For a casual afternoon snack, serve them just as they are. For a special dessert platter, dress them up with whipped cream, frosting, or a warm drizzle.
Either way, these Ooey Gooey Banana Bars are easy to love.
Table of Contents
- What Are Ooey Gooey Banana Bars?
- Recipe Overview
- Why You’ll Love Ooey Gooey Banana Bars
- Ingredients You’ll Need
- Ingredient Spotlight: Ripe Bananas
- Directions
- Step 1: Preheat the Oven
- Step 2: Prepare the Baking Pan
- Step 3: Consider Lining the Pan
- Step 4: Gather the Ingredients
- Step 5: Mash the Bananas
- Step 6: Check the Banana Texture
- Step 7: Add the Granulated Sugar
- Step 8: Add the Brown Sugar
- Step 9: Add the Melted Butter
- Step 10: Mix the Wet Base
- Step 11: Add the Egg
- Step 12: Add the Vanilla Extract
- Step 13: Add the Baking Soda
- Step 14: Add the Salt
- Step 15: Add the Cinnamon
- Step 16: Add the Flour
- Step 17: Stir Until Just Combined
- Step 18: Check the Batter
- Step 19: Add Optional Mix-Ins If Desired
- Step 20: Pour the Batter into the Pan
- Step 21: Smooth the Top
- Step 22: Bake the Banana Bars
- Step 23: Test for Doneness
- Step 24: Remove from the Oven
- Step 25: Cool in the Pan
- Step 26: Transfer to a Wire Rack
- Step 27: Cool Completely Before Cutting
- Step 28: Slice into Bars
- Step 29: Serve Plain or Dressed Up
- Serving Suggestions
- Variations
- Helpful Notes
- Storage Tips
- Common Mistakes
- Frequently Asked Questions
- Can I Freeze Ooey Gooey Banana Bars?
- What Can I Substitute for the Egg?
- How Do I Know When the Bars Are Done?
- Can I Make These Bars Gluten-Free?
- Can I Add Chocolate Chips?
- Can I Add Nuts?
- How Long Do These Bars Last?
- Can I Frost These Banana Bars?
- Can I Use Coconut Oil Instead of Butter?
- Can I Reduce the Sugar?
- Final Thoughts
- Ooey Gooey Banana Bars
What Are Ooey Gooey Banana Bars?
Ooey Gooey Banana Bars are soft baked dessert bars made with ripe mashed bananas, granulated sugar, brown sugar, melted butter, egg, vanilla, cinnamon, baking soda, salt, and flour. They bake into tender squares that are moist, flavorful, and perfect for snacking or sharing.
Think of them as a relaxed cousin of banana bread. They have the same cozy banana flavor, but they bake in a pan and are cut into easy-to-serve bars.
They are quicker and simpler than many cakes, but they still feel like a proper homemade dessert. That makes them useful for busy days, casual gatherings, lunchbox treats, or evenings when you want something sweet without a complicated project.
The word “gooey” here speaks to the soft, moist texture. These bars are not dry or crumbly when made correctly.
They should feel tender when sliced and rich when bitten into. The bananas give them natural softness, while the sugars and melted butter help create that comforting, slightly dense bite.
Recipe Overview
Prep Time: 10 minutes
Cook Time: 25 minutes
Total Time: 35 minutes
Servings: About 12 to 16 bars, depending on how large you slice them
Why You’ll Love Ooey Gooey Banana Bars
They Are Quick to Prepare
These banana bars take only about 10 minutes to mix before they go into the oven. That makes them perfect for days when you want a homemade dessert without spending a long time baking.
You do not need to cream butter, chill dough, or prepare multiple components. The batter comes together in one main mixing bowl with simple steps.
They Use Minimal Ingredients
This recipe is built from everyday baking staples. Bananas, sugar, brown sugar, butter, egg, vanilla, baking soda, salt, cinnamon, and flour are all familiar ingredients.
If you bake often, you may already have most of them in your kitchen. The only ingredient you truly need to plan around is the ripe bananas.
They Are Perfect for Overripe Bananas
The riper the bananas, the better the flavor. Bananas with brown spots are ideal because they are sweeter, softer, and easier to mash.
This recipe is a wonderful way to use bananas that are no longer firm enough to eat plain. Instead of wasting them, you can turn them into soft, sweet dessert bars.
They Are Family-Friendly
These bars are sweet, soft, and easy to eat, which makes them appealing to both kids and adults. They are simple enough for an everyday snack but comforting enough to serve after dinner.
They also travel well, so they work for lunchboxes, potlucks, picnics, or casual family visits. Just cut them into squares and they are ready to share.
They Are Moist and Flavorful
The combination of mashed bananas, brown sugar, and melted butter gives these bars a tender, moist texture. The cinnamon adds warmth, and the vanilla makes the sweetness feel more rounded.
They do not need frosting to taste delicious. Even plain, they have enough flavor to stand on their own.
They Are Freezer-Friendly
You can freeze these bars for later, which makes them convenient for meal prep or future desserts. Once cooled, wrap them well and store them in the freezer for up to 3 months.
When you want one, just thaw and enjoy. They make a great sweet treat to keep on hand.
They Are Easy to Customize
These banana bars are delicious as written, but they are also flexible. You can add chocolate chips, nuts, dried fruit, coconut flakes, or even a little instant coffee for a mocha-style twist.
You can also dress them up with whipped cream or chocolate sauce for a more indulgent dessert. The base recipe is simple enough to support many variations.
Ingredients You’ll Need
Ripe Bananas
You will need 3 medium ripe bananas, mashed. The riper they are, the sweeter and more flavorful your bars will be.
Bananas with brown spots are ideal. They mash easily and blend smoothly into the batter.
Granulated Sugar
You will need 1 cup of granulated sugar. White sugar works best here because it gives clean sweetness and helps create the right texture.
It also balances the natural flavor of the bananas. Since the bars are meant to be sweet and dessert-like, this ingredient plays an important role.
Brown Sugar
You will need ½ cup of packed brown sugar. Brown sugar adds moisture and depth, giving the bars a richer flavor.
The packed measurement matters. Press the brown sugar firmly into the measuring cup so you get the right amount.
Unsalted Butter
You will need ½ cup of unsalted butter, melted. Melted butter gives the batter richness and helps make the bars tender.
Make sure the butter is not too hot when you add it. If it is very hot, it can affect the egg once mixed in.
Egg
You will need 1 large egg. The egg helps bind the batter together and gives the bars structure.
For a vegan version, you can use ¼ cup of unsweetened applesauce instead. This also keeps the bars moist.
Vanilla Extract
You will need 1 teaspoon of vanilla extract. Pure vanilla extract gives the best flavor.
Vanilla adds warmth and helps round out the banana and cinnamon. It makes the bars taste fuller and more balanced.
Baking Soda
You will need 1 teaspoon of baking soda. Make sure it is fresh for the best rise.
Baking soda helps lift the batter so the bars do not become too heavy. It is a small ingredient, but it matters.
Salt
You will need ½ teaspoon of salt. Salt balances the sweetness and keeps the flavor from tasting flat.
It also enhances the banana, brown sugar, and vanilla. Do not skip it.
Ground Cinnamon
You will need 1 teaspoon of ground cinnamon. Cinnamon adds cozy warmth to the bars.
It pairs naturally with banana and brown sugar. The flavor is gentle but noticeable.
All-Purpose Flour
You will need 1 ½ cups of all-purpose flour. This gives the bars structure and helps them slice cleanly.
For a gluten-free option, you can use a 1:1 gluten-free flour blend. Keep the measurement the same.
Ingredient Spotlight: Ripe Bananas
Ripe bananas are the soul of this recipe. They bring sweetness, moisture, and that unmistakable banana flavor that makes these bars so comforting.
A firm yellow banana will work, but it will not give the same depth of flavor. The best bananas for this recipe are soft, fragrant, and speckled with brown spots.
As bananas ripen, their texture changes. They become easier to mash and blend more smoothly into the batter.
That softness helps create the “ooey gooey” texture of the bars. It also means you do not need complicated steps to get a moist dessert.
If your bananas are very ripe and almost collapsing, they can still work well as long as they smell sweet and fresh. Avoid bananas that smell fermented or unpleasant.
This recipe is one of the best ways to use bananas that might otherwise be forgotten on the counter. In a way, the recipe turns a nearly wasted ingredient into the best part of dessert.
Directions
Step 1: Preheat the Oven
Start by preheating your oven to 350°F (175°C). A properly heated oven helps the bars bake evenly from edge to center.
Do not place the pan in before the oven reaches temperature. If the oven is too cool at the beginning, the texture may turn out uneven.
Step 2: Prepare the Baking Pan
Use a 9×13-inch baking pan for these banana bars. Grease the pan with butter, non-stick spray, or a light coating of oil.
Make sure to cover the corners and sides well. This helps the bars release cleanly after baking.
Step 3: Consider Lining the Pan
If you want easier removal, you can line the pan with parchment paper after greasing it lightly. Leave a little overhang on the sides so you can lift the bars out once cooled.
This step is optional, but it makes cutting neater. It is especially helpful if you plan to serve the bars on a platter.
Step 4: Gather the Ingredients
Before mixing, place all ingredients on the counter. You will need ripe bananas, granulated sugar, brown sugar, melted butter, egg, vanilla, baking soda, salt, cinnamon, and flour.
This simple habit makes baking smoother. It also helps prevent accidentally leaving something out.
Step 5: Mash the Bananas
Peel the 3 ripe bananas and place them in a large mixing bowl. Mash them with a fork or potato masher until mostly smooth.
A few small banana lumps are fine. They can add soft pockets of flavor in the finished bars.
Step 6: Check the Banana Texture
The mashed bananas should look soft and spoonable. They should not be chunky enough to make the batter uneven.
If you prefer a smoother bar, mash the bananas more thoroughly. If you like a more rustic texture, leave a few small pieces.
Step 7: Add the Granulated Sugar
Add 1 cup of granulated sugar to the mashed bananas. Stir until the sugar begins to blend into the banana mixture.
The sugar helps sweeten the bars and loosen the mashed bananas slightly. This creates a smooth base for the batter.
Step 8: Add the Brown Sugar
Add ½ cup of packed brown sugar. Stir again until the mixture looks evenly combined.
The brown sugar will bring moisture and a caramel-like depth. Make sure there are no large clumps left in the bowl.
Step 9: Add the Melted Butter
Pour in ½ cup of melted unsalted butter. The butter should be melted but not piping hot.
If the butter is very hot, let it cool for a minute before adding it. Warm butter is fine, but hot butter can cause problems when the egg is added.
Step 10: Mix the Wet Base
Stir the bananas, sugars, and melted butter until the mixture looks glossy and combined. It should smell sweet and rich already.
Take your time, but do not beat aggressively. A gentle, steady stir is enough.
Step 11: Add the Egg
Crack in 1 large egg. Mix until the egg is fully incorporated into the banana mixture.
The egg gives the bars structure and helps them hold together once sliced. Make sure no streaks of egg remain.
Step 12: Add the Vanilla Extract
Add 1 teaspoon of vanilla extract. Stir until it is blended into the wet mixture.
Vanilla may seem small, but it brings softness to the overall flavor. It helps the banana, cinnamon, and sugars feel balanced.
Step 13: Add the Baking Soda
Sprinkle 1 teaspoon of baking soda over the wet mixture. Try to scatter it evenly rather than dumping it all in one spot.
This helps it distribute more easily. Baking soda pockets can create uneven flavor or texture.
Step 14: Add the Salt
Add ½ teaspoon of salt. Stir gently so it begins to blend through the mixture.
Salt is important because these bars are sweet. It prevents the sweetness from becoming too heavy.
Step 15: Add the Cinnamon
Add 1 teaspoon of ground cinnamon. Stir until the cinnamon is evenly mixed into the wet ingredients.
The batter should begin to smell warm and cozy. Cinnamon adds the kind of background flavor that makes banana desserts feel nostalgic.
Step 16: Add the Flour
Add 1 ½ cups of all-purpose flour to the bowl. Add it gradually if that feels easier to mix.
The flour gives the bars structure. Once it is added, you want to mix gently to keep the texture tender.
Step 17: Stir Until Just Combined
Use a spatula or wooden spoon to fold the flour into the banana mixture. Stop when you no longer see dry streaks of flour.
Do not worry if the batter has a few small lumps. Overmixing can make the bars tougher and less tender.
Step 18: Check the Batter
The batter should be thick but spreadable. It should look moist and slightly glossy, with a warm banana-cinnamon aroma.
If it looks a little rustic, that is okay. Banana bars do not need a perfectly smooth batter.
Step 19: Add Optional Mix-Ins If Desired
If you want to add chocolate chips, nuts, raisins, coconut flakes, or dried fruit, fold them in gently now. Use only a handful or moderate amount so the bars still bake evenly.
This step is optional. The original bars are delicious without add-ins.
Step 20: Pour the Batter into the Pan
Transfer the batter into your prepared 9×13-inch baking pan. Use a spatula to scrape the bowl clean.
Spread the batter evenly from corner to corner. An even layer helps the bars bake consistently.
Step 21: Smooth the Top
Gently smooth the surface with a spatula. The top does not need to be perfectly flat, but it should be level enough to bake evenly.
Pay attention to the corners. Batter tends to stay thicker in the middle if not spread well.
Step 22: Bake the Banana Bars
Place the pan in the preheated oven. Bake for about 25 minutes.
The bars should become lightly golden and set in the center. Your kitchen should smell like bananas, cinnamon, and warm sugar.
Step 23: Test for Doneness
Insert a toothpick into the center of the bars. If it comes out clean or with a few moist crumbs, the bars are done.
If wet batter sticks to the toothpick, bake for a few more minutes and test again. Be careful not to overbake, because the bars should stay moist.
Step 24: Remove from the Oven
Once baked, carefully remove the pan from the oven. Place it on a heat-safe surface.
The bars will be delicate while hot, so do not cut them right away. They need time to settle.
Step 25: Cool in the Pan
Let the banana bars cool in the pan for about 10 minutes. This helps them firm up slightly and makes them easier to handle.
The aroma will be tempting, but a little patience gives you cleaner slices. It also helps the texture set properly.
Step 26: Transfer to a Wire Rack
If using parchment paper, lift the bars out of the pan and place them on a wire rack. If not, you can leave them in the pan until fully cool.
Cooling on a rack allows air to circulate. This prevents the bottom from becoming too soft from trapped steam.
Step 27: Cool Completely Before Cutting
Let the bars cool completely before slicing if you want neat squares. Warm bars are delicious, but they may crumble or smear when cut too soon.
For clean edges, use a sharp knife. Wipe the knife between cuts if needed.
Step 28: Slice into Bars
Cut the cooled banana bars into squares or rectangles. The size is up to you.
For a party platter, smaller squares are easier to serve. For a casual family dessert, larger bars feel generous and comforting.
Step 29: Serve Plain or Dressed Up
Serve the bars as they are, or add whipped cream, chocolate sauce, frosting, or a dusting of powdered sugar. They are flexible enough for simple snacking or a more decorated dessert.
If serving warm, a dollop of whipped cream or a drizzle of chocolate sauce makes them feel extra special. If serving at room temperature, they are easy to pick up and enjoy.

Serving Suggestions
Serve Warm
These bars are wonderful when served slightly warm. The texture feels extra soft, and the banana flavor comes through beautifully.
If the bars have cooled, you can warm individual pieces briefly before serving. Keep the heat gentle so they do not dry out.
Serve at Room Temperature
Room-temperature banana bars are great for lunchboxes, potlucks, and casual dessert trays. They hold their shape better once fully cooled.
This is the easiest way to serve them for gatherings. Just slice, arrange, and enjoy.
Add Whipped Cream
A dollop of whipped cream turns these simple bars into a more dessert-like treat. The light creaminess pairs nicely with the banana and cinnamon.
This is a great option when serving guests. It makes the bars feel a little more special without much effort.
Drizzle with Chocolate Sauce
Chocolate and banana are a classic pairing. A light drizzle of chocolate sauce adds richness and makes the bars more indulgent.
You do not need much. A small amount is enough to make each square feel extra satisfying.
Add Frosting for a Special Occasion
If you want to dress these bars up for a party, frosting is a great option. A simple vanilla or cream cheese-style frosting would complement the banana flavor well.
Frost only after the bars have cooled completely. Warm bars can melt frosting and make it slide.
Serve with Coffee or Tea
These bars pair beautifully with coffee, tea, or milk. Their soft sweetness makes them a lovely afternoon treat.
They are also easy to enjoy as a casual breakfast-style sweet, though they are still dessert bars at heart.
Variations
Chocolate Chip Banana Bars
Fold a handful of chocolate chips into the batter before baking. Semi-sweet chocolate works especially well with the banana and cinnamon.
This version is great for kids and chocolate lovers. It makes the bars feel a little richer.
Nutty Banana Bars
Add chopped walnuts or pecans for crunch. Nuts give contrast to the soft, gooey texture of the bars.
Use this variation only if there are no nut allergies. The original recipe is nut-free unless you choose to add them.
Whole Wheat Banana Bars
Swap some of the all-purpose flour for whole wheat flour. This creates a heartier texture and slightly nuttier flavor.
Do not replace too much at first if you want to keep the bars soft. A partial swap is the safest approach.
Mocha Banana Bars
Mix in 1 teaspoon of instant coffee granules for a mocha-inspired twist. The coffee deepens the sweetness and pairs nicely with chocolate chips if you add them.
This variation gives the bars a more grown-up flavor. It is still simple but feels different from the classic version.
Fall-Inspired Banana Bars
Add chopped apples or a little pumpkin puree for a seasonal touch. These additions can make the bars feel extra cozy during cooler months.
Be careful not to add too much extra moisture. A small amount is best.
Dairy-Free Banana Bars
Use coconut oil instead of melted butter. For the egg, use a flax egg or ¼ cup unsweetened applesauce.
This changes the texture slightly, but the bars can still be moist and delicious. Coconut oil may add a subtle coconut note.
Lighter Banana Bars
Use half the sugar and add a little unsweetened applesauce to help maintain moisture. This creates a less-sweet version.
The bars will taste different from the original, but they can still be pleasant if you prefer a lighter dessert.
Coconut Banana Bars
Fold in coconut flakes for a chewy texture. Coconut adds a tropical note that works naturally with banana.
You can use this variation with or without chocolate chips. Both combinations are delicious.
Dried Fruit Banana Bars
Add raisins or other dried fruits for extra chewiness. This gives the bars more texture and a slightly old-fashioned flavor.
Do not add too much, or the bars may become overly sweet. A small handful is enough.
Helpful Notes
Use Very Ripe Bananas
The riper the bananas, the better these bars will taste. Soft bananas with brown spots bring more sweetness and stronger banana flavor.
Avoid underripe bananas if possible. They are firmer, less sweet, and harder to mash smoothly.
Do Not Overmix the Batter
Once the flour goes in, mix only until combined. Overmixing can make the bars dense or tough.
A few small lumps are perfectly fine. Tender bars come from gentle mixing.
Let the Butter Cool Slightly
Melted butter should not be too hot when added to the batter. If it is very hot, it can affect the egg.
Let it cool for a minute or two after melting. Warm butter is easier to work with than hot butter.
Add Yogurt for Extra Moisture
For an extra moist texture, you can add 1 tablespoon of yogurt to the banana mixture. This is optional but helpful if you want the bars especially soft.
Do not add too much, or the batter may become too wet. One tablespoon is enough.
Make a Brown Sugar Substitute If Needed
If you do not have brown sugar, you can use granulated sugar mixed with a teaspoon of molasses. This gives a similar depth of flavor.
The texture may vary slightly, but it is a useful substitute. Brown sugar is still preferred when available.
Let the Bars Cool Before Cutting
Cooling helps the bars set. If you cut them too soon, they may fall apart or look messy.
If you love warm bars, cut one corner for yourself after 10 minutes and let the rest cool fully. That way you get both comfort and clean slices.
Keep Them Covered
Banana bars can dry out if left uncovered. Store them in an airtight container once fully cooled.
This helps preserve their soft texture. It also keeps them tasting fresh longer.
Storage Tips
Room Temperature Storage
Store the bars in an airtight container at room temperature for up to 3 days. Make sure they are completely cool before sealing them.
Room temperature storage is best if you plan to eat them quickly. Keep them away from heat and direct sunlight.
Refrigerator Storage
For longer storage, refrigerate the bars for up to 1 week. Use an airtight container to prevent them from drying out.
Cold banana bars will be firmer. Let them sit at room temperature for a few minutes before serving if you prefer a softer texture.
Freezer Storage
You can freeze these banana bars for up to 3 months. Cool them completely first, then wrap them tightly in plastic wrap or foil.
Place the wrapped bars in an airtight container or freezer bag. This helps prevent freezer burn.
How to Thaw
Thaw frozen bars at room temperature or in the refrigerator. If you want them slightly warm, heat them gently after thawing.
Do not overheat them. They are already baked and only need warming.
Common Mistakes
Using Bananas That Are Not Ripe Enough
Underripe bananas do not mash as well and will not give the same sweetness. This can make the bars less flavorful.
Use ripe or overripe bananas for the best result. Brown spots are a good sign.
Overmixing the Batter
Mixing too much after adding flour can make the bars dense. The batter should be stirred gently until just combined.
Stop as soon as you no longer see dry flour. That is enough.
Adding Hot Butter
Hot butter can affect the egg and change the texture of the batter. Let melted butter cool slightly before mixing it in.
It should be liquid but not steaming. This small detail helps keep the batter smooth.
Overbaking the Bars
Overbaking can make the bars dry instead of gooey and moist. Start checking around the suggested baking time.
A toothpick should come out clean or with a few moist crumbs. It should not come out with wet batter.
Cutting Too Soon
Warm bars are soft and delicate. Cutting too soon can make them crumble or look uneven.
Letting them cool gives you better slices. This is especially important if serving them to guests.
Forgetting to Grease the Pan
Banana bars can stick if the pan is not prepared properly. Grease the pan well before adding the batter.
Parchment paper is also helpful. It makes lifting and slicing much easier.
Frequently Asked Questions
Can I Freeze Ooey Gooey Banana Bars?
Yes, you can freeze Ooey Gooey Banana Bars for up to 3 months. Let them cool completely before wrapping.
Wrap them tightly in plastic wrap or foil, then place them in an airtight container or freezer bag. Thaw before serving.
What Can I Substitute for the Egg?
For a vegan version, use ¼ cup of unsweetened applesauce in place of the egg. You can also use a flax egg made from 1 tablespoon ground flaxseed mixed with 2.5 tablespoons water.
The texture may be slightly different, but both options can help bind the bars. Applesauce also adds moisture.
How Do I Know When the Bars Are Done?
Insert a toothpick into the center of the bars. If it comes out clean or with a few moist crumbs, they are done.
If wet batter clings to the toothpick, bake for a few more minutes. Check again so you do not overbake them.
Can I Make These Bars Gluten-Free?
Yes, you can use a 1:1 gluten-free flour blend in place of all-purpose flour. Keep the measurement the same.
The texture may vary slightly depending on the blend. Choose one designed for baking.
Can I Add Chocolate Chips?
Yes, chocolate chips are a delicious addition. Fold them into the batter gently before baking.
You can use a small handful or more depending on how chocolatey you want the bars. Do not overload the batter, or the texture may change.
Can I Add Nuts?
Yes, chopped nuts can be added for crunch. Walnuts or pecans work especially well with banana and cinnamon.
If serving to others, check for allergies first. The base recipe is nut-free without additions.
How Long Do These Bars Last?
They last up to 3 days at room temperature in an airtight container. They can also be refrigerated for up to 1 week.
For longer storage, freeze them for up to 3 months. Thaw before eating.
Can I Frost These Banana Bars?
Yes, you can frost them for a special occasion. Make sure the bars are completely cool first.
A frosting or glaze can make them feel more like a dessert cake. Plain bars are still delicious for everyday snacking.
Can I Use Coconut Oil Instead of Butter?
Yes, coconut oil can replace melted butter. It may add a light coconut flavor.
Use the same amount. Make sure it is melted before mixing.
Can I Reduce the Sugar?
You can reduce the sugar slightly if you prefer a less sweet bar. The texture may change a little because sugar contributes moisture and softness.
For a lighter version, you can use less sugar and add a bit of unsweetened applesauce to help keep the bars moist.
Final Thoughts
Ooey Gooey Banana Bars are a beautiful reminder that simple recipes can still feel special. They do not need fancy ingredients or complicated steps to bring comfort to the table.
All you need are ripe bananas, a few pantry staples, and a little time in the oven. The result is a soft, moist, warmly spiced treat that feels homemade in the most nostalgic way.
These bars are perfect for using up overripe bananas, but they are more than just a practical recipe. They are the kind of dessert that makes a kitchen smell welcoming and turns an ordinary day into something sweeter.
Serve them warm when you want comfort. Serve them cool when you need an easy snack.
Dress them up with whipped cream or chocolate sauce when guests are coming. Keep them plain when you want something simple with coffee or tea.
However you enjoy them, these Ooey Gooey Banana Bars are easy to make, easy to share, and easy to remember. They are soft, sweet, cozy, and full of the kind of flavor that feels like home.
Ooey Gooey Banana Bars
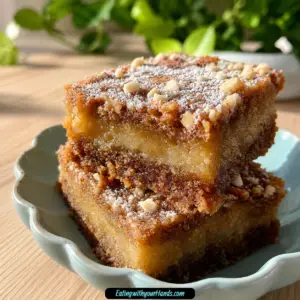
These Ooey Gooey Banana Bars are soft, moist, and full of sweet banana flavor. Made with ripe bananas, brown sugar, cinnamon, melted butter, and vanilla, they are an easy dessert or snack that can be served plain or finished with cream cheese frosting.
Recipe Information
- Prep Time: 10 minutes
- Cook Time: 25 minutes
- Total Time: 35 minutes
- Course: Dessert
- Cuisine: American
- Servings: 12 bars
- Calories: 180 kcal
Equipment
- Mixing bowl
- Baking pan
Ingredients
For the Bars
- ½ cup brown sugar, packed
Adds moisture, sweetness, and a light caramel-like flavor. - 1 teaspoon vanilla extract
Adds warmth and rounds out the banana flavor. - 3 medium ripe bananas, mashed
Create the soft, moist base and natural banana sweetness. - 1 teaspoon ground cinnamon
Adds warm spice that pairs well with the bananas. - ½ cup unsalted butter, melted
Gives the bars richness and a tender texture. - 1 ½ cups all-purpose flour
Provides structure for the banana bars. - ½ teaspoon salt
Balances the sweetness and enhances the overall flavor. - 1 large egg
Helps bind the batter and gives the bars structure. - 1 teaspoon baking soda
Helps the bars rise and bake evenly. - 1 cup granulated sugar
Sweetens the batter and helps create a soft texture.
Instructions
- Preheat the oven to 350°F (175°C).
- Grease a baking pan.
- In a mixing bowl, combine the mashed bananas, granulated sugar, brown sugar, melted unsalted butter, egg, and vanilla extract.
- Stir until the wet ingredients are smooth and well blended.
- Add the baking soda, salt, ground cinnamon, and all-purpose flour to the banana mixture.
- Stir just until the batter comes together. Avoid overmixing so the bars stay soft.
- Pour the batter into the prepared baking pan.
- Spread it evenly into the pan.
- Bake for 25 minutes, or until a toothpick inserted into the center comes out clean.
- Let the bars cool before cutting into squares.
Notes
- Serve the banana bars plain for a simple snack.
- Add cream cheese frosting if you want a richer dessert.
- Use very ripe bananas for the best sweetness and moisture.

Fernando is the creator and writer behind the food blog Eating with your Hands. Living and working in cities like Paris, Barcelona, and Berlin, and being married to a Canadian foodie, has given Fernando a passion and interest in food and inspired him to run EWYH.