
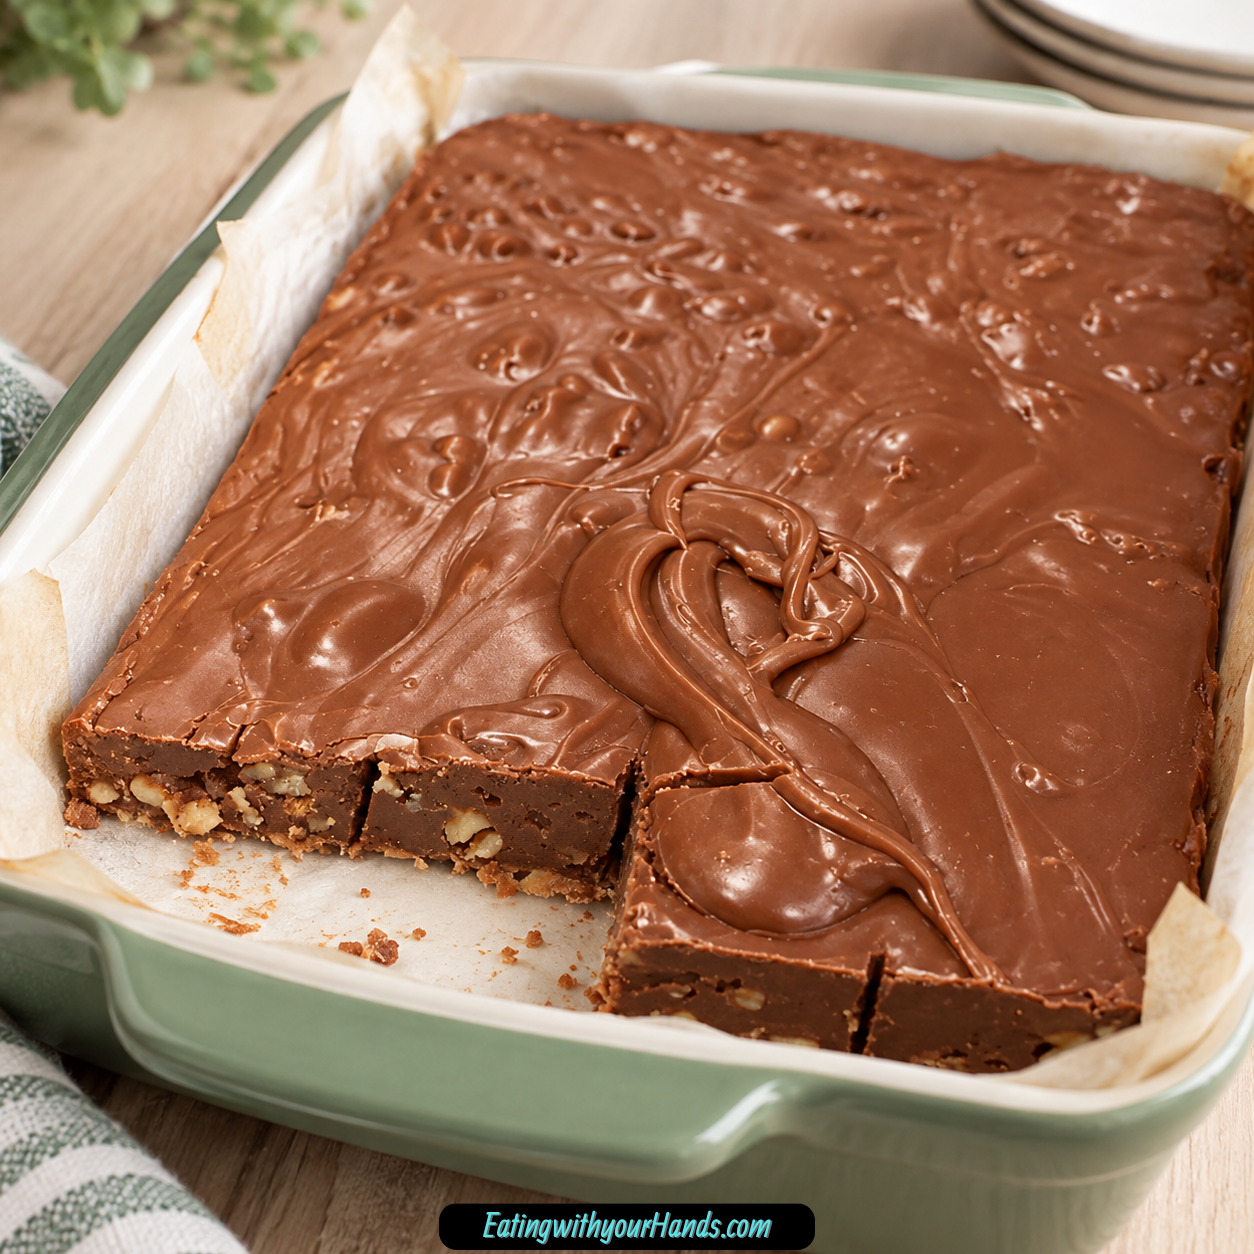
Paula Deen’s Quick 5-Minute Fudge is the kind of old-fashioned chocolate treat that feels like it belongs on every holiday candy tray. It is creamy, rich, sweet, nostalgic, and wonderfully simple, made with pantry staples that turn into smooth fudge in just minutes on the stovetop.
There is something especially comforting about a fudge recipe that does not ask for a candy thermometer or a long list of complicated steps. You stir sugar, evaporated milk, butter, and salt together, bring them to a full rolling boil, cook for 5 full minutes, then melt in chocolate chips, marshmallows, and vanilla.
The result is glossy, creamy chocolate fudge with a soft old-fashioned texture and just enough structure to slice into neat squares after it cools. Chopped walnuts bring a little crunch, but the fudge sets perfectly without them if you prefer a nut-free batch.
This is the kind of recipe that fits naturally into Christmas gifting, potlucks, bake sales, neighbor plates, church gatherings, holiday dessert trays, or late-night chocolate cravings. It is quick enough for last-minute baking days and classic enough to feel like something that has been passed around for years.
The marshmallows are part of the magic. They melt into the hot chocolate mixture and help create a creamy, quick-setting texture that feels smooth instead of grainy when cooked properly.
Evaporated milk also matters here. It gives the fudge a thicker, creamier base than regular milk, while sugar and butter help the mixture set with that familiar candy-shop sweetness.
After the fudge is poured into an 8-inch square pan, it rests at room temperature until firm enough to slice. In about 2 hours, you have a pan of chocolate squares ready for wrapping, gifting, serving, or quietly keeping in the kitchen for yourself.
Paula Deen’s Quick 5-Minute Fudge is fast, reliable, and deeply satisfying. It tastes like the kind of recipe families keep taped inside cabinet doors, ready for the holidays, unexpected guests, or any day that needs a little chocolate comfort.
Table of Contents
- Why You’ll Love Paula Deen’s Quick 5-Minute Fudge
- Recipe Details
- Ingredients
- Ingredient Notes
- Optional Swaps, Variations, Add-Ins, and Serving Ideas
- Why This Recipe Works
- Directions
- Step 1: Prepare the Pan
- Step 2: Choose the Right Saucepan
- Step 3: Add the Base Ingredients
- Step 4: Begin Cooking Over Medium Heat
- Step 5: Bring to a Full Rolling Boil
- Step 6: Boil for 5 Full Minutes
- Step 7: Keep Stirring Carefully
- Step 8: Remove From Heat
- Step 9: Add Chocolate, Marshmallows, and Vanilla
- Step 10: Check for Smoothness
- Step 11: Fold in the Walnuts
- Step 12: Pour Into the Pan
- Step 13: Smooth the Top
- Step 14: Let the Fudge Set
- Step 15: Lift and Slice
- Step 16: Serve or Pack
- Step 17: Store Leftovers
- Step 18: Freeze if Needed
- Serving Ideas
- Storage
- Freezing
- Make-Ahead
- Helpful Notes for Best Results
- Variations
- Troubleshooting
- Frequently Asked Questions
- Can I use semi-sweet chocolate instead of milk chocolate chips?
- Why did my fudge turn grainy?
- Can I use mini marshmallows instead of large marshmallows?
- Can I double the recipe?
- Can I make it without nuts?
- Can I use regular milk instead of evaporated milk?
- Can I use condensed milk instead of evaporated milk?
- How long does the fudge last?
- Why This Recipe Works So Well
- Final Thoughts
- Paula Deen’s 5-Minute Fudge
Why You’ll Love Paula Deen’s Quick 5-Minute Fudge
This fudge comes together quickly. From stovetop to pan, the cooking process takes only about 5 minutes once the mixture reaches a full rolling boil.
It does not require a candy thermometer. That makes it approachable for beginners and helpful for last-minute holiday treats.
It uses simple ingredients. Sugar, evaporated milk, butter, salt, chocolate chips, marshmallows, vanilla, and walnuts create the whole batch.
The texture is creamy and old-fashioned. When boiled properly and stirred well, the fudge sets smooth instead of grainy.
It is easy to customize. Add nuts, skip nuts, use semi-sweet chocolate, add cinnamon, or swap vanilla for peppermint extract.
It is perfect for gifting. Cut it into squares, pack it in tins, or wrap pieces in cellophane bags for the holidays.
Recipe Details
This recipe is made in a large, heavy-bottomed saucepan. A sturdy saucepan helps prevent scorching while the sugar mixture boils.
The fudge is poured into an 8-inch square pan. Line the pan with parchment paper or lightly grease it before pouring in the fudge.
The base starts with 1 ½ cups white sugar. Sugar sweetens the fudge and helps it set.
The liquid is ⅔ cup evaporated milk. It is thicker and creamier than regular milk and should not be replaced with condensed milk or regular milk.
The fat is 1 tablespoon unsalted butter. It adds richness and helps the fudge set smoothly.
The salt amount is ½ teaspoon. It balances the sweetness and helps the chocolate flavor stand out.
The chocolate is 6 oz milk chocolate chips, or 1 package. These melt into the hot mixture and create the chocolate base.
The fudge also uses 16 large marshmallows. They melt into the chocolate mixture for softness, stability, and creaminess.
The flavoring is 1 teaspoon pure vanilla extract. It gives the fudge that classic warm aroma.
The crunch comes from 1 cup chopped walnuts. Coarsely chopped nuts give the best bite, though they can be skipped for a nut-free version.
Ingredients
Main Fudge Ingredients
- 1 ½ cups white sugar
- ⅔ cup evaporated milk
- 1 tablespoon unsalted butter
- ½ teaspoon salt
- 6 oz milk chocolate chips, 1 package
- 16 large marshmallows
- 1 teaspoon pure vanilla extract
- 1 cup chopped walnuts
Optional Swaps, Variations, and Serving Ideas
- Semi-sweet chocolate chips
- About 2 cups mini marshmallows
- Extra ¼ cup sugar
- Pinch of cinnamon
- Peppermint extract
- Peanut butter
- Nuts
- Dried fruit
- Coffee
- Hot cocoa
- Cellophane bags
- Tins
Ingredient Notes
White sugar gives the fudge its sweetness and structure. It dissolves with the evaporated milk during the boil.
Evaporated milk is important for the correct texture. It is creamier and thicker than regular milk, but it is not the same as sweetened condensed milk.
Unsalted butter adds richness. It also helps the fudge feel smooth once it sets.
Salt keeps the sweetness balanced. A little salt makes the chocolate taste deeper.
Milk chocolate chips melt into the hot base and give the fudge its classic chocolate flavor. Semi-sweet chocolate chips can be used for a deeper, more intense chocolate taste.
Large marshmallows melt into the fudge and help create a creamy texture. Fresh marshmallows work best because stale marshmallows may not melt smoothly.
Mini marshmallows can be used instead of large marshmallows. Use about 2 cups of minis.
Pure vanilla extract gives warmth and classic fudge aroma. Add it off the heat so the flavor stays smooth.
Chopped walnuts add crunch and contrast. Coarsely chopped walnuts give the best bite.
If you prefer nut-free fudge, skip the walnuts. No other adjustments are needed.
Optional Swaps, Variations, Add-Ins, and Serving Ideas
Classic Quick 5-Minute Fudge
Make the fudge with white sugar, evaporated milk, butter, salt, milk chocolate chips, marshmallows, vanilla, and chopped walnuts. This gives the creamy old-fashioned version.
Let the fudge set at room temperature until firm. Slice into squares once it cuts cleanly.
Nut-Free Fudge
Leave out the walnuts completely. The fudge will still set properly.
This version is smooth, creamy, and easier for those who do not want nuts. No other ingredient changes are needed.
Semi-Sweet Chocolate Fudge
Use semi-sweet chocolate chips instead of milk chocolate chips. The flavor becomes deeper and less sweet.
This is a great option for stronger chocolate flavor. The method stays the same.
Walnut Fudge
Use 1 cup chopped walnuts for texture. Coarsely chopped walnuts give the best bite.
Fold them in after the chocolate and marshmallows have melted. Stir only until distributed.
Peanut Butter Swirl Fudge
Swirl in peanut butter for a chocolate-peanut butter twist. Add it after the hot fudge mixture becomes smooth.
Do not overmix if you want visible swirls. Use gentle strokes with a spatula.
Dried Fruit Fudge
Add dried fruit for a chewy variation. Stir it in at the same stage as the nuts.
Use pieces small enough to slice cleanly. This gives the fudge a sweet, chewy contrast.
Cinnamon Holiday Fudge
Add a pinch of cinnamon for a holiday twist. Cinnamon gives warmth without changing the basic fudge structure.
Use a light hand. The chocolate should remain the main flavor.
Peppermint Fudge
Replace the vanilla with peppermint extract. This gives the fudge a festive mint-chocolate flavor.
Use peppermint carefully because it can be strong. The flavor should be refreshing, not overwhelming.
Firmer Fudge
Add an extra ¼ cup sugar if you want a firmer fudge. This helps create a sturdier set.
Keep the same boiling method. Stir constantly and boil for 5 full minutes.
Mini Marshmallow Fudge
Use about 2 cups mini marshmallows instead of 16 large marshmallows. They melt quickly into the hot mixture.
Fresh mini marshmallows are best. Stale ones may not melt smoothly.
Holiday Gift Fudge
Cut the fudge into small squares and wrap them in cellophane bags. You can also place pieces in tins.
This is perfect for neighbor plates, Christmas trays, or bake sale packaging. Let the fudge fully set before wrapping.
Dessert Board Fudge
Add fudge squares to a dessert charcuterie board. They bring a rich chocolate element beside cookies and candies.
Cut them into small pieces. Fudge is rich, so little squares work well.
Coffee Pairing
Serve fudge with coffee. The rich chocolate flavor pairs well with a warm drink.
This is a lovely winter treat. It works especially well after dinner.
Hot Cocoa Pairing
Serve fudge with hot cocoa for a very chocolatey dessert moment. Keep the fudge pieces small.
This pairing feels especially festive during the holidays. Add it to a Christmas dessert spread.
Why This Recipe Works
This recipe works because it uses a quick-boil method to dissolve sugar and build structure without requiring a thermometer. The full rolling boil is the key.
A full rolling boil means the mixture bubbles vigorously across the entire surface and continues boiling even while stirred. This stage must be maintained for 5 full minutes.
Evaporated milk gives the fudge creaminess. It is thicker than regular milk, which helps the texture.
Marshmallows help the fudge set quickly and smoothly. They melt into the hot chocolate mixture and create stability.
Chocolate chips melt off the heat so they do not scorch. The residual heat from the boiled base is enough to create a glossy mixture.
Butter adds richness and smoothness. Salt balances the sugar.
Stirring constantly prevents scorching. It also helps the sugar dissolve and keeps the mixture even.
Cooling at room temperature lets the fudge firm gradually. After about 2 hours, it should be ready to slice cleanly.
Directions
Step 1: Prepare the Pan
Line an 8-inch square pan with parchment paper or lightly grease it. Make sure the parchment has enough overhang if you want to lift the fudge out easily.
Set the pan near the stove before you begin. Once the fudge is ready, you need to pour it quickly.
Step 2: Choose the Right Saucepan
Use a large, heavy-bottomed saucepan. The mixture expands as it boils, so do not use a pan that is too small.
A heavy-bottomed pan helps prevent scorching. It gives more even heat.
Step 3: Add the Base Ingredients
Add 1 ½ cups white sugar, ⅔ cup evaporated milk, 1 tablespoon unsalted butter, and ½ teaspoon salt to the saucepan. Stir to combine before turning on the heat.
This helps the ingredients begin evenly mixed. It also makes the cooking process smoother.
Step 4: Begin Cooking Over Medium Heat
Place the saucepan over medium heat. Stir constantly with a wooden spoon or silicone spatula.
Scrape the bottom of the pan as you stir. This helps prevent the sugar and milk from scorching.
Step 5: Bring to a Full Rolling Boil
Continue cooking and stirring until the mixture reaches a full rolling boil. The entire surface should bubble vigorously.
A full rolling boil should continue even while you stir. This is the stage needed before timing begins.
Step 6: Boil for 5 Full Minutes
Once the mixture reaches a full rolling boil, boil for 5 full minutes. Stir nonstop the entire time.
This step helps the sugar dissolve fully and allows the fudge to set properly. Do not shorten the time.
Step 7: Keep Stirring Carefully
During the 5-minute boil, keep scraping the bottom and sides of the pan. This protects the mixture from burning.
The mixture will be very hot. Stir steadily and carefully.
Step 8: Remove From Heat
After 5 full minutes, remove the saucepan from the heat. Turn off the burner.
Move quickly but carefully. The next ingredients need to go in while the mixture is still hot.
Step 9: Add Chocolate, Marshmallows, and Vanilla
Immediately add the 6 oz milk chocolate chips, 16 large marshmallows, and 1 teaspoon pure vanilla extract. Stir quickly.
The heat from the sugar mixture will melt the chocolate and marshmallows. Keep stirring until the mixture becomes smooth and glossy.
Step 10: Check for Smoothness
Continue stirring until no large marshmallow pieces remain. The fudge should look thick, shiny, and evenly chocolatey.
If using mini marshmallows, they may melt faster. Use about 2 cups of minis.
Step 11: Fold in the Walnuts
Add 1 cup chopped walnuts. Stir lightly until evenly distributed.
Coarsely chopped nuts give the best texture. Do not overmix once the nuts are added.
Step 12: Pour Into the Pan
Pour the hot fudge mixture into the prepared 8-inch pan. Use a spatula to scrape the saucepan.
Work quickly because fudge begins to thicken as it cools. Spread it gently into the corners.
Step 13: Smooth the Top
Use a spatula to smooth the top of the fudge. It does not need to be perfect.
A slightly rustic surface is fine. The fudge will still slice beautifully.
Step 14: Let the Fudge Set
Leave the fudge at room temperature for about 2 hours. It should become firm enough to slice cleanly.
Do not rush it while warm. Cooling gives the fudge its final texture.
Step 15: Lift and Slice
If you used parchment, lift the fudge from the pan once set. Place it on a cutting board.
Cut into squares with a sharp knife. Wipe the knife between cuts if needed for cleaner edges.
Step 16: Serve or Pack
Serve the fudge on a dessert tray, with coffee, with hot cocoa, or as part of a holiday candy plate. Small squares are best because the fudge is rich.
For gifting, pack squares in tins, cellophane bags, or holiday containers. Let the fudge set completely before wrapping.
Step 17: Store Leftovers
Place leftover fudge in an airtight container. Store at room temperature for up to 5 days.
For a firmer texture, refrigerate it. It keeps well in the refrigerator for up to 2 weeks.
Step 18: Freeze if Needed
Freeze fudge for up to 2 months. Store it tightly wrapped or in an airtight container.
Thaw in the refrigerator overnight for best results. Serve chilled or let it sit briefly before eating.
Serving Ideas
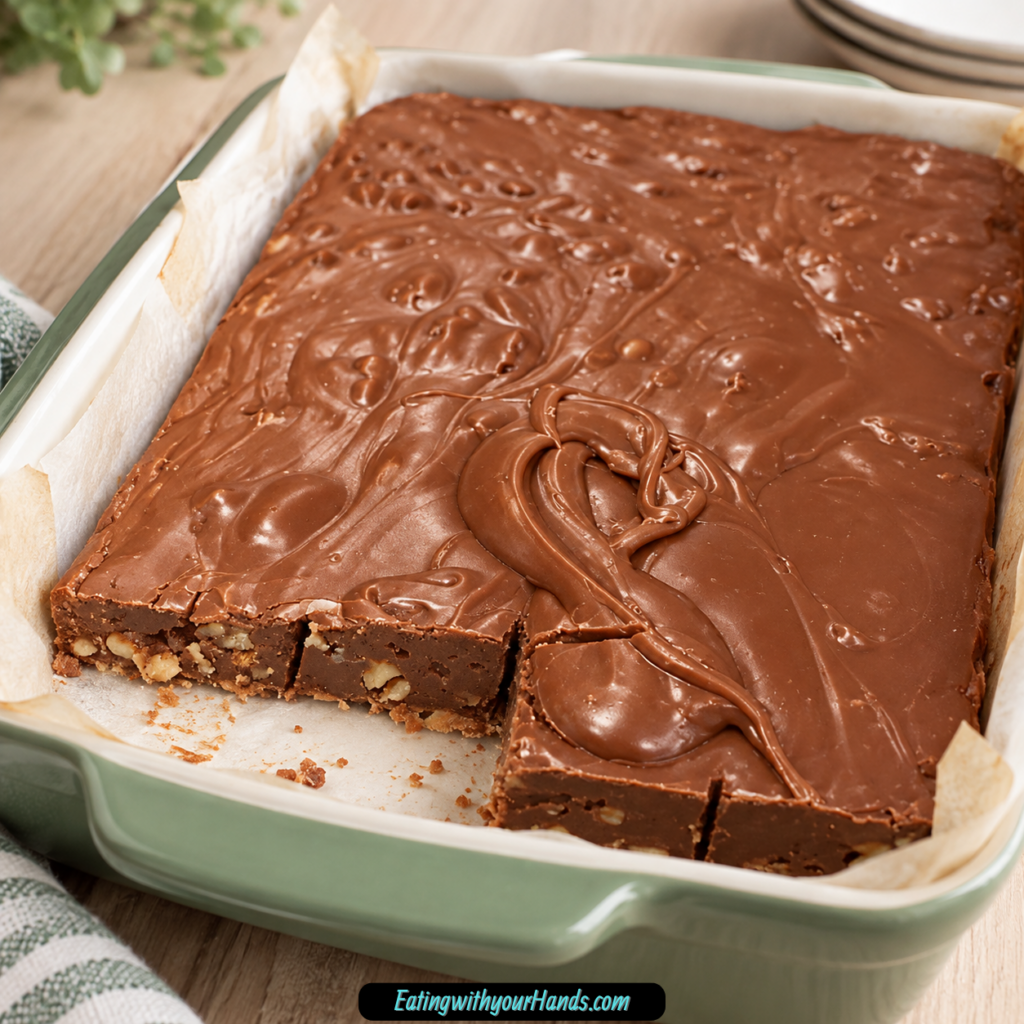
Serve Paula Deen’s Quick 5-Minute Fudge on a holiday dessert tray with cookies and candies. The small chocolate squares add richness and old-fashioned charm.
Pair fudge with coffee after dinner. The warm drink balances the sweetness.
Serve it with hot cocoa for a cozy winter treat. Keep the pieces small because the combination is rich.
Wrap individual squares in cellophane bags for gifting. Add ribbon for an easy holiday presentation.
Pack fudge in tins for neighbor plates or Christmas boxes. Use parchment between layers to keep pieces neat.
Add it to a dessert charcuterie board. It gives the board a smooth chocolate element beside crunchy cookies or candies.
Serve it at bake sales. The squares are easy to portion and transport.
Keep a small container in the refrigerator for firmer pieces. Cold fudge has a denser bite.
Storage
Store fudge in an airtight container at room temperature for up to 5 days. Keep it covered so it does not dry out.
Place parchment between layers if stacking pieces. This keeps the squares neat.
For longer storage, refrigerate the fudge. It keeps well for up to 2 weeks.
Refrigerated fudge will have a firmer texture. Let it sit briefly at room temperature if you prefer it softer.
Keep fudge away from heat. Warm kitchens can soften it.
Do not leave it uncovered. Sugar and chocolate can pick up odors or become dry.
Use clean hands or utensils when handling. This keeps gift pieces looking fresh.
Freezing
Fudge freezes well for up to 2 months. Wrap it tightly or place it in an airtight freezer-safe container.
For best results, freeze fully set fudge. Do not freeze while warm.
Use parchment between layers if stacking. This helps pieces separate cleanly later.
Thaw fudge in the refrigerator overnight. Slow thawing helps protect the texture.
After thawing, serve cold or let the pieces sit briefly at room temperature. The texture will soften slightly.
Do not thaw and refreeze repeatedly. This can affect texture.
Freezing is helpful for holiday planning. You can make fudge ahead and save it for trays or gifts.
Make-Ahead
This fudge is excellent for making ahead. It sets at room temperature in about 2 hours and stores well.
For holiday gifting, make it a day or two before packing. This gives it time to fully firm.
Cut into squares after the fudge sets. Store airtight until ready to package.
If making multiple batches, prepare each pan before cooking. The fudge thickens quickly once finished.
You can refrigerate the finished fudge for up to 2 weeks. This is helpful during busy holiday baking days.
You can also freeze it for up to 2 months. Thaw overnight in the refrigerator before serving.
For the neatest gift pieces, slice cold fudge. Use a sharp knife and wipe between cuts.
Helpful Notes for Best Results
Stir constantly during boiling. This prevents burning and helps keep the texture creamy.
Use fresh marshmallows. Stale marshmallows may not melt smoothly.
Do not replace evaporated milk with condensed milk or regular milk. The consistency will be off.
Maintain a full rolling boil for 5 full minutes. This helps prevent grainy fudge and supports proper setting.
Use a large saucepan because the mixture expands as it boils. A small pot can overflow.
Add the chocolate chips and marshmallows immediately after removing the pan from heat. The mixture needs to be hot enough to melt them.
For firmer fudge, add an extra ¼ cup sugar. This gives a sturdier texture.
For nut-free fudge, skip the walnuts. No other changes are required.
Variations
Classic Milk Chocolate Walnut Fudge
Use milk chocolate chips and chopped walnuts. This gives the classic creamy, nutty version.
Let the fudge set at room temperature before slicing. Store airtight.
Nut-Free Chocolate Fudge
Omit the walnuts. The fudge will still set perfectly.
This version is smooth and simple. It is ideal for anyone who prefers plain fudge.
Semi-Sweet Chocolate Fudge
Use semi-sweet chocolate chips instead of milk chocolate chips. The flavor becomes deeper and more intense.
The fudge will taste less sweet. The method stays the same.
Mini Marshmallow Fudge
Use about 2 cups mini marshmallows instead of 16 large marshmallows. They melt quickly.
Fresh marshmallows are still important. Stale minis may not melt smoothly.
Firmer Fudge
Add an extra ¼ cup sugar. This creates a firmer set.
Keep the 5-minute full rolling boil. The cooking method remains important.
Cinnamon Holiday Fudge
Add a pinch of cinnamon for a warm holiday flavor. Stir it in with the chocolate and marshmallows.
Use only a small amount. Cinnamon should support the chocolate.
Peppermint Fudge
Replace the vanilla extract with peppermint extract. This gives a festive mint flavor.
Use peppermint carefully because it can be strong. Start with a balanced amount.
Peanut Butter Swirl Fudge
Swirl in peanut butter after the chocolate mixture is smooth. Use gentle strokes to keep the swirl visible.
Do not overmix. The goal is a ribboned effect.
Dried Fruit Fudge
Add dried fruit with the walnuts or instead of walnuts. Chop larger pieces first.
This gives chewy sweetness. It works well for holiday trays.
Double Batch Fudge
Double the recipe if needed. Use a larger pan and a bigger pot.
The mixture expands as it boils. Give it plenty of room.
Troubleshooting
The Fudge Turned Grainy
The mixture may not have boiled long enough. Make sure it reaches a full rolling boil and boils for 5 full minutes.
Stir nonstop while boiling. Proper boiling helps the sugar dissolve fully.
The Fudge Did Not Set
The boil may not have been strong enough or long enough. A full rolling boil should keep bubbling even while stirred.
Let the fudge cool fully before deciding it is too soft. It needs about 2 hours at room temperature.
The Fudge Scorched
The heat may have been too high, or the mixture was not stirred enough. Use medium heat and stir constantly.
A heavy-bottomed saucepan helps. Scrape the bottom as you stir.
The Marshmallows Did Not Melt Smoothly
The marshmallows may have been stale. Use fresh marshmallows for the best texture.
Add them immediately after removing the hot mixture from the heat. Stir quickly while the base is still hot.
The Chocolate Did Not Melt Fully
The mixture may have cooled too much before stirring. Add chocolate immediately after removing the pan from heat.
Keep stirring until smooth. The heat should melt the chocolate chips.
The Fudge Is Too Soft
For a firmer batch next time, add an extra ¼ cup sugar. Also make sure to boil for 5 full minutes.
Refrigerating the fudge can firm it up. The texture will become denser.
The Fudge Is Too Firm
It may have boiled too aggressively or too long. Keep the boil steady and time it carefully.
Store firm fudge at room temperature before serving. It may soften slightly.
The Fudge Is Too Sweet
Use semi-sweet chocolate chips next time. They create a deeper flavor.
You can also cut smaller squares. Fudge is naturally rich.
The Nuts Sink or Clump
Fold the walnuts in gently but evenly. Coarsely chopped pieces work best.
Add them after the fudge is smooth. Stir just enough to distribute.
The Fudge Is Hard to Cut
Chill it briefly for cleaner edges or let it sit at room temperature if it is too firm. Use a sharp knife.
Wipe the knife between cuts. This gives neater squares.
Frequently Asked Questions
Can I use semi-sweet chocolate instead of milk chocolate chips?
Yes, semi-sweet chocolate chips can be used. They give the fudge a deeper, more intense chocolate flavor.
Milk chocolate gives a sweeter classic taste. Both options work.
Why did my fudge turn grainy?
The fudge may not have boiled long enough. Maintain a full rolling boil for 5 full minutes while stirring constantly.
This helps the sugar dissolve and supports a smoother texture. Do not start timing before the full rolling boil begins.
Can I use mini marshmallows instead of large marshmallows?
Yes, use about 2 cups mini marshmallows. They melt quickly into the hot mixture.
Use fresh marshmallows for the smoothest result. Stale marshmallows can leave lumps.
Can I double the recipe?
Yes, the recipe can be doubled. Use a larger pan and a bigger pot.
The mixture expands as it boils. Make sure the pot has enough space.
Can I make it without nuts?
Yes, you can skip the walnuts. The fudge sets perfectly fine without them.
No other adjustments are needed. The texture will be smooth instead of crunchy.
Can I use regular milk instead of evaporated milk?
No, regular milk should not be used in place of evaporated milk. The consistency will be off.
Evaporated milk is thicker and creamier. It is important for the fudge texture.
Can I use condensed milk instead of evaporated milk?
No, condensed milk is not the same as evaporated milk. It is sweetened and much thicker.
Using it would change the sweetness and consistency. Use evaporated milk for this recipe.
How long does the fudge last?
It lasts up to 5 days at room temperature in an airtight container. It lasts up to 2 weeks in the refrigerator.
It can also be frozen up to 2 months. Thaw overnight in the refrigerator.
Why This Recipe Works So Well
Paula Deen’s Quick 5-Minute Fudge works because it combines a boiled sugar base with fast-melting chocolate and marshmallows. The result is creamy fudge without a candy thermometer.
The evaporated milk creates a rich base. It gives the fudge more body than regular milk.
Sugar gives sweetness and structure. Boiling it properly is what helps the fudge set.
Butter adds smoothness. Salt keeps the fudge from tasting flat.
The marshmallows create a quick, creamy set. They melt into the hot mixture and help stabilize the texture.
Chocolate chips melt after the pan comes off the heat. This prevents scorching and creates a glossy finish.
The 5-minute full rolling boil is essential. It helps dissolve the sugar and prevents a grainy result.
Walnuts add crunch, but the fudge does not depend on them to set. That makes the recipe flexible.
Most of all, this fudge works because it is simple, quick, and reliable. It gives you that old-fashioned chocolate candy flavor without complicated equipment or a long cooking process.
Final Thoughts
Paula Deen’s Quick 5-Minute Fudge is made with white sugar, evaporated milk, butter, salt, milk chocolate chips, marshmallows, vanilla, and chopped walnuts. The mixture is brought to a full rolling boil, cooked for 5 full minutes, stirred smooth with chocolate and marshmallows, poured into an 8-inch pan, cooled until firm, and sliced into creamy chocolate squares.
Serve it on holiday trays, package it for gifts, pair it with coffee or hot cocoa, or customize it with semi-sweet chocolate, cinnamon, peppermint, peanut butter, dried fruit, or a nut-free finish. With its quick stovetop method, no-thermometer process, 5-day room-temperature storage, 2-week refrigerator life, and 2-month freezer option, this fudge is a dependable old-fashioned treat for holidays and everyday chocolate cravings alike.
Paula Deen’s 5-Minute Fudge
Rich, creamy, chocolatey, and packed with walnut crunch, Paula Deen’s 5-Minute Fudge is a classic stovetop fudge made with sugar, evaporated milk, butter, marshmallows, milk chocolate chips, vanilla, and chopped walnuts. The mixture boils for 5 minutes, then sets into sweet squares with a smooth texture and simple old-fashioned flavor.
Recipe Details
- Prep Time: 10 minutes
- Cook Time: 10 minutes
- Total Time: 20 minutes
- Calories: 200 kcal
Ingredients
For the Fudge
- 1 cup chopped walnuts
- 1 teaspoon pure vanilla extract
- 16 large marshmallows
- 6 oz milk chocolate chips
- ½ teaspoon salt
- 1 tablespoon unsalted butter
- ⅔ cup evaporated milk
- 1 ½ cups white sugar
Instructions
Step 1: Start the Sugar Mixture
In a large saucepan, combine the white sugar, evaporated milk, unsalted butter, and salt. Stir the ingredients together before turning the mixture into fudge.
Place the saucepan over medium heat. Keep the mixture moving as it warms so the sugar begins dissolving evenly.
Step 2: Bring to a Rolling Boil
Cook over medium heat, stirring constantly, until the mixture reaches a full rolling boil. Do not stop stirring once the mixture begins bubbling.
A full rolling boil means the mixture continues bubbling strongly even while it is being stirred. This is the base that helps the fudge set properly.
Step 3: Boil for 5 Minutes
Continue boiling and stirring for 5 minutes. Keep the heat steady and stir the whole time so the mixture cooks evenly.
This short boiling step is key to the texture of the fudge. Once the 5 minutes are complete, remove the saucepan from the heat right away.
Step 4: Add Chocolate, Marshmallows, and Vanilla
Remove the saucepan from the heat and immediately stir in the milk chocolate chips, large marshmallows, and pure vanilla extract. Stir until everything melts into a smooth mixture.
Use fresh marshmallows for a smoother melt and creamier texture, as noted. Keep stirring until no large pieces remain.
Step 5: Fold in the Walnuts
Fold in the chopped walnuts. Stir gently until they are evenly distributed through the fudge.
Coarsely chopped walnuts add the best crunch. For nut-free fudge, simply omit the walnuts with no adjustments needed.
Step 6: Pour Into the Pan
Pour the fudge mixture into a greased or parchment-lined 8-inch square pan. Spread it evenly so the top is level.
Work while the mixture is still warm and pourable. Once spread, leave it undisturbed so it can set.
Step 7: Cool and Cut
Cool at room temperature for about 2 hours, or until set. Once firm, cut the fudge into squares and serve.
Let the fudge set fully before slicing for cleaner pieces. The finished squares should be smooth, chocolatey, and firm enough to hold their shape.
Notes
- Use fresh marshmallows for a smoother melt and creamier texture.
- Coarsely chopped walnuts add the best crunch.
- For nut-free fudge, simply omit the walnuts-no adjustments needed.
- Store in an airtight container at room temperature for up to 5 days or refrigerate for a firmer texture.
Serving Suggestions
Serve Paula Deen’s 5-Minute Fudge once it has cooled at room temperature for about 2 hours and set completely. The milk chocolate chips, marshmallows, vanilla, evaporated milk, sugar, butter, and walnuts create a creamy chocolate fudge with a sweet, classic texture.
Cut the fudge into squares after it is firm. For the neatest pieces, wait until the fudge is fully set before lifting or slicing.
This fudge works well for dessert trays, holiday candy boxes, potlucks, gifting, or simple chocolate cravings. Leave the walnuts in for crunch, or omit them for a nut-free version with no adjustments needed.
Storage
How to Store
Store the fudge in an airtight container at room temperature for up to 5 days. Keep the container sealed so the squares stay fresh.
Refrigerator Tip
Refrigerate the fudge if you want a firmer texture. The recipe does not provide a separate refrigerated storage duration, so no extra time is added here.
Marshmallow Tip
Use fresh marshmallows for a smoother melt and creamier texture. Stir them in immediately after removing the saucepan from the heat.
Walnut Tip
Use coarsely chopped walnuts for the best crunch. For nut-free fudge, omit the walnuts with no adjustments needed.
Setting Tip
Cool the fudge at room temperature for about 2 hours, or until set. This setting time is separate from the listed Total Time.
Cutting Tip
Cut into squares only after the fudge has fully firmed. This helps the pieces hold their shape and gives cleaner edges.

Fernando is the creator and writer behind the food blog Eating with your Hands. Living and working in cities like Paris, Barcelona, and Berlin, and being married to a Canadian foodie, has given Fernando a passion and interest in food and inspired him to run EWYH.