
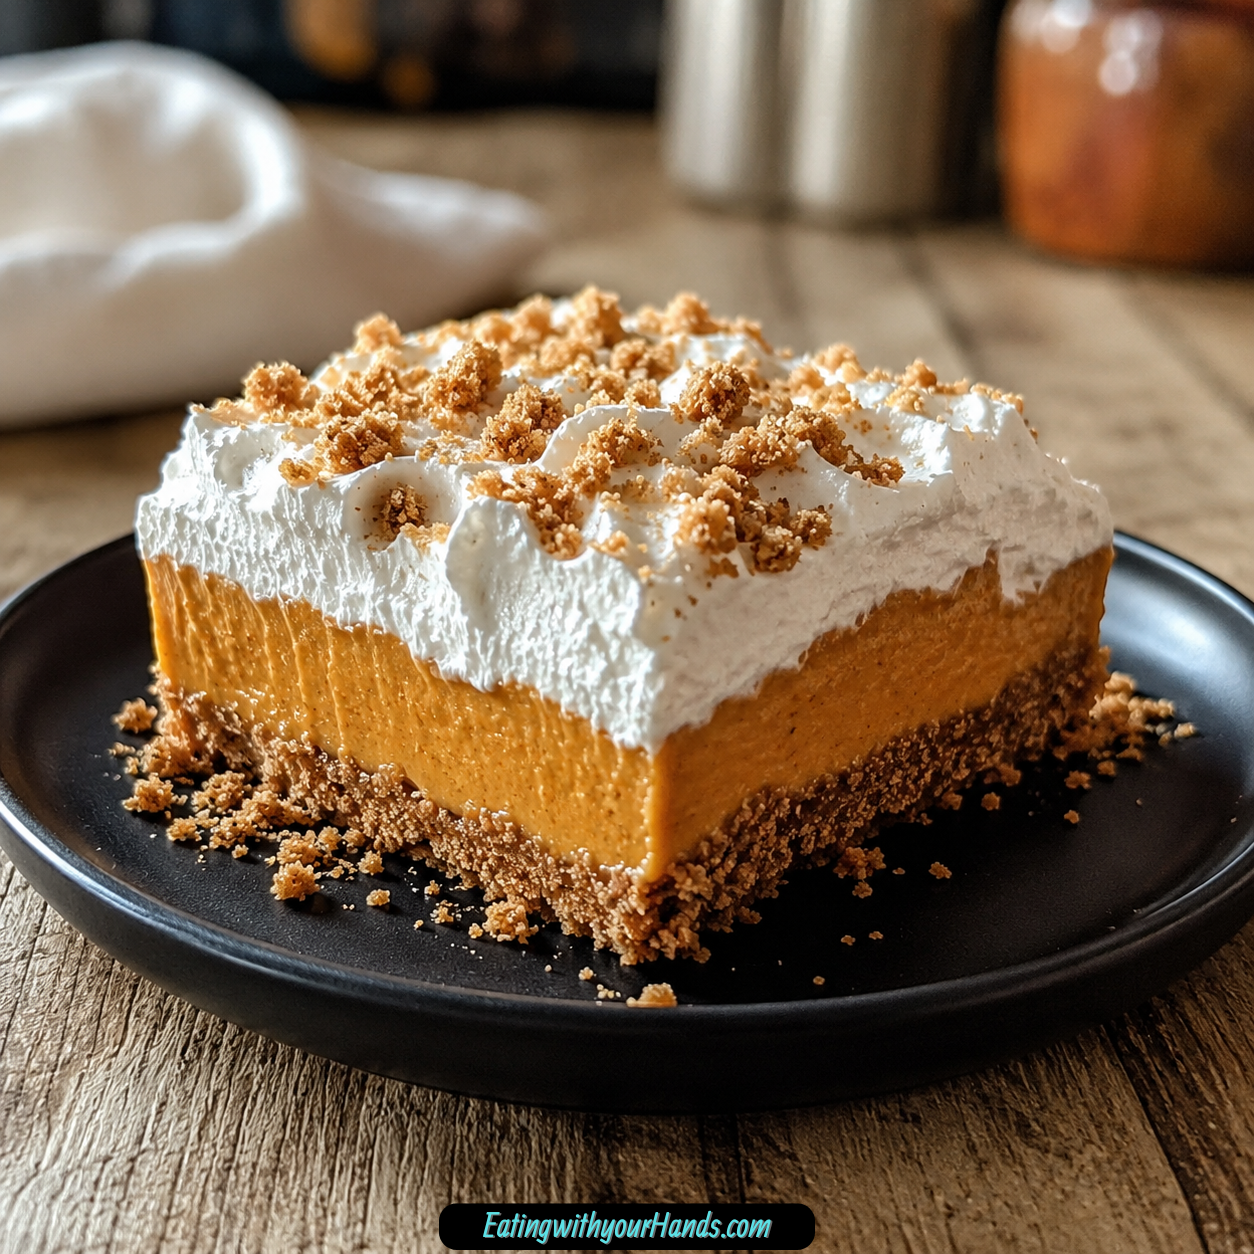
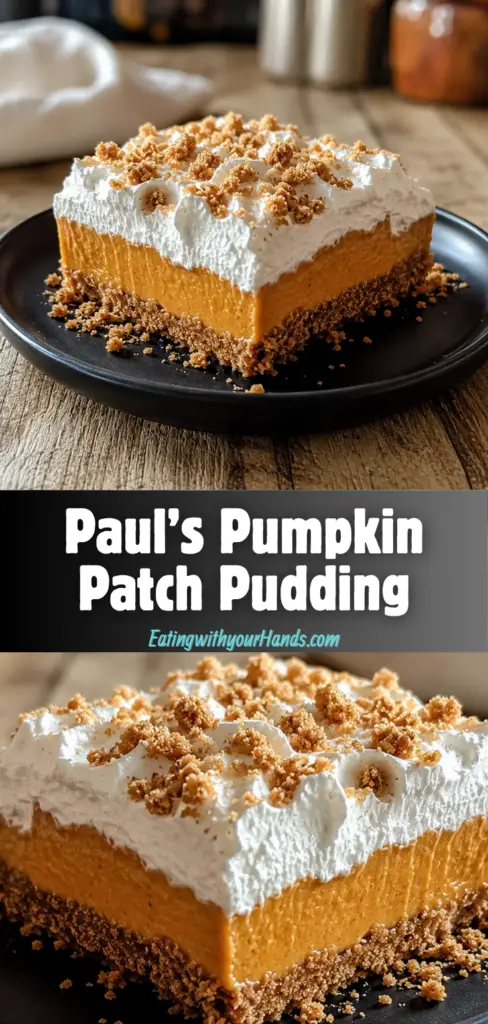
There is something about the first cool night of fall that makes a creamy pumpkin dessert feel almost necessary. When the air turns crisp and the kitchen starts to smell like cinnamon, nutmeg, ginger, and cloves, Paul’s Pumpkin Patch Pudding feels like the kind of treat that belongs right in the middle of the season.
This is the dessert I imagine pulling from the refrigerator after dinner, when everyone is full but still hoping for something sweet. It has a buttery graham cracker crust, a smooth pumpkin filling, and a soft whipped topping that makes each bite feel cozy without being heavy.
What I love most is that it feels special, but it does not ask you to turn on the oven. You mix, press, layer, chill, and somehow end up with a dessert that tastes like fall settled into a chilled square.
Paul’s Pumpkin Patch Pudding is perfect for Thanksgiving potlucks, quiet nights at home, or anytime pumpkin cravings show up before you have the energy for baking. It is easy enough for a casual weeknight and pretty enough to bring to a table full of people you love.
Table of Contents
- Why You’ll Love This Recipe
- Recipe Details
- Ingredients
- Optional Swaps, Variations, Add-Ins, and Serving Ideas
- Why This No-Bake Pumpkin Dessert Works
- Directions
- Step 1: Set Up the 9×9-Inch Dish
- Step 2: Combine the Graham Cracker Crumbs and Sugar
- Step 3: Add the Melted Butter to the Crust Mixture
- Step 4: Press the Crust Firmly Into the Dish
- Step 5: Whisk the Pumpkin Puree With Sugar and Spices
- Step 6: Beat the Softened Cream Cheese and Powdered Sugar
- Step 7: Combine the Pumpkin Mixture and Cream Cheese Mixture
- Step 8: Stop Mixing Once the Filling Is Smooth
- Step 9: Spread the Pumpkin Filling Over the Crust
- Step 10: Chill the Bowl and Beaters for the Topping
- Step 11: Whip the Heavy Cream With Powdered Sugar and Vanilla
- Step 12: Fold in the Whipped Topping
- Step 13: Spread the Topping Over the Pumpkin Layer
- Step 14: Chill for at Least 2 Hours
- Step 15: Chill Overnight if You Can Wait
- Step 16: Slice the Pudding Cold
- Step 17: Garnish Before Serving
- Serving Ideas
- Storage
- Reheating
- Freezing
- Make-Ahead
- Helpful Notes for Best Results
- Variations
- Troubleshooting
- Frequently Asked Questions
- Can I Use Fresh Pumpkin Instead of Canned?
- How Long Does This Pudding Last in the Fridge?
- Can I Make This Ahead for Thanksgiving?
- Can I Freeze Paul’s Pumpkin Patch Pudding?
- Can I Double the Recipe?
- Can I Use Pumpkin Pie Filling?
- What If I Do Not Have Graham Crackers?
- Can I Use Store-Bought Whipped Cream?
- How Do I Make Cleaner Slices?
- Why This Recipe Works So Well
- Final Thoughts
- Paul’s Pumpkin Patch Pudding
Why You’ll Love This Recipe
Paul’s Pumpkin Patch Pudding is a no-bake pumpkin dessert, which makes it wonderfully practical during busy fall cooking. You do not need to heat the oven, watch a cake rise, or worry about baking time.
The texture is one of the best parts of this dessert. The crust gives you buttery graham cracker crunch, the pumpkin layer is creamy and spiced, and the topping is fluffy enough to make the whole dish feel light.
The flavor tastes like autumn without being complicated. Cinnamon, ginger, nutmeg, and cloves bring warmth, while pumpkin puree and vanilla make the filling smooth and familiar.
This dessert is also a crowd-pleaser because it looks layered and thoughtful. It feels like something you planned carefully, even though the steps are simple and easy to follow.
It is a great make-ahead option for Thanksgiving or fall gatherings. The pudding needs at least 2 hours to chill, and if you can let it rest overnight, the layers become even better.
The recipe also gives you room to play. You can try a nutty crust, a dairy-free direction, a gingersnap or vanilla wafer crust, maple sweetness, or extra spices if you want to make it your own.
Leftovers keep well in the refrigerator for up to 4 days. If you freeze individual slices, you can save them for later, though the topping will not be quite as fluffy after thawing.
Recipe Details
Paul’s Pumpkin Patch Pudding is a no-bake layered pumpkin dessert made in a 9×9-inch dish. It has a graham cracker crumb crust, a creamy pumpkin and cream cheese filling, and a whipped topping layer.
The crust is made with graham cracker crumbs, granulated sugar, and melted unsalted butter. It is pressed firmly into the dish, with the crumbs pressed slightly up the sides to help hold the filling.
The pumpkin filling is made with pumpkin puree, granulated sugar, cinnamon, ginger, nutmeg, cloves, vanilla extract, softened cream cheese, and powdered sugar. The cream cheese and powdered sugar are beaten separately until smooth before being combined with the spiced pumpkin mixture.
The topping is made with heavy whipping cream, powdered sugar, vanilla extract, and whipped topping. The heavy cream is beaten to stiff peaks before the whipped topping is gently folded in.
The finished dessert needs to chill for at least 2 hours. Overnight chilling makes it even better if you can wait.
Covered tightly with plastic wrap, it keeps in the refrigerator for up to 4 days. Individual slices can be wrapped tightly and frozen for up to 2 months.
For serving a crowd, the recipe can be doubled in a 9×13-inch dish. More pudding means more happiness, especially when this dessert is headed to a holiday table.
Ingredients
Graham Cracker Crust
1 ½ cups graham cracker crumbs
¼ cup granulated sugar
½ cup unsalted butter, melted
Pumpkin Filling
1 can (15 oz) pumpkin puree
½ cup granulated sugar
1 teaspoon ground cinnamon
½ teaspoon ground ginger
¼ teaspoon ground nutmeg
¼ teaspoon ground cloves
1 teaspoon vanilla extract
8 oz cream cheese, softened
1 cup powdered sugar
Whipped Topping
1 cup whipped topping, like Cool Whip
1 ½ cups heavy whipping cream
¼ cup powdered sugar
1 teaspoon vanilla extract
Ingredient Notes
The graham cracker crumbs equal about 10–12 full sheets crushed up. You can crush them yourself or use pre-crumbed graham crackers if you want to save time.
Use pumpkin puree, not pumpkin pie filling. Pumpkin puree is just pumpkin, while pumpkin pie filling already has added sugar and spices.
Libby’s is a go-to pumpkin puree option mentioned for this pudding. The important detail is still to use pumpkin puree rather than pumpkin pie filling.
The cream cheese should be softened before mixing. Let it sit out for 30 minutes so it blends smoothly instead of leaving lumps in the filling.
Full-fat cream cheese gives maximum creaminess. Reduced-fat cream cheese works in a pinch, but it should still be softened before mixing.
For the heavy whipping cream, chilling the bowl and beaters first gives the best results. A cold bowl helps the cream whip into a fluffier topping.
Optional Swaps, Variations, Add-Ins, and Serving Ideas
Nutty Crust Upgrade
For a nutty crust, swap half the graham cracker crumbs for finely chopped pecans or walnuts. Toast the nuts first for 5 minutes in a dry pan if you want extra flavor.
This variation adds a little more depth and crunch to the crust. It still keeps the same no-bake layered style.
Dairy-Free Direction
For a dairy-free direction, use coconut oil instead of butter in the crust. Use dairy-free cream cheese, such as Kite Hill, and coconut whipped cream.
This keeps the dessert creamy while moving away from the dairy-based ingredients. The dessert still stays soft, chilled, and pumpkin-forward.
Spice Explorer Variation
Add a pinch of cardamom or allspice to the pumpkin mixture if you want a slightly different spice profile. You can also add a dash of black pepper for a surprising little lift.
These spices should be used as accents. The main fall flavor still comes from cinnamon, ginger, nutmeg, and cloves.
Maple Magic Variation
Replace half the sugar in the filling with real maple syrup. You can also drizzle extra maple syrup on top before serving.
This gives the pudding a warmer sweetness. The maple flavor fits naturally with the pumpkin and spices.
Cookie Crust Swap
If you are out of graham crackers, try gingersnaps or vanilla wafers for the crust. Each one gives the dessert a different feeling while keeping the same layered structure.
Gingersnaps create a stronger spiced crust. Vanilla wafers make the crust softer and sweeter in flavor.
Lighter Topping Option
To lighten the topping, swap half the heavy cream with Greek yogurt. This gives the topping a tangy twist with fewer calories.
The topping will have a different flavor from the classic whipped cream version. It still works with the pumpkin layer because the tanginess balances the sweetness.
Shortcut Topping
If you are short on time, use store-bought whipped cream instead of making your own. This keeps the dessert easy when you need a faster finish.
The homemade topping gives you more control over texture. The shortcut option is there when convenience matters most.
Garnish Ideas
A sprinkle of cinnamon looks simple and pretty on top. Toasted pecans or graham cracker crumbs also make the pudding look more finished.
For holiday serving, tiny maple leaf sprinkles can be added. A drizzle of caramel is another way to make the top feel festive.
Why This No-Bake Pumpkin Dessert Works
Paul’s Pumpkin Patch Pudding works because each layer has a different job. The crust brings buttery crunch, the pumpkin filling brings creamy spice, and the topping brings soft sweetness.
The graham cracker crust keeps the dessert grounded. Its slight crunch gives the silky filling something to rest on, so each bite feels complete instead of one-note.
The pumpkin filling is smooth because the cream cheese is beaten with powdered sugar before being combined with the pumpkin mixture. That separate step helps prevent lumps and gives the filling a creamy base.
The spices bring the fall flavor. Cinnamon leads the way, ginger adds warmth, nutmeg rounds things out, and cloves bring a small but powerful depth.
The whipped topping layer keeps the dessert from feeling too dense. Heavy cream whipped with powdered sugar and vanilla becomes fluffy, then the whipped topping adds even more softness.
The chilling time matters because the layers need time to set. At least 2 hours in the refrigerator lets the crust firm up, the filling settle, and the flavors come together.
Overnight chilling makes the dessert even better. The pumpkin, spices, cream cheese, and crust have more time to become one cozy, spoonable dessert.
Directions
Step 1: Set Up the 9×9-Inch Dish
Choose a 9×9-inch dish for Paul’s Pumpkin Patch Pudding. This size gives the crust, pumpkin filling, and whipped topping enough space to form neat, satisfying layers.
Keep the dish nearby before you start mixing the crust. Since this is a no-bake dessert, the structure comes from pressing, layering, and chilling rather than from oven heat.
A square dish also makes slicing easier once the pudding has chilled. Cold squares hold their shape best when the layers are even from the beginning.
Step 2: Combine the Graham Cracker Crumbs and Sugar
Add 1 ½ cups graham cracker crumbs and ¼ cup granulated sugar to a bowl. Stir them together until the sugar is evenly mixed through the crumbs.
This step is simple, but it matters because the sugar should be spread throughout the crust. You want each bite of crust to taste lightly sweet instead of having sweet patches in only one area.
The crumbs should look dry and sandy at this point. The melted butter will turn that dry mixture into a pressable crust.
Step 3: Add the Melted Butter to the Crust Mixture
Pour ½ cup unsalted butter, melted, over the graham cracker crumbs and sugar. Stir until the crumbs look evenly moistened.
The texture should look like wet sand. Every crumb should have a little buttery coating so the crust can hold together once pressed into the dish.
If the crust feels too crumbly, add another tablespoon of melted butter. If it feels too wet, add a sprinkle more crumbs.
Step 4: Press the Crust Firmly Into the Dish
Transfer the buttery crumb mixture into the 9×9-inch dish. Use the back of a spoon or your fingers to press it firmly into an even layer.
Pressing firmly helps the crust hold its shape when the dessert is sliced. A loose crust may scatter when you scoop or cut into the chilled pudding.
Press the crust up the sides a tiny bit to create a small wall for the filling. That little edge helps contain the pumpkin layer and gives each square a neater base.
Step 5: Whisk the Pumpkin Puree With Sugar and Spices
In a big bowl, add 1 can (15 oz) pumpkin puree, ½ cup granulated sugar, 1 teaspoon ground cinnamon, ½ teaspoon ground ginger, ¼ teaspoon ground nutmeg, ¼ teaspoon ground cloves, and 1 teaspoon vanilla extract. Whisk until the mixture looks smooth and evenly spiced.
This is where the filling begins to smell like fall. The cinnamon, ginger, nutmeg, cloves, and vanilla blend into the pumpkin and create the warm flavor that makes this dessert so comforting.
Taste the pumpkin mixture if you want to check the spice balance. If you want more cinnamon, you can adjust the spices as needed.
Step 6: Beat the Softened Cream Cheese and Powdered Sugar
In another bowl, add 8 oz cream cheese, softened, and 1 cup powdered sugar. Beat them together until the mixture is smooth.
Softened cream cheese is important here because cold cream cheese can leave lumps. Let it sit on the counter for 30 minutes, or microwave it in 5-second bursts if you are impatient.
If the cream cheese is stubborn, it can be microwaved for 10 seconds. Do not let it melt, because melted cream cheese can change the texture of the filling.
Step 7: Combine the Pumpkin Mixture and Cream Cheese Mixture
Add the spiced pumpkin mixture to the beaten cream cheese and powdered sugar. Mix until the filling is totally smooth and creamy.
A hand mixer works well for this step. A sturdy spatula also works in a pinch if you mix carefully and scrape the bowl well.
Scrape the sides of the bowl so no hidden lumps remain. The filling should look creamy, thick, and evenly colored.
Step 8: Stop Mixing Once the Filling Is Smooth
Stop mixing as soon as the pumpkin filling is smooth. Overmixing can make the filling too loose.
This dessert needs the filling to be creamy but stable. Since it is no-bake, the texture depends on careful mixing and enough chilling time.
If the filling looks smooth and there are no obvious lumps, it is ready. There is no need to keep beating it longer.
Step 9: Spread the Pumpkin Filling Over the Crust
Pour the pumpkin filling over the prepared graham cracker crust. Spread it into an even layer with a small offset spatula or a butter knife.
Try to level the surface gently. A smooth layer helps the whipped topping sit evenly on top later.
Be careful not to drag too hard through the crust. The crust is pressed firmly, but gentle spreading helps keep the bottom layer intact.
Step 10: Chill the Bowl and Beaters for the Topping
For the best whipped topping texture, use a chilled bowl and chilled beaters. If you forgot to chill them ahead, pop the bowl in the freezer for 5 minutes.
Cold tools help the heavy whipping cream whip better. This is a small step that makes the topping fluffier and more stable.
You do not need anything fancy. Just a cold bowl, cold beaters, and the right ingredients are enough.
Step 11: Whip the Heavy Cream With Powdered Sugar and Vanilla
In the chilled bowl, add 1 ½ cups heavy whipping cream, ¼ cup powdered sugar, and 1 teaspoon vanilla extract. Beat until stiff peaks form.
Stiff peaks mean the cream holds its shape when the beaters are lifted. It should look fluffy and structured rather than runny.
The powdered sugar sweetens the cream just right. The vanilla adds warmth and makes the topping taste more complete.
Step 12: Fold in the Whipped Topping
Gently fold in 1 cup whipped topping, like Cool Whip. Use a light hand so the topping stays fluffy.
The goal is to combine the whipped cream and whipped topping without deflating the mixture. It should look soft and cloud-like, not runny.
Fold instead of stirring aggressively. This keeps the topping airy, which makes the finished dessert feel light against the creamy pumpkin layer.
Step 13: Spread the Topping Over the Pumpkin Layer
Spoon the whipped topping mixture over the pumpkin filling. Spread it gently from edge to edge.
You can swirl the top if you want a prettier finish. A rustic, simple top is also perfectly fine.
The topping should sit in a soft layer over the pumpkin. Do not press down hard, because the goal is to keep it fluffy.
Step 14: Chill for at Least 2 Hours
Place the assembled pudding in the refrigerator for at least 2 hours. This is the hardest part, but it is also one of the most important steps.
The chilling time lets the crust firm, the pumpkin layer set, and the topping settle. Without enough time in the refrigerator, the dessert may taste good but slice too softly.
The flavors also meld as the pudding chills. The pumpkin and spices become smoother, and the whole dessert feels more complete.
Step 15: Chill Overnight if You Can Wait
If you can resist, chill the dessert overnight. Overnight chilling makes it even better.
The longer rest gives the layers more time to settle. It also helps the filling become cold, creamy, and easier to slice.
This makes Paul’s Pumpkin Patch Pudding a wonderful make-ahead dessert. You can prepare it the day before and serve it without last-minute stress.
Step 16: Slice the Pudding Cold
Slice the pudding while it is cold. It holds its shape best when chilled.
For cleaner slices, run a knife under hot water and dry it quickly before cutting. This helps the blade glide through the whipped topping and pumpkin layer more neatly.
Cold slicing is especially helpful if you want picture-perfect squares. The layers stay more defined when the dessert is fully chilled.
Step 17: Garnish Before Serving
Before serving, add any toppings you like from the garnish options. A sprinkle of cinnamon, toasted pecans, or graham cracker crumbs can make the top look finished.
For a holiday table, tiny maple leaf sprinkles can add a seasonal touch. A drizzle of caramel also makes the pudding feel extra special.
Keep the garnish simple if you want the pumpkin flavor to shine. This dessert already has plenty of flavor from the crust, filling, and topping.
Serving Ideas
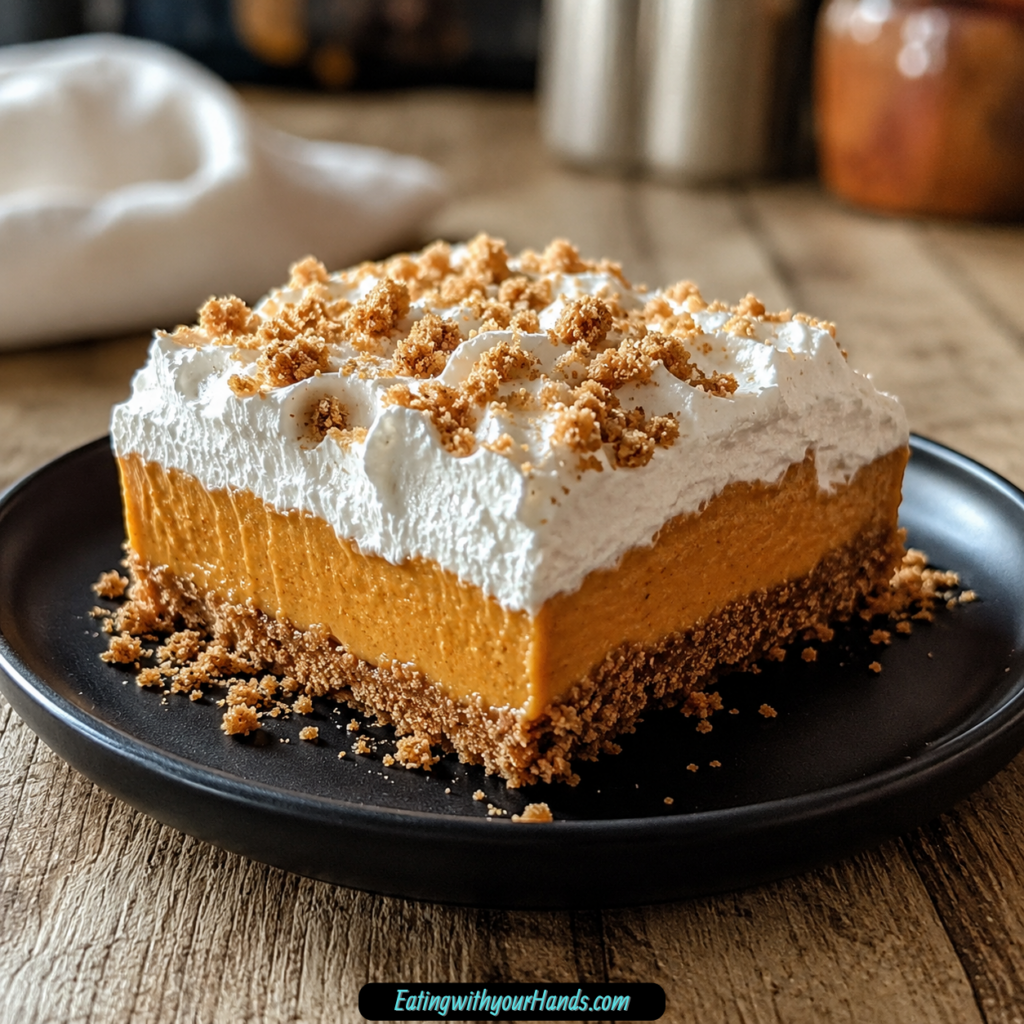
Paul’s Pumpkin Patch Pudding is best served cold. The chilled texture helps the crust, pumpkin filling, and whipped topping stay in clean layers.
This dessert is lovely after dinner because it feels creamy and satisfying without needing to be warm. It is also a sweet choice for cozy nights in, Thanksgiving potlucks, or fall gatherings.
For a pretty finish, sprinkle cinnamon over the top. Toasted pecans or a few graham cracker crumbs also make each serving look more inviting.
For holidays, tiny maple leaf sprinkles can make the dessert feel festive. A drizzle of caramel gives it a sweeter, more decadent finish.
Use the hot-knife trick for neat squares. Run a knife under hot water, dry it quickly, and slice while the pudding is still cold.
If serving a crowd, double the recipe in a 9×13-inch dish. This keeps the same layered idea but gives you more pudding to share.
Storage
Cover Paul’s Pumpkin Patch Pudding tightly with plastic wrap and store it in the refrigerator. It keeps for up to 4 days.
For the best texture, keep it cold until serving. The layers hold their shape better when chilled.
The crust may soften a little over time. The flavor gets better as it rests, so the softer crust is not a problem if you enjoy a creamy chilled dessert.
To help prevent condensation, press a piece of parchment onto the whipped topping. This is especially useful when the dessert will sit in the refrigerator for more than a short time.
Plastic wrap can also be pressed right onto the topping to help prevent it from absorbing fridge smells. Keep the dessert tightly covered so it stays fresh.
Reheating
Paul’s Pumpkin Patch Pudding is not a reheated dessert. It is meant to be served chilled from the refrigerator.
Because the filling and whipped topping are creamy and no-bake, heating would change the texture. The best serving method is to keep it cold and slice it after it has set.
If the pudding has been frozen, thaw it in the refrigerator overnight. Serve it cold after thawing, knowing the topping will not be quite as fluffy as it was fresh.
Freezing
Yes, Paul’s Pumpkin Patch Pudding can be frozen. Wrap individual slices tightly and freeze them for up to 2 months.
Thaw frozen slices in the refrigerator overnight before serving. This gives the layers time to soften gradually.
The topping will not be quite as fluffy after freezing and thawing. The dessert will still be sweet and creamy, but the fresh topping texture is best before freezing.
For best results, freeze portions rather than repeatedly thawing the entire dessert. Individual slices are easier to manage and help preserve the remaining pieces.
Make-Ahead
Paul’s Pumpkin Patch Pudding is a very helpful make-ahead dessert. You can assemble it up to 2 days before Thanksgiving or another gathering.
For maximum fluffiness, add the whipped topping the day of serving. This keeps the top layer as light as possible.
If you are making the entire dessert ahead, keep it covered tightly in the refrigerator. The dessert needs at least 2 hours to chill, but overnight chilling makes it even better.
This make-ahead flexibility is one of the reasons the recipe is so useful for holidays. It gives you a creamy pumpkin dessert ready to serve while the rest of the meal gets your attention.
Helpful Notes for Best Results
Double-check the pumpkin can before you begin. You need pumpkin puree, not pumpkin pie filling.
Pumpkin pie filling already includes added sugar and spices. This recipe uses plain pumpkin puree so the sweetness and spices can be controlled in the filling.
Let the cream cheese soften for 30 minutes. Cold cream cheese can turn the filling lumpy, and softened cream cheese blends much more smoothly.
If you are short on time, microwave the cream cheese in 5-second bursts. If it is especially stubborn, 10 seconds can help, but do not let it melt.
Do not overmix the pumpkin filling after it becomes smooth. Overmixing can make the filling too loose.
Chill the bowl and beaters before whipping the heavy cream. This gives the topping the best chance to become light and fluffy.
If the filling becomes lumpy, run it through a sieve or give it a quick blitz with an immersion blender. Lumps happen, but they can be fixed.
If using fresh pumpkin, squeeze out excess moisture in a cheesecloth. Too much moisture can make the filling soggy.
Variations
Nutty Pumpkin Patch Pudding
Swap half the graham cracker crumbs for finely chopped pecans or walnuts. Toast them first for 5 minutes in a dry pan for extra flavor.
This gives the crust a deeper, nuttier crunch. It is a lovely option when you want the crust to feel a little more special.
Dairy-Free Pumpkin Patch Pudding
Use coconut oil instead of butter in the crust. Use dairy-free cream cheese, such as Kite Hill, and coconut whipped cream.
This version keeps the pudding creamy while changing the dairy-based ingredients. The flavor will be slightly different, but the dessert stays soft and fall-inspired.
Extra-Spiced Pumpkin Patch Pudding
Add a pinch of cardamom or allspice to the pumpkin mixture. You can also add a dash of black pepper.
These additions make the spice flavor a little more unexpected. Use them carefully so they support the pumpkin rather than overpower it.
Maple Pumpkin Patch Pudding
Replace half the sugar in the filling with real maple syrup. Drizzle extra maple syrup on top before serving if you want more maple flavor.
This variation gives the pudding a gentle maple sweetness. It pairs naturally with the pumpkin and warm spices.
Gingersnap Crust
Use gingersnaps instead of graham crackers for the crust. This gives the dessert a stronger spice flavor.
The gingersnap crust works especially well if you love bold fall spices. It changes the personality of the dessert while keeping the no-bake method.
Vanilla Wafer Crust
Use vanilla wafers instead of graham crackers for the crust. This gives the pudding a sweeter, softer cookie flavor.
Vanilla wafers make the crust feel gentle and classic. They are a good option when you want the pumpkin filling to stay the main focus.
Greek Yogurt Topping
Swap half the heavy cream with Greek yogurt in the topping. This adds a tangy twist with fewer calories.
The texture and flavor will be different from the classic topping. It is a nice option when you want a little brightness against the sweet pumpkin layer.
Troubleshooting
Why Is My Crust Too Crumbly?
The crust may need more moisture. Add another tablespoon of melted butter if it feels too crumbly.
The mixture should look like wet sand. If it still looks dry and loose, it may not hold together well after chilling.
Why Is My Crust Too Wet?
If the crust seems too wet, add a sprinkle more crumbs. This brings the texture back toward a pressable crumb mixture.
The crust should not feel greasy or soupy. It should press firmly into the dish and hold its shape.
Why Is My Filling Lumpy?
The cream cheese may have been too cold. Let it soften for 30 minutes before beating it with the powdered sugar.
If the filling is already lumpy, run it through a sieve or give it a quick blitz with an immersion blender. This can smooth it out without starting over.
Why Is My Filling Too Loose?
The filling may have been overmixed. Stop mixing once the pumpkin mixture and cream cheese mixture are smooth.
The dessert also needs proper chilling time. Chill it for at least 2 hours so the layers can set.
Why Is My Filling Soggy?
Too much moisture may be the problem. If using fresh pumpkin, squeeze out excess moisture in a cheesecloth first.
Use sugar pumpkin rather than carving pumpkins when making fresh pumpkin puree. Carving pumpkins are too watery for this filling.
Why Is My Whipped Topping Runny?
The heavy cream may not have reached stiff peaks before the whipped topping was folded in. Beat the heavy cream, powdered sugar, and vanilla until it holds its shape.
A chilled bowl and chilled beaters help the cream whip better. If you forgot, put the bowl in the freezer for 5 minutes before whipping.
Why Does the Dessert Not Slice Cleanly?
It may not be cold enough. This pudding holds its shape best when fully chilled.
Use a hot, dry knife for cleaner cuts. Run the knife under hot water, dry it quickly, and slice the pudding while cold.
Frequently Asked Questions
Can I Use Fresh Pumpkin Instead of Canned?
Yes, fresh pumpkin can be used. Roast and puree about 2 cups of sugar pumpkin.
Do not use carving pumpkins because they are too watery. Squeeze out excess moisture in a cheesecloth first so the filling does not become soggy.
How Long Does This Pudding Last in the Fridge?
It is happiest eaten within 4 days. Keep it covered tightly in the refrigerator.
Press plastic wrap right onto the topping to help prevent it from absorbing fridge smells. You can also use parchment on the whipped topping to help prevent condensation.
Can I Make This Ahead for Thanksgiving?
Yes, it can be assembled up to 2 days before Thanksgiving. For maximum fluffiness, add the whipped topping the day of serving.
This makes the dessert very helpful for a busy holiday. The pumpkin layer can chill while you focus on the rest of the meal.
Can I Freeze Paul’s Pumpkin Patch Pudding?
Yes, you can freeze it. Wrap individual slices tightly and store them for up to 2 months.
Thaw the slices in the refrigerator overnight. Just know the topping will not be quite as fluffy after freezing.
Can I Double the Recipe?
Yes, if you are serving a crowd, double the recipe in a 9×13-inch dish. This gives you more pudding while keeping the same layered dessert idea.
A larger dish is perfect for potlucks and holidays. More servings are especially helpful when everyone wants a second piece.
Can I Use Pumpkin Pie Filling?
No, use pumpkin puree. Pumpkin pie filling already has sugar and spices added.
This recipe uses pumpkin puree so the sugar, cinnamon, ginger, nutmeg, cloves, and vanilla can be added in the right amounts. Always double-check the can label before starting.
What If I Do Not Have Graham Crackers?
Use gingersnaps or vanilla wafers for the crust. Both options keep the dessert no-bake and easy.
Gingersnaps make the crust spicier. Vanilla wafers make it sweeter and softer in flavor.
Can I Use Store-Bought Whipped Cream?
Yes, store-bought whipped cream can be used if you are out of time. It is a helpful shortcut.
The homemade topping gives you a fluffy, layered finish. The shortcut version keeps things simple when speed matters.
How Do I Make Cleaner Slices?
Slice the pudding cold. Run a knife under hot water, dry it quickly, and cut into squares.
Cold layers hold together better. The hot knife helps glide through the topping and filling more cleanly.
Why This Recipe Works So Well
Paul’s Pumpkin Patch Pudding works so well because it gives you the feeling of a fall dessert without the work of baking. It is creamy, spiced, chilled, and layered, which makes it feel both easy and special.
The graham cracker crust adds a buttery base that contrasts with the soft pumpkin filling. Pressing it firmly into the dish gives the dessert structure and makes the chilled squares easier to serve.
The pumpkin filling has depth because the pumpkin puree is mixed with sugar, cinnamon, ginger, nutmeg, cloves, and vanilla. The cream cheese and powdered sugar make it smooth, creamy, and rich.
The topping adds the final soft layer. Heavy whipping cream creates body, powdered sugar sweetens it, vanilla warms it, and whipped topping makes it extra fluffy.
The chilling time pulls everything together. At least 2 hours in the refrigerator lets the layers set, while overnight chilling makes the dessert even better.
This recipe also works because it is flexible without becoming complicated. You can keep it classic, add maple, change the crust, make it dairy-free, freeze slices, or prepare it ahead for Thanksgiving.
Most of all, it works because it feels like fall in a dish. Every cold, creamy forkful carries pumpkin spice warmth, buttery crumbs, and that gentle whipped topping finish.
Final Thoughts
Paul’s Pumpkin Patch Pudding is the kind of dessert that makes the season feel a little sweeter. It is simple, creamy, full of pumpkin spice comfort, and easy enough to make without turning the kitchen upside down.
I love that it can sit quietly in the refrigerator while the rest of the day unfolds. When it is time to serve, it comes out chilled, layered, and ready for cinnamon, toasted pecans, graham crumbs, caramel, or whatever little touch makes it feel like yours.
Make it for a Thanksgiving table, a cozy dinner, or one of those crisp evenings when dessert feels like a small celebration. With its buttery graham cracker crust, silky pumpkin filling, and fluffy topping, Paul’s Pumpkin Patch Pudding is a no-bake fall favorite worth making all season long.
Paul’s Pumpkin Patch Pudding
This creamy pumpkin pudding dessert has a buttery graham cracker crust, a smooth spiced pumpkin cream cheese filling, and a fluffy whipped topping. It is a chilled fall dessert that works beautifully for Thanksgiving, autumn gatherings, potlucks, or any time you want pumpkin flavor without baking.
Recipe Details
- Prep Time: 20 minutes
- Total Time: 20 minutes
- Course: Dessert
- Cuisine: American
- Servings: 8 people
Equipment
- Mixing bowl
- Whisk
- Hand mixer
- 9×9 inch baking dish
Ingredients
For the Crust
- ½ cup unsalted butter, melted
- 1 ½ cups graham cracker crumbs about 10-12 full graham crackers
- ¼ cup granulated sugar
For the Pumpkin Filling
- 8 oz cream cheese, softened
- 1 cup powdered sugar
- 1 can pumpkin puree 15 oz
- 1 teaspoon vanilla extract
- ½ cup granulated sugar
- 1 teaspoon ground cinnamon
- ¼ teaspoon ground cloves
- ½ teaspoon ground ginger
- ¼ teaspoon ground nutmeg
For the Whipped Topping
- 1 ½ cups heavy whipping cream
- 1 teaspoon vanilla extract
- ¼ cup powdered sugar
- 1 cup whipped topping such as Cool Whip
Instructions
Step 1: Make the Graham Cracker Crust
Combine the graham cracker crumbs, granulated sugar, and melted butter in a bowl. Press the mixture firmly into the bottom of a 9×9 inch baking dish to create an even crust layer.
Step 2: Mix the Pumpkin and Spices
In a large bowl, mix the pumpkin puree, granulated sugar, cinnamon, ginger, nutmeg, cloves, and vanilla extract until everything is well combined.
Step 3: Beat the Cream Cheese Mixture
In a separate bowl, beat the softened cream cheese and powdered sugar until smooth.
Step 4: Finish the Pumpkin Filling
Add the pumpkin mixture to the cream cheese mixture and mix until fully incorporated.
Step 5: Layer the Filling
Spread the pumpkin filling evenly over the graham cracker crust.
Step 6: Whip the Cream
In another bowl, whip the heavy cream, powdered sugar, and vanilla extract until stiff peaks form.
Step 7: Fold in the Whipped Topping
Fold the whipped topping into the whipped cream mixture until combined.
Step 8: Add the Topping and Chill
Spread the whipped topping over the pumpkin filling. Chill in the refrigerator for at least 2 hours before serving.
Notes
For a nuttier crust, replace half of the graham cracker crumbs with finely chopped pecans or walnuts.
Serving Suggestions
- Serve chilled as a no-bake-style fall dessert after dinner.
- Add it to a Thanksgiving or autumn potluck dessert table.
- Pair with hot coffee, spiced tea, or apple cider.
- Slice into squares and serve directly from the 9×9 inch baking dish.
- Top each serving with a small sprinkle of cinnamon for a simple finished look.
Storage
How to Refrigerate
Cover the 9×9 inch baking dish tightly or transfer leftovers to an airtight container. Keep refrigerated until ready to serve again.
How to Make Ahead
This dessert works well when chilled before serving because the pumpkin filling and whipped topping need time to set. Chill in the refrigerator for at least 2 hours before serving.
Best Texture Tip
Serve the pudding cold so the graham cracker crust holds together better and the pumpkin filling stays creamy and sliceable.

Fernando is the creator and writer behind the food blog Eating with your Hands. Living and working in cities like Paris, Barcelona, and Berlin, and being married to a Canadian foodie, has given Fernando a passion and interest in food and inspired him to run EWYH.