
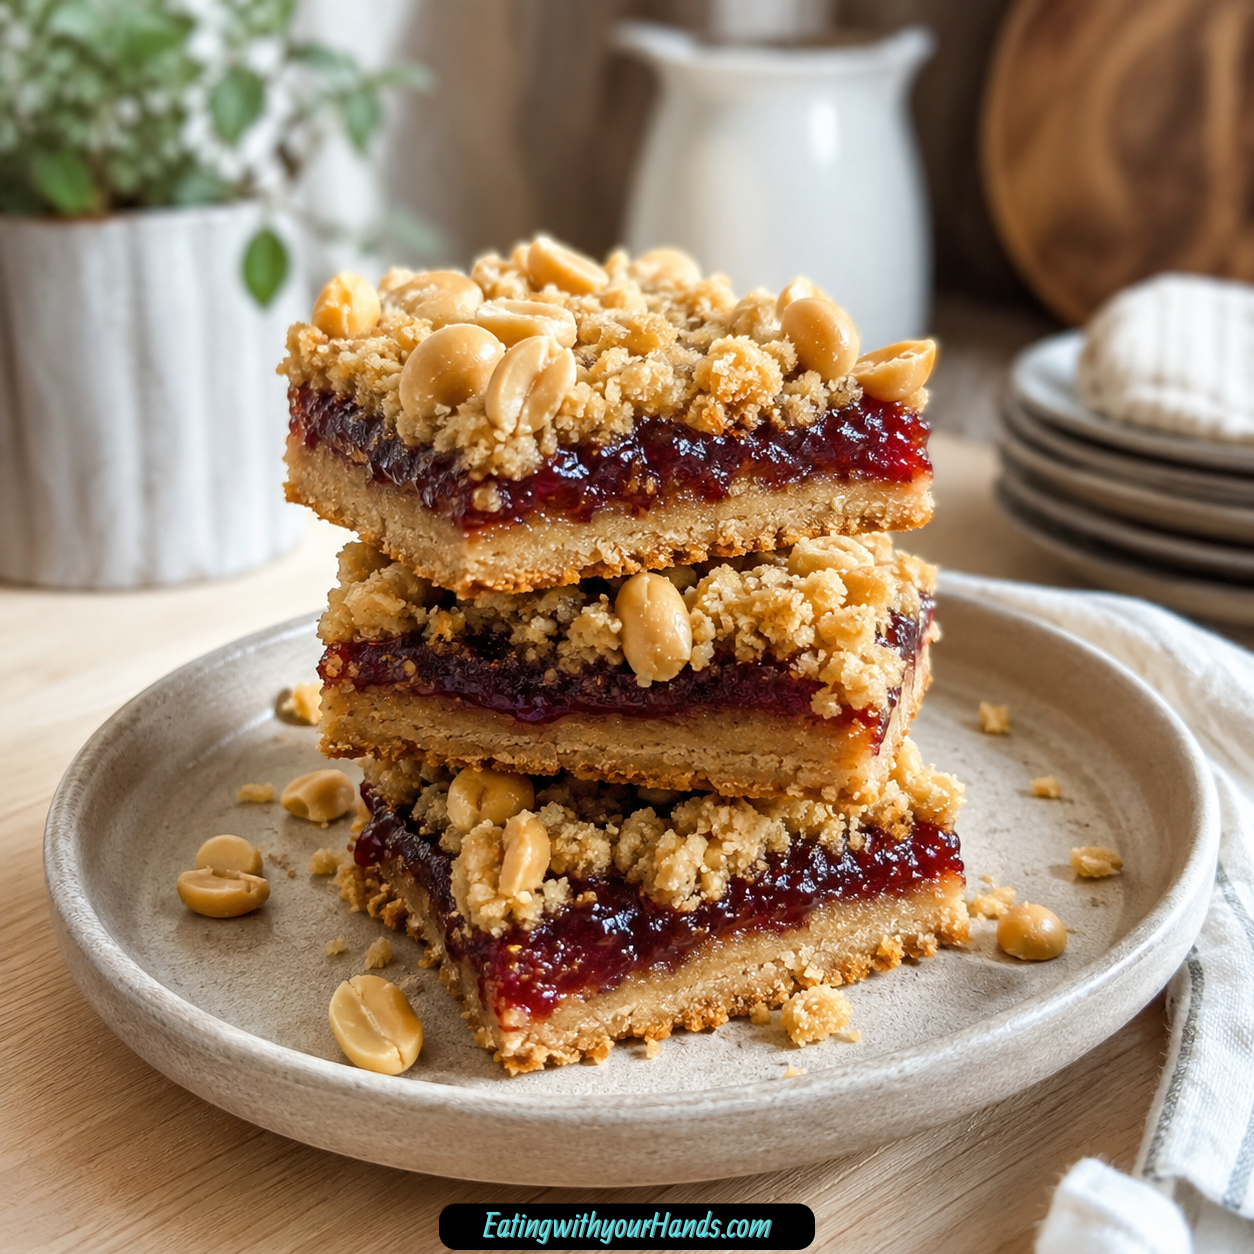
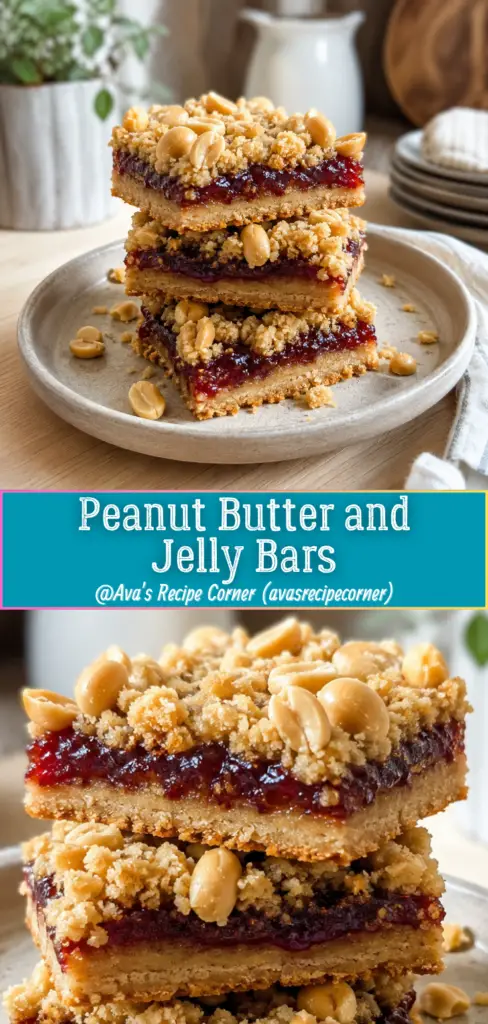
Peanut Butter and Jelly Bars are the kind of dessert that can make a regular afternoon feel like a memory you want to keep. They take the familiar comfort of peanut butter and jelly and turn it into soft, chewy, golden bars with a sweet jam center and crunchy salted peanuts on top.
I love recipes that feel simple but still carry a little emotion with them. These bars have that old kitchen-table feeling, the kind that brings back school lunches, family snacks, lazy Sunday baking, and the warm smell of peanut butter drifting through the house.
There is something special about turning a classic flavor pairing into a baked treat. Peanut butter gives the bars richness, brown sugar adds chewiness, grape jelly brings that sweet fruity layer, and chopped salted peanuts give the top a little crunch.
This is the kind of recipe that works for family gatherings, school bake sales, parties, lunchbox treats, or an afternoon pick-me-up. It is quick to prepare, easy to share, and comforting in a way that feels both playful and homemade.
The best part is how practical it is. The ingredients are simple pantry staples, the prep takes just about 15 minutes, and the bars freeze beautifully if you want to save some for later.
Table of Contents
- Why You’ll Love These Peanut Butter and Jelly Bars
- Recipe Details
- Ingredients
- Optional Swaps, Variations, Add-Ins, and Serving Ideas
- Why These Peanut Butter and Jelly Bars Work
- Directions
- Step 1: Preheat the Oven
- Step 2: Prepare the Baking Pan
- Step 3: Start the Peanut Butter Mixture
- Step 4: Cream the Peanut Butter, Brown Sugar, and Butter
- Step 5: Add the Egg
- Step 6: Add the Vanilla
- Step 7: Whisk the Dry Ingredients
- Step 8: Combine the Dry and Wet Mixtures
- Step 9: Mix Just Until Combined
- Step 10: Divide the Dough
- Step 11: Press the Bottom Layer Into the Pan
- Step 12: Add the Jelly Layer
- Step 13: Add the Remaining Dough
- Step 14: Add the Salted Peanuts
- Step 15: Bake the Bars
- Step 16: Check for Doneness
- Step 17: Cool Completely
- Step 18: Slice Into Bars
- Serving Ideas
- Storage
- Reheating
- Freezing
- Make-Ahead
- Helpful Notes for Best Results
- Variations
- Troubleshooting
- Frequently Asked Questions
- Why This Recipe Works So Well
- Final Thoughts
- Peanut Butter and Jelly Bars
- Recipe Details
- Equipment
- Ingredients
- Instructions
- Step 1: Prepare the Baking Pan
- Step 2: Mix the Peanut Butter Base
- Step 3: Add the Egg and Vanilla
- Step 4: Combine the Dry Ingredients
- Step 5: Finish the Dough
- Step 6: Add the First Dough Layer
- Step 7: Add the Jelly Layer
- Step 8: Add the Remaining Dough and Peanuts
- Step 9: Bake Until Golden
- Step 10: Cool and Slice
- Notes
- Serving Suggestions
- Storage
Why You’ll Love These Peanut Butter and Jelly Bars
These bars are quick and easy to prepare. You can have them ready for the oven in about 15 minutes.
They use minimal ingredients. Peanut butter, brown sugar, butter, egg, vanilla, flour, salt, baking powder, jelly, and peanuts come together with very little fuss.
They are family-friendly. Kids love the peanut butter and jelly flavor, while adults appreciate the nostalgic comfort.
They are great for sharing. Cut them into squares or rectangles and bring them to parties, bake sales, or family gatherings.
They are freezer-friendly. You can make a double batch and save some for later.
They are easy to change. Try a different jelly, add chocolate chips, mix in oats, or use fun candy pieces for a colorful twist.
Recipe Details
These Peanut Butter and Jelly Bars bake at 350°F (175°C). A 9×13-inch baking pan works perfectly for this recipe.
The baking pan should be greased with butter or non-stick spray before the dough is added. This helps the bars come out easily after baking.
The peanut butter base uses 1 cup crunchy peanut butter, ¾ cup packed light brown sugar, ½ cup softened unsalted butter, 1 large room-temperature egg, and 1 teaspoon vanilla extract. Creamy peanut butter can be used if that is your preference.
The dry ingredients are 1 ¾ cups all-purpose flour, ¾ teaspoon salt, and ½ teaspoon baking powder. These should be whisked together separately before being added to the peanut butter mixture.
The filling uses ¾ cup grape jelly or jam. You can experiment with favorite flavors such as strawberry, raspberry, or apricot.
The top is finished with ½ cup coarsely chopped salted peanuts. They give the bars extra crunch and balance the sweetness.
The bars bake for about 25 minutes. They are done when the edges are golden brown and a toothpick comes out mostly clean with a few crumbs.
Ingredients
Peanut Butter Dough
1 cup crunchy peanut butter
¾ cup light brown sugar, packed
½ cup unsalted butter, softened to room temperature
1 large egg, at room temperature
1 teaspoon vanilla extract
Dry Ingredients
1 ¾ cups all-purpose flour
¾ teaspoon salt
½ teaspoon baking powder
Jelly Layer and Topping
¾ cup grape jelly or jam
½ cup salted peanuts, coarsely chopped
Ingredient Notes
Crunchy peanut butter gives the bars texture and strong peanut flavor. Creamy peanut butter can be used if you prefer a smoother bar.
Light brown sugar gives the dough sweetness and chewiness. It should be packed into the measuring cup.
Unsalted butter should be softened to room temperature. Soft butter blends smoothly with the peanut butter and brown sugar.
A room-temperature egg mixes more evenly into the dough. It helps bind the bars together.
Vanilla extract adds a warm background flavor. Pure vanilla gives a richer flavor if you have it.
All-purpose flour gives the bars structure. A gluten-free flour blend can be used if needed.
Salt balances the sweetness and peanut butter richness. Baking powder helps the bars bake up properly.
Grape jelly or jam gives the classic peanut butter and jelly flavor. You can use other favorite flavors if you want a fruity change.
Salted peanuts add crunch on top. Coarsely chopping them keeps the texture noticeable.
Optional Swaps, Variations, Add-Ins, and Serving Ideas
Creamy Peanut Butter Bars
Use creamy peanut butter instead of crunchy peanut butter. This creates a smoother dough with less texture inside.
The salted peanut topping still gives the bars crunch. This option is great if you like a softer peanut butter layer.
Strawberry Peanut Butter Bars
Swap the grape jelly for strawberry jam. This gives the bars a bright, fruity flavor.
Strawberry is a familiar pairing with peanut butter. It makes the bars feel slightly sweeter and more playful.
Raspberry Peanut Butter Bars
Use raspberry jam instead of grape jelly. The flavor becomes a little more tart.
Raspberry works especially well if you want the filling to balance the sweetness. It also gives the bars a deeper fruit note.
Apricot Jam Bars
Use apricot jam for a different fruity twist. It gives the bars a golden, sweet flavor.
This variation changes the classic peanut butter and jelly feeling in a fun way. It still works beautifully with the peanut butter base.
Chocolate Chip Peanut Butter and Jelly Bars
Add ½ cup chocolate chips to the dough. This gives the bars a chocolatey twist.
Chocolate works naturally with peanut butter. It makes the bars feel more dessert-like.
Mini Chocolate Chip or M&M Bars
Mix in mini chocolate chips or M&Ms for a colorful touch. This is especially fun for parties or kids’ treats.
The candy or chips add sweetness and texture. Fold them in gently so the dough stays workable.
Cinnamon Peanut Butter Bars
Add a sprinkle of cinnamon to the dough. It gives the bars a warm, cozy flavor.
This is a simple variation that does not change the core recipe. It makes the peanut butter taste a little softer and warmer.
Oat Peanut Butter and Jelly Bars
Add about ½ cup oats for extra texture and flavor. The oats make the bars feel a little heartier.
This variation keeps the same nostalgic flavor. It just gives the dough more chew.
Dairy-Free Version
Use coconut oil instead of butter. Use a plant-based egg substitute in place of the egg.
The texture may change, but the bars can still be delicious. Make sure the dough remains spreadable.
Gluten-Free Version
Use a gluten-free flour blend in place of all-purpose flour. Check that the baking powder is gluten-free as well.
The texture might be slightly different. Bake until the edges are golden and the center is set.
Nut-Free Alternative
Use sunflower seed butter instead of peanut butter for a nut allergy-friendly direction. This gives a different flavor but keeps the spreadable base idea.
Skip the salted peanuts or use an appropriate topping that fits your needs. The bars will not taste the same, but they can still be a sweet layered treat.
Why These Peanut Butter and Jelly Bars Work
These bars work because they turn a beloved flavor combination into a simple baked dessert. The peanut butter dough is rich and tender, while the jelly adds a sweet fruit layer.
The brown sugar helps create a chewy texture. It also gives the dough a deeper flavor than plain sweetness alone.
Softened butter blends into the peanut butter and sugar smoothly. This creates a base that spreads well in the pan.
The egg helps hold the dough together. Vanilla adds warmth and makes the peanut butter flavor feel fuller.
The dry ingredients give the bars enough structure to slice. Baking powder helps them bake evenly instead of becoming too dense.
The salted peanut topping is important because it adds crunch. It also balances the sweetness of the jelly and brown sugar.
Directions
Step 1: Preheat the Oven
Preheat your oven to 350°F (175°C). This gives the bars a steady baking temperature.
Let the oven fully preheat before placing the pan inside. A properly heated oven helps the edges turn golden and the center set.
While the oven warms, gather your ingredients and prepare the baking pan. This makes the baking process feel smooth from start to finish.
Step 2: Prepare the Baking Pan
Use a 9×13-inch baking pan for this recipe. Grease it with butter or non-stick spray.
Coat the bottom and sides so the bars release more easily after cooling. This step also makes slicing and serving simpler.
Set the prepared pan aside. Once the dough is mixed, you will press half of it into the bottom.
Step 3: Start the Peanut Butter Mixture
In a mixing bowl, add 1 cup crunchy peanut butter. If you prefer a smoother texture, creamy peanut butter can be used.
Add ¾ cup packed light brown sugar. Make sure the brown sugar is packed firmly so the amount is accurate.
Add ½ cup softened unsalted butter. The butter should be soft enough to mix smoothly, not melted.
Step 4: Cream the Peanut Butter, Brown Sugar, and Butter
Use a wooden spoon or hand mixer to combine the peanut butter, brown sugar, and softened butter. Mix until smooth and creamy.
Take your time with this step. The mixture should not have large butter clumps or dry sugar pockets.
A smooth base makes the dough easier to mix and spread. It also helps the bars bake evenly.
Step 5: Add the Egg
Crack in 1 large egg. The egg should be at room temperature for better mixing.
Mix until the egg is fully blended into the peanut butter mixture. The dough base should look softer and more cohesive.
Room-temperature egg helps the mixture come together more smoothly. If it is cold, mix a little longer until evenly combined.
Step 6: Add the Vanilla
Pour in 1 teaspoon vanilla extract. Mix it into the peanut butter mixture.
Vanilla adds a warm flavor that supports the peanut butter and jelly. It gives the bars a more rounded sweetness.
Once mixed, scrape the sides of the bowl if needed. This keeps everything evenly blended.
Step 7: Whisk the Dry Ingredients
In a separate bowl, add 1 ¾ cups all-purpose flour, ¾ teaspoon salt, and ½ teaspoon baking powder. Whisk them together.
This helps distribute the salt and baking powder evenly. It prevents one section of dough from tasting too salty or rising unevenly.
The dry mixture should look uniform before adding it to the peanut butter base. This small step makes the final texture better.
Step 8: Combine the Dry and Wet Mixtures
Gradually add the dry mixture to the peanut butter mixture. Stir gently as you add it.
Do not dump everything in at once if you want easier mixing. Gradual additions help the dough come together without overworking it.
The dough will be somewhat thick. That is exactly what you want for bars that can hold the jelly layer.
Step 9: Mix Just Until Combined
Stir only until the flour disappears into the dough. Stop once the mixture looks combined.
Overmixing can make the bars less tender. The dough should be sticky but spreadable.
If it looks thicker than expected, do not panic. Peanut butter bar dough is meant to have body.
Step 10: Divide the Dough
Take about half of the dough for the bottom layer. Keep the remaining dough for the top.
The bottom layer should be thick enough to support the jelly. The top layer will be dropped over the jelly and spread gently.
If needed, lightly dampen your fingers to make pressing easier. The dough may be sticky.
Step 11: Press the Bottom Layer Into the Pan
Spread half of the dough evenly into the bottom of the prepared baking pan. Use your fingers to pat it down gently.
Try to create an even layer from corner to corner. This gives the bars a steady base.
Do not press too hard. A gentle, even pat is enough.
Step 12: Add the Jelly Layer
Spoon ¾ cup grape jelly or jam over the bottom dough layer. Spread it evenly.
It does not need to look perfect. A rustic layer is completely fine.
Keep the jelly mostly over the dough and avoid pushing it too hard into the edges. This helps prevent sticky overflow.
Step 13: Add the Remaining Dough
Take the remaining dough and drop spoonfuls over the jelly layer. Spread gently to cover the jelly as much as possible.
The top does not need to be perfectly smooth. Small gaps and rustic patches are part of the charm.
Work carefully so you do not drag all the jelly into the dough. Gentle spreading keeps the layers more distinct.
Step 14: Add the Salted Peanuts
Sprinkle ½ cup coarsely chopped salted peanuts over the top. Spread them evenly.
The peanuts add crunch and a salty finish. They also make the bars look inviting before baking.
Press them very lightly if needed so they settle into the top. Do not flatten the dough too much.
Step 15: Bake the Bars
Place the pan in the preheated oven. Bake for about 25 minutes.
Watch for golden brown edges. The top should look set, and the bars should smell like warm peanut butter and sugar.
Avoid overbaking if you want a chewy texture. The bars will firm more as they cool.
Step 16: Check for Doneness
Use a toothpick to test the bars if needed. It should come out mostly clean, with a few crumbs okay.
Some jelly may cling if you hit the center filling. Test in a dough section for the clearest result.
Golden edges are another good sign. The center should not look wet or raw.
Step 17: Cool Completely
Remove the pan from the oven and let the bars cool completely. This is important before slicing.
The jelly layer needs time to settle. If you cut too soon, the bars may crumble or smear.
Waiting can be hard, but it gives cleaner slices. The texture improves as the bars cool.
Step 18: Slice Into Bars
Once fully cooled, cut the bars into squares or rectangles. Choose the size based on how you want to serve them.
Use a sharp knife and wipe between cuts if the jelly sticks. This keeps the edges neater.
Place the bars on a plate or store them right away. They are best at room temperature.
Serving Ideas
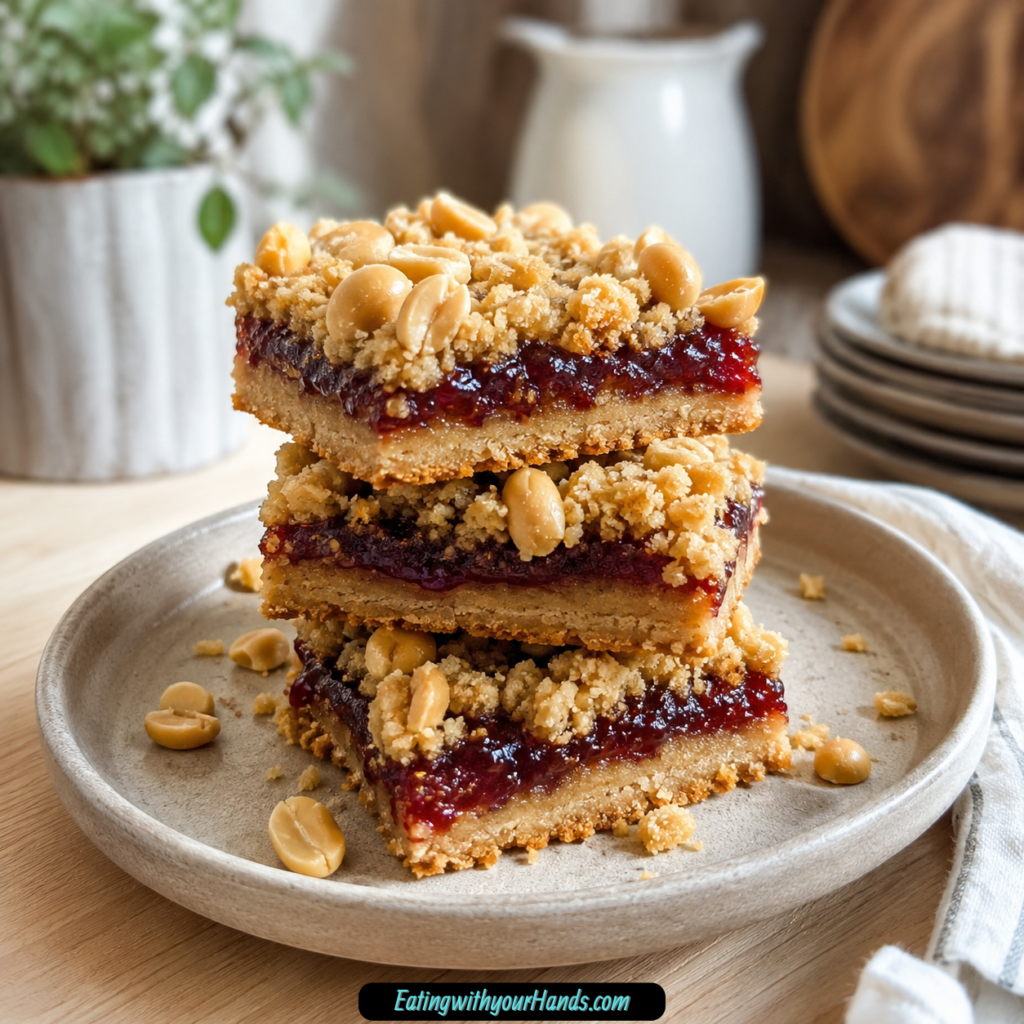
Serve Peanut Butter and Jelly Bars at room temperature. This lets the peanut butter dough and jelly layer taste balanced.
Cut them into squares for parties or rectangles for a lunchbox-style treat. Either shape works well.
Serve with a glass of cold milk for a classic pairing. The milk balances the peanut butter richness.
A warm cup of tea also works beautifully. It makes the bars feel like a cozy afternoon snack.
For special occasions, dust the bars lightly with powdered sugar. This adds a simple touch of sweetness and makes them look more finished.
These bars are great for bake sales, family gatherings, school treats, or casual dessert plates. They are easy to transport and easy to share.
Storage
Store the cooled bars in an airtight container at room temperature. They will stay fresh for up to 1 week.
Make sure the bars are fully cooled before storing. Warm bars can create steam and soften the texture.
Keep the container sealed between servings. This helps maintain the chewy texture.
If stacking the bars, place them carefully so the jelly layer does not stick too much. A little parchment between layers can help if needed.
Reheating
These bars do not need reheating. They are best served at room temperature.
If you want a fresh-baked feel, warm one briefly in the microwave for a few seconds. The jelly and peanut butter will soften slightly.
Do not overheat them. Too much heat can make the jelly runny.
Let the warmed bar sit for a moment before eating. The center can become hot quickly.
Freezing
Peanut Butter and Jelly Bars freeze wonderfully. Wrap them tightly in plastic wrap, then place them in a freezer-safe bag.
They will keep in the freezer for up to 3 months. This makes them a great make-ahead treat.
When ready to enjoy, thaw them at room temperature. You can also warm them in the microwave for a few seconds.
Freeze individual bars if you want easy portions. That way, you can pull out only what you need.
Make-Ahead
These bars are excellent for making ahead. Bake them, cool them fully, slice them, and store them in an airtight container.
They keep at room temperature for up to 1 week. For longer storage, freeze them for up to 3 months.
A double batch is useful if you want some now and some later. The bars hold their flavor well when wrapped properly.
Make sure the bars are completely cooled before wrapping. This keeps the texture from turning too soft.
Helpful Notes for Best Results
Use room-temperature butter and egg for smoother mixing. This helps the dough come together without clumps.
Do not overmix after adding the dry ingredients. Mix just until combined.
The dough should be thick, sticky, and spreadable. That texture helps support the jelly.
Use grape jelly for the classic flavor, or choose another jam if you prefer. Strawberry, raspberry, and apricot all work.
If you are out of brown sugar, granulated sugar can be used. The bars may be a little less chewy.
For nut allergies, sunflower seed butter can be used instead of peanut butter. The flavor will be different, but it is a helpful alternative.
If you prefer a less sweet treat, reduce the sugar carefully and watch the texture. Sugar affects both sweetness and structure.
Variations
Chocolate Chip Peanut Butter and Jelly Bars
Add ½ cup chocolate chips to the dough. This gives the bars a chocolatey twist.
The chocolate pairs well with peanut butter and jelly. It makes the bars feel even more dessert-like.
Strawberry Jam Bars
Use strawberry jam instead of grape jelly. This gives the bars a bright, sweet fruit flavor.
Strawberry keeps the nostalgic feel. It just changes the fruit layer.
Raspberry Jam Bars
Use raspberry jam for a slightly tart variation. It balances the sweet peanut butter dough.
This is a great choice if you want a bolder fruit flavor. The color also looks beautiful in the middle.
Apricot Jam Bars
Use apricot jam for a sunny, sweet twist. It gives the bars a different personality.
Apricot pairs nicely with peanut butter. It makes the bars feel a little less traditional.
Dairy-Free Peanut Butter and Jelly Bars
Use coconut oil instead of butter and a plant-based egg substitute. This changes the texture, but the bars can still work.
Make sure the dough holds together before pressing it into the pan. Adjust gently if needed.
Gluten-Free Peanut Butter and Jelly Bars
Use a gluten-free flour blend in place of all-purpose flour. Check that the baking powder is gluten-free too.
The texture may be slightly different. Bake until the edges are golden and the center looks set.
Cinnamon Peanut Butter Bars
Add a sprinkle of cinnamon to the dough. This gives the bars a cozy warmth.
The cinnamon works quietly in the background. It does not take away from the peanut butter and jelly flavor.
Oat Peanut Butter and Jelly Bars
Add about ½ cup oats for extra texture and flavor. The bars become chewier and heartier.
This variation is especially nice for snack-style bars. It makes them feel more substantial.
M&M Peanut Butter Bars
Mix in M&Ms for a colorful touch. They add crunch, chocolate, and a playful look.
This is a fun option for kids’ parties or bake sales. Use a gentle hand when mixing.
Fruit Preserve Bars
Use fruit preserves or homemade fruit compote instead of jelly. This gives the bars a more textured fruit layer.
Adjust based on the thickness and moisture of what you use. The filling should spread but not run everywhere.
Troubleshooting
Why Are My Bars Crumbling?
The bars may have been sliced before cooling completely. Let them cool fully before cutting.
The dough may also have been too dry from too much flour. Measure carefully and avoid overmixing.
Why Is My Jelly Layer Too Runny?
The bars may still be warm. Let them cool completely so the jelly can settle.
Some jams and preserves are looser than others. Use a thicker jam if you want cleaner layers.
Why Are My Bars Too Dry?
They may have been overbaked or mixed too much. Bake just until the edges are golden and the toothpick comes out mostly clean.
Using too much flour can also dry the bars. Measure accurately.
Why Did the Top Dough Not Spread Easily?
The dough is thick and sticky by design. Drop it in spoonfuls and spread gently.
You do not need a perfect top. Rustic patches are fine and still bake beautifully.
Why Did the Bars Stick to the Pan?
The pan may not have been greased enough. Use butter or non-stick spray before adding the dough.
Let the bars cool before removing them. Warm bars can break more easily.
Frequently Asked Questions
Can I Freeze Peanut Butter and Jelly Bars?
Yes, these bars freeze wonderfully. Wrap them tightly in plastic wrap and place them in a freezer-safe bag.
They will keep in the freezer for up to 3 months. Thaw at room temperature or warm them in the microwave for a few seconds.
What Can I Substitute for the Jelly?
You can swap grape jelly for strawberry, raspberry, or apricot jam. Fruit preserves or homemade fruit compote can also be used.
Choose a spread that is thick enough to layer. Very thin fillings may make the bars messy.
How Do I Make These Bars Gluten-Free?
Use a gluten-free flour blend instead of all-purpose flour. Check that the baking powder is gluten-free as well.
The texture might be slightly different. They should still be delicious when baked until set.
Can I Use Creamy Peanut Butter?
Yes, creamy peanut butter works if that is your preference. The bars will have a smoother texture.
Crunchy peanut butter gives more bite. Both versions work.
What If I Am Out of Brown Sugar?
Granulated sugar can be used instead. The bars may be a bit less chewy.
Brown sugar gives moisture and depth, so use it when possible. Granulated sugar is still a practical backup.
Can I Make These Nut-Free?
Sunflower seed butter can be used instead of peanut butter for a nut allergy-friendly direction. The flavor will change.
Skip the salted peanuts or use a topping that fits your needs. Make sure all ingredients are safe for the people you are serving.
Can I Add Oats?
Yes, about ½ cup oats can be added. They bring extra texture and flavor.
The bars will become a little heartier. Mix gently so the dough stays tender.
Why This Recipe Works So Well
Peanut Butter and Jelly Bars work because they take a classic childhood flavor and make it into a soft, sliceable dessert. The peanut butter dough is rich and familiar, while the jelly brings sweetness and color.
The brown sugar gives chew and warmth. It helps the bars feel soft rather than dry.
The butter and peanut butter create richness. Together, they make the dough flavorful and easy to press into the pan.
The egg and dry ingredients help the bars hold their shape. Baking powder gives the dough just enough lift.
The jelly layer keeps the bars fun and nostalgic. It turns each bite into a sweet peanut butter and fruit combination.
The salted peanut topping adds the final contrast. It gives crunch, salt, and a homemade finish.
Final Thoughts
Peanut Butter and Jelly Bars are the kind of treat that carries a little childhood sweetness into the present. They are simple, chewy, fruity, nutty, and easy enough to bake on a quiet afternoon.
I love how they turn pantry staples into something that feels joyful. Peanut butter, jelly, brown sugar, butter, vanilla, flour, and peanuts become a pan of bars that can make a family table feel full of warmth.
Bake them for a school event, a weekend snack, a family gathering, or a freezer stash for later. However you slice them, these bars bring that classic peanut butter and jelly comfort in a soft, shareable form.
Peanut Butter and Jelly Bars
These Peanut Butter and Jelly Bars are soft, nutty, sweet, and packed with the classic peanut butter-and-jelly flavor everyone knows and loves. With a crunchy peanut butter base, a fruity grape jelly or jam layer, and coarsely chopped salted peanuts on top, they make an easy dessert for lunchboxes, bake sales, casual gatherings, or simple family treats.
Recipe Details
- Prep Time: 15 minutes
- Cook Time: 25 minutes
- Total Time: 40 minutes
- Course: Dessert
- Cuisine: American
- Servings: 12 bars
- Calories: 250 kcal
Equipment
- Mixing bowl
- baking pan
Ingredients
For the Base
- 1 ¾ cups all-purpose flour
- ¾ teaspoons salt
- ½ teaspoon baking powder
- 1 cup crunchy peanut butter
- ½ cup unsalted butter, softened
- ¾ cup light brown sugar, packed
- 1 large egg, room temperature
- 1 teaspoon vanilla extract
For the Topping
- ½ cup salted peanuts, coarsely chopped
- ¾ cup grape jelly or jam, or any other flavor
Instructions
Step 1: Prepare the Baking Pan
Preheat your oven to 350°F (175°C). Grease a baking pan.
Step 2: Mix the Peanut Butter Base
In a mixing bowl, combine the crunchy peanut butter, light brown sugar, and softened unsalted butter. Mix until smooth.
Step 3: Add the Egg and Vanilla
Add the room temperature egg and vanilla extract to the peanut butter mixture, then mix well.
Step 4: Combine the Dry Ingredients
In another bowl, whisk together the all-purpose flour, salt, and baking powder.
Step 5: Finish the Dough
Gradually add the flour mixture to the peanut butter mixture, stirring until combined.
Step 6: Add the First Dough Layer
Spread half of the dough into the prepared baking pan.
Step 7: Add the Jelly Layer
Layer the grape jelly or jam over the dough.
Step 8: Add the Remaining Dough and Peanuts
Top with the remaining dough, then sprinkle the coarsely chopped salted peanuts over the top.
Step 9: Bake Until Golden
Bake for 25 minutes, or until golden brown.
Step 10: Cool and Slice
Allow the bars to cool before slicing into 12 bars.
Notes
Store the bars in an airtight container at room temperature for up to a week.
Serving Suggestions
- Serve as a lunchbox-style dessert with cold milk.
- Add to bake sale trays or casual party dessert platters.
- Pair with coffee or tea for an easy afternoon treat.
- Use grape jelly or jam for a classic flavor, or any other flavor for a simple variation.
- Cut into 12 bars once fully cooled for cleaner slices.
Storage
How to Store
Store the bars in an airtight container at room temperature for up to a week.
Best Texture Tip
Let the bars cool before slicing so the peanut butter base and jelly layer have time to set.
Serving Tip
For neat pieces, slice only after the bars have cooled completely.

Fernando is the creator and writer behind the food blog Eating with your Hands. Living and working in cities like Paris, Barcelona, and Berlin, and being married to a Canadian foodie, has given Fernando a passion and interest in food and inspired him to run EWYH.