
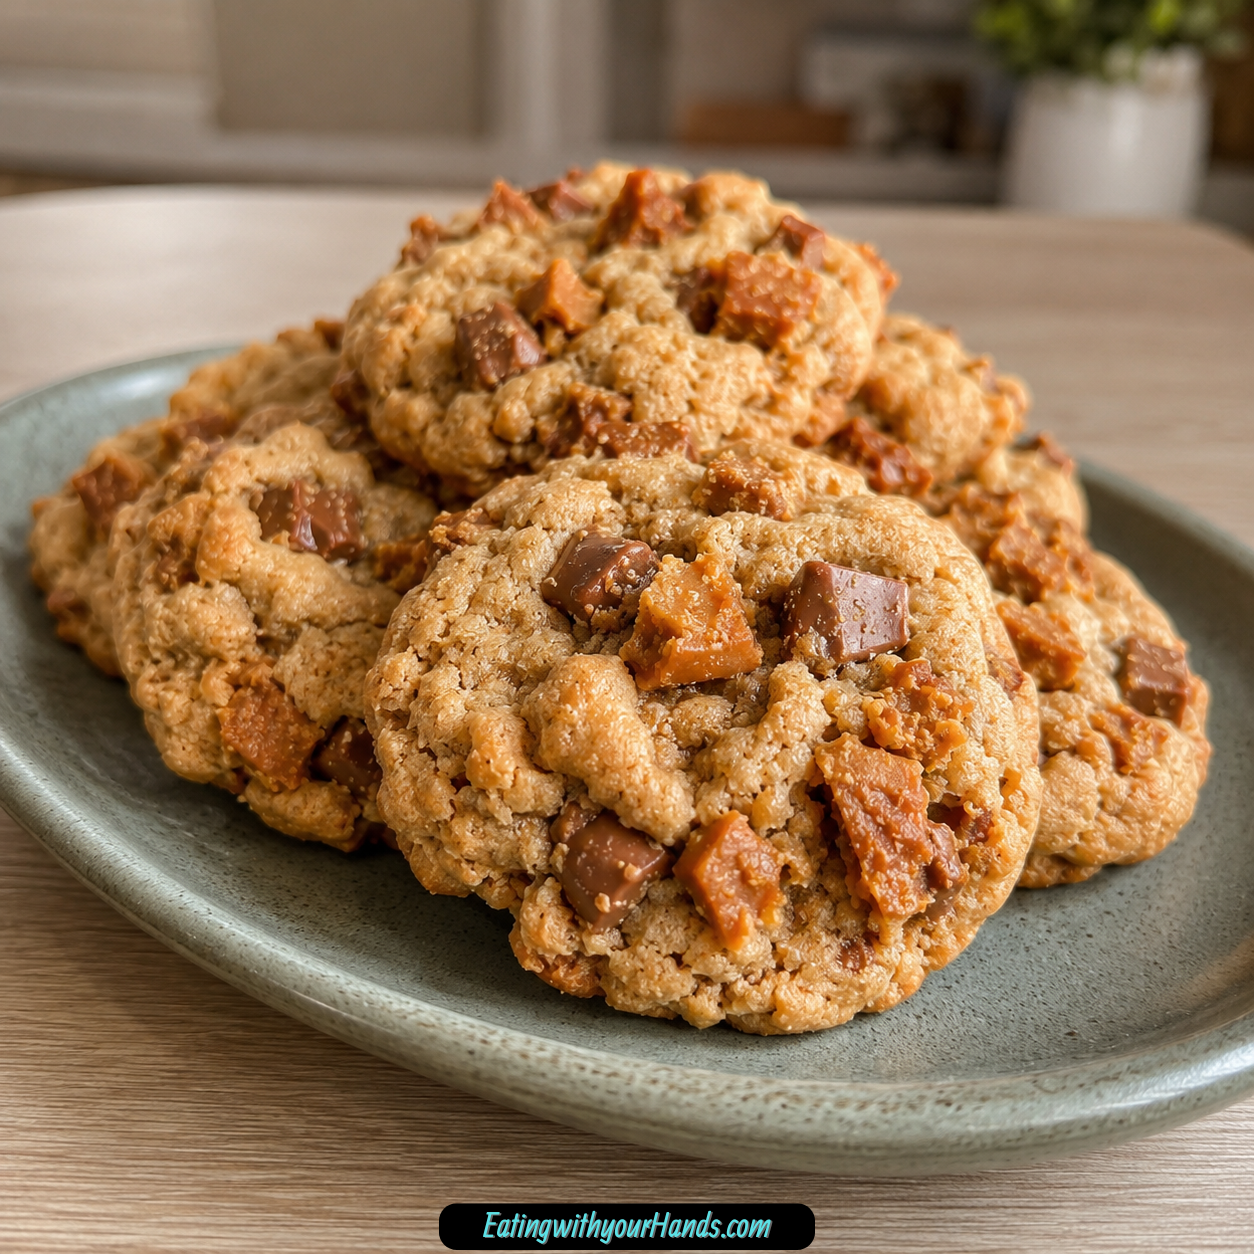
Some cookies are made because you planned a baking day, and others happen because a pantry treat suddenly looks like it belongs in cookie dough. These Peanut Butter Butterfinger Cookies feel like that second kind of recipe, the kind that starts with a simple craving and turns into something everyone remembers.
They take a soft peanut butter cookie base and load it with chopped Butterfinger pieces, giving every bite a mix of tender chew and crispy candy crunch. The peanut butter makes the cookie rich and familiar, while the Butterfinger adds that golden, flaky, candy-bar texture that makes these cookies feel playful and nostalgic.
This is not a complicated cookie recipe. You cream butter and sugars, mix in peanut butter, egg, and vanilla, add the dry ingredients, fold in chopped candy, scoop, bake, and cool.
The result is a cookie that feels perfect for bake sales, potlucks, movie nights, weekend baking, or a simple glass-of-milk dessert at home. They are sweet, crunchy, soft, peanut buttery, and easy enough to make without turning the afternoon into a full baking project.
These cookies are especially good when served slightly warm. The centers are soft, the Butterfinger pieces are melty and crisp, and the peanut butter base has just the right amount of chew.
Table of Contents
- Why You’ll Love Peanut Butter Butterfinger Cookies
- Recipe Details
- Ingredients
- Optional Variations and Add-Ins
- The Cookie Story Behind This Recipe
- Why Regular Peanut Butter Works Best
- Why Butterfinger Pieces Make These Cookies Special
- Directions
- Step 1: Preheat the Oven
- Step 2: Line the Baking Sheets
- Step 3: Chop the Butterfinger Bars
- Step 4: Soften the Butter Correctly
- Step 5: Cream the Butter and Sugars
- Step 6: Add the Peanut Butter
- Step 7: Add the Egg
- Step 8: Add the Vanilla
- Step 9: Whisk the Dry Ingredients
- Step 10: Add the Dry Ingredients to the Wet Ingredients
- Step 11: Fold in the Butterfinger Pieces
- Step 12: Check the Dough Texture
- Step 13: Scoop the Dough
- Step 14: Space the Cookies
- Step 15: Add Extra Butterfinger Crumbs if Desired
- Step 16: Bake the Cookies
- Step 17: Avoid Overbaking
- Step 18: Cool on the Baking Sheets
- Step 19: Transfer to a Wire Rack
- Step 20: Cool Baking Sheets Between Batches
- Serving Tips
- Storage
- Freezing Baked Cookies
- Freezing the Dough
- Helpful Notes for Best Results
- Variations
- Troubleshooting
- Frequently Asked Questions
- Why These Cookies Work for Parties and Bake Sales
- Why This Recipe Works So Well
- Final Thoughts
- Peanut Butter Butterfinger Cookies
Why You’ll Love Peanut Butter Butterfinger Cookies
These cookies are soft and chewy with plenty of texture. The peanut butter dough stays tender, while chopped Butterfinger pieces bring crispy crunch throughout.
They are easy to make because there are no fancy steps. You mix, scoop, bake, cool, and enjoy.
The flavor is nostalgic and fun. Peanut butter already feels like a classic cookie flavor, and Butterfinger candy turns it into something more exciting.
They are great for sharing. Bake sales, potlucks, parties, and casual family nights all make sense for a cookie that tastes familiar but still feels special.
They store well at room temperature for several days. You can also freeze baked cookies or freeze dough balls for later.
They are flexible, too. You can use crunchy peanut butter, swap in Reese’s Pieces, add chocolate chips, mix in pretzels, try gluten-free flour, or use mini Butterfingers.
Recipe Details
- Recipe name: Peanut Butter Butterfinger Cookies
- Oven temperature: 350°F (175°C)
- Baking time: 10 minutes
- Cooling time on baking sheets: 5 minutes
- Butter amount: ¾ cup softened butter, equal to 1 and ½ sticks
- Butterfinger amount: 16 ounces, about 8 full-size bars
- Best peanut butter: Regular peanut butter, not natural peanut butter
- Storage at room temperature: Up to 5 days
- Best freshness window: Within 3 days
- Freezer storage for baked cookies: Up to 2 months
- Freezing dough: Scoop into balls, freeze, and bake from frozen with 1 to 2 extra minutes
Ingredients
- ¾ cup butter, softened, 1 and ½ sticks
- ½ cup granulated sugar
- ½ cup brown sugar, packed
- 1 cup peanut butter
- 1 large egg
- 1 ½ teaspoons vanilla
- 1 ½ cups all-purpose flour, spooned and leveled
- ½ teaspoon baking soda
- ½ teaspoon baking powder
- ¼ teaspoon kosher salt
- 16 ounces Butterfinger, chopped
Optional Variations and Add-Ins
- Crunchy peanut butter
- Reese’s Pieces
- Semi-sweet chocolate chips
- Milk chocolate chips
- Crushed pretzels
- 1:1 gluten-free flour blend with xanthan gum
- Mini Butterfingers
- Vanilla ice cream
- Extra Butterfinger crumbs for topping
The Cookie Story Behind This Recipe
Peanut butter cookies already have a way of feeling like home. They are simple, familiar, sweet, and rich without needing much decoration.
Adding Butterfinger pieces changes the whole experience. Suddenly the cookie has little pockets of crisp candy texture, peanut-buttery crunch, and sweet golden flakes in every bite.
The beauty of this recipe is that the dough itself stays straightforward. It is not trying to be fancy, and it does not need complicated steps to taste good.
Butter, granulated sugar, brown sugar, peanut butter, egg, vanilla, flour, baking soda, baking powder, salt, and chopped candy are enough. The ingredients are simple, but the result feels like a cookie made for attention.
These are the kind of cookies that disappear quickly because they offer more than one texture. You get softness, chew, crisp candy bits, and a little crumble from the Butterfinger pieces.
That is why they work so well for sharing. They are fun, sweet, familiar, and just different enough to make people reach for another.
Why Regular Peanut Butter Works Best
The recipe specifically calls for regular peanut butter, not natural peanut butter. That detail matters for texture.
Natural peanut butter can separate, leaving oil on top and a thicker paste underneath. That extra oil can make the dough greasy and affect how the cookies bake.
Regular peanut butter gives the dough a more stable texture. It mixes smoothly with butter, sugars, egg, and vanilla.
It also gives the cookies the classic peanut butter cookie flavor. The dough stays soft and holds the chopped Butterfinger pieces well.
Creamy peanut butter works beautifully if you want a smoother cookie base. Crunchy peanut butter can also be used if you want even more texture.
The important thing is to use the regular kind. That keeps the cookies from becoming oily or spreading strangely.
Why Butterfinger Pieces Make These Cookies Special
Butterfinger candy brings a texture that chocolate chips alone cannot give. The chopped pieces add crisp, flaky crunch inside a soft peanut butter cookie.
The candy also melts slightly as the cookies bake. This gives little sticky, crisp, sweet spots throughout the dough.
Chopping the Butterfinger into pea-sized bits helps it distribute evenly. Pieces that are too large may make shaping harder, while pieces that are too tiny can disappear into the dough.
The crumbs from chopping should not be wasted. The notes suggest saving Butterfinger dust and sprinkling it on top before baking for extra crunch.
Using 16 ounces gives the cookies plenty of candy. That is about 8 full-size bars, which makes every cookie feel loaded.
If full-size bars are not available, mini Butterfingers can also work. Chop them up or use them in a fun way for surprise bites.
Directions
Step 1: Preheat the Oven
Preheat your oven to 350°F (175°C). Let it fully heat before the first tray of cookies goes in.
A properly preheated oven helps the cookies bake evenly. Since they bake for only 10 minutes, the oven temperature matters from the start.
While the oven heats, set out your mixing bowls, mixer, spatula, baking sheets, parchment paper, and cooling rack. A little preparation makes the recipe easier.
Step 2: Line the Baking Sheets
Line your baking sheets with parchment paper. This prevents sticking and makes cleanup easier.
Parchment also helps the cookies release cleanly after baking. Since candy pieces can melt slightly, lining the pan is especially helpful.
Set the prepared baking sheets aside. You will scoop the dough onto them after mixing.
Step 3: Chop the Butterfinger Bars
Chop 16 ounces of Butterfinger bars into small pieces. This is about 8 full-size bars.
Aim for pea-sized bits. They should be big enough to give crunch but small enough to spread evenly through the dough.
Save the crumbs that form while chopping. Those little bits can be sprinkled on top before baking for extra Butterfinger flavor and texture.
Step 4: Soften the Butter Correctly
Use ¾ cup butter, which is 1 and ½ sticks. The butter should be softened, not melted.
It should leave a gentle dent when pressed. If it is oily or melted, the dough may spread too much.
Room-temperature butter is ideal. Properly softened butter creams smoothly with the sugars and helps create the cookie’s tender texture.
Step 5: Cream the Butter and Sugars
Place the softened butter in a large mixing bowl. Add ½ cup granulated sugar and ½ cup packed brown sugar.
Beat the mixture until light and fluffy, about 2 minutes with a hand mixer. Scrape down the sides of the bowl halfway through.
The mixture should look pale and creamy when ready. This step helps create a soft cookie base.
Step 6: Add the Peanut Butter
Add 1 cup regular peanut butter to the creamed butter and sugar mixture. Do not use natural peanut butter that separates.
Mix until the peanut butter is fully combined. The dough base should look smooth and rich.
This is where the peanut butter flavor becomes the foundation of the cookie. Make sure it is evenly blended before adding the egg.
Step 7: Add the Egg
Crack 1 large egg into a separate small bowl first. This helps avoid shell pieces in the dough.
Add the egg to the mixing bowl. Beat until fully incorporated.
The egg binds the dough and helps create the proper cookie structure. Mix until the dough base looks smooth.
Step 8: Add the Vanilla
Add 1 ½ teaspoons vanilla. Mix until combined.
Vanilla rounds out the peanut butter flavor and softens the sweetness. It also gives the dough a warmer, more complete taste.
Scrape the sides of the bowl again if needed. Keeping the mixture even helps the cookies bake consistently.
Step 9: Whisk the Dry Ingredients
In a separate bowl, whisk together 1 ½ cups all-purpose flour, ½ teaspoon baking soda, ½ teaspoon baking powder, and ¼ teaspoon kosher salt.
Whisking helps distribute the leavening and salt evenly. This prevents bitter baking soda pockets or uneven rise.
Measure the flour by spooning and leveling. Do not scoop directly from the bag, because packed flour can make the cookies dry.
Step 10: Add the Dry Ingredients to the Wet Ingredients
Gradually add the dry ingredients to the wet mixture. Mix on low speed until just combined.
Do not overmix. Overmixing can make cookies tougher and less tender.
A few flour streaks are okay at this point. They can finish disappearing when the Butterfinger pieces are folded in.
Step 11: Fold in the Butterfinger Pieces
Add the chopped Butterfinger pieces to the dough. Use a spatula to fold them in gently.
The dough will be thick and full of candy bits. That is exactly what you want.
Fold just until the candy is distributed. Avoid crushing the pieces too much, because their crunch is part of the cookie’s appeal.
Step 12: Check the Dough Texture
The dough should be thick, soft, and scoopable. It should not be runny.
If the dough feels sticky, the FAQ suggests chilling it for 20 minutes to firm up. Sticky dough can lead to flatter cookies.
If the dough feels normal, you can scoop right away. The recipe is designed to be simple and direct.
Step 13: Scoop the Dough
Use a tablespoon or cookie scoop to drop rounded portions of dough onto the prepared baking sheets. Keep the portions as even as possible.
Even cookie sizes bake at the same rate. This prevents smaller cookies from overbaking while larger ones stay too soft.
Scoop gently so the Butterfinger pieces stay distributed. Do not pack the dough too tightly.
Step 14: Space the Cookies
Place the dough portions about 2 inches apart on the baking sheets. These cookies spread a bit as they bake.
Spacing prevents them from running together. It also gives the edges room to set properly.
If you have more dough than space, bake in batches. Crowding the pan can affect shape and texture.
Step 15: Add Extra Butterfinger Crumbs if Desired
Sprinkle saved Butterfinger crumbs over the tops of the dough portions if desired. This adds extra crunch and makes the cookies look more loaded.
Do not press too hard. A light sprinkle is enough.
This step is optional but useful if you want stronger Butterfinger texture on the surface. It also makes the cookies look more inviting.
Step 16: Bake the Cookies
Bake the cookies at 350°F (175°C) for 10 minutes. The edges should be lightly golden.
The centers should still look slightly soft. Do not wait until the entire cookie looks firm.
The cookies will continue to set as they cool. Pulling them at the right time keeps them soft and chewy.
Step 17: Avoid Overbaking
Do not bake until the cookies are deeply browned. That can make them dry and harder.
Look for lightly golden edges and soft centers. This is the best doneness cue.
Butterfinger pieces can also caramelize slightly in the oven. Pulling the cookies on time keeps the candy bits pleasantly crisp and sweet instead of overdone.
Step 18: Cool on the Baking Sheets
Let the cookies cool on the baking sheets for 5 minutes. This helps prevent them from breaking when moved.
They will be soft when hot. The resting time allows them to firm up.
Do not rush this step, especially because the candy pieces may be warm and melty. Let the cookies settle before transferring.
Step 19: Transfer to a Wire Rack
After 5 minutes, move the cookies to a wire rack. Let them cool completely, or enjoy a few while still slightly warm.
Warm cookies will have softer candy pieces and a tender peanut butter base. Cooled cookies will be easier to store and stack.
Use a spatula to move them gently. The cookies should be set but still soft.
Step 20: Cool Baking Sheets Between Batches
If baking multiple batches, let the baking sheets cool before adding more dough. Hot pans can make dough spread too much before baking begins.
Use a second baking sheet if possible. This keeps the process moving without placing fresh dough on a hot surface.
Cool sheets help preserve the shape of the cookies. This is especially important with soft peanut butter dough and candy pieces.
Serving Tips
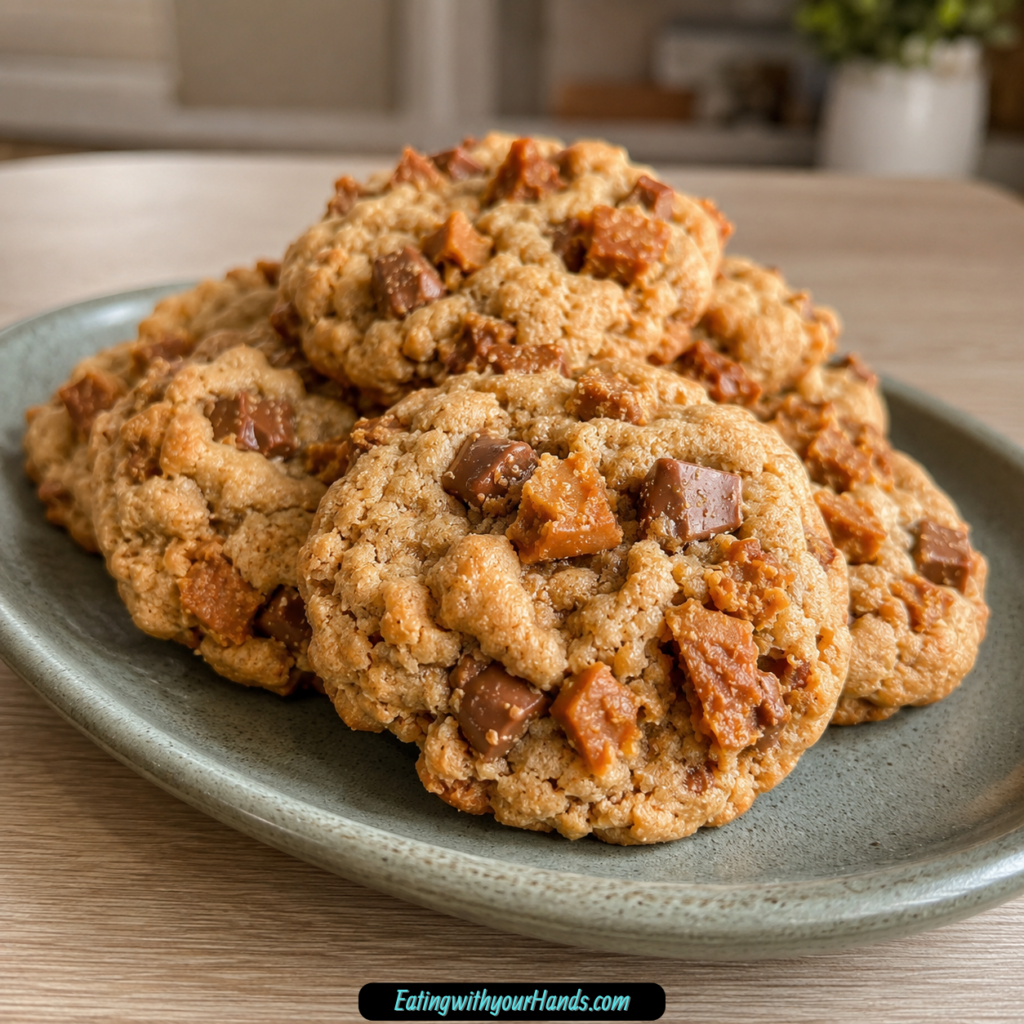
These cookies are best slightly warm. The peanut butter base is soft, and the Butterfinger pieces are a little melty and crisp.
Pair them with a cold glass of milk for a classic, nostalgic treat. The milk balances the sweetness and peanut butter richness.
For a more indulgent dessert, sandwich a scoop of vanilla ice cream between two cookies. This turns them into a fun cookie ice cream sandwich.
They are also great for bake sales and potlucks. The chopped candy makes them stand out on a cookie tray.
If serving after storage, let them come to room temperature. You can also warm one briefly if you want that fresh-baked feeling.
Storage
Store the cookies in an airtight container at room temperature. They will stay fresh for up to 5 days.
They are best within 3 days for the freshest texture. The cookie base stays soft, and the candy pieces keep more of their bite.
Let the cookies cool completely before storing. Warm cookies can create moisture inside the container.
Use parchment between layers if stacking. This helps protect the cookie tops and keeps them from sticking together.
Freezing Baked Cookies
Baked cookies can be frozen in a freezer-safe bag for up to 2 months. Let them cool completely first.
Place parchment between layers if stacking. This helps prevent sticking and protects the candy pieces.
Thaw the cookies at room temperature when ready to enjoy. They should still taste rich and peanut buttery.
For a softer texture, warm a thawed cookie briefly. This can bring back some of that fresh-baked comfort.
Freezing the Dough
The dough can also be frozen before baking. Scoop it into balls first.
Freeze the dough balls on a tray until solid. Then transfer them to a freezer bag.
Bake straight from frozen when ready. Add 1 to 2 extra minutes to the baking time.
This is a helpful make-ahead option for parties or last-minute cookie cravings. You can bake only what you need.
Helpful Notes for Best Results
Use regular peanut butter instead of natural peanut butter. Natural peanut butter can separate and make the cookies greasy.
Crunchy peanut butter works if you want extra texture. Just make sure it is still the regular kind.
Measure flour carefully by spooning it lightly into the cup and leveling it off. Packed flour can make the cookies dry.
If the dough is sticky, chill it for 20 minutes before scooping. This helps keep the cookies from spreading too much.
Save the Butterfinger crumbs from chopping. Sprinkle them on top before baking for extra crunch.
Let baking sheets cool between batches. Hot pans can cause the dough to spread too quickly.
Variations
Reese’s Pieces Version
Swap the Butterfinger pieces for Reese’s Pieces. This gives the cookies a double peanut butter flavor.
The candy adds color and crunch. It creates a fun variation while keeping the peanut butter cookie base.
Use the same method and baking time. Watch for lightly golden edges and soft centers.
Chocolate Chip Butterfinger Cookies
Add 1 cup semi-sweet or milk chocolate chips to the dough. You can use chocolate chips with Butterfinger pieces for an extra-loaded cookie.
Semi-sweet chocolate gives a stronger balance against the sweetness. Milk chocolate makes the cookies sweeter.
Fold the chips in gently with the candy. Do not overmix the dough.
Pretzel Crunch Cookies
Add a handful of crushed pretzels to the dough. Pretzels bring salty crunch.
This variation works well because peanut butter, candy, and salty pretzels all complement each other. The result is sweet, salty, soft, and crunchy.
Do not crush the pretzels too finely. Small pieces give better texture.
Gluten-Free Peanut Butter Butterfinger Cookies
Use a 1:1 gluten-free flour blend instead of all-purpose flour. Make sure it includes xanthan gum for structure.
The texture may be slightly different, but the cookies can still turn out delicious. Follow the same baking cues.
Keep an eye on spreading. Gluten-free dough can behave a little differently.
Mini Butterfinger Version
Use mini Butterfingers if full-size bars are unavailable. Chop them up or leave some larger pieces for surprise bites.
Mini bars work just as well in the dough. The goal is still to get Butterfinger flavor throughout.
If leaving some pieces larger, make sure they do not make the dough hard to scoop. Balance larger chunks with smaller chopped bits.
Crunchy Peanut Butter Version
Use regular crunchy peanut butter instead of creamy. This adds peanut pieces throughout the dough.
The result is a more textured cookie. It works especially well with the Butterfinger crunch.
Avoid natural crunchy peanut butter that separates. The oil issue still applies.
Troubleshooting
Why Is My Dough Sticky?
Sticky dough can happen if the butter is too soft or the kitchen is warm. Chill the dough for 20 minutes to firm it up.
Sticky dough may lead to flat cookies. Chilling gives the dough more structure before baking.
Do not add too much flour unless absolutely needed. Extra flour can make the cookies dry.
Why Did My Cookies Spread Too Much?
The baking sheet may have been hot, or the dough may have been too soft. Let baking sheets cool between batches.
Make sure the butter is softened, not melted. Melted butter can cause spreading.
If the dough feels soft, chill it before scooping. This helps keep the cookies thicker.
Why Are My Cookies Dry?
The flour may have been overmeasured. Spoon and level the flour instead of scooping directly from the bag.
Overbaking can also dry them out. Bake for 10 minutes and remove when the edges are lightly golden but the centers still look soft.
The cookies firm up as they cool. Do not wait until they look completely done in the oven.
Why Are My Cookies Greasy?
Natural peanut butter may have been used. The oil separation in natural peanut butter can make the cookies greasy.
Use regular peanut butter for the best texture. It blends more smoothly into the dough.
Butter that is too soft or melted can also affect texture. Use softened butter only.
Why Are There Dry Flour Pockets?
The dry ingredients may not have been whisked well before adding. Whisking flour, baking soda, baking powder, and salt helps prevent uneven pockets.
Add the dry ingredients gradually and mix on low. Scrape the bowl if needed.
A few flour streaks before adding Butterfinger pieces are fine. They should disappear during folding.
Frequently Asked Questions
Can I Use Crunchy Peanut Butter?
Yes, crunchy peanut butter works. It adds an extra texture twist.
Make sure it is regular crunchy peanut butter, not natural peanut butter. Natural peanut butter can make the dough too oily.
How Long Do These Cookies Stay Fresh?
They stay fresh in an airtight container at room temperature for up to 5 days. They are best within 3 days.
For longer storage, freeze them. Baked cookies keep in the freezer for up to 2 months.
My Dough Is Sticky. What Should I Do?
Chill the dough for 20 minutes. This firms it up and helps prevent flat cookies.
Sticky dough can be harder to scoop. A short chill makes shaping easier.
Can I Freeze the Dough?
Yes, scoop the dough into balls and freeze on a tray. Once solid, transfer the dough balls to a freezer bag.
Bake straight from frozen and add 1 to 2 extra minutes. This is a great way to keep cookie dough ready.
Can I Use Natural Peanut Butter?
No, natural peanut butter is not recommended. The oil separation can make the cookies greasy.
Regular peanut butter gives the best texture. Brands like the regular shelf-stable style are better for this dough.
Can I Use Mini Butterfingers?
Yes, mini Butterfingers work well. Chop them up or leave some larger pieces for fun texture.
Use the same total candy amount as the recipe calls for. The cookies should still be loaded with Butterfinger pieces.
Can I Add Chocolate Chips?
Yes, semi-sweet or milk chocolate chips can be added. You can use them along with Butterfinger pieces for a richer cookie.
Semi-sweet gives more balance. Milk chocolate makes the cookies sweeter.
Can I Make These Gluten-Free?
Yes, use a 1:1 gluten-free flour blend. Make sure the blend contains xanthan gum.
The texture may be slightly different. Watch the cookies carefully and use the same doneness signs.
Why These Cookies Work for Parties and Bake Sales
Peanut Butter Butterfinger Cookies are excellent for sharing because they look and taste fun. The candy pieces make them different from a basic peanut butter cookie.
They are easy to make in batches. Since the method is simple, you can prepare them without complicated decorating.
They also travel well once cooled. Pack them in an airtight container with parchment between layers.
The flavor is familiar enough for a crowd. Peanut butter and candy are both easy favorites.
They feel homemade but playful. That makes them perfect for bake sales, potlucks, movie nights, and casual dessert tables.
Why This Recipe Works So Well
This recipe works because the cookie base is soft and dependable. Butter, granulated sugar, brown sugar, peanut butter, egg, and vanilla create a rich foundation.
The flour gives structure, while baking soda and baking powder help the cookies rise and spread properly. Kosher salt balances the sweetness.
Butterfinger pieces bring crunch and sweetness. They make the cookies feel loaded without requiring extra frosting or toppings.
The baking time is short, which protects the soft center. Removing the cookies when the edges are lightly golden keeps them chewy.
The 5-minute rest on the baking sheet is important. It lets the cookies finish setting before they are moved.
Final Thoughts
Peanut Butter Butterfinger Cookies are soft, chewy, crunchy, sweet, and full of peanut butter candy flavor. With softened butter, granulated sugar, brown sugar, regular peanut butter, egg, vanilla, flour, baking soda, baking powder, kosher salt, and chopped Butterfinger bars, they turn simple pantry-style ingredients into a cookie that feels fun and memorable.
The most important details are easy to follow. Use regular peanut butter instead of natural, chop the Butterfinger pieces small enough to distribute evenly, spoon and level the flour, and avoid overmixing the dough.
Bake the cookies at 350°F (175°C) for 10 minutes, just until the edges are lightly golden and the centers still look soft. Let them rest on the baking sheets for 5 minutes before moving them to a wire rack.
Serve them slightly warm with milk, turn them into ice cream sandwiches, pack them for bake sales, or freeze dough balls for later. However you enjoy them, these cookies bring creamy peanut butter, crispy Butterfinger crunch, and soft cookie comfort into every bite.
Peanut Butter Butterfinger Cookies
These peanut butter Butterfinger cookies are soft, chewy, and packed with crunchy candy pieces in every bite. The peanut butter cookie base is rich and tender, while the chopped Butterfinger adds sweet, crisp texture and a caramel-like candy flavor. They are easy to make in under 30 minutes and work well for bake sales, parties, lunchbox treats, or anytime you want a fun peanut butter cookie with extra crunch.
Recipe Details
- Prep Time: 15 minutes
- Cook Time: 10 minutes
- Total Time: 25 minutes
- Course: Cookies, Dessert
- Cuisine: American
- Servings: 24 cookies
Equipment
- Mixing bowl
- Baking sheet
Ingredients
- 16 ounces butterfinger, chopped
- 1 cup peanut butter don’t use natural pb
- ¾ cup butter, softened (1 and ½ sticks)
- ½ cup brown sugar, packed
- ½ cup granulated sugar
- 1 large egg
- 1 & ½ teaspoons vanilla
- 1 & ½ cups all purpose flour, spooned and leveled
- ½ teaspoon baking powder
- ½ teaspoon baking soda
- ¼ teaspoon kosher salt
Instructions
Step 1: Prepare the Oven and Baking Sheets
Preheat the oven to 350°F (175°C). Line baking sheets with parchment paper.
Step 2: Cream the Butter and Sugars
In a mixing bowl, cream together the softened butter, granulated sugar, and packed brown sugar until the mixture is light and fluffy.
Step 3: Add the Peanut Butter Mixture
Beat in the peanut butter, egg, and vanilla until everything is well combined.
Step 4: Mix the Dry Ingredients
In a separate bowl, whisk together the all purpose flour, baking soda, baking powder, and kosher salt.
Step 5: Make the Cookie Dough
Gradually add the dry ingredients to the wet ingredients, mixing just until combined.
Step 6: Fold in the Butterfinger
Fold the chopped Butterfinger pieces into the dough until evenly distributed.
Step 7: Portion the Dough
Drop tablespoon-sized portions of dough onto the prepared baking sheets, spacing them 2 inches apart.
Step 8: Bake the Cookies
Bake for 10 minutes, or until the edges are lightly golden.
Step 9: Cool Before Serving
Let the cookies cool on the baking sheets for 5 minutes, then transfer them to wire racks to cool further.
Notes
Store the cookies in an airtight container at room temperature for up to 5 days.
Serving Suggestions
- Serve with a glass of cold milk.
- Add to cookie trays for parties or bake sales.
- Pair with hot coffee or cocoa.
- Pack into lunchboxes as a sweet treat.
- Use in homemade cookie gift boxes.
Storage
How to Store
Keep the cooled cookies in an airtight container at room temperature for up to 5 days.
How to Freeze
Place cooled cookies in a freezer-safe airtight container and freeze for longer storage. Thaw before serving.
Best Texture Tip
Use regular peanut butter rather than natural peanut butter, as noted in the ingredients, and avoid overbaking so the cookies stay soft and chewy.

Fernando is the creator and writer behind the food blog Eating with your Hands. Living and working in cities like Paris, Barcelona, and Berlin, and being married to a Canadian foodie, has given Fernando a passion and interest in food and inspired him to run EWYH.