
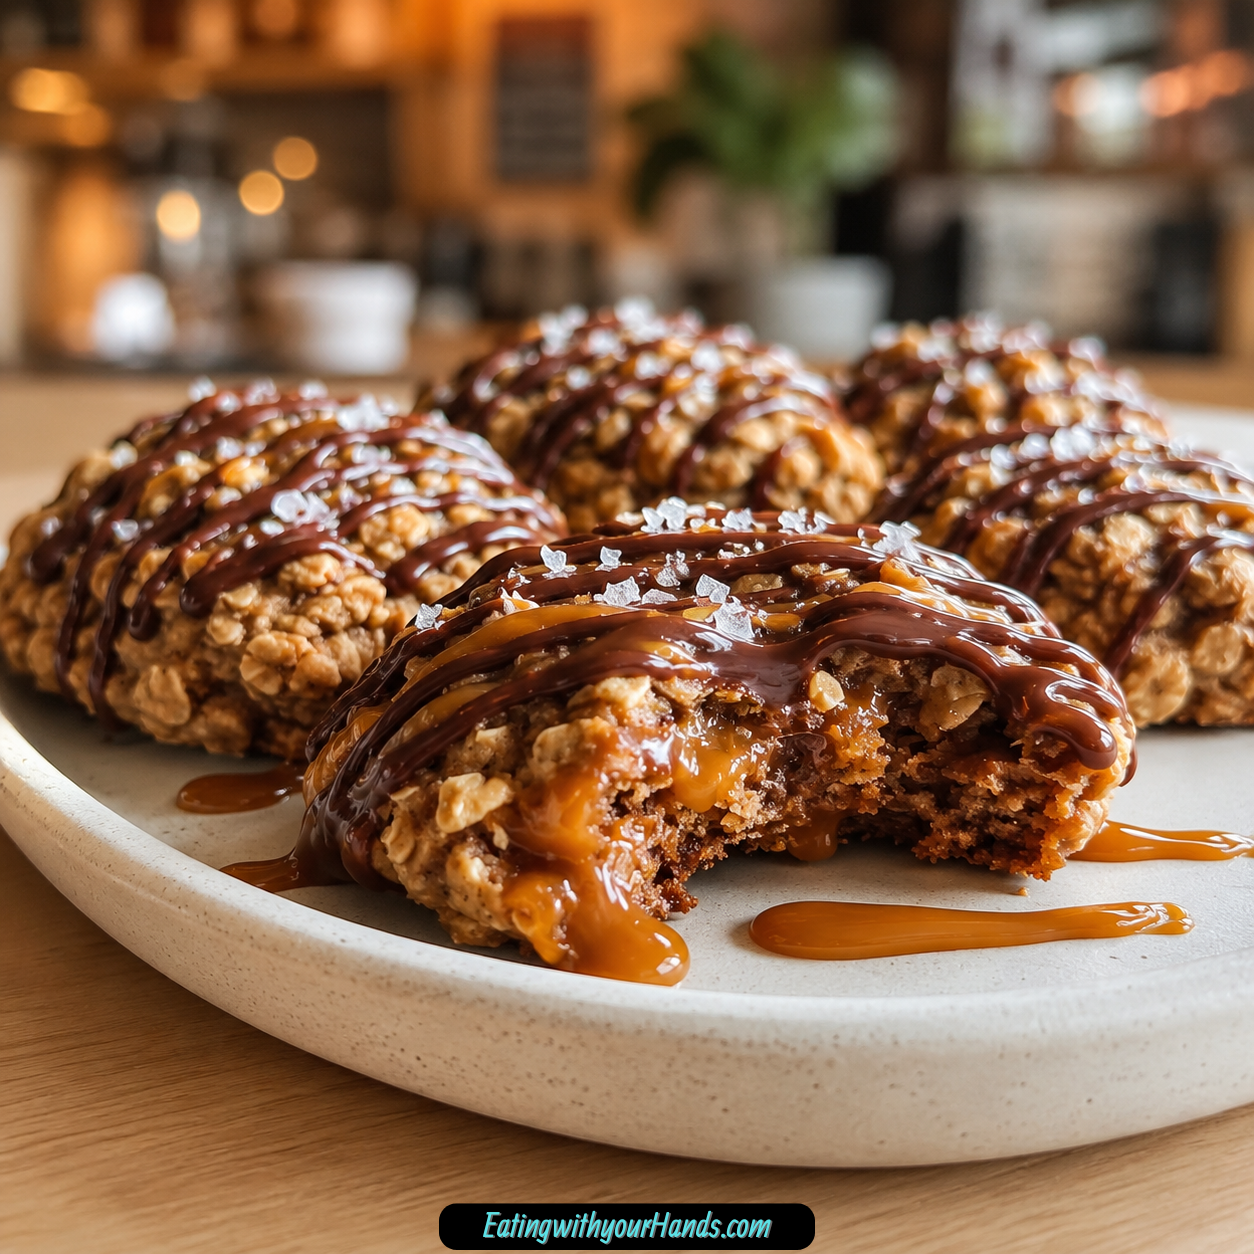
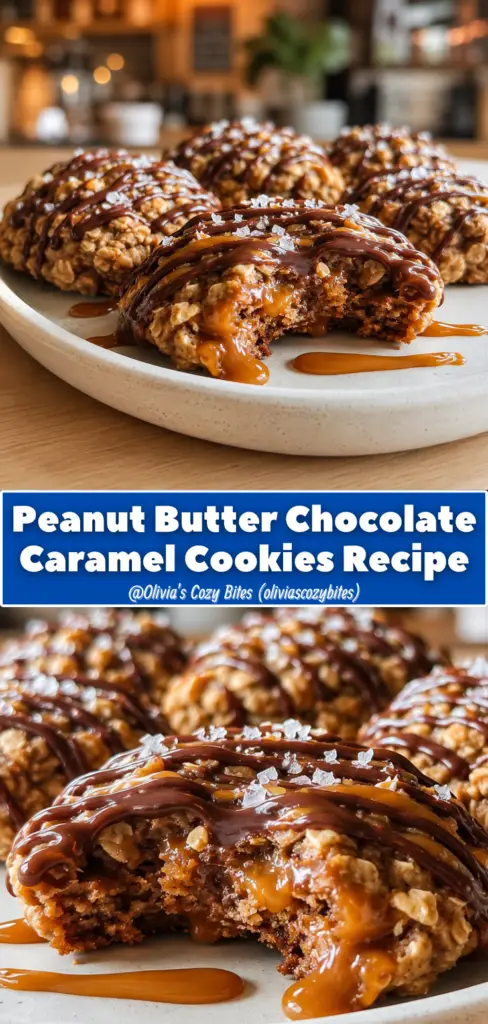
Some cookies are quiet and simple, and some cookies walk into the room like they know everyone is going to ask for the recipe. These Peanut Butter Chocolate Caramel Cookies belong to the second group, because they bring together chewy oats, rich peanut butter, melted chocolate, and gooey caramel in one wonderfully messy bite.
They have that homemade cookie comfort people love, but the chocolate and caramel drizzle make them look more special than the effort required. The best part is that the dough is easy, the method is relaxed, and there is no mixer or dough chilling required for the main recipe.
This is the kind of dessert that feels perfect when you want something sweet but do not want a complicated baking project. You mix the dough in a bowl, shape it into 24 little cookies, bake them for 10 minutes, let them rest, then finish with melted chocolate, caramel sauce, and optional sea salt.
The flavor is rich and nostalgic. Peanut butter gives the cookies their nutty base, oats add hearty chew, brown sugar brings warmth, vanilla rounds it out, and the chocolate-caramel topping turns every cookie into a small dessert moment.
These cookies are wonderful for parties, bake sales, picnics, dessert trays, or a quick treat when you want something that looks bakery-style without actually spending the afternoon in the kitchen. They are soft, chewy, sweet, salty if you add sea salt, and just a little delightfully messy.
Table of Contents
- Why You’ll Love Peanut Butter Chocolate Caramel Cookies
- Recipe Details
- Ingredients
- Optional Variations and Add-Ins
- The Sweet Comfort Behind These Cookies
- Why Old-Fashioned Oats Work Best
- Choosing the Right Peanut Butter
- Directions
- Step 1: Preheat the Oven
- Step 2: Prepare the Baking Sheet
- Step 3: Soften the Butter
- Step 4: Add the Oats to a Mixing Bowl
- Step 5: Add the Peanut Butter
- Step 6: Add the Softened Butter
- Step 7: Add the Brown Sugar
- Step 8: Add the Milk
- Step 9: Add the Vanilla Extract
- Step 10: Mix the Dough
- Step 11: Adjust the Dough if Needed
- Step 12: Shape Into 24 Balls
- Step 13: Place on the Baking Sheet
- Step 14: Flatten Each Cookie
- Step 15: Bake the Cookies
- Step 16: Cool on the Baking Sheet
- Step 17: Melt the Chocolate Chips
- Step 18: Warm the Caramel Sauce if Needed
- Step 19: Drizzle With Chocolate and Caramel
- Step 20: Add Sea Salt if Desired
- Serving Tips
- Storage
- Freezing
- Helpful Notes for Best Results
- Variations
- Troubleshooting
- Frequently Asked Questions
- Can I Use Quick Oats Instead of Old-Fashioned Oats?
- How Do I Stop My Cookies From Spreading Too Much?
- Can I Freeze These Cookies?
- My Caramel Sauce Is Too Thick to Drizzle. What Should I Do?
- Can I Use Almond Butter or Cashew Butter?
- Can I Make These Dairy-Free?
- Can I Use White Chocolate?
- How Should I Store Them for a Bake Sale?
- Why These Cookies Are Great for Parties
- Why This Recipe Works for Lazy Baking Days
- Final Thoughts
- Peanut Butter Chocolate Caramel Cookies
Why You’ll Love Peanut Butter Chocolate Caramel Cookies
These cookies have a chewy-meets-gooey texture that makes them hard to resist. Old-fashioned oats give the dough body, while melted chocolate and caramel sauce make the tops soft, glossy, and rich.
Peanut butter is the star of the cookie base. You can use creamy or chunky peanut butter, depending on whether you want the dough smoother or slightly more textured.
The recipe is pantry-friendly and simple. Oats, peanut butter, butter, brown sugar, milk, vanilla, chocolate chips, caramel sauce, and sea salt are familiar ingredients that come together easily.
It is also very beginner-friendly. There is no fancy mixer, no chilling required in the standard method, and no complicated decorating technique.
The cookies look impressive with very little effort. Drizzling chocolate and caramel over the tops makes them feel special, even though the process is simple.
They are also flexible. You can try dark chocolate, white chocolate, almond butter, cashew butter, crushed pretzels, chopped soft caramels, crushed graham crackers, gluten-free crisp rice cereal, espresso powder, sunflower seed butter, or dairy-free chocolate chips.
Recipe Details
- Recipe name: Peanut Butter Chocolate Caramel Cookies
- Oven temperature: 350°F (175°C)
- Yield: 24 cookies
- Baking time: 10 minutes
- Cooling time on baking sheet: 5 minutes
- Topping setting time: About 10 minutes before stacking
- Best oats: Old-fashioned oats
- Peanut butter note: Do not use natural peanut butter that separates
- Room temperature storage: Up to 3 days
- Freezer storage: Freeze undecorated cookies for up to 1 month
- Best served: Warm and gooey or at room temperature after toppings set
Ingredients
- 2 cups old-fashioned oats
- 1 cup peanut butter
- 4 tablespoons unsalted butter, softened
- ½ cup brown sugar
- ¼ cup whole milk
- 1 teaspoon vanilla extract
- 1 cup caramel sauce
- 1 cup chocolate chips, melted
- Sea salt for garnish, optional
Optional Variations and Add-Ins
- Dark chocolate
- White chocolate
- Almond butter
- Cashew butter
- Crushed pretzels
- Chopped soft caramels
- 1 ½ cups crushed graham crackers
- Gluten-free crisp rice cereal
- Espresso powder
- Sunflower seed butter
- Dairy-free chocolate chips
- Maple syrup
- Molasses
- Date paste
- Extra oats
- Cream
- Almond milk
The Sweet Comfort Behind These Cookies
Peanut butter and chocolate already make a classic pair, but caramel brings in a softer, richer sweetness. When all three meet on top of a chewy oat cookie, the result feels playful, indulgent, and completely satisfying.
The cookie base is dense and rich because it does not rely on flour. Old-fashioned oats provide the structure, while peanut butter and softened butter help hold everything together.
Brown sugar adds warmth and a deeper sweetness than plain white sugar would. Whole milk loosens the mixture just enough so the dough can hold together without becoming dry.
Vanilla extract gives the dough a rounder flavor. It makes the peanut butter and brown sugar taste softer and more complete.
The toppings make the cookies feel special. Melted chocolate adds a smooth, rich finish, while caramel sauce gives each cookie a sweet, sticky drizzle.
A pinch of sea salt is optional, but it helps balance the sweetness. It also makes the peanut butter, chocolate, and caramel flavors stand out more clearly.
Why Old-Fashioned Oats Work Best
The recipe specifically calls for old-fashioned oats. These oats create the hearty chew that makes the cookies feel substantial.
Quick oats can be used, but the texture will be softer and more like a muffin top than a chewy cookie. That is why old-fashioned oats are the better choice for the intended result.
The oats replace the structure flour often provides in other cookies. They absorb moisture from the peanut butter, milk, butter, and brown sugar while still staying pleasantly chewy.
Because the dough is thick and slightly sticky, the oats help it hold together. They give the cookies a rustic texture and keep each bite from feeling too smooth.
Do not grind the oats. The goal is to keep that old-fashioned oat texture visible and noticeable in the finished cookie.
Choosing the Right Peanut Butter
You can use creamy or chunky peanut butter in this recipe. Creamy peanut butter gives the cookies a smoother texture, while chunky peanut butter adds little nutty bits throughout.
The important rule is to avoid natural peanut butter that separates. The extra oil can make the dough too loose and may affect how the cookies bake.
A stable peanut butter helps the dough hold its shape. It also mixes more evenly with the oats, butter, brown sugar, milk, and vanilla.
Peanut butter is the main flavor in the cookie base, so choose one you enjoy. It should taste rich, nutty, and balanced.
If you need an allergy-friendly swap, sunflower seed butter can be used. The flavor will change, but the cookies can still be tasty.
Directions
Step 1: Preheat the Oven
Preheat your oven to 350°F (175°C). Let it fully heat before the cookies go in.
If your oven runs hot, the original note suggests lowering the temperature to 340°F. This can help prevent the cookies from browning too quickly.
While the oven heats, gather your baking sheet, parchment paper, mixing bowl, spoon or spatula, and ingredients. This recipe moves quickly once the dough is mixed.
Step 2: Prepare the Baking Sheet
Line a baking sheet with parchment paper. Parchment makes cleanup easier and helps keep the caramel and chocolate from sticking later.
If you do not have parchment paper, a silicone mat works too. You can also lightly grease the pan if needed, though parchment is preferred.
Set the prepared baking sheet aside. The dough balls will be placed on it after shaping.
Step 3: Soften the Butter
Use 4 tablespoons unsalted butter, softened but not melted. The butter should be soft enough to mix into the dough.
If the butter is cold from the refrigerator, microwave it for about 5 seconds. Be careful not to melt it.
Softened butter helps bind the dough while keeping the cookies from spreading too much. Melted butter can make the dough overly loose.
Step 4: Add the Oats to a Mixing Bowl
Place 2 cups old-fashioned oats in a large mixing bowl. These oats create the chewy structure of the cookies.
Do not use quick oats if you want the original hearty texture. Quick oats can make the cookies softer and less chewy.
Use a bowl large enough for stirring a thick dough. The mixture will become sticky once the peanut butter and other ingredients are added.
Step 5: Add the Peanut Butter
Add 1 cup peanut butter to the bowl with the oats. Use creamy or chunky peanut butter depending on your preferred texture.
Avoid natural peanut butter that separates. Its oiliness can make the dough too loose and affect the final shape.
The peanut butter should be stirred and smooth enough to blend into the oats. It is the main flavor and binder in the cookie base.
Step 6: Add the Softened Butter
Add the softened unsalted butter to the bowl. The butter adds richness and helps the dough come together.
Make sure it is softened rather than melted. The texture of the butter matters for keeping the cookies from spreading too much.
Stir slightly to begin combining it with the peanut butter and oats. It will fully incorporate as the rest of the ingredients are mixed in.
Step 7: Add the Brown Sugar
Add ½ cup brown sugar. Pack it into the measuring cup before adding it to the bowl.
Light or dark brown sugar can be used. Dark brown sugar gives a deeper molasses-style flavor, while light brown sugar keeps the sweetness a little softer.
Brown sugar helps sweeten the dough and adds moisture. It also supports the chewy texture of the cookies.
Step 8: Add the Milk
Pour in ¼ cup whole milk. Whole milk makes the dough a little richer.
Skim milk can work in a pinch, but whole milk creates a more lush dough. Cream or almond milk can also be used if needed.
The milk helps the oats and peanut butter bind into a scoopable dough. It should make the mixture thick and slightly sticky.
Step 9: Add the Vanilla Extract
Add 1 teaspoon vanilla extract. Use good vanilla if you have it, because the flavor shines in this simple dough.
Vanilla softens the strong peanut butter flavor and rounds out the sweetness. It makes the cookies taste more complete.
Stir it in with the other ingredients. The dough is now ready to be mixed thoroughly.
Step 10: Mix the Dough
Use a sturdy spoon or spatula to mix the oats, peanut butter, butter, brown sugar, milk, and vanilla. Stir until the ingredients are fully combined.
The dough should be thick and slightly sticky. That is the correct texture.
If the dough looks crumbly, add another splash of milk, 1 teaspoon at a time. Stop once the dough holds together when pinched.
Step 11: Adjust the Dough if Needed
If the dough feels too dry, continue adding milk by the teaspoon until it comes together. Do not add too much at once.
If the dough is too sticky, add a sprinkle of extra oats. This helps absorb extra moisture and makes shaping easier.
The dough should be soft enough to roll but firm enough to hold its shape. This balance gives the best cookie texture.
Step 12: Shape Into 24 Balls
Divide the dough into 24 little balls. Each one should be about the size of a ping-pong ball.
Wet your hands slightly if the dough sticks. This makes rolling easier without adding too much extra moisture.
Try to keep the cookies similar in size. Even sizing helps them bake evenly.
Step 13: Place on the Baking Sheet
Set the dough balls on the prepared baking sheet. Leave some space between them.
These cookies do not need perfect spacing like very spreadable cookies, but they still need room to bake. A little space keeps the edges from touching.
Work in batches if needed. Do not crowd the baking sheet.
Step 14: Flatten Each Cookie
Gently flatten each dough ball with your fingers. They should look like small cookie pucks.
Do not press them too thin. The cookies should still have enough thickness to stay chewy.
Flattening helps them bake evenly. It also gives you a better surface for the chocolate and caramel drizzle later.
Step 15: Bake the Cookies
Bake the cookies at 350°F (175°C) for 10 minutes. They are ready when the edges turn a light golden brown.
The centers may still look soft. That is okay because they will firm up as they cool.
Do not overbake. The goal is a chewy oat-packed cookie, not a dry one.
Step 16: Cool on the Baking Sheet
Let the cookies sit on the baking sheet for 5 minutes after baking. This helps them set before moving.
Do not rush this step. The cookies will be delicate while hot.
After 5 minutes, they should be firm enough to handle carefully. They can remain on the tray while you prepare the toppings.
Step 17: Melt the Chocolate Chips
Melt 1 cup chocolate chips. Semi-sweet chocolate is classic, while dark chocolate gives a deeper flavor.
Microwave the chocolate in 20-second bursts, stirring well between each burst. This helps prevent scorching and keeps the chocolate smooth.
The melted chocolate should be glossy and easy to drizzle. If it is too thick, stir until smooth before using.
Step 18: Warm the Caramel Sauce if Needed
Use 1 cup caramel sauce for drizzling. Store-bought caramel sauce works, and homemade caramel sauce can also be used if you have it.
If the caramel is too thick to drizzle, microwave it for 5 seconds. You can also stir in 1 teaspoon warm water to loosen it.
If the caramel is too runny, chill it briefly. It should be pourable but not watery.
Step 19: Drizzle With Chocolate and Caramel
Drizzle the melted chocolate and caramel sauce over the cookies. Use a fork, spoon, or squeeze bottle.
Move back and forth over the cookies to create thin lines. The drizzle does not need to be perfect.
This is the decorating step, but it should still feel relaxed. The cookies are meant to look generous, homemade, and delicious.
Step 20: Add Sea Salt if Desired
Sprinkle a tiny pinch of sea salt over the tops if desired. This is optional, but it helps cut the sweetness.
Sea salt makes the chocolate, caramel, and peanut butter flavors pop. Use only a little so it does not overpower the cookies.
Let the toppings set for a few minutes before serving. If you plan to stack the cookies, let the toppings set for about 10 minutes first.
Serving Tips
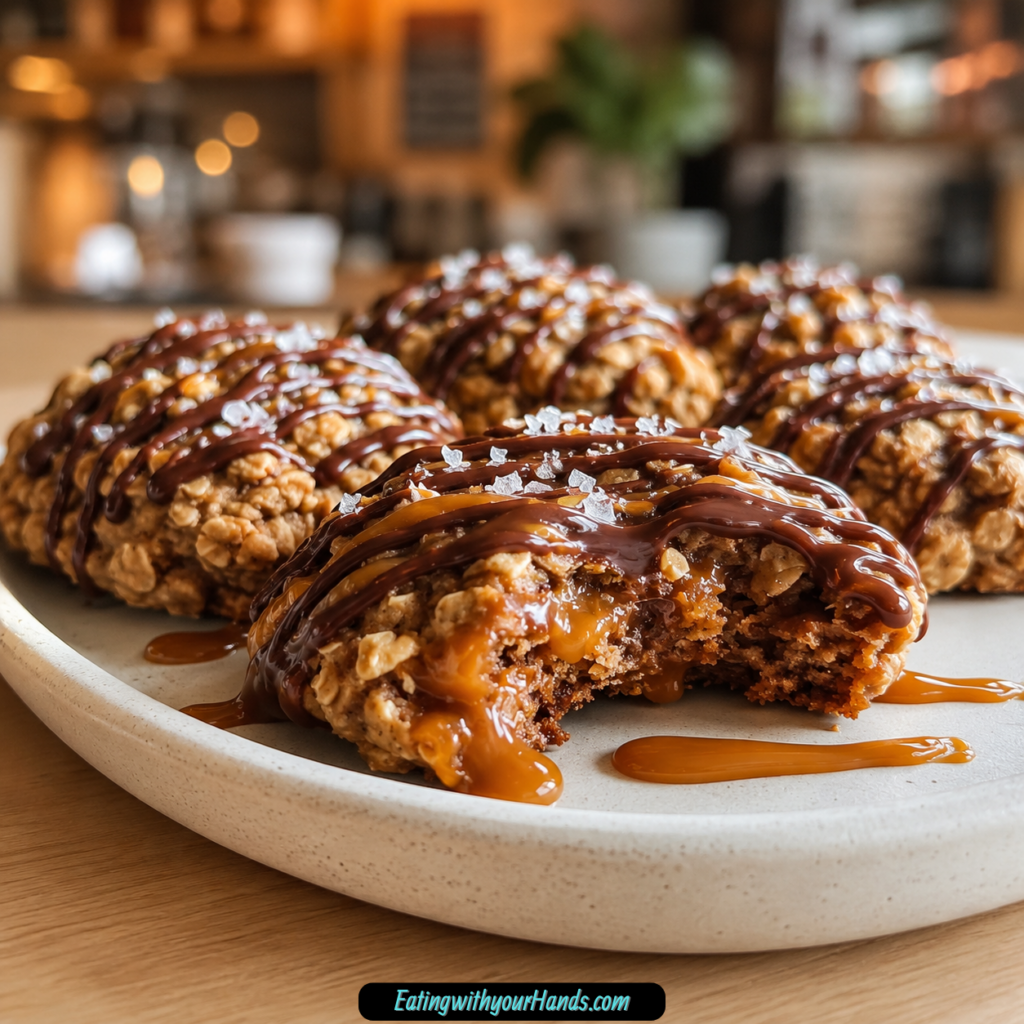
These cookies are best when served warm and gooey. The chocolate and caramel are soft, the peanut butter base is chewy, and the oats give every bite texture.
They are also excellent at room temperature once the toppings have set. This makes them easy to pack for picnics, bake sales, or parties.
If serving on a tray, let the chocolate and caramel set for about 10 minutes before stacking. Otherwise, the topping may smear.
For a dessert platter, arrange them in a single layer first. The drizzle makes them look more bakery-style without requiring precise decorating.
You can reheat a cookie for a few seconds in the microwave to bring back that warm, fresh-baked feel. Watch closely so the caramel does not become too hot.
Storage
Store the cookies in an airtight container at room temperature for up to 3 days. Let the chocolate and caramel set before closing the container.
Layer the cookies with parchment paper to prevent sticking. This is especially helpful because the toppings can stay slightly tacky.
Keep them in a cool place if possible. Warm conditions can soften the chocolate and caramel.
The cookies are best within the first few days. Their chewy texture and gooey topping are strongest when fresh.
Freezing
These cookies can be frozen, but it is best to freeze them undecorated. Place the baked, cooled cookies in a single layer first.
Once frozen, transfer them to a freezer-safe container or bag. They will keep for up to 1 month.
Thaw the cookies before adding the chocolate and caramel drizzle. This gives the toppings the best texture and appearance.
Hiding a few undecorated cookies in the freezer can be a smart move. They are easy to finish later when a quick dessert is needed.
Helpful Notes for Best Results
If the dough is too dry, add milk 1 teaspoon at a time until it holds together. Do not pour in a large amount at once.
If the dough is too sticky, add a sprinkle of extra oats. The oats absorb moisture and make the dough easier to shape.
If you are out of brown sugar, white sugar plus 1 tablespoon molasses or maple syrup can work in a pinch. It is not ideal, but it can help replace some of the brown sugar flavor.
If the cookies spread too much, the butter may have been too soft or the oven may have been too cool. Chill the dough for 10 minutes next time.
Using parchment paper helps reduce spreading compared with a greased pan. Greased pans can encourage cookies to spread more.
If you want a lighter-style variation, swap caramel for date paste and use dark chocolate. They are still cookies, but the flavor shifts into a less sweet direction.
Variations
Dark Chocolate Version
Use dark chocolate instead of semi-sweet chocolate chips. Dark chocolate gives the cookies a richer, slightly more intense flavor.
Drizzle extra dark chocolate over the top if you want a more dramatic finish. It pairs beautifully with peanut butter and caramel.
Almond Butter or Cashew Butter Version
Swap the peanut butter for almond butter or cashew butter. Both can work in this recipe.
Avoid very oily natural nut butters that separate. They can make the dough slide and spread too much.
White Chocolate Version
Melt white chocolate instead of semi-sweet chocolate. This gives the cookies a sweeter, vanilla-like finish.
Add crushed pretzels on top if you want salty-sweet contrast. The pretzels add crunch and make the cookies feel more playful.
Extra Caramel Version
Stir chopped soft caramels into the dough before baking. This creates gooey caramel pockets inside the cookies.
This version can be messier, so napkins may be needed. The extra caramel makes the cookies richer and stickier.
Oat-Free Option
Replace the oats with 1 ½ cups crushed graham crackers or gluten-free crisp rice cereal. The texture will be different, but still delicious.
This option is useful if you want a different base. The cookies will not have the same hearty oat chew.
Espresso Chocolate Version
Add a sprinkle of espresso powder to the dough. Use just enough to deepen the chocolate flavor without making the cookies taste strongly like coffee.
This variation works especially well with dark chocolate. It gives the cookies a richer dessert flavor.
Allergy-Friendly Version
Use sunflower seed butter instead of peanut butter. Use dairy-free chocolate chips if needed.
The flavor will shift, but the cookies can still be delicious. Keep the same method and adjust texture with oats or milk if needed.
Troubleshooting
Why Is My Dough Too Dry?
The dough may need a little more milk. Add milk 1 teaspoon at a time until it holds together when pinched.
Do not overdo the liquid. The dough should be thick and slightly sticky, not wet.
Why Is My Dough Too Sticky?
The dough may have too much moisture or the peanut butter may be too soft. Add a sprinkle of extra oats.
You can also chill the dough for 10 minutes before shaping. This makes it easier to roll and flatten.
Why Did My Cookies Spread Too Much?
The butter may have been too soft or melted. The recipe calls for softened butter, not melted butter.
The oven may also have been too cool. If needed, chill the dough for 10 minutes next time and bake on parchment paper.
Why Are My Cookies Too Soft?
The cookies may need the full 10 minutes, or they may need to cool longer. They firm up as they rest.
Let them sit on the baking sheet for 5 minutes before moving. This helps them set.
Why Is My Caramel Too Thick to Drizzle?
Microwave the caramel for 5 seconds. You can also stir in 1 teaspoon warm water.
If it becomes too runny, chill it briefly. The caramel should be easy to drizzle but not watery.
Frequently Asked Questions
Can I Use Quick Oats Instead of Old-Fashioned Oats?
You can, but the texture will be softer. The cookies may taste more like a muffin top than a chewy oat cookie.
Old-fashioned oats are recommended for the hearty chew. They give the cookies their intended texture.
How Do I Stop My Cookies From Spreading Too Much?
Use softened butter, not melted butter. If your kitchen is hot, chill the dough for 10 minutes before baking.
Bake on parchment paper rather than a greased pan. If needed, add an extra tablespoon of oats to thicken the dough.
Can I Freeze These Cookies?
Yes, freeze the cookies undecorated in a single layer. Add the toppings after thawing.
They will keep for up to 1 month in the freezer. This gives the best texture for the chocolate and caramel drizzle.
My Caramel Sauce Is Too Thick to Drizzle. What Should I Do?
Microwave it for 5 seconds or stir in 1 teaspoon warm water. Mix until smooth and drizzleable.
If it becomes too thin, chill it briefly. Caramel can be fussy, but the texture is easy to adjust.
Can I Use Almond Butter or Cashew Butter?
Yes, almond butter or cashew butter can work. Avoid very oily natural versions that separate.
The flavor will change depending on the nut butter. The method stays the same.
Can I Make These Dairy-Free?
You can use dairy-free chocolate chips and an appropriate milk swap, such as almond milk. For the peanut butter swap, sunflower seed butter is an allergy-friendly option.
The flavor and texture may change slightly. Adjust with small amounts of oats or milk if needed.
Can I Use White Chocolate?
Yes, melted white chocolate can replace semi-sweet chocolate. It gives the cookies a sweeter, creamier topping.
Crushed pretzels are a nice addition with white chocolate. They add salty crunch.
How Should I Store Them for a Bake Sale?
Let the toppings set for about 10 minutes before stacking. Layer with parchment paper so the chocolate and caramel do not stick.
Store at room temperature in an airtight container for up to 3 days. Keep them cool enough that the toppings do not melt.
Why These Cookies Are Great for Parties
These cookies look special without requiring careful decorating. A simple drizzle of chocolate and caramel makes them feel dessert-table ready.
They are easy to pick up and share. Since the recipe makes 24 cookies, it works well for gatherings, bake sales, and party trays.
The flavor is familiar but still exciting. Peanut butter, chocolate, caramel, oats, and optional sea salt are a crowd-friendly combination.
They also travel well once the toppings set. Use parchment between layers if packing them in a container.
Because they are rich, one cookie feels satisfying. That makes them useful when serving a variety of desserts.
Why This Recipe Works for Lazy Baking Days
This recipe is perfect for days when you want homemade cookies without a complicated process. There is no mixer, no dough chilling in the basic method, and no delicate shaping.
The dough is stirred by hand with a sturdy spoon or spatula. It is thick, forgiving, and easy to adjust with a little milk or oats.
The cookies bake quickly in 10 minutes. After a 5-minute rest, they are ready for their chocolate and caramel topping.
Even the decorating is relaxed. Drizzle, sprinkle, let set, and serve.
That is what makes these cookies so useful. They give you big dessert flavor with a simple, practical method.
Final Thoughts
Peanut Butter Chocolate Caramel Cookies are rich, chewy, gooey, and wonderfully easy to make. With old-fashioned oats, peanut butter, softened butter, brown sugar, milk, vanilla, caramel sauce, melted chocolate chips, and optional sea salt, they deliver a dessert that feels indulgent without requiring complicated baking.
The key details are simple. Use old-fashioned oats for chew, avoid oily natural peanut butter, keep the butter softened but not melted, shape the dough into 24 balls, flatten them slightly, and bake at 350°F (175°C) for 10 minutes.
After baking, let the cookies rest on the sheet for 5 minutes so they can set. Then drizzle with melted chocolate and caramel sauce, and add a tiny pinch of sea salt if you want that sweet-salty finish.
Serve them warm and gooey, or let the toppings set and pack them for parties, picnics, bake sales, or dessert trays. They are simple, playful, rich, and exactly the kind of cookie that makes a tray come back empty.
Peanut Butter Chocolate Caramel Cookies
These peanut butter chocolate caramel cookies are chewy, rich, and layered with sweet, salty flavor. Old-fashioned oats give the cookies texture, peanut butter adds a creamy nutty base, and the caramel and melted chocolate make the tops extra indulgent. They are quick to prepare and bake in just 10 minutes, making them a great choice for dessert trays, bake sales, parties, or an easy homemade cookie treat.
Recipe Details
- Prep Time: 15 minutes
- Cook Time: 10 minutes
- Total Time: 25 minutes
- Course: Cookies, Dessert
- Cuisine: American
- Servings: 24 cookies
Equipment
- Mixing bowl
- Baking sheet
Ingredients
- 2 cups old-fashioned oats
- 1 cup chocolate chips melted
- 1 cup caramel sauce store-bought or homemade
- 1 cup peanut butter creamy or chunky
- ½ cup brown sugar
- ¼ cup whole milk
- 4 tablespoons unsalted butter
- 1 teaspoon vanilla extract
- sea salt for garnish
Instructions
Step 1: Prepare the Oven and Baking Sheet
Preheat the oven to 350°F (175°C). Line a baking sheet with parchment paper.
Step 2: Mix the Cookie Dough
In a mixing bowl, combine the old-fashioned oats, peanut butter, unsalted butter, brown sugar, whole milk, and vanilla extract.
Mix until the ingredients are well blended and a cookie dough forms.
Step 3: Shape the Cookies
Roll the dough into 24 small balls and arrange them on the prepared baking sheet.
Gently flatten each dough ball with your fingers.
Step 4: Bake the Cookies
Bake for 10 minutes, or until the edges are lightly golden.
Step 5: Cool on the Baking Sheet
Allow the cookies to cool on the baking sheet for 5 minutes before adding the toppings.
Step 6: Add Chocolate, Caramel, and Sea Salt
Drizzle the melted chocolate and caramel sauce over the cookies.
Sprinkle with sea salt, if desired.
Notes
Store the cookies in an airtight container at room temperature for up to 3 days.
Serving Suggestions
- Serve with cold milk.
- Pair with hot coffee or cocoa.
- Add to cookie trays or dessert boards.
- Serve as a sweet snack for parties or bake sales.
- Top with a small extra drizzle of caramel before serving for a richer finish.
Storage
How to Store
Keep the cookies in an airtight container at room temperature for up to 3 days.
Best Texture Tip
Let the cookies cool briefly before drizzling with melted chocolate and caramel so the toppings sit nicely on the surface without soaking into the cookies too much.

Fernando is the creator and writer behind the food blog Eating with your Hands. Living and working in cities like Paris, Barcelona, and Berlin, and being married to a Canadian foodie, has given Fernando a passion and interest in food and inspired him to run EWYH.