
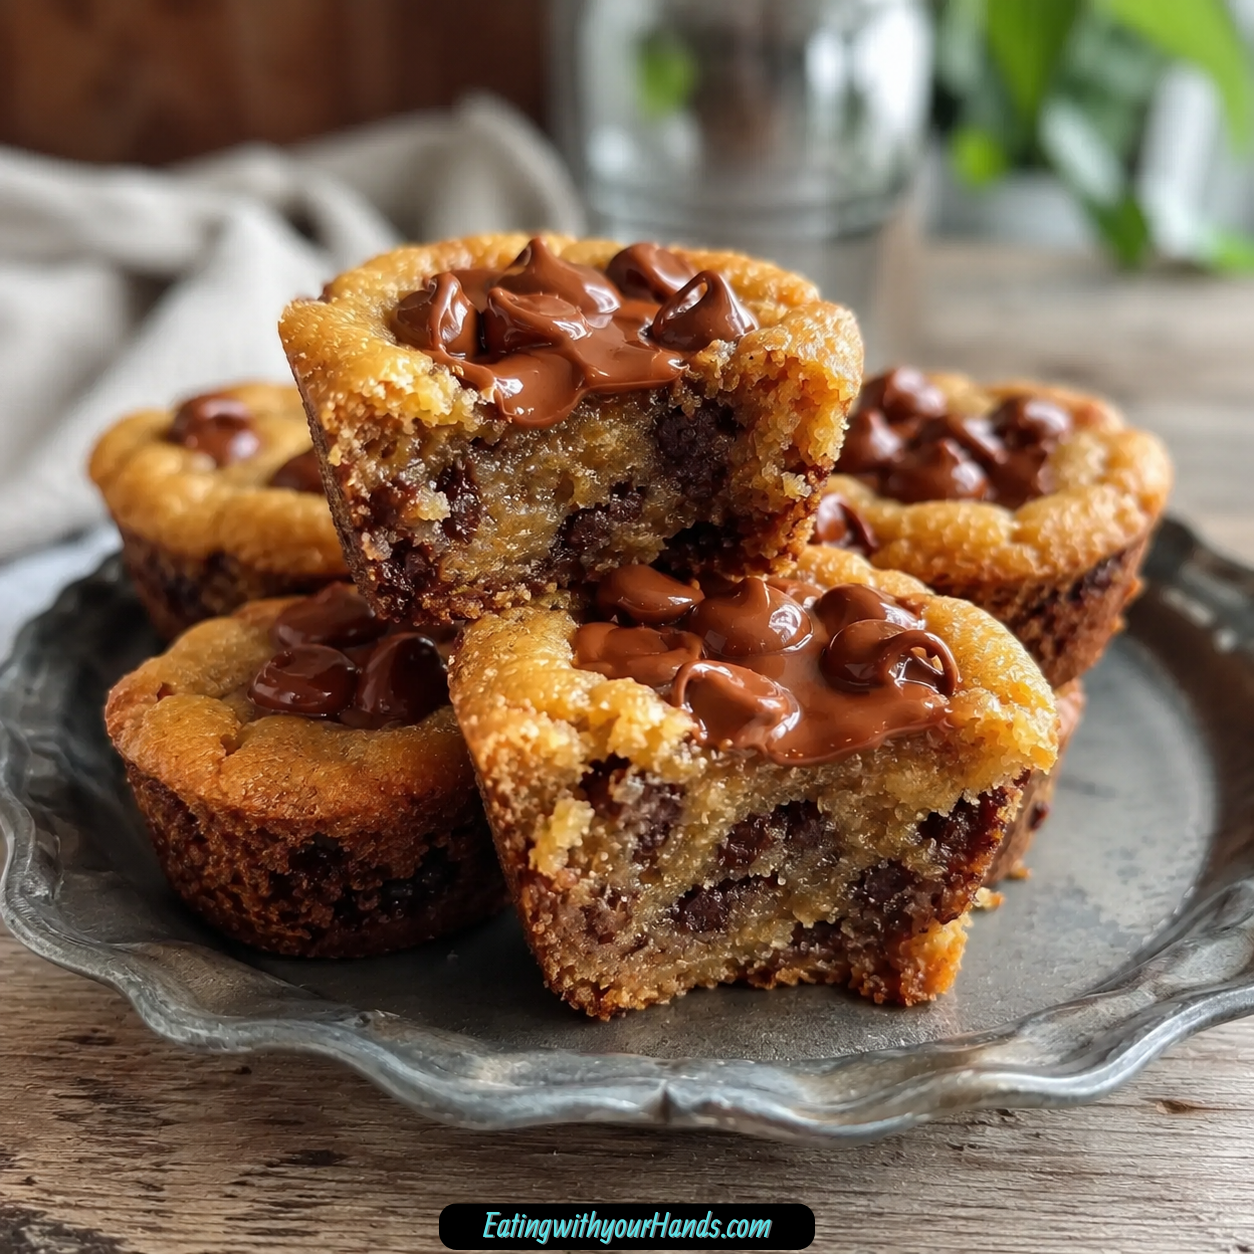
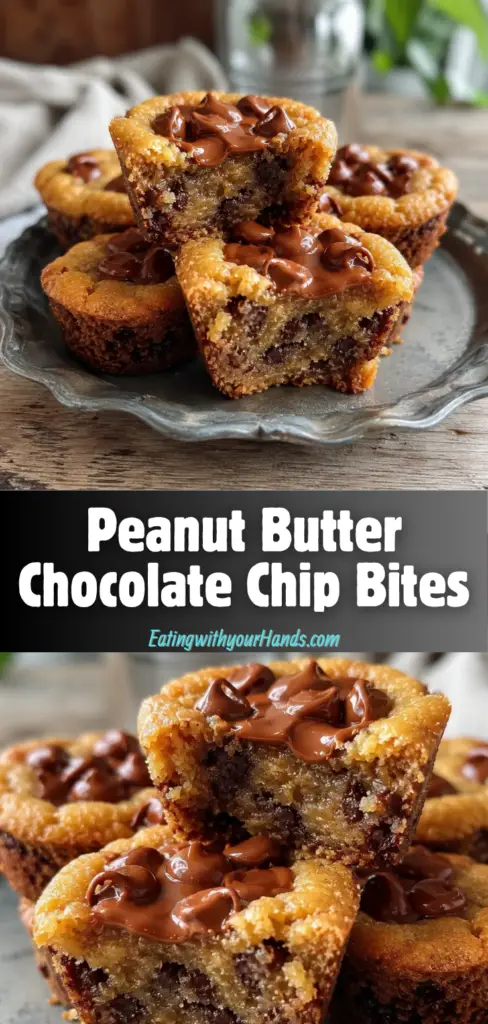
Peanut Butter Chocolate Chip Bites are the kind of little dessert squares that feel familiar and special at the same time. They have the cozy flavor of peanut butter cookies, the sweetness of chocolate chips, and the neat layered look of something you might tuck into a party tray or a holiday treat box.
I love recipes that take a classic flavor pairing and give it a new shape. Peanut butter and chocolate already belong together, but when they are tucked between buttery dough and baked into clean, snackable bites, they feel a little more polished without becoming difficult.
These bites are part cookie, part candy bar, and completely comforting. The dough bakes up tender and golden, the peanut butter filling stays creamy and sweet, and the chocolate chips melt into rich little pockets between the layers.
They are perfect for lunchbox surprises, cookie swaps, party platters, gifting tins, or a simple weekend baking project. You can cut them into squares, rectangles, or playful shapes, which makes them easy to adapt for holidays, kids, or any table that needs a homemade sweet.
Table of Contents
- Why You’ll Love This Recipe
- Recipe Details
- Ingredients
- Optional Swaps, Variations, Add-Ins, and Serving Ideas
- Why These Peanut Butter Chocolate Chip Bites Work
- Directions
- Step 1: Preheat the Oven to 350°F (175°C)
- Step 2: Line the Baking Sheet
- Step 3: Cream the Butter and Sugars
- Step 4: Add the Egg and Vanilla if Using
- Step 5: Add the Flour Gradually
- Step 6: Divide the Dough Into Two Portions
- Step 7: Chill the Dough if Desired
- Step 8: Make the Peanut Butter Filling
- Step 9: Roll Out the First Dough Half
- Step 10: Spread the Peanut Butter Filling
- Step 11: Add the Chocolate Chips
- Step 12: Roll Out the Second Dough Half
- Step 13: Place the Second Dough Layer on Top
- Step 14: Trim and Cut Into Bites
- Step 15: Arrange the Bites on the Baking Sheet
- Step 16: Brush With Egg Wash
- Step 17: Bake for 12–15 Minutes
- Step 18: Cool on the Pan for 5 Minutes
- Step 19: Transfer to a Wire Rack
- Serving Ideas
- Storage
- Reheating
- Freezing
- Make-Ahead
- Helpful Notes for Best Results
- Variations
- Troubleshooting
- Frequently Asked Questions
- Why This Recipe Works So Well
- Final Thoughts
- Peanut Butter Chocolate Chip Bites
- Recipe Details
- Ingredients
- Instructions
- Step 1: Prepare the Oven and Baking Sheet
- Step 2: Cream the Butter and Sugars
- Step 3: Add the Egg and Vanilla
- Step 4: Make the Dough
- Step 5: Mix the Peanut Butter Filling
- Step 6: Roll the First Dough Layer
- Step 7: Add the Filling and Chocolate Chips
- Step 8: Add the Top Dough Layer
- Step 9: Cut Into Bites
- Step 10: Brush the Tops
- Step 11: Bake Until Golden
- Step 12: Cool Before Serving
- Notes
- Serving Suggestions
- Storage
Why You’ll Love This Recipe
Peanut Butter Chocolate Chip Bites are all about layered goodness. Instead of mixing the peanut butter and chocolate into the dough, they are tucked inside so every bite has a sweet filling and a chocolate surprise.
They are easy to shape and customize. You can cut them into bite-sized squares, rectangles, or use cookie cutters for fun shapes.
These bites are freezer-friendly, which makes them helpful for planning ahead. Bake and cool them fully, then freeze them for quick desserts or snacks later.
They are kid-friendly because they are easy to eat and fun to help assemble. Rolling dough, spreading peanut butter filling, sprinkling chocolate chips, and cutting shapes all feel like hands-on baking moments.
They are also elegant enough for events. The layered look makes them a great addition to dessert trays, cookie swaps, treat boxes, and tins.
No special equipment is required. A rolling pin and baking sheet are enough, and a sharp knife or pizza cutter helps create neat pieces.
Recipe Details
These Peanut Butter Chocolate Chip Bites bake at 350°F (175°C). The baking sheet should be lined with parchment paper before the bites are arranged about 1 inch apart.
The dough begins with 1 cup softened unsalted butter, ¾ cup brown sugar, and ½ cup granulated sugar. These are creamed together until light and fluffy, about 2–3 minutes with a hand or stand mixer.
One large egg is optional in the dough. If using it, mix it in with 1 teaspoon vanilla extract until fully incorporated, but if omitting the egg, continue directly to adding the flour.
The dough uses 2 cups all-purpose flour. Once a soft dough forms, it is divided into two equal portions.
Chilling the dough is optional but helpful. Each portion can be wrapped in plastic wrap and chilled for 30 minutes to make rolling and layering easier.
The peanut butter filling is made with ½ cup creamy peanut butter and ¼ cup powdered sugar. This mixture is spread over the first rolled dough layer, then topped with 1 ½ cups semi-sweet chocolate chips before the second dough layer is placed over the top.
The bites are brushed with an egg wash made from 1 egg yolk mixed with 1 tablespoon water. They bake for 12–15 minutes, until the edges are lightly golden and the tops are set.
Ingredients
Buttery Dough
1 cup unsalted butter, softened
¾ cup brown sugar
½ cup granulated sugar
1 large egg, optional
1 teaspoon vanilla extract
2 cups all-purpose flour
Peanut Butter Chocolate Filling
½ cup creamy peanut butter
¼ cup powdered sugar
1 ½ cups semi-sweet chocolate chips
Golden Finish
1 egg yolk mixed with 1 tablespoon water
Ingredient Notes
Softened unsalted butter is essential for the rich, soft dough. It creams smoothly with the sugars and helps create a tender bite.
Brown sugar adds moisture and a slight caramel note. Granulated sugar gives sweetness and helps the dough hold structure.
The egg is optional. It adds richness and structure, but the recipe still works without it.
Vanilla extract boosts the flavor and aroma of the dough. It makes the buttery base taste warmer and more complete.
All-purpose flour provides structure and chew. Add it gradually so the dough forms evenly.
Creamy peanut butter works best for the filling because it spreads smoothly. Powdered sugar sweetens and stabilizes the peanut butter layer.
Semi-sweet chocolate chips give every bite rich chocolate flavor. The egg yolk and water mixture is brushed on top to help create a golden finish.
Optional Swaps, Variations, Add-Ins, and Serving Ideas
Peanut Butter Options
Creamy peanut butter gives the smoothest filling. Crunchy peanut butter can be used if you want extra texture.
Natural peanut butter can also be used, but it must be well mixed and not too oily. If it is too loose, the filling may become runny.
Chocolate Options
Semi-sweet chocolate chips are the main chocolate layer. Mini chocolate chips can be used for more even distribution.
Mini chips spread through the filling more easily and make the bites a little easier to cut. Regular chips give larger pockets of melty chocolate.
Decorative Finishes
For a fancier finish, drizzle the cooled bites with melted chocolate. You can also dust them with cocoa powder.
These simple touches make the bites look more dressed up for dessert trays. They are especially nice for parties or gifting.
Extra Flavor
Add a pinch of cinnamon to the dough for warmth. You can also add a pinch of sea salt on top before baking.
The cinnamon gives the buttery dough a gentle spice note. Sea salt adds contrast to the peanut butter and chocolate.
Gluten-Free Direction
You can make these with a 1:1 gluten-free flour blend. The texture may be slightly different but still delicious.
Use the same method and visual cues. The bites should bake until the edges are lightly golden and the tops are set.
Egg-Free Direction
The egg in the dough is optional, so you can skip it. You can also use an egg substitute.
The egg wash can be replaced with milk for a bit of shine. This keeps the top finished without using the yolk wash.
Why These Peanut Butter Chocolate Chip Bites Work
These bites work because the filling is layered instead of stirred into the dough. That gives each square a defined center of peanut butter and chocolate.
The dough is soft, buttery, and sturdy enough to wrap around the filling. Brown sugar and granulated sugar balance moisture and sweetness.
Powdered sugar thickens the peanut butter so it spreads like a filling instead of melting into a thin layer. This helps the bites hold their shape.
Chocolate chips add rich flavor and texture. Pressing them gently into the peanut butter layer helps them stay in place when the top dough is added.
The egg wash creates a golden finish. It makes the tops look polished and gives the bites a bakery-style appearance.
Chilling the dough is optional, but it helps with rolling and clean layering. A chilled dough is easier to handle, especially when shaping neat squares.
Directions
Step 1: Preheat the Oven to 350°F (175°C)
Set your oven to 350°F (175°C). This temperature allows the dough to bake through while the tops set and the edges turn lightly golden.
Let the oven fully preheat before baking. Since these bites are layered, steady heat helps the dough bake evenly around the peanut butter and chocolate filling.
This is also the best time to prepare your pan and gather the tools. Once the layered dough is cut, the bites should be ready to go straight onto the baking sheet.
Step 2: Line the Baking Sheet
Line a baking sheet with parchment paper. This prevents sticking and makes cleanup easier.
The bites have a buttery dough and a sweet filling, so parchment helps them release neatly after baking. It also makes it easier to move them once cooled.
Set the lined baking sheet aside. You will place the cut pieces about 1 inch apart before baking.
Step 3: Cream the Butter and Sugars
In a large bowl, cream together 1 cup softened unsalted butter, ¾ cup brown sugar, and ½ cup granulated sugar. Beat until the mixture is light and fluffy, about 2–3 minutes with a hand or stand mixer.
This step creates the base of the dough. The softened butter blends with the sugars to create a tender, sweet texture.
Scrape the bowl as needed so everything mixes evenly. The mixture should look smooth and lighter before moving on.
Step 4: Add the Egg and Vanilla if Using
If using the optional egg, mix in 1 large egg and 1 teaspoon vanilla extract. Beat until fully incorporated.
The egg adds richness and structure, while the vanilla boosts aroma and flavor. The mixture should look creamy and well combined.
If you are omitting the egg, skip it and proceed directly to the next step. The recipe still works without the egg.
Step 5: Add the Flour Gradually
Gradually add 2 cups all-purpose flour to the wet mixture. Mix until a soft dough forms.
Add the flour in portions so it blends evenly. This helps prevent dry pockets and keeps the dough easier to manage.
Stop mixing once the dough comes together. It should be soft and workable, not overmixed or tough.
Step 6: Divide the Dough Into Two Portions
Divide the dough into two equal portions. These two portions will become the bottom and top layers of the bites.
Try to make the portions as even as possible. Even dough layers make the final bites look cleaner and bake more consistently.
Shape each portion gently so it is easier to wrap or roll. You do not need perfect shapes yet, just two equal pieces.
Step 7: Chill the Dough if Desired
For easier handling, wrap each portion in plastic wrap and chill for 30 minutes. This step is optional but helpful.
Chilled dough is less sticky and easier to roll into a neat rectangle. It also makes layering cleaner.
If you are short on time, you can continue without chilling. Just handle the dough gently and use a lightly floured surface if needed.
Step 8: Make the Peanut Butter Filling
In a small bowl, mix ½ cup creamy peanut butter and ¼ cup powdered sugar until smooth. This creates the sweet peanut butter filling.
The powdered sugar helps stabilize the peanut butter. It makes the filling thicker and easier to spread over the dough.
Mix until no dry powdered sugar remains. The filling should look smooth, creamy, and spreadable.
Step 9: Roll Out the First Dough Half
On a lightly floured surface, roll out one half of the dough to about ¼ inch thickness. Try to make it a rectangle for easy layering.
A rectangle makes the filling easier to spread and the finished bites easier to cut. It does not have to be perfect, but straight edges help.
If the dough sticks, dust the surface lightly with flour. Use just enough to prevent sticking without drying the dough.
Step 10: Spread the Peanut Butter Filling
Spread the peanut butter mixture evenly over the rolled-out dough. Leave a slight border around the edges.
The border helps with sealing once the top dough layer is added. It also helps keep the filling from squeezing out too much.
Spread gently so you do not tear the dough. A smooth, even peanut butter layer gives every bite the right flavor.
Step 11: Add the Chocolate Chips
Sprinkle 1 ½ cups semi-sweet chocolate chips evenly over the peanut butter layer. Press down gently to set them in place.
Pressing lightly helps the chips stay put when the second dough sheet is added. It also makes the final layers easier to cut.
Try to cover the filling evenly. Each bite should have both peanut butter and chocolate.
Step 12: Roll Out the Second Dough Half
Roll out the second half of the dough to match the size of the first. Keep it about the same thickness so the bites bake evenly.
Use the first rolled dough as a guide for size. A matching top layer makes the finished pieces neater.
If the dough becomes too soft, pause briefly or chill it again. Soft dough can stretch when moved.
Step 13: Place the Second Dough Layer on Top
Carefully lay the second dough half over the chocolate chip layer. Press lightly to seal the edges.
Work slowly so the top layer does not tear. If it stretches or wrinkles, gently adjust it with your hands.
Pressing the edges helps hold the filling inside. It also gives the bites a cleaner shape after cutting.
Step 14: Trim and Cut Into Bites
Use a sharp knife or pizza cutter to trim the edges if you want a neater finish. This step is optional.
Cut the layered dough into bite-sized squares or your desired shapes. You can also use cookie cutters for fun shapes.
For clean, even squares, use a ruler and pizza cutter. Neat cuts make the bites look more polished for trays or gifting.
Step 15: Arrange the Bites on the Baking Sheet
Place the bites on the lined baking sheet about 1 inch apart. Give them a little space so they can bake evenly.
They will not need as much room as traditional drop cookies, but spacing still matters. The edges need room to set.
Transfer them gently so the layers stay aligned. A thin spatula can help if the dough is soft.
Step 16: Brush With Egg Wash
Mix 1 egg yolk with 1 tablespoon water. Brush the tops of the bites lightly with the egg wash.
This helps the tops bake to a beautiful golden color. Use a light touch so the dough is coated but not soaked.
If making the egg wash substitute, milk can be used for a bit of shine. The finish may look slightly different.
Step 17: Bake for 12–15 Minutes
Bake the bites for 12–15 minutes. They are done when the edges are lightly golden and the tops are set.
Watch the edges closely. They are the best clue that the dough has baked through.
Do not overbake. The goal is tender dough with a warm peanut butter and chocolate center.
Step 18: Cool on the Pan for 5 Minutes
Let the bites cool on the pan for 5 minutes. This helps them firm enough to move.
The filling will be warm and soft right after baking. A short rest keeps the layers from sliding or breaking.
This also allows the bottoms to set. After 5 minutes, they are ready to move to a wire rack.
Step 19: Transfer to a Wire Rack
Transfer the bites to a wire rack to cool completely. This lets air circulate so the bottoms do not become too soft.
Cooling completely helps the chocolate settle and the dough finish firming. The bites are easier to store once fully cool.
Serve them warm for a softer center or fully cooled for cleaner, neater pieces. Both ways are delicious.
Serving Ideas
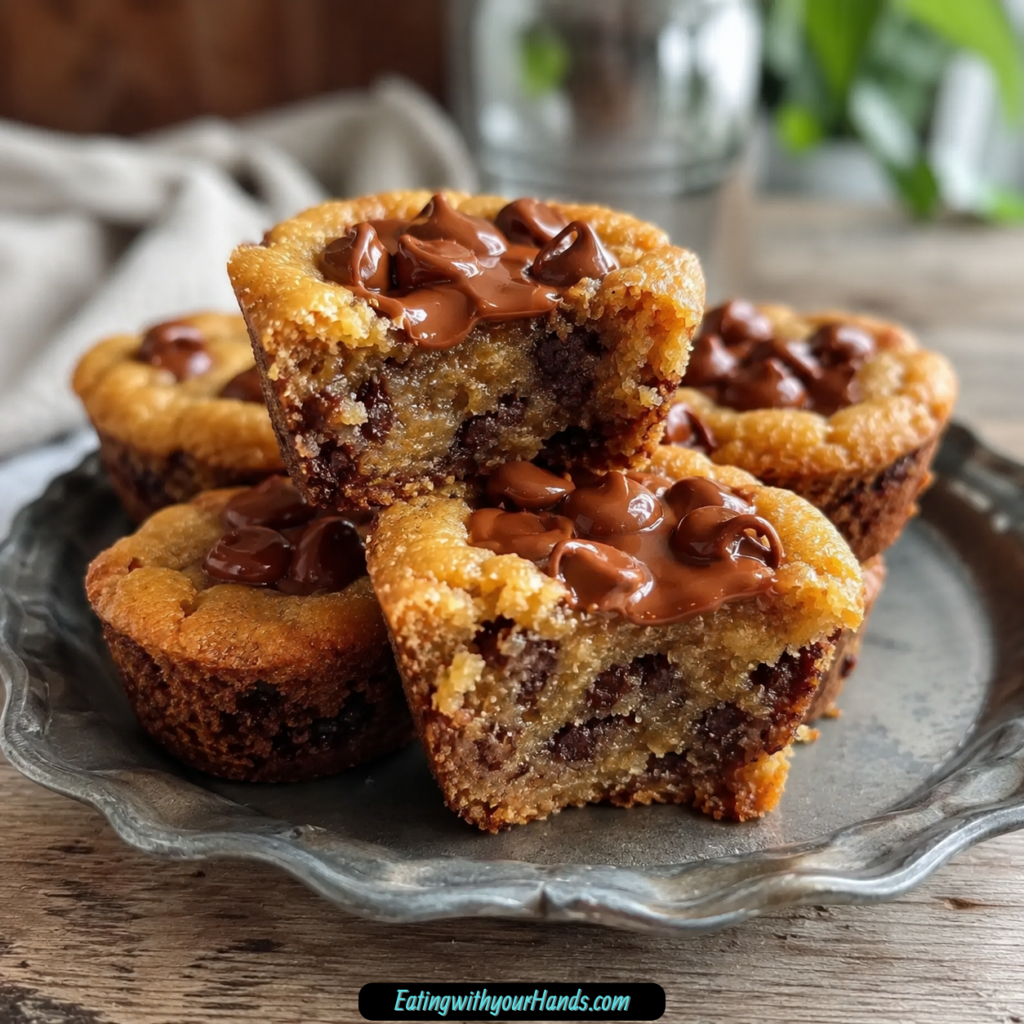
Serve Peanut Butter Chocolate Chip Bites on a platter dusted with powdered sugar for a pretty presentation. The light dusting makes the layered squares look a little more special.
Pair them with a tall glass of milk. The classic peanut butter and chocolate flavor tastes especially comforting with milk.
They are also lovely with hot coffee. The richness of the peanut butter and chocolate works well with a warm drink.
Pack them in treat boxes or tins for gifting. Their neat shape makes them easy to arrange and share.
Serve them at cookie swaps, parties, or dessert trays. The layered look gives them a bakery-worthy twist without complicated decorating.
Storage
Store the bites in an airtight container at room temperature for up to 5 days. Let them cool completely before storing.
If your kitchen is particularly warm, refrigerate them. This helps protect the chocolate and peanut butter filling.
Use parchment between layers if stacking. This keeps the tops neat and prevents sticking.
Keep the container sealed between servings. Airtight storage helps preserve the tender dough texture.
Reheating
These bites can be reheated for a warm treat. Use a toaster oven or microwave.
Warm them gently so the peanut butter and chocolate soften without overheating the dough. A little warmth makes the center feel extra cozy.
If reheating from the refrigerator, use a brief warming time. The goal is soft and warm, not dry.
Freezing
Freeze fully baked and cooled bites in a freezer-safe bag for up to 2 months. Make sure they are completely cooled before freezing.
Seal the bag well to protect the texture. If stacking, separate layers with parchment if needed.
Reheat in a toaster oven or microwave for a warm treat. You can also let them thaw before serving.
Freezing makes these bites useful for busy weeks. They are easy to pull out when you need a quick dessert or snack.
Make-Ahead
These Peanut Butter Chocolate Chip Bites are make-ahead friendly because they store and freeze well. You can bake them, cool them, and keep them ready for snacks or dessert trays.
For short-term storage, keep them in an airtight container at room temperature for up to 5 days. If the kitchen is warm, refrigerate them.
For longer storage, freeze the fully baked and cooled bites for up to 2 months. Reheat in a toaster oven or microwave when you want a warm treat.
You can also chill the dough portions for easier rolling before assembly. That 30-minute chill helps make the layering cleaner.
Helpful Notes for Best Results
Skipping the egg is fine. These bites still turn out rich and flavorful without the egg.
Chilling the dough is optional, but it helps with easier rolling and cleaner layering. If the dough feels too soft, chill it for 30 minutes.
Use creamy peanut butter for the smoothest filling. If using natural peanut butter, make sure it is well mixed and not too oily.
Try crunchy peanut butter for more texture. Use mini chocolate chips if you want more even distribution.
For a fancier finish, drizzle the cooled bites with melted chocolate or dust them with cocoa powder. These touches make them look event-ready.
Use a ruler and pizza cutter for clean, even squares. This is helpful for gifting or dessert trays.
Add a pinch of cinnamon to the dough or a pinch of sea salt on top before baking for extra flavor. Keep the additions light so the peanut butter and chocolate stay central.
Variations
Crunchy Peanut Butter Bites
Use crunchy peanut butter instead of creamy peanut butter. This adds texture to the filling.
The bites will have a slightly more rustic crunch. They still keep the same peanut butter-chocolate flavor.
Mini Chocolate Chip Bites
Use mini chocolate chips for more even distribution. This gives every bite smaller pockets of chocolate.
Mini chips are also easier to cut through. They work especially well when making smaller squares.
Chocolate-Drizzled Bites
Drizzle the cooled bites with melted chocolate. This makes them look more polished.
Let the drizzle set before storing. This variation is especially nice for gift boxes.
Cocoa-Dusted Bites
Dust the finished bites with cocoa powder. This gives them a simple, pretty finish.
Cocoa powder adds a slightly deeper chocolate look. Use it lightly for presentation.
Cinnamon Peanut Butter Bites
Add a pinch of cinnamon to the dough. This gives the buttery dough a little warmth.
The cinnamon should be subtle. It supports the peanut butter and chocolate without overpowering them.
Sea Salt Chocolate Peanut Butter Bites
Add a pinch of sea salt on top before baking. This gives the bites a sweet-salty finish.
Sea salt works especially well with chocolate and peanut butter. Use only a small pinch.
Gluten-Free Peanut Butter Chocolate Chip Bites
Use a 1:1 gluten-free flour blend. The texture may be slightly different but still delicious.
Follow the same rolling, filling, cutting, and baking method. Watch for lightly golden edges and set tops.
Troubleshooting
Why Is My Dough Too Soft to Roll?
The butter may be very soft, or the dough may be warm. Wrap each portion in plastic wrap and chill for 30 minutes.
Chilling makes the dough firmer and easier to handle. It also helps create cleaner layers.
Why Is the Peanut Butter Filling Runny?
Natural peanut butter may not have been mixed well, or it may be too oily. Make sure it is well stirred before using.
Powdered sugar helps stabilize the filling. Mix until the filling is smooth and thick enough to spread.
Why Are the Layers Sliding?
The filling may have been spread too close to the edges, or the dough may have been too warm. Leave a slight border and press lightly to seal the edges.
Cooling the baked bites on the pan for 5 minutes also helps the layers set. Do not move them too quickly.
Why Are My Squares Messy?
The dough may have been too soft when cut. Chilling makes the dough easier to cut cleanly.
Use a sharp knife or pizza cutter. A ruler can help make even squares.
Why Are the Tops Pale?
The egg wash may have been skipped, or the bites may need the full baking time. Brush lightly with the egg yolk and water mixture before baking.
Milk can replace the egg wash for a bit of shine if needed. The color may not be exactly the same, but it still helps the top look finished.
Frequently Asked Questions
Can I Use Natural Peanut Butter?
Yes, but make sure it is well mixed and not too oily. If it is too oily, the filling may be runny.
Creamy peanut butter is the easiest option because it spreads smoothly. Natural peanut butter needs more attention before mixing with powdered sugar.
Do I Have to Chill the Dough?
Chilling is optional but helpful. It makes rolling easier and layering cleaner.
If your dough feels soft or sticky, chill it for 30 minutes. If it is easy to handle, you can continue without chilling.
Can I Make This Gluten-Free?
Yes, use a 1:1 gluten-free flour blend. The texture may be slightly different but still delicious.
Follow the same method. Bake until the edges are lightly golden and the tops are set.
How Do I Make It Egg-Free?
The egg in the dough is optional, so you can skip it. You can also use an egg substitute.
The egg wash can be replaced with milk for a bit of shine. This keeps the tops looking finished without using the yolk wash.
What If I Do Not Have Powdered Sugar?
Blend granulated sugar in a food processor until fine. You can also use honey, reduced slightly, for a different twist.
Powdered sugar helps sweeten and stabilize the peanut butter filling. If using an alternative, the filling texture may change.
Can I Freeze These Bites?
Yes, freeze fully baked and cooled bites in a freezer-safe bag for up to 2 months. Reheat in a toaster oven or microwave for a warm treat.
Make sure they are cooled before freezing. This helps protect the texture.
Can I Cut Them Into Shapes?
Yes, you can cut them into squares, rectangles, or use cookie cutters for fun shapes. Cookie cutters are especially nice for parties or holidays.
For clean cuts, use a sharp knife, pizza cutter, or ruler. Chilled dough is easier to cut neatly.
Why This Recipe Works So Well
Peanut Butter Chocolate Chip Bites work so well because they take a classic flavor combination and turn it into a tidy layered treat. Instead of a regular cookie dough with mix-ins, each bite has a clear peanut butter and chocolate center.
The dough is buttery and tender but strong enough to hold the filling. Brown sugar and granulated sugar give it sweetness, while flour gives it structure.
The peanut butter filling becomes smooth and stable with powdered sugar. That makes it easier to spread and keeps it from turning too loose during assembly.
The chocolate chips melt slightly as the bites bake. They add rich little pockets that make the filling feel more indulgent.
The egg wash gives the tops a golden finish, making the bites look more polished. The optional milk replacement still gives a bit of shine.
Most of all, this recipe works because it is simple but feels thoughtful. The layers make the bites look special, while the flavor stays familiar, comforting, and easy to love.
Final Thoughts
Peanut Butter Chocolate Chip Bites are the kind of treat that feels nostalgic but just a little elevated. They bring together tender buttery dough, creamy peanut butter filling, and melty semi-sweet chocolate chips in a neat little square that is easy to serve and even easier to enjoy.
I love them for lunchbox treats, dessert trays, cookie swaps, gifting tins, and cozy baking days when peanut butter and chocolate sound exactly right. They are simple enough to make without stress but pretty enough to share.
Cut them into squares, dress them up with melted chocolate or cocoa powder, or keep them plain and classic. However you serve them, these bites have that sweet peanut butter-chocolate comfort that always finds a place on the dessert table.
Peanut Butter Chocolate Chip Bites
These Peanut Butter Chocolate Chip Bites are buttery, sweet, and filled with creamy peanut butter and melty semi-sweet chocolate chips. Baked until lightly golden and cut into small squares, they make an easy treat for lunchboxes, bake sales, dessert trays, or cozy coffee breaks.
Recipe Details
- Prep Time: 20 minutes
- Cook Time: 15 minutes
- Total Time: 35 minutes
- Servings: 24 bites
- Calories: 180 kcal
Ingredients
- 1½ cups semi-sweet chocolate chips
- ½ cup creamy peanut butter
- ¼ cup powdered sugar
- 2 cups all-purpose flour
- 1 teaspoon vanilla extract
- 1 large egg optional
- ¾ cup brown sugar
- ½ cup granulated sugar
- 1 cup unsalted butter softened
- 1 egg yolk mixed with 1 tablespoon water for brushing
Instructions
Step 1: Prepare the Oven and Baking Sheet
Preheat oven to 350°F (175°C) and line a baking sheet with parchment paper.
Step 2: Cream the Butter and Sugars
In a large bowl, cream the softened butter, brown sugar, and granulated sugar until light and fluffy.
Step 3: Add the Egg and Vanilla
Add the egg, if using, along with the vanilla extract. Mix well until combined.
Step 4: Make the Dough
Gradually mix in the all-purpose flour until a soft dough forms.
Step 5: Mix the Peanut Butter Filling
In a separate bowl, mix the creamy peanut butter and powdered sugar until smooth.
Step 6: Roll the First Dough Layer
Roll out half of the dough to ¼ inch thickness.
Step 7: Add the Filling and Chocolate Chips
Spread the peanut butter mixture over the rolled dough, then sprinkle the semi-sweet chocolate chips evenly over the top.
Step 8: Add the Top Dough Layer
Roll out the second half of the dough and place it over the peanut butter and chocolate chip layer. Press lightly to seal.
Step 9: Cut Into Bites
Cut the layered dough into bite-sized squares and place them on the prepared baking sheet.
Step 10: Brush the Tops
Brush the tops with the egg yolk mixed with 1 tablespoon water.
Step 11: Bake Until Golden
Bake for 12-15 minutes, until the edges are lightly golden.
Step 12: Cool Before Serving
Cool the bites on wire racks before serving.
Notes
Chilling the dough before rolling makes it easier to handle.
Use a sharp knife or pizza cutter for clean, uniform squares.
Skip the egg for an egg-free version; the bites are still deliciously rich.
These are great with a drizzle of melted chocolate or a sprinkle of sea salt on top.
Store in an airtight container for up to 5 days or freeze for up to 2 months.
Serving Suggestions
- Serve with coffee, cold milk, or hot cocoa for a sweet snack.
- Pack into lunchboxes for a small homemade treat.
- Add to bake sale trays, cookie boxes, or dessert platters.
- Serve slightly warm for softer chocolate chips and a richer peanut butter filling.
- Cut into neat squares for easy bite-sized party servings.
Storage
How to Store
Store the cooled bites in an airtight container for up to 5 days.
How to Freeze
Freeze the bites for up to 2 months.
How to Serve After Freezing
Thaw before serving so the dough layers and peanut butter filling soften properly.
Best Texture Tip
Chill the dough before rolling if it feels too soft, and let the baked bites cool on wire racks so the edges stay lightly crisp while the centers remain tender.

Fernando is the creator and writer behind the food blog Eating with your Hands. Living and working in cities like Paris, Barcelona, and Berlin, and being married to a Canadian foodie, has given Fernando a passion and interest in food and inspired him to run EWYH.