
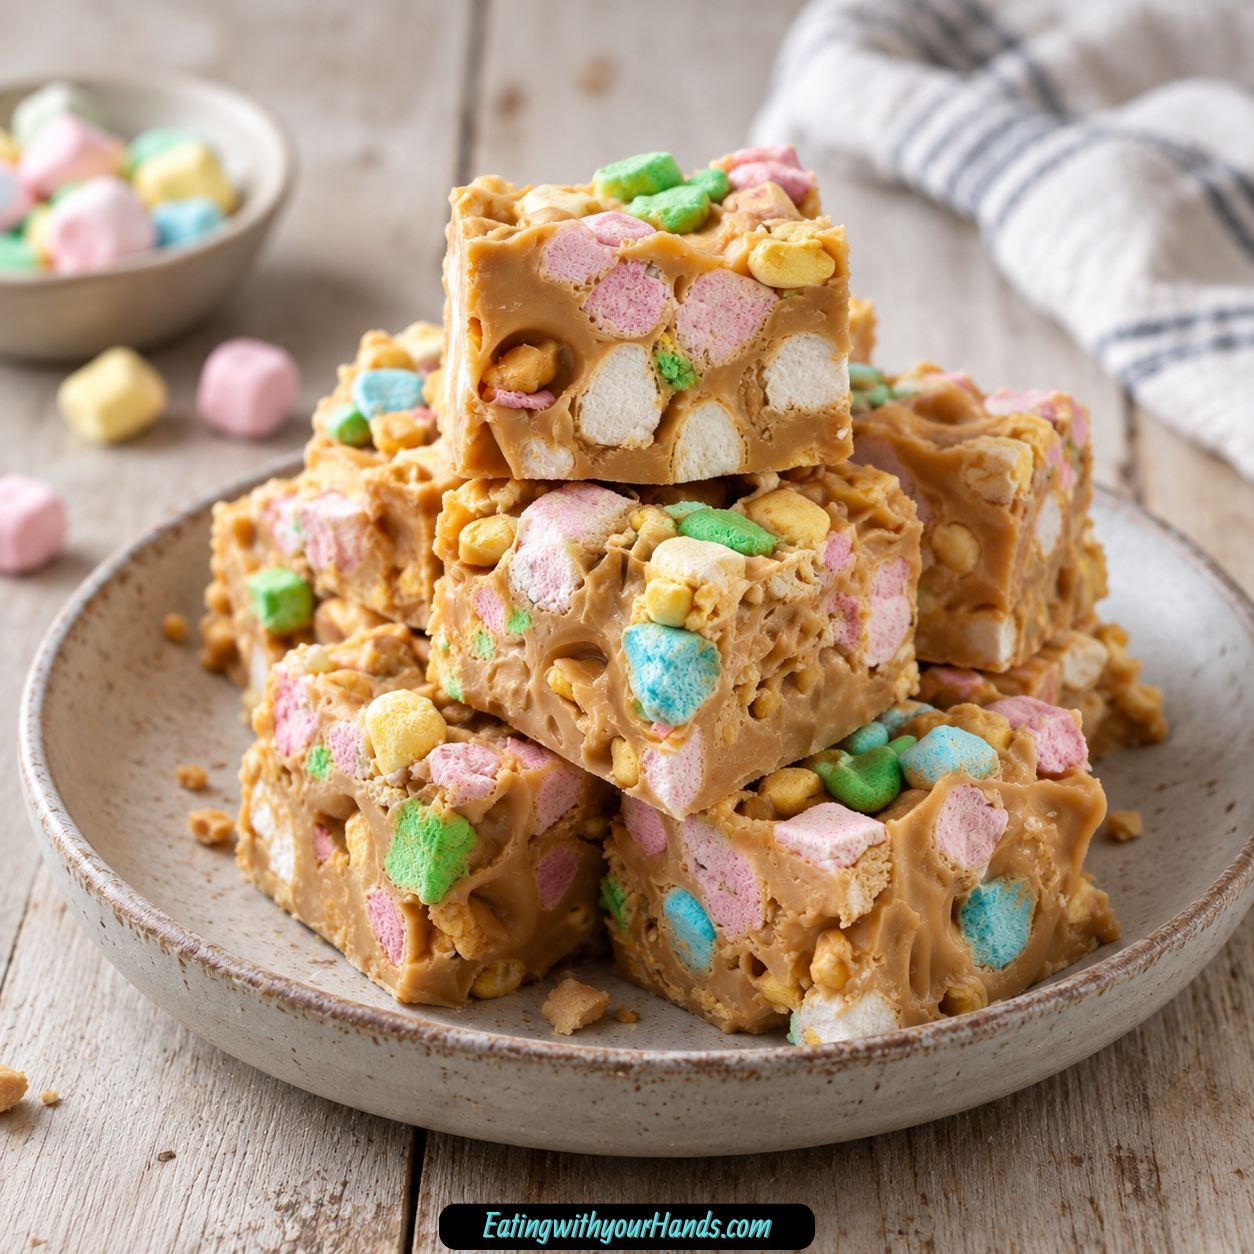
Peanut Butter Marshmallow Squares are the kind of no-bake dessert that feels sweet, cheerful, and wonderfully familiar. They have that old-school kitchen charm, the kind that comes from melting a glossy peanut butter mixture on the stovetop, folding in colorful marshmallows, and waiting for everything to set into soft, chewy squares.
This is a treat that does not need an oven, fancy decorating, or complicated steps. It is simple, rich, colorful, and full of the nostalgic sweetness that makes people reach for just one more piece.
The base starts with unsalted butter, creamy peanut butter, and butterscotch chips. As they melt together over low heat, they become smooth, shiny, and full of that classic peanut butter-butterscotch flavor.
Vanilla extract rounds out the sweetness, giving the mixture a deeper aroma. Then fruity-flavored mini marshmallows are folded in, bringing color, chewiness, and a playful flavor twist.
Once pressed into a greased 9×13-inch baking dish, the mixture simply needs time to firm up. It can set at room temperature for at least 2 hours, or it can be refrigerated if you want quicker results.
These squares are perfect for potlucks, bake sales, holiday trays, parties, family gatherings, and busy weeknights when you want something sweet without turning on the oven. They are easy enough for beginners but still fun and impressive enough to share.
Peanut Butter Marshmallow Squares taste best at room temperature when they are soft, chewy, and easy to bite into. Each square has creamy peanut butter richness, butterscotch sweetness, and bright marshmallow pieces that make the whole dessert feel happy and homemade.
Table of Contents
- Why You’ll Love These Peanut Butter Marshmallow Squares
- Recipe Details
- Ingredients
- For the Peanut Butter Butterscotch Base
- For the Marshmallow Squares
- Ingredient Notes
- Optional Swaps, Variations, Add-Ins, and Serving Ideas
- Milk Chocolate Peanut Butter Squares
- White Chocolate Peanut Butter Squares
- Less Sweet Peanut Butter Squares
- Gluten-Free Peanut Butter Marshmallow Squares
- Chilled Peanut Butter Squares
- Room-Temperature Soft Squares
- Holiday Tray Squares
- Potluck Peanut Butter Squares
- Bake Sale Squares
- Freezer-Friendly Squares
- Beginner-Friendly Treat
- Why This Recipe Works
- Directions
- Step 1: Prepare the Baking Dish
- Step 2: Measure the Ingredients
- Step 3: Melt the Butter Gently
- Step 4: Add the Creamy Peanut Butter
- Step 5: Stir in the Butterscotch Chips
- Step 6: Watch the Heat Carefully
- Step 7: Remove from Heat
- Step 8: Add the Vanilla Extract
- Step 9: Fold in the Fruity Mini Marshmallows
- Step 10: Transfer to the Baking Dish
- Step 11: Press into an Even Layer
- Step 12: Let the Squares Set
- Step 13: Chill Before Cutting If Needed
- Step 14: Slice into Squares
- Step 15: Serve at Room Temperature
- Step 16: Store the Squares
- Step 17: Freeze for Longer Storage
- Serving Ideas
- Storage
- Freezing
- Make-Ahead
- Helpful Notes for Best Results
- Variations
- Milk Chocolate Peanut Butter Marshmallow Squares
- White Chocolate Peanut Butter Marshmallow Squares
- Less Sweet Marshmallow Squares
- Gluten-Free Peanut Butter Marshmallow Squares
- Extra Firm Peanut Butter Squares
- Party Tray Marshmallow Squares
- Bake Sale Peanut Butter Squares
- Freezer-Friendly Marshmallow Squares
- Chopped Marshmallow Version
- Troubleshooting
- The Mixture Is Burning
- The Base Is Lumpy
- The Marshmallows Are Melting Too Much
- The Squares Are Too Sticky to Press
- The Squares Are Too Soft to Slice
- The Squares Are Too Sweet
- The Squares Do Not Hold Their Shape
- The Squares Stick Together in Storage
- The Squares Need to Be Gluten-Free
- The Squares Need Longer Storage
- Frequently Asked Questions
- Why This Recipe Works So Well
- Final Thoughts
- Peanut Butter Marshmallow Squares
Why You’ll Love These Peanut Butter Marshmallow Squares
These squares require no baking. They are perfect for warm days, busy schedules, holiday oven traffic, or any time you want a dessert without heating the kitchen.
They are made with just a handful of pantry-friendly ingredients. Butter, peanut butter, butterscotch chips, vanilla, and fruity mini marshmallows create the whole treat.
They are sweet, creamy, chewy, and colorful. The fruity marshmallows add a fun pop that makes every square look playful.
They are great for parties, bake sales, and holiday trays. They hold their shape once set and are easy to cut into shareable pieces.
They are beginner-friendly. The steps are simple, but the finished squares still feel special enough to bring somewhere.
They are kid-friendly and nostalgic. The soft marshmallows, peanut butter base, and sweet butterscotch flavor make them comforting and memorable.
Recipe Details
Peanut Butter Marshmallow Squares are a no-bake dessert. They are made on the stovetop, then pressed into a greased 9×13-inch baking dish to set.
The mixture should cool at room temperature for at least 2 hours. For quicker results, it can be refrigerated until firm.
The recipe uses ½ cup unsalted butter. This adds richness and helps everything melt together smoothly.
The peanut butter should be creamy. The recipe uses 1 cup creamy peanut butter, with Peter Pan brand noted.
The butterscotch chips come in an 11-ounce bag. Nestlé Toll House brand is noted, and the chips add classic caramel-like sweetness that pairs beautifully with peanut butter.
The recipe also uses 1 teaspoon vanilla extract. This enhances and rounds out the sweetness.
The marshmallows are a 10-ounce bag of fruity-flavored mini marshmallows. Jet-Puffed brand is noted, and the marshmallows add chewiness, color, and a fun fruity twist.
The butter is melted gently over low heat. Low heat is important because it helps prevent scorching.
The peanut butter and butterscotch chips are stirred into the melted butter until everything becomes glossy, smooth, and lump-free. Constant stirring helps the mixture melt evenly.
Once the saucepan comes off the heat, the vanilla is stirred in. The marshmallows are folded in immediately while the mixture is still warm enough to coat them.
Ingredients
For the Peanut Butter Butterscotch Base
- ½ cup unsalted butter
- Adds richness and helps everything melt together smoothly
- 1 cup creamy peanut butter (Peter Pan brand used)
- Creamy peanut butter works best for a smooth, cohesive texture
- 11-ounce bag butterscotch chips (Nestlé Toll House brand used)
- These add that classic, caramel-like sweetness that pairs beautifully with peanut butter
- 1 teaspoon vanilla extract
- Enhances and rounds out the sweetness
For the Marshmallow Squares
- 10-ounce bag fruity-flavored mini marshmallows (Jet-Puffed brand used)
- These add chewiness, color, and a fun fruity twist
Ingredient Notes
Unsalted butter gives the squares richness. It also helps the peanut butter and butterscotch chips melt into a smooth base.
Creamy peanut butter works best for this recipe. It creates a smoother, more cohesive texture than a chunkier option would.
Peter Pan brand is noted for the creamy peanut butter. The important part is using a creamy peanut butter that melts smoothly.
Butterscotch chips add the classic caramel-like sweetness that makes these squares taste nostalgic. Nestlé Toll House brand is noted in the recipe.
Vanilla extract enhances the sweetness. It makes the melted base smell warmer and taste more rounded.
Fruity-flavored mini marshmallows add color, chewiness, and a fun fruity twist. Jet-Puffed brand is noted in the recipe.
Mini marshmallows work best because they fold through the mixture easily. Chopped regular marshmallows can work in a pinch if mini ones are not available.
The baking dish should be greased well before the mixture is added. A 9×13-inch dish gives the squares room to spread into an even layer.
A spatula helps press the mixture into the dish. Lightly buttering the spatula or your hands can help prevent sticking.
Optional Swaps, Variations, Add-Ins, and Serving Ideas
Milk Chocolate Peanut Butter Squares
If you do not have butterscotch chips, milk chocolate chips can be used. The flavor will change slightly.
This version turns the squares into a more chocolate-peanut butter style treat. It keeps the same no-bake method.
White Chocolate Peanut Butter Squares
White chocolate chips can also be substituted for butterscotch chips. The flavor will become sweeter and creamier.
This variation changes the classic butterscotch note. It still pairs well with peanut butter and marshmallows.
Less Sweet Peanut Butter Squares
If you prefer less sweetness, reduce the butterscotch chips slightly. This keeps the base rich but makes it a little less sweet.
The texture may change slightly depending on how much you reduce. Keep the mixture smooth enough to coat the marshmallows well.
Gluten-Free Peanut Butter Marshmallow Squares
These squares are naturally gluten-free as long as all ingredients are certified gluten-free. Check every ingredient label if gluten-free serving is important.
The method does not need to change. Use certified gluten-free versions of the ingredients to keep the dessert aligned with that need.
Chilled Peanut Butter Squares
For easier cutting, chill the squares before slicing. Refrigeration helps the mixture firm up more quickly.
This is especially useful if your kitchen is warm. Chilled squares cut more neatly.
Room-Temperature Soft Squares
Serve the squares at room temperature for the best soft and chewy texture. If they have been refrigerated, let them sit out for a few minutes before serving.
This helps the peanut butter base soften slightly. The texture becomes more pleasant and less firm.
Holiday Tray Squares
Cut the dessert into neat squares and arrange them on a holiday tray. The colorful fruity marshmallows make them look festive without decoration.
They pair well beside cookies and brownies. Their no-bake texture adds variety to a dessert table.
Potluck Peanut Butter Squares
These squares are great for potlucks because they are easy to cut and share. They hold their shape once set.
Transport them in an airtight container. If stacking, use parchment paper between layers.
Bake Sale Squares
Peanut Butter Marshmallow Squares work well for bake sales. They are colorful, sweet, and easy to package.
Let them set fully before cutting and wrapping. This helps the squares stay neat.
Freezer-Friendly Squares
Freeze the squares for up to 2 months. Separate layers with parchment paper so they do not stick together.
Thaw before serving. Let them come back to a soft, chewy texture before eating.
Beginner-Friendly Treat
This recipe is easy enough for beginners. The key is using low heat, stirring constantly, and letting the squares set fully.
There is no oven timing to manage. The stovetop mixture and setting time do most of the work.
Why This Recipe Works
Peanut Butter Marshmallow Squares work because the melted base holds the marshmallows together in a rich, chewy layer. Butter, peanut butter, and butterscotch chips melt into a smooth mixture that coats every marshmallow.
Low heat keeps the base from scorching. Stirring constantly helps the peanut butter and butterscotch chips melt evenly.
The vanilla extract is added after removing the saucepan from the heat. This gives the base a warmer flavor and aroma.
The fruity mini marshmallows are folded in immediately. They need to be coated while the mixture is still soft and glossy.
Pressing the mixture into a greased 9×13-inch baking dish creates an even layer. Once the squares set, they can be cut cleanly.
Room-temperature setting gives the dessert its classic soft chew. Refrigeration helps if you want faster results or firmer slices.
The recipe is flexible, too. Milk chocolate chips, white chocolate chips, reduced butterscotch chips, certified gluten-free ingredients, chopped regular marshmallows, chilling before slicing, and freezer storage all give you ways to adapt the treat.
Directions
Step 1: Prepare the Baking Dish
Grease a 9×13-inch baking dish well. Make sure the bottom and sides are coated so the mixture will release more easily after setting.
Set the prepared dish near your work area. Once the marshmallows are folded in, the mixture should be transferred quickly.
Step 2: Measure the Ingredients
Measure ½ cup unsalted butter, 1 cup creamy peanut butter, the 11-ounce bag butterscotch chips, 1 teaspoon vanilla extract, and the 10-ounce bag fruity-flavored mini marshmallows. Keep everything close to the stovetop.
This recipe moves quickly once the melting begins. Having everything ready helps prevent the mixture from overheating or firming before it is spread.
Step 3: Melt the Butter Gently
Place a large saucepan over low heat. Add the butter and let it melt gently, stirring occasionally.
Do not rush this step. Low heat helps prevent scorching and gives the base a smoother start.
Step 4: Add the Creamy Peanut Butter
Once the butter has melted, stir in the creamy peanut butter. Keep the heat low and continue stirring.
The peanut butter should begin to loosen and blend into the butter. The mixture should look smooth before moving on.
Step 5: Stir in the Butterscotch Chips
Add the butterscotch chips to the saucepan. Stir constantly as they melt into the butter and peanut butter.
Keep the mixture moving so the chips melt evenly. The base should become glossy, smooth, and lump-free.
Step 6: Watch the Heat Carefully
Continue using low heat while melting the base. Do not turn the heat up high to speed things along.
Gentle melting protects the flavor and texture. If the mixture gets too hot, it can scorch or become less smooth.
Step 7: Remove from Heat
Once the butter, peanut butter, and butterscotch chips are fully melted and smooth, remove the saucepan from the heat. Set it on a safe surface.
The mixture should look shiny and cohesive. It should be ready to flavor and combine with marshmallows.
Step 8: Add the Vanilla Extract
Stir in 1 teaspoon vanilla extract. Mix well so the vanilla spreads through the warm base.
The aroma will deepen and sweeten almost immediately. This small step makes the base taste more complete.
Step 9: Fold in the Fruity Mini Marshmallows
Immediately add the fruity-flavored mini marshmallows to the saucepan. Gently fold until all the marshmallows are evenly coated.
Do not worry if the marshmallows look crowded. That is exactly what you want for thick, chewy squares.
Step 10: Transfer to the Baking Dish
Pour the marshmallow mixture into the greased 9×13-inch baking dish. Use a spatula to guide it evenly into the pan.
Work while the mixture is still soft. This makes spreading much easier.
Step 11: Press into an Even Layer
Lightly press the mixture down with a spatula to create an even layer. Do not press so hard that the squares become compacted.
If the spatula sticks, lightly butter it. You can also lightly butter your hands to press the mixture more easily.
Step 12: Let the Squares Set
Allow the squares to cool at room temperature for at least 2 hours. They should firm up enough to slice cleanly.
For quicker results, refrigerate them until firm. Chilling also helps if your kitchen is warm.
Step 13: Chill Before Cutting If Needed
If the squares feel soft or sticky, place the dish in the refrigerator before slicing. This makes cutting easier.
A firmer block will give cleaner edges. Let the squares soften slightly before serving if they become too firm in the refrigerator.
Step 14: Slice into Squares
Once fully set, cut the dessert into squares. Use a sharp knife and wipe it as needed for cleaner cuts.
The finished squares should be soft, chewy, and filled with colorful marshmallows. They should hold together while still having a tender bite.
Step 15: Serve at Room Temperature
Serve Peanut Butter Marshmallow Squares at room temperature for the best texture. They should be perfectly soft and chewy.
If refrigerated, let them sit out for a few minutes before serving. This helps them soften slightly.
Step 16: Store the Squares
Place leftovers in an airtight container. Store them at room temperature for up to 3 days or in the refrigerator for up to 1 week.
If stacking, separate layers with parchment paper. This keeps the squares from sticking together.
Step 17: Freeze for Longer Storage
For longer storage, freeze the squares for up to 2 months. Place them in an airtight container with parchment between layers.
Thaw before serving. Let them return to a soft, chewy texture before enjoying.
Serving Ideas
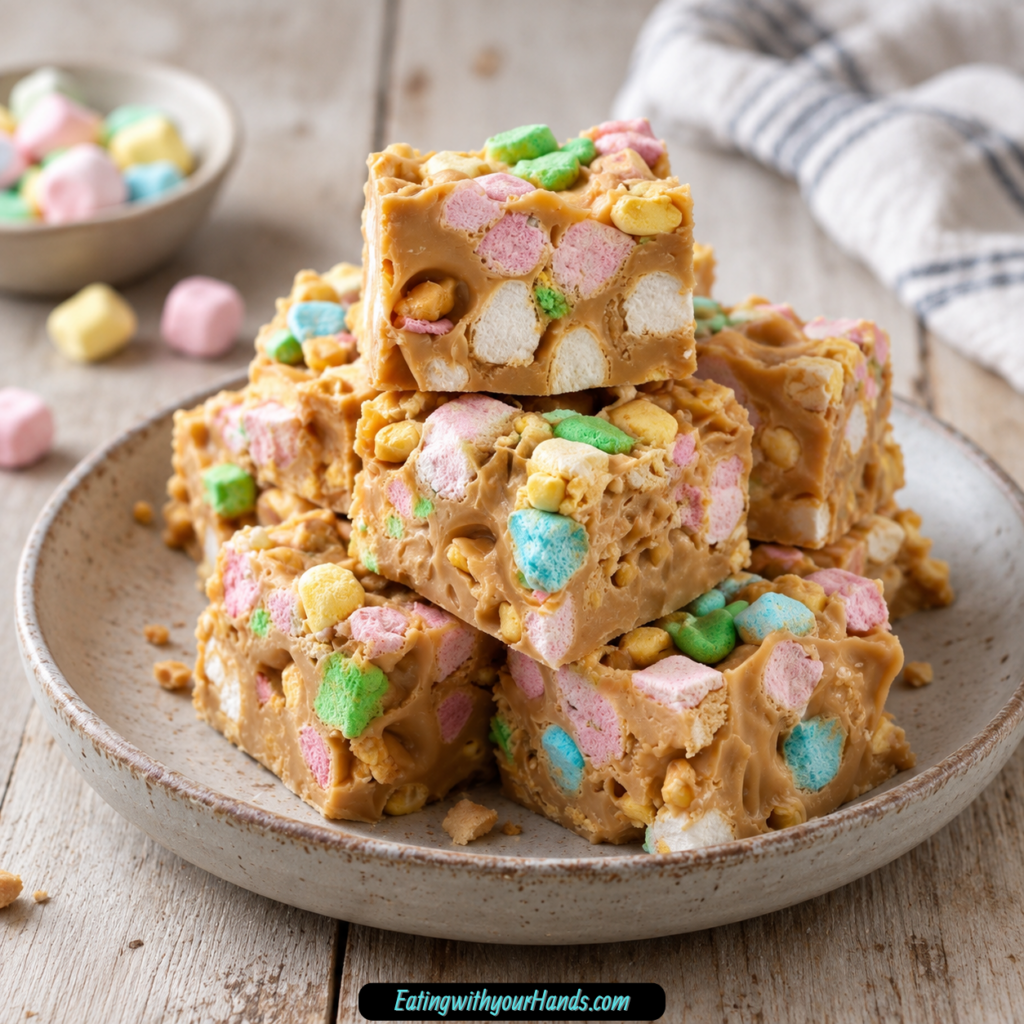
Peanut Butter Marshmallow Squares are best served at room temperature. This is when they have the perfect soft and chewy texture.
If the squares have been refrigerated, let them sit out for a few minutes before serving. This helps the peanut butter-butterscotch base soften slightly.
Serve them on a dessert tray with cookies and brownies. Their colorful marshmallows make the tray look bright and fun.
They are wonderful for potlucks and family gatherings. Each square is easy to pick up, share, and enjoy.
These squares also fit beautifully on holiday trays. The fruity marshmallows give them color, and the no-bake method keeps holiday prep simple.
They work well for bake sales because they are easy to cut and package. Use parchment paper between layers if stacking them in containers.
Serve them whenever you want something sweet without baking. They are rich, creamy, chewy, and nostalgic from the very first bite.
Storage
Store Peanut Butter Marshmallow Squares in an airtight container. They keep well at room temperature for up to 3 days.
For longer refrigerator storage, keep them chilled for up to 1 week. Refrigeration helps them hold their shape longer.
If refrigerated, let the squares sit out for a few minutes before serving. This softens the texture slightly.
Separate layers with parchment paper if stacking. This prevents the squares from sticking together.
Freezing
Peanut Butter Marshmallow Squares can be frozen for up to 2 months. Place them in an airtight container once fully set.
Use parchment paper between layers. This helps keep the squares separate and easy to thaw.
Thaw before serving. Let the texture return to soft and chewy before eating.
Make-Ahead
These squares are easy to make ahead because they need time to set. Prepare them at least 2 hours before serving if setting at room temperature.
For faster firming, refrigerate them until set. This is helpful before parties, bake sales, or holiday trays.
Once set and sliced, store them in an airtight container. Keep them at room temperature for up to 3 days, refrigerate up to 1 week, or freeze up to 2 months.
Helpful Notes for Best Results
Always use creamy peanut butter for the smoothest texture. Creamy peanut butter helps the base melt into a cohesive mixture.
Stir constantly while melting the peanut butter and butterscotch chips. This helps prevent burning and keeps the mixture smooth.
Use low heat instead of rushing the melting process. Gentle heat protects the flavor and texture.
For easier cutting, chill the squares before slicing. A firm block is easier to cut neatly.
Lightly butter your spatula or hands when pressing the mixture into the dish. This helps prevent sticking.
If you prefer less sweetness, reduce the butterscotch chips slightly. The flavor and texture may change slightly, but it can soften the sweetness.
These squares are naturally gluten-free as long as all ingredients are certified gluten-free. Check labels carefully if gluten-free serving is important.
Mini marshmallows work best, but chopped regular marshmallows can work in a pinch. Use fruity-flavored marshmallows for the intended color and flavor.
Variations
Milk Chocolate Peanut Butter Marshmallow Squares
Use milk chocolate chips instead of butterscotch chips if needed. The flavor will change slightly.
This version tastes more like a chocolate peanut butter treat. It keeps the same chewy marshmallow texture.
White Chocolate Peanut Butter Marshmallow Squares
White chocolate chips can also replace the butterscotch chips. They create a sweeter, creamier flavor.
This variation still works with peanut butter and fruity marshmallows. The final taste will be different from the classic butterscotch version.
Less Sweet Marshmallow Squares
Reduce the butterscotch chips slightly if you prefer less sweetness. This can make the squares taste a little more peanut butter-forward.
The texture may change depending on how much is reduced. Keep enough melted base to coat the marshmallows.
Gluten-Free Peanut Butter Marshmallow Squares
Use certified gluten-free ingredients. The recipe is naturally gluten-free as long as every ingredient is verified.
This is an easy adjustment for gluten-free needs. The method remains the same.
Extra Firm Peanut Butter Squares
Refrigerate the squares until firm before slicing. This helps create cleaner pieces.
After slicing, let them sit briefly at room temperature before serving. That gives them the best chewy bite.
Party Tray Marshmallow Squares
Cut the set mixture into neat squares and arrange them on a platter. Their colorful marshmallows make them look fun and cheerful.
They pair well with cookies, brownies, and other no-bake treats. They are easy to serve at gatherings.
Bake Sale Peanut Butter Squares
Wrap individual squares after they are fully set. This makes them easy to sell or share.
Let them set completely before packaging. Use parchment paper if stacking in containers.
Freezer-Friendly Marshmallow Squares
Freeze the squares for up to 2 months. Separate layers with parchment paper before freezing.
Thaw before serving. This keeps the texture soft and chewy.
Chopped Marshmallow Version
If mini marshmallows are not available, chopped regular marshmallows can work in a pinch. Cut them into smaller pieces so they mix more evenly.
The texture may be slightly different. Mini marshmallows remain the best choice.
Troubleshooting
The Mixture Is Burning
The heat may be too high. Use low heat and stir constantly while melting the peanut butter and butterscotch chips.
Do not rush the melting process. Gentle heat gives the smoothest base.
The Base Is Lumpy
Keep stirring until the butter, peanut butter, and butterscotch chips are fully melted. The mixture should be glossy and lump-free.
If the chips are not fully melted, continue stirring over low heat. Remove the pan from heat only once the base is smooth.
The Marshmallows Are Melting Too Much
Remove the saucepan from the heat before adding the vanilla and marshmallows. Fold the marshmallows in gently.
The marshmallows should be coated, not completely melted. Work quickly once they are added.
The Squares Are Too Sticky to Press
Lightly butter your spatula or hands. This helps prevent the mixture from sticking while you press it into the dish.
Press lightly into an even layer. Do not pack the mixture down too hard.
The Squares Are Too Soft to Slice
Let the squares set at room temperature for at least 2 hours. If they are still soft, refrigerate until firm.
Chilling before slicing makes cleaner cuts. Let the squares sit out briefly before serving if refrigerated.
The Squares Are Too Sweet
Reduce the butterscotch chips slightly next time if you prefer less sweetness. This is the listed adjustment for a less sweet version.
The flavor will change slightly. The butterscotch chips are part of the classic sweetness.
The Squares Do Not Hold Their Shape
Make sure they have fully set before slicing. Room-temperature setting takes at least 2 hours.
Refrigeration helps them hold their shape longer. Store them chilled if your kitchen is warm.
The Squares Stick Together in Storage
Separate layers with parchment paper. This keeps the squares from sticking to one another.
This is especially helpful for freezing. It also makes them easier to serve later.
The Squares Need to Be Gluten-Free
Use certified gluten-free ingredients. The recipe is naturally gluten-free only when every ingredient is verified.
Check the peanut butter, butterscotch chips, marshmallows, and vanilla. Then prepare as directed.
The Squares Need Longer Storage
Freeze them in an airtight container for up to 2 months. Use parchment paper between layers.
Thaw before serving. Let them soften slightly for the best texture.
Frequently Asked Questions
Can I freeze Peanut Butter Marshmallow Squares?
Yes, these squares can be frozen. Store them in an airtight container for up to 2 months.
Use parchment paper between layers if stacking. Thaw at room temperature before serving.
What if I don’t have butterscotch chips?
Milk chocolate or white chocolate chips can be used instead. The flavor will change slightly.
Butterscotch chips give the classic caramel-like sweetness. Use the substitute that fits your taste.
Can I use regular marshmallows instead of mini ones?
Mini marshmallows work best. They mix evenly and give the squares their ideal texture.
Chopped regular marshmallows will work in a pinch. Cut them smaller so they fold into the mixture more easily.
Do these need to be refrigerated?
Not necessarily. They are fine at room temperature for up to 3 days.
Refrigeration helps them hold their shape longer. They can be stored in the refrigerator for up to 1 week.
How long do they need to set?
Let the squares cool at room temperature for at least 2 hours. This gives them time to firm up before slicing.
For quicker results, refrigerate them until firm. Chilling also makes cutting easier.
What peanut butter works best?
Creamy peanut butter works best. It gives the smoothest, most cohesive texture.
Peter Pan brand is noted in the recipe. Use a creamy peanut butter that melts smoothly.
Can I make these less sweet?
Yes, reduce the butterscotch chips slightly if you prefer less sweetness. The flavor and texture may change a little.
The butterscotch chips are part of the classic flavor. Reduce gently rather than removing too much.
Are these squares gluten-free?
They are naturally gluten-free as long as all ingredients are certified gluten-free. Check every label carefully.
Use certified gluten-free peanut butter, butterscotch chips, marshmallows, vanilla, and any other packaged ingredients. Then follow the same method.
Why This Recipe Works So Well
Peanut Butter Marshmallow Squares work so well because the recipe turns a few simple ingredients into something rich, chewy, colorful, and nostalgic. Butter, peanut butter, and butterscotch chips create a smooth base that holds the marshmallows together.
The unsalted butter adds richness and helps the base melt smoothly. It gives the mixture a glossy texture when combined with peanut butter and butterscotch.
Creamy peanut butter gives the squares body and flavor. It keeps the texture cohesive so the bars can set properly.
Butterscotch chips bring caramel-like sweetness. They pair beautifully with peanut butter and make the dessert taste classic and old-fashioned.
Vanilla extract rounds out the sweetness. It deepens the aroma as soon as it hits the warm mixture.
Fruity mini marshmallows are what make the squares fun. They add chewiness, color, sweetness, and a playful twist.
The no-bake method keeps the recipe easy. Low heat, steady stirring, and setting time are all it takes.
The 9×13-inch dish gives the mixture an even shape. Once firm, the dessert cuts into shareable squares.
The recipe is also practical for storing and sharing. The squares keep at room temperature, last longer in the refrigerator, and freeze well for up to 2 months.
Most of all, these squares work because they feel like a simple treat from a family kitchen. They are creamy, chewy, sweet, colorful, and easy to love.
Final Thoughts
Peanut Butter Marshmallow Squares are no-bake treats made with unsalted butter, creamy peanut butter, butterscotch chips, vanilla extract, and fruity-flavored mini marshmallows. The mixture melts together over low heat, gets folded with marshmallows, presses into a greased 9×13-inch dish, and sets until firm enough to slice.
Serve them at room temperature for the best soft and chewy bite, or chill before slicing for cleaner squares. With their no-bake method, pantry-friendly ingredients, nostalgic peanut butter-butterscotch flavor, colorful marshmallows, party-ready texture, refrigerator storage, and freezer-friendly option, these squares are a sweet treat worth keeping close for holidays, potlucks, bake sales, and busy nights when dessert should be easy.
Peanut Butter Marshmallow Squares
Rich, chewy, sweet, and wonderfully simple, these Peanut Butter Marshmallow Squares are an easy no-bake dessert made with creamy peanut butter, butterscotch chips, butter, vanilla, and fruity-flavored mini marshmallows. The mixture sets into soft, colorful squares that are perfect for sharing at parties, potlucks, dessert trays, or casual sweet-tooth moments.
Recipe Details
- Prep Time: 10 minutes
- Cook Time: 10 minutes
- Setting Time: 2 hours
- Total Time: 2 hours 20 minutes
- Servings: 12 squares
- Calories: 280 kcal
Ingredients
For the Peanut Butter Marshmallow Squares
- ½ cup unsalted butter
- 1 cup creamy peanut butter
- 11 oz butterscotch chips
- 1 teaspoon vanilla extract
- 10 oz fruity-flavored mini marshmallows
Instructions
Step 1: Melt the Butter
In a large saucepan, melt the butter over low heat. Keep the heat low so the butter melts gently.
Step 2: Add Peanut Butter and Butterscotch Chips
Add the peanut butter and butterscotch chips. Stir constantly until smooth and fully melted.
Step 3: Add the Vanilla
Remove from heat and stir in the vanilla extract. Mix until the vanilla is fully blended into the melted peanut butter mixture.
Step 4: Fold in the Marshmallows
Immediately fold in the mini marshmallows until evenly coated. Work gently so the marshmallows stay distinct while being covered in the mixture.
Step 5: Press Into the Baking Dish
Transfer the mixture to a greased 9×13-inch baking dish. Press gently into an even layer.
Step 6: Let the Squares Set
Let set at room temperature for at least 2 hours or refrigerate until firm.
Step 7: Slice and Serve
Cut into squares and serve.
Notes
- Use creamy peanut butter for the smoothest texture.
- Stir constantly while melting to prevent scorching.
- Chill before slicing for cleaner cuts.
- Store in an airtight container at room temperature for 3 days or refrigerate up to 1 week.
Serving Suggestions
Serve these Peanut Butter Marshmallow Squares after they have set and been cut into 12 pieces. The creamy peanut butter, butterscotch chips, vanilla, butter, and fruity-flavored mini marshmallows create a rich no-bake dessert with a soft, chewy bite.
These squares work well for dessert platters, holiday trays, lunchbox-style treats, potlucks, or quick make-ahead sweets. Chill before slicing if you want cleaner cuts, exactly as noted.
Storage
How to Store
Store the squares in an airtight container at room temperature for 3 days. You can also refrigerate them for up to 1 week.
Setting Tip
Let the mixture set at room temperature for at least 2 hours or refrigerate until firm. This gives the squares enough structure to cut cleanly.
Best Texture Tip
Use creamy peanut butter for the smoothest texture. Stir constantly while melting the peanut butter and butterscotch chips to prevent scorching.
Slicing Tip
Chill before slicing for cleaner cuts. Once firm, cut into 12 squares and serve.
Mixing Tip
Fold in the fruity-flavored mini marshmallows immediately after removing the melted mixture from heat. This helps coat the marshmallows evenly before the mixture begins to set.

Fernando is the creator and writer behind the food blog Eating with your Hands. Living and working in cities like Paris, Barcelona, and Berlin, and being married to a Canadian foodie, has given Fernando a passion and interest in food and inspired him to run EWYH.