
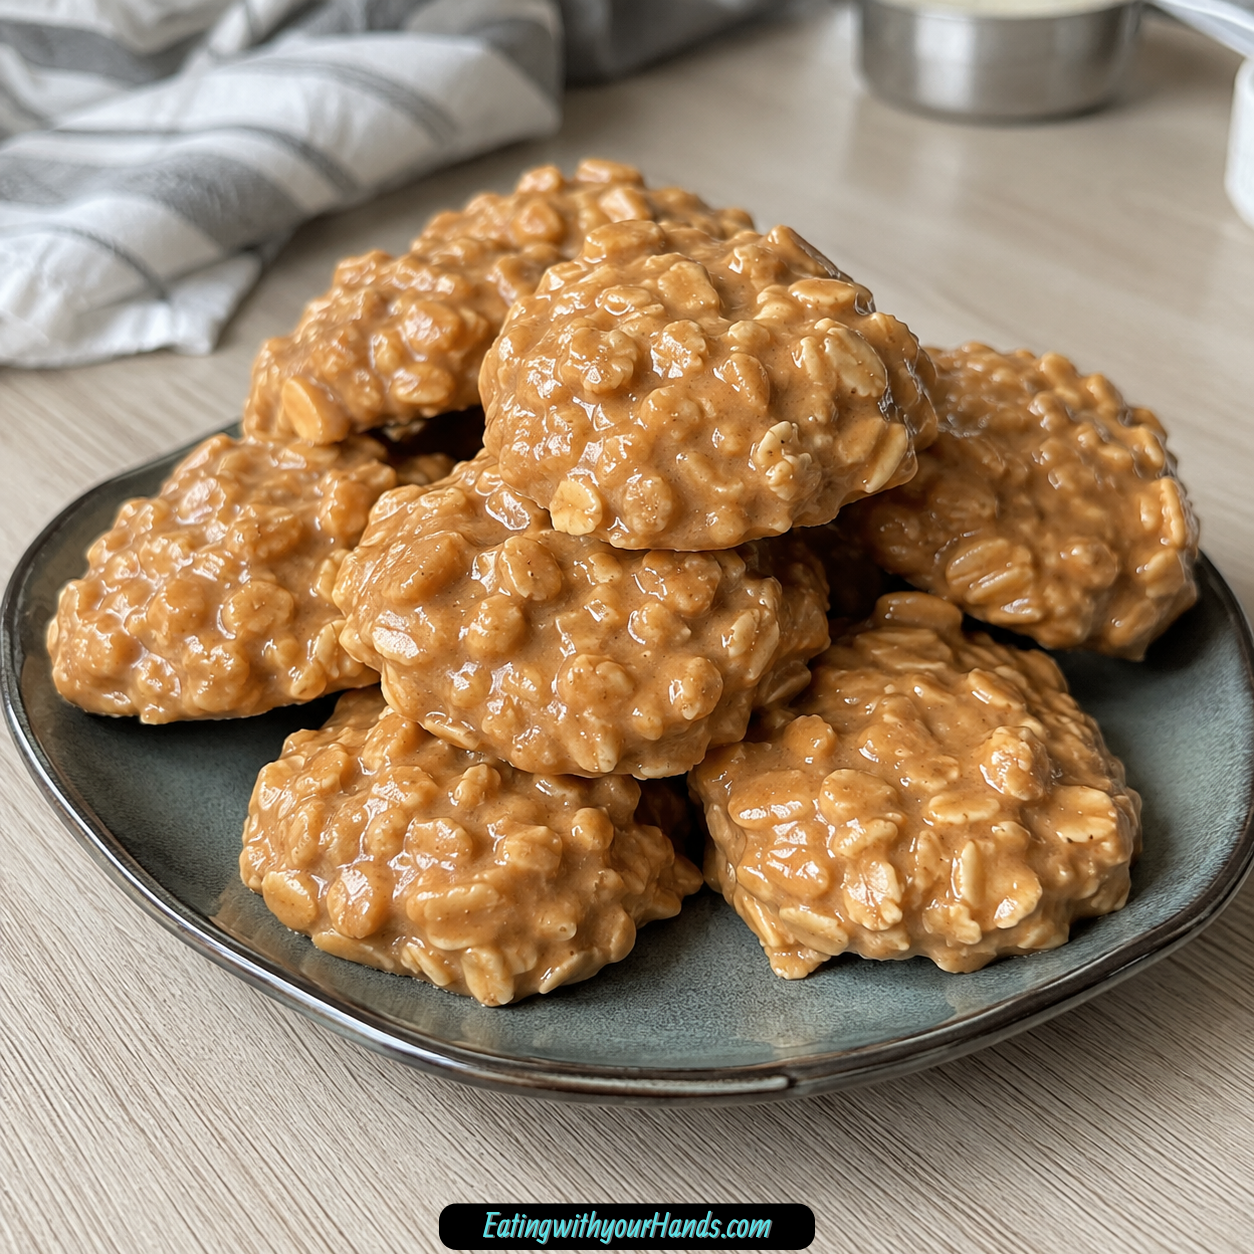
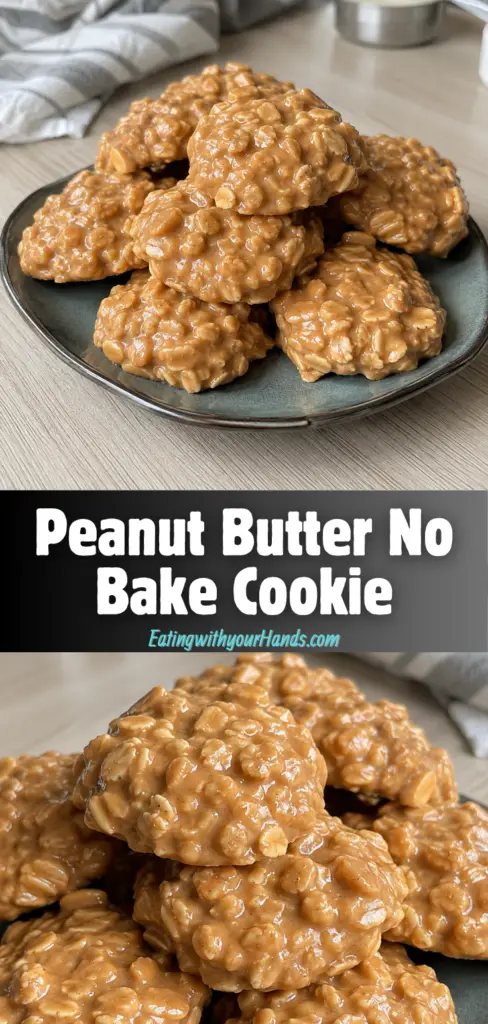
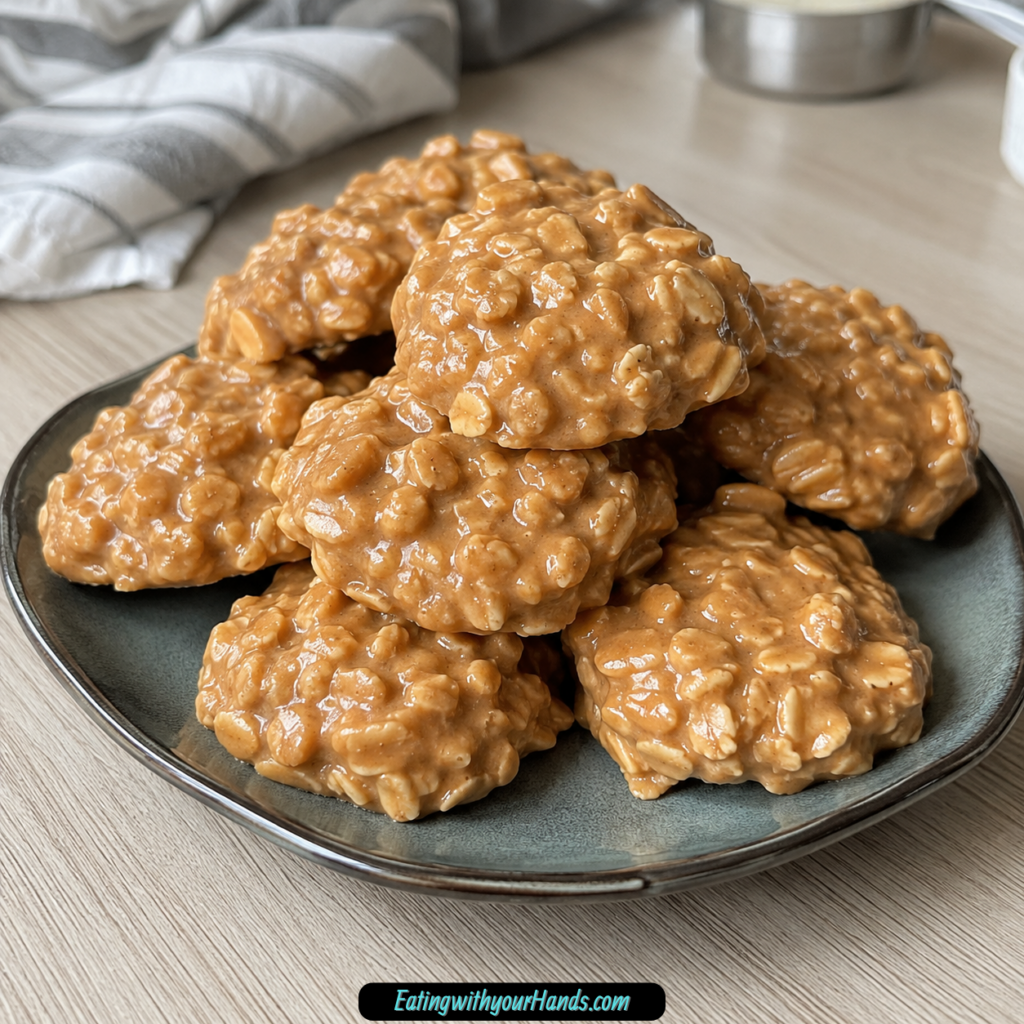
Peanut Butter No Bake Cookie is the kind of simple homemade treat that feels comforting before it even has time to set. It is made with quick-cook oats, butter, granulated sugar, milk, peanut butter, vanilla extract, and a pinch of salt, then dropped onto wax paper and cooled into chewy little cookies without using the oven.
I love recipes that start with a saucepan and end with everyone hovering near the counter. There is something special about watching butter, sugar, and milk warm together, then stirring in peanut butter until the whole mixture turns smooth, creamy, and sweet.
These cookies feel old-fashioned in the best way. They are quick, rich, chewy, and full of peanut butter flavor, with oats giving them the texture that makes every bite feel satisfying.
They are perfect for hot summer days because there is no baking required. They are also perfect for last-minute get-togethers, after-school treats, lunchbox snacks, or a sweet bite when the day needs something easy.
The recipe comes together in about 10 minutes of prep, then the cookies cool and set in about 30 minutes. Once they are firm, they are ready to serve at room temperature with cold milk, warm coffee, or just a quiet moment in the kitchen.
Table of Contents
- Why You’ll Love This Peanut Butter No Bake Cookie
- Recipe Details
- Ingredients
- Optional Swaps, Variations, Add-Ins, and Serving Ideas
- Chocolate Peanut Butter No Bake Cookies
- Raisin Peanut Butter Cookies
- Cranberry Peanut Butter Cookies
- Almond Butter No Bake Cookies
- Sunbutter No Bake Cookies
- Cashew Butter No Bake Cookies
- Gluten-Free Peanut Butter Cookies
- Lighter Peanut Butter Cookies
- Dairy-Free Peanut Butter Cookies
- Cinnamon Peanut Butter Cookies
- Why This Peanut Butter No Bake Cookie Works
- Directions
- Step 1: Prepare the Wax Paper
- Step 2: Set Out the Saucepan
- Step 3: Add the Butter
- Step 4: Add the Granulated Sugar
- Step 5: Add the Milk
- Step 6: Heat the Mixture
- Step 7: Watch for Bubbling
- Step 8: Remove From the Heat
- Step 9: Add the Peanut Butter
- Step 10: Add the Vanilla Extract
- Step 11: Add the Salt
- Step 12: Add the Quick-Cook Oats
- Step 13: Mix Until Combined
- Step 14: Add Any Optional Mix-Ins
- Step 15: Chill the Mixture Briefly if Needed
- Step 16: Scoop the Cookies
- Step 17: Shape the Cookies
- Step 18: Let the Cookies Cool
- Step 19: Serve at Room Temperature
- Step 20: Store for Later
- Serving Ideas
- Storage
- Reheating
- Freezing
- Make-Ahead
- Helpful Notes for Best Results
- Variations
- Chocolate Peanut Butter No Bake Cookies
- Raisin Peanut Butter No Bake Cookies
- Cranberry Peanut Butter No Bake Cookies
- Almond Butter No Bake Cookies
- Cashew Butter No Bake Cookies
- Sunbutter No Bake Cookies
- Gluten-Free Peanut Butter No Bake Cookies
- Lighter Peanut Butter No Bake Cookies
- Cinnamon Peanut Butter No Bake Cookies
- Dairy-Free Peanut Butter No Bake Cookies
- Nutty No Bake Cookies
- Troubleshooting
- Frequently Asked Questions
- Why This Recipe Works So Well
- Final Thoughts
- Peanut Butter No Bake Cookie
Why You’ll Love This Peanut Butter No Bake Cookie
These cookies are quick and easy to prepare. Just 10 minutes is all you need to make the warm mixture, stir in the oats, and drop the cookies.
They do not require baking. That makes them perfect for hot days when turning on the oven sounds like too much.
They use minimal ingredients. Quick-cook oats, salt, butter, granulated sugar, milk, peanut butter, and vanilla make the whole batch.
They are family-friendly and fun. Kids love helping mix and drop the cookies once the hot stovetop steps are finished.
They freeze well. You can make a batch and save some for sweet cravings later.
They are customizable. Chocolate chips, cocoa powder, dried fruit, almond butter, sunbutter, cinnamon, and dairy-free swaps can all give them a new twist.
Recipe Details
These Peanut Butter No Bake Cookies are made on the stove in a medium-sized saucepan. The heat should be set to medium.
The warm mixture starts with ½ cup butter, 2 cups granulated sugar, and ½ cup milk. These ingredients are heated together until the butter melts and the mixture bubbles slightly.
The heating step usually takes about 3–5 minutes. Once the butter is fully melted and the mixture is bubbling slightly, the saucepan is removed from the heat.
After removing from the heat, 1 cup peanut butter and 2 teaspoons vanilla extract are stirred in. The mixture should become smooth, creamy, and velvety.
The oats and salt are added next. The recipe uses 3 cups quick-cook oats and ¼ teaspoon salt.
The cookie mixture is dropped onto wax paper using a spoon or cookie scoop. A baking sheet or large plate can be lined with the wax paper.
The cookies should be spaced a few inches apart. They set in about 30 minutes.
These cookies are best served at room temperature. They can be stored in an airtight container at room temperature for up to 1 week or frozen for about 3 months.
Ingredients
Oat Base
3 cups quick-cook oats
¼ teaspoon salt
Peanut Butter Mixture
½ cup butter
2 cups granulated sugar
½ cup milk
1 cup peanut butter
2 teaspoons vanilla extract
Ingredient Notes
Quick-cook oats give the cookies their lovely texture. They absorb the peanut butter mixture quickly and help the cookies set.
Salt enhances the sweetness. Just ¼ teaspoon balances the sugar and makes the peanut butter flavor stronger.
Butter gives the cookies richness. Unsalted butter gives you better control over the saltiness.
Granulated sugar sweetens the cookies and helps create their chewy consistency. The recipe also allows you to adjust the sugar to your liking if you prefer a sweeter cookie.
Milk helps the butter and sugar melt into a smooth base. Whole milk works best, but any milk you have on hand can be used.
Peanut butter gives these cookies their main flavor. Creamy or crunchy peanut butter both work, depending on the texture you like.
Vanilla extract adds warmth. Pure vanilla makes a world of difference, but imitation vanilla works too.
Optional Swaps, Variations, Add-Ins, and Serving Ideas
Chocolate Peanut Butter No Bake Cookies
For a chocolate twist, stir in ½ cup cocoa powder or chocolate chips. Cocoa powder gives the whole mixture a chocolate flavor, while chocolate chips add sweet pockets.
This variation is perfect when you want peanut butter and chocolate together. It makes the cookies taste richer and more dessert-like.
Raisin Peanut Butter Cookies
Add dried raisins for a fruity kick. Raisins bring chewiness and sweetness to the oat mixture.
This option gives the cookies a more classic snack-style texture. It works well with peanut butter and oats.
Cranberry Peanut Butter Cookies
Use dried cranberries for another fruit variation. Cranberries add a little tartness and color.
They make the cookies feel brighter. They are a good option when you want a sweet and chewy contrast.
Almond Butter No Bake Cookies
Substitute almond butter for peanut butter. This gives the cookies a different nutty flavor.
Almond butter keeps the mixture creamy. It changes the taste while keeping the same no-bake method.
Sunbutter No Bake Cookies
Use sunbutter or sunflower seed butter for a nut-free option. This keeps the cookies creamy without peanut butter.
Sunbutter has its own flavor, so the finished cookies will taste different. It is a helpful option for nut-free needs.
Cashew Butter No Bake Cookies
Cashew butter can be used as another peanut butter substitute. It gives the cookies a mild, creamy flavor.
This variation still keeps the texture soft and rich. It is a good choice when you want a gentler nut-butter taste.
Gluten-Free Peanut Butter Cookies
Make these cookies gluten-free by using certified gluten-free oats. The oats are the ingredient to check carefully.
The rest of the method stays the same. Once the oats are stirred in, the cookies set on wax paper as usual.
Lighter Peanut Butter Cookies
For a lighter version, reduce the sugar to 1 cup and use low-fat milk. This changes the sweetness and richness.
The cookies may taste less sweet and may set a little differently. Use this option when you want a lighter direction.
Dairy-Free Peanut Butter Cookies
Make these cookies dairy-free by using vegan butter and plant-based milk. The texture and flavor may vary depending on the products used.
This version keeps the same stovetop method. The cookies still need time to cool and set.
Cinnamon Peanut Butter Cookies
Add a pinch of cinnamon for warmth. Cinnamon gives the cookies a cozy spice note.
Use just a little so the peanut butter flavor still leads. It adds depth without taking over.
Why This Peanut Butter No Bake Cookie Works
This recipe works because the warm butter, sugar, and milk mixture creates the base that binds the oats. Once the peanut butter melts in and the oats are stirred through, the mixture cools into chewy cookies.
The medium heat step is important. It lets the butter melt and the sugar mixture bubble slightly before the saucepan is removed from the stove.
Peanut butter gives the mixture body. It turns the warm sugar mixture into something creamy and rich.
Quick-cook oats are the right texture for this kind of cookie. They absorb the mixture better than larger oats and help the cookies set.
Salt and vanilla round out the flavor. Salt balances the sweetness, while vanilla gives the cookies a warm finish.
Cooling time is the final step that makes the cookies work. They need about 30 minutes on wax paper to firm up nicely.
Directions
Step 1: Prepare the Wax Paper
Line a baking sheet or large plate with wax paper. This gives the cookies a nonstick place to set.
Place the lined surface near your stove or work area. Once the mixture is ready, you will want to drop the cookies quickly.
Wax paper makes cleanup easier. It also helps the cookies lift cleanly once they are firm.
Step 2: Set Out the Saucepan
Place a medium-sized saucepan on the stove. This is where the butter, sugar, and milk will warm together.
Choose a saucepan with enough room for stirring. The mixture needs space as it melts and begins to bubble.
Set the heat to medium. This is the point where the cookie mixture begins.
Step 3: Add the Butter
Add ½ cup butter to the saucepan. Unsalted butter is a good choice because it lets you control the salt.
The butter will melt as the saucepan warms. Stir gently so it begins to soften evenly.
Do not rush with high heat. Medium heat gives you better control.
Step 4: Add the Granulated Sugar
Add 2 cups granulated sugar to the saucepan. Stir it together with the butter.
The sugar gives the cookies their sweetness and chewy consistency. It is an important part of the classic no-bake texture.
As the butter melts, the sugar will begin to blend in. Keep the mixture moving gently.
Step 5: Add the Milk
Pour in ½ cup milk. Whole milk works best, but any milk you have on hand can be used.
The milk helps loosen the mixture and allows the butter and sugar to combine. It also helps create the smooth sauce-like base.
Stir gently as the milk blends in. The mixture should begin looking glossy as it heats.
Step 6: Heat the Mixture
Continue heating the butter, sugar, and milk over medium heat. Stir gently as everything melts together.
Keep an eye on the saucepan. You want the ingredients to combine without scorching.
The butter should fully melt. The sugar and milk should become part of a smooth, hot mixture.
Step 7: Watch for Bubbling
Once the butter is fully melted, watch for the mixture to bubble slightly. This usually takes about 3–5 minutes.
A gentle bubble means the mixture is hot enough and ready for the next stage. It should not need a long boil.
Do not walk away from the stove. A simple recipe still needs attention during the heating step.
Step 8: Remove From the Heat
When the mixture is bubbling slightly and the butter is fully melted, remove the saucepan from the heat. Set it on a heat-safe surface.
This stops the cooking process. The peanut butter and vanilla should be stirred in off the heat.
Be careful, because the mixture is hot. Adults should handle this step if kids are helping.
Step 9: Add the Peanut Butter
Add 1 cup peanut butter to the hot mixture. Creamy peanut butter gives a smoother cookie, while crunchy peanut butter adds texture.
Stir until the peanut butter melts completely. It should blend into the butter, sugar, and milk mixture.
The mixture should begin looking rich and thick. It will smell sweet and nutty.
Step 10: Add the Vanilla Extract
Add 2 teaspoons vanilla extract. Stir it into the peanut butter mixture.
Vanilla adds warmth and makes the cookies taste more complete. Pure vanilla gives the best flavor, but imitation vanilla works too.
The mixture should now look smooth and creamy. It should resemble a rich, velvety sauce.
Step 11: Add the Salt
Add ¼ teaspoon salt. Stir it in so it is evenly distributed.
The salt helps balance the sweetness. It also makes the peanut butter flavor stand out more.
Even though it is a small amount, it matters. Do not leave it concentrated in one spot.
Step 12: Add the Quick-Cook Oats
Add 3 cups quick-cook oats to the saucepan. Stir them into the warm peanut butter mixture.
The mixture will become thicker quickly. This is exactly what should happen.
Make sure the oats are added after the peanut butter and vanilla are smooth. This helps them coat evenly.
Step 13: Mix Until Combined
Stir until everything is well combined. The oats should be coated in the peanut butter mixture.
Do not worry if the mixture looks thick. That is how it should be.
Scrape the bottom and sides of the saucepan as you mix. This helps make sure no dry oats remain.
Step 14: Add Any Optional Mix-Ins
If using chocolate chips, cocoa powder, raisins, cranberries, cinnamon, nuts, or other mix-ins, add them carefully. Stir until distributed.
If adding cocoa powder for a chocolate twist, make sure it blends well. If using chocolate chips, remember they may soften in the warm mixture.
Keep the mixture thick enough to hold its shape. Too many add-ins can make scooping harder.
Step 15: Chill the Mixture Briefly if Needed
If the mixture seems too loose, chill it for a few minutes before dropping the cookies. This can help it hold shape better.
Do not chill too long, or it may become harder to scoop. A brief rest is enough.
This step is optional. Use it only if the mixture needs a little help staying in mounds.
Step 16: Scoop the Cookies
Use a spoon or cookie scoop to drop spoonfuls of the mixture onto the wax paper. Space them a few inches apart.
The cookies may spread slightly. Giving them room helps keep each one separate.
Try to keep the spoonfuls similar in size. This makes the cookies look even and helps them set at the same pace.
Step 17: Shape the Cookies
If needed, gently shape the spoonfuls with the back of the spoon. They can be rounded, rustic, or slightly flattened.
No-bake cookies do not have to look perfect. Their homemade look is part of the charm.
Avoid pressing them too thin. A thicker cookie stays chewy and satisfying.
Step 18: Let the Cookies Cool
Let the cookies cool on the wax paper. They will set up nicely in about 30 minutes.
During this time, the oats absorb the peanut butter mixture. The cookies become firm enough to lift and serve.
It is okay to sneak a bite before they are fully set if you cannot wait. The texture will be softer, but the flavor will still be delicious.
Step 19: Serve at Room Temperature
Serve the cookies at room temperature. They taste best once set but still soft and chewy.
Pair them with a glass of cold milk for a classic treat. They also go well with a warm cup of coffee.
These cookies are great for lunchboxes and after-school snacks. They are easy to pack once they have firmed up.
Step 20: Store for Later
Store the cooled cookies in an airtight container at room temperature. They will keep for up to 1 week.
For longer storage, layer them between wax paper in a freezer-safe container. Freeze for about 3 months.
Let frozen cookies thaw before serving. They are a wonderful make-ahead treat for future cravings.
Serving Ideas
Serve Peanut Butter No Bake Cookies at room temperature. This gives them the best chewy texture and makes them easy to pick up.
A glass of cold milk is a perfect pairing. The milk balances the sweetness and creamy peanut butter flavor.
A warm cup of coffee also goes beautifully with these cookies. It turns them into a cozy afternoon treat.
They are great for lunchboxes. Once set, they hold their shape well enough to pack.
They also make easy after-school snacks. Kids can help make them and enjoy them once they cool.
Serve them for family gatherings, last-minute desserts, hot summer days, holidays, or simple sweet cravings. They are low-stress and always comforting.
Storage
Store Peanut Butter No Bake Cookies in an airtight container at room temperature. They will last for up to 1 week.
Make sure the cookies are fully set before storing. If they are still warm or soft, they may stick together.
If stacking the cookies, place wax paper between layers. This keeps them neat.
Keep the container sealed. This helps the cookies stay chewy and fresh.
Reheating
These cookies do not need reheating. They are designed to be enjoyed at room temperature.
If the cookies have been frozen, thaw them before serving. Let them soften naturally.
Avoid microwaving unless you do not mind changing the texture. Heat can soften the peanut butter mixture.
Room-temperature serving is best. It gives you the classic no-bake cookie texture.
Freezing
These cookies freeze well. Layer them between wax paper in a freezer-safe container.
They will last for about 3 months in the freezer. This makes them great for make-ahead treats.
Keep the container tightly closed. This protects the cookies from freezer burn.
When ready to enjoy, thaw the cookies until they are soft enough to eat. Then serve at room temperature.
Make-Ahead
Peanut Butter No Bake Cookies are great for making ahead. They set in about 30 minutes and store well.
Make the cookies, let them cool completely, then transfer them to an airtight container. They can stay at room temperature for up to 1 week.
For longer make-ahead storage, freeze them for about 3 months. Use wax paper between layers so they do not stick together.
This makes them helpful for parties, family snacks, lunchboxes, and last-minute desserts. You can make one batch and have treats ready when needed.
Helpful Notes for Best Results
Use quick-cook oats. They give the cookies the right texture and help the mixture set.
Do not skip the salt. A small pinch enhances the sweetness and balances the flavor.
Use unsalted butter if possible. It gives you better control over the saltiness.
Creamy peanut butter makes a smoother cookie. Crunchy peanut butter adds texture.
If you prefer a sweeter cookie, adjust the sugar to your liking. For a lighter version, reduce the sugar to 1 cup and use low-fat milk.
For a nut-free option, use sunflower seed butter. Sunbutter works well and keeps the cookies creamy.
These cookies can be made dairy-free with vegan butter and plant-based milk. The texture and flavor may change.
Chilling the mixture for a few minutes before dropping can help it hold shape better. This is useful if the mixture looks too loose.
Variations
Chocolate Peanut Butter No Bake Cookies
Stir in ½ cup cocoa powder or chocolate chips. This gives the cookies a chocolate twist.
Cocoa powder makes the whole mixture chocolatey. Chocolate chips add little sweet pockets.
Raisin Peanut Butter No Bake Cookies
Add raisins for a fruity kick. They give the cookies a chewy texture.
Raisins pair well with oats and peanut butter. This variation feels cozy and snack-like.
Cranberry Peanut Butter No Bake Cookies
Add dried cranberries. They bring chewiness and a tart-sweet flavor.
The cranberries give the cookies more color. They also balance the sweetness.
Almond Butter No Bake Cookies
Use almond butter instead of peanut butter. This gives the cookies a different nutty flavor.
The cookies will still be creamy. The flavor will be slightly different.
Cashew Butter No Bake Cookies
Use cashew butter as a peanut butter substitute. It gives a mild, creamy taste.
This variation stays rich and smooth. It is a nice alternative if you enjoy cashew flavor.
Sunbutter No Bake Cookies
Use sunbutter or sunflower seed butter for a nut-free option. This keeps the cookies creamy without peanut butter.
The flavor will change. It is a good option for nut-free needs.
Gluten-Free Peanut Butter No Bake Cookies
Use certified gluten-free oats. This makes the cookies gluten-free when the other ingredients fit your needs.
The method stays the same. The cookies still cool and set on wax paper.
Lighter Peanut Butter No Bake Cookies
Reduce the sugar to 1 cup and use low-fat milk. This creates a lighter version.
The cookies may be less sweet and may set differently. Use this variation when you want a lighter treat.
Cinnamon Peanut Butter No Bake Cookies
Add a pinch of cinnamon. It gives the cookies a lovely warmth.
Cinnamon works well with peanut butter and oats. Use only a small amount.
Dairy-Free Peanut Butter No Bake Cookies
Use vegan butter and plant-based milk. This creates a dairy-free version.
The flavor and texture depend on the products used. Follow the same stovetop method.
Nutty No Bake Cookies
Add nuts if you want more crunch. They give the cookies extra texture.
Use this variation when you want something heartier. Keep the mixture scoopable.
Troubleshooting
Why Did My Cookies Not Set?
The mixture may not have heated enough before being removed from the stove. It should be bubbling slightly and fully melted before the peanut butter is added.
The cookies also need cooling time. Let them sit on wax paper for about 30 minutes.
Why Are My Cookies Too Thick?
The mixture is supposed to look thick after the oats are added. That is normal.
If it becomes too hard to scoop, work quickly after mixing. You can shape the cookies gently with a spoon.
Why Are My Cookies Too Loose?
The mixture may need a few minutes to cool before scooping. Chilling it briefly can help it hold shape better.
Make sure you used quick-cook oats. They absorb the mixture and help the cookies set.
Why Is My Peanut Butter Mixture Not Smooth?
The peanut butter may need more stirring in the hot mixture. Stir until it is completely melted.
Remove the saucepan from the heat before adding peanut butter. The heat already in the mixture should be enough to melt it smoothly.
Why Are My Cookies Too Sweet?
These cookies are meant to be sweet, but you can adjust the sugar to your liking. A lighter version reduces the sugar to 1 cup.
Salt also helps balance the sweetness. Make sure the ¼ teaspoon salt is included.
Frequently Asked Questions
Can I Freeze Peanut Butter No Bake Cookies?
Yes, these cookies freeze well. Layer them between wax paper in an airtight container.
They will last for about 3 months in the freezer. Thaw before serving.
What Can I Use as a Peanut Butter Substitute?
Almond butter, cashew butter, or sunflower seed butter work well. Each one brings its own unique taste.
Sunflower seed butter is a good nut-free option. Choose the substitute that fits your needs.
How Long Do These Cookies Last?
These cookies last in an airtight container at room temperature for up to 1 week. Keep the container sealed.
If stored properly in the freezer, they can last up to 3 months. Use wax paper between layers.
Can I Make These Cookies Gluten-Free?
Yes, use certified gluten-free oats. The oats are the main ingredient to check.
Make sure the rest of your ingredients also fit your gluten-free needs. The method does not change.
Can I Make These Cookies Dairy-Free?
Yes, use vegan butter and plant-based milk. The texture and flavor may be different.
Follow the same stovetop steps. Let the cookies set fully before storing.
Can I Use Crunchy Peanut Butter?
Yes, crunchy peanut butter can be used. It gives the cookies extra texture.
Creamy peanut butter makes a smoother cookie. Choose based on your preference.
Can Kids Help Make These?
Yes, kids can help drop the cookies onto wax paper once the hot mixture is safely handled by an adult. They can also help measure ingredients and arrange the cookies.
Adults should manage the saucepan and stove steps. The mixture is hot before it cools and sets.
Why This Recipe Works So Well
Peanut Butter No Bake Cookie works because the warm butter, sugar, and milk mixture creates a sweet base that firms as it cools. The peanut butter melts into that base and makes it creamy.
Quick-cook oats absorb the mixture and give the cookies their chewy structure. They are what turn the sauce-like mixture into spoonable cookies.
The vanilla adds warmth. The salt keeps the sweetness balanced and makes the peanut butter taste better.
The no-bake method makes the recipe especially practical. You do not need to preheat an oven, roll dough, or wait for baking sheets to rotate.
The cookies also work because they are flexible. Chocolate, raisins, cranberries, almond butter, sunbutter, gluten-free oats, low-fat milk, cinnamon, vegan butter, plant-based milk, and other mix-ins can all change the final batch.
Most of all, these cookies work because they feel homemade with very little effort. They are quick, sweet, nostalgic, and easy to share.
Final Thoughts
Peanut Butter No Bake Cookie is simple, chewy, creamy, and full of sweet peanut butter flavor. With quick-cook oats, butter, sugar, milk, peanut butter, vanilla, and salt, it turns into a batch of cookies without needing the oven.
I love how this recipe makes dessert feel easy and familiar. The saucepan warms, the peanut butter melts in, the oats thicken the mixture, and little cookies sit on wax paper while everyone waits for them to set.
Serve them at room temperature with cold milk, warm coffee, lunchbox snacks, after-school treats, or a quiet sweet moment at home. Whether you make them for family, friends, gatherings, summer days, or sudden cravings, these Peanut Butter No Bake Cookies bring soft, sweet comfort in every bite.
Peanut Butter No Bake Cookie
These Peanut Butter No Bake Cookies are chewy, sweet, creamy, and packed with classic peanut butter oat flavor. Made with quick-cook oats, butter, sugar, milk, vanilla, and peanut butter, they are an easy no-bake dessert for quick treats, lunchboxes, snack trays, or anytime you want homemade cookies without using the oven.
Recipe Details
- Prep Time: 10 minutes
- Total Time: 10 minutes
- Course: Dessert
- Cuisine: American
- Servings: 12 cookies
- Calories: 150 kcal
Equipment
- Mixing bowl
- Stove
Ingredients
For the Cookies
- 3 cups quick-cook oats
- 1 cup peanut butter
- 2 teaspoons vanilla
- ½ cup milk
- 2 cups sugar
- ½ cup butter
- ¼ teaspoon salt
Instructions
Step 1: Melt the Butter Mixture
In a saucepan, melt the butter, sugar, and milk over medium heat, stirring until combined.
Step 2: Remove from Heat
Once the butter, sugar, and milk mixture is melted and combined, remove the saucepan from the heat.
Step 3: Add the Peanut Butter and Vanilla
Stir in the peanut butter and vanilla until the mixture is smooth and creamy.
Step 4: Mix in the Oats and Salt
Add the quick-cook oats and salt, then stir until everything is evenly mixed.
Step 5: Shape the Cookies
Drop spoonfuls of the mixture onto wax paper.
Step 6: Let the Cookies Set
Let the cookies cool until set before serving.
Notes
Store cookies in an airtight container.
You can add chocolate chips or nuts for extra flavor.
Serving Suggestions
- Serve with cold milk for a classic peanut butter cookie pairing.
- Pack into lunchboxes or snack containers for an easy sweet treat.
- Add to dessert trays with brownies, bars, or other no-bake cookies.
- Serve with coffee, tea, or hot cocoa for a cozy snack.
- Enjoy chilled if you prefer a firmer texture.
Storage
How to Store
Store cookies in an airtight container.
Best Texture Tip
Let the cookies cool fully on wax paper until set so they hold their shape.
Serving Tip
For a firmer cookie, let the cookies sit longer before serving or store them chilled.

Fernando is the creator and writer behind the food blog Eating with your Hands. Living and working in cities like Paris, Barcelona, and Berlin, and being married to a Canadian foodie, has given Fernando a passion and interest in food and inspired him to run EWYH.