
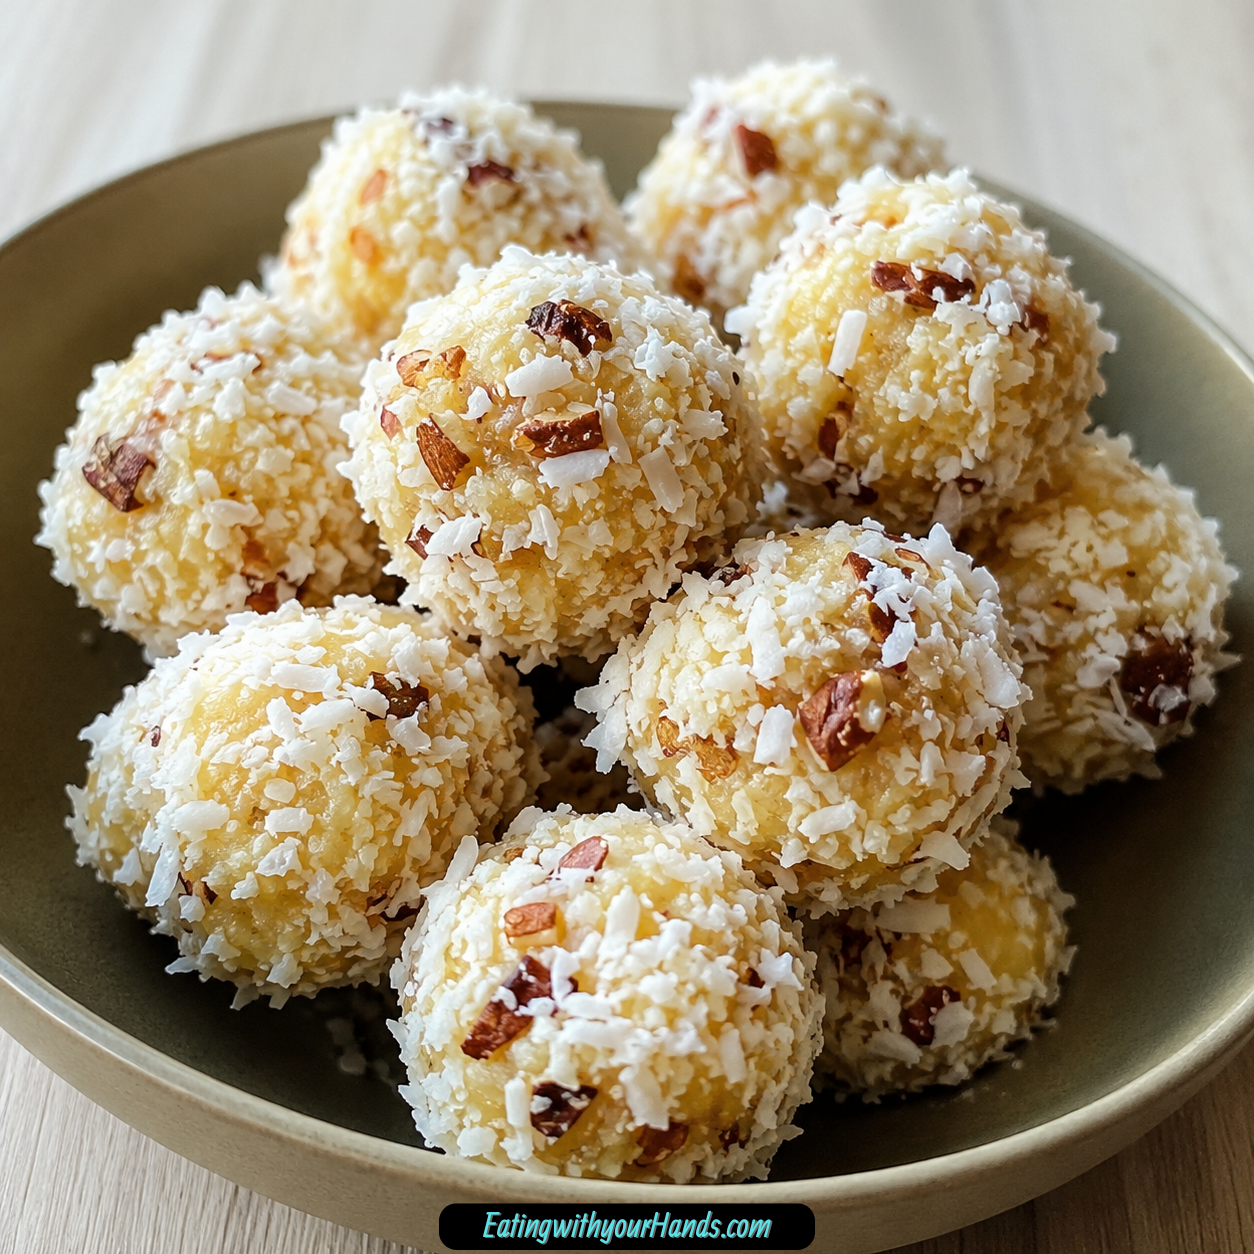
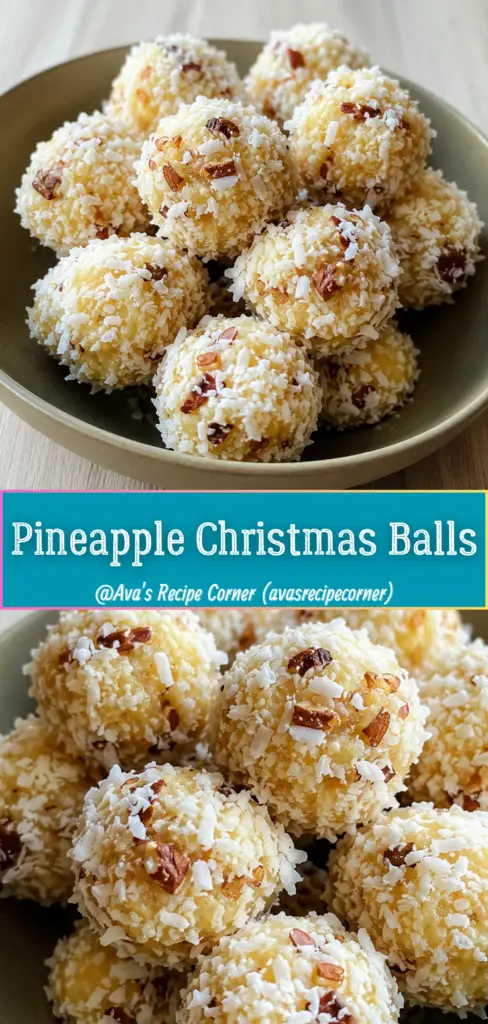
Some holiday desserts feel like they were made to brighten the table. Pineapple Christmas Balls are exactly that kind of treat: creamy, fruity, nutty, lightly tropical, and finished with a snowy coating that makes them look right at home on a Christmas platter.
They are no-bake, which makes them especially welcome during a busy holiday season. When the oven is full, the kitchen is crowded, and there are already enough things to time perfectly, a chilled dessert like this feels like a small gift.
These little bites bring together softened cream cheese, powdered sugar, well-drained crushed pineapple, shredded coconut, and chopped nuts. Once shaped and rolled in a coating of more chopped nuts, coconut, and optional mini chocolate chips, they become festive bite-sized treats that are easy to serve, easy to gift, and easy to love.
The flavor is sweet and creamy with a bright pineapple note. The coconut adds a classic holiday snowball feel, while the nuts give the soft centers a crisp, textured coating.
This is the kind of recipe that feels nostalgic without being heavy. It brings a tropical twist to Christmas sweets while still fitting beautifully beside cookies, candies, hot chocolate, coffee, and holiday punch.
Table of Contents
- Why You’ll Love Pineapple Christmas Balls
- Recipe Details
- Ingredients
- Optional Festive Additions
- The Sweet Holiday Charm Behind These No-Bake Bites
- Why Draining the Pineapple Matters
- Directions
- Step 1: Prepare the Work Area
- Step 2: Drain the Crushed Pineapple
- Step 3: Soften the Cream Cheese
- Step 4: Add the Powdered Sugar
- Step 5: Stir in the Drained Pineapple
- Step 6: Add the Shredded Coconut
- Step 7: Add the Chopped Nuts
- Step 8: Add Optional Chocolate Chips if Desired
- Step 9: Chill the Mixture if It Feels Sticky
- Step 10: Shape the Pineapple Balls
- Step 11: Prepare the Coating
- Step 12: Roll Each Ball in the Coating
- Step 13: Add a Festive Touch
- Step 14: Chill Until Firm
- Serving Suggestions
- Storage
- Freezing
- Make-Ahead Tips
- Helpful Notes for Best Results
- Optional Variations
- Troubleshooting
- Frequently Asked Questions
- Why These Are Perfect for Christmas Dessert Platters
- Why This Recipe Works for Busy Holiday Schedules
- Final Thoughts
- Pineapple Christmas Balls
Why You’ll Love Pineapple Christmas Balls
These Pineapple Christmas Balls are no-bake, which means they are quick to prepare and perfect for busy holiday schedules. You do not need to heat the oven or plan around baking time.
They also bring a refreshing flavor to a Christmas dessert table. Pineapple and coconut give them a bright tropical taste that stands out among richer holiday cookies and candies.
The texture is another reason they work so well. The cream cheese base is smooth and creamy, the pineapple adds fruitiness, and the nuts create a crunchy contrast.
They are make-ahead friendly because the refrigerator does the final work. Once shaped and coated, the balls chill until firm and are served cold.
They are also easy to customize. Mini chocolate chips, dried fruit, maraschino cherries, rum extract, vanilla extract, colored coconut flakes, edible glitter, graham cracker crumbs, cookie crumbs, or different nuts can all shift the look or flavor.
Most importantly, they are festive without being difficult. A tray of these little snowball-style bites looks thoughtful, even though the process is simple and practical.
Recipe Details
- Recipe name: Pineapple Christmas Balls
- Main method: No-bake
- Chill time: At least 2 hours
- Optional pre-chill before coating: 30 minutes if the mixture feels sticky
- Best served: Cold
- Refrigerator storage: Up to 5 days
- Freezer storage: Up to 1 month
- Make-ahead option: Prepare the mixture a day early, shape, and chill overnight
- Main flavors: Pineapple, coconut, cream cheese, and nuts
- Best for: Christmas dessert platters, cookie exchanges, edible gifts, and holiday trays
Ingredients
- 1 cup crushed pineapple
- 8 oz cream cheese
- 1 cup powdered sugar
- 1 cup shredded coconut
- ½ cup chopped nuts
- 1 cup chopped nuts, for coating
- ½ cup shredded coconut, for coating
- ¼ cup mini chocolate chips, optional
Optional Festive Additions
- Maraschino cherries
- Dried fruits
- Crushed graham crackers
- Cookie crumbs
- Rum extract
- Vanilla extract
- Colored coconut flakes
- Edible glitter
- Pecans
- Walnuts
- Almonds
- Macadamia nuts
The Sweet Holiday Charm Behind These No-Bake Bites
Pineapple Christmas Balls have a different kind of holiday personality from baked cookies or rich chocolate candies. They are creamy and sweet, but the pineapple gives them a bright, cheerful flavor that keeps them from feeling too heavy.
The cream cheese creates the soft base. It gives the mixture richness and helps everything hold together once chilled.
Powdered sugar sweetens the mixture and adds structure. Because powdered sugar blends smoothly, it works well with the cream cheese without making the filling gritty.
Crushed pineapple brings the fruit flavor, but it must be drained very well. Too much liquid can make the mixture loose and difficult to shape.
Shredded coconut adds chewiness and a snowy holiday look. Chopped nuts bring crunch and help balance the creamy filling.
The coating is what gives these little bites their finished appearance. Chopped nuts and coconut create texture on the outside, while optional mini chocolate chips add a fun little surprise.
Why Draining the Pineapple Matters
The most important technical detail in this recipe is draining the pineapple. Crushed pineapple contains a lot of liquid, and that moisture can make the mixture too soft if it is not removed.
The recipe calls for placing the crushed pineapple in a fine mesh strainer and pressing gently. This helps remove as much liquid as possible before the pineapple is mixed with the cream cheese base.
If the pineapple is not drained well, the balls may become soggy or difficult to roll. The mixture may also struggle to firm up properly in the refrigerator.
Good draining keeps the pineapple flavor while protecting the texture. You still get the bright tropical taste, but the base remains thick enough to shape.
This step is especially important if you plan to make the recipe ahead. A firmer mixture will hold better in storage and look nicer on a dessert platter.
Directions
Step 1: Prepare the Work Area
Before mixing anything, clear a small space on your counter for the ingredients, mixing bowl, coating bowl, and tray. This recipe is simple, but it is easier when everything is ready.
Line a tray with parchment paper. The shaped pineapple balls will sit on this tray before chilling.
A parchment-lined tray helps prevent sticking. It also makes it easier to move the balls in and out of the refrigerator.
Step 2: Drain the Crushed Pineapple
Measure 1 cup crushed pineapple and place it in a fine mesh strainer. Let the liquid begin draining naturally.
Press the pineapple gently to remove as much liquid as possible. Do not skip this step, because excess moisture can make the mixture soggy.
The pineapple should still be moist, but it should not be dripping. The goal is to keep the fruit flavor while removing the liquid that would loosen the cream cheese base.
Step 3: Soften the Cream Cheese
Use 8 oz cream cheese softened to room temperature. Softened cream cheese mixes more easily and creates a smoother base.
If the cream cheese is too cold, it may stay lumpy when combined with the powdered sugar. A smooth base is important for the best texture.
Place the softened cream cheese in a large mixing bowl. This will be the main bowl for the filling.
Step 4: Add the Powdered Sugar
Add 1 cup powdered sugar to the cream cheese. Powdered sugar adds sweetness and helps give the mixture structure.
Mix the cream cheese and powdered sugar until smooth and creamy. Make sure there are no dry pockets of sugar left in the bowl.
This base should look soft, thick, and evenly blended. It will hold the pineapple, coconut, and nuts together.
Step 5: Stir in the Drained Pineapple
Add the well-drained crushed pineapple to the cream cheese mixture. Stir gently until the pineapple is evenly distributed.
Take time to fold it through the base so every bite gets fruit flavor. The mixture should stay creamy and thick.
If the mixture immediately looks watery, the pineapple may not have been drained enough. In that case, chilling later becomes even more important.
Step 6: Add the Shredded Coconut
Add 1 cup shredded coconut to the bowl. You can use sweetened or unsweetened coconut depending on your taste.
The coconut adds chewiness and helps thicken the mixture. It also supports the Christmas snowball look of the finished bites.
Stir until the coconut is spread evenly throughout the cream cheese and pineapple base. The mixture should begin to feel more textured.
Step 7: Add the Chopped Nuts
Add ½ cup chopped nuts to the filling mixture. Pecans or walnuts work wonderfully.
The nuts add crunch and balance the creamy sweetness of the base. They also give the filling more structure.
Stir gently until the chopped nuts are evenly mixed in. Try not to overmix; just combine until everything is distributed.
Step 8: Add Optional Chocolate Chips if Desired
If using mini chocolate chips, you may add ¼ cup to the mixture or save them for the coating mixture, as provided in the recipe. Mini chips add a small chocolate surprise in each bite.
Fold them in gently so they do not clump in one area. Because the balls are small, mini chocolate chips work better than larger chips.
This step is optional. The pineapple, coconut, cream cheese, and nuts are enough to make the base recipe complete.
Step 9: Chill the Mixture if It Feels Sticky
If the mixture feels too sticky to roll, chill it for 30 minutes before shaping. This is one of the helpful notes included with the recipe.
Chilling firms the cream cheese base and makes the mixture easier to handle. It also helps the balls hold their shape.
If the mixture is already thick enough to scoop and roll, you can move directly to shaping. The 30-minute chill is only needed when the texture feels too soft.
Step 10: Shape the Pineapple Balls
Use a small cookie scoop or spoon to portion the mixture. Shape each portion into a bite-sized ball.
Roll gently between your hands. Do not press too hard, because the mixture should stay soft and creamy inside.
Place each shaped ball on the parchment-lined tray. Continue until all of the mixture has been shaped.
Step 11: Prepare the Coating
In a shallow bowl, combine 1 cup chopped nuts and ½ cup shredded coconut. Add the optional mini chocolate chips if using them in the coating.
Mix the coating ingredients together so each ball can pick up a little of everything. A shallow bowl makes rolling easier.
For the smoothest coating, use finely chopped nuts. Smaller pieces cling better and create a more even outer layer.
Step 12: Roll Each Ball in the Coating
Place one pineapple ball into the coating mixture. Roll it gently until the outside is fully covered.
Press lightly if needed so the coconut and nuts attach to the surface. Do not flatten the ball while coating.
Repeat with the remaining balls. Each one should have a festive outer layer of coconut and chopped nuts.
Step 13: Add a Festive Touch
For extra color, press a maraschino cherry on top of each ball. This is optional but creates a classic holiday look.
You can also mix dried fruits into the filling during the earlier flavor step. This adds color and another layer of sweetness.
Colored coconut flakes or edible glitter can also be used as a decorative twist. These options make the bites look especially festive for Christmas trays.
Step 14: Chill Until Firm
Place the tray of coated pineapple balls in the refrigerator. Chill for at least 2 hours, or until firm.
This chilling time is essential because the recipe is no-bake. The refrigerator helps the cream cheese mixture set so the balls hold their shape.
Serve the balls cold once they are firm. Keep them refrigerated until ready to serve because of the cream cheese base.
Serving Suggestions
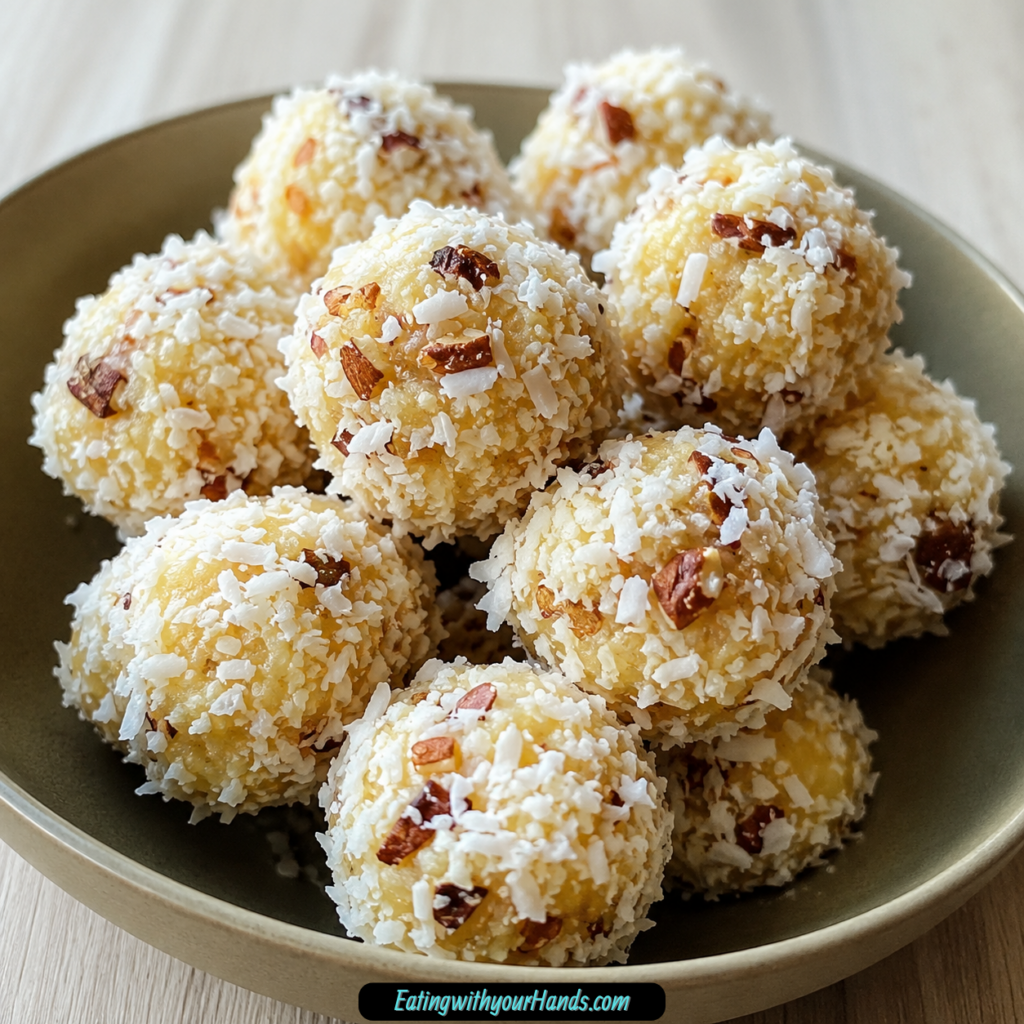
Arrange the Pineapple Christmas Balls on a festive platter for a holiday dessert table. Their coconut coating gives them a snowy look that fits beautifully with Christmas sweets.
You can also place each ball in a mini cupcake liner. This makes them easier to pick up and gives the presentation a neat, giftable appearance.
Serve them with coffee, hot chocolate, or holiday punch. The creamy pineapple flavor pairs well with cozy drinks and festive gatherings.
They are also a great option for cookie exchanges. Because they are no-bake, they add variety beside baked cookies and bars.
For edible gifts, pack them carefully in a chilled container. Since they contain cream cheese, they should stay cold until ready to serve.
Storage
Store Pineapple Christmas Balls in an airtight container in the refrigerator. They will keep for up to 5 days.
Because the base contains cream cheese, they should remain refrigerated. Do not leave them out for extended periods before serving.
If stacking them, place parchment between layers. This helps protect the coating and keeps them from sticking together.
Freezing
These pineapple balls can be frozen for up to 1 month in a sealed container. Freeze them after they are shaped, coated, and firm.
Thaw them in the refrigerator before serving. This helps preserve the texture and keeps the cream cheese base cold.
Freezing is helpful when preparing holiday desserts in advance. Just make sure they are sealed well so they stay fresh.
Make-Ahead Tips
The mixture can be prepared a day early. Shape the balls and chill them overnight for easy entertaining.
This makes the recipe especially practical during the holiday season. You can finish them before guests arrive or before assembling dessert trays.
If the mixture is made ahead but feels sticky when shaping, chill it longer. Cold cream cheese is easier to roll and coat.
Add decorative touches, such as maraschino cherries or edible glitter, closer to serving if you want the freshest appearance. The basic balls can still be chilled ahead.
Helpful Notes for Best Results
Drain the crushed pineapple thoroughly. This is the most important step for preventing soggy pineapple balls.
Use softened cream cheese so the base mixes smoothly. Cold cream cheese can leave lumps in the mixture.
If the mixture feels sticky, chill it for 30 minutes before rolling. This makes shaping easier.
Use finely chopped nuts for a smoother coating. Smaller pieces cling better and create a neater finish.
For a nut-free version, substitute the nuts with crushed graham crackers or cookie crumbs. This keeps the coating textured without using nuts.
Add a splash of rum extract or vanilla extract for extra holiday flavor. These are optional flavor boosts from the recipe notes.
Roll the balls in colored coconut flakes or edible glitter for a festive finish. This decorative twist can make them especially pretty on a Christmas platter.
Optional Variations
Nut-Free Pineapple Christmas Balls
For a nut-free version, replace the nuts with crushed graham crackers or cookie crumbs. This keeps the texture while removing the nuts.
Use the crumbs in the filling or coating where nuts would normally appear. The result will be softer and sweeter, but still festive.
Chocolate Pineapple Balls
Add ¼ cup mini chocolate chips to the mixture or coating. The chocolate gives each bite a small sweet surprise.
Mini chips work best because they distribute more evenly. Larger chips may be too bulky for bite-sized balls.
Cherry-Topped Christmas Balls
Press a maraschino cherry on top of each ball for a festive touch. The red color looks beautiful against the coconut and nut coating.
Add the cherry gently so the ball keeps its shape. This option is especially nice for dessert platters.
Dried Fruit Variation
Mix dried fruits into the filling during the flavor step. This adds more color and sweetness.
Use this option when you want the balls to look extra festive inside. It also creates a slightly chewier texture.
Coconut Snowball Finish
Roll the balls in extra coconut for a snowy look. You can use the provided ½ cup shredded coconut for coating or add colored coconut flakes for decoration.
This version highlights the Christmas appearance. It is simple, pretty, and easy to serve.
Holiday Flavor Boost
Add a splash of rum extract or vanilla extract. This gives the filling a little extra holiday flavor.
Use only enough to enhance the mixture. The pineapple, coconut, cream cheese, and nuts should still remain the main flavors.
Troubleshooting
Why Is My Mixture Too Sticky?
The mixture may be too warm, or the pineapple may not have been drained enough. Chill the mixture for 30 minutes before rolling.
If the pineapple was very wet, the balls may take longer to firm. Make sure to drain the fruit thoroughly next time.
Why Are My Pineapple Balls Soggy?
Sogginess usually comes from excess pineapple liquid. The crushed pineapple should be pressed gently in a fine mesh strainer before mixing.
Do not skip the draining step. It protects both the texture and the shape of the balls.
Why Is My Coating Not Sticking?
The coating may not stick well if the balls are too wet or too firm. Roll them gently while the surface is still slightly tacky.
Finely chopped nuts also help. Smaller pieces cling better than large chunks.
Why Are the Balls Too Soft After Chilling?
They may need more time in the refrigerator. Chill for at least 2 hours, or until firm.
If they are still soft, the pineapple may have added too much moisture. Serve them very cold and drain the pineapple more thoroughly next time.
Frequently Asked Questions
Can I Use Fresh Pineapple Instead of Canned?
Yes, fresh pineapple can be used. It must be crushed and drained thoroughly to remove all excess liquid.
The key is moisture control. Too much liquid can make the mixture loose and soggy.
What Nuts Work Best for This Recipe?
Pecans and walnuts are traditional choices and work wonderfully. Almonds or macadamia nuts also taste amazing with pineapple.
Use chopped nuts in the filling and for the coating. Finely chopped nuts create a smoother outside layer.
How Can I Make This Dairy-Free?
Use dairy-free cream cheese and a plant-based powdered sugar substitute. This creates a dairy-free version of the recipe.
The texture may vary depending on the products used. Keep the mixture chilled so it holds its shape.
Can I Skip the Coconut?
Yes, coconut can be replaced with crushed graham crackers or finely chopped nuts. This gives the balls a different texture.
If replacing coconut in the coating, make sure the substitute is finely crushed or chopped. This helps it cling to the outside.
Do These Need to Stay Refrigerated?
Yes, they should stay refrigerated because of the cream cheese base. Keep them cold until ready to serve.
Store leftovers in an airtight container in the refrigerator for up to 5 days. Serve cold for the best texture.
Can I Make Them Ahead?
Yes, these are make-ahead friendly. You can prepare the mixture a day early, shape the balls, and chill them overnight.
This makes them convenient for holiday gatherings. They are ready to serve once firm.
Can I Freeze Pineapple Christmas Balls?
Yes, freeze them in a sealed container for up to 1 month. Thaw them in the refrigerator before serving.
Freezing works best after the balls are fully shaped and coated. Keep them sealed tightly.
Why These Are Perfect for Christmas Dessert Platters
Holiday dessert platters often have plenty of baked cookies, chocolate treats, and rich bars. Pineapple Christmas Balls bring something different with their creamy tropical flavor and chilled texture.
Their snowy coconut coating makes them look festive without needing complicated decoration. Add maraschino cherries, colored coconut flakes, or edible glitter if you want them to look even more cheerful.
They are also easy to portion because each ball is already bite-sized. Guests can pick up one or two without needing a knife or fork.
The flavor also stands out. Pineapple and coconut bring brightness to a table that often leans heavily on chocolate, spice, and caramel.
That contrast is why these little no-bake treats work so well during the holidays. They are still sweet and festive, but they bring a refreshing twist.
Why This Recipe Works for Busy Holiday Schedules
No-bake recipes are especially useful in December. The oven may already be full, and the schedule may already be packed with cooking, shopping, wrapping, and hosting.
Pineapple Christmas Balls keep things simple. The mixture is stirred together, shaped, coated, and chilled.
The refrigerator handles the setting time. That means you can prepare them ahead and focus on other dishes.
They also store well for several days. Keeping them in an airtight container in the refrigerator makes them easy to pull out when guests arrive.
For gifting, they can be made ahead and packed once firm. Just remember that they should stay cold because of the cream cheese.
Final Thoughts
Pineapple Christmas Balls are a bright, creamy, no-bake holiday treat with a tropical twist. Made with crushed pineapple, cream cheese, powdered sugar, shredded coconut, chopped nuts, and an optional touch of mini chocolate chips, they are simple to prepare and beautiful to serve.
The most important step is draining the pineapple well. Once that is done, the mixture comes together easily, rolls into bite-sized balls, and chills until firm.
They are perfect for Christmas dessert platters, cookie exchanges, edible gifts, holiday parties, or any moment when you want a sweet treat that does not require the oven. Serve them cold in mini cupcake liners, with coffee, hot chocolate, or holiday punch.
With their creamy center, fruity pineapple flavor, snowy coconut coating, and crunchy nutty finish, these little bites bring something cheerful and different to the holiday table. They are easy, festive, make-ahead friendly, and exactly the kind of recipe that can become a December tradition.
Pineapple Christmas Balls
These pineapple Christmas balls are creamy, sweet, and filled with bright tropical flavor. Crushed pineapple, softened cream cheese, coconut, and crunchy nuts come together in a soft no-bake center with a textured holiday coating. They are easy to prepare ahead of time and make a colorful addition to Christmas cookie platters, dessert trays, edible gift boxes, or festive parties.
Recipe Details
- Prep Time: 20 minutes
- Chill Time: 2 hours
- Total Time: 2 hours 20 minutes
- Servings: 20 balls
- Calories: 150 kcal
Ingredients
For the Pineapple Mixture
- 8 oz cream cheese softened
- 1 cup powdered sugar
- 1 cup crushed pineapple well drained
- 1 cup shredded coconut
- ½ cup chopped nuts pecans or walnuts
For the Coating
- 1 cup chopped nuts for coating
- ½ cup shredded coconut for coating
- ¼ cup mini chocolate chips optional
Instructions
Step 1: Drain the Pineapple
Drain the crushed pineapple thoroughly. Press out as much excess liquid as possible so the filling does not become watery.
Step 2: Beat the Cream Cheese Base
Place the softened cream cheese and powdered sugar in a large bowl. Beat until the mixture is smooth and evenly blended.
Step 3: Add the Pineapple, Coconut, and Nuts
Stir the drained pineapple, 1 cup shredded coconut, and ½ cup chopped nuts into the cream cheese mixture until fully combined.
Step 4: Shape the Balls
Roll the mixture into small, bite-sized balls. Arrange them on a parchment-lined tray.
Step 5: Prepare the Coating
Combine 1 cup chopped nuts, ½ cup shredded coconut, and the mini chocolate chips, if using.
Step 6: Coat Each Ball
Roll each pineapple ball in the prepared coating mixture until the outside is evenly covered.
Step 7: Chill Until Firm
Refrigerate the coated balls for at least 2 hours, or until firm.
Step 8: Serve Chilled
Serve the pineapple balls cold. For an extra festive presentation, add a cherry on top before serving.
Notes
For easier shaping and a smoother finish, chill the pineapple mixture before rolling the balls in the coating.
Store the finished balls in the refrigerator for up to 5 days, or freeze them for up to 1 month.
For a nut-free option, replace the nuts with crushed graham crackers or cookie crumbs.
For a holiday flavor variation, add rum or vanilla extract.
Serving Suggestions
- Arrange them on a Christmas cookie platter.
- Add them to a holiday dessert board.
- Package them in small gift boxes or festive treat cups.
- Serve chilled alongside hot coffee or tea.
- Top each ball with a cherry for a colorful holiday finish.
Storage
How to Store
Keep the pineapple balls in an airtight container in the refrigerator for up to 5 days.
How to Freeze
Place the balls in a freezer-safe airtight container and freeze for up to 1 month.
How to Thaw
Transfer frozen pineapple balls to the refrigerator and let them thaw before serving.
Best Texture Tip
Drain the pineapple as thoroughly as possible and chill the mixture before shaping. This helps the balls stay firm and makes them easier to coat.

Fernando is the creator and writer behind the food blog Eating with your Hands. Living and working in cities like Paris, Barcelona, and Berlin, and being married to a Canadian foodie, has given Fernando a passion and interest in food and inspired him to run EWYH.