
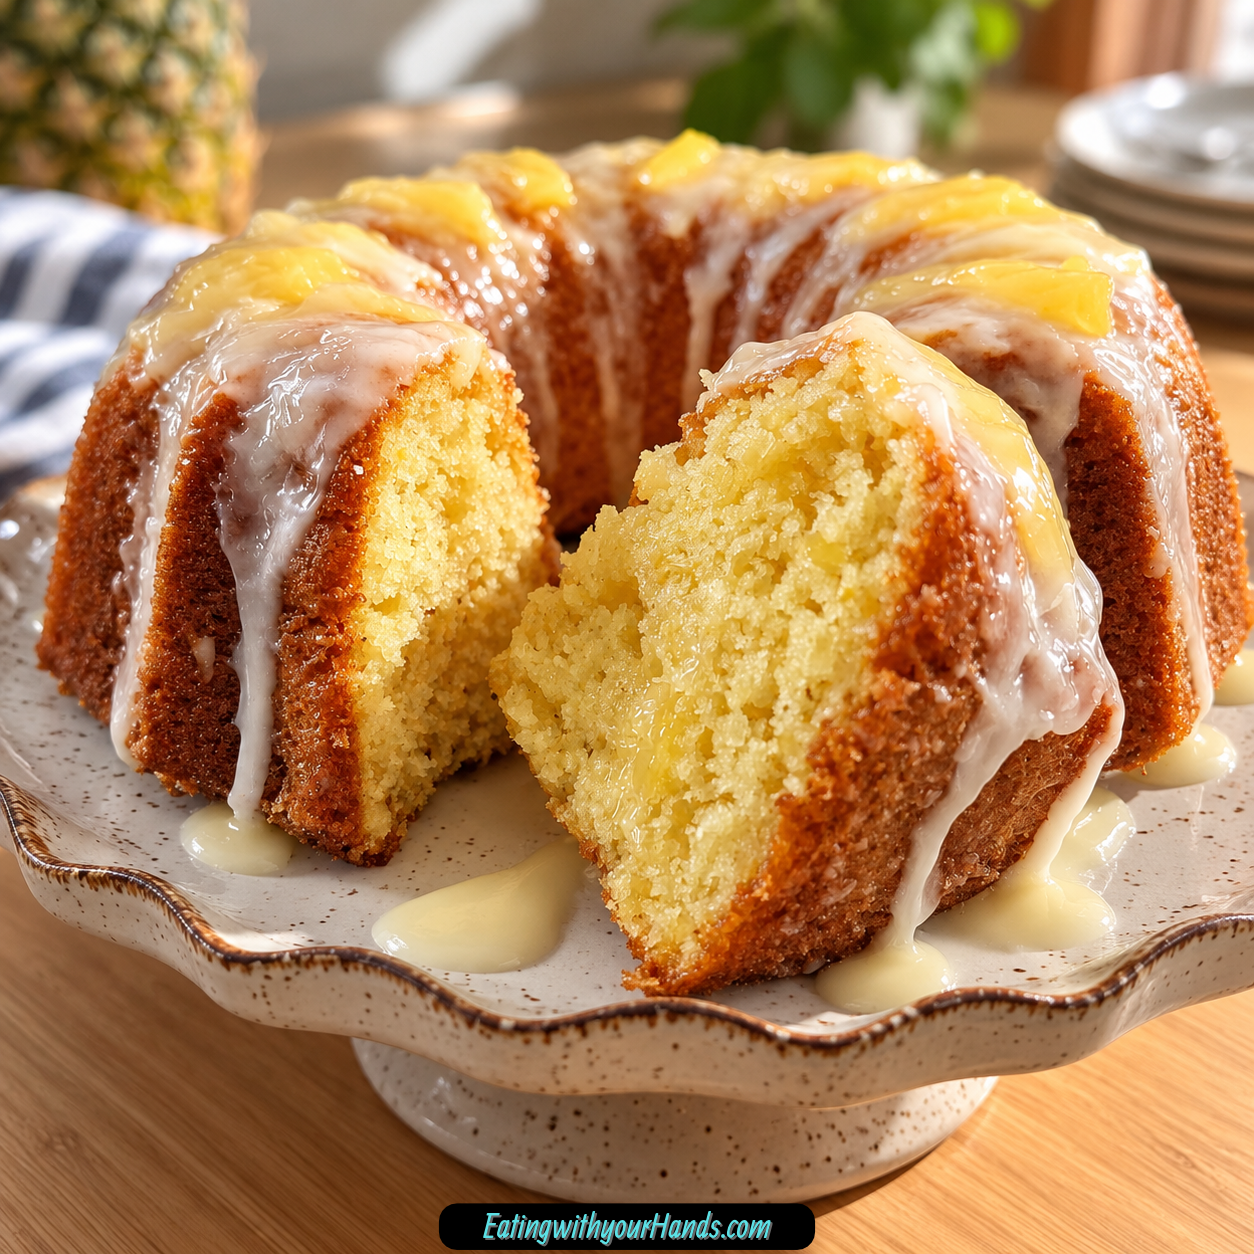
Some cakes win you over with layers of frosting and elaborate decorations, but this Pineapple Juice Cake does something completely different. It relies on an incredibly moist golden crumb, bright pineapple flavor, and a glossy glaze that slowly settles into every curve of the cake.
I still remember tasting it for the first time at my aunt’s summer potluck. One forkful was enough to make me stop thinking about everything else on the dessert table because the cake was so tender, sweet, and gently tangy at the same time.
I asked for the recipe almost immediately. What surprised me most was discovering how little effort was hiding behind a cake that tasted as though someone had spent far longer preparing it.
Pineapple juice is the detail that makes the entire dessert memorable. It appears in both the batter and the glaze, allowing that sunny fruit flavor to run through the cake instead of sitting only on the surface.
There is also something wonderfully nostalgic about beginning with yellow cake mix. It keeps the preparation easy while vegetable oil, eggs, and pineapple juice transform it into something exceptionally soft and flavorful.
Then comes the glaze, which is where the cake becomes impossible for me to ignore. Powdered sugar, butter, and more pineapple juice create a rich topping that can soak gently into the cake while still leaving a sweet finish on the outside.
This is the dessert I make when I need something dependable for a potluck, birthday, shower, or ordinary evening that could use a little sweetness. It looks impressive in a Bundt pan but asks for very little complicated technique in return.
That easygoing character is probably why it has stayed in my kitchen for so long. Every time I make it, I am reminded that a handful of familiar ingredients can still create something people remember long after the last slice disappears.
Table of Contents
- Why You’ll Love This Pineapple Juice Cake
- Ingredients for Pineapple Juice Cake
- Why Pineapple Juice Makes This Cake Different
- Why Vegetable Oil Works So Well
- Why Room-Temperature Eggs Help
- Equipment You’ll Need
- How to Make Pineapple Juice Cake
- Step 1: Preheat the Oven and Prepare the Bundt Pan
- Step 2: Bring the Eggs to the Right Temperature
- Step 3: Combine the Cake Ingredients
- Step 4: Fill the Bundt Pan
- Step 5: Bake and Begin Checking Early
- Step 6: Rest the Cake in the Pan
- Step 7: Melt the Butter for the Glaze
- Step 8: Add the Pineapple Juice
- Step 9: Whisk in the Powdered Sugar
- Step 10: Choose Your Glazing Point
- Step 11: Glaze Slowly and Evenly
- Step 12: Let the Cake Set Before Slicing
- How to Keep the Bundt Cake From Sticking
- How to Avoid Overmixing the Batter
- Knowing Exactly When the Cake Is Ready
- The Best Time to Add the Glaze
- Coconut Oil Variation
- Applesauce Variation
- White Cake Mix Variation
- Pineapple or Coconut Cake Mix Variation
- Lemon Glaze Variation
- Orange Glaze Variation
- Rum Glaze Variation
- Coconut Milk Glaze Variation
- Serving With Whipped Cream
- Serving With Toasted Coconut
- Serving With Pineapple and Berries
- Serving With Coffee
- Potlucks and Gatherings
- Making Pineapple Juice Cake Ahead
- Storage
- Freezing Pineapple Juice Cake
- Using a 9×13-Inch Pan
- Making Pineapple Juice Cupcakes
- Frequently Asked Questions
- Nutritional Information
- The Cake That Always Takes Me Back to That Potluck
- Pineapple Juice Cake Recipe
Why You’ll Love This Pineapple Juice Cake
The preparation is refreshingly simple. Most of the cake batter comes together in one large bowl, which means there is less measuring, mixing, and cleanup than the finished dessert might suggest.
Its texture is another reason this cake has such loyal fans. Pineapple juice and vegetable oil help keep the crumb exceptionally tender rather than dry or fragile.
The glaze doubles down on that moisture. Instead of sitting like a heavy frosting, it works its way around the golden cake and adds another layer of sweet pineapple flavor.
This is also an excellent recipe for gatherings. A Bundt cake travels easily, slices neatly, and looks attractive without requiring detailed decorating.
The flavor suits more than one season or occasion. It can feel bright and tropical at a summer party, comforting beside coffee, or cheerful enough to bring some sunshine to a gray afternoon.
Best of all, the base recipe is flexible without becoming complicated. Coconut oil, applesauce, alternate cake mixes, citrus glaze variations, whipped cream, coconut, fruit, and different pan shapes all offer ways to change the presentation while keeping the cake recognizable.
Ingredients for Pineapple Juice Cake
This cake begins with four straightforward batter ingredients and finishes with a three-ingredient pineapple glaze. Keeping the ingredient list short is part of what makes the recipe so useful when you want maximum payoff without an elaborate baking project.
For the Cake
- 1 15.25-ounce box yellow cake mix
- ¾ cup vegetable oil
- ¾ cup pineapple juice
- 4 large eggs, room temperature
Yellow cake mix creates the familiar golden base. Pillsbury is one preferred option for texture, though the recipe centers on the 15.25-ounce box size.
The pineapple juice should ideally have a clean, bright flavor. Juice that is not from concentrate can be used when available.
For the Pineapple Glaze
- 2 cups powdered sugar
- ¾ cup pineapple juice
- 4 tablespoons unsalted butter
Salted butter can work when necessary. The glaze should end up smooth enough to pour slowly over the cake and settle into the curves.
Why Pineapple Juice Makes This Cake Different
Pineapple juice is not merely a flavor added at the end. Three-quarters of a cup goes directly into the cake batter, where it becomes part of the crumb itself.
Another ¾ cup appears in the glaze. That repeated pineapple flavor gives the dessert a much stronger identity than a plain yellow cake covered with an unrelated topping.
The juice also contributes to the cake’s tender character. Every slice feels moist and soft, which is one reason the cake remains appealing even after it has been stored.
Fresh pineapple juice can be used as well. Strain it carefully first so pulp does not interfere with the smooth batter or glaze.
Why Vegetable Oil Works So Well
The recipe uses ¾ cup vegetable oil rather than relying only on butter in the cake itself. This contributes to the consistently tender texture that makes each slice feel soft for days.
Oil also keeps the mixing process uncomplicated. There is no need to cream fat and sugar or wait for butter to reach a precise texture before making the batter.
For a different version, melted coconut oil can replace the vegetable oil. Keep the other ingredients at room temperature so the coconut oil does not firm up while you are mixing.
Applesauce can replace up to half of the vegetable oil as another variation. This keeps the basic preparation familiar while changing the balance of the batter.
Why Room-Temperature Eggs Help
Four large eggs give the batter structure and richness. Bringing them to room temperature helps them blend more smoothly with the oil, pineapple juice, and cake mix.
Setting the eggs out about 30 minutes before baking is the easiest approach. If you forget, placing them in warm water for about 5 minutes provides a faster option.
Cold eggs can make the batter look less cohesive. Giving them a little time to warm prevents that unnecessary problem.
Once they are ready, all four eggs can join the batter ingredients. The cake remains wonderfully straightforward from that point forward.
Equipment You’ll Need
A 10-cup Bundt pan gives this cake its classic shape. The decorative curves are especially useful because the pineapple glaze can run into every ridge and create a beautiful finish.
You will also need a large mixing bowl and a wooden spoon. No specialized mixer is required for the standard batter.
A small saucepan is used for the glaze. It gives you enough control to melt the butter gently and combine the pineapple juice and powdered sugar smoothly.
A wire rack is useful during cooling and glazing. Placing a baking sheet underneath catches the extra glaze that drips from the cake.
How to Make Pineapple Juice Cake
The beauty of this recipe is how little complicated work stands between the ingredients and the finished cake. The most important details are preparing the Bundt pan carefully, mixing without overworking the batter, watching the baking time closely, and choosing the right moment to glaze.
Step 1: Preheat the Oven and Prepare the Bundt Pan
Preheat the oven to 350°F or 175°C. Give the oven enough time to reach full temperature while you prepare the pan and batter.
Grease a 10-cup Bundt pan thoroughly, working the fat into every curve, ridge, and center section. Follow with a light dusting of flour for extra protection against sticking.
This preparation deserves attention because Bundt pans contain many places where cake can cling. A well-coated pan makes the later release much easier and helps preserve the decorative shape.
Set the prepared pan aside. Once the batter is mixed, it can go directly into the pan without waiting.
Step 2: Bring the Eggs to the Right Temperature
Use 4 large eggs that have been allowed to sit at room temperature for about 30 minutes. They should no longer feel refrigerator-cold when you begin mixing.
If you did not remember to take them out ahead of time, place the eggs in warm water for about 5 minutes. This brings their temperature up more quickly without requiring a long wait.
Room-temperature eggs combine more smoothly with the liquid ingredients. That makes the batter easier to bring together without excessive mixing.
Once the eggs are ready, crack them into the large mixing bowl with the remaining cake ingredients. There is no separate whipping step required.
Step 3: Combine the Cake Ingredients
Add the 15.25-ounce box yellow cake mix, ¾ cup vegetable oil, ¾ cup pineapple juice, and 4 large eggs to the mixing bowl. Begin stirring gently so the dry cake mix does not scatter.
Continue mixing by hand for approximately 1–2 minutes. Stop once everything looks evenly combined and the batter is smooth enough to pour.
A few small lumps are perfectly acceptable. Do not keep stirring simply because you want the mixture to look flawlessly silky.
The batter should be thick but pourable and have a warm golden appearance. Once it reaches that stage, it is ready for the pan.
Step 4: Fill the Bundt Pan
Pour the batter carefully into the prepared Bundt pan. Move around the pan as you pour so the batter is distributed relatively evenly.
Use the wooden spoon to guide any batter left in the bowl into the pan. Avoid vigorously spreading or beating the batter once it is in place.
Take a moment to make sure no large empty pockets remain around the Bundt shape. The surface does not need to be perfectly flat.
Place the pan in the preheated oven. The baking stage is where the cake develops its golden color and tender structure.
Step 5: Bake and Begin Checking Early
Bake the cake for about 40 minutes. Begin checking around the 35-minute mark rather than automatically waiting for the entire time.
Look for a golden surface and gently press the top. A properly baked cake should spring back lightly under your touch.
You can also insert a toothpick near the center. A clean toothpick or one carrying a few moist crumbs means the cake is ready, while wet batter means it needs more time.
Do not rely only on the clock. Oven behavior can vary, so the cake’s appearance and texture are your best guides near the end.
Step 6: Rest the Cake in the Pan
Remove the Bundt cake from the oven and leave it in the pan for about 10 minutes. This gives the structure time to firm enough for a cleaner release.
Avoid turning it out immediately while it is extremely hot. A freshly baked cake is more delicate and can break if rushed.
At the same time, do not forget the cake in the pan for a very long period. The 10-minute rest provides the intended balance between stability and easy release.
After that rest, carefully invert the cake onto a wire rack. Let it continue cooling as you prepare the glaze.
Step 7: Melt the Butter for the Glaze
Place the 4 tablespoons unsalted butter in a small saucepan. Melt it gently over low heat.
Do not brown the butter. The glaze is intended to have a clean pineapple sweetness rather than a toasted butter flavor.
Once the butter is completely melted, keep the heat gentle. You are now ready to incorporate the pineapple juice.
The saucepan method makes it easy to combine everything smoothly. Keep a whisk nearby for the next stage.
Step 8: Add the Pineapple Juice
Whisk ¾ cup pineapple juice into the melted butter. Continue until the liquid looks evenly blended.
Use the same quality of pineapple juice you chose for the cake. This keeps the flavor consistent between the crumb and glaze.
The mixture will still be thin at this point. Powdered sugar provides the body and sweetness in the next step.
Keep the heat low as you work. There is no need to aggressively boil the glaze.
Step 9: Whisk in the Powdered Sugar
Gradually add the 2 cups powdered sugar while whisking. Adding it in stages makes it easier to prevent stubborn lumps.
Continue whisking until the glaze becomes silky and smooth. Scrape around the saucepan as needed so all the sugar is incorporated.
If the glaze feels thicker than you want, pineapple juice can be added 1 teaspoon at a time. Make each adjustment gradually rather than thinning it too quickly.
The finished glaze should be fluid enough to pour. It also needs enough body to cling to the cake instead of immediately disappearing.
Step 10: Choose Your Glazing Point
For a glaze that soaks more noticeably into the cake, pour it while the cake is still slightly warm. The warmth encourages some of that pineapple sweetness to move into the crumb.
For a more visible glaze on the exterior, allow the cake to cool completely first. A cooler surface keeps more of the glaze resting on top.
Place the wire rack over a baking sheet before pouring. This catches the extra glaze and makes cleanup easier.
Either way, pour slowly rather than emptying the entire saucepan at once. Give the glaze time to travel into the Bundt cake’s curves.
Step 11: Glaze Slowly and Evenly
Begin pouring the glaze around the highest part of the cake. Move slowly around the entire ring so every section receives some.
Allow some glaze to flow naturally down the outside and into the center. Those drips are part of what gives a Bundt cake its inviting appearance.
Pause when necessary and let the first layer settle. Then continue with more glaze rather than forcing everything onto the cake at once.
The aroma of pineapple and butter becomes especially noticeable at this stage. Once the surface is evenly glazed, leave the cake undisturbed.
Step 12: Let the Cake Set Before Slicing
Allow the cake and glaze to settle before cutting. A little patience gives the exterior time to develop its sweet finish.
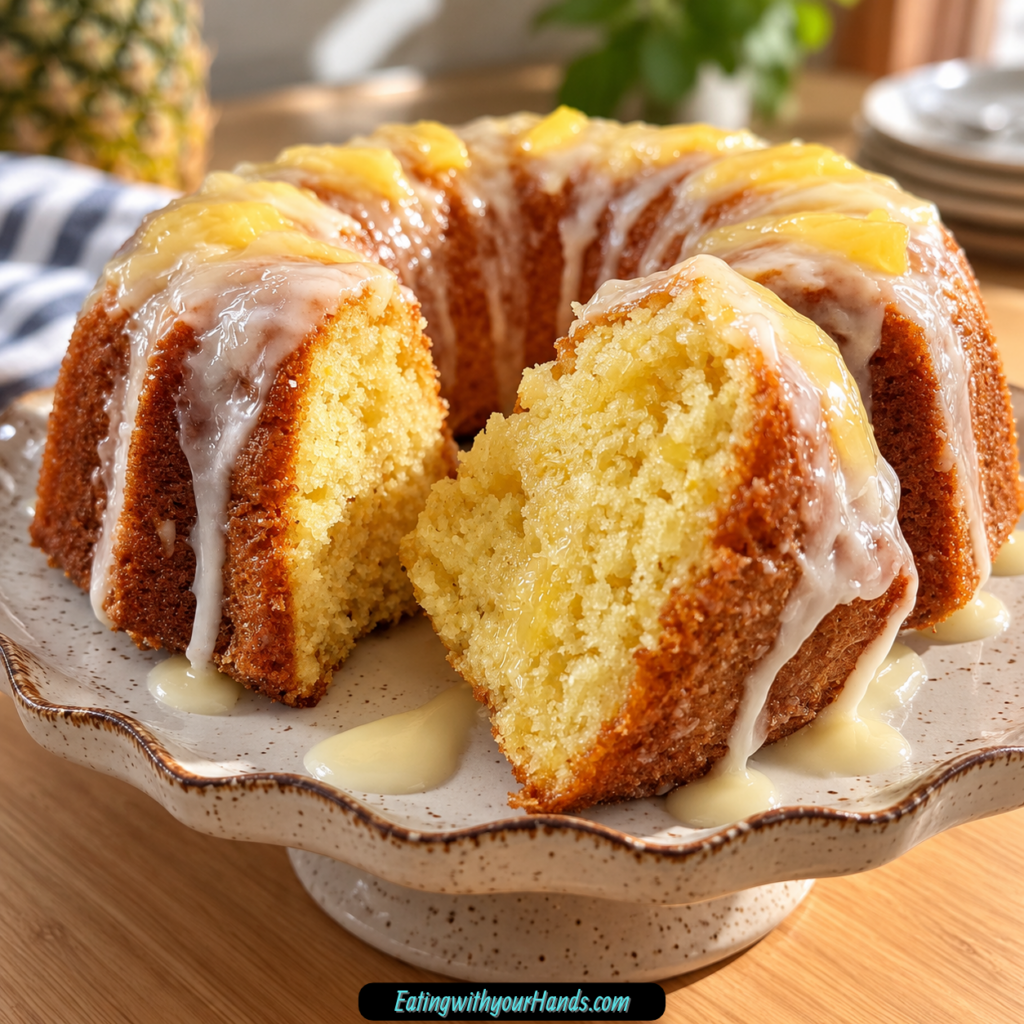
As the glaze sets, it creates a lightly crackled sweetness against the moist crumb underneath. That contrast is one of the best parts of the finished cake.
Use a sharp knife for serving. Slice through the Bundt cake carefully so the shape and glaze stay attractive.
The first piece should reveal a tender golden interior. Serve it plain or add one of the simple accompaniments below.
How to Keep the Bundt Cake From Sticking
The safest strategy begins before batter ever touches the pan. Grease every curve thoroughly rather than coating only the large visible surfaces.
Dusting the greased pan with flour adds another layer of protection. Pay particular attention to the center tube and detailed ridges.
The 10-minute cooling period also matters. It lets the cake firm before you attempt to remove it.
A properly prepared pan should release with far less resistance. Protecting the Bundt shape is worth the extra minute of attention.
How to Avoid Overmixing the Batter
This cake does not benefit from extended beating. Mix only for approximately 1–2 minutes, stopping when the ingredients are incorporated.
Small lumps do not need to send you back into another long round of stirring. They are preferable to unnecessarily overworked batter.
The box cake mix already makes preparation forgiving. Your main job is simply to combine the oil, juice, eggs, and mix into a thick pourable batter.
Once that happens, move on to baking. More mixing is not more insurance.
Knowing Exactly When the Cake Is Ready
Begin checking at about 35 minutes even though the total bake may reach around 40 minutes. This gives you a chance to catch the cake at the right point rather than after it has gone too far.
The top should be golden and should spring back lightly when touched. These visual and tactile signs provide useful information before you even use a toothpick.
Insert the toothpick near the center of the cake. Moist crumbs are acceptable, but wet batter indicates that the interior still needs more baking.
Remember that the hot cake continues settling as it rests in the pan. Avoid baking it beyond the point necessary to eliminate raw batter.
The Best Time to Add the Glaze
A slightly warm cake absorbs more glaze. This produces an especially moist result with pineapple sweetness moving farther into the crumb.
A completely cooled cake keeps the glaze more visible. This is useful when appearance matters and you want a defined coating over the Bundt shape.
Neither approach requires pouring glaze onto a piping-hot cake. Allow the initial 10-minute pan rest and safe removal before deciding how much further to cool it.
Think about the finish you prefer before pouring. More soak or more surface glaze can both be delicious.
Coconut Oil Variation
Melted coconut oil can replace vegetable oil for a subtle tropical variation. Its flavor fits naturally with pineapple.
Make sure the other batter ingredients are at room temperature. Colder ingredients can cause melted coconut oil to begin solidifying.
Mix the batter using the same method. Avoid adding unnecessary extra mixing time simply because the oil has changed.
The finished cake will have a slightly different tropical character. The pineapple glaze can stay exactly the same.
Applesauce Variation
Applesauce can replace up to half of the vegetable oil. This provides another way to adjust the standard cake.
Keep the remaining portion of oil in the batter. The substitution is intended for up to half rather than replacing all of it.
Combine everything with the cake mix, pineapple juice, and eggs as usual. The mixing and baking process remains straightforward.
The texture will differ somewhat from the full-oil version. The familiar pineapple flavor remains present through both cake and glaze.
White Cake Mix Variation
White cake mix can replace the yellow mix when necessary. The finished cake will have a somewhat different base flavor and color.
Keep the standard pineapple juice, oil, and eggs with it. Follow the same mixing and Bundt-pan method.
Bake while watching the same visual and toothpick cues. Do not rely solely on the appearance of the original yellow cake version.
Finish with the pineapple glaze. That glaze keeps the fruit flavor prominent even when the cake mix changes.
Pineapple or Coconut Cake Mix Variation
Pineapple or coconut cake mix can be used when you want even more flavor in the base. Reduce the added pineapple juice by 2 tablespoons when using these flavored mixes.
Keep the rest of the process familiar. Mix just until combined and bake in the prepared Bundt pan.
The flavor becomes more intense than the standard yellow-cake version. This can be especially appealing when you want a stronger tropical profile.
Use the glaze as the final finish. Its pineapple character still ties the entire dessert together.
Lemon Glaze Variation
Lemon juice can replace pineapple juice in the glaze. This gives the cake a brighter citrus finish.
Keep the cake itself pineapple-flavored. The lemon changes only the glaze and creates a sharper contrast with the sweet crumb.
Whisk the citrus juice with melted butter and powdered sugar using the same general method. Adjust the consistency gradually as needed.
The finished cake becomes more citrus-forward at the surface. Pineapple still remains inside every slice.
Orange Glaze Variation
Orange juice can also replace pineapple juice in the glaze. It creates a softer citrus note than the lemon variation.
The orange flavor works alongside the sweet pineapple cake rather than replacing it. This creates a more layered fruit profile.
Prepare the glaze with butter and powdered sugar in the same way. Pour it slowly over the cooled or slightly warm cake.
Allow the glaze to settle before slicing. The Bundt shape will still catch the drips beautifully.
Rum Glaze Variation
A tablespoon of rum can be added to the glaze for another variation. Reduce the other liquid slightly to account for the addition.
The rum gives the sweet pineapple finish a different character. Keep the amount controlled so the glaze still has enough body.
Whisk everything until smooth before pouring. The basic glazing technique remains unchanged.
This variation works when you want a more grown-up flavor direction. The original cake underneath stays familiar.
Coconut Milk Glaze Variation
A tablespoon of coconut milk can be added to the glaze. Reduce the other liquid slightly so the mixture does not become too thin.
Pineapple and coconut naturally move the cake toward a stronger tropical character. The change is small but noticeable.
Whisk until completely smooth. The glaze should still pour rather than run like water.
Drizzle over the cake using the same slow technique. Let the Bundt ridges guide the glaze down the sides.
Serving With Whipped Cream
A dollop of fresh whipped cream is one of the simplest ways to dress up a slice. Its cool, light texture works beautifully beside the moist cake.
The cream does not need to be heavily flavored. The pineapple glaze already gives the dessert plenty of sweetness.
Add the whipped cream immediately before serving. This keeps it fresh rather than allowing it to melt into the cake.
For gatherings, you can keep whipped cream in a separate bowl. Guests can add as much or as little as they like.
Serving With Toasted Coconut
A sprinkle of toasted coconut adds both texture and another tropical flavor. Use it over individual slices or across the serving platter.
The coconut brings a little crunch against the soft crumb. It also fits naturally with pineapple without overpowering the glaze.
Add it close to serving time. This preserves its texture.
Pairing whipped cream with toasted coconut creates an especially festive presentation. The cake itself still remains the main attraction.
Serving With Pineapple and Berries
Fresh pineapple chunks can be arranged around slices for a fruit-forward presentation. Berries add color and a contrasting fresh flavor.
This approach is particularly attractive for summer gatherings. It gives the plate a bright, tropical feel without changing the cake itself.
Keep the fruit separate until serving. That prevents additional juice from sitting against the cake during storage.
A glazed slice, fresh fruit, and a little whipped cream are more than enough for an impressive dessert plate. No complicated decoration is necessary.
Serving With Coffee
One of my favorite ways to eat this cake is alongside coffee. The sweet pineapple glaze feels especially comforting with a warm drink.
Serve a simple slice without any extra garnish when you want the cake’s texture and pineapple flavor to stand on their own. The combination works equally well in the morning or as an afternoon treat.
A slightly warm slice can feel especially cozy. The glaze softens while the crumb remains tender.
This is also a wonderful way to enjoy leftovers. Very little needs to be done before sitting down with a piece.
Potlucks and Gatherings
The Bundt shape makes this cake naturally suited to sharing. It looks decorative without requiring layers, piping, or elaborate finishing work.
Bake it ahead and let the glaze settle before transporting. Cover it so the exterior stays protected.
At a potluck, slices can be served exactly as they are. Whipped cream, coconut, or fruit can be offered separately if desired.
This is the kind of cake people can recognize and enjoy without explanation. The pineapple aroma usually does enough advertising on its own.
Making Pineapple Juice Cake Ahead
The cake can be baked the day before serving. Keep it covered at room temperature.
For a make-ahead schedule, glaze it a few hours before you plan to serve. This gives the topping time to settle while keeping the cake presentation fresh.
The pineapple flavor melds nicely overnight. That makes the cake particularly convenient when you do not want to bake on the same day as an event.
Avoid refrigeration unless your kitchen is especially hot. Excessive warmth can make the glaze weep, but ordinary room-temperature storage is the preferred approach.
Storage
Cover the cake loosely with foil or place it beneath a cake dome. Store at room temperature for up to 3 days.
The glaze continues soaking into the cake as it rests. That can make later slices taste even more saturated with pineapple.
Keep the cut side protected after slicing. This helps the crumb retain its moisture.
The cake does not require reheating before serving. It can be enjoyed at room temperature or gently warmed according to preference.
Freezing Pineapple Juice Cake
For longer storage, freeze the cake without glaze. Unglazed slices can be wrapped tightly in plastic and frozen for up to 2 months.
Individual slices are especially convenient because you can thaw only what you need. Keep each piece well wrapped.
Thaw the cake at room temperature. An overnight thaw on the counter can be used before serving.
Prepare fresh glaze after the cake has thawed. This preserves the best appearance and texture.
Using a 9×13-Inch Pan
A 9×13-inch pan can replace the Bundt pan. The shallower cake requires a shorter baking time.
Bake at 350°F for approximately 30–35 minutes. Begin checking toward the earlier end of that window.
Use the same doneness signs: golden color, a springy surface, and a toothpick without wet batter. Cool before adding the glaze.
The glaze may spread differently over the flatter cake. The pineapple flavor remains the same.
Making Pineapple Juice Cupcakes
The batter can also be baked as cupcakes. Fill the liners about ⅔ full.
Bake at 350°F for approximately 18–20 minutes. Check for doneness before removing them.
Let the cupcakes cool before adding glaze. The topping may pool differently on individual cakes than it does on a Bundt cake.
This format works well when individual portions are more convenient. The same moist pineapple flavor carries through each cupcake.
Frequently Asked Questions
Can I Use Fresh Pineapple Juice?
Yes. Fresh pineapple juice works beautifully in both cake and glaze.
Strain it thoroughly first so the liquid is free of pulp. Taste it as well because fresh pineapples can vary in sweetness.
How Do I Know When the Cake Is Done?
Look for a golden surface that springs back lightly when touched. Begin checking at around 35 minutes.
Insert a toothpick near the center. Moist crumbs are acceptable, but wet batter means the cake needs more time.
Can I Make Pineapple Juice Cake Ahead?
Yes. Bake the cake 1 day before serving and keep it covered at room temperature.
The glaze can be added a few hours before serving. The pineapple flavor settles beautifully as the cake rests.
What If I Don’t Have a Bundt Pan?
Use a 9×13-inch pan and bake for about 30–35 minutes. Check for doneness with the same toothpick method.
Cupcakes are another option. Fill liners ⅔ full and bake for about 18–20 minutes.
Can I Use Applesauce?
Yes. Applesauce can replace up to half of the vegetable oil.
Keep the rest of the ingredients and method the same. The finished texture will differ somewhat from the full-oil version.
Can I Use Coconut Oil?
Yes. Melted coconut oil can replace vegetable oil for a subtle tropical flavor.
Keep the other ingredients at room temperature. This helps prevent the coconut oil from solidifying during mixing.
Can I Freeze the Cake?
Yes. Freeze it before glazing.
Wrap unglazed slices tightly in plastic and keep them frozen for up to 2 months. Thaw at room temperature and add fresh glaze afterward.
When Should I Glaze the Cake?
Glazing while the cake is slightly warm allows more of the topping to soak into the crumb. Waiting until completely cool keeps more glaze visible on the exterior.
Do not pour it over the cake immediately from the oven. Allow the initial cooling and removal from the pan first.
Nutritional Information
One slice contains approximately 320 calories. The final value can vary according to the specific cake mix, pineapple juice, oil, glaze ingredients, substitutions, and portion size.
Changes such as applesauce, coconut oil, flavored cake mix, citrus juice, rum, coconut milk, whipped cream, or other additions will affect the finished nutritional profile. Slice size also naturally changes the amount in each serving.
The Cake That Always Takes Me Back to That Potluck
There are certain recipes I can make years later and still remember exactly where I was when I first tasted them. Pineapple Juice Cake will always take me back to that summer potluck and the moment my aunt handed me a golden glazed slice.
I remember expecting a perfectly pleasant cake and getting something much more memorable. The crumb was so tender, and the sweet-tangy pineapple flavor seemed to run through every bite rather than appearing only in the glaze.
That was why I needed the recipe. I wanted to understand how something so simple could taste so generous and comforting.
The answer turned out to be exactly what I appreciate most in home baking. There was no complicated secret technique, only a handful of ingredients being used in a way that made each one matter.
I still love watching the glaze travel over the Bundt cake. It catches in the ridges, runs toward the center, and slowly becomes part of the cake rather than feeling like a separate layer.
Sometimes I serve the cake completely plain because it needs nothing else. Other times whipped cream, toasted coconut, pineapple, or berries make the plate feel a little more celebratory.
I have also made it when there was no celebration at all. A regular Tuesday can be reason enough for a cake that tastes bright, nostalgic, and comforting.
That versatility is probably why it has earned such a permanent place in my kitchen. It can be dressed up for guests, packed for a potluck, baked ahead for an event, or sliced beside a cup of coffee at home.
No matter how I serve it, the pineapple remains the part I look forward to most. It keeps the golden crumb moist, gives the glaze its personality, and turns an easy cake into something people tend to remember.
For me, that is the best kind of recipe to keep. Pineapple Juice Cake asks for very little fuss, gives back far more flavor than the effort suggests, and still tastes like that first sunny slice I could not stop thinking about.
Pineapple Juice Cake Recipe
Soft, moist, and packed with sweet pineapple flavor, this Pineapple Juice Cake starts with a simple cake mix and comes together with just a handful of ingredients. A smooth pineapple-butter glaze soaks into the warm cake for an extra sweet finish in every slice.
Recipe Details
- Prep Time: 10 minutes
- Cook Time: 45 minutes
- Total Time: 55 minutes
- Course: Dessert
- Cuisine: American
- Servings: 12 servings
- Calories: 320 kcal
Ingredients
For the Cake
- 1 15.25-ounce box yellow or butter cake mix, Pillsbury preferred
- ¾ cup vegetable oil
- ¾ cup pineapple juice
- 4 large eggs
For the Glaze
- 4 tablespoons unsalted butter
- ¾ cup pineapple juice
- 2 cups powdered sugar
Instructions
Step 1: Prepare the Oven and Pan
Preheat the oven to 350°F (175°C).
Grease and flour a bundt pan so the baked cake releases cleanly.
Step 2: Make the Batter
In a large bowl, combine the cake mix, vegetable oil, pineapple juice, and eggs.
Mix until the batter is smooth and evenly blended.
Step 3: Fill the Bundt Pan
Pour the batter into the prepared bundt pan.
Spread it evenly around the pan before baking.
Step 4: Bake
Bake for 40–45 minutes.
The cake is ready when a toothpick inserted into it comes out clean.
Step 5: Cool Briefly
Let the cake cool in the pan for 10 minutes.
Transfer it carefully to a wire rack.
Step 6: Make the Pineapple Glaze
Melt the unsalted butter in a saucepan over low heat.
Stir in the pineapple juice and powdered sugar until the glaze becomes smooth.
Step 7: Glaze the Cake
Pour the pineapple glaze over the warm cake.
Let the glaze settle over the surface as the cake continues cooling.
Step 8: Cool and Serve
Allow the cake to cool completely before serving.
Slice into 12 servings and enjoy.
Notes
- Use Pillsbury cake mix for best results.
- Let cake cool slightly before glazing.
- Store leftovers covered at room temperature.
Serving Suggestions
Serve Pineapple Juice Cake after it has cooled completely and the glaze has settled into the surface. The moist yellow or butter cake and sweet pineapple glaze create a simple dessert with plenty of fruity flavor.
This recipe makes 12 servings and works well for sharing at gatherings or enjoying as an easy homemade dessert. The glaze is poured over the cake while it is still warm, helping the pineapple flavor spread throughout each slice.
For best results, allow the cake to rest briefly after removing it from the bundt pan before adding the glaze.
Storage
Store leftovers covered at room temperature.
Cake Mix Tip
Use one 15.25-ounce box yellow or butter cake mix.
Pillsbury cake mix works especially well for this recipe.
Pineapple Juice Tip
Use ¾ cup pineapple juice in the cake batter and a separate ¾ cup for the glaze.
Egg Tip
Add 4 large eggs to the cake batter and mix until smooth.
Oil Tip
Use ¾ cup vegetable oil to keep the cake moist.
Baking Tip
Bake at 350°F (175°C) for 40–45 minutes.
Check for doneness with a toothpick.
Cooling Tip
Let the cake cool in the pan for 10 minutes before transferring it to a wire rack.
Glaze Tip
Melt 4 tablespoons unsalted butter over low heat, then stir in ¾ cup pineapple juice and 2 cups powdered sugar until smooth.
Serving Tip
Pour the glaze over the warm cake, then let the cake cool completely before serving.

Fernando is the creator and writer behind the food blog Eating with your Hands. Living and working in cities like Paris, Barcelona, and Berlin, and being married to a Canadian foodie, has given Fernando a passion and interest in food and inspired him to run EWYH.