
Some desserts carry a feeling that is bigger than the bowl they are served in. Protein Banana Pudding is one of those simple, creamy treats that feels familiar, cozy, and sweet without being heavy.
It has the soft comfort of banana pudding, the creamy tang of Greek yogurt, the vanilla sweetness of protein powder, and the little nostalgic crunch of crushed vanilla wafers. Every spoonful feels like a lighter version of a classic dessert you might remember from family dinners, Sunday afternoons, or quiet evenings when something sweet sounds just right.
What makes this recipe especially lovely is how quickly it comes together. There is no baking, no stovetop cooking, and no complicated layering required.
In just 10 minutes, you can mix together a creamy, protein-packed banana pudding that works beautifully as a light dessert, a post-workout snack, or a make-ahead treat waiting in the refrigerator.
Table of Contents
- What Is Protein Banana Pudding?
- Why This Recipe Feels So Comforting
- Recipe Overview
- Why You’ll Love Protein Banana Pudding
- Ingredients You’ll Need
- Ingredient Notes
- Directions
- Step 1: Gather All Ingredients
- Step 2: Check the Greek Yogurt
- Step 3: Measure the Greek Yogurt
- Step 4: Measure the Protein Powder
- Step 5: Measure the Banana Pudding Mix
- Step 6: Add the Pudding Mix to the Yogurt
- Step 7: Add the Almond Milk
- Step 8: Begin Mixing the Pudding Base
- Step 9: Add the Protein Powder
- Step 10: Mix Until Smooth
- Step 11: Crush the Vanilla Wafers
- Step 12: Slice the Banana
- Step 13: Fold in the Banana Slices
- Step 14: Add the Crushed Vanilla Wafers
- Step 15: Check the Consistency
- Step 16: Divide Into Two Bowls
- Step 17: Add Optional Garnish
- Step 18: Serve Immediately
- Step 19: Chill for a Refreshing Texture
- Step 20: Make-Ahead Banana Tip
- Pro Tips for the Best Protein Banana Pudding
- Variations
- Serving Suggestions
- Storage Tips
- Freezing Instructions
- Make-Ahead Instructions
- Common Mistakes to Avoid
- Helpful Notes
- Frequently Asked Questions
- Final Thoughts
- Protein Banana Pudding
What Is Protein Banana Pudding?
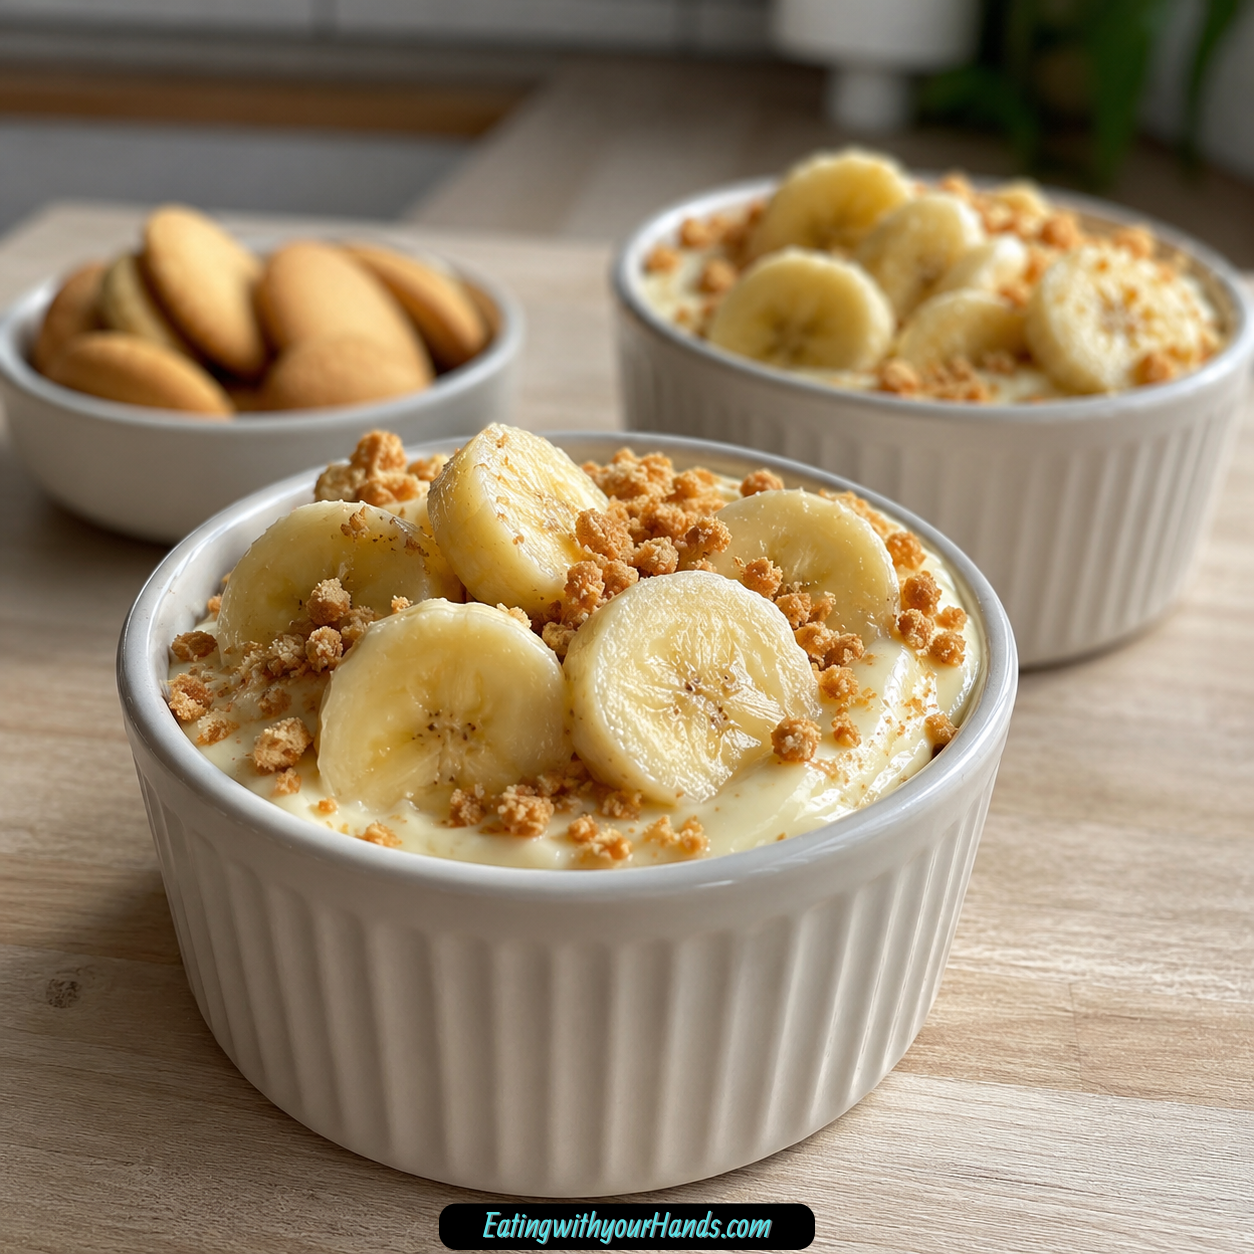
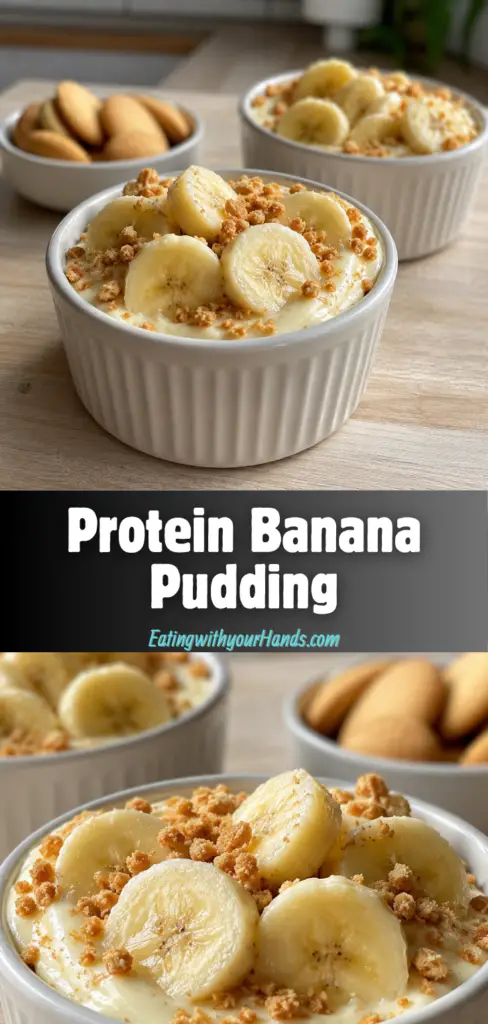
Protein Banana Pudding is a quick, healthy-style dessert made with non-fat Greek yogurt, vanilla protein powder, banana cream flavor instant pudding mix, unsweetened almond milk, crushed vanilla wafers, and sliced banana. It gives you the creamy flavor of banana pudding while adding extra protein from the yogurt and whey protein powder.
The texture is thick, smooth, and satisfying. The Greek yogurt creates the creamy base, the protein powder adds vanilla flavor and nutrition, and the instant pudding mix gives the dessert its banana cream character.
The banana slices bring natural sweetness. The crushed vanilla wafers add that classic pudding-style texture and a little bit of crunch.
This recipe is perfect when you want something sweet but still easy and balanced. It feels like dessert, but it can also fit into a snack routine or a post-workout moment.
Why This Recipe Feels So Comforting
Banana pudding has a gentle kind of sweetness. It is creamy, soft, and familiar in a way that makes it feel comforting from the first spoonful.
This version keeps that cozy feeling while making the recipe quicker and lighter. Instead of a traditional pudding base, Greek yogurt creates a creamy foundation with protein.
The vanilla protein powder and banana cream pudding mix make the flavor taste dessert-like. The vanilla wafers bring back that classic pudding memory, even though the recipe is much simpler.
It is also the kind of treat that feels personal. You can make two little bowls, chill them for later, and enjoy a quiet sweet moment without needing to make a full dessert tray.
Recipe Overview
Prep Time: 10 minutes
Cook Time: 0 minutes
Total Time: 10 minutes
Servings: 2 bowls
This recipe takes only 10 minutes to prepare. It does not require baking or cooking, making it perfect for last-minute cravings.
The recipe makes 2 bowls, which is ideal for sharing or saving one serving for later. You can serve it right away or chill it for about 30 minutes for a cooler, more refreshing texture.
Why You’ll Love Protein Banana Pudding
You will love this recipe because it is quick. In just 10 minutes, you can have a creamy banana pudding ready to enjoy.
The ingredients are simple and wholesome. Greek yogurt, vanilla protein powder, banana cream pudding mix, almond milk, vanilla wafers, and banana come together easily.
This recipe is beginner-friendly. You only need to measure, mix, fold, and serve.
It is perfect for gatherings when you want a lighter dessert option. You can serve it in individual bowls or small cups for a simple presentation.
It is also make-ahead friendly. You can prepare it in advance and keep it chilled until ready to serve.
Ingredients You’ll Need
0.67 cup non-fat Greek yogurt: A creamy base rich in protein. Use high-quality yogurt for the best flavor.
0.33 cup whey vanilla protein powder: Adds protein and sweet vanilla flavor. Plant-based protein can be used for a dairy-free option.
4 teaspoons banana cream flavor instant pudding mix: Gives the pudding its banana essence. Choose sugar-free if desired.
2 teaspoons unsweetened almond milk: Helps adjust the consistency. Any milk can work, but almond milk keeps it light.
3 whole vanilla wafers: Crushed for texture. Sugar-free wafers can be used if you are watching sugar intake.
0.5 medium banana: Sliced for natural sweetness. Use a ripe banana for richer flavor.
Ingredient Notes
Non-fat Greek yogurt gives the pudding its thick, creamy texture. It also adds protein and makes the dessert feel satisfying.
Whey vanilla protein powder brings extra protein and a sweet vanilla note. It also helps give the pudding more body.
Banana cream flavor instant pudding mix gives this recipe its classic banana pudding taste. It helps thicken the mixture and adds that familiar dessert flavor.
Unsweetened almond milk loosens the pudding. You only need a small amount, but it helps create a smoother consistency.
Vanilla wafers add texture and nostalgic flavor. Crushing them gives the pudding little cookie-like bites throughout.
Banana slices add natural sweetness and softness. A ripe banana works best, but it should still be firm enough to slice cleanly.
Directions
Step 1: Gather All Ingredients
Start by gathering the Greek yogurt, vanilla protein powder, banana cream instant pudding mix, almond milk, vanilla wafers, and banana. Place everything on the counter before you begin.
This recipe comes together quickly, so having everything ready makes the process smooth. You will not need to stop halfway through to measure or crush anything.
You will also need a medium mixing bowl, a whisk or spatula, measuring cups, measuring spoons, and two serving bowls. A small zip-top bag and rolling pin can help crush the wafers neatly.
Step 2: Check the Greek Yogurt
Make sure your Greek yogurt is fresh and smooth. Since it is the base of the pudding, its flavor matters.
Non-fat Greek yogurt keeps the recipe light while still giving the pudding a thick texture. If the yogurt has any liquid on top, stir it before measuring.
A smooth yogurt base helps the pudding mix and protein powder blend better. This creates a creamier final texture.
Step 3: Measure the Greek Yogurt
Measure 0.67 cup non-fat Greek yogurt and place it in a medium mixing bowl. Use a spatula to scrape the measuring cup clean.
The yogurt should sit in the bowl as a thick, creamy base. This is where the rest of the ingredients will be mixed.
Using the right amount matters because the protein powder and pudding mix will thicken the yogurt. Too little yogurt can make the mixture overly thick.
Step 4: Measure the Protein Powder
Measure 0.33 cup whey vanilla protein powder and set it aside. This ingredient adds both protein and vanilla sweetness.
Vanilla protein powder works especially well because it blends with the banana pudding flavor. It helps the dessert taste more like a creamy vanilla-banana treat.
If using plant-based protein powder, keep in mind that the texture may vary. Some plant-based powders absorb more liquid and may need a little extra almond milk.
Step 5: Measure the Banana Pudding Mix
Measure 4 teaspoons banana cream flavor instant pudding mix. This gives the recipe its banana pudding flavor and helps thicken the mixture.
A small amount goes a long way. It adds sweetness, flavor, and body without needing to cook anything.
Choose sugar-free pudding mix if you want a lighter option. Use the version that fits your preference.
Step 6: Add the Pudding Mix to the Yogurt
Add the banana cream instant pudding mix to the bowl with the Greek yogurt. Sprinkle it evenly over the top.
Adding it before the milk helps it begin blending into the yogurt. It will thicken the mixture as you stir.
Do not worry if it looks powdery at first. It will smooth out once mixed with the yogurt and almond milk.
Step 7: Add the Almond Milk
Pour in 2 teaspoons unsweetened almond milk. This small amount helps loosen the mixture.
The almond milk makes the pudding easier to stir and gives it a creamier consistency. Any milk can work, but almond milk keeps the dessert light.
If you prefer a thinner pudding later, you can add a little more. Start with the listed amount first.
Step 8: Begin Mixing the Pudding Base
Use a whisk or spatula to mix the Greek yogurt, pudding mix, and almond milk. Stir slowly at first to avoid powder spilling.
As you mix, the pudding base will become smoother and thicker. Scrape the sides of the bowl to make sure everything is incorporated.
The goal is a creamy texture with no visible clumps of pudding mix. Take your time here for the best result.
Step 9: Add the Protein Powder
Add the measured vanilla protein powder to the bowl. Sprinkle it in gradually if needed.
Protein powder can clump if added too quickly, so mix carefully. A whisk is helpful for breaking up small lumps.
The mixture will thicken more once the protein powder is added. This is normal.
Step 10: Mix Until Smooth
Continue mixing until the pudding is smooth and well combined. The texture should be creamy and thick, but still spoonable.
If the pudding looks too thick, add a small splash of almond milk. Add only a little at a time so it does not become runny.
The finished base should taste like creamy banana-vanilla pudding. It should be free of dry pockets or lumps.
Step 11: Crush the Vanilla Wafers
Place 3 whole vanilla wafers in a small zip-top bag. Crush them with a rolling pin until they become fine crumbs or small pieces.
You can make the crumbs as fine or chunky as you like. Finer crumbs blend into the pudding, while larger pieces add more crunch.
Vanilla wafers give this recipe that classic banana pudding feeling. Even a small amount adds a lot of nostalgic flavor.
Step 12: Slice the Banana
Peel 0.5 medium banana and slice it into thin rounds. Try to keep the slices even.
Uniform slices distribute better through the pudding. They also make the finished bowls look prettier if you use some for topping.
Choose a ripe banana for sweetness, but avoid one that is overly soft. A banana that is too mushy can make the pudding watery.
Step 13: Fold in the Banana Slices
Add the banana slices to the pudding mixture. Use a spatula to gently fold them in.
Be careful not to mash the banana too much. The goal is to keep the slices intact so every spoonful has soft banana pieces.
Fold slowly from the bottom of the bowl upward. This keeps the texture light and creamy.
Step 14: Add the Crushed Vanilla Wafers
Add the crushed vanilla wafers to the pudding mixture. Fold them in gently.
The wafers add texture and a classic dessert flavor. Some pieces will soften slightly, while others may keep a little crunch.
Do not overmix after adding the wafers. Gentle folding helps preserve the texture.
Step 15: Check the Consistency
Look at the pudding texture before serving. It should be creamy, thick, and easy to spoon.
If it feels too thick, stir in a tiny bit more almond milk. If it feels too thin, let it chill for a few minutes so the pudding mix can firm it up.
Adjusting the consistency is part of making the pudding exactly how you like it. A small change can make it creamier and more enjoyable.
Step 16: Divide Into Two Bowls
Spoon the pudding into two serving bowls. Divide it evenly so each bowl has banana slices and wafer pieces.
Use a spoon or spatula to smooth the tops. This makes the bowls look more inviting.
Individual bowls are perfect for this recipe. They make serving simple and help with portioning.
Step 17: Add Optional Garnish
Top each bowl with a few extra banana slices if desired. Add a small sprinkle of crushed vanilla wafers on top.
This garnish makes the pudding look more finished. It also adds texture to the first bite.
If you are making the pudding ahead, wait to add fresh banana slices until just before serving. This helps prevent browning.
Step 18: Serve Immediately
You can serve the pudding right away if you want a quick dessert. The texture will be creamy and soft.
Serving immediately is great when you want something sweet fast. The wafers will still have more crunch at this stage.
Enjoy it as a light dessert, snack, or post-workout treat. It is simple, creamy, and satisfying.
Step 19: Chill for a Refreshing Texture
For a cooler dessert, cover the bowls and chill them in the refrigerator for about 30 minutes. This allows the flavors to meld.
Chilling makes the pudding thicker and more refreshing. It also softens the wafer crumbs slightly.
This step is optional but recommended if you have time. It gives the pudding a more classic chilled dessert feel.
Step 20: Make-Ahead Banana Tip
If making the pudding ahead, store banana slices separately until ready to serve. This helps prevent browning.
You can mix the yogurt, protein powder, pudding mix, and almond milk ahead of time. Then fold in fresh banana and wafers closer to serving.
This keeps the texture and color fresher. It is especially helpful if you are preparing the pudding for guests.

Pro Tips for the Best Protein Banana Pudding
Use a ripe but firm banana. It gives natural sweetness without making the pudding watery.
Mix thoroughly to avoid lumps. Protein powder and pudding mix need time to blend into the yogurt.
Adjust the consistency with almond milk. Add a little at a time until it feels creamy.
Chill for at least 30 minutes if you want the flavors to meld. This makes the pudding taste more balanced.
Store banana slices separately if making ahead. This helps keep them from browning.
Variations
Add 1 tablespoon cocoa powder for a chocolate banana pudding. This creates a deeper dessert flavor.
Incorporate chopped walnuts or pecans for a nutty crunch. They add texture and richness.
Swap in fresh berries or diced peaches for a fruity twist. These fruits can brighten the pudding.
Use gluten-free vanilla wafers to accommodate dietary needs. This keeps the classic texture while adjusting the recipe.
Add chia seeds for extra fiber. They also thicken the pudding slightly as it sits.
Sprinkle cinnamon into the mixture for warmth. It pairs beautifully with banana and vanilla.
Serving Suggestions
Serve Protein Banana Pudding chilled in individual bowls. The cool texture makes it feel refreshing and creamy.
For a prettier presentation, garnish with extra banana slices and crushed vanilla wafers. This gives the top texture and color.
Pair it with a cup of herbal tea for a light dessert moment. It also works nicely after a simple meal.
You can serve it after a workout as a sweet protein snack. The Greek yogurt and protein powder make it more satisfying than a typical pudding.
For gatherings, portion it into small cups. This makes it easy for guests to enjoy.
Storage Tips
Store leftovers in an airtight container in the refrigerator for up to 2 days. Keep the pudding cold until ready to eat.
For the best appearance, store banana slices separately if possible. This helps prevent browning.
The pudding may thicken as it sits. Stir in a tiny splash of almond milk before serving if needed.
Do not leave it at room temperature for too long. It tastes best chilled and fresh.
Freezing Instructions
Protein Banana Pudding can be frozen, but it is best enjoyed fresh. Freezing may change the texture once thawed.
If you choose to freeze it, store it in an airtight container. Consume it within a week of preparation for best results.
After thawing, the pudding may be less creamy. Stir it well before serving.
For the best texture, refrigeration is the better storage method. This keeps the pudding smooth and fresh.
Make-Ahead Instructions
This pudding is great for making ahead. You can prepare it up to 24 hours in advance and keep it chilled in the refrigerator.
For best results, mix the pudding base first and add banana slices closer to serving. This prevents the banana from browning.
You can also keep crushed wafers separate until serving if you want more crunch. Folding them in early will make them softer.
Make-ahead preparation is perfect for busy mornings, post-workout snacks, or simple desserts after dinner.
Common Mistakes to Avoid
Using overly mushy bananas can make the pudding watery. Choose bananas that are ripe but still firm.
Not mixing thoroughly can leave lumps of protein powder or pudding mix. Take your time and stir until smooth.
Skipping the chilling step is fine if you are in a hurry, but chilling improves flavor. Give it 30 minutes if possible.
Not adjusting the consistency can make the pudding too thick. Add a little more almond milk if needed.
Adding banana too early when making ahead can lead to browning. Store banana slices separately until serving.
Helpful Notes
If you prefer a sweeter pudding, add honey, stevia, or another sweetener to taste. Start with a small amount.
If the pudding is too thick, add more almond milk a little at a time. This helps you reach your preferred creaminess.
Chia seeds can be added for extra fiber. They will thicken the pudding as it sits.
A sprinkle of cinnamon adds warmth and pairs nicely with banana. It is a simple way to deepen the flavor.
For nut allergies, substitute almond milk with oat milk or soy milk. Choose the milk that works best for your needs.
Frequently Asked Questions
Can Protein Banana Pudding Be Frozen?
Yes, it can be frozen, but it is best enjoyed fresh. The texture may change after thawing and become less creamy.
If you freeze it, store it in an airtight container and consume within a week. Stir well after thawing.
Can Ingredients Be Substituted?
Yes, several ingredients can be substituted. Greek yogurt can be replaced with coconut yogurt for a dairy-free option.
Whey protein powder can be replaced with plant-based protein powder. Almond milk can be swapped for soy milk, oat milk, or any milk you prefer.
How Should I Store Leftovers?
Store leftovers in an airtight container in the refrigerator for up to 2 days. Keep the pudding chilled.
To prevent browning, store banana slices separately until ready to serve. This keeps the pudding looking fresher.
Can This Recipe Be Made Ahead?
Yes, this pudding is perfect for making ahead. Prepare it up to 24 hours in advance and keep it refrigerated.
For the best texture, add banana slices and crushed wafers closer to serving. This keeps the bananas fresh and the wafers from becoming too soft.
How Do I Make the Pudding Sweeter?
You can add honey, stevia, or another sweetener to taste. Add a small amount first and adjust as needed.
A ripe banana also adds natural sweetness. Choose one that is ripe but not overly mushy.
How Do I Fix Pudding That Is Too Thick?
Add a little more unsweetened almond milk and stir. Start with a small splash so the pudding does not become too thin.
You can use any milk you prefer. Oat milk, soy milk, or regular milk can also work.
Can I Make This Gluten-Free?
Yes, use gluten-free vanilla wafers. Also check the labels on your protein powder and pudding mix if needed.
The rest of the ingredients can fit a gluten-free version depending on the brands you choose.
Final Thoughts
Protein Banana Pudding is the kind of recipe that turns a few simple ingredients into something creamy, sweet, and comforting. With Greek yogurt, vanilla protein powder, banana cream pudding mix, almond milk, vanilla wafers, and fresh banana, you can make a quick dessert that feels both nostalgic and practical.
It comes together in just 10 minutes, making it perfect for last-minute cravings, light desserts, post-workout snacks, or make-ahead treats. The texture is smooth and creamy, with little bites of banana and cookie-like crunch from the wafers.
What makes this recipe special is its balance. It feels like a classic banana pudding, but the Greek yogurt and protein powder give it a more satisfying, protein-rich twist.
Serve it chilled in two little bowls, top it with banana slices and crushed wafers, and enjoy each creamy spoonful. This Protein Banana Pudding is simple, sweet, comforting, and ready to become one of those easy recipes you return to again and again.
Protein Banana Pudding

This Protein Banana Pudding is a creamy, lighter dessert made with non-fat Greek yogurt, vanilla protein powder, sugar-free banana cream pudding mix, banana slices, and crushed vanilla wafers. It is quick to prepare, high in protein, and a great option when you want something sweet without a lot of added sugar.
Recipe Information
- Prep Time: 10 minutes
- Total Time: 10 minutes
- Course: Dessert
- Cuisine: American
- Servings: 2 bowls
- Calories: 150 kcal
Ingredients
For the Pudding
- 0.5 whole medium banana, sliced, 60g
Adds natural banana flavor and soft texture. - 0.33 cup whey vanilla protein powder, 30g
Boosts the protein content and adds vanilla sweetness. - 3 whole vanilla wafers, sugar-free recommended, crushed, 14g
Adds a light cookie crunch and classic banana pudding flavor. - 2 teaspoons unsweetened almond milk, 10ml
Helps loosen the mixture and create a smoother pudding texture. - 0.67 cup non-fat Greek yogurt, 150g
Creates the creamy, tangy, high-protein base. - 4 teaspoons banana cream flavor instant pudding mix, sugar-free, 11g
Adds banana pudding flavor while helping the mixture thicken.
Instructions
- Add the non-fat Greek yogurt, whey vanilla protein powder, banana cream flavor instant pudding mix, and unsweetened almond milk to a bowl.
- Stir until the mixture is smooth, thick, and fully combined.
- Gently fold in the sliced banana and crushed vanilla wafers.
- Serve chilled for the best texture and flavor.
Notes
- Add a small amount of sweetener if you prefer a sweeter pudding.
- Chill the pudding before serving if you want a thicker texture.
- For extra crunch, sprinkle a few crushed vanilla wafers on top right before eating.

Fernando is the creator and writer behind the food blog Eating with your Hands. Living and working in cities like Paris, Barcelona, and Berlin, and being married to a Canadian foodie, has given Fernando a passion and interest in food and inspired him to run EWYH.