
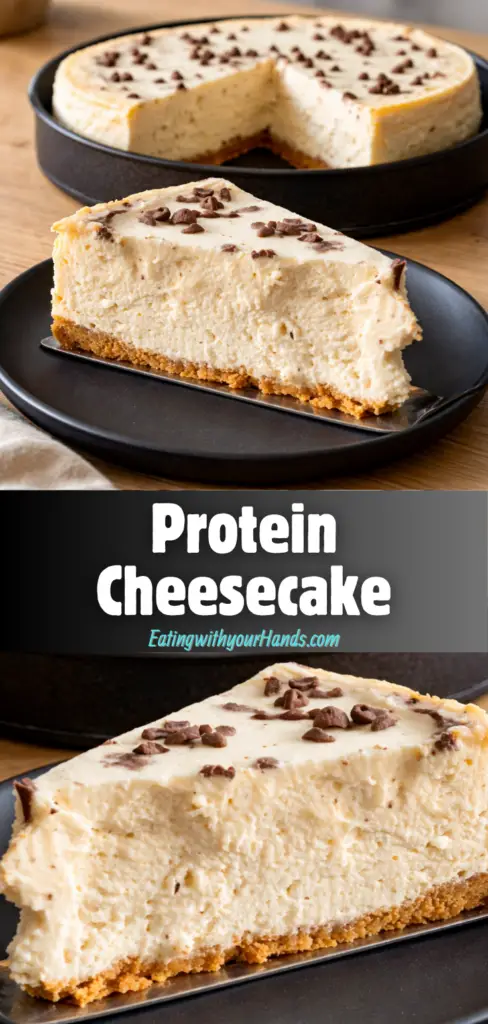
Some desserts are tied so closely to memory that they feel bigger than the recipe itself. Protein Cheesecake has that kind of presence, because it carries the creamy comfort of a classic cheesecake while also feeling practical, wholesome, and easy enough to fit into everyday life.
I always think there is something special about desserts that manage to feel both indulgent and reassuring at the same time. They offer the richness and sweetness people crave, yet they also bring a sense of balance that makes enjoying them feel a little lighter and more relaxed.
This is exactly where Protein Cheesecake shines. It keeps the smooth, satisfying character that makes cheesecake so beloved, but it introduces a protein boost and a no-bake method that make it especially appealing for busy days, casual gatherings, and those moments when you want dessert without turning the kitchen upside down.
It is the sort of treat that feels right at home in many different settings. It can sit proudly on a dessert table during a family gathering, or it can quietly wait in the refrigerator for a cozy evening slice after dinner.
That versatility is part of what makes it so easy to love. It is not only a dessert for special occasions, but also the kind of recipe that can become part of your regular routine because it is simple, quick, and forgiving.
The texture is one of its greatest pleasures. A good cheesecake should feel creamy, smooth, and satisfying from the first bite, and this version is built around exactly that kind of comfort.
The flavor is equally inviting. Sweet vanilla, rich cream cheese, and the soft tang of yogurt come together in a way that feels familiar and cozy, while the protein powder gives the dessert a practical twist without taking away from its dessert identity.
There is also something deeply comforting about a no-bake dessert. It feels approachable, low-stress, and wonderfully suited to the kind of days when you want something homemade but do not want to commit to an elaborate baking project.
That is why this Protein Cheesecake has such appeal. It lets you enjoy a dessert that feels rich and satisfying while still fitting neatly into a simple kitchen routine.
It is easy to prepare, easy to chill, easy to slice, and easy to share. In so many ways, it captures what people love most about home desserts, which is that they bring comfort, sweetness, and a little joy without asking too much in return.
Table of Contents
- What Is Protein Cheesecake?
- Why You’ll Love Protein Cheesecake
- Ingredients You’ll Need
- Cream Cheese or Vegan Cream Cheese
- Greek Yogurt or Dairy-Free Alternative
- Protein Powder
- Sweetener of Choice
- Pure Vanilla Extract
- Optional Crust Idea
- Step-by-Step Directions for Protein Cheesecake
- Preparing the Ingredients
- Mixing the Cheesecake Filling
- Pouring the Mixture
- Chilling the Cheesecake
- Serving the Cheesecake
- Variations to Try
- Serving and Storage Tips
- Common Mistakes to Avoid
- Helpful Notes
- Frequently Asked Questions
- Why This Cheesecake Feels So Comforting
- Final Thoughts on Protein Cheesecake
- Protein Cheesecake
- Equipment
- Ingredients
- Instructions
- Notes
What Is Protein Cheesecake?
Protein Cheesecake is a creamy, no-bake dessert that combines the smooth richness of traditional cheesecake with the added benefit of protein. It is designed to satisfy a sweet craving while still feeling a little more nourishing and balanced than a typical dessert.
The source recipe makes it clear that simplicity is one of its greatest strengths. This is not the kind of cheesecake that asks for a water bath, a long baking time, or complicated steps that make you second-guess yourself halfway through.
Instead, it comes together with softened cream cheese, Greek yogurt, protein powder, sweetener, and vanilla extract. Those ingredients are blended until smooth, poured into a prepared springform pan, and chilled until set.
That easy process is a huge part of the appeal. It makes the dessert accessible to beginners and also makes it convenient for experienced cooks who simply want something reliable and low-effort.
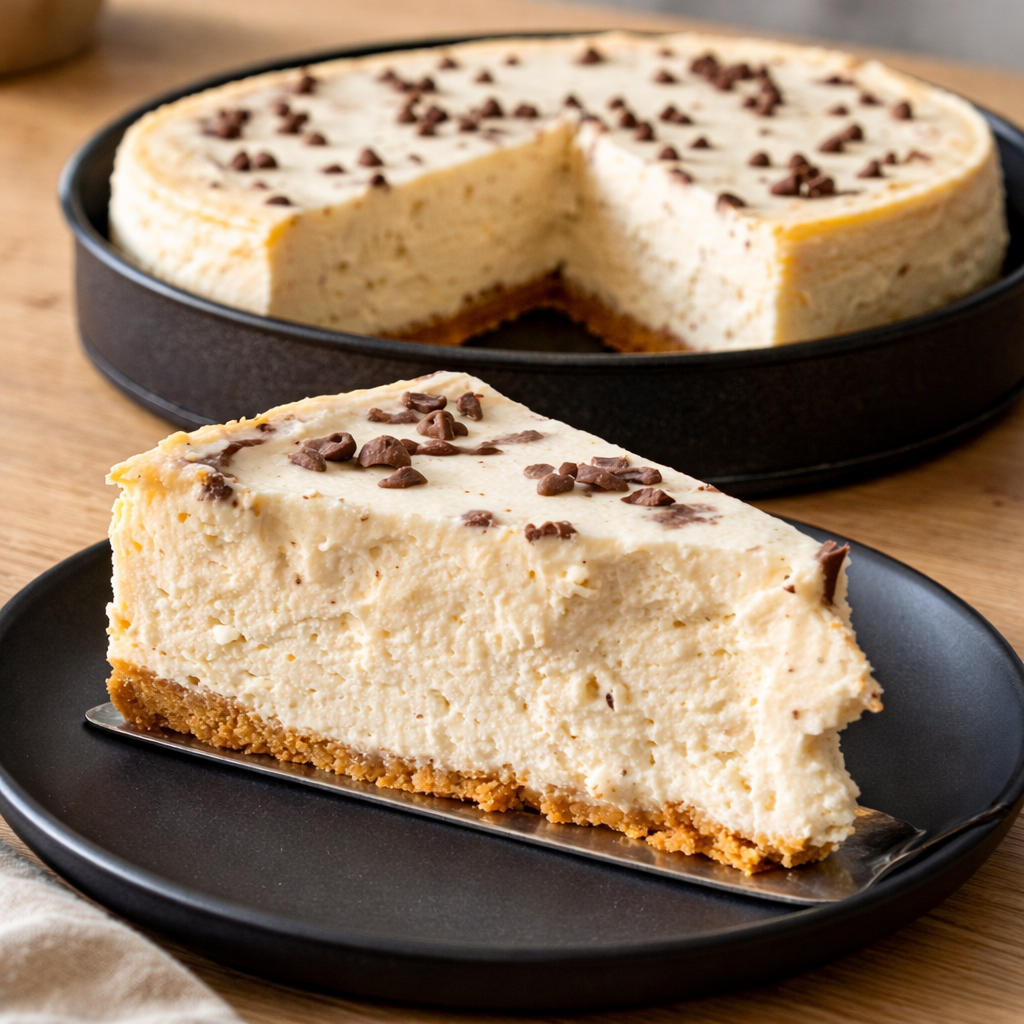
The result is a chilled cheesecake that feels creamy, rich, and lightly sweet. It holds onto the soul of a classic cheesecake while offering a protein-forward twist that makes it stand out.
Prep time is just 15 minutes. There is no cook time, which makes the total active time especially short and manageable.
The recipe serves 8 slices. That makes it a useful dessert for sharing, but it is also practical for storing in the refrigerator and enjoying over several days.
Why You’ll Love Protein Cheesecake
One of the most obvious reasons to love this recipe is the speed. In only 15 minutes of preparation, you can put together a dessert that feels elegant, satisfying, and ready to impress once chilled.
Another reason is the simplicity of the ingredient list. You only need a handful of basic ingredients, which keeps the process approachable and helps the dessert feel realistic for everyday life.
It is also extremely beginner-friendly. Since there is no baking involved, this is an especially welcoming recipe for anyone who may feel a little nervous about traditional cheesecake methods.
That no-bake format removes a lot of pressure. You do not have to worry about cracks, overbaking, underbaking, or complicated oven timing.
It is also ideal for gatherings. A chilled cheesecake always feels a little special when brought to the table, and this one has the added appeal of being both indulgent and protein-boosted.
The make-ahead convenience is another major benefit. You can prepare it ahead of time, let it chill, and have a ready-to-serve dessert waiting when you need it.
That kind of flexibility matters. A dessert that can rest in the refrigerator and still feel fresh, creamy, and complete later is incredibly useful when life gets busy.
Most of all, this recipe offers comfort. The soft vanilla aroma, the rich creamy filling, and the cold, smooth texture make it feel like the kind of dessert people naturally linger over.
Ingredients You’ll Need
This recipe stays wonderfully simple, but every ingredient matters. Each one contributes to the structure, flavor, or creamy character that makes the cheesecake so satisfying.
Cream Cheese or Vegan Cream Cheese
You will need 24 ounces of cream cheese or vegan cream cheese, softened. Softened cream cheese is important because it mixes more easily and helps create a filling that feels smooth rather than lumpy.
Cream cheese is the foundation of the cheesecake. It brings the rich, creamy body and the familiar tang that people expect from a dessert like this.
The source also allows for a vegan cream cheese option. That makes the recipe more flexible while keeping the same general cheesecake idea intact.
Greek Yogurt or Dairy-Free Alternative
You will need 2 cups of Greek yogurt or a dairy-free alternative. This adds creaminess and helps lighten the texture while supporting the protein-forward nature of the dessert.
The yogurt brings a soft tang that blends beautifully with the cream cheese. It also helps the filling feel smoother and a little more balanced.
If you choose a dairy-free alternative, the source notes that it should be well suited for this recipe. That detail matters because the texture of the yogurt can affect the final consistency.
Protein Powder
You will need ½ cup of protein powder. You can choose your favorite flavor, which gives you some flexibility in how the finished cheesecake tastes.
This is the ingredient that turns the dessert into Protein Cheesecake rather than a more traditional no-bake version. It adds depth, structure, and the nutritional boost that makes the recipe especially appealing for many people.
The source also suggests using a high-quality protein powder for the best results. Since protein powder contributes directly to the flavor and texture, that advice makes sense.
Sweetener of Choice
You will need ⅔ cup of sweetener. The source suggests options such as honey, agave, or a sugar substitute.
This flexibility is helpful because different people enjoy different sweetness levels and sweetener styles. It allows the cheesecake to be adapted without changing its essential character.
The sweetener balances the tang of the cream cheese and yogurt. It is what helps the filling move fully into dessert territory.
Pure Vanilla Extract
You will need 2 ½ teaspoons of pure vanilla extract. Vanilla adds warmth, softness, and that familiar sweet aroma that makes the whole dessert feel comforting.
It is one of the quiet stars of the recipe. Even though it is not the most noticeable ingredient on paper, it plays a big role in making the cheesecake feel complete.
Optional Crust Idea
The source mentions that if you want a crust, you can consider using crushed nuts or gluten-free cookies. This is optional, but it offers an easy way to add another layer of texture and flavor.
The source also notes that for a gluten-free option, you can skip the crust altogether or use gluten-free cookies. That keeps the recipe flexible without making it complicated.
Step-by-Step Directions for Protein Cheesecake
This recipe is simple, but attention to detail makes a big difference. The smoother the filling and the better the chilling process, the more satisfying the finished cheesecake will be.
Preparing the Ingredients
Step 1: Gather Everything Before You Begin
Start by gathering all of your ingredients in one place. Set out the cream cheese, Greek yogurt, protein powder, sweetener, and vanilla extract so the process feels organized and easy to manage.
This step helps the recipe move more smoothly. It also gives you a chance to make sure every ingredient is ready at the right temperature and measured properly.
Step 2: Soften the Cream Cheese
Make sure the cream cheese is softened to room temperature before mixing. This is one of the most important steps in the entire recipe because softened cream cheese blends much more easily.
If the cream cheese is too cold, lumps can remain in the filling. A smooth cheesecake starts with a softened base.
Step 3: Measure the Yogurt and Sweetener Carefully
Measure the Greek yogurt and sweetener accurately. These ingredients affect both the flavor and the consistency, so taking a little care here helps the finished cheesecake stay balanced.
The source emphasizes accurate measuring for the best texture and taste. That is especially true in a no-bake recipe, where there is no baking process to help correct small texture issues later.
Step 4: Prepare the Pan
Before you begin mixing, have your springform pan ready. If you are using a crust made from crushed nuts or gluten-free cookies, prepare that base first according to your preference so the filling can be poured in as soon as it is mixed.
If you are skipping the crust, simply have the prepared springform pan ready for the filling. This keeps the process uninterrupted once the mixture is smooth.
Mixing the Cheesecake Filling
Step 5: Add the Main Ingredients to a Mixing Bowl
In a large mixing bowl, add the softened cream cheese, Greek yogurt, protein powder, sweetener, and vanilla extract. These are the core ingredients that will create the creamy no-bake filling.
At this stage, the recipe still looks very simple. That is part of its charm, because a dessert this easy can still feel surprisingly luxurious once it is chilled and sliced.
Step 6: Mix Until Smooth and Creamy
Use a hand mixer or a whisk to blend the ingredients together until the mixture is smooth, creamy, and free of lumps. This step is crucial because it determines the final texture of the cheesecake.
The source makes this point clearly, and it is worth slowing down for. A velvety texture depends on mixing long enough to smooth everything out, but not so aggressively that the mixture becomes heavy.
Step 7: Check the Sweetness
The source gives a useful pro tip here: taste the mixture before pouring it into the pan. If you want a sweeter cheesecake, this is the moment to adjust by adding more sweetener.
This flexibility is one of the nicest parts of the recipe. It lets you tailor the dessert to your own preference without changing the basic structure.
Step 8: Avoid Overmixing
Once the filling is smooth and the flavor feels right, stop mixing. The source warns that overmixing can make the cheesecake dense, so it is best to stop as soon as the mixture looks creamy and fully blended.
That detail matters because the goal is a dessert that feels smooth and light enough to slice beautifully. Too much mixing can work against that.
Pouring the Mixture
Step 9: Transfer the Filling to the Prepared Springform Pan
Once the filling is ready, pour it into the prepared springform pan. Use a spatula to spread it evenly so the top looks smooth and level.
This step is simple, but it sets up the final presentation. A clean, even surface makes the chilled cheesecake look especially nice when served.
Step 10: Tap the Pan Gently
Gently tap the pan on the counter to remove any air bubbles. This helps create a more even texture and a smoother top.
This is one of those small, satisfying steps that makes the dessert feel more polished. It helps the filling settle naturally into place.
Step 11: Cover the Cheesecake
Cover the pan with plastic wrap. This protects the surface while the cheesecake chills and helps keep it fresh.
Covering it also supports the make-ahead nature of the recipe. Once wrapped, it can rest calmly in the refrigerator while the flavors settle together.
Chilling the Cheesecake
Step 12: Refrigerate Until Set
Place the covered cheesecake in the refrigerator for at least 2 hours, or until set. This chilling time is essential because it allows the filling to firm up and develop its best texture.
The source emphasizes that this time also helps the flavors meld beautifully. That matters because chilled desserts often taste more complete once they have had time to rest.
Step 13: Be Patient With the Chilling Step
Do not rush the chilling process. The source also lists skipping the chilling time as a common mistake, and that is easy to understand because a cheesecake that has not rested enough will not have the same satisfying sliceable texture.
This is where the dessert transforms from a mixed filling into an actual cheesecake. Time in the refrigerator does the quiet work that makes the recipe feel complete.
Serving the Cheesecake
Step 14: Slice Into Generous Wedges
Once the cheesecake is fully set, remove it from the refrigerator and slice it into 8 pieces. A chilled cheesecake cuts best when it has had enough time to firm up properly.
The source suggests generous wedges, which fits the comforting character of the dessert. This is not meant to feel tiny or fussy, but satisfying and shareable.
Step 15: Serve Chilled
Serve the Protein Cheesecake cold. That chilled texture is part of what makes it feel so creamy, smooth, and refreshing.
A cold cheesecake also highlights the vanilla flavor and the richness of the cream cheese beautifully. It gives the dessert that soothing finish people often look for.
Step 16: Add Optional Toppings
The source suggests serving with a dollop of fresh whipped cream or a sprinkle of nuts for extra texture. Fresh berries or a fruit compote can also be served on the side for a burst of flavor.
These toppings are optional, but they add another layer of contrast and beauty. They also give you an easy way to make the dessert feel more personalized or more festive for guests.
Variations to Try
One of the nice things about this recipe is how easily it can be adapted while keeping the same creamy base. Small additions can shift the flavor without changing the heart of the dessert.
Fruit Swirl Variation
Add a swirl of fruit puree, such as raspberry or mango, for a fruity twist. This gives the cheesecake a more colorful appearance and a brighter flavor profile.
Berry or Chocolate Topping Variation
Top the cheesecake with fresh berries or a drizzle of chocolate. Either option adds a simple finishing touch that makes the dessert feel even more special.
Seasonal Spice Variation
Incorporate seasonal spices such as pumpkin spice in the fall. This changes the mood of the cheesecake without changing the overall method.
Flavored Protein Powder Variation
Use flavored protein powder, such as chocolate or vanilla, for added depth. Since the recipe already welcomes flexibility in protein powder flavor, this is an easy way to personalize it.
Gluten-Free Crust Variation
For a gluten-free option, skip the crust or use gluten-free cookies. This keeps the cheesecake accessible while preserving the same creamy filling.
Serving and Storage Tips
Serve the cheesecake chilled for the best experience. The cold texture is part of what makes it feel smooth, rich, and especially satisfying.
The source suggests pairing it with fresh whipped cream, nuts, fresh berries, or a fruit compote. These simple additions can make the dessert feel fuller and more polished without taking away from the cheesecake itself.
Store leftovers in an airtight container in the refrigerator for up to 5 days. Keeping it covered helps maintain freshness and prevents it from absorbing other odors from the refrigerator.
For longer storage, individual slices can be wrapped tightly in plastic wrap and frozen for up to 2 months. Thaw them in the refrigerator before serving.
This makes the cheesecake especially practical. It is not only easy to make ahead, but also easy to portion and save for later.
Common Mistakes to Avoid
One of the most common mistakes is not softening the cream cheese. Cold cream cheese can leave lumps in the filling, which affects the texture.
Another issue is overmixing the batter. The source notes that overmixing can make the cheesecake dense, so it is best to mix only until smooth.
Skipping the chilling time is also a major mistake. A cheesecake that has not rested long enough will not set properly and will not have the same satisfying texture.
The source also warns against using low-quality ingredients. Since there are so few ingredients in the recipe, the quality of the cream cheese and protein powder has a noticeable effect on both taste and texture.
Helpful Notes
If you want a vegan option, make sure both the cream cheese and yogurt are plant-based. This keeps the dessert aligned with the original idea while making it accessible for different preferences.
For a tangier flavor, add a tablespoon of lemon juice. This gives the cheesecake a brighter edge and can make the vanilla feel even fresher.
For a lower-calorie version, the source suggests using a sugar-free sweetener. That is a simple substitution that can fit different goals without changing the easy method.
You can also mix in chocolate chips or nuts for added texture and flavor. This is a nice option if you want the dessert to feel a little more playful or layered.
Frequently Asked Questions
Can the Recipe Be Frozen?
Yes, the Protein Cheesecake can be frozen. Wrap individual slices tightly in plastic wrap and store them in an airtight container to help prevent freezer burn.
The source says it will keep well for up to 2 months. When you are ready to enjoy a slice, thaw it overnight in the refrigerator.
Can Ingredients Be Substituted?
Absolutely. Dairy-free cream cheese and yogurt can be used for a vegan version.
If you do not have protein powder, the source says you can replace it with additional Greek yogurt, although the protein content will be lower. For sweeteners, options such as honey, maple syrup, or stevia can work depending on your preference.
How Should Leftovers Be Stored?
Store leftover cheesecake in an airtight container in the refrigerator for up to 5 days. Keep it covered so it stays fresh and does not absorb other refrigerator smells.
This makes it very convenient as a make-ahead dessert. You can enjoy one slice at a time without losing the overall quality.
Can the Recipe Be Made Ahead?
Yes, and this is one of its biggest strengths. You can prepare the cheesecake a day or two in advance and let it chill in the refrigerator until you are ready to serve it.
The source points out that this resting time allows the flavors to develop. That means the dessert is not only convenient ahead of time, but often even better after a little time has passed.
Why This Cheesecake Feels So Comforting
There is something about cheesecake that naturally feels comforting. It has that smooth, cool richness that makes even a simple slice feel like a real treat.
This version carries that same comfort while also feeling a bit more practical. The added protein and no-bake ease give it a personality that feels very modern, yet the emotional experience of eating it remains classic and familiar.
The vanilla aroma helps with that feeling. It gives the cheesecake a soft sweetness that feels warm and nostalgic, even though the dessert itself is served chilled.
The texture matters too. A creamy cheesecake that slices cleanly and melts softly on the tongue always feels a little luxurious, and that sensation never really loses its appeal.
There is also a simple emotional pleasure in serving a dessert that feels generous but not overly complicated. It is the kind of thing people are happy to see at the table because it feels both special and approachable.
That combination of familiarity and ease is what gives the recipe its emotional warmth. It feels like something made with care, but without stress.
Final Thoughts on Protein Cheesecake
Protein Cheesecake is one of those desserts that manage to feel indulgent and practical at the same time. It brings together the creamy richness people love in cheesecake with a protein boost and a no-bake method that make it especially easy to fit into real life.
That is part of what makes it so appealing. It does not ask for much effort, but it still gives you a dessert that feels complete, satisfying, and very easy to share.
The ingredients are simple, the steps are beginner-friendly, and the final result is smooth, sweet, and comforting. It works for gatherings, quiet evenings, meal prep, and those moments when you want something homemade waiting in the refrigerator.
It is also flexible enough to become your own. You can change the protein powder flavor, add fruit swirls, adjust the sweetness, or serve it with berries, nuts, chocolate, or whipped cream.
Most of all, it offers that lovely feeling of making a dessert that brings people pleasure without making the process overwhelming. That is a very special kind of recipe to keep around.
A chilled slice of this cheesecake feels calm, creamy, and satisfying in the best way. And that may be exactly why it is the kind of dessert people come back to again and again.
Protein Cheesecake
Protein Cheesecake is a rich and satisfying dessert that offers plenty of flavor along with a protein boost. It is a simple option for anyone looking for a treat that feels indulgent while still fitting into a more balanced lifestyle.
- Prep Time: 15 minutes
- Total Time: 15 minutes
- Course: Dessert
- Cuisine: American
- Servings: 8 slices
Equipment
Mixing bowl
Springform pan
Ingredients
For the Cheesecake Filling
- Greek yogurt or dairy free alternative, 2 cups
- Protein powder, ½ cup
- Cream cheese or vegan cream cheese, 24 oz
- Pure vanilla extract, 2 ½ teaspoon
- Sweetener of choice, ⅔ cup
Instructions
In a mixing bowl, add the cream cheese, Greek yogurt, protein powder, sweetener, and vanilla extract.
Mix until the texture is smooth and everything is fully combined. Pour the cheesecake mixture into a springform pan.
Notes
You can add any crust you like if you want to give the cheesecake extra flavor.

Fernando is the creator and writer behind the food blog Eating with your Hands. Living and working in cities like Paris, Barcelona, and Berlin, and being married to a Canadian foodie, has given Fernando a passion and interest in food and inspired him to run EWYH.