
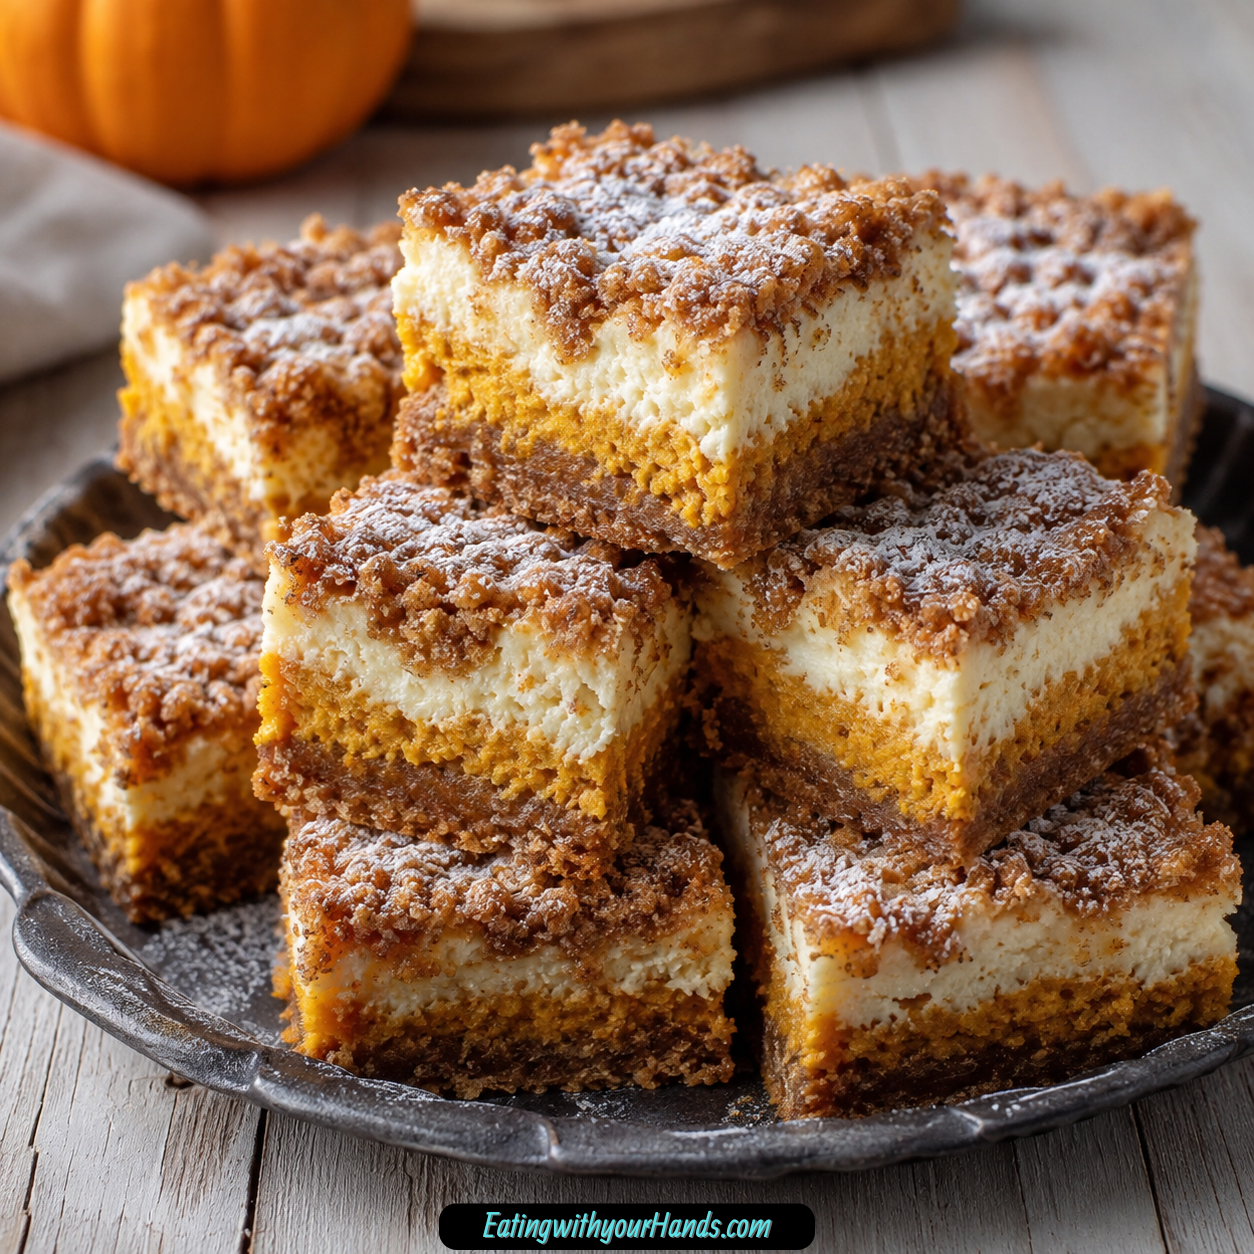
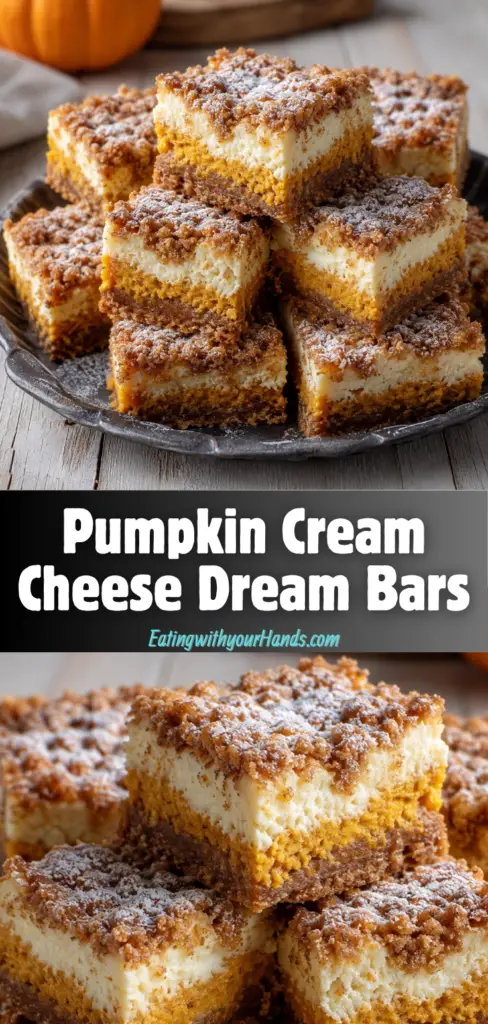
Pumpkin Cream Cheese Dream Bars are the kind of dessert that make the kitchen feel softer, warmer, and a little more forgiving. They have that cozy pumpkin spice feeling I crave when the day needs something sweet, but they stay simple enough that I do not have to turn baking into a whole production.
I think part of their charm is how comforting they feel without being fussy. The pumpkin brings that familiar autumn sweetness, the cream cheese adds a tangy richness, and the honey or maple syrup keeps everything gently sweet instead of heavy.
These bars are the ones I imagine cutting into small squares for friends, setting beside an afternoon cup of coffee, or sneaking from the refrigerator when the house gets quiet. They taste like a little pause in the day, the kind of treat that feels homemade, calm, and worth slowing down for.
What makes them even better is how practical they are. You mix the batter, bake it in a 9×9 inch pan, let it cool, and end up with soft, spiced pumpkin cream cheese bars that are just as lovely the next day.
Table of Contents
- Why You’ll Love This Recipe
- Recipe Details
- Ingredients
- Optional Swaps, Variations, Add-Ins, and Serving Ideas
- Why These Pumpkin Cream Cheese Bars Work
- Directions
- Step 1: Preheat the Oven to 350°F (175°C)
- Step 2: Grease a 9×9 Inch Baking Pan
- Step 3: Add the Pumpkin, Cream Cheese, and Sweetener to a Bowl
- Step 4: Mix Until Smooth and Creamy
- Step 5: Add the Eggs and Vanilla
- Step 6: Add the Flour, Pumpkin Spice, and Salt
- Step 7: Stir Until Just Combined
- Step 8: Spread the Batter Into the Pan
- Step 9: Bake for About 30 Minutes
- Step 10: Cool in the Pan for 15–20 Minutes
- Step 11: Chill for a Firmer Texture if Desired
- Step 12: Slice Into Squares and Serve
- Serving Ideas
- Storage
- Reheating
- Freezing
- Make-Ahead
- Helpful Notes for Best Results
- Variations
- Troubleshooting
- Frequently Asked Questions
- Why This Recipe Works So Well
- Final Thoughts
- Pumpkin Cream Cheese Dream Bars
Why You’ll Love This Recipe
Pumpkin Cream Cheese Dream Bars are creamy, cozy, and easy to make. They bring together pumpkin puree, softened cream cheese, warm pumpkin spice, and vanilla in a dessert that feels rich without requiring complicated steps.
The texture is one of the best parts. The bars bake up soft and tender, with a creamy pumpkin filling that firms as it cools and becomes even better after resting.
They are also wonderfully simple. The batter comes together without fancy techniques, and the recipe uses a 9×9 inch baking pan, so it feels approachable even on a busy day.
The sweetness is flexible because you can use either honey or maple syrup. Both work, and each one gives the bars a slightly different flavor.
These bars are also make-ahead friendly. They taste even better the next day as the flavors meld, which makes them helpful for gatherings, holidays, or a calm dessert you can prepare before you need it.
They fit so many moments. Serve them slightly warm with whipped cream, enjoy them chilled with morning coffee, cut them into smaller squares for a party, or freeze individual bars for later pumpkin cravings.
Recipe Details
Pumpkin Cream Cheese Dream Bars bake at 350°F (175°C). The recipe uses a greased 9×9 inch baking pan.
The batter is made with 1 cup pumpkin puree, 8 oz softened cream cheese, ½ cup honey or maple syrup, 1 cup whole wheat flour, 2 large eggs, 1 teaspoon vanilla extract, 1 teaspoon pumpkin spice, and ½ teaspoon salt. The bars bake for about 30 minutes.
They are done when the edges are slightly golden and a toothpick inserted into the center comes out clean. If your oven runs hot or cold, start checking at 25 minutes.
The center may still look a little soft when the pan comes out of the oven. That is okay because the bars firm up as they cool.
The bars should cool in the pan for at least 15–20 minutes before slicing. For a firmer texture, refrigerate them for an hour before serving.
Store the bars in an airtight container in the refrigerator for up to 5 days. For longer storage, wrap individual bars tightly in plastic wrap, place them in a freezer bag, and freeze for up to 3 months.
Ingredients
Pumpkin Cream Cheese Batter
1 cup pumpkin puree
8 oz cream cheese, softened
½ cup honey or maple syrup
1 cup whole wheat flour
2 large eggs
1 teaspoon vanilla extract
1 teaspoon pumpkin spice
½ teaspoon salt
Ingredient Notes
Use pure pumpkin puree, not pumpkin pie filling. Pumpkin pie filling already has added sugars and spices, which will throw off the balance of these bars.
Softened cream cheese is important for a smooth batter. Let it sit out for a bit, or microwave it for 10 seconds if you are in a hurry.
Honey and maple syrup both work as the sweetener. Honey gives one kind of gentle sweetness, while maple syrup brings its own cozy flavor.
Whole wheat flour makes the bars a little heartier. All-purpose flour works too if that is what you have.
Room temperature eggs are best because they mix more easily. Eggs straight from the refrigerator still work in a pinch.
Use real vanilla extract if you have it. It adds warmth and helps the pumpkin and cream cheese taste more rounded.
Pumpkin spice can be homemade or store-bought. Either one works beautifully in these bars.
Optional Swaps, Variations, Add-Ins, and Serving Ideas
Flour Swaps
For a gluten-free twist, swap the whole wheat flour for almond flour or a gluten-free flour blend. The texture may be a little denser, but the bars will still be delicious.
All-purpose flour also works perfectly fine if you do not have whole wheat flour. Oat flour can be used in a pinch, and if the batter seems too thin, add an extra tablespoon.
Sweetener Adjustment
If you are watching your sugar, you can cut the sweetener down to ¼ cup. The pumpkin and cream cheese still make the bars satisfying.
You can use honey or maple syrup as written. If using maple syrup, adding a dash of cinnamon can enhance the cozy autumn flavor.
Add-Ins and Toppings
For a nutty crunch, fold in a handful of chopped pecans or walnuts. You can also sprinkle a few on top before baking for a pretty finish.
For a chocolate fix, stir in some chocolate chips. Pumpkin and chocolate make the bars feel more indulgent.
For a deeper spice flavor, add a pinch of ginger or cardamom to the pumpkin spice. These little additions give the bars a warmer kick.
Dairy-Free and Protein Options
For a dairy-free direction, use coconut cream cheese. Choose the block style, not the spreadable kind.
To boost the protein, swap one egg for a flax egg. The texture stays surprisingly perfect.
Serving Ideas
Serve the bars slightly warm with a dollop of whipped cream for dessert. They are also wonderful chilled straight from the refrigerator with morning coffee.
For parties, cut the bars into smaller squares because they are rich. A little piece goes a long way, especially after a meal.
Why These Pumpkin Cream Cheese Bars Work
Pumpkin Cream Cheese Dream Bars work because the flavor is simple but layered. Pumpkin puree gives the bars their soft seasonal base, while cream cheese adds richness and a gentle tang.
The honey or maple syrup sweetens the batter without making it feel too sugary. That keeps the bars balanced enough to enjoy with coffee, tea, or as a quiet dessert after dinner.
The eggs help the bars set as they bake. They give the batter structure while still letting the center stay soft and creamy.
Whole wheat flour gives the bars body. It makes the texture a little heartier while still allowing the pumpkin and cream cheese to stay at the center.
Pumpkin spice and vanilla do the emotional work of the recipe. They make the kitchen smell warm, and they give the bars that familiar cozy flavor people expect from pumpkin desserts.
The cooling time matters too. The bars may look a little soft when they come out of the oven, but they become easier to slice as they rest.
Directions
Step 1: Preheat the Oven to 350°F (175°C)
Preheat your oven to 350°F (175°C). This temperature allows the bars to bake gently enough for the cream cheese and pumpkin mixture to set without drying out too quickly.
Give the oven time to fully heat before the pan goes in. A steady oven temperature helps the edges turn slightly golden while the center stays soft and creamy.
If your oven tends to run hot or cold, keep that in mind before baking. You will start checking early so the bars do not overbake.
Step 2: Grease a 9×9 Inch Baking Pan
Grease a 9×9 inch baking pan with a little butter or non-stick spray. Use just enough to help the bars release easily after baking.
This step makes slicing much easier later. Pumpkin and cream cheese batters can be soft, so a prepared pan helps keep the edges from sticking.
Set the pan aside while you make the batter. Having it ready means you can pour and spread the batter as soon as it is mixed.
Step 3: Add the Pumpkin, Cream Cheese, and Sweetener to a Bowl
In a mixing bowl, add 1 cup pumpkin puree, 8 oz softened cream cheese, and ½ cup honey or maple syrup. These three ingredients create the creamy base of the bars.
Make sure the cream cheese is softened before mixing. Cold cream cheese can leave little lumps, and these bars are best when the batter is smooth.
Use honey or maple syrup depending on the flavor you want. Both are included as options, and both make the bars gently sweet.
Step 4: Mix Until Smooth and Creamy
Mix the pumpkin puree, cream cheese, and sweetener until smooth and creamy. A hand mixer works well, but a whisk and some effort can also do the job.
The mixture should look soft and mostly even. Take a moment to scrape the bowl so the cream cheese does not hide along the sides.
Do not worry if it takes a little patience. Once the cream cheese blends into the pumpkin, the batter starts to look rich and silky.
Step 5: Add the Eggs and Vanilla
Add 2 large eggs and 1 teaspoon vanilla extract to the pumpkin cream cheese mixture. Mix until everything is fully combined.
The batter may look a little runny at this stage, and that is normal. The flour will help bring it together in the next step.
The eggs help the bars set in the oven. The vanilla adds warmth that makes the pumpkin spice flavor feel softer and more complete.
Step 6: Add the Flour, Pumpkin Spice, and Salt
Sprinkle in 1 cup whole wheat flour, 1 teaspoon pumpkin spice, and ½ teaspoon salt. Add them over the wet mixture so they can be stirred in evenly.
The flour gives the bars structure. The pumpkin spice brings the cozy flavor, and the salt balances the sweetness.
Try to distribute the dry ingredients across the surface before stirring. This helps prevent one pocket of spice or flour from staying in one spot.
Step 7: Stir Until Just Combined
Stir the batter until the dry ingredients are just combined. Do not overmix.
A few lumps are totally fine. These bars are not bread, so there is no need to work the batter until it becomes heavy or overly smooth.
Once the flour disappears into the pumpkin mixture, stop stirring. Overmixing can change the texture and make the bars less tender.
Step 8: Spread the Batter Into the Pan
Pour the batter into the prepared 9×9 inch pan. Use a spatula to spread it into an even layer.
Smooth the top gently so the bars bake evenly. An even surface also makes the finished squares look nicer once sliced.
The batter should smell like pumpkin spice and vanilla at this point. It may look soft, but it will firm up during baking and cooling.
Step 9: Bake for About 30 Minutes
Place the pan in the preheated oven and bake for about 30 minutes. The bars are done when the edges are slightly golden and a toothpick inserted into the center comes out clean.
If your oven runs hot or cold, start checking at 25 minutes. The toothpick should come out with just a few moist crumbs, not wet batter.
Do not panic if the center still looks a little soft. The bars will firm up as they cool.
Step 10: Cool in the Pan for 15–20 Minutes
Remove the pan from the oven and let the bars cool in the pan for at least 15–20 minutes. This rest makes slicing much easier.
The center continues to settle as the bars cool. If you cut too soon, the texture may be too soft to hold neat squares.
A little patience here gives you better pieces later. The bars should feel tender but more stable after resting.
Step 11: Chill for a Firmer Texture if Desired
If you want a firmer texture, refrigerate the bars for an hour before serving. This makes them easier to cut and gives the cream cheese layer a denser, cooler bite.
Chilling is optional, because the bars are amazing either way. Slightly warm bars feel soft and cozy, while chilled bars feel creamy and neat.
This choice depends on how you want to serve them. For a party tray, chilled bars are usually easier to handle.
Step 12: Slice Into Squares and Serve
Once cooled, cut the bars into squares. If serving at a party, cut them smaller because they are rich.
Serve them slightly warm with whipped cream if you want a dessert-style plate. Serve them chilled with coffee if you want something sweet and calm in the morning or afternoon.
If the tops crack a little, do not worry. You can dust them with powdered sugar or drizzle melted white chocolate over them if you want to hide the cracks.
Serving Ideas
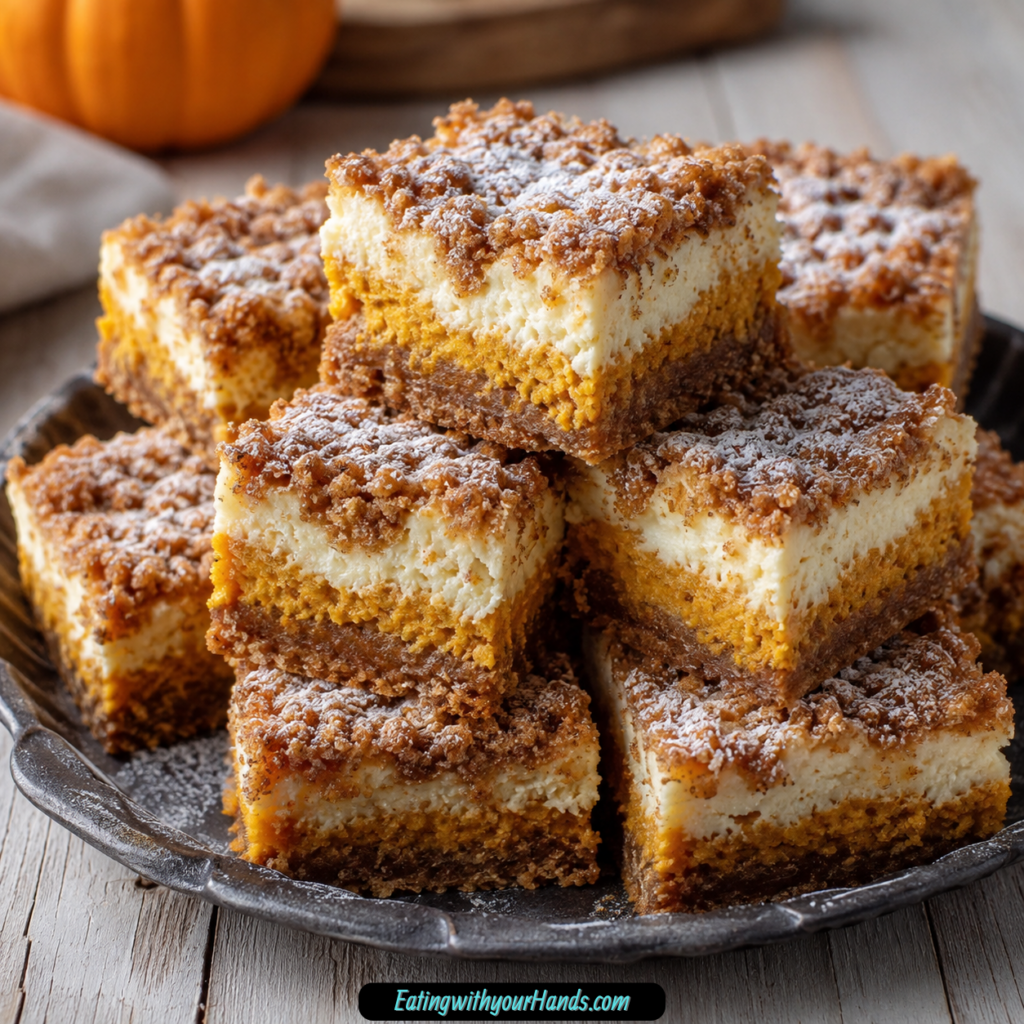
Pumpkin Cream Cheese Dream Bars are lovely slightly warm. The texture is softer, and the pumpkin spice flavor feels especially cozy.
They are also wonderful chilled straight from the refrigerator. I love them this way with coffee because the cream cheese texture feels a little firmer and richer.
For dessert, add a dollop of whipped cream. It gives the bars a soft, sweet finish without making them complicated.
If you are serving them at a party, cut them into smaller squares. They are rich, so smaller portions make them easier to enjoy on a dessert table.
For a prettier finish, dust cracked tops with powdered sugar. A drizzle of melted white chocolate also works when you want the bars to look extra polished.
Storage
Store Pumpkin Cream Cheese Dream Bars in an airtight container in the refrigerator. They keep for up to 5 days.
The bars actually get better after a day or two. The pumpkin spice, cream cheese, and sweetener have time to meld, making the flavor smoother.
Keep them chilled until you are ready to serve. This helps preserve the creamy texture and makes the bars easier to handle.
If stacking the bars, keep them protected so the tops stay neat. The texture is soft, so gentle storage helps them look as good as they taste.
Reheating
These bars can be enjoyed chilled, at room temperature, or slightly warm. If you prefer them warm, use a gentle reheating method so the cream cheese texture stays pleasant.
The recipe does not give a specific reheating time. Because of that, treat warming as optional and keep it light.
Many people will love these straight from the refrigerator with coffee. Chilling gives them a firmer texture and makes the pumpkin cream cheese flavor feel especially smooth.
Freezing
These bars freeze well. Wrap individual bars tightly in plastic wrap, then place them in a freezer bag for up to 3 months.
You can also wrap individual portions in parchment paper before freezing. This makes it easier to separate and thaw only what you need.
Thaw the bars overnight in the refrigerator or at room temperature when a pumpkin craving hits. They taste just as amazing after freezing when wrapped well.
Freezing individual bars is helpful because you do not have to thaw the whole batch. It turns the recipe into a ready-made treat for later.
Make-Ahead
Pumpkin Cream Cheese Dream Bars are make-ahead friendly. They are even better the next day as the flavors meld.
Bake them the day before you need them, cool them, and store them in the refrigerator. This makes them a low-stress choice for gatherings.
For a firmer texture, refrigerate the bars for an hour before serving. If you are making them ahead, that chill time naturally happens while they rest in the fridge.
They also freeze well for longer planning. Wrap individual bars tightly and freeze them for up to 3 months.
Helpful Notes for Best Results
Use pure pumpkin puree, not canned pumpkin pie filling. Pie filling has added sugars and spices that will throw off the whole recipe.
Let the cream cheese soften before mixing. Softened cream cheese blends smoothly and helps prevent lumps.
If you are in a hurry, microwave the cream cheese for 10 seconds. It should soften, not melt.
Do not overmix after adding the flour. Stir just until the dry ingredients are incorporated.
If the bars crack a little on top after baking, that is totally normal. Dust with powdered sugar or drizzle with melted white chocolate if you want to cover the cracks.
If you are watching your sugar, cut the sweetener down to ¼ cup. The pumpkin and cream cheese still make the bars satisfying.
For dairy-free bars, use coconut cream cheese in block style. Avoid the spreadable kind because the texture is different.
If you want to boost the protein, swap one egg for a flax egg. The texture stays surprisingly perfect.
Variations
Gluten-Free Pumpkin Cream Cheese Bars
Swap the whole wheat flour for almond flour or a gluten-free flour blend. The bars may be a little denser, but they will still be delicious.
This is a simple way to adjust the recipe while keeping the pumpkin cream cheese flavor. Keep an eye on the texture as noted.
Nutty Pumpkin Bars
Fold in a handful of chopped pecans or walnuts. This adds extra texture to the creamy bars.
You can also sprinkle a few nuts on top before baking. It gives the bars a pretty finish and a little crunch.
Maple Cinnamon Bars
Use maple syrup as the sweetener and add a dash of cinnamon. This enhances the cozy, autumnal flavor.
The maple and cinnamon make the bars feel especially warm. They are lovely with coffee or tea.
Chocolate Chip Pumpkin Bars
Stir in some chocolate chips if you want a more indulgent bar. Pumpkin and chocolate work beautifully together.
This variation makes the bars feel more dessert-like. It is a great choice when you want something a little richer.
Extra-Spiced Pumpkin Bars
Add a pinch of ginger or cardamom to the pumpkin spice. This gives the bars a deeper, spicier kick.
Keep the addition small so it supports the pumpkin spice instead of overpowering it. The flavor should still feel cozy and balanced.
Dairy-Free Pumpkin Cream Cheese Bars
Use coconut cream cheese in block style. This option helps make the bars dairy-free.
The texture may vary slightly depending on the cream cheese alternative. The block style works best for structure.
Troubleshooting
Why Are My Bars Too Soft?
The bars may need more cooling time. Let them cool in the pan for at least 15–20 minutes before slicing.
If you want a firmer texture, refrigerate them for an hour before serving. The center firms as it cools and chills.
Why Did the Top Crack?
A few cracks on top are normal. These bars are still delicious and do not need to look perfect.
If you want to hide the cracks, dust the top with powdered sugar or drizzle with melted white chocolate. I like to think of those little cracks as character.
Why Is My Batter Lumpy?
The cream cheese may not have been soft enough. Let it sit out for a bit, or microwave it for 10 seconds if needed.
Mix the pumpkin, cream cheese, and sweetener until smooth before adding the eggs and dry ingredients. This helps prevent lumps later.
Why Did My Bars Turn Dense?
The batter may have been overmixed after the flour was added. Stir only until just combined.
A few lumps are fine. Overworking the batter is not needed and can make the texture heavier.
Why Does My Batter Seem Too Thin?
If you used oat flour and the batter seems too thin, add an extra tablespoon. This helps bring the texture back into balance.
The batter can look a little runny after the eggs are added. That part is normal before the dry ingredients are stirred in.
How Do I Know They Are Done?
The edges should be slightly golden. A toothpick inserted into the center should come out clean or with just a few moist crumbs, not wet batter.
Start checking at 25 minutes if your oven runs hot or cold. The usual bake time is about 30 minutes.
Frequently Asked Questions
Can I Use Canned Pumpkin Pie Filling Instead of Pure Pumpkin Puree?
No, use plain pumpkin puree. Pumpkin pie filling has added sugars and spices that will throw off the recipe.
Pure pumpkin puree gives you control over the sweetness and spice. It is the right choice for these bars.
What If I Do Not Have Whole Wheat Flour?
All-purpose flour works perfectly fine. Use it if that is what you have.
Oat flour can also work when needed. If the batter seems too thin, add an extra tablespoon.
Can I Make These Gluten-Free?
Yes, swap the whole wheat flour for almond flour or a gluten-free flour blend. The bars might be a little denser.
They will still be delicious. Just keep an eye on the texture as they bake and cool.
Can I Make These Dairy-Free?
Yes, use your favorite vegan cream cheese alternative. The block style works best.
Coconut cream cheese is a good option mentioned for these bars. Avoid the spreadable kind for the best texture.
Can I Freeze These Bars?
Yes, these bars freeze well. Wrap them tightly and freeze for up to 3 months.
Individual portions can be wrapped in parchment paper or plastic wrap, then stored in a freezer bag. Thaw overnight in the refrigerator or at room temperature.
Can I Reduce the Sweetener?
Yes, you can cut the sweetener down to ¼ cup. The pumpkin and cream cheese still make the bars satisfying.
This is helpful if you want the bars less sweet. The flavor remains creamy and cozy.
Can I Serve These Warm?
Yes, the bars are lovely slightly warm with whipped cream. They are also amazing chilled from the refrigerator.
Warm bars feel softer and more dessert-like. Chilled bars feel firmer and are wonderful with coffee.
When Should I Start Checking the Bars?
Start checking at 25 minutes if your oven runs hot or cold. The recipe bakes for about 30 minutes.
Look for slightly golden edges and a toothpick that comes out clean or with a few moist crumbs. Avoid wet batter in the center.
Why This Recipe Works So Well
Pumpkin Cream Cheese Dream Bars work so well because they keep the flavors focused. Pumpkin, cream cheese, vanilla, pumpkin spice, and honey or maple syrup are simple ingredients, but together they create a dessert that feels creamy, warm, and comforting.
The cream cheese adds tang and richness, which keeps the pumpkin from tasting flat. The pumpkin puree adds color, moisture, and that soft seasonal flavor people love.
The sweetener is just enough to make the bars feel like dessert. Honey and maple syrup both work, and each one changes the flavor slightly without making the recipe complicated.
The flour, eggs, and cooling time give the bars structure. They bake up tender, then firm as they rest.
The recipe also works because it fits real life. You can serve the bars warm, chill them for a firmer texture, make them ahead, freeze them, or adapt them with nuts, chocolate chips, spices, or dairy-free cream cheese.
Most of all, these bars feel like a small comfort. They are easy to bake, easy to share, and just sweet enough to make an ordinary afternoon feel softer.
Final Thoughts
Pumpkin Cream Cheese Dream Bars are the kind of dessert I love keeping close because they do not ask for much and still give back so much comfort. They are creamy, gently spiced, lightly sweet, and simple enough for a weekday but special enough for company.
Make them when pumpkin season is calling, when coffee needs a companion, or when you want a dessert that feels homemade without leaving the kitchen in chaos. Let them cool, chill them if you want clean squares, and enjoy the way the pumpkin and cream cheese settle into something soft and memorable.
These bars are rich, cozy, and forgiving in the best way. Once you make them, it is easy to understand why they become the kind of recipe you look for excuses to bake again.
Pumpkin Cream Cheese Dream Bars
These Pumpkin Cream Cheese Dream Bars are soft, creamy, warmly spiced, and lightly sweetened with honey or maple syrup. With pumpkin puree, softened cream cheese, whole wheat flour, and pumpkin spice, they make an easy fall dessert for gatherings, lunchbox treats, or a cozy sweet bite after dinner.
Recipe Details
- Prep Time: 15 minutes
- Cook Time: 30 minutes
- Total Time: 45 minutes
- Course: Dessert
- Cuisine: American
- Servings: 12 bars
Equipment
- Mixing bowl
- 9×9 inch baking pan
Ingredients
For the Bars
- 8 oz cream cheese softened
- ½ cup honey or maple syrup
- 1 teaspoon vanilla extract
- 2 large eggs
- 1 cup pumpkin puree
- 1 cup whole wheat flour
- ½ teaspoon salt
- 1 teaspoon pumpkin spice
Instructions
Step 1: Prepare the Pan
Preheat the oven to 350°F (175°C). Grease a 9×9 inch baking pan.
Step 2: Mix the Creamy Pumpkin Base
In a mixing bowl, combine the pumpkin puree, softened cream cheese, and honey or maple syrup. Mix until smooth.
Step 3: Add the Eggs and Vanilla
Add the eggs and vanilla extract, then mix well until the batter is evenly blended.
Step 4: Stir in the Dry Ingredients
Stir in the whole wheat flour, pumpkin spice, and salt until fully incorporated.
Step 5: Fill the Baking Pan
Pour the batter into the prepared baking pan and spread it evenly.
Step 6: Bake the Bars
Bake for 30 minutes, or until a toothpick inserted in the center comes out clean.
Step 7: Cool and Slice
Allow the bars to cool before slicing into 12 bars.
Notes
For a firmer texture, refrigerate the bars for at least 1 hour before serving.
Serving Suggestions
- Serve chilled for a firmer, creamier texture.
- Pair with hot coffee, chai tea, or warm apple cider.
- Add to a fall dessert tray with cookies, brownies, or pumpkin treats.
- Serve after dinner as a lighter pumpkin dessert.
- Cut into small squares for parties, potlucks, or holiday gatherings.
Storage
How to Store
Let the bars cool completely, then place them in an airtight container or cover the baking pan tightly. Refrigerate until ready to serve.
How to Refrigerate
For a firmer texture, refrigerate the bars for at least 1 hour before serving.
Best Texture Tip
Allow the bars to cool fully before slicing so they hold their shape better. For the cleanest cuts and firmest texture, serve them chilled.

Fernando is the creator and writer behind the food blog Eating with your Hands. Living and working in cities like Paris, Barcelona, and Berlin, and being married to a Canadian foodie, has given Fernando a passion and interest in food and inspired him to run EWYH.