
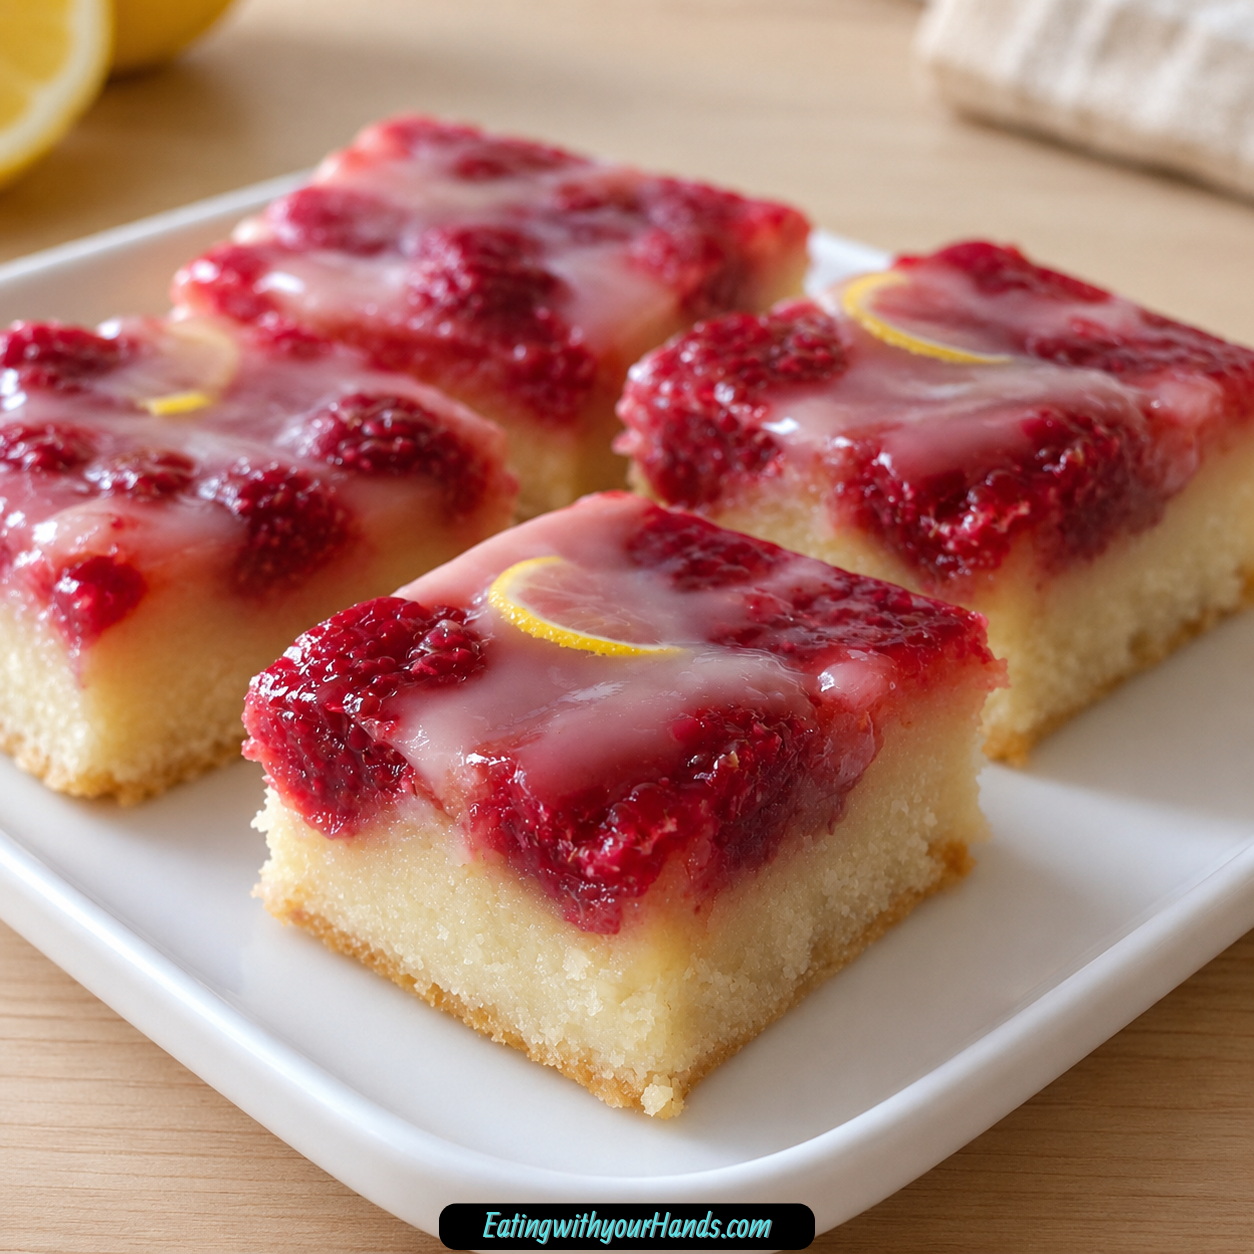
Raspberry Lemonade Bars are bright, sweet-tart dessert bars made with buttery lemon batter, fresh raspberries, and a smooth raspberry lemon glaze. They bring together softened butter, granulated sugar, eggs, fresh lemon juice, lemon zest, all-purpose flour, juicy raspberries, powdered sugar, seedless raspberry jam, and more lemon for a colorful treat that tastes like summer in every square.
I love desserts that feel fresh the moment you cut into them. These bars have that sunny, cheerful feeling, with lemon giving them sparkle and raspberries adding soft berry sweetness.
They are the kind of dessert that belongs at picnics, family gatherings, birthday parties, weekend get-togethers, and quiet afternoons at home. The color alone makes them feel happy, but the flavor is what keeps people reaching for another piece.
The batter is simple and tender. Butter and sugar are creamed together, then eggs, lemon juice, salt, zest, and flour are folded in before the raspberries are added gently.
After baking, the bars cool just enough for the glaze. Powdered sugar, seedless raspberry jam, fresh lemon juice, and lemon zest turn into a thick but pourable topping that makes the bars look as pretty as they taste.
Table of Contents
- Why You’ll Love These Raspberry Lemonade Bars
- Recipe Details
- Ingredients
- Optional Swaps, Variations, Add-Ins, and Serving Ideas
- Why These Raspberry Lemonade Bars Work
- Directions
- Step 1: Preheat the Oven
- Step 2: Prepare the Baking Dish
- Step 3: Soften the Butter
- Step 4: Cream the Butter and Sugar
- Step 5: Add the Eggs
- Step 6: Add the Fresh Lemon Juice
- Step 7: Add the Salt
- Step 8: Add the Lemon Zest
- Step 9: Add the Flour Gradually
- Step 10: Stir Until Just Combined
- Step 11: Prepare the Raspberries
- Step 12: Fold in the Raspberries
- Step 13: Spread the Batter
- Step 14: Bake the Bars
- Step 15: Test for Doneness
- Step 16: Make the Glaze
- Step 17: Adjust the Glaze Texture
- Step 18: Cool the Bars
- Step 19: Glaze the Bars
- Step 20: Cut Into Squares
- Step 21: Serve and Enjoy
- Serving Ideas
- Storage
- Reheating
- Freezing
- Make-Ahead
- Helpful Notes for Best Results
- Variations
- Mango Raspberry Lemonade Bars
- Pineapple Raspberry Lemonade Bars
- Blueberry Lemonade Bars
- Gluten-Free Raspberry Lemonade Bars
- Lavender Raspberry Lemon Bars
- Chocolate Glaze Raspberry Bars
- Limeade Raspberry Bars
- Brown Sugar Raspberry Bars
- Vanilla Raspberry Lemon Bars
- Dairy-Free Raspberry Lemon Bars
- Strawberry Lemonade Bars
- Troubleshooting
- Frequently Asked Questions
- Why This Recipe Works So Well
- Final Thoughts
- Raspberry Lemonade Bars
Why You’ll Love These Raspberry Lemonade Bars
These Raspberry Lemonade Bars are quick and easy to prepare. The prep takes just 15 minutes, which makes them great for busy days.
They use minimal ingredients. Butter, sugar, eggs, lemon, salt, flour, raspberries, powdered sugar, and raspberry jam create the whole dessert.
They have a balanced tart and sweet flavor. Lemon keeps the bars bright, while raspberries and sugar make them soft and sweet.
They are family-friendly. Kids can help mix, fold, glaze, and enjoy the finished squares.
They are freezer-friendly. You can save some for later or pack them for lunches.
They work for many occasions. Summer picnics, family dinners, parties, cozy evenings, and refreshing snacks all feel right for these bars.
Recipe Details
These bars bake at 350°F (175°C). A baking dish should be greased before the batter is added.
A 9×9 inch baking dish is a good size for these bars. The batter should be spread evenly before baking.
The base uses ½ cup softened butter, ¾ cup granulated sugar, 2 large eggs, 1 tablespoon fresh lemon juice, ¼ teaspoon salt, zest of ½ lemon, and ¾ cup all-purpose flour.
The raspberries are folded into the batter gently. The recipe uses ¾ to 1 cup fresh raspberries.
The bars bake for 25 minutes. They are done when the center is set and a toothpick comes out clean.
The glaze uses 1 cup powdered sugar, 1 tablespoon seedless raspberry jam, 1 tablespoon fresh lemon juice, and zest of ½ lemon.
The bars cool in the baking dish for about 10–15 minutes after baking. Then the glaze is spread over the top before cutting into squares.
These bars are best served chilled or at room temperature. Leftovers can be stored in an airtight container in the refrigerator for up to 1 week or frozen for up to 3 months.
Ingredients
Lemon Raspberry Bar Base
½ cup softened butter
¾ cup granulated sugar
2 large eggs
1 tablespoon fresh lemon juice
¼ teaspoon salt
Zest of ½ lemon
¾ cup all-purpose flour
Raspberry Topping
¾ to 1 cup fresh raspberries
Raspberry Lemon Glaze
1 cup powdered sugar
1 tablespoon seedless raspberry jam
1 tablespoon fresh lemon juice
Zest of ½ lemon
Ingredient Notes
Softened butter gives the bars richness and tenderness. Unsalted butter is helpful because it gives better control over sweetness and balance.
Granulated sugar works best in the base. It sweetens the lemon batter and helps create a soft texture.
Room-temperature eggs mix more easily into the batter. They help the bars bake evenly.
Fresh lemon juice gives the bars their bright, zesty flavor. Bottled lemon juice can work in a pinch, but fresh gives the best kick.
Salt enhances all the flavors. A small amount keeps the bars from tasting flat.
Lemon zest adds fragrance. Do not skip it, because it gives the bars a stronger lemon aroma.
All-purpose flour gives the bars structure. You can sift it if you want an extra light texture.
Fresh raspberries bring juicy berry flavor. Ripe raspberries give the bars the strongest fruit taste.
Powdered sugar creates a smooth glaze. Seedless raspberry jam adds rich raspberry flavor without seeds.
Optional Swaps, Variations, Add-Ins, and Serving Ideas
Tropical Raspberry Lemonade Bars
Add diced mango or pineapple to the filling for a tropical twist. These fruits bring a sunny sweetness that pairs with lemon.
This variation makes the bars feel even more picnic-ready. It keeps the refreshing idea while adding a new fruit note.
Blueberry Lemonade Bars
Substitute blueberries for raspberries for a different berry flavor. Blueberries give the bars a softer, deeper fruit sweetness.
This variation keeps the lemon base the same. It simply changes the berry character.
Gluten-Free Lemonade Bars
Use a 1:1 gluten-free flour blend to make the bars gluten-free. The texture may vary depending on the blend.
Follow the same mixing, baking, cooling, and glazing steps. Make sure the other ingredients fit your needs.
Lavender Lemon Bars
Add a hint of lavender for a floral note. Lavender pairs beautifully with lemon when used lightly.
This variation makes the bars feel delicate and special. It is a lovely option for spring or summer gatherings.
Chocolate Glazed Raspberry Bars
Drizzle the bars with a chocolate glaze instead of raspberry glaze for a rich contrast. Chocolate gives the dessert a deeper finish.
This version changes the bright berry glaze into something more decadent. It is a fun option when you want a richer dessert.
Limeade Bars
Swap the lemon juice for lime juice to create a zesty limeade version. Lime gives the bars a sharper citrus flavor.
This variation keeps the same bar format. It simply changes the citrus direction.
Brown Sugar Raspberry Bars
Substitute half of the granulated sugar with brown sugar for a richer flavor. Brown sugar adds depth.
The bars may taste warmer and slightly more caramel-like. This is a good option when you want a less traditional sweetness.
Vanilla Raspberry Lemon Bars
Add 1 teaspoon vanilla extract for a lovely depth of flavor. Vanilla softens the tart lemon and makes the bars taste warmer.
This variation keeps the raspberry lemonade idea. It just adds another layer of sweetness.
Dairy-Free Raspberry Lemon Bars
Use coconut oil instead of butter to make the bars dairy-free. The flavor and texture may change.
This option keeps the dessert bright and fruity. Use it when you need a butter-free version.
Frozen Raspberry Bars
If you do not have fresh raspberries, frozen ones can work. Thaw and drain them before adding to the batter.
Draining is important because it helps avoid excess moisture. The bars should still bake cleanly.
Why These Raspberry Lemonade Bars Work
These bars work because lemon and raspberry naturally balance each other. Lemon brings tart brightness, while raspberries add fruit sweetness.
The butter and sugar base makes the bars tender. Creaming them together creates a smooth start for the batter.
Eggs help the bars set as they bake. They also make the texture soft and sliceable.
The flour gives the bars structure without making them heavy. Stirring until just combined helps keep the texture gentle.
Folding in the raspberries carefully protects the fruit. It keeps the berries from breaking down too much in the batter.
The glaze makes the bars feel complete. Powdered sugar, raspberry jam, lemon juice, and zest create a smooth topping that adds color and flavor.
Directions
Step 1: Preheat the Oven
Preheat your oven to 350°F (175°C). This gives the bars an even heat from the beginning.
A fully heated oven helps the center set properly. It also helps the edges bake without drying out too much.
Let the oven warm while you prepare the baking dish and batter. This keeps the process smooth.
Step 2: Prepare the Baking Dish
Grease a baking dish before adding the batter. A 9×9 inch baking dish works well for these bars.
Greasing the dish helps prevent sticking. It also makes cutting and serving easier once the bars cool.
Set the prepared dish aside. You will pour the finished batter into it before baking.
Step 3: Soften the Butter
Make sure the ½ cup butter is softened before mixing. Softened butter blends more easily with sugar.
Butter that is too cold can make the batter uneven. Soft butter helps create a creamy base.
Use unsalted butter if you want better control over the flavor. The salt in the recipe will still balance the sweetness.
Step 4: Cream the Butter and Sugar
In a mixing bowl, combine the softened butter and ¾ cup granulated sugar. Beat until creamy.
This should take about 2–3 minutes with an electric mixer. The mixture should look smooth and slightly lighter.
This step creates the foundation of the bars. A creamy base helps the final texture become tender.
Step 5: Add the Eggs
Add 2 large eggs to the butter and sugar mixture. Room-temperature eggs mix best.
Beat until the eggs are fully incorporated. The mixture should look smooth and luscious.
If the mixture looks slightly uneven at first, keep mixing gently. It will come together.
Step 6: Add the Fresh Lemon Juice
Add 1 tablespoon fresh lemon juice. Freshly squeezed lemon juice gives the brightest flavor.
Mix until the lemon juice is blended into the batter. It should add a fresh aroma immediately.
If you are out of fresh lemon juice, bottled juice can work in a pinch. Fresh is still best for the strongest zestiness.
Step 7: Add the Salt
Add ¼ teaspoon salt to the bowl. This small amount helps enhance every flavor.
Salt balances the sugar and brightens the raspberry and lemon. It should be evenly mixed through the batter.
Do not skip it. Without salt, the bars can taste less complete.
Step 8: Add the Lemon Zest
Add the zest of ½ lemon. This gives the bars a fragrant citrus note.
The zest carries lemon aroma in a way juice alone cannot. It makes the bars smell fresh even after baking.
Mix until the zest is evenly distributed. Little flecks of zest should be spread through the batter.
Step 9: Add the Flour Gradually
Gradually add ¾ cup all-purpose flour to the batter. Stir gently as you add it.
You want the flour to disappear into the mixture without overmixing. Overmixing is not needed for soft bars.
If you want an extra light texture, sift the flour first. This can help it blend more smoothly.
Step 10: Stir Until Just Combined
Fold the flour into the batter until just combined. Stop once no dry flour streaks remain.
The batter should be soft and smooth. It should not be beaten heavily after the flour is added.
Gentle mixing helps keep the bars tender. This step is simple, but it matters.
Step 11: Prepare the Raspberries
Measure ¾ to 1 cup fresh raspberries. Use ripe, juicy berries for maximum flavor.
Look over the raspberries and remove any that are not good. The fruit should be fresh and bright.
If using frozen raspberries, thaw and drain them first. This helps avoid adding extra moisture to the batter.
Step 12: Fold in the Raspberries
Gently fold the raspberries into the batter. Use a light hand so they do not break apart too much.
The goal is to distribute them evenly. Each square should have some raspberry flavor.
Do not stir aggressively. Raspberries are delicate and can easily crush.
Step 13: Spread the Batter
Pour the batter into the prepared baking dish. Spread it out evenly.
Use a spatula or spoon to guide the batter into the corners. The surface should be level.
Even spreading helps the bars bake consistently. Try to keep the thickness the same across the dish.
Step 14: Bake the Bars
Place the baking dish in the preheated oven. Bake for 25 minutes.
The bars should become set in the center. The top should look baked rather than wet.
Keep an eye on them near the end. Baking time matters for clean slices.
Step 15: Test for Doneness
Insert a toothpick into the center. If it comes out clean, the bars are done.
If batter clings to the toothpick, bake a little longer and check again. The center should be set.
Do not overbake if the bars are already done. You want them tender, not dry.
Step 16: Make the Glaze
While the bars are baking, prepare the glaze. In a bowl, mix 1 cup powdered sugar, 1 tablespoon seedless raspberry jam, 1 tablespoon fresh lemon juice, and zest of ½ lemon.
Stir until smooth. The glaze should be thick yet pourable.
It should look bright and glossy. The jam gives it raspberry flavor without seeds.
Step 17: Adjust the Glaze Texture
Check the glaze after mixing. It should be smooth enough to spread over the bars.
If it feels too thick, continue stirring until it loosens. The lemon juice and jam should blend fully with the powdered sugar.
Do not make the glaze watery. It should sit on top of the bars like a soft finish.
Step 18: Cool the Bars
Once the bars are done, remove the baking dish from the oven. Let them cool in the dish for about 10–15 minutes.
This cooling time helps the bars settle. It also makes the glaze easier to spread without disappearing completely.
Do not cut them immediately. Warm bars need a little time to firm up.
Step 19: Glaze the Bars
After the bars have cooled, spread the glaze over the top. Cover the surface evenly.
Use gentle strokes so the top stays smooth. The glaze should create a pretty raspberry lemon finish.
Let the glaze settle slightly before cutting. This helps the squares look cleaner.
Step 20: Cut Into Squares
Cut the bars into squares once the glaze is spread. Use careful cuts for neat edges.
If the bars feel very soft, let them cool a little longer before slicing. Chilled bars cut even more cleanly.
Serve chilled or at room temperature. Both options bring out the sweet-tart flavor.
Step 21: Serve and Enjoy
Serve the Raspberry Lemonade Bars on their own or with a scoop of vanilla ice cream. They are refreshing, colorful, and sweet.
They also make a lovely treat with a cup of tea on a quiet afternoon. The lemon and raspberry keep every bite bright.
Use them for summer parties, picnics, family dinners, or snacks any time of day. They are easy to share and easy to love.
Serving Ideas
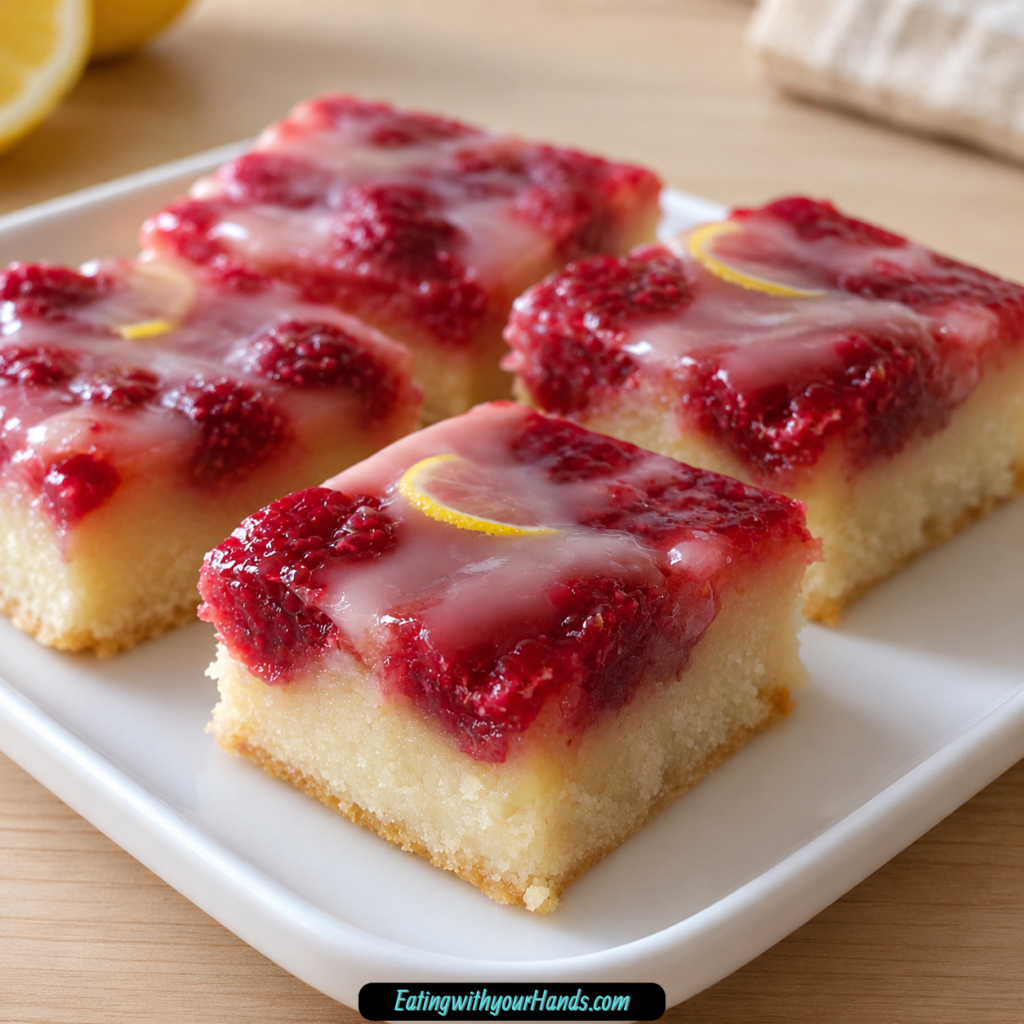
Serve Raspberry Lemonade Bars chilled or at room temperature. Both ways give you the sweet-tart flavor of lemon and raspberries.
Cut them into squares for easy serving. Their bright glaze makes each piece look pretty on a dessert tray.
They are delicious on their own. The lemon base, raspberries, and glaze already make a complete dessert.
Pair them with a scoop of vanilla ice cream for an extra treat. The creamy ice cream softens the tart lemon flavor.
Serve them with a cup of tea for a cozy afternoon. The citrus and berry flavor make the pairing feel refreshing.
These bars are perfect for summer parties, picnics, birthday gatherings, family dinners, weekend get-togethers, and lunchbox treats. They are bright enough for warm days but comforting enough for evenings at home.
Storage
Store leftover Raspberry Lemonade Bars in an airtight container in the refrigerator. They will keep for up to 1 week.
Keep them covered so the glaze stays fresh. The chilled storage also helps the bars hold their shape.
If stacking, place them carefully so the glaze does not smear too much. A single layer is best when possible.
Serve them cold from the refrigerator or let them come closer to room temperature. Either way works well.
Reheating
These bars do not need reheating. They are best served chilled or at room temperature.
Heating can soften the glaze and change the texture. The refreshing flavor is strongest when they stay cool.
If frozen, thaw them in the refrigerator overnight. Serve after they are fully thawed.
Keep the bars chilled until ready to serve if you want clean squares. This helps the glaze and base stay firm.
Freezing
Raspberry Lemonade Bars freeze beautifully. Wrap them tightly in plastic wrap and store them in an airtight container.
They will stay fresh for up to 3 months. This makes them useful for make-ahead treats or saved leftovers.
Thaw them in the refrigerator overnight before serving. This helps protect the texture and glaze.
Once thawed, serve chilled or at room temperature. They should still taste delicious.
Make-Ahead
These bars are a good make-ahead dessert. Bake them, cool them, glaze them, and store them in the refrigerator.
They will keep in an airtight container for up to 1 week. This makes them easy for parties and picnics.
For longer storage, freeze them for up to 3 months. Wrap tightly and thaw in the refrigerator overnight before serving.
Make-ahead storage is especially useful for lunches, gatherings, and busy weekends. The bars are ready when you need a bright dessert.
Helpful Notes for Best Results
Use fresh lemon juice when possible. It gives the bars the best zesty flavor.
Do not skip the lemon zest. It adds fragrance and makes the lemon flavor feel fuller.
Use room-temperature eggs for better mixing. They blend more smoothly into the batter.
Fold in the flour gently. Overmixing is not needed and can affect the texture.
Fold the raspberries carefully. They are delicate and can break apart if stirred too hard.
If using frozen raspberries, thaw and drain them first. This prevents excess moisture in the batter.
For richer flavor, substitute half of the granulated sugar with brown sugar. For deeper flavor, add 1 teaspoon vanilla extract.
For a dairy-free version, use coconut oil instead of butter. To make them nut-free, make sure the flour is processed in a nut-free facility.
Variations
Mango Raspberry Lemonade Bars
Add diced mango to the filling. This gives the bars a tropical twist.
Mango adds sweet fruit flavor. It pairs well with lemon and raspberry.
Pineapple Raspberry Lemonade Bars
Add diced pineapple to the filling. This makes the bars feel extra sunny.
Pineapple brings a sweet-tart tropical note. It works well for summer parties.
Blueberry Lemonade Bars
Use blueberries instead of raspberries. This creates a different berry flavor.
Blueberries make the bars softer and deeper in flavor. The lemon still keeps them bright.
Gluten-Free Raspberry Lemonade Bars
Use a 1:1 gluten-free flour blend. This makes the bars gluten-free when the other ingredients fit your needs.
The texture may vary slightly. Follow the same baking and cooling steps.
Lavender Raspberry Lemon Bars
Add a hint of lavender. It gives the bars a floral note.
Lavender pairs beautifully with lemon. Use it lightly so it does not overpower the fruit.
Chocolate Glaze Raspberry Bars
Drizzle with a chocolate glaze instead of raspberry glaze. This creates a rich contrast.
Chocolate makes the dessert feel more decadent. It changes the bright finish into something deeper.
Limeade Raspberry Bars
Swap the lemon juice for lime juice. This creates a zesty limeade version.
Lime gives the bars a sharper citrus flavor. It is a refreshing twist.
Brown Sugar Raspberry Bars
Replace half of the granulated sugar with brown sugar. This gives the bars a richer flavor.
Brown sugar adds depth. It changes the sweetness slightly.
Vanilla Raspberry Lemon Bars
Add 1 teaspoon vanilla extract. It gives the bars a lovely depth of flavor.
Vanilla softens the tartness. It pairs nicely with raspberries and lemon.
Dairy-Free Raspberry Lemon Bars
Use coconut oil instead of butter. This makes the bars dairy-free.
The flavor and texture may change. Follow the same method and watch the bake.
Strawberry Lemonade Bars
Use chopped strawberries for a different fruity twist. Strawberries give the bars a sweeter berry flavor.
This variation keeps the lemonade-style brightness. It is a fun option when raspberries are not available.
Troubleshooting
Why Are My Bars Too Soft?
The center may not have baked long enough. Bake for 25 minutes or until the center is set and a toothpick comes out clean.
Let the bars cool before cutting. Cooling helps them firm up.
Why Are My Bars Dry?
They may have baked too long. Remove them when the center is set and the toothpick test is clean.
Do not keep baking after they are done. The bars should stay tender.
Why Did My Raspberries Break Apart?
The raspberries may have been stirred too firmly. Fold them gently into the batter.
If using very ripe berries, they may break more easily. That is okay, but gentle mixing helps.
Why Is My Glaze Too Thick?
The glaze should be thick yet pourable. Make sure the powdered sugar, raspberry jam, lemon juice, and zest are fully mixed.
Keep stirring until smooth. The jam needs to blend into the powdered sugar.
Why Is My Glaze Too Thin?
The glaze may have too much liquid. It should not be watery.
Let it sit briefly if needed before spreading. It should coat the top of the bars.
Why Are My Frozen Raspberries Making the Batter Wet?
Frozen raspberries need to be thawed and drained before using. Extra moisture can affect the texture.
Drain them well before folding into the batter. This keeps the bars from becoming too wet.
Frequently Asked Questions
Can I Freeze Raspberry Lemonade Bars?
Yes, these bars freeze beautifully. Wrap them tightly in plastic wrap and store them in an airtight container.
They will stay fresh for up to 3 months. Thaw them in the refrigerator overnight before serving.
How Do I Substitute Ingredients?
Granulated sugar can be swapped with brown sugar for a deeper flavor. You can also substitute half of the granulated sugar with brown sugar for richer flavor.
If you are out of fresh lemon juice, bottled juice works in a pinch. Fresh lemon juice is still best for that zesty kick.
What Can I Use Instead of Fresh Raspberries?
Frozen raspberries work if fresh raspberries are not available. Thaw and drain them first to avoid excess moisture.
You can also use blueberries or chopped strawberries for a different fruity twist. Each fruit changes the final flavor.
Can I Make These Bars Gluten-Free?
Yes, use a 1:1 gluten-free flour blend. Make sure the other ingredients fit your needs.
The texture may vary depending on the flour blend. Bake until the center is set.
Can I Make These Bars Dairy-Free?
Yes, use coconut oil instead of butter. This makes the bars dairy-free.
The texture and flavor may change. Follow the same steps and watch the baking time.
Can I Use Lime Instead of Lemon?
Yes, swap the lemon juice for lime juice for a limeade version. The flavor will be sharper and zesty.
You can use this when you want a different citrus flavor. It keeps the same bright bar style.
How Should I Serve Them?
Serve the bars chilled or at room temperature. Cut them into squares.
They are delicious on their own or with vanilla ice cream. They also pair nicely with tea.
Why This Recipe Works So Well
Raspberry Lemonade Bars work because they bring together two lively flavors in a soft, sliceable dessert. Lemon adds tart brightness, and raspberries add sweet fruit flavor.
The butter and sugar create a tender base. Eggs help the bars set and hold together.
Fresh lemon juice and zest give the bars their sunny flavor. The zest makes the lemon taste more fragrant.
The raspberries add bursts of fruit throughout the batter. Folding them gently keeps the texture pretty and fresh.
The glaze adds another layer of raspberry and lemon. Powdered sugar makes it smooth, seedless raspberry jam deepens the berry flavor, and lemon juice keeps it bright.
The recipe is also flexible. Mango, pineapple, blueberries, lavender, chocolate glaze, lime juice, brown sugar, vanilla, coconut oil, frozen raspberries, and chopped strawberries can all create different versions while keeping the same sweet-tart spirit.
Final Thoughts
Raspberry Lemonade Bars are bright, tender, colorful, and full of sweet-tart flavor. They turn butter, sugar, eggs, lemon, flour, raspberries, powdered sugar, raspberry jam, and lemon zest into a dessert that feels refreshing and joyful.
I love how these bars capture that summer-dessert feeling in such a simple way. The batter comes together quickly, the raspberries fold in like little ruby bursts, and the glaze gives the top a smooth, glossy finish.
Serve them chilled or at room temperature, with vanilla ice cream, tea, or a simple plate of squares for sharing. Whether you make them for a picnic, birthday party, family dinner, weekend gathering, lunchbox treat, or quiet evening at home, these Raspberry Lemonade Bars bring sunshine to every bite.
Raspberry Lemonade Bars

These Raspberry Lemonade Bars are bright, sweet, tangy, and soft with fresh raspberries folded into a lemony base and finished with a pretty raspberry-lemon glaze. The combination of lemon juice, lemon zest, seedless raspberry jam, and fresh raspberries makes each bar refreshing enough for spring and summer, but simple enough for any everyday dessert tray.
Recipe Details
- Prep Time: 15 minutes
- Cook Time: 25 minutes
- Total Time: 40 minutes
- Course: Dessert
- Cuisine: American
- Servings: 9 bars
- Calories: 250 kcal
Equipment
- Mixing bowl
- baking dish
Ingredients
Base Ingredients
- ¾ cup all purpose flour
- zest of ½ lemon lemon zest
- ¼ teaspoon salt
- 1 tablespoon lemon juice
- 2 pieces eggs
- ¾ cup granulated sugar
- ½ cup butter softened
Raspberry Topping
- ¾-1 cup fresh raspberries
Glaze Ingredients
- zest of ½ lemon lemon zest
- 1 tablespoon lemon juice
- 1 tablespoon seedless raspberry jam
- 1 cup powdered sugar
Instructions
Step 1: Prepare the Oven and Dish
Preheat your oven to 350°F (175°C). Grease a baking dish.
Step 2: Cream the Butter and Sugar
In a mixing bowl, combine the softened butter and granulated sugar until creamy.
Step 3: Add the Lemon and Eggs
Add the eggs, lemon juice, salt, and lemon zest. Mix well until combined.
Step 4: Add the Flour
Gradually add the all purpose flour to the mixture and stir until combined.
Step 5: Fold in the Raspberries
Fold in the fresh raspberries gently so they are distributed through the batter without being crushed too much.
Step 6: Spread the Batter
Pour the batter into the prepared baking dish and spread it evenly.
Step 7: Bake the Bars
Bake for 25 minutes, or until set.
Step 8: Make the Glaze
While the bars are baking, prepare the glaze by mixing the powdered sugar, seedless raspberry jam, lemon juice, and lemon zest in a bowl until smooth.
Step 9: Cool the Bars
Once the bars are done, let them cool before adding the glaze.
Step 10: Glaze and Slice
Spread the glaze over the top of the cooled bars, then cut into squares.
Notes
For a more intense raspberry flavor, you can add more fresh raspberries on top of the bars before baking.
Serving Suggestions
- Serve chilled or at room temperature as a refreshing dessert bar.
- Add to spring brunch tables, summer cookouts, baby showers, or afternoon tea spreads.
- Pair with iced tea, lemonade, coffee, or cold milk.
- Cut into 9 bars for neat, even servings.
- Add more fresh raspberries on top before baking if you want a stronger raspberry flavor.
Storage
How to Store
Store the bars in an airtight container after they have cooled and the glaze has set.
Best Texture Tip
Let the bars cool completely before spreading the glaze so the topping stays smooth and does not melt into the warm base.
Serving Tip
For cleaner squares, allow the glaze to set before slicing and serving.

Fernando is the creator and writer behind the food blog Eating with your Hands. Living and working in cities like Paris, Barcelona, and Berlin, and being married to a Canadian foodie, has given Fernando a passion and interest in food and inspired him to run EWYH.