
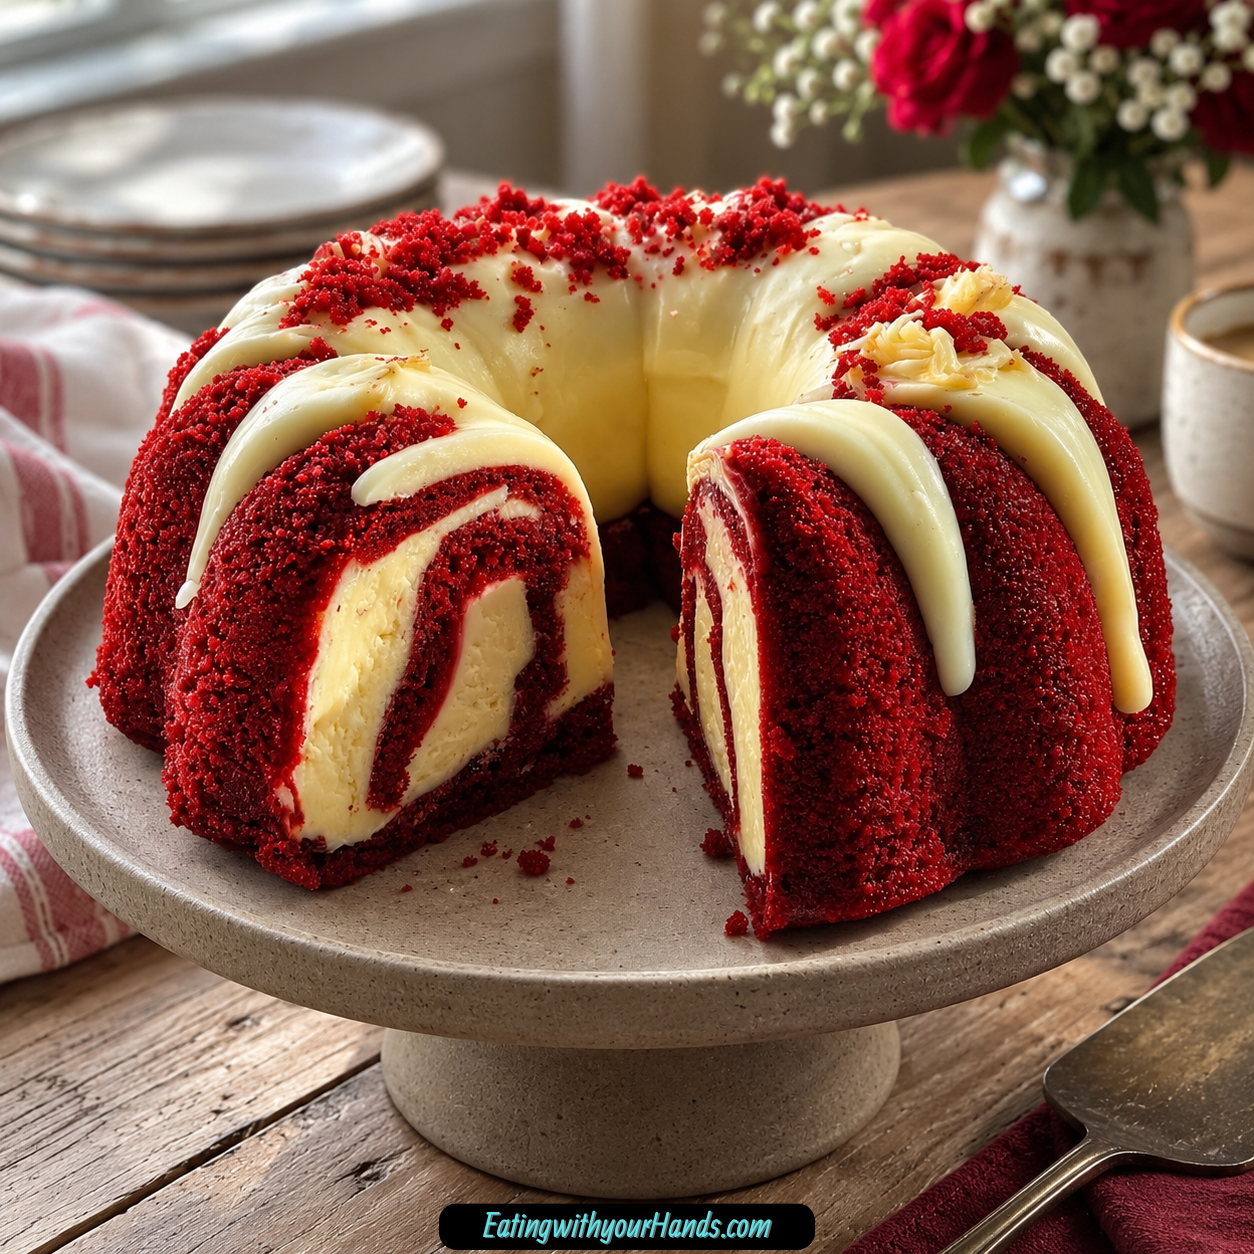
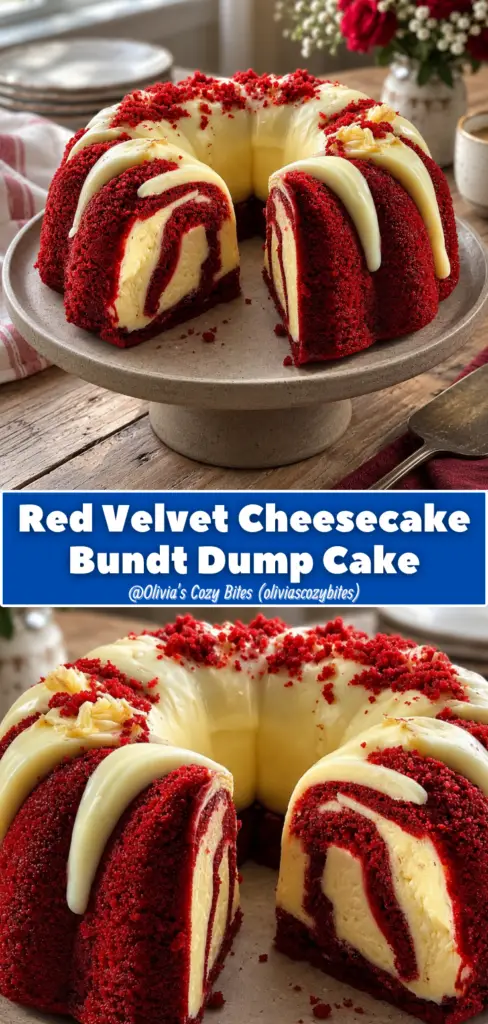
Red Velvet Cheesecake Bundt Dump Cake is the kind of dessert that feels dramatic, cozy, and wonderfully easy all at the same time. It has the bold red color of red velvet cake, a creamy cheesecake surprise tucked inside, and a beautiful bundt shape that makes it look like something made for a celebration.
This is a cake for the moments when you want a dessert that looks impressive without asking for complicated baking techniques. It starts with boxed red velvet cake mix, then becomes richer with sweetened condensed milk, melted butter, eggs, and a smooth cream cheese filling.
The result is soft, sweet, creamy, and eye-catching. Every slice shows off the deep red cake and the hidden cheesecake layer, making it feel special enough for holidays, birthdays, family gatherings, or a quiet night when dessert needs to feel a little more joyful.
There is something nostalgic about red velvet desserts. The color alone can make a table feel festive, and when that color is paired with a creamy cheesecake center, the whole cake feels like a sweet surprise.
This recipe keeps things simple while still giving you a dessert that people notice. The bundt pan does most of the presentation work, and the filling makes each slice feel more indulgent than a plain cake.
You can serve it slightly warm for the best texture, or let it chill and enjoy it later from the refrigerator. A dollop of whipped cream, a drizzle of cream cheese frosting, or a few fresh berries can turn it into a dessert that feels even more finished.
Whether you make it for a holiday table, a family birthday, or a weekend treat, Red Velvet Cheesecake Bundt Dump Cake brings color, sweetness, and comfort to the plate. It is simple, freezer-friendly, family-friendly, and beautiful enough to become the dessert everyone remembers.
Table of Contents
- Why You’ll Love This Red Velvet Cheesecake Bundt Dump Cake
- Recipe Details
- Ingredients
- For the Red Velvet Cake
- For the Cheesecake Layer
- Ingredient Notes
- Optional Swaps, Variations, Add-Ins, and Serving Ideas
- Chocolate Chip Red Velvet Bundt Cake
- Almond Red Velvet Cheesecake Cake
- Gluten-Free Red Velvet Bundt Cake
- Greek Yogurt Cheesecake Layer
- Festive Nut Topping
- Sprinkle Topping
- Whipped Cream Finish
- Cream Cheese Frosting Drizzle
- Fresh Berry Serving
- Extra Creamy Cheesecake Layer
- Store-Bought Frosting Shortcut
- Coconut Sugar Option
- Dairy-Free Direction
- Flavor-Boosted Batter
- Why This Recipe Works
- Directions
- Step 1: Preheat the Oven and Prepare the Bundt Pan
- Step 2: Let Key Ingredients Come to the Right Texture
- Step 3: Make the Red Velvet Cake Batter
- Step 4: Make the Cheesecake Mixture
- Step 5: Add the First Layer of Cake Batter
- Step 6: Add the Cheesecake Layer
- Step 7: Add the Remaining Cake Batter
- Step 8: Bake the Cake
- Step 9: Cool in the Pan
- Step 10: Invert the Cake
- Step 11: Serve Slightly Warm
- Step 12: Add Optional Toppings
- Step 13: Cool Leftovers Before Storing
- Step 14: Refrigerate Leftovers
- Step 15: Freeze for Longer Storage
- Serving Ideas
- Storage
- Freezing
- Make-Ahead
- Helpful Notes for Best Results
- Variations
- Chocolate Chip Red Velvet Cheesecake Cake
- Almond Red Velvet Cheesecake Cake
- Gluten-Free Red Velvet Cheesecake Cake
- Greek Yogurt Cheesecake Cake
- Festive Sprinkle Bundt Cake
- Nut-Topped Red Velvet Cake
- Whipped Cream Red Velvet Cake
- Cream Cheese Frosting Drizzle Cake
- Fresh Berry Red Velvet Cake
- Dairy-Free Red Velvet Cheesecake Cake
- Coconut Sugar Cheesecake Layer
- Extra Creamy Cheesecake Layer
- Troubleshooting
- Frequently Asked Questions
- Can I freeze Red Velvet Cheesecake Bundt Dump Cake?
- What can I use instead of cream cheese?
- How do I know when the cake is done?
- Can I use a gluten-free cake mix?
- Can I add chocolate chips?
- What toppings go well with this cake?
- How long does this cake last in the refrigerator?
- Can I make this cake ahead of time?
- Why This Recipe Works So Well
- Final Thoughts
- Red Velvet Cheesecake Bundt Dump Cake
Why You’ll Love This Red Velvet Cheesecake Bundt Dump Cake
This cake has a quick prep time. You can get it ready for the oven in just 15 minutes.
It uses minimal ingredients. A boxed red velvet cake mix keeps the process simple, while sweetened condensed milk and cream cheese make the cake feel rich.
It is family-friendly. Kids, adults, and grandparents can all enjoy the soft red velvet cake and creamy cheesecake surprise.
It is freezer-friendly. Leftovers can be wrapped tightly and saved for later.
It has an impressive presentation. The bundt shape and vibrant red color make it a stunning centerpiece.
It works for many occasions. Serve it for holidays, birthdays, cozy winter nights, or a weekday treat that feels extra special.
Recipe Details
Red Velvet Cheesecake Bundt Dump Cake bakes at 350°F (175°C). The baking time is about 40 minutes.
The cake is done when a toothpick inserted into the center comes out clean. A few crumbs clinging to the toothpick are okay, but there should not be wet batter.
The prep time is 15 minutes. The cake batter and cheesecake filling both come together quickly before being layered in the bundt pan.
The bundt pan should be greased well. Non-stick spray or generous buttering helps the cake release more easily after baking.
The cake batter is made with 1 box red velvet cake mix, 1 14-ounce can sweetened condensed milk, ½ cup unsalted butter melted and cooled slightly, and 3 large eggs.
Duncan Hines red velvet cake mix is mentioned as a favorite for its moist texture. Room-temperature eggs work best for a smooth batter.
The cheesecake mixture is made with 1 8-ounce package softened cream cheese, ½ cup granulated sugar, and 1 teaspoon vanilla extract. The cream cheese should be softened so it blends smoothly.
Half of the red velvet batter goes into the bundt pan first. The cheesecake mixture is spooned over it, then the remaining cake batter is spread gently on top.
After baking, the cake cools in the pan for about 10 minutes. Then it is carefully inverted onto a plate.
Serve the cake slightly warm for the best texture. It can be served plain or finished with whipped cream, cream cheese frosting, or fresh berries.
Store leftovers in an airtight container in the refrigerator for up to 5 days. For longer storage, wrap tightly and freeze for up to 3 months.
Ingredients
For the Red Velvet Cake
- 1 box red velvet cake mix (I love using Duncan Hines for its moist texture.)
- 1 14-ounce can sweetened condensed milk (This adds creaminess and sweetness – no substitutes here!)
- ½ cup unsalted butter, melted (Make sure it’s cooled slightly before mixing.)
- 3 large eggs (Room temperature eggs work best for a smooth batter.)
For the Cheesecake Layer
- 1 8-ounce package cream cheese, softened (Don’t skip softening it; it makes blending easier.)
- ½ cup granulated sugar (Adjust to taste if you prefer it sweeter.)
- 1 teaspoon vanilla extract (Pure vanilla extract is always worth it for flavor.)
Ingredient Notes
Red velvet cake mix creates the base of this bundt dump cake. A boxed mix makes the recipe simple while still giving the cake its signature color and flavor.
Duncan Hines is mentioned as a favorite because of its moist texture. You can use the boxed red velvet cake mix that works best for you.
Sweetened condensed milk adds creaminess and sweetness to the cake batter. The recipe specifically notes no substitutes for this ingredient.
Unsalted butter adds richness. It should be melted, then cooled slightly before mixing so it blends smoothly without being too hot.
Room-temperature eggs help create a smoother batter. They mix more evenly with the cake mix, condensed milk, and butter.
Softened cream cheese is essential for the cheesecake layer. If it is too cold, the filling can become lumpy and harder to spread.
Granulated sugar sweetens the cheesecake mixture. It can be adjusted to taste if you prefer a sweeter filling.
Vanilla extract gives the cheesecake layer warmth and flavor. Pure vanilla extract is noted as worth using for the best flavor.
Optional Swaps, Variations, Add-Ins, and Serving Ideas
Chocolate Chip Red Velvet Bundt Cake
Mix chocolate chips into the cake batter before baking. This gives the cake a chocolate twist.
The chocolate chips add texture and extra sweetness. They also make the red velvet flavor feel richer.
Almond Red Velvet Cheesecake Cake
Add a splash of almond extract for an extra layer of flavor. This changes the flavor profile slightly while keeping the cake festive.
Almond extract pairs well with sweet cake and creamy filling. Use this variation when you want a more distinctive flavor.
Gluten-Free Red Velvet Bundt Cake
Use a gluten-free red velvet cake mix. This creates a gluten-free version of the cake.
The texture may vary depending on the mix. Follow the same layering and baking method.
Greek Yogurt Cheesecake Layer
Substitute the cream cheese with Greek yogurt for a lighter version. Greek yogurt will add a slight tanginess.
The texture will be different from the cream cheese version. Use this option if you want a lighter cheesecake-style center.
Festive Nut Topping
Add crushed nuts on top for festive occasions. They bring a crunchy finish to the cake.
This works well if nut allergies are not a concern. The nuts can make the cake look more decorated.
Sprinkle Topping
Add sprinkles on top for festive occasions. Sprinkles make the bundt cake feel more fun and colorful.
This is a simple way to match the cake to holidays, birthdays, or parties. Add them as part of the final presentation.
Whipped Cream Finish
Serve slices with whipped cream. It adds a soft, creamy topping without needing much extra work.
Whipped cream is especially nice when the cake is served slightly warm. It makes each slice feel more dessert-like.
Cream Cheese Frosting Drizzle
Drizzle the cake with cream cheese frosting. This gives the dessert a classic red velvet-style finish.
Use this when you want a sweeter, more polished presentation. A drizzle also looks beautiful over the bundt shape.
Fresh Berry Serving
Serve the cake with fresh berries. They add color and a lovely touch beside the red velvet cake.
Berries make the plate look bright and special. They work well for gatherings or holidays.
Extra Creamy Cheesecake Layer
For extra creaminess, add a splash of heavy cream to the cheesecake mixture. This can make the filling softer and richer.
Use only a splash, as noted. The cheesecake layer should still be thick enough to spoon into the bundt pan.
Store-Bought Frosting Shortcut
If you are short on time, use store-bought frosting instead of making whipped cream. This keeps the serving step simple.
A drizzle of frosting can make the cake feel finished quickly. It is helpful for busy days.
Coconut Sugar Option
Swap the granulated sugar for coconut sugar if you prefer a less processed option. This changes the flavor of the cheesecake layer.
The color and sweetness may vary. Use it if that flavor fits your preference.
Dairy-Free Direction
To make the cake dairy-free, use a dairy-free cream cheese alternative and plant-based butter. These swaps change the cheesecake layer and cake batter.
The final texture and flavor may vary depending on the products used. Choose alternatives that fit your needs.
Flavor-Boosted Batter
Add a pinch of salt to the batter to enhance the flavors. This is a simple optional note for deeper balance.
The salt should not overpower the cake. It only supports the sweetness and richness.
Why This Recipe Works
Red Velvet Cheesecake Bundt Dump Cake works because it uses simple ingredients in a layered way. The cake batter creates a vibrant base, while the cheesecake mixture bakes into a creamy center.
The boxed cake mix keeps the process easy. It gives the cake structure, color, and flavor without requiring a long list of dry ingredients.
Sweetened condensed milk adds richness and sweetness. It makes the batter feel smooth and velvety.
Melted butter gives the cake a richer taste. Cooling it slightly before mixing helps it blend better with the other ingredients.
The eggs help the cake bake properly. Room-temperature eggs create a smoother batter.
The cheesecake layer adds surprise. Cream cheese, sugar, and vanilla become a creamy center that makes each slice more memorable.
The bundt pan gives the cake a beautiful shape. It turns a simple batter-and-filling dessert into a centerpiece.
Directions
Step 1: Preheat the Oven and Prepare the Bundt Pan
Preheat your oven to 350°F (175°C). Grease the bundt pan very well with non-stick spray or butter so the cake releases more easily later.
Make sure to coat all the curves and ridges of the pan. A well-greased pan is important because the bundt shape has many areas where cake can stick.
Step 2: Let Key Ingredients Come to the Right Texture
Use room-temperature eggs for the smoothest batter. Let the cream cheese soften before making the cheesecake mixture.
Melt the unsalted butter, then let it cool slightly before mixing. The butter should be liquid but not too hot.
Step 3: Make the Red Velvet Cake Batter
In a mixing bowl, combine 1 box red velvet cake mix, 1 14-ounce can sweetened condensed milk, ½ cup melted unsalted butter, and 3 large eggs. Mix with a whisk or electric mixer until everything is well combined.
The batter should look smooth and velvety with no dry streaks. If it looks a bit runny, do not worry, because that is the texture wanted here.
Step 4: Make the Cheesecake Mixture
In another bowl, beat 1 softened 8-ounce package cream cheese with ½ cup granulated sugar and 1 teaspoon vanilla extract. Mix until the filling is smooth and creamy.
Take your time so the mixture becomes lump-free. If using an electric mixer, start on low speed to avoid splattering.
Step 5: Add the First Layer of Cake Batter
Pour half of the red velvet cake batter into the prepared bundt pan. Spread it gently so it is evenly distributed.
This first layer creates the base around the cheesecake filling. Try to keep the batter level without pressing too hard.
Step 6: Add the Cheesecake Layer
Spoon the cream cheese mixture over the cake batter. Dollop it around the pan and spread it slightly.
It does not have to look perfect. Just make sure the cheesecake mixture is distributed so each slice gets some creamy filling.
Step 7: Add the Remaining Cake Batter
Pour the remaining red velvet cake batter over the cheesecake layer. Use a spatula to smooth it gently over the top.
Try to cover the cheesecake layer without mixing the two layers together too much. The cake will settle as it bakes.
Step 8: Bake the Cake
Place the bundt pan in the preheated oven. Bake for about 40 minutes.
The cake is done when a toothpick inserted into the center comes out clean. A few moist crumbs are fine, but avoid wet batter.
Step 9: Cool in the Pan
Remove the cake from the oven and let it cool in the pan for about 10 minutes. This helps it firm up before turning it out.
Do not invert it immediately. The short cooling time makes the cake easier to release.
Step 10: Invert the Cake
Carefully invert the bundt cake onto a plate. If needed, give the pan a gentle shake to help release the cake.
Lift the pan away slowly. The cake should hold its beautiful bundt shape.
Step 11: Serve Slightly Warm
Slice the Red Velvet Cheesecake Bundt Dump Cake while it is still slightly warm for the best texture. The cake will be soft, and the cheesecake layer will feel creamy.
Serve it plain if you want the red velvet and cheesecake flavors to stand on their own. It is already rich and sweet.
Step 12: Add Optional Toppings
For an extra touch, serve with whipped cream or a drizzle of cream cheese frosting. Fresh berries can also add a lovely finish.
You can add crushed nuts or sprinkles on top for festive occasions. Use toppings that match the gathering.
Step 13: Cool Leftovers Before Storing
Let leftover cake cool before placing it into storage. This keeps extra moisture from collecting in the container.
Once cooled, move leftovers into an airtight container. Refrigeration keeps the cheesecake layer fresh.
Step 14: Refrigerate Leftovers
Store leftovers in an airtight container in the refrigerator for up to 5 days. Keep the cake covered so it stays moist.
Serve chilled or warm slightly before eating. Warming it a little can bring back that fresh-baked taste.
Step 15: Freeze for Longer Storage
For longer storage, wrap the cake tightly and freeze for up to 3 months. Plastic wrap and foil work well for protecting the cake.
Thaw in the refrigerator before serving. Warm it slightly if you want a softer, just-baked texture.
Serving Ideas
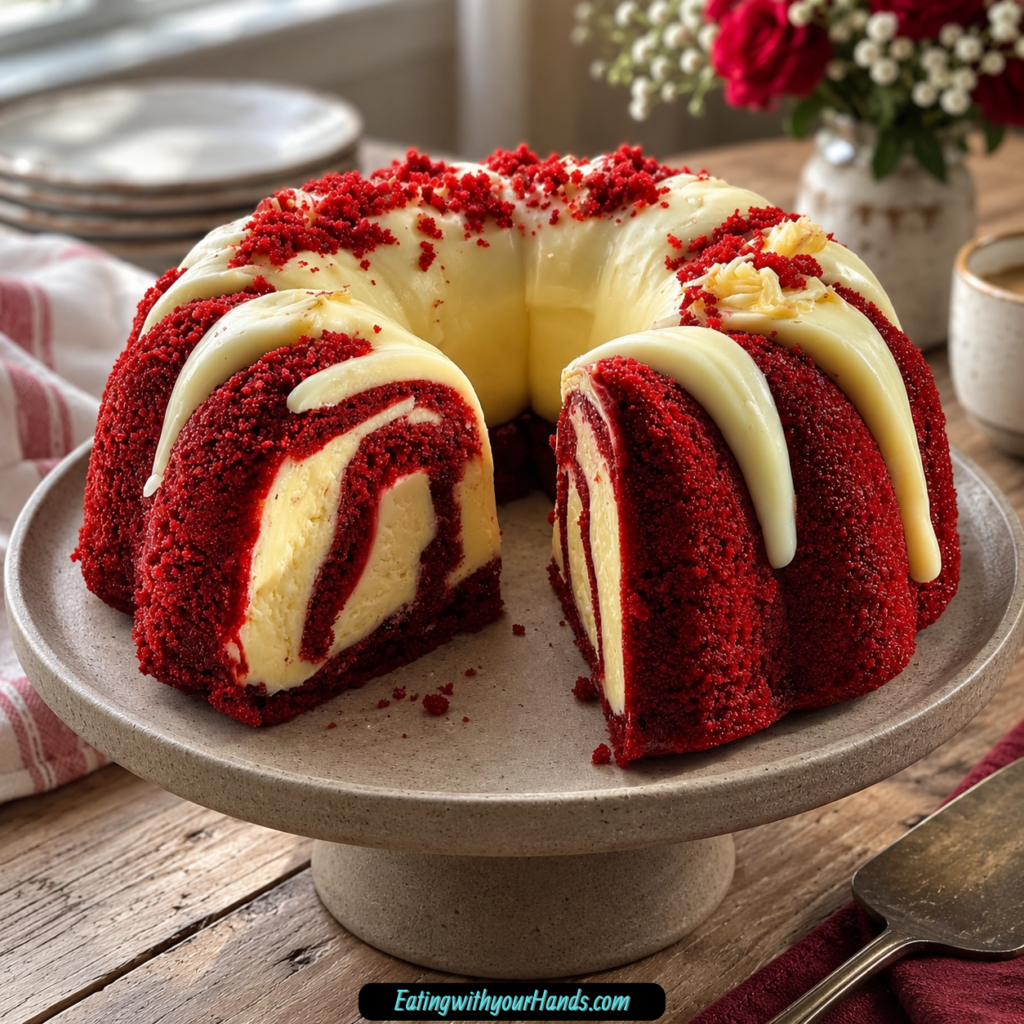
Red Velvet Cheesecake Bundt Dump Cake is best sliced while still slightly warm if you want the softest texture. The cake feels tender, and the cheesecake center tastes creamy and rich.
You can serve it plain because the red velvet cake and cheesecake filling already make it flavorful. The vibrant color and bundt shape make it look beautiful without much extra decoration.
Whipped cream is a simple topping that makes each slice feel softer. It is especially nice for family birthdays, holidays, or cozy winter nights.
A drizzle of cream cheese frosting gives the cake a more classic red velvet finish. It also makes the bundt cake look polished on a dessert table.
Fresh berries add a lovely touch. They bring color and freshness beside the sweet cake.
For festive occasions, add crushed nuts or sprinkles on top. These toppings make the cake feel more celebratory.
This cake works well as a centerpiece dessert. The shape, color, and cheesecake surprise make it feel more impressive than the effort required.
Storage
Store leftover Red Velvet Cheesecake Bundt Dump Cake in an airtight container in the refrigerator. It will keep for up to 5 days.
Because the cake has a cheesecake center, refrigeration is important. Keep it covered so the cake stays moist and fresh.
You can enjoy leftovers chilled or warm them slightly. A gentle warm-up helps bring back a fresh-baked texture.
Freezing
This cake can be frozen for up to 3 months. Wrap it tightly to protect it during freezing.
Use plastic wrap and aluminum foil for the best protection. This helps keep the cake from drying out.
Thaw the cake in the refrigerator before serving. Once thawed, warm it slightly if you want it to taste closer to fresh-baked.
Make-Ahead
Red Velvet Cheesecake Bundt Dump Cake can be made ahead because it stores well. Bake it, cool it, and keep it refrigerated until ready to serve.
You can also freeze leftovers or the cake for longer storage. This makes it useful for planning ahead before gatherings.
Add toppings like whipped cream, frosting drizzle, berries, nuts, or sprinkles close to serving. This keeps the presentation fresh and pretty.
Helpful Notes for Best Results
Grease the bundt pan very well. The shape is beautiful, but it needs good greasing so the cake releases cleanly.
Use room-temperature eggs for a smoother batter. Cold eggs can make mixing less even.
Let the melted butter cool slightly before adding it. Butter that is too hot can affect the batter texture.
Soften the cream cheese fully before mixing the cheesecake layer. Soft cream cheese blends more easily and helps avoid lumps.
Mix the cake batter until there are no dry streaks. It should look smooth and velvety.
Do not worry if the batter looks a little runny. That is expected for this cake.
Spoon the cheesecake layer gently over the first layer of batter. It does not need to be perfect because it will settle as it bakes.
Check the cake with a toothpick. A clean toothpick or a few moist crumbs means it is ready, but wet batter means it needs more time.
Variations
Chocolate Chip Red Velvet Cheesecake Cake
Mix chocolate chips into the cake batter before baking. This gives the cake a richer chocolate twist.
The chocolate chips add texture and sweetness. They work well with the red velvet cake and cheesecake center.
Almond Red Velvet Cheesecake Cake
Add a splash of almond extract for an extra layer of flavor. This gives the cake a slightly different aroma.
The almond note makes the dessert feel more special. It is a simple way to change the flavor.
Gluten-Free Red Velvet Cheesecake Cake
Use a gluten-free red velvet cake mix. This creates a gluten-free version.
The texture may vary depending on the mix. Bake by the same toothpick cue.
Greek Yogurt Cheesecake Cake
Substitute the cream cheese with Greek yogurt for a lighter version. Greek yogurt gives the filling a slight tanginess.
The texture will be different from traditional cream cheese. Use it when you want a lighter option.
Festive Sprinkle Bundt Cake
Add sprinkles on top for festive occasions. This makes the cake feel party-ready.
Sprinkles are especially fun for birthdays or holidays. Add them as a finishing touch.
Nut-Topped Red Velvet Cake
Add crushed nuts on top for festive occasions. They add crunch and visual appeal.
Use this only when nut allergies are not a concern. The nuts give the cake more texture.
Whipped Cream Red Velvet Cake
Serve the cake with whipped cream. It makes each slice soft and creamy.
This is an easy topping when you do not want to make frosting. It pairs well with the cheesecake center.
Cream Cheese Frosting Drizzle Cake
Drizzle the cake with cream cheese frosting. This adds sweetness and a classic red velvet finish.
The drizzle looks beautiful over the bundt shape. Use store-bought frosting if you are short on time.
Fresh Berry Red Velvet Cake
Serve slices with fresh berries. Berries add color and a lovely touch.
This is a simple way to brighten the dessert plate. It works well for gatherings.
Dairy-Free Red Velvet Cheesecake Cake
Use a dairy-free cream cheese alternative and plant-based butter. This creates a dairy-free direction.
The texture and flavor may change. Use products that fit your needs.
Coconut Sugar Cheesecake Layer
Swap the granulated sugar for coconut sugar if you prefer a less processed option. This changes the flavor of the cheesecake layer.
The sweetness and color may vary. Use it if you enjoy coconut sugar.
Extra Creamy Cheesecake Layer
Add a splash of heavy cream to the cheesecake mixture for extra creaminess. This makes the filling a little richer.
Use only a splash. The mixture still needs to be spoonable and creamy.
Troubleshooting
The Cake Sticks to the Bundt Pan
Grease the bundt pan very well before adding batter. Make sure to coat all the curves and center tube.
Let the cake cool in the pan for about 10 minutes before inverting. This helps it firm up and release more easily.
The Batter Looks Runny
The batter may look a bit runny, and that is okay. The recipe notes that this is the texture you want.
Mix until no dry streaks remain. Then layer the batter and cheesecake mixture as directed.
The Cheesecake Mixture Has Lumps
Use softened cream cheese. Beat it with the granulated sugar and vanilla extract until smooth and creamy.
Take your time with this step. A lump-free filling gives the cake the best texture.
The Cheesecake Layer Looks Uneven
Do not worry if the cheesecake mixture looks uneven when spooned over the batter. It will bake into the cake.
Dollop it around and spread it slightly. It does not have to be perfect.
The Cake Is Not Done Yet
Insert a toothpick into the center of the cake. It should come out clean or with a few moist crumbs.
If there is wet batter on the toothpick, bake for a few more minutes. Check again before removing it from the oven.
The Cake Seems Dry
Avoid overbaking. Bake for about 40 minutes and use the toothpick test.
A few moist crumbs are okay. Waiting for a completely dry toothpick can lead to a drier cake.
The Cake Breaks When Inverted
Let it cool in the pan for about 10 minutes first. This helps the cake firm up.
Invert carefully onto a plate and lift the pan slowly. A gentle shake can help release it if needed.
The Cake Needs More Flavor
Use pure vanilla extract in the cheesecake layer. You can also add a pinch of salt to the batter to enhance the flavors.
A splash of almond extract is another variation. Toppings like whipped cream, cream cheese frosting, or fresh berries can also add flavor.
The Cake Needs to Be Dairy-Free
Use a dairy-free cream cheese alternative and plant-based butter. These are the listed dairy-free swaps.
The final texture may vary. Choose products that work well for baking.
The Cake Needs Longer Storage
Wrap it tightly and freeze for up to 3 months. Thaw in the refrigerator before serving.
Warm slightly before serving if you want a fresh-baked taste. Store refrigerated after thawing.
Frequently Asked Questions
Can I freeze Red Velvet Cheesecake Bundt Dump Cake?
Yes, you can freeze this cake. Wrap it tightly in plastic wrap and then aluminum foil to keep it fresh.
It will last in the freezer for up to 3 months. When ready to enjoy, thaw it in the refrigerator overnight.
What can I use instead of cream cheese?
Greek yogurt can be used as a substitute for cream cheese if you want a lighter version. It will give a creamy texture with a slight tanginess.
A dairy-free cream cheese alternative can also be used. This is a good option for a dairy-free direction.
How do I know when the cake is done?
Insert a toothpick into the center of the cake. It should come out clean or with a few moist crumbs.
If the toothpick has wet batter on it, bake the cake for a few more minutes. Check again before removing it from the oven.
Can I use a gluten-free cake mix?
Yes, you can use a gluten-free red velvet cake mix. This creates a gluten-free version of the cake.
The texture may vary depending on the mix. Use the same baking temperature and toothpick test.
Can I add chocolate chips?
Yes, chocolate chips can be mixed into the cake batter before baking. This gives the cake a chocolate twist.
The chips add texture and richer flavor. They pair well with red velvet and cheesecake.
What toppings go well with this cake?
Whipped cream, cream cheese frosting, fresh berries, crushed nuts, and sprinkles all work well. Choose toppings based on the occasion.
For a simple finish, serve the cake plain. The bundt shape and red color already make it beautiful.
How long does this cake last in the refrigerator?
Leftovers can be stored in an airtight container in the refrigerator for up to 5 days. Keep the cake covered.
Because of the cheesecake layer, refrigeration is important. Serve chilled or warm slightly before eating.
Can I make this cake ahead of time?
Yes, this cake can be made ahead. Store it in the refrigerator after it cools.
Add toppings close to serving for the freshest look. It can also be frozen for longer storage.
Why This Recipe Works So Well
Red Velvet Cheesecake Bundt Dump Cake works so well because it gives you a showstopping dessert with a simple process. A boxed red velvet cake mix creates the base, while the cheesecake layer makes the cake feel homemade and indulgent.
The sweetened condensed milk adds creaminess and sweetness. It makes the batter smooth and rich.
The melted butter gives the cake more flavor. Cooling it slightly helps it mix cleanly into the batter.
Room-temperature eggs help the batter become smooth. They are part of what gives the cake its soft texture.
The cheesecake filling is simple but powerful. Softened cream cheese, granulated sugar, and vanilla extract create a creamy center that surprises people when they slice into the cake.
The bundt pan turns the dessert into a centerpiece. The shape makes the cake look impressive without complicated decorating.
The recipe is also flexible. Chocolate chips, almond extract, gluten-free red velvet cake mix, Greek yogurt, crushed nuts, sprinkles, whipped cream, cream cheese frosting, fresh berries, heavy cream, store-bought frosting, coconut sugar, dairy-free cream cheese alternative, plant-based butter, and a pinch of salt all give you ways to adjust or serve it.
Most of all, this cake works because it feels joyful without being stressful. It is colorful, creamy, sweet, freezer-friendly, and perfect for occasions when dessert should bring a little excitement to the table.
Final Thoughts
Red Velvet Cheesecake Bundt Dump Cake is a vibrant dessert made with boxed red velvet cake mix, sweetened condensed milk, melted butter, eggs, softened cream cheese, granulated sugar, and vanilla extract. The cake is layered in a well-greased bundt pan, baked at 350°F for about 40 minutes, cooled briefly, and inverted into a beautiful centerpiece.
Serve it slightly warm, plain, or with whipped cream, cream cheese frosting, fresh berries, crushed nuts, or sprinkles. With its creamy cheesecake center, bold red velvet color, easy preparation, refrigerator storage, freezer-friendly leftovers, and festive bundt shape, this cake is a sweet celebration for holidays, birthdays, winter nights, or any day that deserves a little extra joy.
Red Velvet Cheesecake Bundt Dump Cake
Rich, creamy, colorful, and easy to slice, this Red Velvet Cheesecake Bundt Dump Cake combines red velvet cake mix with sweetened condensed milk, melted butter, eggs, and a smooth cream cheese filling. Baked in a Bundt pan and finished with optional whipped cream or frosting, it makes a festive American dessert with cheesecake-style sweetness tucked inside every piece.
Recipe Details
- Prep Time: 15 minutes
- Cook Time: 40 minutes
- Total Time: 55 minutes
- Course: Dessert
- Cuisine: American
- Servings: 10 people
- Calories: 350 kcal
Equipment
- Bundt pan
- Mixing bowl
Ingredients
For the Cheesecake Mixture
- 1 8-ounce package cream cheese, softened
- ½ cup granulated sugar
- 1 teaspoon vanilla extract
For the Cake
- 1 box red velvet cake mix
- 1 14-ounce can sweetened condensed milk
- ½ cup unsalted butter, melted
- 3 large eggs
Instructions
Step 1: Preheat and Grease the Pan
Preheat your oven to 350°F (175°C) and grease the bundt pan. Make sure the pan is ready before adding the batter.
Step 2: Mix the Red Velvet Cake Batter
In a mixing bowl, combine the red velvet cake mix, sweetened condensed milk, melted butter, and eggs. Mix until well combined.
Step 3: Make the Cheesecake Mixture
In another bowl, beat the softened cream cheese, granulated sugar, and vanilla extract until smooth. Keep mixing until the filling is creamy and easy to spoon.
Step 4: Layer the Cake and Cheesecake Filling
Pour half of the cake batter into the prepared bundt pan. Spoon the cream cheese mixture over it, then top with the remaining cake batter.
Step 5: Bake Until Done
Bake for 40 minutes or until a toothpick inserted into the center comes out clean.
Step 6: Cool and Invert
Let the cake cool in the pan for 10 minutes before inverting onto a plate. Allow it to release carefully so the Bundt shape stays intact.
Notes
- Serve with whipped cream or your favorite frosting for extra flavor.
Serving Suggestions
Serve this Red Velvet Cheesecake Bundt Dump Cake after it has cooled slightly and been inverted onto a plate. The red velvet cake layer and creamy cheesecake mixture make each slice rich, soft, and sweet.
This cake works well for holidays, birthdays, dessert tables, or any gathering where a Bundt cake feels festive and easy to share. Serve with whipped cream or your favorite frosting for extra flavor, exactly as noted.
Storage
How to Store
The recipe does not provide specific storage instructions or storage duration, so no exact storage time is added here.
Best Texture Tip
Let the cake cool in the pan for 10 minutes before inverting onto a plate. This helps the cake settle and makes it easier to release from the Bundt pan.
Cheesecake Layer Tip
Spoon the cream cheese mixture over half of the cake batter before adding the remaining batter. This keeps the cheesecake layer tucked inside the red velvet cake.
Baking Tip
Bake for 40 minutes or until a toothpick inserted into the center comes out clean. This preserves the exact baking guidance from the recipe.
Serving Tip
Serve with whipped cream or your favorite frosting for extra flavor. No exact quantity is provided, so the topping remains flexible.

Fernando is the creator and writer behind the food blog Eating with your Hands. Living and working in cities like Paris, Barcelona, and Berlin, and being married to a Canadian foodie, has given Fernando a passion and interest in food and inspired him to run EWYH.