
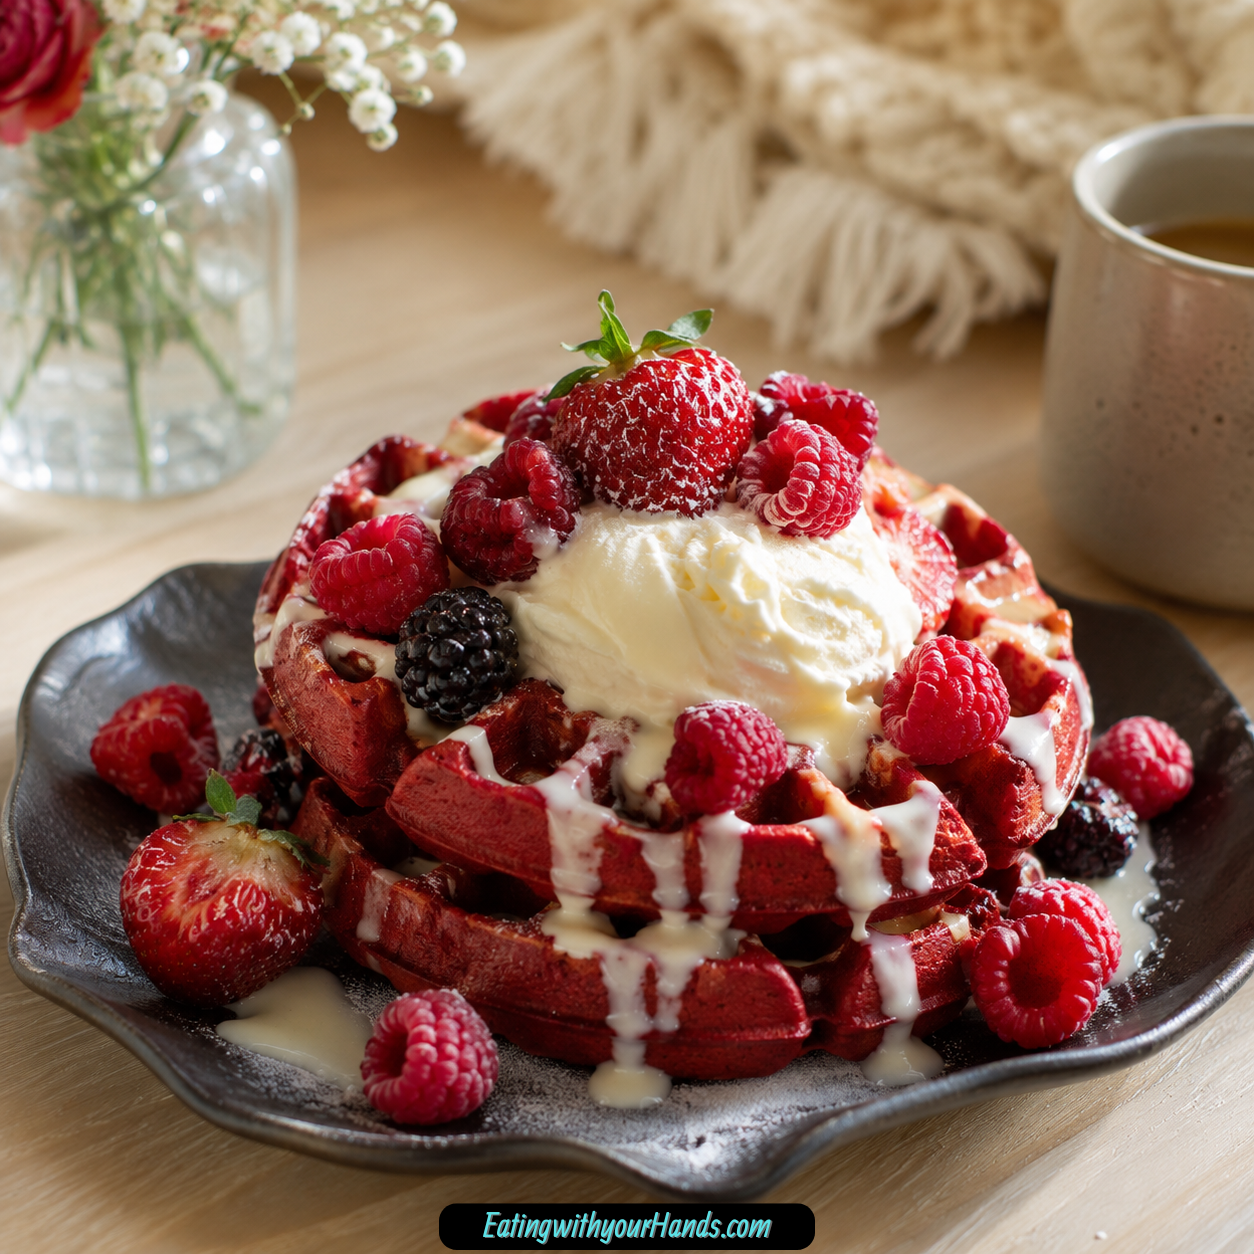
Red Velvet Marble Waffles have a way of turning breakfast into something that feels almost like a celebration. They are fluffy, colorful, sweet, and playful, with that beautiful swirl of classic waffle batter and red velvet batter coming together right inside the waffle maker.
Every time these waffles hit the table, they carry the feeling of a cozy Saturday morning. I think of sleepy smiles, kids peeking over the counter, and that little burst of excitement that happens when breakfast looks as fun as it tastes.
There is something special about pouring two batters side by side and watching them become one marbled waffle. It feels a little like painting with flavor, and the result is never exactly the same twice.
These Red Velvet Marble Waffles are perfect for special occasions, but they are also simple enough for a weekend morning when you want to make the day feel brighter. They bring rich red velvet flavor, soft classic waffle comfort, and a fluffy texture that makes every bite feel festive.
The best part is that they are quick to prepare, with just 15 minutes of prep time. You can make breakfast feel special without needing an elaborate plan or a long list of ingredients.
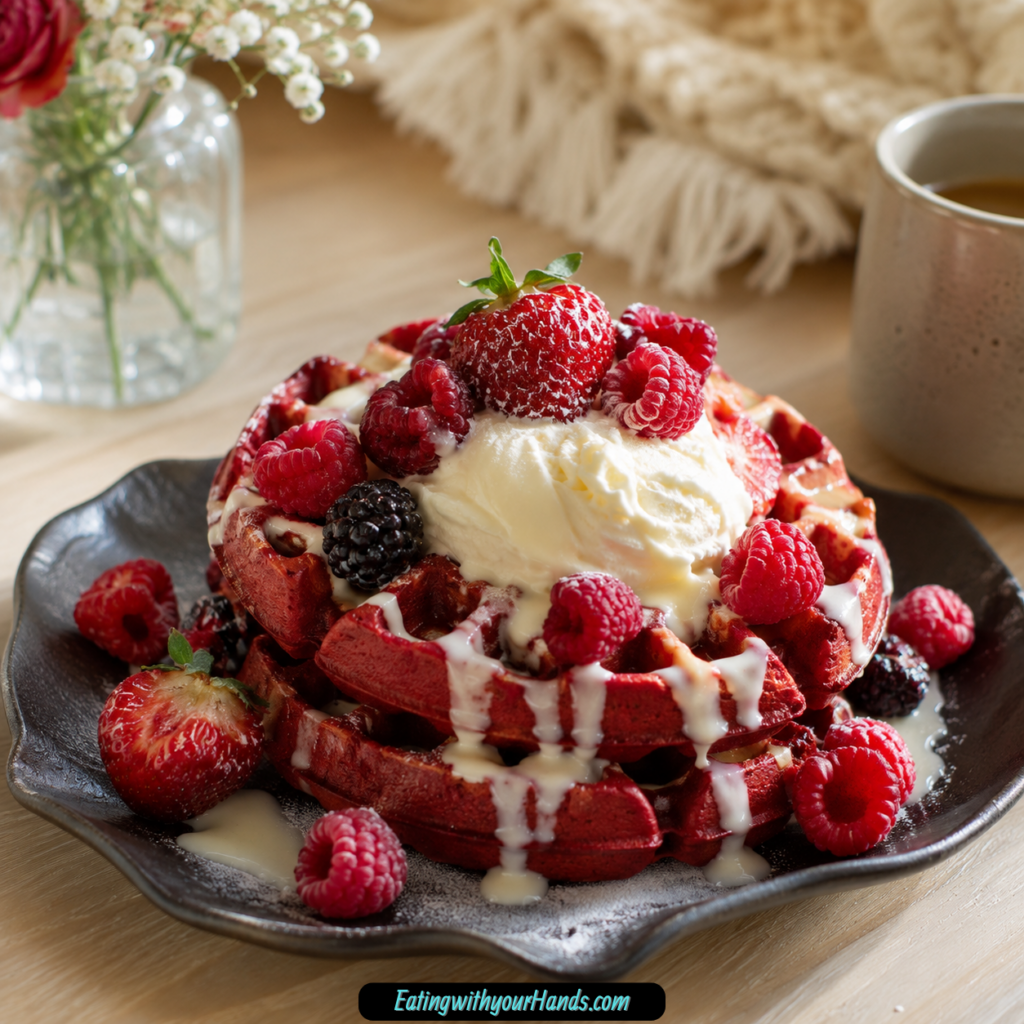
Whether you serve them with whipped cream, fresh berries, maple syrup, or a drizzle of cream cheese frosting, these waffles bring joy to the table. They are a colorful, family-friendly breakfast that can easily become one of those traditions everyone remembers.
Table of Contents
- Why You’ll Love These Red Velvet Marble Waffles
- Recipe Details
- Ingredients
- Optional Swaps, Variations, Add-Ins, and Serving Ideas
- Why This Recipe Works
- Directions
- Step 1: Prepare Your Workspace
- Step 2: Mix the Classic Dry Ingredients
- Step 3: Mix the Classic Wet Ingredients
- Step 4: Combine the Classic Batter
- Step 5: Set the Classic Batter Aside
- Step 6: Mix the Red Velvet Dry Ingredients
- Step 7: Mix the Red Velvet Wet Ingredients
- Step 8: Combine the Red Velvet Batter
- Step 9: Preheat the Waffle Maker
- Step 10: Check Both Batters
- Step 11: Start with Classic Batter
- Step 12: Add the Red Velvet Batter
- Step 13: Alternate the Batters
- Step 14: Close the Waffle Maker
- Step 15: Cook Until Golden and Crispy
- Step 16: Remove the Waffle Carefully
- Step 17: Repeat with Remaining Batter
- Step 18: Serve Warm
- Step 19: Add Favorite Toppings
- Step 20: Gather and Enjoy
- Serving Ideas
- Storage
- Reheating
- Freezing
- Make-Ahead
- Helpful Notes for Best Results
- Variations
- Troubleshooting
- Frequently Asked Questions
- Why This Recipe Works So Well
- Final Thoughts
- Red Velvet Marble Waffles
Why You’ll Love These Red Velvet Marble Waffles
These Red Velvet Marble Waffles have a quick and easy prep time of just 15 minutes. That makes them perfect for mornings when you want something special without making breakfast complicated.
They are a wonderful way to make breakfast feel festive with very little extra effort. The marbled pattern gives the waffles a beautiful look, but the process stays simple and fun.
This recipe is family-friendly and especially fun to make with kids. They will love watching the classic batter and red velvet batter swirl together in the waffle maker.
The ingredients are minimal, but the result still feels impressive. You get a classic waffle flavor with a red velvet twist that looks beautiful enough for guests.
These waffles are also great for batch cooking. You can freeze extras for busy mornings and reheat them in the toaster or oven.
The toppings are versatile, which makes it easy to customize every plate. Whipped cream, fresh berries, maple syrup, honey, fresh strawberries, chocolate chips, nuts, or cream cheese frosting can all take these waffles in a delicious direction.
Recipe Details
Red Velvet Marble Waffles are made with two batters: a classic waffle batter and a red velvet batter. The batters are poured into the waffle maker in alternating ladlefuls to create a whimsical marbled effect.
The prep time is just 15 minutes. The waffles cook according to your waffle maker’s instructions, usually about 3 to 5 minutes, until they are golden brown and crispy.
The classic waffle batter uses all-purpose flour, sugar, baking powder, baking soda, salt, buttermilk, eggs, melted butter, and vanilla extract. The red velvet batter uses all-purpose flour, unsweetened cocoa powder, sugar, baking powder, baking soda, salt, buttermilk, egg, melted butter, vanilla extract, and red food coloring.
A waffle maker is required for cooking the waffles. It should be preheated according to the manufacturer’s instructions so the waffles come out crispy and golden.
Leftover waffles can be stored in an airtight container in the fridge for up to 3 days. They can also be frozen for up to 2 months and reheated in the toaster or oven for a quick breakfast.
Ingredients
For the Classic Waffle Batter
- 1 ½ cups all-purpose flour
- 1 tablespoon sugar
- 1 teaspoon baking powder
- ½ teaspoon baking soda
- ¼ teaspoon salt
- 1 cup buttermilk (can substitute with milk mixed with a tablespoon of vinegar for a quick buttermilk alternative)
- 2 large eggs
- ¼ cup melted butter
- 1 teaspoon vanilla extract
For the Red Velvet Batter
- 1 cup all-purpose flour
- 2 tablespoons cocoa powder (unsweetened)
- ¼ cup sugar
- 1 teaspoon baking powder
- ½ teaspoon baking soda
- ¼ teaspoon salt
- ¾ cup buttermilk (same substitution as above applies)
- 1 large egg
- ¼ cup melted butter
- 1 teaspoon vanilla extract
- 1 tablespoon red food coloring
Ingredient Notes
All-purpose flour is used in both batters to create the structure of the waffles. The classic batter uses 1 ½ cups, while the red velvet batter uses 1 cup.
Sugar appears in both batters, but in different amounts. The classic batter uses 1 tablespoon, and the red velvet batter uses ¼ cup for a sweeter red velvet flavor.
Baking powder and baking soda help create the fluffy waffle texture. Both batters use 1 teaspoon baking powder and ½ teaspoon baking soda.
Salt balances the sweetness in both batters. Each batter uses ¼ teaspoon salt.
Buttermilk gives the waffles tenderness and flavor. If you do not have buttermilk, regular milk mixed with a tablespoon of vinegar can be used as a quick buttermilk alternative.
The FAQ also notes that regular milk can be mixed with 1 tablespoon of vinegar or lemon juice and left to sit for about 5 minutes. This gives a similar tangy flavor that works well in the batter.
Melted butter brings richness to both batters. Each batter uses ¼ cup melted butter.
Vanilla extract adds warmth and sweetness. Both the classic waffle batter and the red velvet batter use 1 teaspoon.
Unsweetened cocoa powder gives the red velvet batter its chocolatey depth. Red food coloring creates the bold red color that makes the marbled look so striking.
Optional Swaps, Variations, Add-Ins, and Serving Ideas
Whole Wheat Variation
For a lighter option, swap half the all-purpose flour for whole wheat flour. This keeps the waffle structure while changing the flour blend.
The main recipe uses all-purpose flour in both batters. The whole wheat option is a simple way to adjust the waffles while keeping the marbled idea.
Warm Cinnamon Classic Batter
A teaspoon of cinnamon can be added to the classic batter for extra warmth and flavor. This gives the waffles a cozy note that works especially well for weekend mornings.
The cinnamon belongs in the classic batter variation. It adds flavor without changing the red velvet batter.
Fall Pumpkin Twist
Pumpkin puree can be incorporated into the red velvet batter during fall for a seasonal twist. This gives the waffles a cozy autumn direction.
The recipe keeps the red velvet batter as the base. Pumpkin puree is an optional seasonal addition when you want a different feel.
Mini Waffles
Try making mini waffles for a fun bite-sized treat. This is especially perfect for kids because the smaller size feels playful and easy to enjoy.
Mini waffles can also be nice for brunch platters. They let everyone take a few little pieces and try different toppings.
Dairy-Free Direction
For a dairy-free version, almond milk or oat milk can be used as a buttermilk substitute. This gives you a way to adjust the batter for dairy-free needs.
The main recipe uses buttermilk. Almond milk or oat milk is included as the dairy-free variation.
Gluten-Free Version
For a gluten-free version, use a gluten-free all-purpose flour blend. This changes the flour while keeping the waffle format.
The main recipe uses all-purpose flour in both batters. The gluten-free blend is the option to use when you need that adjustment.
Extra Texture Add-Ins
Chocolate chips can be added to the batters for extra texture and flavor. They make the waffles feel more dessert-like and fun.
Nuts can also be added for texture. They bring crunch to the fluffy waffles and work well with sweet toppings.
Lower Sugar Option
For a lower sugar option, reduce the sugar in both batters without compromising taste. This keeps the waffles sweet enough while making them a little less sugary.
Because both batters include sugar, the adjustment applies to each one. It is a simple way to make the recipe fit your preference.
Topping Ideas
Whipped cream, fresh berries, maple syrup, and cream cheese frosting are all delicious topping ideas. Fresh strawberries are especially lovely with the red velvet look.
Honey is also mentioned as a classic topping option. You can keep the waffles simple or dress them up for an extra treat.
Why This Recipe Works
Red Velvet Marble Waffles work because they turn a familiar breakfast into something beautiful and festive. The classic waffle batter gives comfort, while the red velvet batter adds color, cocoa flavor, and a sense of occasion.
The marbling method makes the recipe feel special without requiring perfect technique. Alternating the batters and letting them overlap creates a pattern that is naturally whimsical.
The two batters share similar structures, so they cook together in the waffle maker. Flour, sugar, baking powder, baking soda, salt, buttermilk, egg, butter, and vanilla help both sides bake into fluffy waffles.
The toppings make the waffles even more flexible. They can be sweet and simple with maple syrup, bright with berries, extra indulgent with cream cheese frosting, or playful with whipped cream and chocolate chips.
Directions
Step 1: Prepare Your Workspace
Before mixing the batters, set out two large mixing bowls for the classic waffle batter and the red velvet batter. You will also need additional bowls for the wet ingredients, plus a whisk and your waffle maker.
This recipe moves more smoothly when each batter has its own space. Since the marble effect depends on having two separate batters, keeping them organized helps the process feel easy.
Step 2: Mix the Classic Dry Ingredients
In a large mixing bowl, combine 1 ½ cups all-purpose flour, 1 tablespoon sugar, 1 teaspoon baking powder, ½ teaspoon baking soda, and ¼ teaspoon salt. Whisk the dry ingredients until they are well blended.
This step helps distribute the leavening and salt evenly through the flour. A well-mixed dry base gives the classic waffle batter a more consistent texture.
Step 3: Mix the Classic Wet Ingredients
In another bowl, whisk together 1 cup buttermilk, 2 large eggs, ¼ cup melted butter, and 1 teaspoon vanilla extract. Whisk until the mixture looks smooth.
The buttermilk gives the batter tenderness, while the eggs and melted butter bring structure and richness. Vanilla adds a sweet breakfast aroma.
Step 4: Combine the Classic Batter
Pour the wet ingredients into the dry ingredients for the classic waffle batter. Stir gently until just combined.
Do not worry if the batter looks a little lumpy. That is perfectly okay, and overmixing should be avoided.
Step 5: Set the Classic Batter Aside
Once the classic batter is just combined, set it aside while you prepare the red velvet batter. Keep it close because you will use both batters when it is time to create the marble effect.
The classic batter should stay separate from the red velvet batter. That separation is what allows the finished waffles to show two colors.
Step 6: Mix the Red Velvet Dry Ingredients
In a separate bowl, combine 1 cup all-purpose flour, 2 tablespoons unsweetened cocoa powder, ¼ cup sugar, 1 teaspoon baking powder, ½ teaspoon baking soda, and ¼ teaspoon salt. Whisk until nicely blended.
The cocoa powder gives the red velvet batter its deeper flavor. Whisking also helps break up any dry spots so the batter mixes more evenly later.
Step 7: Mix the Red Velvet Wet Ingredients
In another bowl, combine ¾ cup buttermilk, 1 large egg, ¼ cup melted butter, 1 teaspoon vanilla extract, and 1 tablespoon red food coloring. Mix until fully combined.
This wet mixture is where the red velvet color begins to appear. The red food coloring should be blended evenly so the batter becomes beautifully red.
Step 8: Combine the Red Velvet Batter
Pour the red velvet wet ingredients into the red velvet dry ingredients. Stir gently until just combined.
Mix only enough to incorporate everything. You want to see that gorgeous red color, but you do not want to overmix the batter.
Step 9: Preheat the Waffle Maker
While you are mixing the batters, preheat your waffle maker according to the manufacturer’s instructions. It should be nice and hot before any batter is added.
A properly heated waffle maker helps the waffles become crispy and golden. This step is important for both texture and easy release.
Step 10: Check Both Batters
Before cooking, make sure both batters are ready and close by. The classic batter should be pale and slightly lumpy, while the red velvet batter should be red and gently mixed.
Do not stir them together in the bowls. The marbling happens in the waffle maker, not before.
Step 11: Start with Classic Batter
Once the waffle maker is preheated, pour a ladleful of the classic waffle batter onto one side of the waffle maker. Let it spread naturally.
This first pour gives you the light part of the marble design. Try to place it with enough room for the red velvet batter beside it.
Step 12: Add the Red Velvet Batter
Pour a ladleful of the red velvet batter right next to the classic batter. Allow the two batters to slightly overlap.
The overlap is what begins the marbled effect. You do not need to swirl aggressively or make it perfect.
Step 13: Alternate the Batters
Continue alternating between the classic batter and the red velvet batter. Add them in a way that creates a beautiful marbled pattern.
The design is meant to be a little whimsical. Do not stress about perfection because each waffle can look unique.
Step 14: Close the Waffle Maker
Once the batter is added, close the waffle maker. Let it cook according to your appliance’s instructions.
The waffle maker will shape and cook the batters together. The two colors will settle into a marbled pattern as the waffle forms.
Step 15: Cook Until Golden and Crispy
Cook the waffles for about 3 to 5 minutes, or until they are golden brown and crispy. The exact time depends on your waffle maker.
Watch for the signs your appliance gives when the waffle is done. The waffle should be cooked through, lightly crisp, and ready to lift.
Step 16: Remove the Waffle Carefully
Carefully open the waffle maker when the waffle is done. Use a fork to lift the waffle out gently.
The waffle should come out easily. If it sticks, give it a little nudge rather than pulling too hard.
Step 17: Repeat with Remaining Batter
Continue cooking waffles with the remaining classic and red velvet batters. Keep alternating the batters in the waffle maker to create the marble effect.
Each waffle will have its own pattern. That is part of what makes this recipe fun and memorable.
Step 18: Serve Warm
Serve the waffles warm, straight from the waffle maker. They are delicious on their own and even better when dressed up with toppings.
Warm waffles have the best texture. They are crisp on the outside, fluffy inside, and full of sweet red velvet charm.
Step 19: Add Favorite Toppings
Top the waffles with whipped cream, fresh berries, maple syrup, or cream cheese frosting. Fresh strawberries are another beautiful option.
For a classic sweet finish, honey can also be used. If you want more texture, chocolate chips or nuts make great additions.
Step 20: Gather and Enjoy
Bring the waffles to the table and enjoy them while they are warm. This is the kind of breakfast that feels best when shared.
Let everyone choose their toppings and make their plate their own. The color, flavor, and marbled design make breakfast feel festive without any extra stress.
Serving Ideas
Serve Red Velvet Marble Waffles warm for the best flavor. The texture is most enjoyable when the waffles are fresh from the waffle maker.
Whipped cream makes them feel light and festive. It also looks beautiful against the red and classic waffle colors.
Fresh berries are a bright topping choice. Fresh strawberries are especially lovely with the red velvet batter.
Maple syrup is a classic waffle topping. Honey is another sweet option if you want something simple.
A drizzle of cream cheese frosting makes the waffles feel extra indulgent. It pairs especially well with the red velvet flavor.
Chocolate chips or nuts can also be added if you are feeling adventurous. They bring extra texture and make the waffles feel even more fun.
Storage
Store any leftover waffles in an airtight container in the fridge for up to 3 days. Let them cool before storing so the texture stays as pleasant as possible.
Keep the toppings separate from the stored waffles. This helps the waffles reheat better and prevents them from becoming soggy.
Reheating
Leftover waffles can be reheated in the toaster for a quick and delicious breakfast. The toaster helps bring back some of the crispness.
They can also be reheated in the oven. This is a useful option when warming several waffles at once.
Freezing
To freeze Red Velvet Marble Waffles, place them in a single layer on a baking sheet until solid. Once frozen, transfer them to a freezer bag.
They will keep well for up to 2 months. Reheat them in the toaster or oven for a quick breakfast.
Make sure the waffles cool completely before freezing. This helps them store better and makes them easier to reheat later.
Make-Ahead
These waffles are great for batch cooking. You can make extra, freeze them, and have a colorful breakfast ready for busy mornings.
Freezing them in a single layer first helps keep the waffles separate. After they are solid, moving them to a freezer bag makes storage easier.
When you are ready to eat, simply reheat them in the toaster or oven. This makes the recipe practical even though it feels festive.
Helpful Notes for Best Results
Do not overmix either batter. A few lumps are perfectly okay and help keep the waffles from becoming heavy.
Make sure the waffle maker is properly preheated. A hot waffle maker helps create a crispy, golden exterior.
If you do not have buttermilk, mix regular milk with a tablespoon of vinegar and let it sit for 5 minutes. The FAQ also says lemon juice can be used in place of vinegar for the same quick substitute.
For a gluten-free version, use a gluten-free all-purpose flour blend. This helps adjust the recipe while keeping the waffle structure.
Consider adding chocolate chips or nuts to the batters for extra texture and flavor. These additions make the waffles more playful.
For a lower sugar option, reduce the sugar in both batters without compromising taste. This lets you adjust the sweetness while keeping the recipe enjoyable.
Variations
Whole Wheat Red Velvet Marble Waffles
Swap half the all-purpose flour for whole wheat flour for a lighter option. This changes the flour blend while keeping the classic and red velvet batter structure.
The waffles still keep their marbled look. The whole wheat flour simply brings a different feel to the batter.
Cinnamon Classic Batter Waffles
Add a teaspoon of cinnamon to the classic batter. This gives the lighter batter extra warmth and flavor.
The cinnamon makes the waffles feel especially cozy. It pairs nicely with maple syrup, honey, and whipped cream.
Pumpkin Red Velvet Marble Waffles
Incorporate pumpkin puree into the red velvet batter during fall. This gives the waffles a seasonal twist.
The pumpkin variation makes the recipe feel right for autumn mornings. It keeps the red velvet idea but adds a fall-inspired note.
Mini Red Velvet Marble Waffles
Make mini waffles for a bite-sized treat. This is a fun option for kids and a playful idea for brunch.
Mini waffles are easy to serve and easy to top. They make the recipe feel even more festive.
Dairy-Free Red Velvet Marble Waffles
Use almond milk or oat milk as a buttermilk substitute for a dairy-free version. This adjusts the batter while keeping the waffle idea intact.
The main recipe uses buttermilk, but the dairy-free options give you flexibility. Choose the substitute that works best for your needs.
Gluten-Free Red Velvet Marble Waffles
Use a gluten-free all-purpose flour blend for a gluten-free version. This keeps the waffle format while changing the flour.
The marbled look can still be created with two batters. The toppings can remain as simple or indulgent as you like.
Chocolate Chip or Nut Waffles
Add chocolate chips to the batters for extra flavor and texture. They make the waffles sweeter and more dessert-like.
Nuts can also be added for crunch. These additions are especially fun when serving waffles for a special breakfast.
Cream Cheese Frosting Waffles
Drizzle the waffles with cream cheese frosting for extra indulgence. This topping pairs beautifully with the red velvet flavor.
It makes the waffles feel more like a special-occasion breakfast. A dollop of cream cheese frosting is also a delightful match.
Troubleshooting
The Waffles Are Dense
Avoid overmixing the batters. Both batters should be stirred gently until just combined.
A little lumpiness is perfectly okay. Overmixing can make the waffles less fluffy.
The Batters Blend Too Much
Pour the batters side by side and let them slightly overlap. Do not mix them together in the bowl.
The marble effect is meant to be whimsical. Alternating ladlefuls in the waffle maker creates the look.
The Waffles Stick to the Waffle Maker
Make sure the waffle maker is preheated according to the manufacturer’s instructions. A hot waffle maker helps the waffles release more easily.
If a waffle sticks, use a fork to lift it gently and give it a little nudge. Avoid pulling too hard.
The Waffles Are Not Crispy
Cook the waffles until they are golden brown and crispy. This usually takes about 3 to 5 minutes, depending on the waffle maker.
Make sure the waffle maker is nice and hot before adding batter. Heat is key for crisp edges.
The Red Velvet Color Looks Uneven
Mix the red food coloring fully into the red velvet wet ingredients before combining with the dry ingredients. This helps the color distribute through the batter.
Stir the batter just enough to incorporate everything. The red should be visible without overmixing.
The Waffles Need More Flavor
Use vanilla extract in both batters as written. You can also add cinnamon to the classic batter for extra warmth.
For toppings, try maple syrup, honey, fresh berries, whipped cream, or cream cheese frosting. These finishes add sweetness and personality.
The Waffles Lose Texture After Storage
Reheat leftover waffles in the toaster or oven. This helps bring back a better texture than eating them cold.
Store them in an airtight container in the fridge for up to 3 days. For longer storage, freeze them for up to 2 months.
Frequently Asked Questions
Can I freeze Red Velvet Marble Waffles?
Yes, you can freeze Red Velvet Marble Waffles. Allow them to cool completely, then place them in a single layer on a baking sheet until solid.
Transfer the frozen waffles to a freezer bag or airtight container. They will keep well for up to 2 months and can be reheated in the toaster or oven for a quick breakfast.
How can I substitute the buttermilk?
If you do not have buttermilk, you can make a quick substitute. Mix 1 cup regular milk with 1 tablespoon of vinegar or lemon juice and let it sit for about 5 minutes.
This gives a similar tangy flavor that works well in the batter. The same substitution applies to the red velvet batter.
What toppings go well with these waffles?
There are many delicious topping options for these waffles. You can go classic with maple syrup or honey.
You can also make them fancy with whipped cream and fresh strawberries. For a fun twist, drizzle cream cheese frosting on top.
Can I add chocolate chips or nuts?
Yes, chocolate chips or nuts can be added if you want extra texture and flavor. They make the waffles feel more adventurous and indulgent.
Add them to the batters before cooking. They work well with the red velvet flavor and the sweet breakfast toppings.
Can I make these waffles dairy-free?
Yes, almond milk or oat milk can be used as a buttermilk substitute for a dairy-free version. This gives you a way to adjust the batter.
Use the dairy-free substitute in place of the buttermilk. The rest of the recipe can be handled according to your needs.
Can I make these waffles gluten-free?
Yes, use a gluten-free all-purpose flour blend. This is the suggested gluten-free option.
The recipe can still be made with two batters to create the marble effect. Use your favorite toppings when serving.
Can I make mini waffles?
Yes, mini waffles are a fun bite-sized treat that is perfect for kids. They can also be nice for brunch or special mornings.
Cook them according to your waffle maker’s instructions. The timing may depend on the appliance.
Why This Recipe Works So Well
Red Velvet Marble Waffles work so well because they bring together comfort and surprise. The classic batter gives the familiar waffle taste, while the red velvet batter adds cocoa, color, sweetness, and a little excitement.
The marbling makes breakfast feel creative. You do not need perfect swirls, because the charm comes from the playful overlap of the two batters.
The recipe is also practical. It has a 15-minute prep time, uses approachable ingredients, cooks quickly in a waffle maker, and can be frozen for busy mornings.
The toppings give every plate a different personality. Some mornings can be simple with maple syrup, while others can be festive with whipped cream, berries, and cream cheese frosting.
Most importantly, these waffles feel like family breakfast food. They bring people into the kitchen, invite kids to watch the colors swirl, and make an ordinary morning feel like something everyone will remember.
Final Thoughts
Red Velvet Marble Waffles are more than a colorful breakfast. They are a fun, fluffy, sweet way to bring a little celebration into the morning.
I hope these waffles become part of your own cozy family traditions. Pour the batters, enjoy the marbled magic, add your favorite toppings, and share them warm with the people who make breakfast feel special.
Red Velvet Marble Waffles
Soft, warm, and beautifully swirled, these Red Velvet Marble Waffles combine classic waffle flavor with a cocoa-kissed red velvet batter. The marbled effect makes them feel special for breakfast, brunch, or any morning when you want waffles with a little extra color and sweetness.
Recipe Details
- Prep Time: 15 minutes
- Cook Time: 15 minutes
- Total Time: 30 minutes
- Course: Breakfast
- Cuisine: American
- Servings: 4 waffles
- Calories: 300 kcal
Equipment
- Waffle Maker
- mixing bowls
Ingredients
For the Red Velvet Batter
- 1 cup all-purpose flour
- 2 tablespoons cocoa powder
- ¼ cup sugar
- ¾ cup buttermilk
- 1 large egg
- ¼ cup melted butter
- 1 tablespoon red food coloring
- 1 teaspoon vanilla extract
- 1 teaspoon baking powder
- ½ teaspoon baking soda
- ¼ teaspoon salt
For the Classic Waffle Batter
- 1 ½ cups all-purpose flour
- 1 cup buttermilk
- 2 large eggs
- ¼ cup melted butter
- 1 teaspoon vanilla extract
- 1 tablespoon sugar
- 1 teaspoon baking powder
- ½ teaspoon baking soda
- ¼ teaspoon salt
Instructions
Step 1: Make the Classic Waffle Batter
In a bowl, combine the ingredients for the classic waffle batter. Mix until smooth.
Step 2: Make the Red Velvet Batter
In another bowl, mix the ingredients for the red velvet batter until well combined.
Step 3: Preheat the Waffle Maker
Preheat your waffle maker according to the manufacturer’s instructions.
Step 4: Create the Marble Effect
Pour the classic batter and red velvet batter into the waffle maker, alternating them to create a marbled effect. This gives the waffles their red velvet and classic waffle swirl.
Step 5: Cook the Waffles
Cook according to your waffle maker’s instructions until golden brown.
Step 6: Serve Warm
Serve warm with your favorite toppings.
Notes
- You can use cream cheese frosting as a topping for extra flavor.
Serving Suggestions
Serve these Red Velvet Marble Waffles warm right after cooking. Their swirled red velvet and classic waffle batter makes them feel fun enough for brunch, holidays, birthdays, or a sweet weekend breakfast.
Top them with your favorite toppings, exactly as noted in the recipe. For extra flavor, you can also use cream cheese frosting as a topping.
Storage
How to Store
The recipe does not provide specific storage instructions or storage duration, so no exact storage time is added here.
Best Texture Tip
Serve the waffles warm after they cook until golden brown. This gives them the best fresh waffle texture.
Waffle Maker Tip
Preheat your waffle maker according to the manufacturer’s instructions. Cook the waffles according to your waffle maker’s instructions so they finish properly.
Topping Tip
Serve with your favorite toppings. Cream cheese frosting can be used as a topping for extra flavor, exactly as noted.

Fernando is the creator and writer behind the food blog Eating with your Hands. Living and working in cities like Paris, Barcelona, and Berlin, and being married to a Canadian foodie, has given Fernando a passion and interest in food and inspired him to run EWYH.