
There is something deeply comforting about a recipe that asks very little from you and still gives back so much. Refrigerator Pickled Vegetables are exactly that kind of recipe, simple to make, beautiful to look at, and full of bright flavor that somehow makes everyday meals feel more alive.
Some dishes are memorable because they are rich or elaborate, but this one leaves a different kind of impression. It is crisp, colorful, tangy, and cheerful, and it carries the kind of charm that instantly brings to mind family tables, summer picnics, and jars lined up in the refrigerator waiting to be opened.
The moment vinegar meets fresh vegetables, the whole kitchen seems to change. The air turns sharp and lively, the colors of the produce look even more vibrant, and the entire process feels like a small celebration of freshness.
That is part of what makes this recipe so lovable. It transforms basic vegetables into something crunchy, zesty, and surprisingly satisfying, all without requiring canning knowledge or complicated equipment.
It also feels wonderfully practical. In only 20 minutes, you can prepare jars of pickled vegetables that brighten sandwiches, salads, wraps, and everyday dinners with almost no effort.
There is something special about food like this because it lives in the background of a meal and still manages to stand out. A spoonful on the side of a plate or tucked into a sandwich can change the whole experience with one tangy, crisp bite.
This recipe is also full of warmth in a way that goes beyond flavor. It feels homemade, thoughtful, and generous, like the kind of thing you make not only for yourself, but also to share with the people around you.
And maybe that is the real magic of Refrigerator Pickled Vegetables. They are not just vegetables in brine, but a little jar of brightness that adds joy to the table.
Table of Contents
- What Are Refrigerator Pickled Vegetables?
- Why You’ll Love Refrigerator Pickled Vegetables
- Ingredients You’ll Need
- Fresh Vegetables
- Flavor Boosters
- Brine Base
- Step-by-Step Directions for Refrigerator Pickled Vegetables
- Step 1: Wash All the Vegetables Thoroughly
- Step 2: Cut the Cauliflower into Bite-Sized Florets
- Step 3: Slice the Carrots into Coins
- Step 4: Slice the Cucumbers Thick Enough to Stay Crunchy
- Step 5: Slice the Red Bell Pepper and Trim the Green Beans
- Step 6: Prepare the Brine Base
- Step 7: Let the Brine Sit Briefly
- Step 8: Add the Garlic
- Step 9: Add Mustard Seeds and Peppercorns
- Step 10: Add Red Pepper Flakes if Desired
- Step 11: Stir the Brine Well
- Step 12: Prepare the Clean Jars
- Step 13: Pack the Vegetables Into the Jars
- Step 14: Pour the Brine Over the Vegetables
- Step 15: Submerge Floating Vegetables
- Step 16: Seal the Jars Tightly
- Step 17: Gently Shake the Jars
- Step 18: Refrigerate for at Least 24 Hours
- Step 19: Enjoy as the Flavor Deepens
- Variations to Try
- Serving Ideas and Storage Tips
- Common Mistakes to Avoid
- Helpful Notes
- Frequently Asked Questions
- Final Thoughts on Refrigerator Pickled Vegetables
- Refrigerator Pickled Vegetables Recipe
- Equipment
- Ingredients
- Instructions
- Notes
What Are Refrigerator Pickled Vegetables?
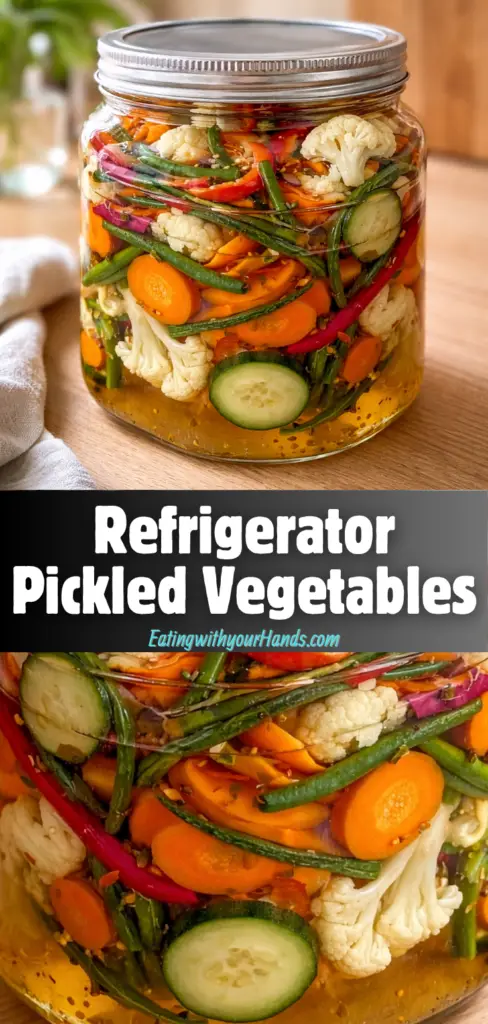
Refrigerator Pickled Vegetables are a simple way to preserve the freshness of seasonal vegetables using a quick brine. Unlike traditional canning methods, this version does not require special preserving skills, which makes it especially approachable for everyday home cooks.
The vegetables are washed, cut, packed into jars, and covered in a tangy mixture made from vinegar, water, salt, sugar, and a few flavor-building additions. Once refrigerated, they begin to absorb the brine and slowly become more flavorful over time.
What makes this recipe especially appealing is its ease. It is quick enough for a busy day, simple enough for beginners, and rewarding enough to become a repeat favorite.
It is also a wonderfully flexible recipe. You can use a colorful mix of vegetables, enjoy them as a snack or side, and keep them ready in the refrigerator for up to two weeks.
Prep time is 20 minutes. There is no cook time, which keeps the process feeling fresh, easy, and very manageable.
The total time to prepare the jars is 20 minutes. The recipe yields 4 jars, giving you plenty to enjoy throughout the week or to share with others.
Why You’ll Love Refrigerator Pickled Vegetables
One of the best things about this recipe is how quickly it comes together. In just 20 minutes, you can prepare something that feels lively, homemade, and full of personality.
It is also built from very simple ingredients. Fresh vegetables and a few pantry staples are all you need to create something that tastes vibrant and deeply satisfying.
Another reason this recipe stands out is that it is beginner-friendly. Since no canning skills are required, it offers a very low-pressure way to make homemade pickled vegetables without feeling intimidated.
That simplicity makes it a lovely recipe for novice cooks. The process is clear, approachable, and easy to follow from start to finish.
These pickled vegetables are also perfect for gatherings. Their bright colors and crunchy texture make them feel inviting on a table, whether you are serving them at a picnic, a family meal, or a casual party.
The make-ahead convenience is another major advantage. Once the jars are prepared, they sit in the refrigerator and improve as the flavors continue to develop.
That means the recipe not only saves time in the moment, but also gives you something ready to enjoy later. It is the kind of little kitchen habit that makes meals easier and more flavorful all week long.
Ingredients You’ll Need
The beauty of this recipe lies in its balance of freshness and simplicity. Each ingredient has a purpose, and together they create a colorful jar full of crunch, tang, and flavor.
Fresh Vegetables
You will need a selection of fresh vegetables, and the source recipe suggests a vibrant seasonal mix. These vegetables bring the color, texture, and variety that make the finished jars so appealing.
Use 1 cup of crisp cauliflower florets. Their firm texture holds up beautifully in the brine and adds a hearty crunch.
Use 1 cup of sliced carrots cut into coins. These add sweetness, color, and a satisfying bite.
Use 1 cup of sliced cucumbers, about ¼ inch thick. Their cool freshness makes them a natural choice for quick pickling.
Use 1 cup of sliced red bell pepper. This adds a pop of color along with a slightly sweet, juicy crispness.
Use 1 cup of fresh green beans, trimmed. They bring a garden-fresh snap and fit beautifully into jars.
The source also notes that vegetables can be substituted based on what you have available. Radishes and zucchini are both mentioned as options that work very well too.
No matter which vegetables you choose, freshness matters. Crisp produce gives the best texture and the most satisfying final result.
Flavor Boosters
These ingredients are what give the brine its character. They add depth, aroma, and just enough complexity to make each jar feel lively and memorable.
You will need 2 cloves of garlic, minced. Garlic gives the brine a fragrant, savory kick that makes the vegetables feel even more flavorful.
You will need 1 tablespoon of mustard seeds. These add a subtle zing and a classic pickled flavor.
You will need 1 tablespoon of whole black peppercorns. They provide warmth and gentle spice throughout the jars.
You may also use ½ teaspoon of red pepper flakes if you enjoy a little heat. This is optional, but it adds a spicy edge that can make the pickles even more exciting.
Brine Base
The brine is the heart of the recipe. It is what transforms fresh vegetables into something tangy, bright, and full of flavor.
You will need 1 cup of white vinegar with 5% acidity. This creates the sharp, clean tang that defines refrigerator pickles.
You will need 1 cup of water. This balances the vinegar so the brine tastes lively without becoming overwhelming.
You will need 2 tablespoons of kosher or pickling salt. Salt seasons the vegetables and helps build that distinct pickled taste.
You will need 1 tablespoon of sugar. This softens the sharpness of the vinegar and rounds out the brine with just a touch of sweetness.
Step-by-Step Directions for Refrigerator Pickled Vegetables
This recipe is not difficult, but the little details matter. Taking your time with each step helps ensure that the vegetables stay crisp, the jars look beautiful, and the brine develops its full flavor.
Step 1: Wash All the Vegetables Thoroughly
Begin by washing all of your vegetables under cold water. This removes dirt and helps the finished pickles taste as clean and fresh as they should.
Because this recipe is all about preserving freshness, starting with well-washed produce is important. It creates a better foundation for every jar you make.
Step 2: Cut the Cauliflower into Bite-Sized Florets
Using a sharp knife, cut the cauliflower into small florets that are easy to eat with a fork. Bite-sized pieces also make the jars easier to pack and serve later.
Try to keep the florets fairly even in size. That helps the jars look more balanced and gives a more pleasing texture when eating.
Step 3: Slice the Carrots into Coins
Slice the carrots into coins about ¼ inch thick. This thickness helps them soften just enough in the brine while still holding onto a pleasant crunch.
Carrots add beautiful color to the jars, so neat slices make a difference. They also create an appealing contrast beside the other vegetables.
Step 4: Slice the Cucumbers Thick Enough to Stay Crunchy
Cut the cucumbers into slices about ¼ inch thick. This is an ideal thickness because it helps them stay crisp after soaking in the brine.
If the cucumber slices are too thin, they may lose some of their satisfying texture more quickly. Thicker rounds give the final jars a sturdier, fresher bite.
Step 5: Slice the Red Bell Pepper and Trim the Green Beans
Slice the red bell pepper into strips. Then trim the green beans so they fit comfortably inside your jars.
This step is also where the recipe begins to look especially cheerful. The vegetables are now colorful, varied, and ready to be layered into something beautiful.
Step 6: Prepare the Brine Base
In a mixing bowl, combine 1 cup of white vinegar, 1 cup of water, 2 tablespoons of kosher or pickling salt, and 1 tablespoon of sugar. Stir the mixture well until the salt and sugar have fully dissolved.
This is the point where the tangy scent begins to rise, and the recipe starts to feel unmistakably alive. Even before the jars are packed, the brine already carries the lively flavor that will define the finished pickles.
Step 7: Let the Brine Sit Briefly
Allow the brine to rest for a few minutes after stirring. This gives the ingredients time to settle together and lets the aroma begin to open up.
It is a small pause, but it helps you move into the next steps more calmly. Recipes like this have a rhythm, and even simple resting moments can make the process feel more intentional.
Step 8: Add the Garlic
Once the base is mixed, add 2 minced cloves of garlic. This brings a warm, aromatic depth that makes the pickles feel fuller in flavor.
Garlic has a way of making a brine feel more grounded and savory. It adds character without overpowering the freshness of the vegetables.
Step 9: Add Mustard Seeds and Peppercorns
Add 1 tablespoon of mustard seeds and 1 tablespoon of whole black peppercorns to the brine. These small ingredients make a big difference in the final taste.
The mustard seeds bring a subtle zing, while the peppercorns add gentle warmth. Together, they give the pickles complexity while keeping the brine clean and balanced.
Step 10: Add Red Pepper Flakes if Desired
If you want a little heat, add ½ teaspoon of red pepper flakes. This step is optional, but it is a lovely way to add a gentle spicy note.
The source text is careful to keep this flexible, which makes the recipe easy to personalize. If you prefer a milder jar, you can leave it out and still have delicious results.
Step 11: Stir the Brine Well
Stir the brine again so the garlic, seeds, peppercorns, and optional red pepper flakes are evenly distributed. This helps each jar receive a balanced amount of flavor.
It also ensures that no part of the brine feels flat or uneven. A well-mixed brine gives every bite the same lively, tangy character.
Step 12: Prepare the Clean Jars
Set out your clean jars before you begin packing. Having them ready makes the assembly smoother and helps you focus on arranging the vegetables neatly.
Since this recipe yields 4 jars, it is helpful to think about how you want the colors distributed. A balanced mix in each jar makes the finished result especially inviting.
Step 13: Pack the Vegetables Into the Jars
Begin layering the prepared vegetables into the jars. Pack them snugly, arranging the cauliflower, carrots, cucumbers, red bell pepper, and green beans in a way that looks colorful and well-balanced.
This is one of the most satisfying parts of the recipe. Watching the jars fill with bright vegetables makes the recipe feel cheerful before it is even finished.
Packing tightly is important here. It helps the vegetables stay in place and allows the flavors to distribute more evenly as they marinate.
Step 14: Pour the Brine Over the Vegetables
Carefully pour the brine into each jar, covering the vegetables completely. Make sure the liquid reaches every layer so the vegetables can pickle evenly.
Leave a little space at the top of each jar. That extra room helps allow for slight movement and makes the jars easier to close without overflowing.
Step 15: Submerge Floating Vegetables
Use a chopstick or a thin spoon to gently press down any pieces that rise above the surface of the brine. The goal is to keep the vegetables fully submerged.
This step matters more than it may seem. If vegetables sit above the brine, they will not absorb the flavor properly and may lose the consistency of the rest of the jar.
Step 16: Seal the Jars Tightly
Close the jars with their lids and make sure they are sealed well. A secure lid keeps the jars neat and helps the pickles marinate properly in the refrigerator.
At this stage, the jars already look beautiful. Their layered vegetables and clear brine make them feel like little containers of freshness waiting to deepen in flavor.
Step 17: Gently Shake the Jars
Give each jar a gentle shake after sealing it. This helps move the spices and garlic around and distributes the flavor more evenly through the brine.
It is a simple finishing touch, but it makes the jars feel complete. It also helps settle the vegetables more naturally into place.
Step 18: Refrigerate for at Least 24 Hours
Place the jars in the refrigerator and let them marinate for at least 24 hours before serving. This waiting time is essential because the vegetables need time to absorb the brine.
The source text emphasizes patience here for a reason. While the jars are quick to assemble, the best flavor comes after they have had time to rest.
Step 19: Enjoy as the Flavor Deepens
Once chilled and marinated, the pickled vegetables are ready to enjoy. They can be served as a snack, side dish, or flavorful addition to salads and sandwiches.
They will continue to improve over the next few days. As they sit, the flavors deepen, the vegetables become more infused, and the jars become even more irresistible.

Variations to Try
One of the nicest things about Refrigerator Pickled Vegetables is how flexible they are. Even small changes can shift the flavor and make each batch feel slightly new.
Try adding fresh seasonal herbs like dill or thyme for a brighter, garden-like twist. These herbs bring freshness and can make the jars feel even more aromatic.
You can also incorporate sliced radishes or zucchini. Both add different textures and flavors while staying true to the same crisp, quick-pickled spirit.
Another idea is experimenting with flavored vinegars such as apple cider vinegar or rice vinegar. These can create a different overall profile while keeping the recipe simple and approachable.
For a sweeter edge, the source suggests adding a few slices of fresh ginger or a dash of honey. This softens the brine in an interesting way and adds a hint of warmth.
If you want more spice, include jalapeño slices or extra red pepper flakes. That makes the jars a little bolder without changing the method at all.
Serving Ideas and Storage Tips
These pickled vegetables are best served chilled. Their refreshing bite and tangy brightness make them a wonderful contrast to heavier foods.
They work beautifully as a side dish, especially when you want something crunchy and colorful on the plate. They also add terrific texture to sandwiches, wraps, salads, and grilled meats.
The source text makes it clear that they can brighten almost any meal. That is part of their appeal, because they do not need to be the main event to make a real impact.
Store the jars in the refrigerator for up to 2 weeks. Over that time, the flavors continue to deepen, which makes them especially useful for make-ahead meal planning.
For longer storage, freezing is mentioned as an option, though the texture may change after thawing. For the best experience, they are most enjoyable fresh from the refrigerator after marinating.
If you are serving leftovers, simply shake the jar gently first. This redistributes the brine and brings all those flavors back together.
Common Mistakes to Avoid
One common mistake is not packing the jars tightly enough. Loose vegetables can lead to uneven flavor and make the jars feel less balanced.
Another issue is skipping the marinating time. The vegetables really do need at least 24 hours to absorb the brine properly, so rushing this step can leave them underwhelming.
Using overripe vegetables is also something to avoid. Fresh, crisp produce is essential here because the final texture depends so much on the quality of the vegetables going into the jar.
It is also important to make sure the vegetables are fully submerged in the brine. If pieces float above the liquid, they will not pickle evenly and may not hold up as well.
Helpful Notes
If you need a gluten-free version, make sure all ingredients used are certified gluten-free. This is a simple step, but it matters when preparing food for different dietary needs.
Apple cider vinegar can be used if you want a slightly sweeter flavor profile. That small substitution changes the character of the brine while keeping the same overall method.
Optional additions like fresh herbs or sliced jalapeños can be used to personalize the jars. This makes the recipe feel adaptable without making it more complicated.
If you prefer a milder flavor, reduce the garlic or skip the red pepper flakes. The beauty of refrigerator pickles is that they are easy to adjust to your own taste.
Frequently Asked Questions
Can the Recipe Be Frozen?
Yes, the source text says the pickled vegetables can be frozen. However, it also notes that the texture may change once thawed.
For the best result, they are most enjoyable fresh after marinating in the refrigerator. That is when the vegetables hold onto their best crunch.
Can Ingredients Be Substituted?
Absolutely. The vegetables can be swapped depending on what you have on hand, and the source specifically mentions radishes, zucchini, and even bell peppers as good options.
The key is choosing fresh vegetables for the best final texture and flavor. That keeps the jars lively, crisp, and enjoyable.
How Should Leftovers Be Stored?
Store leftover pickled vegetables in the refrigerator, tightly sealed, for up to 2 weeks. Before serving, give the jar a gentle shake so the brine is evenly redistributed.
That quick shake helps refresh the flavor and brings everything back together. It is a small step, but it helps the leftovers taste their best.
Can the Recipe Be Made Ahead?
Yes, and this is one of the recipe’s biggest strengths. The jars can be made in advance, and the flavor deepens over time, which makes them especially useful for gatherings and weeknight meals.
Having them ready ahead means less work later. It also means you always have something tangy and crisp waiting in the refrigerator.
Final Thoughts on Refrigerator Pickled Vegetables
Refrigerator Pickled Vegetables are one of those recipes that feel joyful from beginning to end. They start with fresh produce, a simple brine, and a few pantry staples, then become something bright, crunchy, and incredibly useful.
There is something heartwarming about that transformation. It takes everyday vegetables and turns them into a colorful, flavorful addition that can lift the mood of an entire meal.
They are easy enough for beginners, quick enough for busy schedules, and beautiful enough to bring to the table when you want something homemade that still feels special. That combination is what makes them so appealing.
This is also the kind of recipe that invites memory. A jar of homemade pickles in the refrigerator has a certain comfort to it, something practical and cheerful all at once.
Whether you enjoy them as a snack, serve them at a family gathering, or add them to sandwiches and salads throughout the week, they bring freshness and tang in the most satisfying way. They are simple, but they never feel boring.
And perhaps that is why they are so easy to love. They are crisp, colorful, welcoming, and made to be shared.
Refrigerator Pickled Vegetables Recipe

Refrigerator Pickled Vegetables are an easy way to preserve fresh produce with a simple homemade brine. This quick method gives you crisp, flavorful vegetables that are great for adding to meals, snacks, or appetizer boards.
- Prep Time: 20 minutes
- Total Time: 20 minutes
- Course: Condiment
- Cuisine: Various
- Servings: 4 jars
Equipment
Jar
Mixing bowl
Ingredients
Fresh Vegetables
- Sliced cucumbers, 1 cup, about ¼-inch thick
- Crisp cauliflower florets, 1 cup
- Fresh green beans, 1 cup, trimmed
- Red bell pepper, 1 cup, sliced
- Sliced carrots (coins), 1 cup
Flavor Boosters
- Garlic, 2 cloves, minced
- Whole black peppercorns, 1 tablespoon
- Mustard seeds, 1 tablespoon
- Red pepper flakes (optional), ½ teaspoon
Brine Base
- Water, 1 cup
- White vinegar (5% acidity), 1 cup
- Kosher or pickling salt, 2 tablespoon
- Sugar, 1 tablespoon
Instructions
Wash all of the vegetables well, then cut them into suitable sizes for pickling.
In a mixing bowl, stir together the water, white vinegar, salt, and sugar until the salt and sugar have fully dissolved.
Add the garlic, mustard seeds, black peppercorns, and red pepper flakes to the brine mixture.
Fill the jars with the prepared vegetables, then pour the brine over the top, making sure everything is completely submerged.
Seal the jars and place them in the refrigerator for at least 24 hours before eating.
Notes
These refrigerator pickled vegetables will keep for up to 2 weeks when stored in the fridge. You can also try different vegetables and spice combinations to create your own variation.

Fernando is the creator and writer behind the food blog Eating with your Hands. Living and working in cities like Paris, Barcelona, and Berlin, and being married to a Canadian foodie, has given Fernando a passion and interest in food and inspired him to run EWYH.