
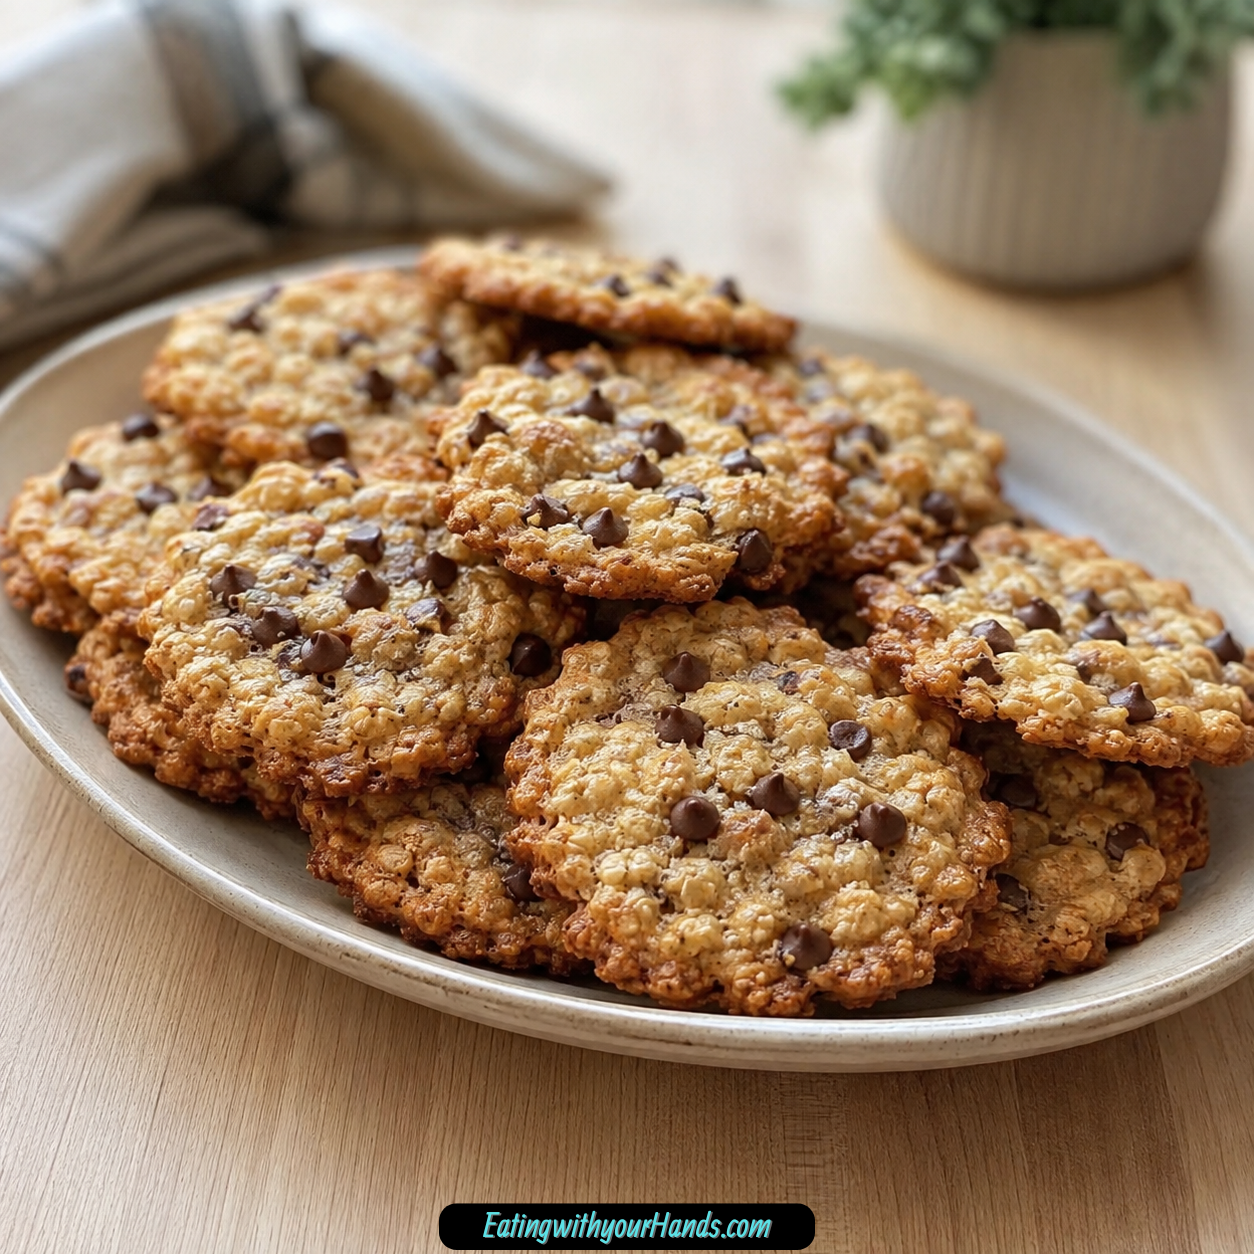

Rice Krispie Chocolate Chip Cookies are soft, buttery cookies with gooey chocolate chips and a playful crispy crunch in every bite. They bring together the familiar comfort of chocolate chip cookies with the light crackle of Rice Krispies cereal, making them sweet, chewy, and fun all at once.
I love cookies that feel a little nostalgic before they even come out of the oven. These have that after-school kitchen feeling, the kind where the butter and sugar smell warm, the vanilla makes everything sweeter, and the cereal adds a tiny surprise that makes everyone reach for one more.
The dough is simple and familiar. Softened butter is creamed with granulated sugar and brown sugar, then mixed with eggs, vanilla, flour, baking soda, salt, semi-sweet chocolate chips, and Rice Krispies cereal.
What makes these cookies special is the texture. The centers stay soft and chewy, the edges bake lightly golden, and the cereal gives each cookie a delicate crunch that makes them different from an ordinary chocolate chip cookie.
They are perfect for family gatherings, bake sales, cozy movie nights, or a sweet after-school snack. They also freeze well, which means you can save some for later if they do not disappear first.
Table of Contents
- Why You’ll Love These Rice Krispie Chocolate Chip Cookies
- Recipe Details
- Ingredients
- Optional Swaps, Variations, Add-Ins, and Serving Ideas
- Why These Rice Krispie Chocolate Chip Cookies Work
- Directions
- Step 1: Preheat the Oven
- Step 2: Prepare the Baking Sheet
- Step 3: Soften the Butter
- Step 4: Cream the Butter and Sugars
- Step 5: Scrape the Bowl
- Step 6: Add the First Egg
- Step 7: Add the Second Egg
- Step 8: Stir in the Vanilla
- Step 9: Combine the Dry Ingredients
- Step 10: Add the Dry Ingredients Slowly
- Step 11: Check the Dough Texture
- Step 12: Add the Chocolate Chips
- Step 13: Add the Rice Krispies
- Step 14: Scoop the Dough
- Step 15: Space the Cookies Properly
- Step 16: Bake the Cookies
- Step 17: Check for Light Golden Edges
- Step 18: Cool on the Baking Sheet
- Step 19: Transfer to a Wire Rack
- Step 20: Serve or Store
- Serving Ideas
- Storage
- Reheating
- Freezing
- Make-Ahead
- Helpful Notes for Best Results
- Variations
- Peanut Butter Chip Rice Krispie Cookies
- Cinnamon Chocolate Chip Cookies
- Gluten-Free Rice Krispie Chocolate Chip Cookies
- Cranberry Rice Krispie Cookies
- Raisin Rice Krispie Cookies
- White Chocolate Rice Krispie Cookies
- Milk Chocolate Rice Krispie Cookies
- Dark Chocolate Rice Krispie Cookies
- Applesauce Lightened Cookies
- Nutty Rice Krispie Cookies
- Dairy-Free Rice Krispie Cookies
- Troubleshooting
- Frequently Asked Questions
- Why This Recipe Works So Well
- Final Thoughts
- Rice Krispie Chocolate Chip Cookies
Why You’ll Love These Rice Krispie Chocolate Chip Cookies
These cookies are quick to prepare and bake. They are ready in just 25 minutes, which makes them perfect for a last-minute sweet craving.
They have a delightful mix of textures. Semi-sweet chocolate chips bring chewy, melty sweetness, while Rice Krispies cereal adds crispy crunch.
They are great for family gatherings, bake sales, and after-school snacks. They feel familiar enough for everyday baking but special enough to share.
They use minimal ingredients. Butter, sugars, eggs, vanilla, flour, baking soda, salt, chocolate chips, and cereal come together easily.
They are freezer-friendly. You can save some for later or share a batch with friends.
They are kid-approved and fun for little helpers. Kids can help fold in the chocolate chips and Rice Krispies, scoop the dough, and wait for the cookies to cool.
Recipe Details
These cookies bake at 350°F (175°C). The oven should be fully preheated before the baking sheet goes in.
The butter, granulated sugar, and brown sugar are creamed together until smooth and fluffy. This usually takes about 2–3 minutes.
The eggs are added one at a time. Each egg should be mixed in well before the next is added.
The dry ingredients include 2 ½ cups all-purpose flour, 1 teaspoon baking soda, and ½ teaspoon salt. They are whisked together separately before being added to the wet mixture.
The mix-ins are 1 cup semi-sweet chocolate chips and 1 ½ cups Rice Krispies cereal. They are folded in gently so the cereal keeps its crunch.
The dough is dropped by spoonfuls or with a cookie scoop onto a parchment-lined baking sheet. Leave space between each scoop so the cookies can spread.
The cookies bake for 10–12 minutes, or until the edges are lightly golden. They cool on the baking sheet for a few minutes before being moved to a wire rack.
Stored in an airtight container at room temperature, the cookies stay delicious for up to 1 week. They can also be frozen for up to 3 months with parchment paper between layers.
Ingredients
Butter and Sugars
1 cup unsalted butter, softened
1 cup granulated sugar
½ cup brown sugar, packed
Eggs and Vanilla
2 large eggs
1 teaspoon vanilla extract
Dry Ingredients
2 ½ cups all-purpose flour
1 teaspoon baking soda
½ teaspoon salt
Mix-Ins
1 cup semi-sweet chocolate chips
1 ½ cups Rice Krispies cereal
Ingredient Notes
Unsalted butter gives the cookies rich flavor. Good quality butter makes the cookies taste even better.
Granulated sugar helps sweeten the dough and gives the cookies their classic sweetness. Brown sugar adds a nice caramel flavor.
The brown sugar should be packed when measured. This gives the dough the right amount of sweetness and moisture.
Eggs help bind the dough together. They also help the cookies bake into soft, chewy centers.
Vanilla extract adds warmth and sweetness. Pure vanilla gives a richer taste.
All-purpose flour forms the base of the cookie dough. It gives the cookies structure.
Baking soda helps the cookies rise and spread properly. Make sure it is fresh, because expired baking soda can affect the rise.
Salt balances the sweetness. Do not skip it, because it helps the chocolate, butter, and sugars taste fuller.
Semi-sweet chocolate chips give the cookies that classic chocolate chip flavor. You can mix in milk chocolate for a sweeter touch.
Rice Krispies cereal gives the cookies their signature crispy texture. Other crispy cereals can also be used if you want to mix it up.
Optional Swaps, Variations, Add-Ins, and Serving Ideas
Peanut Butter Chip Cookies
Swap in peanut butter chips for a nutty flavor twist. This gives the cookies a richer, slightly salty-sweet flavor.
The peanut butter chips pair well with the buttery cookie base. They also make the cookies feel a little different from the classic chocolate version.
Cinnamon Rice Krispie Cookies
Add a pinch of cinnamon for a warm, cozy spice. Cinnamon pairs beautifully with chocolate and brown sugar.
This variation makes the cookies feel more comforting. It is especially nice for cooler days or cozy nights.
Gluten-Free Rice Krispie Cookies
Use gluten-free all-purpose flour to make these cookies gluten-free. Choose ingredients that fit your needs.
The texture may change depending on the flour blend. Keep the same mixing and baking method.
Cranberry Chocolate Chip Cookies
Add dried cranberries for a fruity surprise. Cranberries add chewiness and a little tartness.
This variation gives the cookies more color and contrast. It works well with semi-sweet chocolate chips.
Raisin Rice Krispie Cookies
Use raisins for another dried fruit option. They add soft chewiness to the crispy cereal texture.
The raisins make the cookies taste a little more old-fashioned. They also pair nicely with a pinch of cinnamon.
White Chocolate Rice Krispie Cookies
Use white chocolate chips for a sweeter, creamier cookie experience. This changes the flavor in a fun way.
White chocolate makes the cookies taste softer and sweeter. It is a good option for people who love extra sweetness.
Lighter Applesauce Version
Replace half the butter with unsweetened applesauce for a lighter version. This changes the texture and flavor.
The cookies may bake differently, but they still keep the idea of a sweet, crispy, chocolate chip cookie. Use this variation when you want a lighter treat.
Nutty Crunch Cookies
Add chopped nuts like walnuts or pecans for extra crunch. The nuts add texture alongside the Rice Krispies.
Walnuts or pecans make the cookies taste richer. They work well with chocolate chips and brown sugar.
Dairy-Free Direction
Substitute the butter with coconut oil or dairy-free margarine for a dairy-free option. The flavor and texture may change.
Choose the option that fits your needs. Keep the rest of the dough method the same.
Shortcut Cookie Dough Version
If you are short on time, use pre-made cookie dough and fold in the Rice Krispies and chocolate chips. This gives you a quicker version.
The final flavor and texture will depend on the dough used. The cereal still adds that fun crunch.
Why These Rice Krispie Chocolate Chip Cookies Work
These cookies work because they balance soft cookie dough with crispy cereal. The dough gives buttery sweetness, while the Rice Krispies add light crunch.
Creaming the butter and sugars creates a smooth, fluffy base. This step helps the cookies bake with a better texture.
Brown sugar adds caramel-like depth. Granulated sugar keeps the cookie flavor sweet and classic.
The eggs add structure. Adding them one at a time helps the mixture blend evenly.
The flour, baking soda, and salt create the dry foundation. Whisking them separately helps distribute the baking soda and salt throughout the dough.
Folding in the Rice Krispies gently is important. Overmixing can crush the cereal and take away some of the crispy texture.
Directions
Step 1: Preheat the Oven
Preheat your oven to 350°F (175°C). This gives the cookies the right heat from the moment they go in.
A fully heated oven helps the edges bake lightly golden while the centers stay soft. Do not put the cookies in before the oven is ready.
While the oven heats, gather your ingredients and prepare your baking sheet. This makes the process easier once the dough is mixed.
Step 2: Prepare the Baking Sheet
Line a baking sheet with parchment paper. This helps prevent sticking and makes cleanup easier.
The parchment also helps the cookies release cleanly after baking. It is especially useful for soft cookies with chocolate chips.
Set the baking sheet aside. You will fill it once the dough is ready.
Step 3: Soften the Butter
Make sure 1 cup unsalted butter is softened before mixing. Softened butter blends more easily with the sugars.
The butter should not be melted. It should be soft enough to cream but still hold its shape.
Good quality butter gives the cookies the best flavor. Since butter is a major ingredient, its taste matters.
Step 4: Cream the Butter and Sugars
In a mixing bowl, combine the softened butter, 1 cup granulated sugar, and ½ cup packed brown sugar. Use a hand mixer or a spatula.
Cream the mixture until it becomes smooth and fluffy. This usually takes about 2–3 minutes.
The mixture should look lighter and well blended. This step creates the base for soft, sweet cookies.
Step 5: Scrape the Bowl
Scrape the sides of the mixing bowl with a spatula. This helps make sure all the butter and sugar are fully combined.
Sometimes butter sticks to the sides or bottom. Scraping keeps the dough even.
Once the mixture is smooth, you are ready for the eggs. The dough should already smell sweet and buttery.
Step 6: Add the First Egg
Add 1 large egg to the creamed mixture. Beat or stir until fully blended.
The dough may loosen slightly as the egg goes in. That is normal.
Make sure the first egg is well incorporated before adding the second. This helps the dough stay smooth.
Step 7: Add the Second Egg
Add the second large egg. Mix again until the batter looks creamy and inviting.
The eggs help bind the ingredients together. They also help create a soft, chewy cookie texture.
Take your time with this step. A well-mixed base makes the final dough easier to finish.
Step 8: Stir in the Vanilla
Add 1 teaspoon vanilla extract. Stir it into the dough.
The vanilla gives the cookies a warm aroma. It also deepens the flavor of the butter, sugar, and chocolate.
Once the vanilla is mixed in, the wet ingredients are ready. The kitchen should already smell like cookies are on the way.
Step 9: Combine the Dry Ingredients
In a separate bowl, whisk together 2 ½ cups all-purpose flour, 1 teaspoon baking soda, and ½ teaspoon salt. Whisk until evenly mixed.
This step helps distribute the baking soda through the flour. It also ensures the salt is not concentrated in one spot.
Do not skip the salt. It balances the sweetness and makes the cookies taste better.
Step 10: Add the Dry Ingredients Slowly
Gradually add the dry ingredients to the wet mixture. Mix slowly and gently.
It is best to add the flour mixture in portions instead of all at once. This helps the dough come together more evenly.
Mix only until just combined. Overmixing can make the cookies tougher than they need to be.
Step 11: Check the Dough Texture
The dough may look a little crumbly at this stage. That is completely normal.
As the chocolate chips and cereal are folded in, the dough will become more complete. Do not add extra liquid.
The dough should be thick enough to scoop. It should still hold together when pressed lightly.
Step 12: Add the Chocolate Chips
Add 1 cup semi-sweet chocolate chips to the dough. Fold them in gently.
Semi-sweet chocolate gives a classic cookie flavor. Milk chocolate, dark chocolate, or white chocolate can also be used for variation.
Make sure the chips are spread evenly through the dough. Every cookie should get some chocolate.
Step 13: Add the Rice Krispies
Add 1 ½ cups Rice Krispies cereal. Fold gently.
The cereal is delicate, so avoid crushing it too much. You want those crispy bits to stay crunchy.
Fold only until the cereal is evenly distributed. The dough should look full of chocolate chips and little crisp pieces.
Step 14: Scoop the Dough
Use a spoon or cookie scoop to drop spoonfuls of cookie dough onto the parchment-lined baking sheet. Try to keep the scoops similar in size.
Similar-sized cookies bake more evenly. A cookie scoop also helps make the batch look tidy.
Leave space between each scoop. The cookies need room to spread as they bake.
Step 15: Space the Cookies Properly
Do not crowd the baking sheet. Leave some space between each mound of dough.
If the cookies are too close, they may bake into each other. Proper spacing gives each cookie room to become golden around the edges.
Bake in batches if needed. It is better to take extra time than to crowd the pan.
Step 16: Bake the Cookies
Place the baking sheet in the preheated oven. Bake for 10–12 minutes.
The edges should become lightly golden. The centers should still look soft enough to stay chewy.
Your kitchen will smell buttery, sweet, and chocolatey. Watch the cookies near the end so they do not overbake.
Step 17: Check for Light Golden Edges
Look at the edges of the cookies. They should be lightly golden when done.
Do not wait for the whole cookie to look dark. The cookies continue setting after they come out of the oven.
This helps keep the centers soft and chewy. The Rice Krispies will add texture as the cookies cool.
Step 18: Cool on the Baking Sheet
Let the cookies cool on the baking sheet for a few minutes. This helps them set.
Freshly baked cookies can be fragile. Moving them too soon may cause them to break.
During this short rest, the centers become more stable while staying soft. The bottoms also finish setting.
Step 19: Transfer to a Wire Rack
After a few minutes, transfer the cookies to a wire rack. Use a spatula if needed.
The wire rack lets air circulate around the cookies. This helps them cool without becoming soggy underneath.
Let them cool until they are easy to handle. They can still be enjoyed warm if you like that gooey chocolate bite.
Step 20: Serve or Store
Serve the cookies warm, especially if you love gooey chocolate chips. They are wonderful straight from the oven after a short cooling time.
If storing, let them cool completely first. Then place them in an airtight container at room temperature for up to 1 week.
For longer storage, freeze them for up to 3 months. Separate layers with parchment paper to prevent sticking.
Serving Ideas
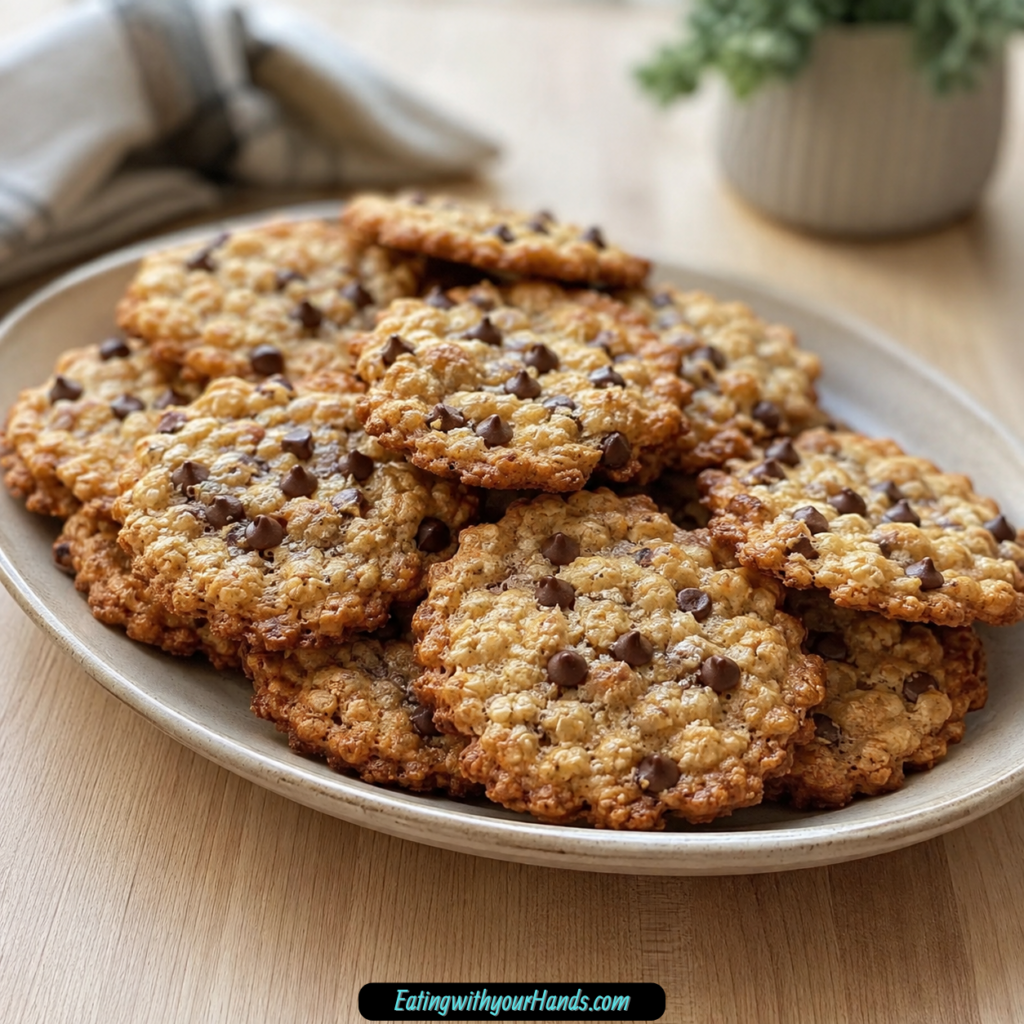
Serve Rice Krispie Chocolate Chip Cookies warm if you can. The chocolate chips will be soft, and the edges will have that freshly baked texture.
Pair them with a glass of cold milk. The cold milk balances the sweetness and makes the cookies feel classic.
A scoop of vanilla ice cream turns them into a more indulgent dessert. Warm cookies and cold ice cream make a cozy combination.
These cookies are perfect for family gatherings. Their texture makes them a little more memorable than regular chocolate chip cookies.
They also work beautifully for bake sales. The crispy cereal makes them stand out on a dessert table.
Serve them during cozy movie nights. They are easy to grab, sweet enough for a treat, and fun to share.
Storage
Store the cookies in an airtight container at room temperature. They will stay delicious for up to 1 week.
Let the cookies cool completely before storing. Warm cookies can create steam inside the container.
If stacking the cookies, place parchment paper between layers. This helps prevent sticking.
Keep the container sealed. This protects the cookies and helps maintain their texture.
Reheating
These cookies do not need reheating, but you can warm one briefly if you want the chocolate chips soft again. A few seconds is enough.
Do not overheat them. Too much heat can make the cookies too soft or dry.
Warm cookies are especially good with milk or vanilla ice cream. Serve right after warming.
If frozen, let the cookies thaw before enjoying. They can be eaten at room temperature once thawed.
Freezing
Rice Krispie Chocolate Chip Cookies freeze well. Place them in an airtight container or freezer bag.
Separate layers with parchment paper to prevent sticking. This makes it easier to remove only the cookies you need.
Freeze for up to 3 months. This is helpful if you want to save some for later.
Let frozen cookies thaw at room temperature before serving. They will be ready when soft enough to eat.
Make-Ahead
These cookies are easy to make ahead. Bake the batch, cool completely, then store in an airtight container.
They keep at room temperature for up to 1 week. This makes them useful for snacks, gatherings, and bake sales.
For longer storage, freeze for up to 3 months. Use parchment paper between layers so they do not stick.
You can also make the baking process faster with pre-made cookie dough and fold in Rice Krispies and chocolate chips. This shortcut is helpful when time is short.
Helpful Notes for Best Results
Use softened butter, not melted butter. Softened butter creams properly with the sugars.
Cream the butter and sugars for about 2–3 minutes. This helps create a smooth and fluffy base.
Add the eggs one at a time. Mix well after each addition.
Whisk the flour, baking soda, and salt separately. This helps the baking soda distribute evenly.
Fold the Rice Krispies gently. Overmixing can crush the cereal and reduce the crunch.
Check your baking soda for freshness. Expired baking soda can affect the rise of the cookies.
If you do not have unsalted butter, salted butter can be used. Reduce the added salt slightly.
For a dairy-free option, use coconut oil or dairy-free margarine instead of butter. The texture and flavor may change.
Variations
Peanut Butter Chip Rice Krispie Cookies
Swap in peanut butter chips for a nutty flavor twist. They give the cookies a sweet, rich flavor.
Peanut butter chips pair well with the crispy cereal. They make the cookies taste more playful.
Cinnamon Chocolate Chip Cookies
Add a pinch of cinnamon. This brings a warm spice that pairs beautifully with chocolate.
The cinnamon should be subtle. It gives the cookies a cozy background flavor.
Gluten-Free Rice Krispie Chocolate Chip Cookies
Use gluten-free all-purpose flour. This makes the cookies gluten-free when the rest of the ingredients fit your needs.
The texture may vary depending on the flour. Follow the same mixing and baking steps.
Cranberry Rice Krispie Cookies
Add dried cranberries. They bring a fruity surprise.
The cranberries add chewiness and a little tartness. They work well with the sweet dough.
Raisin Rice Krispie Cookies
Use raisins for another dried fruit variation. They add a soft, chewy texture.
This gives the cookies a more classic fruit-cookie feel. A pinch of cinnamon works nicely here too.
White Chocolate Rice Krispie Cookies
Use white chocolate chips. This gives a sweeter, creamier cookie experience.
White chocolate makes the cookies taste softer and more dessert-like. It pairs well with the crispy cereal.
Milk Chocolate Rice Krispie Cookies
Use milk chocolate chips for a sweeter touch. This makes the cookies taste extra classic and kid-friendly.
Milk chocolate melts softly into the dough. It is a good choice for anyone who likes a sweeter cookie.
Dark Chocolate Rice Krispie Cookies
Use dark chocolate chips for a richer flavor. This makes the cookies taste deeper.
Dark chocolate balances the sweet dough nicely. It gives the cookies a slightly bolder finish.
Applesauce Lightened Cookies
Replace half the butter with unsweetened applesauce for a lighter version. This changes the texture.
The cookies may become softer. Use this variation when you want to reduce some of the butter.
Nutty Rice Krispie Cookies
Add chopped walnuts or pecans. This gives the cookies extra crunch.
The nuts work well with chocolate chips and brown sugar. They make the cookies feel more textured.
Dairy-Free Rice Krispie Cookies
Use coconut oil or dairy-free margarine instead of butter. This creates a dairy-free direction.
The flavor and texture may vary. Keep the remaining steps the same.
Troubleshooting
Why Are My Cookies Too Flat?
The butter may have been too soft, or the dough may have been overmixed. Use softened butter, not melted butter.
Fresh baking soda also matters. Expired baking soda can affect how the cookies rise.
Why Are My Cookies Dry?
The cookies may have baked too long. Bake only until the edges are lightly golden.
The centers should stay soft. They will continue setting on the baking sheet after they come out of the oven.
Why Did the Rice Krispies Lose Their Crunch?
The cereal may have been overmixed or crushed into the dough. Fold it in gently.
Do not press the dough too much after adding the cereal. Keeping the cereal intact helps preserve the crunch.
Why Is My Dough Crumbly?
The dough can look a little crumbly after the dry ingredients are added. That is normal.
Once the mix-ins are folded in and the dough is scooped, it should hold together. Avoid adding extra liquid.
Why Did My Cookies Stick?
The baking sheet may not have been lined. Use parchment paper to help prevent sticking.
Let the cookies cool for a few minutes before moving them. This helps them release more cleanly.
Frequently Asked Questions
Can I Freeze Rice Krispie Chocolate Chip Cookies?
Yes, these cookies can be frozen for up to 3 months. Place them in an airtight container or freezer bag.
Separate layers with parchment paper to prevent sticking. Thaw at room temperature before serving.
What Can I Substitute for Eggs?
You can use ¼ cup unsweetened applesauce or a mashed banana for each egg. These options help bind the dough.
You can also use flaxseed meal. Mix 1 tablespoon flaxseed meal with 3 tablespoons water and let it sit for a few minutes until it thickens.
How Do I Store the Cookies?
Store the cookies in an airtight container at room temperature. They will last for up to 1 week.
Let them cool completely before storing. This helps keep the texture better.
Can I Use Different Types of Chocolate?
Yes, you can use milk chocolate, dark chocolate, or white chocolate chips. You can also combine different types for a fun flavor twist.
Semi-sweet chocolate gives the classic version. Choose based on how sweet or rich you want the cookies.
Can I Make These Gluten-Free?
Yes, use gluten-free all-purpose flour. Make sure the other ingredients fit your gluten-free needs.
The texture may change depending on the flour blend. Bake until the edges are lightly golden.
Can I Use Another Crispy Cereal?
Yes, other crispy cereals can be used if you want to mix it up. The flavor and texture may change.
Rice Krispies give the classic crispy texture. Other cereals may make the cookies taste slightly different.
Can Kids Help Bake These?
Yes, this recipe is great for baking with little helpers. Kids can help measure, mix, fold in cereal and chocolate chips, and scoop the dough.
Adults should handle the oven and hot baking sheets. The recipe is family-friendly and fun.
Why This Recipe Works So Well
Rice Krispie Chocolate Chip Cookies work because they take a familiar buttery cookie dough and add a crispy cereal twist. The result is a cookie that feels both classic and playful.
The softened butter and sugars create a creamy base. Brown sugar adds caramel flavor, while granulated sugar brings sweetness.
Eggs and vanilla help the dough become smooth and flavorful. The vanilla makes the cookie dough smell warm and sweet.
Flour, baking soda, and salt give the cookies structure. The salt keeps the sweetness balanced.
Chocolate chips add gooey richness. Rice Krispies add the light crackle and crunch that make these cookies special.
The short baking time keeps the centers soft. Cooling on the baking sheet helps the cookies set while staying chewy in the middle.
Final Thoughts
Rice Krispie Chocolate Chip Cookies are sweet, buttery, chewy, crispy, and full of chocolate. They take the comfort of a classic chocolate chip cookie and add the fun crunch of Rice Krispies cereal.
I love how this recipe makes a simple batch of cookies feel memorable. The cereal crackles into the dough, the chocolate chips melt into warm pockets, and the whole kitchen smells like something good is waiting.
Serve them warm with cold milk, dress them up with vanilla ice cream, bring them to a bake sale, or share them during a cozy movie night. However you enjoy them, these cookies bring gooey chocolate and crispy joy to every bite.
Rice Krispie Chocolate Chip Cookies

These Rice Krispie Chocolate Chip Cookies are sweet, buttery, lightly crisp, and filled with melty semi-sweet chocolate chips plus the fun crunch of Rice Krispies cereal. They are easy to bake, great for cookie trays, lunchboxes, parties, or everyday snacking, and have a playful texture that makes them different from a classic chocolate chip cookie.
Recipe Details
- Prep Time: 15 minutes
- Cook Time: 10 minutes
- Total Time: 25 minutes
- Course: Dessert
- Cuisine: American
- Servings: 24 cookies
- Calories: 150 kcal
Equipment
- Mixing bowl
- Baking sheet
Ingredients
For the Cookie Dough
- 2 ½ cups all-purpose flour
- 1 teaspoon baking soda
- ½ teaspoon salt
- 1 cup unsalted butter softened
- ½ cup brown sugar packed
- 1 cup granulated sugar
- 2 large eggs
- 1 teaspoon vanilla extract
For the Mix-Ins
- 1 ½ cups Rice Krispies cereal
- 1 cup semi-sweet chocolate chips
Instructions
Step 1: Preheat the Oven
Preheat your oven to 350°F (175°C).
Step 2: Cream the Butter and Sugars
In a mixing bowl, cream together the softened unsalted butter, granulated sugar, and brown sugar until smooth.
Step 3: Add the Eggs and Vanilla
Beat in the eggs one at a time, then stir in the vanilla extract.
Step 4: Whisk the Dry Ingredients
In a separate bowl, whisk together the all-purpose flour, baking soda, and salt.
Step 5: Make the Cookie Dough
Gradually add the dry ingredients to the wet ingredients, mixing until just combined.
Step 6: Fold in the Crunchy Mix-Ins
Fold in the semi-sweet chocolate chips and Rice Krispies cereal until evenly distributed through the dough.
Step 7: Scoop the Cookies
Drop spoonfuls of dough onto a baking sheet lined with parchment paper.
Step 8: Bake Until Lightly Golden
Bake for 10-12 minutes, or until the edges are lightly golden.
Step 9: Cool the Cookies
Allow the cookies to cool on the baking sheet for a few minutes before transferring them to a wire rack.
Notes
Store cookies in an airtight container to maintain freshness.
Serving Suggestions
- Serve with cold milk, coffee, or hot cocoa.
- Add to cookie trays with brownies, bars, or classic chocolate chip cookies.
- Pack into lunchboxes for a crunchy-sweet homemade treat.
- Serve at parties, bake sales, or casual family gatherings.
- Enjoy slightly warm for softer chocolate chips and a tender cookie center.
Storage
How to Store
Store the cookies in an airtight container to maintain freshness.
Best Texture Tip
Let the cookies cool on the baking sheet for a few minutes before transferring them to a wire rack so they can set without breaking.
Serving Tip
For the best contrast, serve the cookies once cooled enough to hold their shape while the chocolate chips are still slightly soft.

Fernando is the creator and writer behind the food blog Eating with your Hands. Living and working in cities like Paris, Barcelona, and Berlin, and being married to a Canadian foodie, has given Fernando a passion and interest in food and inspired him to run EWYH.