
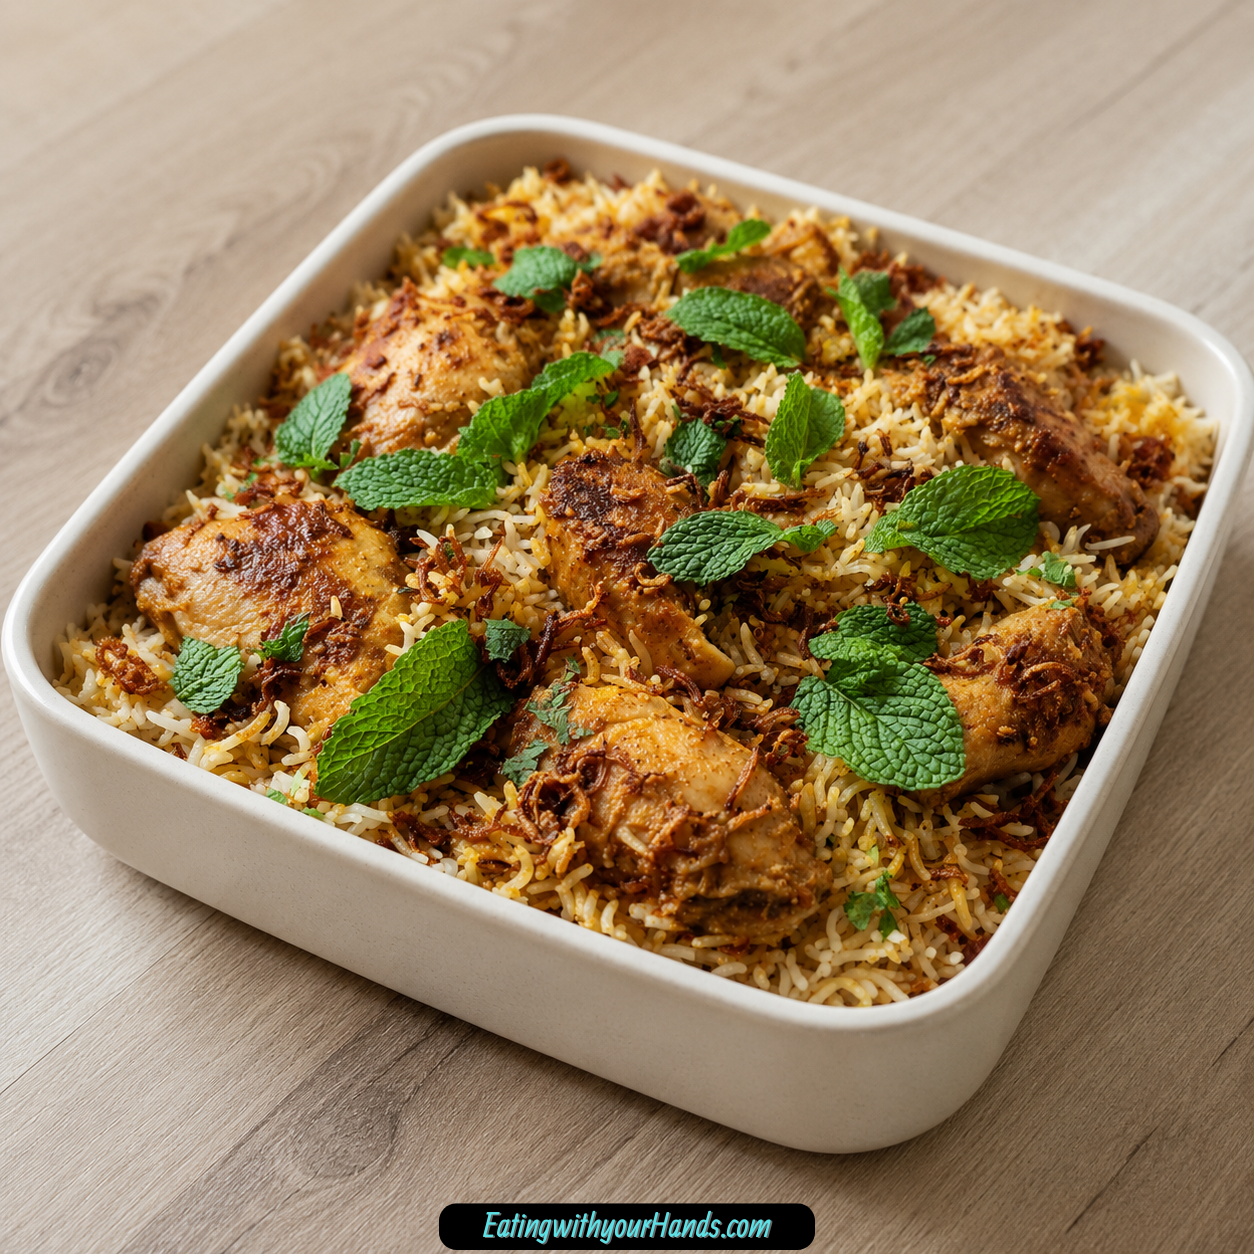

There are meals that do more than fill a plate. They fill the whole room first.
Rich Butter Chicken Biryani is one of those dishes. Before it ever reaches the table, the kitchen begins to tell the story: warm butter melting into onions, ginger garlic paste blooming in the pan, tomatoes softening into a rich masala, mint rising through steam, and basmati rice carrying the fragrance of whole spices.
This dish feels special because it combines two comforting ideas in one pot. You get the creamy, spiced richness of butter chicken and the layered, aromatic beauty of biryani.
The chicken is marinated with ginger garlic paste, turmeric, coriander, red chili powder, and salt until every piece is coated in flavor. The rice is cooked with mint, cloves, cinnamon, cardamom, and bay leaf until it is only partly done, so it can finish gently with the chicken.
Then the magic happens in layers. Tender chicken masala sits beneath fluffy basmati rice, and the whole pot steams together until the flavors settle into each other.
It is rich, comforting, fragrant, and beautiful enough for gatherings. At the same time, the steps are approachable enough for a home cook who wants something warm and memorable without feeling overwhelmed.
Table of Contents
- What Is Rich Butter Chicken Biryani?
- Why This Recipe Feels So Comforting
- Recipe Overview
- Why You’ll Love Rich Butter Chicken Biryani
- Ingredients You’ll Need
- Ingredient Notes
- Directions
- Step 1: Prepare the Chicken Pieces
- Step 2: Add Ginger Garlic Paste to the Chicken
- Step 3: Add the Dry Spices for the Marinade
- Step 4: Marinate the Chicken
- Step 5: Rinse the Basmati Rice
- Step 6: Prepare the Rice Water
- Step 7: Bring the Water to a Boil
- Step 8: Add the Rice
- Step 9: Drain the Rice
- Step 10: Prepare the Masala Ingredients
- Step 11: Melt the Butter
- Step 12: Add Cumin Seeds
- Step 13: Sauté the Onion
- Step 14: Add Tomatoes
- Step 15: Add Ginger Garlic Paste
- Step 16: Add Soaked Cashews
- Step 17: Cook the Masala Until Fragrant
- Step 18: Add the Marinated Chicken
- Step 19: Cook the Chicken
- Step 20: Add the Yogurt
- Step 21: Add Kasuri Methi
- Step 22: Add Garam Masala
- Step 23: Adjust the Masala Consistency
- Step 24: Layer the Rice Over the Chicken
- Step 25: Cover the Pot
- Step 26: Simmer on Low Heat
- Step 27: Let the Biryani Rest
- Step 28: Garnish With Herbs
- Step 29: Add Crispy Fried Onions
- Step 30: Serve Warm
- Pro Tips for the Best Rich Butter Chicken Biryani
- Variations
- Serving Suggestions
- Storage Tips
- Freezing Instructions
- Make-Ahead Instructions
- Common Mistakes to Avoid
- Helpful Notes
- Frequently Asked Questions
- Final Thoughts
- Rich Butter Chicken Biryani
What Is Rich Butter Chicken Biryani?
Rich Butter Chicken Biryani is a flavorful one-pot meal made with marinated chicken, aromatic basmati rice, buttery tomato masala, yogurt, cashews, kasuri methi, garam masala, fresh herbs, and crispy fried onions. It combines the creamy depth of butter chicken with the layered cooking style of biryani.
The chicken is first marinated so it can absorb the spices. The rice is cooked separately until about 70% done, which helps prevent it from becoming mushy once layered with the chicken.
The masala base is made with butter, onion, tomatoes, ginger garlic paste, soaked cashews, cumin seeds, dried fenugreek leaves, yogurt, and garam masala. This creates a rich, fragrant sauce that coats the chicken beautifully.
Once the chicken is cooked through, the partially cooked rice is layered over it. The pot is covered and simmered on low heat so the steam finishes the rice and allows the flavors to blend.
The final biryani is garnished with fresh mint, cilantro, and crispy fried onions. It is warm, aromatic, and full of comforting texture.
Why This Recipe Feels So Comforting
Butter chicken has a creamy richness that feels cozy and familiar. Biryani has a layered fragrance that makes a meal feel celebratory.
Bringing them together creates a dish that tastes generous. It has the tenderness of marinated chicken, the comfort of a buttery masala, and the elegance of spiced basmati rice.
The cashews add subtle richness to the masala. The yogurt brings creaminess and a gentle tang.
Kasuri methi adds a deep, slightly earthy aroma. Garam masala rounds everything out with warmth.
Fresh mint and cilantro at the end brighten the dish. Crispy fried onions add texture and a savory-sweet finish.
Recipe Overview
Prep Time: 30 minutes
Cook Time: 40 minutes
Total Time: 70 minutes
Servings: 4 people
This recipe serves 4 people and takes about 70 minutes total. The prep time includes marinating the chicken, which is important for flavor.
The rice is cooked separately first, then layered with the chicken masala and steamed on low heat. This gives the biryani its signature texture and aroma.
Why You’ll Love Rich Butter Chicken Biryani
You will love this recipe because it feels like a centerpiece dish without being too complicated. It is rich, fragrant, and satisfying.
The ingredients are accessible and easy to work with. Chicken breast, basmati rice, onions, tomatoes, butter, yogurt, and spices come together in a deeply flavorful way.
The method is beginner-friendly when followed step by step. You marinate the chicken, cook the rice, make the masala, cook the chicken, layer the rice, and let everything steam together.
It is perfect for family gatherings, holidays, cozy dinners, and special occasions. The aroma alone makes the meal feel festive.
It is also a wonderful make-ahead dish. The flavors deepen beautifully as it sits, making leftovers delicious the next day.
Ingredients You’ll Need
For Marinating the Chicken
200 g chicken breast, cut into pieces
½ teaspoon ginger garlic paste
¼ teaspoon turmeric powder
½ teaspoon coriander powder
1 teaspoon red chili powder
Salt, to taste
For Cooking the Rice
2 cups basmati rice, rinsed and drained
8 cups water
1 tablespoon oil
2 tablespoons salt
2 tablespoons fresh mint leaves, chopped
2 cloves
¼ cinnamon stick
2 cardamom pods
½ bay leaf
For the Masala Base
1 medium onion, finely chopped
2 large tomatoes, chopped
1 tablespoon ginger garlic paste
6 cashews, soaked
2 tablespoons unsalted butter
½ teaspoon cumin seeds
1 tablespoon kasuri methi, dried fenugreek leaves
2 tablespoons yogurt
1 teaspoon garam masala powder
For Garnish
¼ cup fresh mint leaves and/or cilantro, chopped
⅓ cup crispy fried onions
Ingredient Notes
Chicken breast is used in this recipe and should be cut into pieces before marinating. Smaller pieces cook faster and absorb flavor more easily.
Ginger garlic paste appears in both the marinade and the masala base. It brings warmth, depth, and that essential savory aroma.
Turmeric adds color and earthiness to the chicken. A small amount is enough.
Coriander powder adds a gentle citrusy warmth. It supports the flavor without overpowering the dish.
Red chili powder gives heat and color. You can adjust the intensity based on your preference.
Basmati rice is important because it cooks into long, fluffy grains. Rinsing and draining helps remove excess starch.
Mint leaves are used while cooking the rice and again for garnish. They add freshness to balance the rich masala.
Whole spices like cloves, cinnamon, cardamom, and bay leaf infuse the rice water. They give the biryani a fragrant base.
Onion forms the foundation of the masala. Cooking it until golden builds sweetness and depth.
Tomatoes soften into the masala and help create body in the sauce. They also add brightness.
Soaked cashews add richness and a smooth feel to the masala base. They help make the dish taste more luxurious.
Unsalted butter gives the masala its rich, comforting flavor. It is part of what makes this biryani feel so indulgent.
Cumin seeds add a nutty, warm flavor when cooked in butter. They help start the masala beautifully.
Kasuri methi adds a signature dried fenugreek aroma. It gives the dish a deeper, restaurant-style flavor.
Yogurt adds creaminess and a slight tang. It helps bring the masala together.
Garam masala adds warmth near the end. It finishes the dish with a rounded spice flavor.
Crispy fried onions add texture, sweetness, and a beautiful garnish. They make the biryani feel complete.
Directions
Step 1: Prepare the Chicken Pieces
Start by cutting 200 g chicken breast into pieces. Try to keep the pieces similar in size so they cook evenly.
If some pieces are much larger than others, they may need more time to cook. Even pieces make the final biryani more consistent.
Place the chicken pieces in a mixing bowl. This will be the bowl used for marinating.
Step 2: Add Ginger Garlic Paste to the Chicken
Add ½ teaspoon ginger garlic paste to the chicken. This gives the meat a savory, aromatic base.
Ginger garlic paste is important because it works its way into the chicken as it rests. It gives the dish flavor from the inside out.
Use a spoon or clean hands to begin coating the chicken. Make sure the paste touches all the pieces.
Step 3: Add the Dry Spices for the Marinade
Add ¼ teaspoon turmeric powder, ½ teaspoon coriander powder, and 1 teaspoon red chili powder to the bowl. Sprinkle salt to taste.
These spices create the first layer of flavor. The turmeric gives color, the coriander adds warmth, and the chili powder brings heat.
Mix everything well so the chicken is evenly coated. Each piece should look seasoned on all sides.
Step 4: Marinate the Chicken
Cover the bowl and let the chicken marinate for 30 minutes. This resting time is important.
During the 30 minutes, the chicken absorbs the spices and ginger garlic paste. This helps the final dish taste deeper and more balanced.
Do not skip this step if you can avoid it. Even a simple marinade makes a noticeable difference.
Step 5: Rinse the Basmati Rice
While the chicken marinates, rinse 2 cups basmati rice under water until the water runs clearer. This removes excess starch.
Removing starch helps the rice grains stay separate rather than sticky. That is especially important for biryani.
Drain the rice well after rinsing. Set it aside until the water is ready.
Step 6: Prepare the Rice Water
In a large pot, add 8 cups water. Place it over medium to high heat.
Add 1 tablespoon oil, 2 tablespoons salt, 2 tablespoons chopped fresh mint leaves, 2 cloves, ¼ cinnamon stick, 2 cardamom pods, and ½ bay leaf.
These ingredients season the rice as it cooks. The whole spices and mint give the rice fragrance before it is layered with the chicken.
Step 7: Bring the Water to a Boil
Allow the water to come to a boil. You should smell the mint and whole spices as the water heats.
Boiling the water before adding the rice helps the grains begin cooking properly. It also helps the spices release more aroma.
Once the water is actively boiling, you are ready to add the rice.
Step 8: Add the Rice
Add the rinsed and drained basmati rice to the boiling water. Stir gently to prevent the grains from sticking together.
Be careful not to stir too aggressively. Basmati rice can break if handled too roughly.
Let the rice cook until it is about 70% done. This usually means the grain is partly cooked but still has a slight bite.
Step 9: Drain the Rice
Once the rice is about 70% cooked, drain it carefully. Do not cook it fully at this stage.
The rice will finish cooking later when it is layered over the chicken masala. This prevents the final biryani from becoming mushy.
Set the drained rice aside. Keep it ready for layering.
Step 10: Prepare the Masala Ingredients
Finely chop 1 medium onion. Chop 2 large tomatoes.
Make sure the 6 cashews have been soaked. Soaking helps them soften and blend into the masala more easily.
Keep 1 tablespoon ginger garlic paste, 2 tablespoons unsalted butter, ½ teaspoon cumin seeds, 1 tablespoon kasuri methi, 2 tablespoons yogurt, and 1 teaspoon garam masala nearby.
Step 11: Melt the Butter
In the same pot used for the rice, melt 2 tablespoons unsalted butter over medium heat. Let it become warm and fragrant.
Butter gives the masala richness. It is one of the key ingredients that makes this biryani taste comforting.
Do not let the butter burn. Keep the heat moderate.
Step 12: Add Cumin Seeds
Add ½ teaspoon cumin seeds to the melted butter. Let them warm briefly.
The cumin seeds release a nutty, earthy aroma as they hit the butter. This begins the flavor base of the masala.
Stir gently so they do not burn.
Step 13: Sauté the Onion
Add the finely chopped onion to the pot. Sauté until golden brown, about 5 to 7 minutes.
The onion should soften and take on color. This step builds sweetness and depth in the masala.
Stir often so the onion browns evenly. Avoid rushing this step because golden onion adds real flavor.
Step 14: Add Tomatoes
Add the chopped tomatoes to the pot. Stir them into the onions.
The tomatoes will soften as they cook. They help create the body of the masala and bring a gentle brightness.
Cook until they begin breaking down. This takes about a few minutes.
Step 15: Add Ginger Garlic Paste
Add 1 tablespoon ginger garlic paste to the onion and tomato mixture. Stir well.
This second addition of ginger garlic paste strengthens the savory flavor of the masala. It also gives the dish its warm, familiar aroma.
Cook until fragrant. Be careful not to let it stick or burn.
Step 16: Add Soaked Cashews
Add the 6 soaked cashews to the masala base. Stir them into the tomato and onion mixture.
The cashews add richness and help make the masala taste creamy. They soften further as the mixture cooks.
Let them cook with the tomatoes so their flavor blends into the base.
Step 17: Cook the Masala Until Fragrant
Continue cooking the onion, tomato, ginger garlic paste, cashews, cumin seeds, and spices until the tomatoes soften and the mixture becomes fragrant. This takes about 5 minutes.
The masala should look thicker and more cohesive. The raw smell of the tomatoes should mellow.
This step is important because the flavor of the biryani depends on a well-cooked masala base.
Step 18: Add the Marinated Chicken
Add the marinated chicken to the masala base. Stir well so the chicken pieces are coated.
The chicken should be surrounded by the buttery tomato mixture. This helps it cook in the flavor rather than separately.
Spread the chicken evenly in the pot. Let it begin cooking over medium heat.
Step 19: Cook the Chicken
Cook the chicken for about 10 to 12 minutes, or until it is cooked through and tender. Stir occasionally.
The chicken should absorb the masala as it cooks. The sauce will become richer and more flavorful.
Do not rush this step. The chicken needs enough time to cook fully before the rice is layered on top.
Step 20: Add the Yogurt
Add 2 tablespoons yogurt to the chicken masala. Stir gently to combine.
Yogurt adds creaminess and a light tang. It helps make the masala feel smooth and rich.
Keep the heat moderate when adding yogurt. Stirring helps it blend well into the sauce.
Step 21: Add Kasuri Methi
Add 1 tablespoon kasuri methi to the pot. Crush it lightly between your fingers as you add it if desired.
Kasuri methi gives the dish a deep, aromatic flavor. It is one of the ingredients that makes the biryani taste fuller and more layered.
Stir it into the chicken masala so the flavor spreads evenly.
Step 22: Add Garam Masala
Add 1 teaspoon garam masala powder. Stir gently.
Garam masala is added toward the end of the masala cooking so its aroma stays strong. It gives warmth and complexity.
Taste the masala if needed and adjust salt. The rice has already been cooked in salted water, so season carefully.
Step 23: Adjust the Masala Consistency
If the chicken mixture seems too thick, add a little water. Stir until it reaches your desired consistency.
The masala should not be watery, but it should be moist enough to flavor the rice during steaming. A dry masala can make the biryani feel less rich.
Use only a small amount of water at a time. You can always add more if needed.
Step 24: Layer the Rice Over the Chicken
Once the chicken is cooked, gently layer the drained basmati rice over the chicken masala. Spread the rice evenly.
Do not stir everything together at this stage. Biryani is meant to have layers of rice and masala.
Use a light hand so the rice grains do not break. The goal is fluffy rice sitting over rich chicken.
Step 25: Cover the Pot
Cover the pot with a lid. This traps steam inside.
The steam will finish cooking the rice and help the flavors meld. This is where the dish becomes biryani rather than just rice and chicken.
Make sure the lid fits well. A tight cover helps the rice cook properly.
Step 26: Simmer on Low Heat
Let the biryani simmer on low heat for about 10 minutes. Keep the heat gentle.
Low heat allows the rice to finish cooking without burning the chicken masala underneath. It also gives the spices time to settle into the rice.
Avoid opening the lid too often. Keeping the steam inside is important.
Step 27: Let the Biryani Rest
After the low simmer, turn off the heat and let the pot sit covered for a few minutes if possible. This helps the flavors settle.
Resting makes the rice easier to serve and helps the layers stay more defined. It also keeps the biryani warm until you are ready to garnish.
Do not stir aggressively after resting. Use a gentle hand when serving.
Step 28: Garnish With Herbs
Before serving, garnish with ¼ cup fresh mint leaves and/or cilantro, chopped. The herbs add freshness and color.
Mint gives a cooling aroma that balances the richness. Cilantro adds a fresh, bright finish.
Sprinkle the herbs evenly over the top. This makes the biryani look beautiful and inviting.
Step 29: Add Crispy Fried Onions
Sprinkle ⅓ cup crispy fried onions over the biryani. This adds texture and deep savory sweetness.
The fried onions make the dish feel festive. They also give each serving a little crunch.
Add them right before serving so they stay crisp.
Step 30: Serve Warm
Serve the Rich Butter Chicken Biryani warm. Scoop gently from the pot so each serving includes both rice and chicken masala.
You can serve it with cooling raita or a fresh salad. Naan or paratha can also be served alongside for a fuller meal.
Offer lemon wedges on the side if desired. A small squeeze can brighten the rich flavors.

Pro Tips for the Best Rich Butter Chicken Biryani
Marinate the chicken for the full 30 minutes. This helps the spices soak into the chicken.
Cook the rice only until 70% done. Fully cooked rice can become mushy once layered and steamed.
Use high-quality spices whenever possible. Fresh spices make the dish more aromatic.
Do not skip the resting time after cooking. Resting helps the rice and masala settle together.
Use low heat for the final steaming. High heat can burn the masala at the bottom.
Garnish right before serving. Fresh herbs and crispy onions taste best when added at the end.
Variations
Add saffron soaked in warm milk for a luxurious twist. This gives the rice a beautiful aroma and color.
Incorporate seasonal vegetables like peas or carrots for added nutrition. These can make the dish more colorful.
Use quinoa instead of basmati rice for a gluten-free option. The texture will be different, but it can still be delicious.
Try coconut milk instead of yogurt for a creamier, dairy-free version. It adds a softer richness.
Experiment with different proteins like lamb or shrimp for variety. Cooking times may need adjustment based on the protein.
Substitute chicken with paneer or tofu for a vegetarian option. This keeps the dish comforting while changing the protein.
Use brown rice for a healthier alternative. Adjust the cooking time because brown rice takes longer.
Add bell peppers or peas for extra nutrition. They bring color and texture.
For a nut-free version, skip the cashews or use sunflower seeds instead. This keeps the masala rich while avoiding nuts.
Make it dairy-free by replacing yogurt with coconut yogurt. This keeps the creamy element in the dish.
Serving Suggestions
Rich Butter Chicken Biryani is best served warm. It should be fragrant, fluffy, and rich.
A cooling raita pairs beautifully with the spices. The coolness balances the warmth of the biryani.
A fresh salad also works well. It adds crunch and lightness beside the rich rice and chicken.
Naan or paratha can make the meal more complete. They are especially nice if you like scooping up extra masala.
Lemon wedges can be served on the side. A small squeeze of lemon brightens the flavors.
This dish is also wonderful for gatherings. Place the pot in the center of the table and let everyone serve themselves.
Storage Tips
Store leftover Rich Butter Chicken Biryani in an airtight container in the refrigerator for up to 3 days. Let it cool before sealing.
Reheat gently on the stove or in the microwave. Add a splash of water if needed to restore moisture.
The flavors often deepen after resting. That makes leftovers especially delicious the next day.
Avoid reheating too aggressively. Gentle heat keeps the rice from drying out and helps the chicken stay tender.
Freezing Instructions
You can freeze Rich Butter Chicken Biryani for up to 2 months. Allow it to cool completely first.
Place portions in airtight containers. Freezing in portions makes reheating easier.
When ready to eat, thaw if needed and reheat on the stove or in the microwave. Add a small splash of water to keep the rice moist.
The texture of rice may change slightly after freezing, but the dish will still be flavorful and comforting.
Make-Ahead Instructions
Rich Butter Chicken Biryani is a great make-ahead meal. You can prepare it a day in advance and refrigerate it.
The flavors deepen as it sits. This makes the dish even more enjoyable the next day.
When ready to serve, reheat gently. Add a little water if needed and warm until heated through.
Garnish with fresh herbs and crispy fried onions after reheating. This keeps the top fresh and textured.
Common Mistakes to Avoid
Not marinating the chicken long enough can make the flavor less developed. Allow at least 30 minutes.
Overcooking the rice can make the final biryani mushy. Aim for 70% cooked before layering.
Skipping the resting time after cooking can make the flavors feel less blended. Let the biryani sit covered briefly.
Using low-quality or stale spices can weaken the flavor. Fresh spices make a noticeable difference.
Cooking the final layered biryani on high heat can burn the bottom. Keep the heat low.
Stirring the layered biryani too aggressively can break the rice. Serve gently.
Adding too much water to the masala can make the biryani soggy. Add only a little if needed.
Helpful Notes
Chicken can be replaced with paneer or tofu for a vegetarian option. The result will be different but still comforting.
Brown rice can be used as a healthier alternative. Adjust the cooking time because it needs longer than basmati rice.
Vegetables like bell peppers or peas can be added for extra nutrition. They also make the biryani more colorful.
For a nut-free version, skip the cashews or use sunflower seeds. This helps keep the recipe accessible.
For a dairy-free version, replace yogurt with coconut yogurt. This keeps the creamy texture without dairy.
If the masala becomes too thick, add a little water. The mixture should be rich but not dry.
Use fresh mint and/or cilantro for garnish. Fresh herbs help balance the richness of the butter and spices.
Frequently Asked Questions
Can Rich Butter Chicken Biryani Be Frozen?
Yes, Rich Butter Chicken Biryani can be frozen. Let it cool completely, then store it in an airtight container for up to 2 months.
When ready to serve, reheat gently. Add a splash of water if needed to restore moisture.
Can Ingredients Be Substituted?
Yes, several ingredients can be substituted. Chicken can be replaced with paneer for a vegetarian option.
You can use brown rice instead of basmati, but the cooking time will need adjustment. Yogurt can be replaced with coconut yogurt for a dairy-free version.
How Should I Store Leftovers?
Store leftovers in an airtight container in the refrigerator for up to 3 days. Let the biryani cool before sealing.
Reheat on the stovetop or in the microwave. Add a splash of water if the rice seems dry.
Can This Recipe Be Made Ahead?
Yes, this dish is excellent for making ahead. Prepare it a day in advance, refrigerate it, and reheat when ready to serve.
The flavors deepen as the biryani sits, making it even more flavorful the next day.
Why Should the Rice Be Only 70% Cooked?
The rice continues cooking during the final steaming step. If it is fully cooked before layering, it may become mushy.
Cooking it to 70% helps the grains stay fluffy and separate.
Can I Make This Vegetarian?
Yes, substitute the chicken with paneer or tofu. Keep the same masala base and layering method.
The cooking time may be shorter depending on the substitute used.
What Can I Serve With Butter Chicken Biryani?
Serve it with raita, fresh salad, naan, paratha, or lemon wedges. These sides balance the richness and make the meal feel complete.
Fresh herbs and crispy fried onions also help finish the dish beautifully.
Final Thoughts
Rich Butter Chicken Biryani is the kind of meal that turns dinner into a gathering. It is warm, fragrant, creamy, and layered with comfort.
The marinated chicken brings spice and tenderness. The butter masala adds richness. The basmati rice carries the aroma of mint, cloves, cinnamon, cardamom, and bay leaf.
When everything steams together, the flavors settle into something deeply satisfying. Each scoop gives you fluffy rice, tender chicken, creamy masala, fresh herbs, and crispy fried onions.
This recipe is special enough for holidays and family celebrations, but approachable enough for a cozy dinner at home. It can be made ahead, stored, frozen, reheated, and customized with paneer, tofu, vegetables, brown rice, or coconut yogurt.
Serve it warm, share it generously, and let the aroma bring everyone to the table. Rich Butter Chicken Biryani is more than a meal; it is the kind of dish that creates a memory before the first bite.
Rich Butter Chicken Biryani

This Rich Butter Chicken Biryani is a flavorful Indian-inspired dinner made with tender marinated chicken, fragrant basmati rice, buttery tomato masala, yogurt, kasuri methi, fresh herbs, and crispy fried onions. The layers come together into a comforting biryani with warm spices, creamy richness, and aromatic rice.
Recipe Information
- Prep Time: 30 minutes
- Cook Time: 40 minutes
- Total Time: 1 hour 10 minutes
- Course: Biryani, Dinner
- Cuisine: Indian
- Servings: 4 people
- Calories: 500 kcal
Equipment
- Mixing bowl
- Pot
Ingredients
For Marinating the Chicken
- 1 teaspoon red chili powder
Adds heat and bold color to the chicken. - 200 g chicken breast, cut into pieces
Creates the tender protein base for the biryani. - ½ teaspoon coriander powder
Adds warm, earthy flavor to the marinade. - ½ teaspoon ginger garlic paste
Gives the chicken savory depth and aroma. - ¼ teaspoon turmeric powder
Adds color and a mild earthy flavor.
For Cooking the Rice
- 2 tablespoons fresh mint leaves
Adds a fresh, aromatic flavor to the rice. - 2 tablespoons salt
Seasons the rice as it cooks. - 2 cups basmati rice
Provides the long-grain, fragrant base for the biryani. - 1 tablespoon oil
Helps keep the rice grains separate. - 8 cups water
Used to cook the basmati rice until tender.
For the Masala Base
- 2 tablespoons unsalted butter
Creates a rich, buttery base for the masala. - 1 tablespoon kasuri methi
Adds a distinctive dried fenugreek flavor. - 1 medium onion
Builds sweetness and depth in the masala. - 1 teaspoon garam masala powder
Adds warm spice and classic biryani aroma. - 2 large tomatoes
Create a rich, tangy base for the sauce. - ¼ cup water, if needed
Helps loosen the masala if it becomes too thick. - 1 tablespoon ginger garlic paste
Adds bold savory flavor to the sauce. - ½ teaspoon cumin seeds
Adds earthy warmth to the butter base. - 2 tablespoons yogurt
Makes the masala creamy and slightly tangy.
For Garnish
- ⅓ cup crispy fried onions
Adds crunch, sweetness, and a classic biryani finish. - ¼ cup fresh mint leaves and/or cilantro
Adds freshness and color before serving.
Instructions
- Add the chicken pieces to a mixing bowl.
- Season the chicken with ginger garlic paste, turmeric powder, coriander powder, red chili powder, and salt.
- Mix well until the chicken is evenly coated, then let it marinate for 30 minutes.
- In a pot, cook the basmati rice with water, oil, salt, and fresh mint leaves until the rice is done.
- Drain the rice if needed and set it aside.
- For the masala base, melt the unsalted butter in a pot over medium heat.
- Add the cumin seeds and let them become fragrant.
- Add the onion and cook until softened.
- Stir in the tomatoes and ginger garlic paste.
- Cook until the tomatoes break down and the mixture becomes soft and saucy.
- Add the marinated chicken to the masala base.
- Cook until the chicken is fully cooked through.
- Stir in the yogurt, kasuri methi, and garam masala powder.
- Add a little water if needed to loosen the masala.
- Layer the cooked basmati rice over the chicken masala.
- Cover and let it simmer for a few minutes so the flavors blend together.
- Garnish with fresh mint leaves and/or cilantro.
- Top with crispy fried onions before serving.
Notes
- Adjust the red chili powder depending on how spicy you want the biryani.
- Serve with raita, cucumber salad, or a simple fresh salad.
- Let the biryani rest for a few minutes before serving so the rice and masala flavors settle together.

Fernando is the creator and writer behind the food blog Eating with your Hands. Living and working in cities like Paris, Barcelona, and Berlin, and being married to a Canadian foodie, has given Fernando a passion and interest in food and inspired him to run EWYH.