
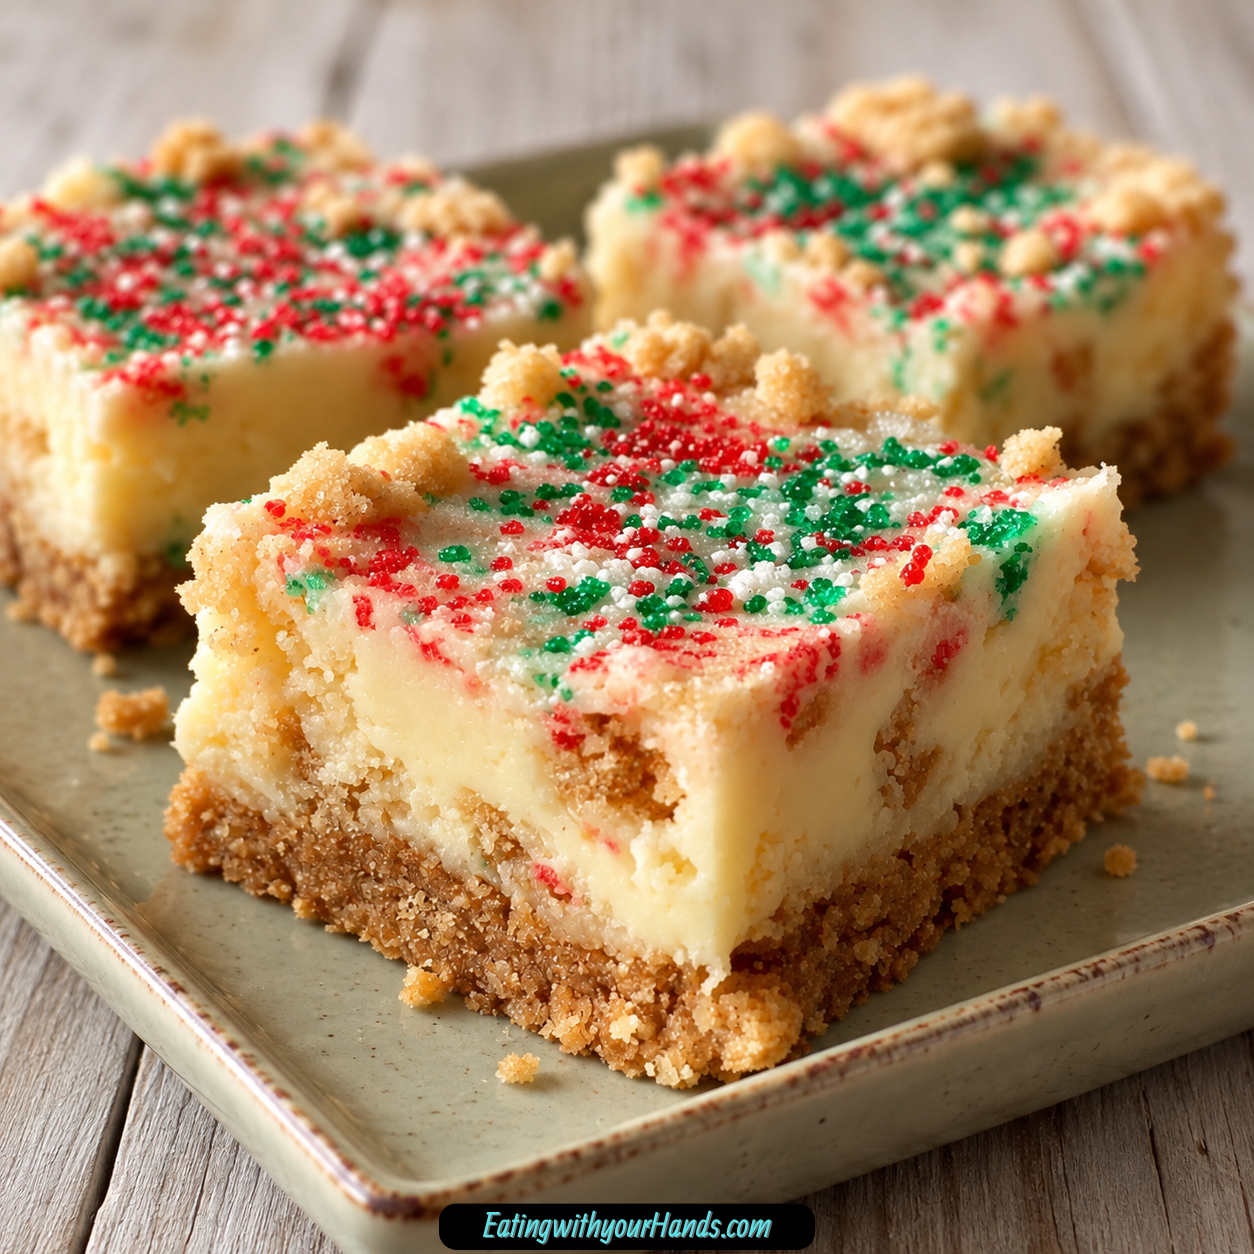
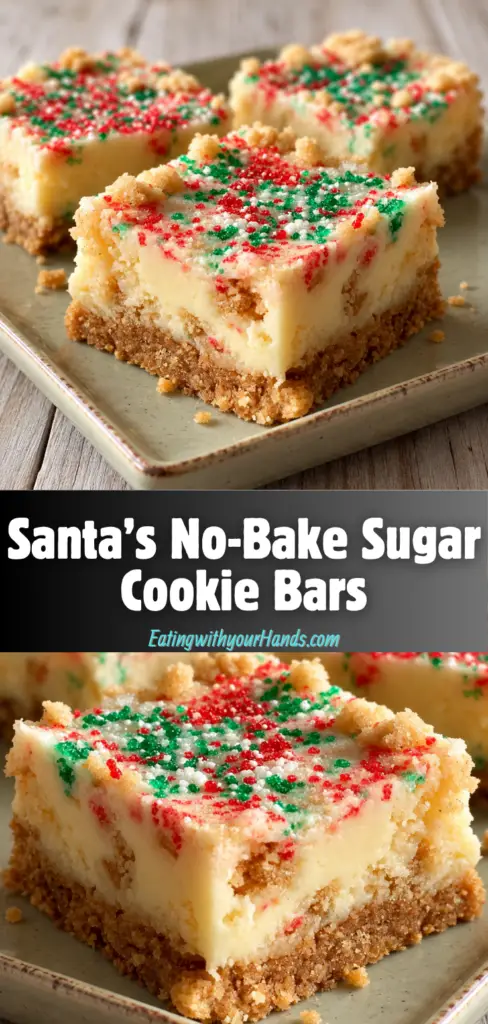
Santa’s No-Bake Sugar Cookie Bars are the kind of holiday treat that makes December feel playful, sweet, and wonderfully easy. They have the cozy flavor of a sugar-cookie-inspired dessert, the creamy richness of condensed milk and white chocolate, the chewiness of mini marshmallows, and the festive sparkle of red, green, and white sprinkles.
These bars are made for busy holiday days when the oven is already full, the schedule is crowded, and everyone still wants something cheerful on the dessert table. They come together with simple pantry-style ingredients, a 9×9-inch pan, and a few minutes of mixing, pressing, sprinkling, and chilling.
The base is a thick graham cracker mixture made with crumbs, melted butter, sweetened condensed milk, and vanilla. It presses into the pan like a soft cookie crust and firms beautifully in the refrigerator.
The top is where the Christmas fun happens. White chocolate chips, mini marshmallows, festive sprinkles, and optional chopped pecans turn the bars into a colorful no-bake dessert that looks like it came from Santa’s own treat tray.
I love recipes like this because they let the holiday spirit happen without stress. There is no dough to roll, no cookies to rotate in and out of the oven, and no need to worry about overbaking.
Kids can help decorate, adults can slice them into neat squares, and the fridge does the hard work. After at least 2 hours of chilling, the bars lift out easily with parchment paper and slice into creamy, crunchy, sweet little squares.
They are perfect for cookie platters, treat bags, school events, Christmas Eve dessert boards, neighbor gifts, or a last-minute party tray. They also freeze well, which makes them extra useful during a month when every day seems to bring another reason to share something sweet.
Santa’s No-Bake Sugar Cookie Bars taste like a cross between a sugar cookie, a creamy holiday fudge bar, and a sprinkle-covered Christmas candy square. They are simple, festive, and exactly the kind of low-effort treat that still feels full of holiday magic.
Table of Contents
- Why You’ll Love These Santa’s No-Bake Sugar Cookie Bars
- Recipe Details
- Ingredients
- Ingredient Notes
- Optional Swaps, Variations, Add-Ins, and Serving Ideas
- Classic Santa’s No-Bake Sugar Cookie Bars
- Almond Sugar Cookie Bars
- Extra Sprinkle Bars
- Nut-Free Christmas Bars
- Softer No-Bake Cookie Bars
- Peppermint No-Bake Bars
- Vanilla Pudding Sugar Cookie Bars
- Pecan Christmas Bars
- Milk Chocolate Sugar Cookie Bars
- Semi-Sweet Chocolate Bars
- Gift Box Bars
- Santa Plate Bars
- Holiday Party Tray Bars
- Why This Recipe Works
- Directions
- Step 1: Prepare the Pan
- Step 2: Melt the Butter
- Step 3: Add the Graham Cracker Crumbs
- Step 4: Add the Condensed Milk
- Step 5: Add Butter and Vanilla
- Step 6: Add Optional Flavor Boosters
- Step 7: Press the Crust Into the Pan
- Step 8: Smooth the Surface
- Step 9: Add White Chocolate Chips
- Step 10: Add Mini Marshmallows
- Step 11: Add Festive Sprinkles
- Step 12: Add Pecans if Using
- Step 13: Press the Topping Lightly
- Step 14: Chill the Bars
- Step 15: Lift From the Pan
- Step 16: Slice Into Squares
- Step 17: Serve Chilled
- Step 18: Store or Freeze
- Serving Ideas
- Storage
- Freezing
- Make-Ahead
- Helpful Notes for Best Results
- Variations
- Classic Santa’s No-Bake Sugar Cookie Bars
- Almond Sugar Cookie Bars
- Extra Sprinkle Sugar Cookie Bars
- Nut-Free Santa Bars
- Softer Santa Bars
- Peppermint Sugar Cookie Bars
- Vanilla Pudding Sugar Cookie Bars
- Pecan Sugar Cookie Bars
- White Chocolate Marshmallow Bars
- Milk Chocolate Cookie Bars
- Semi-Sweet Chocolate Cookie Bars
- Gift Tin Bars
- Christmas Eve Treat Bars
- Troubleshooting
- Frequently Asked Questions
- Why This Recipe Works So Well
- Final Thoughts
- Santa’s No-Bake Sugar Cookie Bars
Why You’ll Love These Santa’s No-Bake Sugar Cookie Bars
These bars do not need an oven. That makes them perfect for busy holiday baking days or crowded December kitchens.
They take only about 15 minutes of hands-on prep. After that, the refrigerator firms them up.
They are festive and kid-friendly. Sprinkles, marshmallows, and simple layering make them fun for little hands to help with.
They are easy to customize. Pecans, almond extract, extra sprinkles, crushed peppermint, pudding mix, and different chocolate chips can all change the flavor.
They are perfect for gifting. Slice them into squares and wrap them in wax paper, treat bags, or holiday tins.
They are sweet, creamy, crunchy, and cheerful. Every bite feels like a little piece of Christmas dessert-table joy.
Recipe Details
This is a no-bake recipe. The bars set in the refrigerator instead of baking in the oven.
The hands-on prep time is about 15 minutes. The bars need at least 2 hours of chilling time before slicing.
The recipe uses a 9×9-inch baking pan. Line the pan with parchment paper so the bars can be lifted out easily after chilling.
The crust is made with 2 cups graham cracker crumbs, 1 cup sweetened condensed milk, ½ cup melted unsalted butter, and 1 teaspoon vanilla extract. The mixture should look like a thick, sticky dough.
The topping includes 1 ½ cups white chocolate chips, 1 cup mini marshmallows, ¼ cup festive sprinkles, and optional ½ cup chopped pecans. Red, green, and white sprinkles make the bars look extra Christmas-ready.
The bars should chill for at least 2 hours. This gives the crust time to firm up and hold its shape.
Serve the bars chilled for the cleanest slices. They also taste good after sitting at room temperature for about 10 minutes to soften slightly.
Store the bars in an airtight container in the refrigerator for up to 5 days. For longer storage, freeze them for up to 2 months.
To freeze, wrap each square tightly in plastic wrap and place the wrapped squares in a freezer-safe container. Thaw before serving.
Ingredients
For the No-Bake Crust
- 2 cups graham cracker crumbs
- 1 cup sweetened condensed milk
- ½ cup unsalted butter, melted
- 1 teaspoon vanilla extract
For the Festive Topping
- 1 ½ cups white chocolate chips
- 1 cup mini marshmallows
- ¼ cup festive sprinkles, red, green, and white
- ½ cup chopped pecans, optional
Optional Swaps, Add-Ins, and Decorating Ideas
- ¼ teaspoon almond extract
- Extra sprinkles
- Crushed candy canes
- Crushed peppermint
- 1 tablespoon dry instant vanilla pudding
- Milk chocolate chips
- Semi-sweet chocolate chips
Ingredient Notes
Graham cracker crumbs form the base of the bars. They give the crust structure and a cookie-like flavor.
Sweetened condensed milk helps bind the crumbs together. It also gives the bars their creamy sweetness.
Melted unsalted butter adds richness and helps create a soft, cohesive crust. It also gives the bars a buttery holiday-cookie flavor.
Vanilla extract brings the sugar-cookie feeling into the crust. It makes the graham cracker base taste warmer and more dessert-like.
White chocolate chips add creamy sweetness on top. They soften slightly as the bars chill and create little pockets of richness.
Mini marshmallows bring soft, chewy texture. They also make the bars feel playful and festive.
Red, green, and white sprinkles give the bars their Christmas look. They turn a simple no-bake dessert into something bright and party-ready.
Chopped pecans are optional. They add crunch and a nutty depth that balances the sweetness.
Almond extract can be added for extra cookie flavor. Use only ¼ teaspoon because almond extract can be strong.
Dry instant vanilla pudding can be mixed into the crust for a sugar-cookie-style twist. Use 1 tablespoon if you want extra flavor.
Milk chocolate or semi-sweet chocolate chips can replace the white chocolate. The flavor will shift, but the bars will still be delicious.
Optional Swaps, Variations, Add-Ins, and Serving Ideas
Classic Santa’s No-Bake Sugar Cookie Bars
Make the bars with graham cracker crumbs, sweetened condensed milk, melted butter, vanilla, white chocolate chips, mini marshmallows, festive sprinkles, and optional pecans. This gives you the full creamy, chewy, crunchy Christmas bar.
Chill for at least 2 hours before slicing. Serve cold for the cleanest squares.
Almond Sugar Cookie Bars
Add ¼ teaspoon almond extract to the crust mixture. This gives the bars a stronger sugar-cookie-style flavor.
Use a light hand with almond extract. A small amount is enough.
Extra Sprinkle Bars
Stir extra sprinkles into the crust before pressing it into the pan. This gives the bars color inside and on top.
Use festive sprinkles for the brightest holiday look. Fold them in gently before pressing.
Nut-Free Christmas Bars
Skip the pecans. No other adjustments are needed.
The bars will still be sweet, creamy, and festive. The marshmallows and white chocolate provide plenty of texture.
Softer No-Bake Cookie Bars
Add an extra 2 to 3 tablespoons of sweetened condensed milk to the crust. This makes the bars softer.
Use this option if you prefer a more tender bite. Chill thoroughly so the bars still slice well.
Peppermint No-Bake Bars
Replace the sprinkles with crushed candy canes. Sprinkle crushed peppermint over the white chocolate layer.
This gives the bars a cool peppermint holiday flavor. It also makes them look bright and festive.
Vanilla Pudding Sugar Cookie Bars
Mix 1 tablespoon dry instant vanilla pudding into the crust mixture. This adds extra vanilla flavor.
The bars will taste more like a sugar-cookie-inspired dessert. Mix well so the pudding distributes evenly.
Pecan Christmas Bars
Add ½ cup chopped pecans to the topping. Pecans bring crunch and a warm nutty flavor.
Toasting is optional. Toasting for 5 minutes at 350°F enhances the flavor beautifully.
Milk Chocolate Sugar Cookie Bars
Use milk chocolate chips instead of white chocolate chips. This creates a sweeter chocolate-style bar.
The flavor will be less like white chocolate sugar cookie and more like a creamy chocolate cookie bar. It still works well with marshmallows.
Semi-Sweet Chocolate Bars
Use semi-sweet chocolate chips instead of white chocolate. This gives the bars a deeper chocolate flavor.
Semi-sweet chocolate helps balance the condensed milk sweetness. It is a good option for chocolate lovers.
Gift Box Bars
Slice the chilled bars into neat squares. Wrap each one in wax paper and place them in decorative tins.
Keep the tins refrigerated until gifting. The bars stay best when chilled.
Santa Plate Bars
Serve these bars on Christmas Eve with other cookies. The sprinkles and marshmallows make them perfect for a Santa-themed dessert plate.
Cut them small if serving with many treats. They are sweet and satisfying.
Holiday Party Tray Bars
Arrange the bars on a platter with candies, cookies, and other bite-sized desserts. Their red, green, and white sprinkles add instant color.
Keep the tray chilled until close to serving. This helps the bars hold their shape.
Why This Recipe Works
This recipe works because the crust mixture is sticky enough to hold together without baking. Graham cracker crumbs provide structure, while condensed milk and melted butter bind everything into a thick dough-like base.
Vanilla gives the crust the warm sweetness that makes it feel like a sugar cookie. The graham crumbs add a cookie-like flavor without requiring baking.
Firm pressing is important. The more evenly and tightly the crust is pressed into the pan, the better the bars will hold together later.
The white chocolate chips add creamy sweetness. They sit on top and soften slightly as the bars chill.
Mini marshmallows create a soft, chewy holiday texture. They make the bars feel fun and candy-like.
Sprinkles bring color and festive personality. They also make the bars feel decorated without extra work.
The refrigerator does the setting. At least 2 hours of chilling gives the bars enough time to firm up and slice cleanly.
Parchment paper makes serving easier. It lets you lift the whole slab out of the pan before cutting.
Directions
Step 1: Prepare the Pan
Line a 9×9-inch baking pan with parchment paper. Leave a little overhang on the sides if possible.
The parchment makes it easy to lift the chilled bars out of the pan. This also helps you cut cleaner squares.
Step 2: Melt the Butter
Melt ½ cup unsalted butter. Let it cool slightly if it feels very hot.
The butter should be melted and pourable. It will help coat the graham cracker crumbs.
Step 3: Add the Graham Cracker Crumbs
Place 2 cups graham cracker crumbs in a large mixing bowl. Break up any clumps with a spoon.
The crumbs should be evenly textured. This helps the crust press together smoothly.
Step 4: Add the Condensed Milk
Pour 1 cup sweetened condensed milk over the crumbs. Use a spatula or spoon to begin combining.
The mixture will start to look sticky. Scrape the sides of the bowl so everything gets coated.
Step 5: Add Butter and Vanilla
Add the melted unsalted butter and 1 teaspoon vanilla extract. Stir until the crumbs are fully moistened.
The mixture should resemble a thick, sticky dough. If it looks dry, keep stirring before adding anything extra.
Step 6: Add Optional Flavor Boosters
If using almond extract, add ¼ teaspoon to the crust mixture. If using dry instant vanilla pudding, add 1 tablespoon.
Mix until evenly incorporated. These additions are optional and should blend fully into the crust.
Step 7: Press the Crust Into the Pan
Transfer the crust mixture into the parchment-lined 9×9-inch pan. Spread it across the bottom.
Press firmly into an even layer. Firm pressing is important because it helps the bars hold together.
Step 8: Smooth the Surface
Use the back of a spoon, spatula, or clean hands to smooth the top of the crust. Make sure the thickness is even from corner to corner.
Pay attention to the edges and corners. Loose edges can crumble after slicing.
Step 9: Add White Chocolate Chips
Sprinkle 1 ½ cups white chocolate chips evenly over the crust. Try to cover the surface without piling too many in one spot.
The white chocolate creates creamy pockets of sweetness. It also makes the bars look wintery and festive.
Step 10: Add Mini Marshmallows
Scatter 1 cup mini marshmallows over the white chocolate chips. Spread them evenly.
The marshmallows add a soft, chewy texture. They also make the bars feel extra fun.
Step 11: Add Festive Sprinkles
Sprinkle ¼ cup red, green, and white festive sprinkles over the top. Let them scatter naturally for a cheerful holiday look.
If you want more color, you can also stir extra sprinkles into the crust before pressing. This step is optional.
Step 12: Add Pecans if Using
Sprinkle ½ cup chopped pecans over the top if desired. Use them evenly so each bar gets some crunch.
If you want extra flavor, toast the pecans for 5 minutes at 350°F before adding them. Let them cool before sprinkling.
Step 13: Press the Topping Lightly
Gently press the topping into the crust. Do not crush the marshmallows or smash everything flat.
A light press helps the white chocolate, marshmallows, sprinkles, and pecans stick. This makes slicing easier later.
Step 14: Chill the Bars
Place the pan in the refrigerator. Chill for at least 2 hours.
The bars need this time to firm up. Cutting too early can make them crumble.
Step 15: Lift From the Pan
Once the bars are fully set, lift them out using the parchment paper. Place the slab on a cutting board.
If the bars feel too soft, return them to the refrigerator longer. They should feel firm before slicing.
Step 16: Slice Into Squares
Cut the chilled slab into squares. Use a sharp knife for clean edges.
Wipe the knife between cuts if needed. This helps keep the bars neat.
Step 17: Serve Chilled
Serve the bars chilled for the best texture. They can also sit at room temperature for about 10 minutes to soften slightly.
Do not leave them out too long if the room is warm. The condensed milk and butter base softens as it sits.
Step 18: Store or Freeze
Store the bars in an airtight container in the refrigerator for up to 5 days. For freezing, wrap each square tightly in plastic wrap and place in a freezer-safe container.
Freeze for up to 2 months. Thaw before serving and keep chilled.
Serving Ideas
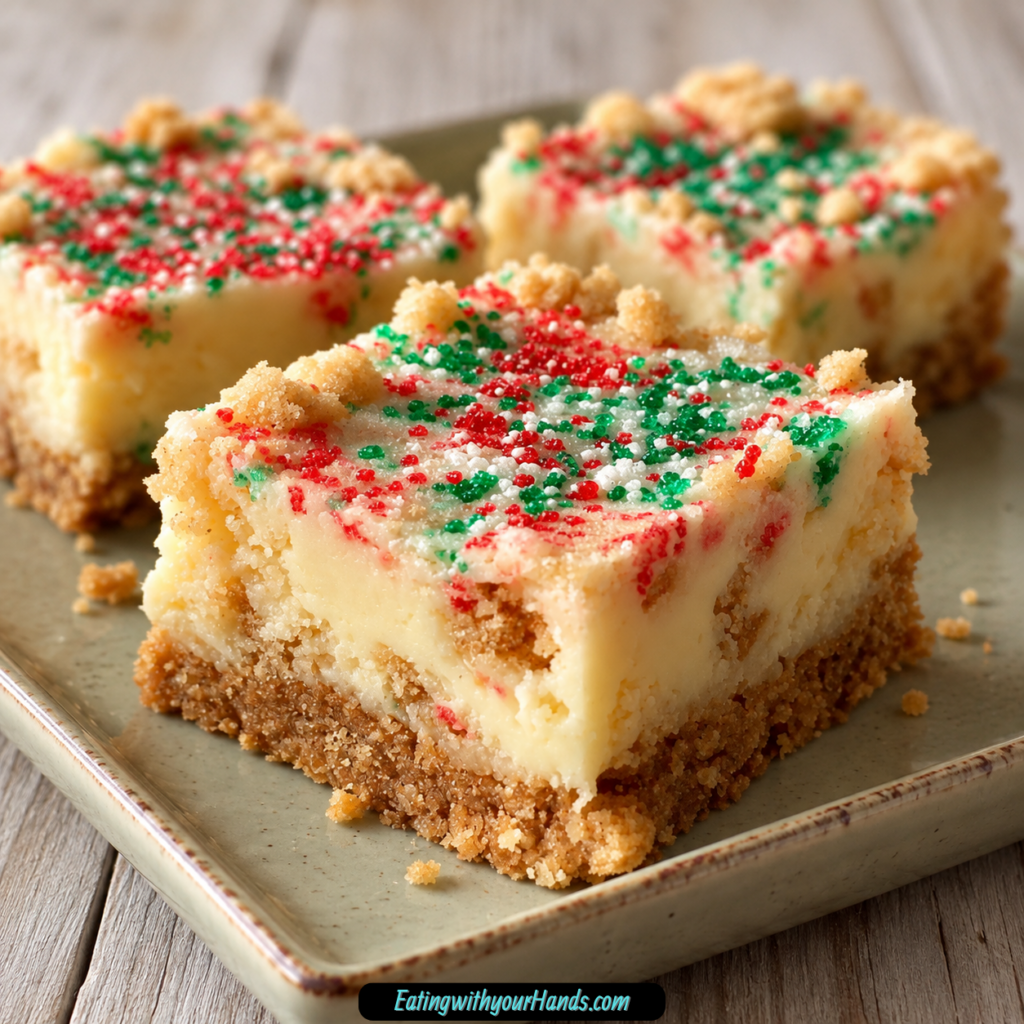
Serve Santa’s No-Bake Sugar Cookie Bars chilled for the cleanest slices. They are sweet, creamy, and easiest to handle straight from the refrigerator.
Let them sit at room temperature for about 10 minutes if you prefer a slightly softer bite. This makes the crust a little more tender.
Add them to Christmas cookie platters. Their sprinkles and marshmallows make them stand out beside baked cookies.
Wrap squares in wax paper for gifting. Place them in decorative tins and keep refrigerated until gifting.
Serve them at school events, holiday parties, or family gatherings. They are easy to pick up and eat without utensils.
Cut them into smaller squares for dessert boards. They are rich enough that little pieces work well.
Serve with hot cocoa for a festive treat. The white chocolate and marshmallows feel perfect with a warm drink.
They also pair well with coffee. The sweetness makes them a fun afternoon holiday bite.
Storage
Keep the bars in an airtight container in the refrigerator for up to 5 days. Chilling helps them hold their shape.
If stacking the bars, place parchment or wax paper between layers. This protects the toppings.
Store them chilled until ready to serve. They are neatest and easiest to handle when cold.
Let them sit at room temperature for about 10 minutes before serving if you want a softer texture. Do not leave them out too long.
For gifting, keep the wrapped bars refrigerated until close to delivery. The bars are best when stored cold.
Avoid storing them uncovered. They can dry out and pick up refrigerator odors.
If the bars become too soft, return them to the refrigerator. They will firm again as they chill.
Freezing
Santa’s No-Bake Sugar Cookie Bars freeze well for up to 2 months. Slice them first for easier serving later.
Wrap each square tightly in plastic wrap. Then place the wrapped squares in a freezer-safe container.
Freezing individual squares makes it easy to pull out only what you need. It also helps protect the texture.
Thaw the bars in the refrigerator before serving. Keep them chilled until ready to eat.
The topping may look slightly different after freezing and thawing, but the flavor remains sweet and festive. Serve chilled for the best texture.
Do not freeze them with loose crackers or extra decorations around them. Freeze only the bars.
Make-Ahead
These bars are excellent for making ahead because they need chilling time. Prepare them the day before serving for the easiest schedule.
Keep them covered in the refrigerator after they set. Slice when ready to serve or slice ahead and store in layers.
For parties, make them the night before and cut them the next day. The bars will be firm and easier to handle.
For gifting, slice into squares, wrap in wax paper, and place in tins. Store the tins in the refrigerator until gifting.
You can freeze them up to 2 months ahead. Wrap each square well before freezing.
If making with kids, prepare the crust and let them add marshmallows and sprinkles. The recipe is simple and decorating-focused.
Helpful Notes for Best Results
Line the pan with parchment paper. It makes lifting and slicing much easier.
Press the crust firmly. Loose crust can crumble after chilling.
Use softened but not hot topping ingredients. Hot butter should be mixed in, but the bars need chilling to set.
Chill for the full 2 hours. This helps the bars hold their shape.
Keep the bars chilled until serving. They slice cleaner and hold together better.
Skip the pecans for a nut-free version. No other changes are needed.
Add 2 to 3 extra tablespoons sweetened condensed milk for a softer bar. Chill thoroughly afterward.
Use crushed candy canes for a peppermint version. This makes the bars extra festive.
Variations
Classic Santa’s No-Bake Sugar Cookie Bars
Use graham cracker crumbs, sweetened condensed milk, melted unsalted butter, vanilla, white chocolate chips, mini marshmallows, festive sprinkles, and optional pecans. This gives the bars their creamy, sweet, holiday-cookie flavor.
Chill for at least 2 hours before slicing. Serve cold for clean squares.
Almond Sugar Cookie Bars
Add ¼ teaspoon almond extract to the crust mixture. This gives the bars a stronger cookie-shop flavor.
Do not add too much. Almond extract is powerful.
Extra Sprinkle Sugar Cookie Bars
Stir extra sprinkles directly into the crust before pressing it into the pan. This adds color throughout the bars.
Use festive red, green, and white sprinkles. Fold gently so the colors stay bright.
Nut-Free Santa Bars
Skip the chopped pecans. The bars do not need any other adjustments.
This keeps the recipe simple for nut-free needs. The white chocolate and marshmallows still give texture.
Softer Santa Bars
Add an extra 2 to 3 tablespoons sweetened condensed milk to the crust. This makes the base softer.
Chill the bars well before slicing. Softer bars need firm chilling time.
Peppermint Sugar Cookie Bars
Replace the sprinkles with crushed candy canes. Sprinkle crushed peppermint over the white chocolate layer.
This version tastes cool and festive. It is perfect for peppermint lovers.
Vanilla Pudding Sugar Cookie Bars
Mix 1 tablespoon dry instant vanilla pudding into the crust mixture. This adds extra vanilla flavor.
The crust will taste more like a sugar-cookie-inspired dessert. Mix well before pressing.
Pecan Sugar Cookie Bars
Add ½ cup chopped pecans to the topping. Pecans bring crunch and nutty flavor.
Toasting them for 5 minutes at 350°F is optional. It enhances the flavor beautifully.
White Chocolate Marshmallow Bars
Keep the white chocolate chips and marshmallows as the main topping. Skip nuts and use plenty of sprinkles.
This version is extra creamy and kid-friendly. It is great for school parties.
Milk Chocolate Cookie Bars
Use milk chocolate chips instead of white chocolate. The bars will taste more chocolatey and sweet.
This is a simple swap. The rest of the recipe stays the same.
Semi-Sweet Chocolate Cookie Bars
Use semi-sweet chocolate chips for a deeper chocolate flavor. This balances the sweetness of the condensed milk.
It is a good choice if you want less white chocolate sweetness. The bars still look festive with sprinkles.
Gift Tin Bars
Slice the bars into squares and wrap each piece in wax paper. Place them in decorative tins.
Keep the tins chilled until gifting. This keeps the bars firm.
Christmas Eve Treat Bars
Serve the bars on Christmas Eve with hot cocoa. The marshmallows and sprinkles make them feel playful.
They are also fun for a Santa cookie plate. Slice into neat squares before serving.
Troubleshooting
The Bars Are Crumbly
The crust may not have been pressed firmly enough. Press the mixture tightly into the pan before adding toppings.
They may also need more chilling time. Chill for the full 2 hours before slicing.
The Bars Are Too Soft
They may need more time in the refrigerator. Return them to chill until firm.
If you added extra condensed milk, the bars will naturally be softer. Keep them cold.
The Crust Looks Dry
Keep stirring before adding extra liquid. The condensed milk and butter need time to coat the crumbs.
If needed for a softer bar, add 2 to 3 extra tablespoons condensed milk. Do this only if the mixture truly needs it.
The Toppings Fall Off
Press the toppings gently into the crust before chilling. Do not smash, but make sure they make contact.
Chilling also helps everything firm together. Slice only after the bars are fully set.
The Bars Stick to the Pan
Use parchment paper. It makes removing the bars much easier.
Leave some overhang so you can lift the slab out. This helps with clean slicing.
The Slices Look Messy
The bars may not be cold enough. Chill longer before cutting.
Use a sharp knife and wipe it between cuts. This keeps the edges cleaner.
The Bars Taste Too Sweet
Use semi-sweet chocolate chips instead of white chocolate next time. You can also add pecans for balance.
Cut smaller squares for serving. These bars are rich and sweet.
The Pecans Taste Flat
Toast them for 5 minutes at 350°F before adding. Let them cool first.
Toasting brings out their flavor. It is optional but helpful.
The Bars Are Too Firm From the Fridge
Let them sit at room temperature for about 10 minutes before serving. They will soften slightly.
Do not leave them out too long. They are best chilled or just slightly softened.
The Bars Lost Their Shape at Room Temperature
They may have sat out too long or been in a warm room. Return them to the refrigerator.
Serve chilled for the best structure. The bars rely on chilling to stay firm.
Frequently Asked Questions
Can I use chocolate chips instead of white chocolate?
Yes, milk chocolate or semi-sweet chocolate chips can be used. The flavor will shift, but the bars will still be delicious.
White chocolate gives the most festive sugar-cookie-style taste. Semi-sweet chocolate adds a deeper flavor.
My bars seem crumbly. What did I do wrong?
They likely need firmer pressing or more chilling time. Press the crust tightly into the pan.
Chill for the full 2 hours before slicing. The bars need time to set.
Can I make these ahead of time?
Yes, these bars are perfect for making ahead. Prepare them the night before and store them in the refrigerator.
Slice before serving or slice ahead and store in an airtight container. Keep chilled.
Can kids help make this recipe?
Yes, this is a very kid-friendly holiday treat. There is no baking, and the decorating is simple.
Kids can help sprinkle marshmallows, white chocolate chips, and festive sprinkles. Adults should handle slicing.
Do I need to toast the pecans first?
No, toasting is optional. The bars work with untoasted chopped pecans.
If you want more flavor, toast the pecans for 5 minutes at 350°F. Let them cool before adding.
How long do these bars last?
They last up to 5 days in an airtight container in the refrigerator. Keep them chilled for the best texture.
The bars can also be frozen for up to 2 months. Wrap each square tightly before freezing.
Can I make these without nuts?
Yes, simply skip the pecans. No other changes are needed.
The bars still have plenty of texture from graham cracker crumbs, white chocolate chips, marshmallows, and sprinkles.
Can I make them peppermint flavored?
Yes, replace the sprinkles with crushed candy canes and sprinkle crushed peppermint over the white chocolate layer. This gives the bars a festive peppermint twist.
You can also keep a few sprinkles if you still want more color. The peppermint version is great for Christmas trays.
Why This Recipe Works So Well
Santa’s No-Bake Sugar Cookie Bars work because they are built on a sturdy no-bake crust. Graham cracker crumbs provide structure, while condensed milk and melted butter hold everything together.
The vanilla gives the base a sugar-cookie-style flavor. Optional almond extract or vanilla pudding mix can push that flavor even further.
The white chocolate chips, marshmallows, and sprinkles make the bars festive without adding complicated steps. They create color, sweetness, creaminess, and chew.
Chilling is what sets the bars. The refrigerator firms the crust and helps the toppings stay in place.
The parchment paper makes the recipe practical. It lets you lift the bars out cleanly and slice them without digging into the pan.
The optional pecans add crunch and balance. They are not required, but they bring a nutty contrast to the sweetness.
The bars also work because they are easy to make ahead. Refrigerating and freezing both fit the recipe well.
Most of all, these bars work because they deliver Christmas fun with almost no stress. They are colorful, sweet, creamy, crunchy, kid-friendly, and ready for the season.
Final Thoughts
Santa’s No-Bake Sugar Cookie Bars are made with graham cracker crumbs, sweetened condensed milk, melted unsalted butter, vanilla extract, white chocolate chips, mini marshmallows, festive sprinkles, and optional chopped pecans. The crust is mixed, pressed firmly into a parchment-lined 9×9-inch pan, topped with white chocolate, marshmallows, sprinkles, and pecans, then chilled until set.
Serve them chilled, wrap them for gifting, add them to cookie trays, or freeze individual squares for later. With their no-bake method, 15-minute hands-on prep, creamy sugar-cookie-style base, festive toppings, easy storage, and kid-friendly decorating, these bars bring sweet Christmas magic to the table without turning on the oven.
Santa’s No-Bake Sugar Cookie Bars
Sweet, creamy, colorful, and completely no-bake, these Santa’s No-Bake Sugar Cookie Bars are an easy holiday treat made with graham cracker crumbs, sweetened condensed milk, melted butter, vanilla, white chocolate chips, mini marshmallows, festive sprinkles, and optional pecans. They chill into firm, sliceable bars that are perfect for Christmas parties, cookie platters, and fun holiday dessert trays.
Recipe Details
- Prep Time: 15 minutes
- Chill Time: 2 hours
- Total Time: 2 hours 15 minutes
- Servings: 12 bars
- Calories: 320 kcal
Ingredients
For the No-Bake Sugar Cookie Bars
- ½ cup chopped pecans optional
- ¼ cup festive sprinkles red, green, white
- 1 cup mini marshmallows
- 1 ½ cups white chocolate chips
- 1 teaspoon vanilla extract
- ½ cup unsalted butter melted
- 1 cup sweetened condensed milk
- 2 cups graham cracker crumbs
Instructions
Step 1: Prepare the Pan
Line a 9×9-inch baking pan with parchment paper. Leave the pan ready before mixing the base so the no-bake mixture can be pressed in right away.
The parchment paper also makes it easier to lift the chilled bars out once they are firm. This helps with cleaner slicing later.
Step 2: Make the Graham Cracker Base
In a large bowl, mix the graham cracker crumbs, melted unsalted butter, sweetened condensed milk, and vanilla extract. Stir until the mixture is fully combined.
The mixture should look thick, moist, and evenly blended. Make sure the crumbs are coated well so the bars hold together after chilling.
Step 3: Press Into the Pan
Transfer the graham cracker mixture to the prepared baking pan. Press it firmly into the bottom of the pan.
Press the crust layer very firmly to prevent crumbling when slicing. An even, compact base helps the finished bars cut into neat squares.
Step 4: Add the White Chocolate
Sprinkle the white chocolate chips evenly over the pressed base. Spread them across the surface so every bar gets a creamy white chocolate layer.
The white chocolate chips add sweetness and a holiday-style finish. Keep them evenly distributed before adding the marshmallows and sprinkles.
Step 5: Add Marshmallows and Sprinkles
Scatter the mini marshmallows over the top. Add the festive red, green, and white sprinkles.
The marshmallows make the bars look playful and sweet, while the sprinkles bring the Christmas color. Add them evenly so the finished squares look festive.
Step 6: Add Pecans If Desired
If desired, sprinkle the chopped pecans over the top for extra crunch. Pecans are optional, so they can be added or left out depending on preference.
For a nut-free version, skip the nuts entirely. You can also swap pecans for almonds as noted.
Step 7: Chill Until Set
Refrigerate the pan for at least 2 hours, or until the bars are fully set. Keep the bars chilled until serving because they soften at room temperature.
Do not slice too early. The full chill time helps the base firm up and makes the toppings easier to cut through.
Step 8: Slice and Serve
Once firm, lift the bars out of the pan using the parchment paper. Slice into 12 squares and serve chilled.
Notes
- Press the crust layer very firmly to prevent crumbling when slicing.
- Keep bars chilled until serving; they soften at room temperature.
- Swap pecans for almonds or skip nuts entirely for a nut-free version.
- Add crushed candy canes or holiday M&Ms for extra festive flair.
- Bars freeze well for up to 2 months; thaw in the fridge before serving.
Serving Suggestions
Serve Santa’s No-Bake Sugar Cookie Bars chilled after they have fully set in the refrigerator. The graham cracker base, sweetened condensed milk, white chocolate chips, mini marshmallows, festive sprinkles, and optional pecans make them a colorful holiday dessert for Christmas parties and cookie platters.
For extra festive flair, add crushed candy canes or holiday M&Ms as noted. Keep the red, green, and white sprinkles on top for a bright Christmas look.
These bars are best served cold because they soften at room temperature. Slice them into 12 squares after chilling, then keep them refrigerated until ready to serve.
Storage
How to Store
Keep the bars chilled until serving. They soften at room temperature, so store them in the refrigerator when not serving.
Freezer Tip
Bars freeze well for up to 2 months. Thaw them in the fridge before serving.
Slicing Tip
Press the crust layer very firmly into the pan before chilling. This helps prevent the bars from crumbling when sliced.
Nut Tip
Use chopped pecans if desired, or swap them for almonds. Skip the nuts entirely for a nut-free version.
Festive Add-In Tip
Add crushed candy canes or holiday M&Ms for extra festive flair. Use them as an optional topping without changing the base mixture.
Serving Tip
Serve the bars chilled after at least 2 hours in the refrigerator. Lift them out with the parchment paper, then cut into 12 bars.

Fernando is the creator and writer behind the food blog Eating with your Hands. Living and working in cities like Paris, Barcelona, and Berlin, and being married to a Canadian foodie, has given Fernando a passion and interest in food and inspired him to run EWYH.