
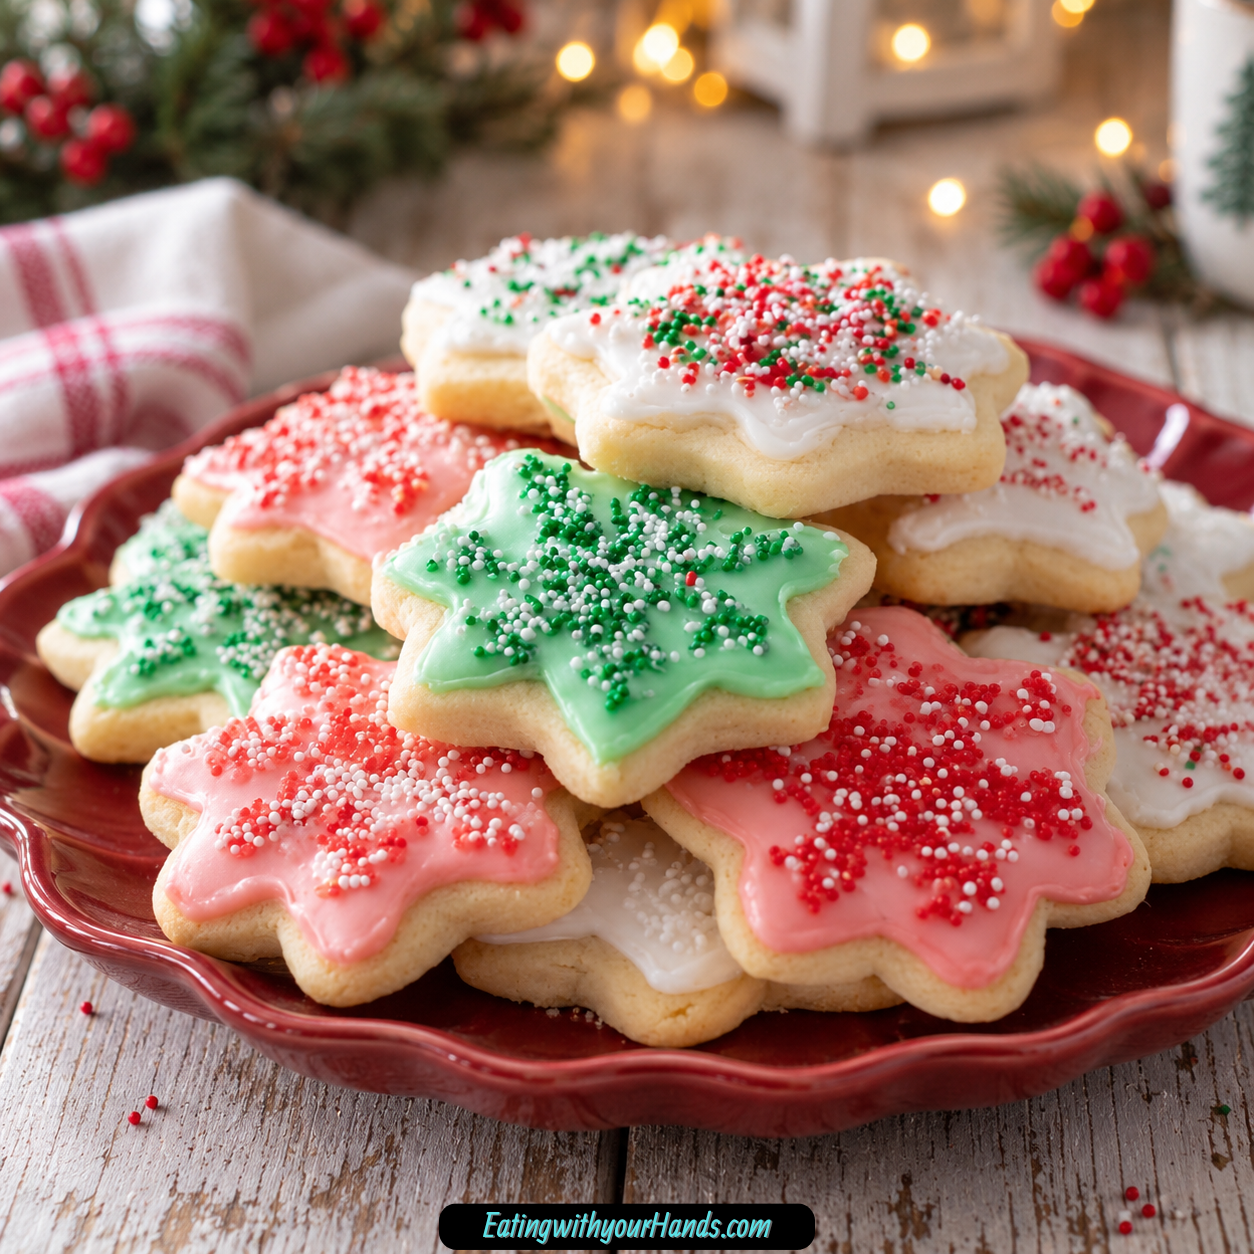
Best Soft Christmas Cookies are the kind of holiday cookie that makes the whole kitchen feel brighter before the decorating even begins. They bake up slightly puffy, tender in the center, lightly golden at the edges, and ready for glossy icing, colorful gel shades, and a shower of sprinkles.
These are the cookies that belong beside a mug of hot cocoa, tucked into gift boxes, arranged on cookie platters, or set out for Santa with a glass of milk. They have that old-fashioned Christmas cookie feeling: simple ingredients, soft texture, sweet vanilla flavor, and just enough festive decoration to make every batch feel special.
The dough is made with butter, granulated sugar, egg, vanilla, optional almond extract, sour cream, flour, baking soda, baking powder, and salt. The sour cream is the little secret that keeps the cookies soft and tender, while the vanilla and optional almond extract give them that familiar bakery-style holiday flavor.
These are drop cookies, not cut-out cookies, which makes them especially easy. You scoop rounded mounds of soft dough onto parchment-lined baking sheets, bake them just until the edges barely turn golden, let them cool, then decorate.
The icing is just as simple. Powdered sugar, milk, and vanilla whisk into a smooth glaze that can be colored with gel food coloring for bright holiday designs.
Once the icing is spread or drizzled over the cooled cookies, sprinkles go on right away before everything sets. That small decorating moment is where the recipe becomes more than cookies; it becomes a memory.
This recipe is wonderful for baking with kids, preparing cookie gifts, stocking a holiday dessert table, or keeping a soft cookie stash ready during December. It is forgiving enough for beginners and nostalgic enough to feel like a family tradition.
Best Soft Christmas Cookies are sweet, fluffy, colorful, and easy to love. They are the kind of cookie people reach for because they look cheerful, then remember because the texture is so soft and comforting.
Table of Contents
- Why You’ll Love These Best Soft Christmas Cookies
- Recipe Details
- Ingredients
- Ingredient Notes
- Optional Swaps, Variations, Add-Ins, and Serving Ideas
- Classic Soft Christmas Cookies
- Vanilla-Only Christmas Cookies
- Bakery-Style Almond Christmas Cookies
- Spiced Soft Christmas Cookies
- Peppermint Christmas Cookies
- Cream Cheese Frosted Cookies
- Royal Icing Cookies
- Hot Cocoa Cookie Plate
- Coffee and Cookie Pairing
- Milk and Cookies for Santa
- Cookie Box Gift Cookies
- Make-Ahead Dough Cookies
- Frozen Unfrosted Cookies
- Frozen Frosted Cookies
- Why This Recipe Works
- Directions
- Step 1: Preheat the Oven
- Step 2: Prepare the Baking Sheets
- Step 3: Mix the Dry Ingredients
- Step 4: Cream the Butter and Sugar
- Step 5: Add the Egg and Extracts
- Step 6: Add the Sour Cream
- Step 7: Combine Wet and Dry Mixtures
- Step 8: Check the Dough Texture
- Step 9: Scoop the Dough
- Step 10: Bake the Cookies
- Step 11: Cool on the Baking Sheet
- Step 12: Transfer to a Wire Rack
- Step 13: Make the Icing
- Step 14: Color the Icing
- Step 15: Ice the Cookies
- Step 16: Add Sprinkles
- Step 17: Let the Icing Dry
- Step 18: Store or Freeze
- Serving Ideas
- Storage
- Freezing
- Make-Ahead
- Helpful Notes for Best Results
- Variations
- Troubleshooting
- Frequently Asked Questions
- Why This Recipe Works So Well
- Final Thoughts
- Soft Christmas Cookies Recipe
- Recipe Details
- Ingredients
- Instructions
- Step 1: Prepare the Oven and Baking Sheets
- Step 2: Mix the Dry Ingredients
- Step 3: Cream the Butter and Sugar
- Step 4: Add the Egg and Extracts
- Step 5: Add the Sour Cream
- Step 6: Finish the Cookie Dough
- Step 7: Scoop the Cookies
- Step 8: Bake Until Soft and Lightly Golden
- Step 9: Cool the Cookies
- Step 10: Make the Icing
- Step 11: Color and Decorate
- Notes
- Serving Suggestions
- Storage
Why You’ll Love These Best Soft Christmas Cookies
These cookies have a soft, puffy texture. The centers stay tender while the edges become only lightly golden.
They have classic holiday flavor. Vanilla, optional almond extract, butter, and sour cream create a nostalgic sugar cookie taste.
They are easy to decorate. The smooth icing takes color well, and sprinkles make them instantly festive.
They are beginner-friendly. The dough is forgiving and does not require rolling or cutting.
They are great for sharing. Add them to cookie boxes, holiday platters, parties, or cookie exchanges.
They can be made ahead. The dough can be prepared up to 2 days in advance, and the baked cookies freeze well.
Recipe Details
This recipe bakes at 375°F (190°C). Line two baking sheets with parchment paper before scooping the dough.
The cookie dough uses 2 ¾ cups all-purpose flour. Spoon and level the flour for accuracy.
The leaveners are 1 teaspoon baking soda and ½ teaspoon baking powder. Together, they help the cookies rise and stay soft.
The fat is 1 cup unsalted butter, softened. Room-temperature butter creams best with the sugar.
The sugar amount is 1 ½ cups granulated sugar. It adds sweetness and structure.
The dough uses 1 egg. It adds richness and helps bind the dough.
The flavorings are 1 teaspoon vanilla extract and optional ½ teaspoon almond extract. Almond extract gives the cookies a nostalgic bakery-style flavor.
The moisture boost is 3 tablespoons sour cream. This is the secret ingredient for tender, soft cookies.
The salt amount is ¼ teaspoon. It balances the sweetness.
The icing uses 2 cups powdered sugar, 1 to 2 tablespoons milk, and 1 teaspoon vanilla extract. Gel food coloring creates vibrant color without thinning the icing too much.
The cookies bake for 8 to 10 minutes. They should come out when the edges are barely golden and the centers look set but still soft.
Ingredients
For the Cookies
- 2 ¾ cups all-purpose flour
- 1 teaspoon baking soda
- ½ teaspoon baking powder
- ¼ teaspoon salt
- 1 cup unsalted butter, softened
- 1 ½ cups granulated sugar
- 1 egg
- 1 teaspoon vanilla extract
- ½ teaspoon almond extract, optional
- 3 tablespoons sour cream
For the Icing
- 2 cups powdered sugar
- 1 to 2 tablespoons milk
- 1 teaspoon vanilla extract
- Gel food coloring
- Sprinkles, optional
Optional Swaps, Variations, and Serving Ideas
- ½ teaspoon cinnamon
- ½ teaspoon nutmeg
- Peppermint extract
- Cream cheese frosting
- Royal icing
- Greek yogurt
- Hot cocoa
- Coffee
- Milk
- Slice of bread for storage
Ingredient Notes
All-purpose flour gives the cookies their structure. Spoon and level it instead of scooping so the dough does not become too heavy.
Baking soda helps the cookies rise just enough. It works with the other ingredients to keep the texture soft.
Baking powder adds lift. It helps create the slightly puffy shape.
Salt balances the sweetness. Even a small amount makes the vanilla flavor stand out more clearly.
Softened unsalted butter creams smoothly with the sugar. If the butter is too cold, the dough may not mix evenly; if it is too soft, the cookies may spread more.
Granulated sugar gives sweetness and structure. It also helps create that classic sugar cookie flavor.
The egg adds richness and helps hold the dough together. Room-temperature egg blends best, but the dough can still work if the egg is cold.
Vanilla extract gives the cookies their familiar sweet flavor. It is the main flavor note in the dough and icing.
Almond extract is optional. It adds a nostalgic bakery-style holiday taste that makes the cookies feel extra special.
Sour cream keeps the cookies moist and tender. Greek yogurt can be substituted in a pinch.
Powdered sugar creates the icing base. It dissolves smoothly into a glossy glaze.
Milk adjusts the icing consistency. Use less for thicker icing and more for a thinner glaze.
Gel food coloring gives strong color without thinning the icing too much. It is especially useful for bright Christmas designs.
Sprinkles should be added before the icing sets. That helps them stick.
Optional Swaps, Variations, Add-Ins, and Serving Ideas
Classic Soft Christmas Cookies
Make the cookies with vanilla, optional almond extract, sour cream, and simple powdered-sugar icing. This gives the soft, nostalgic holiday version.
Decorate with gel-colored icing and sprinkles. Let the icing dry before stacking.
Vanilla-Only Christmas Cookies
Skip the almond extract and use only vanilla extract. The cookies will taste classic, sweet, and simple.
This version is best for anyone who prefers a traditional sugar cookie flavor. It also works well with colorful icing.
Bakery-Style Almond Christmas Cookies
Use the optional ½ teaspoon almond extract. It gives the cookies a warm, nostalgic bakery flavor.
The almond note should be gentle, not overpowering. It pairs beautifully with vanilla icing.
Spiced Soft Christmas Cookies
Add ½ teaspoon cinnamon or ½ teaspoon nutmeg to the dough. This creates a lightly spiced holiday cookie.
The flavor becomes warmer and cozier. Use one spice or the other based on preference.
Peppermint Christmas Cookies
Swap the almond extract for peppermint extract. This gives the cookies a candy-cane style twist.
Use the peppermint lightly so it does not overpower the soft cookie base. Pair with red or green icing.
Cream Cheese Frosted Cookies
Use cream cheese frosting instead of powdered-sugar icing. This makes the cookies richer and thicker on top.
Let the cookies cool completely before frosting. Cream cheese frosting gives a softer finish than glaze.
Royal Icing Cookies
Use royal icing if you want more detailed designs. It works well for cleaner lines and decorative patterns.
These cookies are soft drop cookies, so keep the designs simple and cheerful. Let the icing dry fully before stacking.
Hot Cocoa Cookie Plate
Serve the cookies with hot cocoa. The soft sugar cookie texture pairs beautifully with a warm holiday drink.
This is a cozy option for decorating nights. Add extra sprinkles for a festive plate.
Coffee and Cookie Pairing
Serve the cookies with coffee for adults. The sweet icing and soft vanilla cookie work well with the warm drink.
This is a nice afternoon treat during the holiday season. Keep cookies covered until serving.
Milk and Cookies for Santa
Set the cookies out with milk. The bright icing and sprinkles make them perfect for Christmas Eve.
Let the icing dry before placing them on a plate. This keeps the decorations neat.
Cookie Box Gift Cookies
Pack the cookies in gift boxes after the icing dries completely. Use parchment between layers.
These cookies travel well when packed carefully. They make sweet holiday gifts.
Make-Ahead Dough Cookies
Prepare the dough up to 2 days ahead and refrigerate it. Bake when ready.
Let chilled dough soften slightly if needed before scooping. Bake until edges are barely golden.
Frozen Unfrosted Cookies
Freeze baked unfrosted cookies for up to 2 months. Decorate after thawing.
This is helpful for holiday planning. Fresh icing makes the cookies look newly made.
Frozen Frosted Cookies
Freeze frosted cookies on a tray first. Once firm, store them in layers with parchment.
This protects the icing. Thaw gently before serving.
Why This Recipe Works
This recipe works because the dough is designed to stay soft instead of crisp. Butter, sugar, egg, sour cream, and balanced leavening create tender, puffy cookies.
Sour cream adds moisture without making the dough runny. It is the key ingredient for that melt-in-your-mouth texture.
The combination of baking soda and baking powder gives lift. The cookies puff up rather than spreading widely.
Creaming butter and sugar adds air to the dough. This helps the cookies bake thick and light.
The optional almond extract gives that old-fashioned bakery flavor. It makes the cookies taste festive without needing many extra ingredients.
The cookies are removed from the oven before they look fully firm. This keeps the centers soft.
Cooling on the baking sheet for 5 minutes lets them finish setting gently. Then they move to a rack so they do not overcook.
The icing is simple enough for decorating with kids but polished enough for gift boxes. Gel coloring keeps the icing bright without making it too thin.
Directions
Step 1: Preheat the Oven
Preheat the oven to 375°F (190°C). Let the oven fully heat before baking.
A steady oven temperature helps the cookies puff and bake evenly. This is especially important because they bake quickly.
Step 2: Prepare the Baking Sheets
Line two baking sheets with parchment paper. This prevents sticking and helps the cookies bake evenly.
Set the prepared pans aside. Using two sheets makes the baking process easier.
Step 3: Mix the Dry Ingredients
In a medium bowl, whisk together 2 ¾ cups all-purpose flour, 1 teaspoon baking soda, ½ teaspoon baking powder, and ¼ teaspoon salt. Whisk until everything is evenly combined.
This helps distribute the leaveners before the dry mixture goes into the dough. Set the bowl aside.
Step 4: Cream the Butter and Sugar
In a large bowl, beat 1 cup softened unsalted butter with 1 ½ cups granulated sugar. Mix until the mixture becomes light, fluffy, and pale.
This step adds air to the dough. That air helps the cookies bake up soft and thick.
Step 5: Add the Egg and Extracts
Beat in 1 egg, 1 teaspoon vanilla extract, and ½ teaspoon almond extract if using. Mix until smooth.
The almond extract is optional but gives a nostalgic holiday flavor. Scrape down the bowl so everything blends evenly.
Step 6: Add the Sour Cream
Mix in 3 tablespoons sour cream. Stir until the dough base looks silky and smooth.
The sour cream adds moisture and tenderness. It helps create the soft cookie texture.
Step 7: Combine Wet and Dry Mixtures
Gradually add the dry ingredients to the wet ingredients. Stir just until combined.
Do not overmix once the flour disappears. Overmixing can make the cookies tougher instead of tender.
Step 8: Check the Dough Texture
The dough should be soft, slightly sticky, and easy to scoop. This is the correct texture for soft drop cookies.
If the dough feels too soft or warm, chill it for 30 minutes. Chilling helps prevent excess spreading.
Step 9: Scoop the Dough
Use a cookie scoop or spoon to portion rounded mounds of dough onto the prepared baking sheets. Leave at least 2 inches between cookies.
These cookies puff more than they spread widely, but spacing helps them bake evenly. Keep the mounds similar in size.
Step 10: Bake the Cookies
Bake for 8 to 10 minutes. The edges should be barely golden, and the centers should look set but still soft.
Do not overbake. Soft Christmas cookies need to come out before they become dry.
Step 11: Cool on the Baking Sheet
Let the cookies cool on the baking sheet for 5 minutes. They will continue to set slightly.
This step keeps them from breaking when moved. It also preserves the soft center.
Step 12: Transfer to a Wire Rack
Move the cookies to a wire rack and let them cool fully. Do not ice warm cookies.
The icing needs a cool surface so it does not melt or slide off. Let the cookies cool completely before decorating.
Step 13: Make the Icing
In a medium bowl, whisk together 2 cups powdered sugar, 1 tablespoon milk, and 1 teaspoon vanilla extract. Add more milk if needed.
Use 1 to 2 tablespoons milk total to adjust consistency. Add more powdered sugar if the icing becomes too thin.
Step 14: Color the Icing
Divide the icing into small bowls. Add gel food coloring to each bowl and stir until the colors are even.
Gel coloring creates vibrant holiday shades without making the icing watery. Use a little at a time.
Step 15: Ice the Cookies
Spread or drizzle icing over the cooled cookies. Work with a few cookies at a time.
If decorating with multiple colors, let each color shine without overmixing. Keep the designs simple or playful.
Step 16: Add Sprinkles
Add sprinkles immediately after icing. The sprinkles need wet icing so they can stick.
Decorate before the glaze begins to set. Once it dries, sprinkles will not hold as well.
Step 17: Let the Icing Dry
Let the icing fully dry before stacking, packing, or gifting. Drying time can vary depending on icing thickness.
Do not rush this step if you want neat cookies. Dry icing helps protect the designs.
Step 18: Store or Freeze
Store cookies in an airtight container for 3 to 4 days. Use parchment between layers if needed.
For longer storage, freeze baked unfrosted cookies for up to 2 months or freeze frosted cookies on a tray before layering with parchment. Thaw before serving.
Serving Ideas
Serve Best Soft Christmas Cookies with hot cocoa for a cozy holiday treat. The sweet vanilla icing pairs beautifully with warm chocolate.
They are also lovely with coffee. The soft cookie texture makes them a gentle afternoon dessert.
Serve them with cold milk for a classic Christmas cookie moment. This is especially fitting for Santa’s plate.
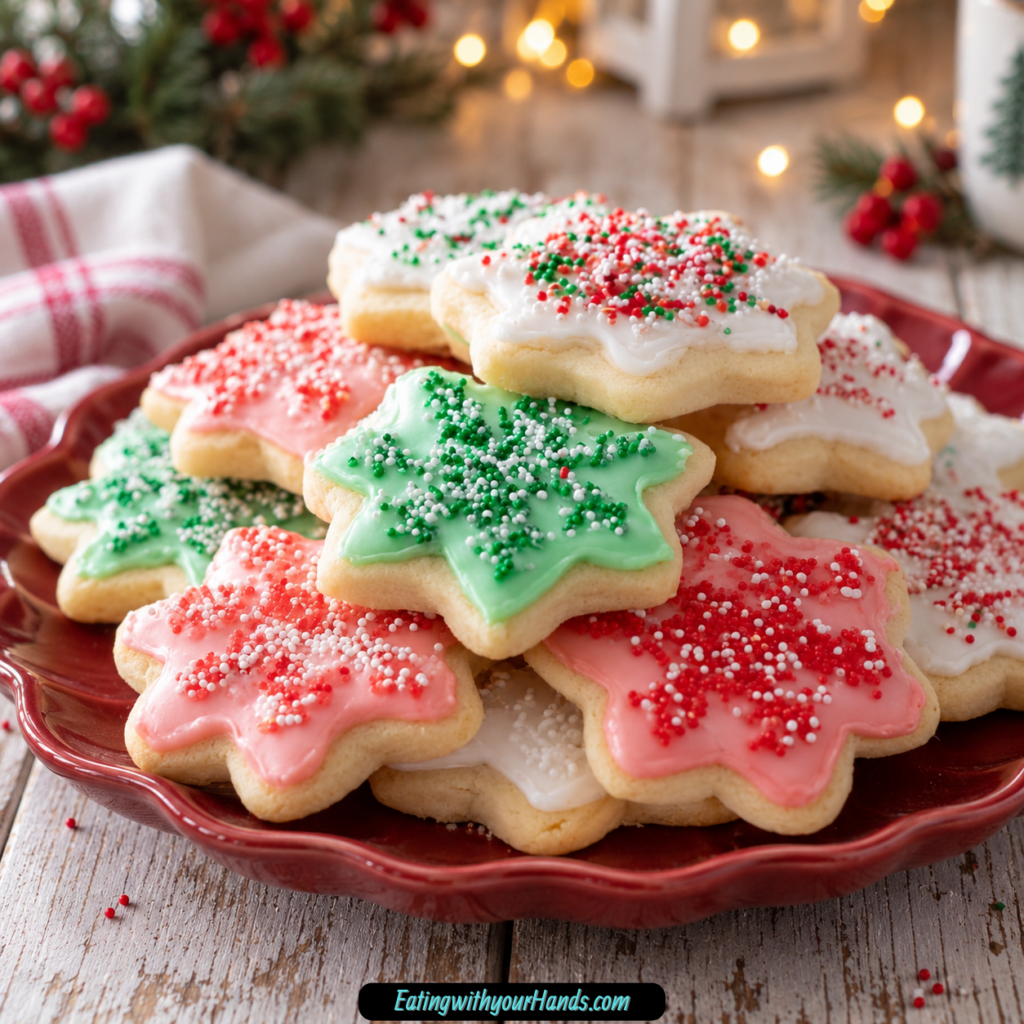
Add them to cookie platters for parties. Their colorful icing and sprinkles make the whole tray look festive.
Pack them in cookie gift boxes once the icing has fully dried. Use parchment between layers to protect the decorations.
Set up a decorating station with bowls of colored icing and sprinkles. These cookies are easy for kids and adults to decorate.
Serve them around the tree after dinner. They feel nostalgic and cheerful without being complicated.
Keep a few unfrosted if you prefer a simpler cookie. The soft vanilla base is delicious even before icing.
Storage
Store fully cooled cookies in an airtight container. They stay soft for 3 to 4 days.
Let the icing dry completely before stacking. This prevents smearing.
Use parchment between layers if packing decorated cookies. It protects the icing and sprinkles.
To help the cookies stay soft longer, store them with a slice of bread in the container. The cookies absorb moisture and stay tender.
Replace the bread slice if it becomes dry. Do not let it touch wet icing.
Keep the container tightly sealed. Air can dry out the cookies.
If cookies are unfrosted, they are easier to stack. Frosted cookies need more careful layering.
Serve at room temperature for the best texture. Cold cookies may feel firmer.
Freezing
Baked unfrosted cookies can be frozen for up to 2 months. Let them cool completely first.
Place them in a freezer-safe container or bag. Thaw before icing.
Frosted cookies can also be frozen. Freeze them first on a tray so the icing firms.
Once the icing is firm, layer the cookies with parchment. Store carefully so decorations stay intact.
Thaw frozen cookies before serving. Keep them flat while thawing if they are frosted.
Freezing unfrosted cookies gives the neatest decorating results. Add icing after thawing for the freshest look.
If making cookies for a holiday event, freezing ahead can save time. Decorate closer to the day you plan to serve them.
Make-Ahead
The dough can be prepared up to 2 days in advance. Cover and refrigerate until ready to bake.
If the dough is firm from the refrigerator, let it sit briefly until scoopable. Do not let it become too warm.
You can also bake the cookies ahead and store them unfrosted. Decorate closer to serving for the cleanest look.
The icing can be made when you are ready to decorate. Adjust with milk or powdered sugar as needed.
If baking for gift boxes, allow enough time for icing to dry completely. This makes packing easier.
For a decorating party, bake the cookies earlier in the day. Let everyone decorate fully cooled cookies.
Keep sprinkles and colored icing ready in small bowls. This makes decorating smoother and more fun.
Helpful Notes for Best Results
Use room-temperature butter. It creams more easily and helps create fluffy dough.
Room-temperature egg blends better, too. This gives a smoother dough.
Do not overmix after adding flour. Stop once the dough is combined.
The dough should be soft and slightly sticky. That softness helps create tender cookies.
Chilling is optional. Chill for 30 minutes if the dough feels too warm or too soft.
If the cookies spread too much, chill the dough for 20 to 30 minutes before baking. Butter that is too soft can cause spreading.
Remove the cookies when the edges are barely golden. The centers should still look soft.
Let icing dry fully before stacking. This keeps decorated cookies neat.
Variations
Classic Soft Christmas Cookies
Use vanilla extract, optional almond extract, sour cream, and powdered-sugar icing. Decorate with gel food coloring and sprinkles.
This version gives the classic soft holiday cookie. It is ideal for cookie boxes and Christmas plates.
Vanilla Soft Christmas Cookies
Skip the almond extract and use only vanilla. The flavor stays simple and familiar.
This is a good choice for anyone who prefers a classic sugar cookie. It pairs well with any icing color.
Almond Bakery-Style Cookies
Add the optional ½ teaspoon almond extract. It gives the cookies a nostalgic bakery-style flavor.
This version tastes especially festive. Use it if you love old-fashioned Christmas cookies.
Cinnamon Soft Christmas Cookies
Add ½ teaspoon cinnamon to the dough. The flavor becomes warm and gently spiced.
This is a cozy variation for winter. It still works with vanilla icing.
Nutmeg Soft Christmas Cookies
Add ½ teaspoon nutmeg to the dough. The cookies take on a classic holiday warmth.
Use nutmeg if you want a slightly deeper flavor. Keep the icing simple.
Peppermint Christmas Cookies
Swap the almond extract for peppermint extract. This creates a candy-cane-style cookie.
Use red and white icing or holiday sprinkles. Keep the peppermint balanced.
Cream Cheese Frosted Cookies
Use cream cheese frosting instead of the glaze. The topping will be thicker and richer.
Let the cookies cool completely before frosting. Store carefully because the frosting is softer.
Royal Icing Decorated Cookies
Use royal icing for more detailed designs. This works if you want sharper lines or patterns.
The cookies themselves are soft drop cookies, not cut-outs. Keep designs appropriate to their rounded shape.
Greek Yogurt Soft Cookies
Use Greek yogurt instead of sour cream in a pinch. The texture may vary slightly.
This keeps the dough moist. Use the same amount.
Make-Ahead Holiday Cookies
Prepare the dough up to 2 days ahead. Refrigerate until ready to bake.
Bake, cool, ice, and decorate when needed. This helps during busy holiday weeks.
Troubleshooting
The Cookies Spread Too Much
The butter may have been too soft, or the dough may have been warm. Chill the dough for 20 to 30 minutes before baking.
Make sure the baking sheets are not warm. Warm pans can make dough spread faster.
The Cookies Are Too Dry
They may have baked too long. Remove them when the edges are barely golden and centers still look soft.
Soft cookies continue setting after baking. Do not wait for the tops to look dry.
The Cookies Are Tough
The dough may have been overmixed after the flour was added. Mix only until combined.
Too much mixing can make cookies less tender. Gentle mixing keeps them soft.
The Dough Is Too Sticky
This dough should be slightly sticky, but it should still scoop. Chill it for 30 minutes if needed.
Do not add too much extra flour. Extra flour can make the cookies dry.
The Dough Is Too Warm
Chill it before baking. A 20 to 30 minute chill helps control spreading.
This is especially helpful if the kitchen is warm. Cool dough holds shape better.
The Cookies Look Pale
They are supposed to stay light. The edges should be barely golden.
Do not bake until fully browned. That can dry them out.
The Icing Is Too Thin
Add more powdered sugar. Stir until the icing thickens.
Thicker icing is better for spreading. Thin glaze is better for drizzling.
The Icing Is Too Thick
Add milk a little at a time. Start with a small amount.
Too much milk can make the icing runny. Adjust slowly.
The Food Coloring Thinned the Icing
Use gel food coloring instead of liquid coloring. Gel gives vibrant color without adding too much moisture.
If icing becomes thin, add powdered sugar. Stir until smooth.
Sprinkles Will Not Stick
The icing may have dried before the sprinkles were added. Sprinkle immediately after icing each cookie.
Work in small batches. Decorate before the glaze sets.
Frequently Asked Questions
The butter may have been too soft, or the dough may have been too warm. Chill the dough for 20 to 30 minutes before baking.
Also use cool baking sheets. Warm pans can cause spreading.
This dough is designed for drop cookies. It bakes soft and puffy.
For cut-outs, use a firmer sugar cookie dough. This dough is better for scooping.
Can I make these without sour cream?
Sour cream is key to the soft texture, but Greek yogurt can be substituted in a pinch. Use the same amount.
The texture may vary slightly. The cookies should still be tender.
What type of icing works best?
A simple powdered-sugar glaze works beautifully. It dries with a shiny finish.
Royal icing can be used for more detailed designs. Cream cheese frosting is another richer option.
Store them in an airtight container with a slice of bread. The cookies absorb moisture and stay soft.
Keep the bread from touching wet icing. Replace it if it dries out.
Yes, baked unfrosted cookies can be frozen for up to 2 months. Thaw and decorate when ready.
Frosted cookies can be frozen on a tray, then layered with parchment once firm. Thaw gently before serving.
Can I make the dough ahead?
Yes, prepare the dough up to 2 days in advance and refrigerate it. Cover it well.
Let it soften slightly if it is too firm to scoop. Then bake as directed.
Can I use peppermint instead of almond extract?
Yes, peppermint extract can replace almond extract for a candy-cane twist. Use it as a flavor variation.
The cookie will taste more minty and festive. Pair with red or green icing if desired.
Why This Recipe Works So Well
Best Soft Christmas Cookies work because the dough is built for tenderness. Butter and sugar cream together to add air, while sour cream keeps the crumb moist.
The egg binds the dough and adds richness. Vanilla and optional almond extract give the cookies their classic holiday flavor.
Baking soda and baking powder help the cookies rise just enough. The result is slightly puffy rather than flat.
The cookies are baked only until the edges are barely golden. This protects the soft center.
The short cooling time on the baking sheet lets them finish setting. Moving them too soon can damage the tender structure.
The icing is simple and flexible. It can be tinted with gel food coloring, spread, drizzled, and decorated with sprinkles.
The recipe is also practical for holiday planning. The dough can be made ahead, and baked cookies can be frozen.
Most of all, these cookies work because they bring together softness, sweetness, color, and nostalgia. They taste like the kind of holiday baking people remember.
Final Thoughts
Best Soft Christmas Cookies are made with a tender sour cream sugar cookie dough, baked until barely golden at the edges, cooled completely, and decorated with a smooth powdered-sugar icing. Vanilla, optional almond extract, soft butter, and sour cream create that classic bakery-style holiday cookie flavor and pillowy texture.
Serve them with hot cocoa, coffee, or milk, add them to cookie boxes, freeze them ahead, or turn decorating into a family tradition with gel colors and sprinkles. With their soft centers, easy drop-cookie method, make-ahead dough option, 3-to-4-day storage, and festive decorating possibilities, these cookies are a sweet holiday recipe to return to year after year.
Soft Christmas Cookies Recipe

Soft, fluffy, tender, and made for decorating, these Soft Christmas Cookies are classic holiday sugar cookies with sour cream in the dough for extra tenderness. A smooth powdered sugar icing, gel food coloring, and optional sprinkles make them perfect for cookie exchanges, gifting, and festive Christmas baking traditions.
Recipe Details
- Prep Time: 15 minutes
- Cook Time: 10 minutes
- Total Time: 25 minutes
- Servings: 24 cookies
- Calories: 210 kcal
Ingredients
Icing
- Sprinkles optional
- Gel food coloring
- 1 teaspoon vanilla extract
- 1 -2 tablespoon milk
- 2 cups powdered sugar
Cookies
- 3 tablespoon sour cream
- ½ teaspoon almond extract optional
- 1 teaspoon vanilla extract
- 1 egg
- 1 ½ cups granulated sugar
- 1 cup unsalted butter softened
- ¼ teaspoon salt
- ½ teaspoon baking powder
- 1 teaspoon baking soda
- 2 ¾ cups all-purpose flour
Instructions
Step 1: Prepare the Oven and Baking Sheets
Preheat the oven to 375°F (190°C). Line baking sheets with parchment paper so the cookie dough has a prepared surface for baking.
Keep the baking sheets ready while you mix the dough. These cookies bake quickly, so it helps to have the pans prepared before scooping.
Step 2: Mix the Dry Ingredients
In a medium bowl, whisk together the all-purpose flour, baking soda, baking powder, and salt. Stir until the dry ingredients are evenly combined.
This helps the leavening spread through the flour before it is added to the butter mixture. Set the bowl aside while you prepare the wet ingredients.
Step 3: Cream the Butter and Sugar
In a large bowl, cream the softened unsalted butter and granulated sugar until light and fluffy. The mixture should look smooth, pale, and well blended.
Use room-temperature butter to ensure a fluffy cookie texture, as noted. This step helps create the soft base of the cookie dough.
Step 4: Add the Egg and Extracts
Beat in the egg, vanilla extract, and almond extract if using. Mix until the egg is fully incorporated and the flavorings are evenly blended.
The almond extract is optional, so it can be included or left out. Keep the mixture smooth before adding the sour cream.
Step 5: Add the Sour Cream
Add the sour cream and mix until smooth. The dough base should look creamy and evenly combined.
Sour cream gives these cookies their extra tender texture. Mix just until it disappears into the butter and sugar mixture.
Step 6: Finish the Cookie Dough
Gradually add the dry ingredients to the wet ingredients. Mix until just combined.
Stop mixing once the flour mixture is incorporated. Overmixing is not needed and can make the cookies less soft.
Step 7: Scoop the Cookies
Scoop the dough onto the prepared baking sheets. Space the dough portions 2 inches apart.
If you want the cookies to spread less, chill the dough for 30 minutes before baking. Keep the portions similar in size so the 24 cookies bake evenly.
Step 8: Bake Until Soft and Lightly Golden
Bake for 8-10 minutes, until the edges are lightly golden but the centers remain soft. Watch the cookies near the end of the baking time.
The centers should not become firm in the oven. They will continue to set slightly as they cool on the baking sheet.
Step 9: Cool the Cookies
Cool the cookies on the baking sheet for 5 minutes. Then transfer them to a wire rack.
Let the cookies cool completely before decorating. The icing will set better on cooled cookies.
Step 10: Make the Icing
For the icing, whisk the powdered sugar, milk, and vanilla extract until smooth. Adjust the consistency with more milk or powdered sugar as needed.
Use 1 -2 tablespoon milk as listed, adding only as needed for the texture you want. The icing should be smooth enough for decorating.
Step 11: Color and Decorate
Divide the icing and add gel food coloring. Decorate the cooled cookies, then add sprinkles if desired.
Gel food coloring works best for vibrant designs. Let the decorated cookies set before storing or serving.
Notes
- Use room-temperature butter to ensure fluffy cookie texture.
- Chill dough for 30 minutes if you want them to spread less.
- Gel food coloring works best for vibrant designs.
- Store cookies in an airtight container for 3-4 days or freeze unfrosted cookies for up to 2 months.
Serving Suggestions
Serve Soft Christmas Cookies after the icing has set and the decorations are ready. The tender sugar cookie base, smooth vanilla icing, colorful gel designs, and optional sprinkles make them ideal for Christmas dessert trays, cookie exchanges, holiday gifting, and festive baking days.
These cookies can be decorated in different colors by dividing the icing and adding gel food coloring. Use sprinkles if desired for an extra Christmas finish.
Since the recipe makes 24 cookies, they are easy to share or package for gifts. Let the cookies cool completely before icing so the decorations stay neat.
Storage
How to Store
Store cookies in an airtight container for 3-4 days. Keep them sealed so the texture stays soft.
Freezer Tip
Freeze unfrosted cookies for up to 2 months. Decorate after thawing if you want the icing and sprinkles to look fresh.
Butter Tip
Use room-temperature unsalted butter for the best fluffy cookie texture. The butter should be softened before creaming with the sugar.
Dough Tip
Chill the dough for 30 minutes if you want the cookies to spread less. This step is optional but helpful for thicker cookies.
Icing Tip
Adjust the icing consistency with more milk or powdered sugar as needed. Gel food coloring works best for vibrant designs.
Baking Tip
Bake at 375°F (190°C) for 8-10 minutes. The edges should be lightly golden while the centers remain soft.

Fernando is the creator and writer behind the food blog Eating with your Hands. Living and working in cities like Paris, Barcelona, and Berlin, and being married to a Canadian foodie, has given Fernando a passion and interest in food and inspired him to run EWYH.