
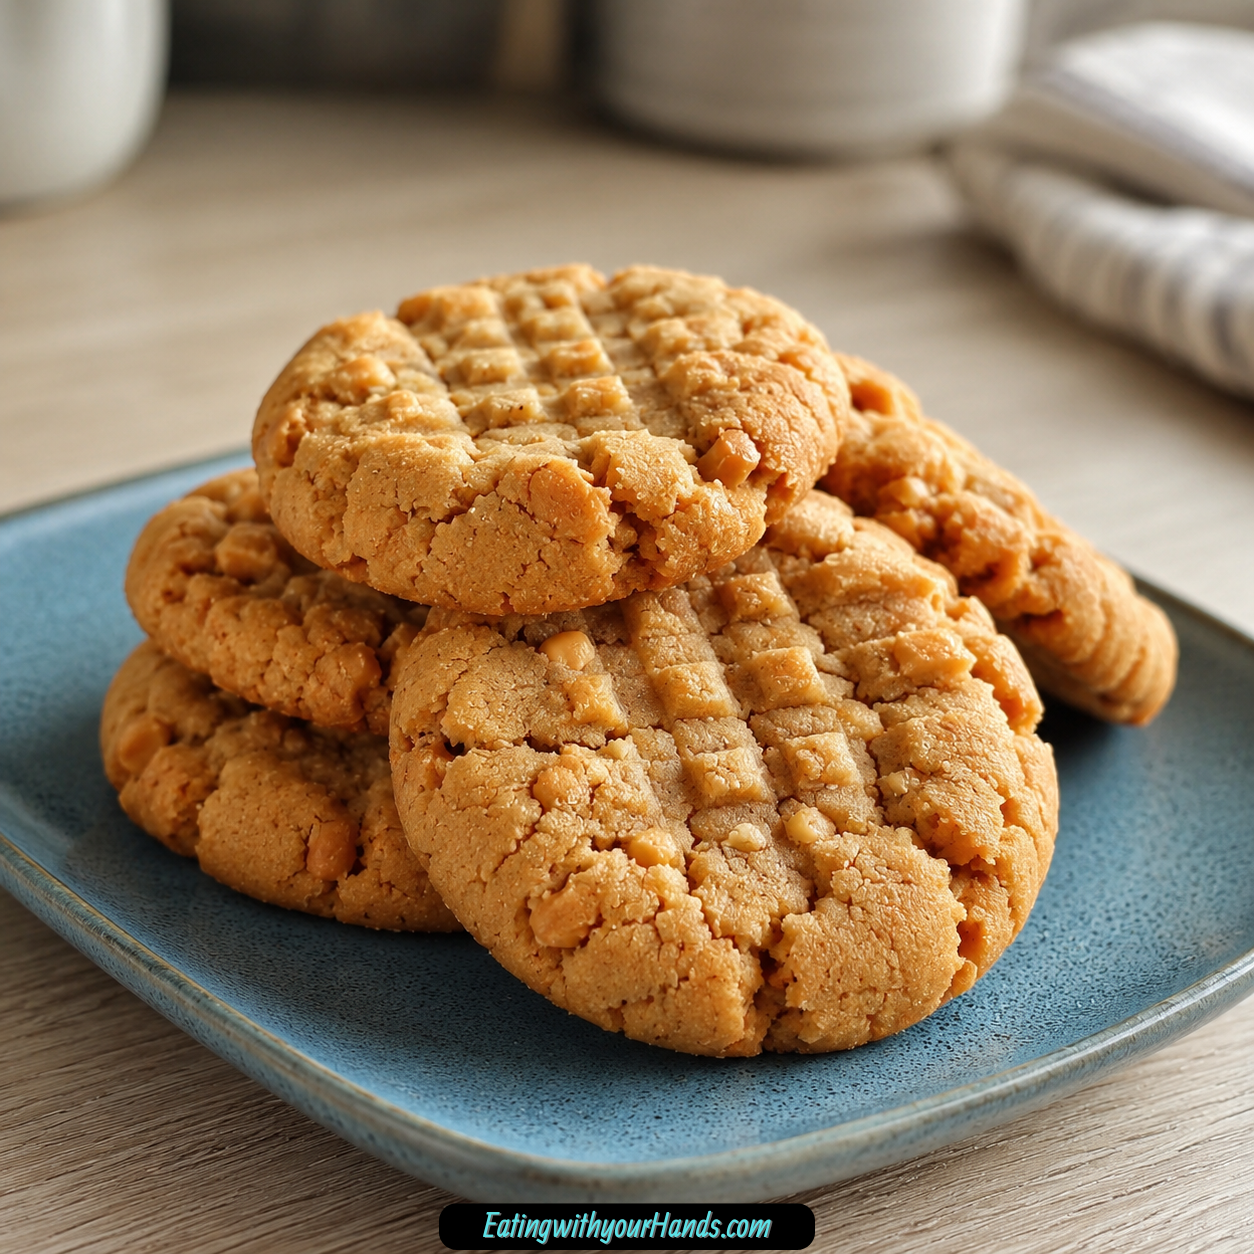
Soft Peanut Butter Cookies are the kind of cookies that feel familiar before you even take the first bite. They have that warm, nutty smell that fills the kitchen, the soft center that bends slightly when you pick one up, and the sweet peanut butter flavor that feels like something from an after-school memory.
There is something especially comforting about a peanut butter cookie that stays tender. It is simple, but it never feels boring, especially when the dough is made with crunchy peanut butter and whole roasted peanuts for extra texture.
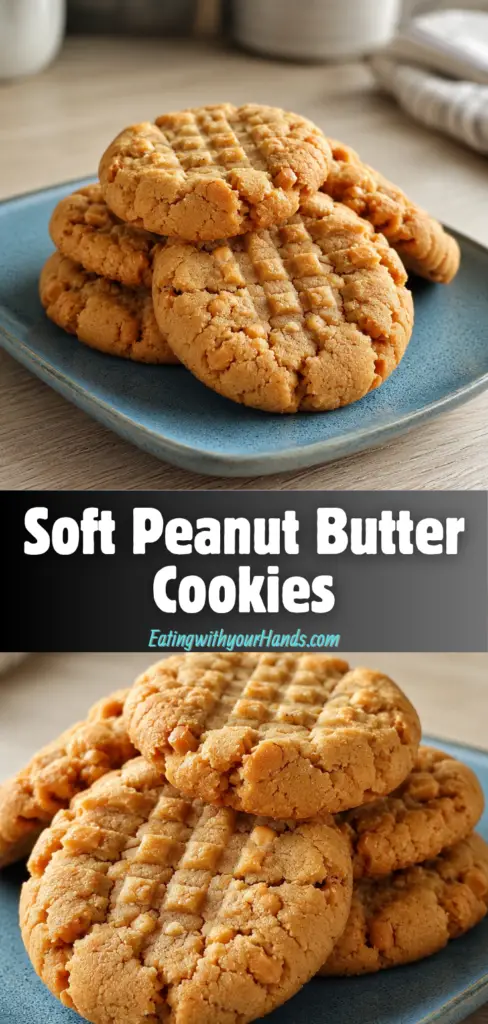
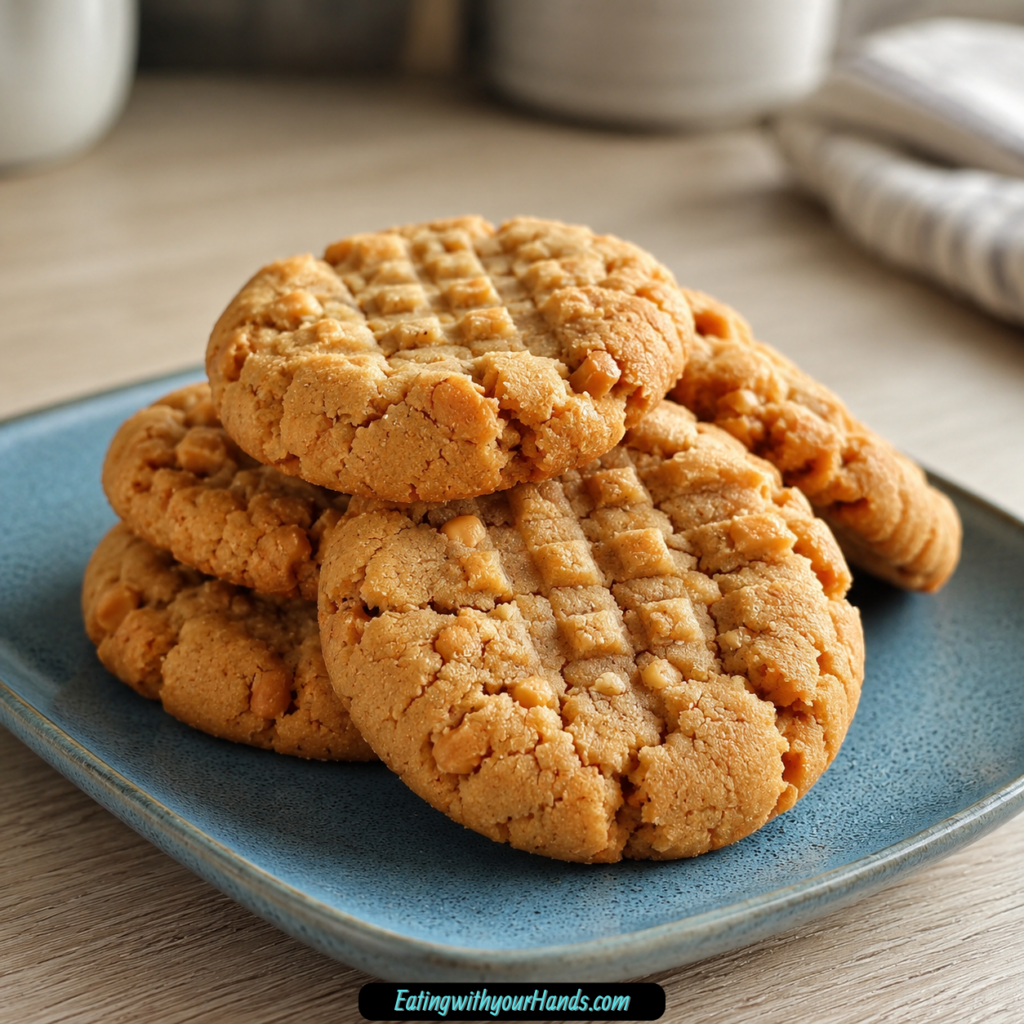
These cookies are soft, slightly crumbly, lightly chewy, and packed with peanut butter flavor. The fork-pressed crisscross pattern gives them that classic peanut butter cookie look, while the sugar coating adds a delicate sparkle and a little extra sweetness.
They are the kind of cookies you can bake for holidays, potlucks, family gatherings, lunchboxes, cozy weekends, or a completely ordinary Tuesday. They do not need frosting, filling, or decoration because the peanut butter does all the work.
The dough comes together in a straightforward way. You whisk the dry ingredients, cream the butter, peanut butter, and sugars, add the eggs, mix everything together gently, fold in roasted peanuts, roll the dough in sugar, press it with a fork, and bake until the edges are lightly golden.
The result is a cookie that tastes nostalgic and homemade. Every bite has that soft peanut butter sweetness with just enough crunch to keep things interesting.
Table of Contents
- What Are Soft Peanut Butter Cookies?
- Why You’ll Love These Soft Peanut Butter Cookies
- Recipe Details
- Ingredients You’ll Need
- A Note About the Ingredient List
- A Closer Look at the Ingredients
- The Flavor Behind These Cookies
- Directions
- Step 1: Gather the Ingredients and Tools
- Step 2: Preheat the Oven
- Step 3: Prepare the Baking Sheets
- Step 4: Whisk the Dry Ingredients
- Step 5: Cream the Butter, Peanut Butter, and Sugars
- Step 6: Scrape Down the Bowl
- Step 7: Add the Eggs One at a Time
- Step 8: Add the Dry Ingredients Gradually
- Step 9: Check the Dough Texture
- Step 10: Fold in the Whole Roasted Peanuts
- Step 11: Prepare the Sugar for Rolling
- Step 12: Scoop the Dough
- Step 13: Roll Into Balls
- Step 14: Coat the Dough in Sugar
- Step 15: Space the Dough on the Baking Sheets
- Step 16: Press with a Fork
- Step 17: Chill the Dough If Needed
- Step 18: Bake the Cookies
- Step 19: Cool on the Baking Sheet
- Step 20: Transfer to a Wire Rack
- Step 21: Serve and Enjoy
- Helpful Tips for the Best Soft Peanut Butter Cookies
- Common Mistakes
- Variations
- Serving Suggestions
- Storage Tips
- Freezing Instructions
- Make-Ahead Notes
- Frequently Asked Questions
- Final Thoughts
- Soft Peanut Butter Cookies
What Are Soft Peanut Butter Cookies?
Soft Peanut Butter Cookies are classic peanut butter cookies made with a tender dough, crunchy peanut butter, roasted peanuts, and a fork-pressed top. They are baked just until the edges are lightly golden while the centers still look soft.
The texture is what makes them special. They are not dry or hard, and they are not overly crisp from edge to center.
Instead, these cookies have a soft bite with a slightly crumbly finish. The brown sugar and butter help keep them tender, while the baking soda and baking powder give them gentle lift.
Crunchy peanut butter adds nutty flavor and little peanut pieces throughout the dough. Whole roasted peanuts bring even more texture, creating a cookie that feels richer than a plain peanut butter cookie.
Why You’ll Love These Soft Peanut Butter Cookies
These cookies have the perfect soft texture. They are tender, lightly chewy, and never meant to be dry or hard.
They are full of peanut butter flavor. Crunchy peanut butter gives them a deeper nutty taste and extra texture.
They include whole roasted peanuts. That added crunch makes every bite more interesting.
They are easy to make. The method is simple: mix, roll, press, bake, and cool.
They look classic. The fork crisscross pattern gives them the traditional peanut butter cookie style.
They freeze well. You can freeze dough balls for future fresh cookies whenever the craving hits.
Recipe Details
- Recipe name: Soft Peanut Butter Cookies
- Oven temperature: 350°F (175°C)
- Cookie dough portion: About 1 ½ tablespoons per cookie
- Cookie shape: Rolled into balls, coated in granulated sugar, then pressed with a fork
- Cookie spacing: About 2 inches apart
- Bake time: 10-12 minutes
- Doneness cue: Lightly golden edges with centers that still look slightly soft
- Cooling time on baking sheet: 5 minutes
- Main texture: Soft, tender, slightly crumbly, and peanut-packed
- Storage: Airtight container at room temperature for up to 5 days
- Softening tip: Store overbaked cookies with a slice of bread overnight
- Dough freezing: Up to 3 months
- Frozen dough baking: Bake from frozen with 1-2 extra minutes
- Spread prevention: Chill dough for 20-30 minutes if butter is too soft or dough is warm
- Gluten-free option: Use a 1:1 gluten-free flour blend, with slightly denser texture possible
- Egg-free option: Use a flax egg made with 1 tablespoon ground flaxseed plus 3 tablespoons water per egg
- Vegan-style note: Use plant-based stick butter with flax egg if needed
Ingredients You’ll Need
Dry Ingredients
- 2 ⅔ cups all-purpose flour (13 ⅓ ounces; 385 g)
- 1 teaspoon baking soda (4 g)
- ½ teaspoon baking powder (2 g)
- ¼ teaspoon kosher salt (1 g)
Wet Ingredients and Peanut Butter Base
- 8 ounces unsalted butter (2 sticks; 225 g), room temperature
- 1 cup crunchy peanut butter (240 ml)
- Brown sugar
- Granulated sugar
- Eggs
Texture and Finishing Ingredients
- Whole roasted peanuts
- Extra granulated sugar, for rolling
A Note About the Ingredient List
The provided source includes complete measurements for the dry ingredients, butter, and crunchy peanut butter. It also clearly mentions brown sugar, granulated sugar, eggs, whole roasted peanuts, and extra granulated sugar for rolling in the method.
Because the supplied ingredient text cuts off after the crunchy peanut butter line, the missing quantities are not guessed here. The recipe description below follows the method and details provided while preserving the listed measurements exactly where they were available.
A Closer Look at the Ingredients
All-purpose flour gives the cookies structure. Spoon and level it rather than packing it down, because too much flour can make peanut butter cookies dry.
Baking soda helps the cookies rise and spread properly. It supports that soft, classic cookie texture.
Baking powder gives a little extra lift. Together with the baking soda, it helps the cookies avoid becoming too dense.
Kosher salt balances the sweetness and brings out the peanut butter flavor. A small amount makes the cookie taste more complete.
Unsalted butter gives the cookies richness and tenderness. It should be at room temperature so it creams smoothly with the peanut butter and sugars.
Crunchy peanut butter is the key flavor ingredient. It gives the cookies deep peanut flavor and tiny bits of texture throughout the dough.
Brown sugar helps keep the cookies soft. It brings moisture and a deeper sweetness than granulated sugar alone.
Granulated sugar adds sweetness and helps create the classic cookie bite. Extra granulated sugar is also used for rolling the dough balls before baking.
Eggs help bind the dough together. Adding them one at a time helps them mix evenly into the butter and sugar base.
Whole roasted peanuts create the extra crunch that makes these cookies more exciting. They turn a soft peanut butter cookie into something with contrast.
The Flavor Behind These Cookies
These cookies are all about peanut butter comfort. Crunchy peanut butter gives the dough its main flavor, while roasted peanuts add a stronger nutty bite.
The sugars make the cookies sweet without hiding the peanut butter. Brown sugar adds softness, and granulated sugar helps create a light sugary finish on the outside.
The butter keeps the cookies tender. It also gives them that rich homemade cookie flavor that pairs so naturally with peanut butter.
The small amount of salt matters because peanut butter cookies can taste flat without it. Salt makes the sweetness feel balanced and the peanut flavor more noticeable.
The fork marks are not just decorative. Pressing the dough slightly helps the cookies bake evenly, especially because peanut butter dough is thicker than many other cookie doughs.
Directions
Step 1: Gather the Ingredients and Tools
Start by gathering the flour, baking soda, baking powder, kosher salt, room-temperature unsalted butter, crunchy peanut butter, brown sugar, granulated sugar, eggs, whole roasted peanuts, and extra granulated sugar for rolling. You will also need mixing bowls, a whisk, mixer or sturdy spoon, spatula, cookie scoop or spoon, baking sheets, parchment paper or nonstick spray, fork, and wire rack.
Having everything ready before mixing makes the process easier. Peanut butter cookie dough comes together quickly once the wet ingredients are creamed.
Make sure the butter is at room temperature before you begin. Cold butter will not cream properly, and overly soft butter can make the cookies spread too much.
Step 2: Preheat the Oven
Preheat your oven to 350°F (175°C). This gives the oven time to reach the right temperature before the cookies go in.
A properly heated oven helps the cookies bake evenly. If the oven is too cool, the cookies may spread too much before they set.
Do not wait until the dough is finished to preheat. Cookie dough is best baked once it is shaped and ready.
Step 3: Prepare the Baking Sheets
Line your baking sheets with parchment paper. Parchment makes cleanup easier and helps prevent sticking.
If you do not have parchment, lightly coat the baking sheets with nonstick spray. Either option works.
Make sure the baking sheets are cool before adding dough. Warm pans can soften the dough and cause spreading.
Step 4: Whisk the Dry Ingredients
In a large bowl, whisk together 2 ⅔ cups all-purpose flour, 1 teaspoon baking soda, ½ teaspoon baking powder, and ¼ teaspoon kosher salt. Whisk until everything is evenly combined.
This step helps distribute the baking soda, baking powder, and salt through the flour. It prevents uneven bites and helps the cookies bake consistently.
Set the dry mixture aside. It will be added to the peanut butter mixture later.
Step 5: Cream the Butter, Peanut Butter, and Sugars
In another large bowl or stand mixer bowl, beat the room-temperature unsalted butter, crunchy peanut butter, brown sugar, and granulated sugar until creamy and light. This should take about 2-3 minutes.
Do not rush this step. Creaming gives the dough a smoother base and helps the cookies bake with a soft texture.
The mixture should look thick, creamy, and evenly blended. If the butter was too cold, it may take a little longer.
Step 6: Scrape Down the Bowl
Pause and scrape down the sides and bottom of the bowl. Peanut butter and butter can cling to the edges.
Scraping makes sure all the sugar and peanut butter blend evenly. This keeps the dough consistent from the first cookie to the last.
Mix briefly again after scraping. The base should look smooth and well combined.
Step 7: Add the Eggs One at a Time
Add the eggs one at a time, mixing well after each addition. This helps the dough come together without separating.
After each egg is mixed in, scrape the bowl if needed. Even mixing matters for texture.
Do not overbeat for too long. Mix until the eggs are fully incorporated, then move on.
Step 8: Add the Dry Ingredients Gradually
Add the dry ingredients to the wet mixture in three batches. Mix just until combined after each addition.
Adding the flour mixture gradually makes the dough easier to handle. It also helps prevent flour from flying out of the bowl.
Stop mixing when the flour disappears. Overmixing can make the cookies tough.
Step 9: Check the Dough Texture
The dough should be thick and a little sticky. That is exactly what you want for soft peanut butter cookies.
If the dough feels too loose or warm, let it rest briefly or chill it before shaping. Warm dough can spread more in the oven.
Do not add extra flour too quickly. Too much flour can make the cookies dry and crumbly.
Step 10: Fold in the Whole Roasted Peanuts
Add the whole roasted peanuts to the dough. Fold them in gently with a spatula.
The peanuts should be distributed throughout the dough so every cookie gets some crunch. This extra texture is part of what makes these cookies special.
Do not crush the peanuts while folding. Keep them whole for the best contrast.
Step 11: Prepare the Sugar for Rolling
Place extra granulated sugar in a small bowl. This will be used to coat the cookie dough balls.
Rolling the dough in sugar gives the cookies a lightly sweet outer crust. It also makes them look pretty after baking.
Keep the sugar bowl near your baking sheets. This makes shaping faster.
Step 12: Scoop the Dough
Scoop about 1 ½ tablespoons of dough for each cookie. A cookie scoop makes this easy, but a spoon works too.
Try to keep the portions similar in size. Even dough balls bake more evenly.
The dough will be thick and slightly sticky. That is normal for this recipe.
Step 13: Roll Into Balls
Roll each portion of dough between your hands to form a ball. Work gently and avoid packing the dough too tightly.
If the dough sticks to your hands, pause and wash or lightly cool your hands. Sticky dough is easier to manage when your hands are not too warm.
A smooth ball helps the cookie bake evenly. It also makes the fork pattern cleaner.
Step 14: Coat the Dough in Sugar
Roll each dough ball in the extra granulated sugar. Coat the outside evenly.
This creates a lightly sparkling finish after baking. It also adds a small sweet crunch to the outside.
Shake off any heavy excess. A light coating is enough.
Step 15: Space the Dough on the Baking Sheets
Place the sugared dough balls on the prepared baking sheets. Leave about 2 inches between them.
The cookies will spread slightly as they bake. Spacing prevents them from running into each other.
Do not crowd the pan. Bake in batches if needed.
Step 16: Press with a Fork
Use a fork to gently press each dough ball down. Press once, then turn the fork and press again to create a crisscross pattern.
Do not flatten them too much. You only want to slightly flatten the dough so the cookies bake evenly.
The crisscross design is the classic peanut butter cookie look. It also helps the thicker dough spread properly.
Step 17: Chill the Dough If Needed
If the dough feels very soft or the kitchen is warm, chill the shaped dough for 20-30 minutes before baking. This helps prevent excessive spreading.
Chilling is especially useful if the butter was too soft. It firms the fat in the dough and helps the cookies hold shape.
You can chill the bowl of dough or the shaped cookies. Either method works.
Step 18: Bake the Cookies
Bake the cookies at 350°F for 10-12 minutes. Look for lightly golden edges.
The centers may still look slightly soft when you remove the cookies from the oven. That is the correct texture.
Do not overbake. The cookies continue setting on the hot baking sheet.
Step 19: Cool on the Baking Sheet
Let the cookies sit on the baking sheet for 5 minutes after baking. This helps them firm up.
Fresh peanut butter cookies can be delicate. Moving them too soon can cause them to crack or fall apart.
The cooling time also helps the centers finish setting. Patience gives the best soft texture.
Step 20: Transfer to a Wire Rack
After 5 minutes, move the cookies to a wire rack. Let them cool completely if you plan to store them.
Cooling on a rack prevents the bottoms from steaming. This helps the cookies keep a better texture.
They are delicious warm, but they become sturdier as they cool. The peanut butter flavor also settles nicely.
Step 21: Serve and Enjoy
Serve the cookies once they are cool enough to handle. They are wonderful warm, room temperature, or gently softened later.
A cold glass of milk is the classic pairing. Coffee or chai tea also works beautifully with their nutty sweetness.
For dessert, crumble one over vanilla ice cream. It turns a simple scoop into a peanut butter cookie sundae.
Helpful Tips for the Best Soft Peanut Butter Cookies
Use room-temperature butter. Cold butter will not cream well, while overly soft butter can cause spreading.
Use crunchy peanut butter for the best texture. Creamy peanut butter works, but crunchy gives more peanut pieces throughout.
Do not overmix once the flour is added. Overmixing can make the cookies tough.
Roll the dough in granulated sugar before pressing. This gives the cookies a sweet, lightly crisp outer finish.
Pull the cookies when the edges are lightly golden. The centers should still look a little soft.
Cool on the baking sheet for 5 minutes. This helps the cookies set without losing softness.
Common Mistakes
Using Butter That Is Too Soft
If the butter is too soft, the cookies can spread too much. The dough may also feel greasy or loose.
Chill the dough for 20-30 minutes if this happens. Cold dough holds its shape better.
Overbaking the Cookies
Soft peanut butter cookies should not look fully firm in the oven. The centers should still look slightly soft.
Remove them when the edges are lightly golden. They will continue baking on the hot sheet.
Overmixing the Dough
Once the dry ingredients are added, too much mixing can toughen the cookies. Mix only until combined.
Fold in the peanuts gently. This keeps the dough tender.
Skipping the Fork Press
Peanut butter dough is thick. If you do not press it slightly, the cookies may not bake evenly.
The fork pattern helps flatten the dough just enough. It also gives the cookies their classic look.
Moving Cookies Too Soon
Fresh cookies are fragile right out of the oven. Let them sit for 5 minutes on the baking sheet.
This short wait helps them set. Then they can be moved without breaking.
Variations
Add 1 cup chocolate chips when folding in the peanuts. Semi-sweet or milk chocolate both work well.
Sprinkle a few extra chocolate chips on top before baking for a bakery-style look. This makes the cookies more visually appealing.
Swap the peanut butter for almond butter. Use chopped almonds instead of peanuts for a softer, slightly sweeter flavor.
Drizzle baked almond butter cookies with melted chocolate. This adds a dessert-style finish.
Use creamy peanut butter instead of crunchy peanut butter. Add an extra handful of chopped peanuts if you still want crunch.
Use a 1:1 gluten-free flour blend for a gluten-free version. The texture may be slightly denser.
Use a flax egg if you need an egg-free version. Mix 1 tablespoon ground flaxseed with 3 tablespoons water per egg.
For a vegan-style version, use flax egg and plant-based stick butter. The cookies may spread more and be a little denser, but they still work.
Use all granulated sugar if you are out of brown sugar. The cookies may be slightly less soft, but they will still bake.
Serving Suggestions
Serve these cookies with a cold glass of milk. Peanut butter and milk are a classic match.
Pair them with coffee for an afternoon treat. The nutty sweetness balances the bitterness of coffee.
Serve them with chai tea if you want something warm and cozy. The spice pairs nicely with peanut butter.
Stack them on a pretty plate for parties or potlucks. The crisscross pattern makes them instantly recognizable.
Crumble a cookie over vanilla ice cream for a quick sundae. The peanut butter flavor turns simple ice cream into a real dessert.
Pack them for lunchboxes or share them with friends. They are sturdy enough to travel once cooled.
Storage Tips
Store cooled cookies in an airtight container at room temperature. They will stay soft and delicious for up to 5 days.
Make sure they are fully cool before sealing the container. Warm cookies can create steam and soften too much.
If cookies become too crisp, store them with a slice of bread overnight. The cookies will absorb some moisture and soften.
Use parchment between layers if stacking. This helps protect the fork pattern and prevents sticking.
Keep the container tightly closed. Air can dry out soft peanut butter cookies.
Freezing Instructions
You can freeze the cookie dough for up to 3 months. Roll the dough into balls first, but skip the sugar coating until baking day.
Place the dough balls on a baking sheet and freeze for about 1 hour. This keeps them from sticking together later.
Transfer the frozen dough balls to a zip-top bag or airtight container. Label them if needed.
When ready to bake, do not thaw. Roll the frozen dough balls in sugar, flatten slightly with a fork, and bake.
Add 1-2 extra minutes to the baking time. Watch for lightly golden edges.
Make-Ahead Notes
The dough can be prepared ahead and chilled if needed. This is especially helpful when the dough is too warm or sticky.
If baking later the same day, keep the dough covered in the refrigerator. Let it sit just long enough to scoop if it becomes too firm.
For longer make-ahead storage, freeze the dough balls. This gives you fresh cookies whenever you want them.
Do not coat frozen dough balls in sugar before freezing. The sugar coating is best added right before baking.
You can also bake cookies ahead and store them airtight for up to 5 days. They are a reliable make-ahead treat for parties and potlucks.
Frequently Asked Questions
Can I Use Creamy Peanut Butter?
Yes, creamy peanut butter works. The cookies will still be soft and full of peanut butter flavor.
The texture will be smoother because you will not have the peanut bits from crunchy peanut butter. Add an extra handful of chopped peanuts if you want more crunch.
How Do I Freeze the Dough?
Roll the dough into balls, but do not coat them in sugar yet. Place them on a baking sheet and freeze for about 1 hour.
Transfer the frozen dough balls to a zip-top bag or airtight container. They will keep for up to 3 months.
Do I Need to Thaw Frozen Dough Before Baking?
No, you can bake straight from frozen. Roll the dough balls in sugar, flatten slightly with a fork, and bake.
Add 1-2 extra minutes to the baking time. Watch for lightly golden edges.
Can I Make These Without Eggs?
Yes, a flax egg can work in a pinch. Use 1 tablespoon ground flaxseed plus 3 tablespoons water per egg.
The cookies may spread a little more and become slightly denser. They will still taste good.
Can I Make These Vegan?
Use a flax egg and plant-based stick butter. The texture may be different from the original.
They may spread more and be a little denser. Still, the peanut butter flavor will remain delicious.
Why Did My Cookies Spread Too Much?
The butter may have been too soft, or the dough may have become warm. Warm dough spreads more in the oven.
Chill the dough for 20-30 minutes before baking. This helps the cookies hold their shape.
Why Are My Cookies Too Crisp?
They were likely baked too long. Remove them when the edges are lightly golden and the centers still look soft.
If they are already too crisp, store them with a slice of bread overnight. This can help them soften.
Can I Make These Gluten-Free?
Yes, a 1:1 gluten-free flour blend can work. The texture may be slightly denser.
Follow the same method and avoid overmixing. The cookies should still be soft and flavorful.
Final Thoughts
Soft Peanut Butter Cookies are a simple, nostalgic treat with the kind of flavor that never goes out of style. They are tender, slightly crumbly, full of peanut butter, and made even better with crunchy peanut butter and whole roasted peanuts.
The method is easy enough for everyday baking. Mix the dough, roll it in sugar, press it with a fork, bake until the edges are lightly golden, and let the cookies cool just long enough to set.
They are perfect for holidays, potlucks, after-school snacks, cozy nights, coffee breaks, or anytime you want a cookie that feels homemade and familiar. They also freeze well, which means future cookie cravings are easy to solve.
Whether you keep them classic, add chocolate chips, try almond butter, make them gluten-free, or use a flax egg, these cookies are forgiving and deeply satisfying. Every batch brings soft peanut butter comfort, a little crunch, and the kind of sweetness that makes the kitchen feel warmer.
Soft Peanut Butter Cookies
These Soft Peanut Butter Cookies are tender, nutty, and full of rich peanut butter flavor. Crunchy peanut butter gives the dough extra texture, while whole roasted peanuts add a satisfying bite in every cookie. The dough is rolled in granulated sugar before baking, creating a lightly sweet outside with soft, chewy centers. These cookies are perfect for everyday baking, lunchbox treats, dessert trays, holidays, or serving with a cold glass of milk.
Recipe Details
- Prep Time: 15 minutes
- Cook Time: 12 minutes
- Total Time: 27 minutes
- Course: Dessert
- Cuisine: American
- Servings: 24 cookies
Equipment
- Mixing bowl
- Baking sheet
Ingredients
Wet Ingredients
- ½ cup granulated sugar 3 ½ ounces; 100 g, for rolling
- 1 ½ cups whole roasted peanuts 5 ounces; 140 g
- 2 large eggs
- ¾ cup granulated sugar 5 ¼ ounces; 150 g
- 1 cup packed light brown sugar 7 ½ ounces; 215 g
- 1 cup crunchy peanut butter 240 ml
- 8 ounces unsalted butter 2 sticks; 225 g, at room temperature
Dry Ingredients
- ¼ teaspoon kosher salt 1 g
- ½ teaspoon baking powder 2 g
- 1 teaspoon baking soda 4 g
- 2 ⅔ cups all-purpose flour 13 ⅓ ounces; 385 g
Instructions
Step 1: Prepare the Oven
Preheat your oven to 350°F (175°C).
Line baking sheets with parchment paper and set them aside.
Step 2: Mix the Dry Ingredients
In a bowl, whisk together the all-purpose flour, baking soda, baking powder, and kosher salt.
Set the dry mixture aside.
Step 3: Cream the Butter and Peanut Butter
In another bowl, beat the unsalted butter, crunchy peanut butter, light brown sugar, and granulated sugar until smooth and creamy.
The mixture should look well blended and slightly fluffy.
Step 4: Add the Eggs
Add the eggs one at a time.
Mix well after each addition so the dough base stays smooth.
Step 5: Combine the Dough
Gradually add the dry ingredients to the peanut butter mixture.
Mix just until everything is combined and a soft cookie dough forms.
Step 6: Add the Roasted Peanuts
Fold in the whole roasted peanuts.
Stir gently until the peanuts are evenly distributed throughout the dough.
Step 7: Shape and Sugar-Coat
Roll the dough into balls.
Roll each dough ball in the remaining granulated sugar until lightly coated.
Step 8: Flatten the Cookies
Place the dough balls on the prepared baking sheets.
Flatten each one slightly with a fork.
Step 9: Bake
Bake for 10-12 minutes, or until the edges are lightly golden.
The centers should still look soft so the cookies stay tender after cooling.
Step 10: Cool
Let the cookies cool on the baking sheets for 5 minutes.
Transfer them to a wire rack to cool completely.
Notes
Store the cookies in an airtight container at room temperature for up to 5 days.
Serving Suggestions
These soft peanut butter cookies pair well with:
- Cold milk
- Hot coffee
- Iced coffee
- Hot chocolate
- Vanilla ice cream
- Chocolate drizzle
- Peanut butter frosting
- Holiday cookie trays
Storage
How to Store
Store cooled cookies in an airtight container at room temperature.
Best Texture Tip
Do not overbake the cookies. Pull them from the oven when the edges are lightly golden and the centers are still soft so they stay tender and chewy.

Fernando is the creator and writer behind the food blog Eating with your Hands. Living and working in cities like Paris, Barcelona, and Berlin, and being married to a Canadian foodie, has given Fernando a passion and interest in food and inspired him to run EWYH.