
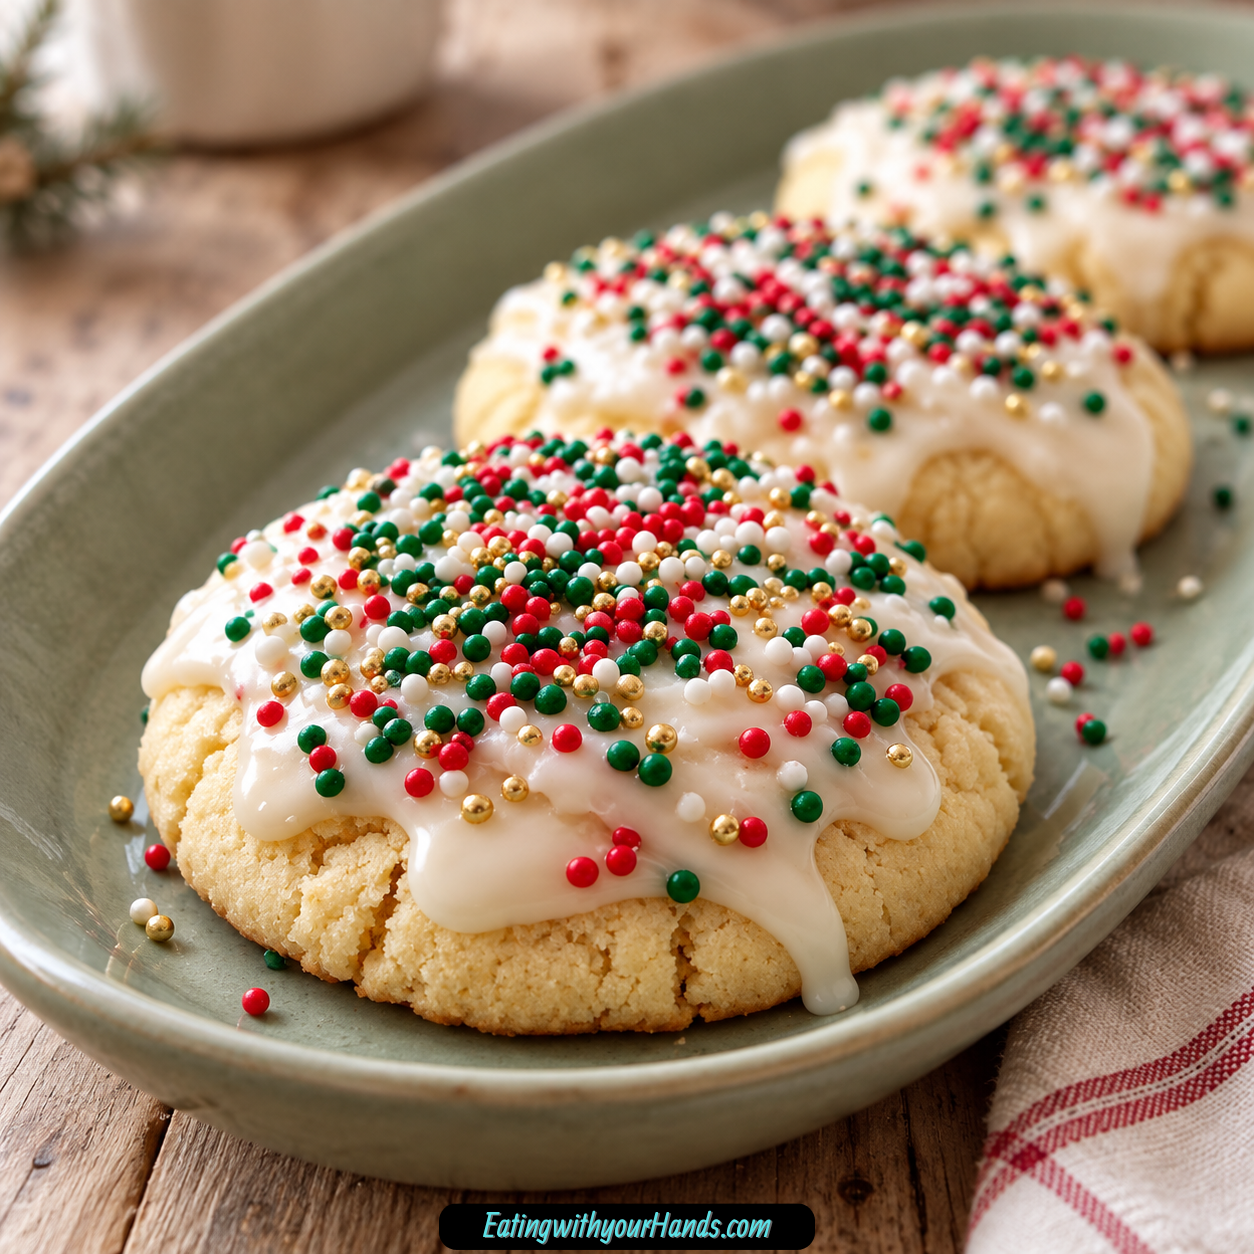
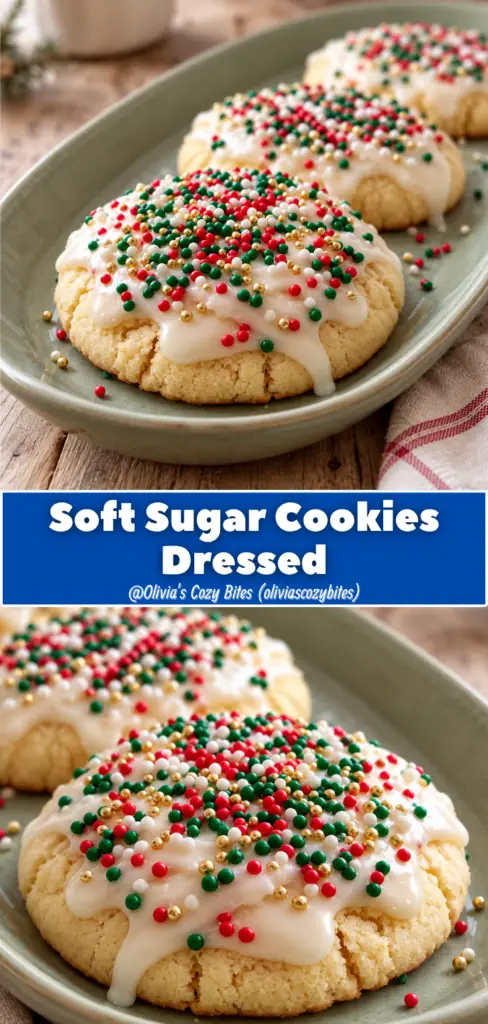
Soft Sugar Cookies Dressed are the kind of cookies that make a kitchen feel festive before the first batch even cools. They are tender, lightly sweet, topped with a smooth cream cheese glaze, and finished with cheerful sprinkles that turn a simple cookie into something ready for holidays, cookie tins, and cozy December afternoons.
These cookies carry that nostalgic, homemade feeling that belongs beside holiday music, flour-dusted counters, and little hands reaching for the sprinkle jar. They are soft enough to feel special, sturdy enough to hold glaze, and simple enough that the process never feels overwhelming.
The cookie base is made with classic pantry ingredients: flour, baking soda, baking powder, salt, softened butter, sugar, egg, vanilla, and milk or heavy cream. The dough mixes easily, scoops neatly, and bakes into soft rounds with edges that are just barely golden.
The glaze is what makes them feel dressed for the season. Softened cream cheese, a little butter, powdered sugar, milk, and vanilla become a tangy-sweet topping that spreads beautifully over each cooled cookie.
Then come the sprinkles. Red and green sprinkles feel classic for Christmas, but gold stars, snowflakes, pastel colors, edible glitter, crushed candy canes, or mini chocolate chips can change the mood completely.
These cookies are also friendly for decorating with kids. The glaze sets quickly, so the sprinkles need to go on while it is still tacky, which makes the decorating part feel lively, messy, and fun.
They are perfect for cookie swaps, neighbors, mail carriers, family gatherings, holiday trays, school treats, or a quiet coffee break when you want something sweet and soft. They feel festive without being fussy.
The best part is that they stay soft for days when stored properly. Layer them between parchment, keep them in an airtight container, and they remain tender and dreamy.
Soft Sugar Cookies Dressed are simple, joyful, and endlessly customizable. They are the cookies you make when you want something easy, pretty, and full of holiday warmth.
Table of Contents
- Why You’ll Love Soft Sugar Cookies Dressed
- Recipe Details
- Ingredients
- Ingredient Notes
- Optional Swaps, Variations, Add-Ins, and Serving Ideas
- Classic Soft Sugar Cookies Dressed
- Almond Glaze Sugar Cookies
- Cinnamon Sugar Cookies
- Dairy-Free Direction
- Colored Glaze Cookies
- Candy Cane Sugar Cookies
- Edible Glitter Cookies
- Mini Chocolate Chip Cookies
- White Chocolate Drizzle Cookies
- Perfect Round Sugar Cookies
- Holiday Cutout Cookies
- Eggnog Glaze Cookies
- Mascarpone Glaze Cookies
- Powdered Sugar Finish
- Stick Margarine Version
- Why This Recipe Works
- Directions
- Step 1: Preheat the Oven
- Step 2: Prepare the Baking Sheets
- Step 3: Mix the Dry Ingredients
- Step 4: Cream the Butter and Sugar
- Step 5: Add Egg, Vanilla, and Milk
- Step 6: Add the Dry Ingredients
- Step 7: Chill Sticky Dough if Needed
- Step 8: Scoop the Dough
- Step 9: Shape if Desired
- Step 10: Bake the Cookies
- Step 11: Cool the Cookies
- Step 12: Make the Cream Cheese Glaze
- Step 13: Add Powdered Sugar, Milk, and Vanilla
- Step 14: Adjust the Glaze Texture
- Step 15: Glaze the Cookies
- Step 16: Add Sprinkles Immediately
- Step 17: Let the Glaze Set
- Step 18: Store or Serve
- Serving Ideas
- Storage
- Freezing
- Make-Ahead
- Helpful Notes for Best Results
- Variations
- Classic Soft Sugar Cookies Dressed
- Almond Glaze Cookies
- Cinnamon Sugar Cookies
- Dairy-Free Holiday Cookies
- Colored Glaze Cookies
- Crushed Candy Cane Cookies
- Edible Glitter Cookies
- Mini Chocolate Chip Cookies
- White Chocolate Drizzle Cookies
- Cookie Cutter Shapes
- Eggnog Glaze Cookies
- Powdered Sugar Cookies
- Mascarpone Glaze Cookies
- Troubleshooting
- Frequently Asked Questions
- Why This Recipe Works So Well
- Final Thoughts
- Soft Sugar Cookies
Why You’ll Love Soft Sugar Cookies Dressed
These cookies stay soft. They are not dry, crunchy sugar cookies, and the cream cheese glaze helps them feel tender and rich.
They are easy to make. There are no complicated decorating skills required.
The cream cheese glaze is tangy and sweet. It is thick enough to cling to the cookies without running everywhere.
They are perfect for holidays. Sprinkles instantly turn them into cheerful cookies for Christmas, Valentine’s Day, Easter, or any celebration.
They are kid-friendly. Decorating with sprinkles is simple, fun, and wonderfully messy.
They freeze well. Unglazed cookies and cookie dough balls can both be frozen for later baking or decorating.
Recipe Details
This recipe bakes at 375°F (190°C). Line the baking sheets with parchment paper or silicone mats before adding the dough.
The cookies bake for 8 to 10 minutes. They are done when the edges are just barely golden.
Do not wait for the cookies to brown deeply. Overbaking takes away their soft texture.
The dough uses 2 ¾ cups all-purpose flour. Spoon and level the flour instead of packing it.
The cookie dough also uses 1 teaspoon baking soda, ½ teaspoon baking powder, and ½ teaspoon salt. Both leaveners are used for the best texture.
The butter is 1 cup unsalted butter, softened. That is 2 sticks.
The sugar is 1 ½ cups granulated sugar. It creams with the butter to create the cookie base.
The dough also includes 1 large room-temperature egg, 2 teaspoons vanilla extract, and 3 tablespoons milk or heavy cream. Heavy cream makes the cookies extra soft, but milk works too.
The glaze uses 4 oz softened block-style cream cheese, 1 tablespoon softened butter, 1 cup powdered sugar, 1 to 2 tablespoons milk, and ½ teaspoon vanilla extract.
Festive sprinkles go on top while the glaze is still tacky. This helps them stick before the glaze sets.
Ingredients
For the Cookies
- 2 ¾ cups all-purpose flour, spooned and leveled
- 1 teaspoon baking soda
- ½ teaspoon baking powder
- ½ teaspoon salt
- 1 cup unsalted butter, softened
- 1 ½ cups granulated sugar
- 1 large egg, room temperature
- 2 teaspoons vanilla extract
- 3 tablespoons milk or heavy cream
For the Cream Cheese Glaze
- 4 oz cream cheese, softened
- 1 tablespoon butter, softened
- 1 cup powdered sugar
- 1 to 2 tablespoons milk
- ½ teaspoon vanilla extract
For the Topping
- Festive sprinkles
Optional Swaps, Add-Ins, and Decorating Ideas
- ¼ teaspoon almond extract
- Pinch of cinnamon
- Plant-based butter
- Plant-based cream cheese
- Almond milk
- Oat milk
- Food coloring
- Crushed candy canes
- Edible glitter
- Mini chocolate chips
- Melted white chocolate
- Heavy cream
- Water
- Eggnog
- Mascarpone
- Powdered sugar for dusting
- Stick margarine
- Extra pinch of salt
Ingredient Notes
All-purpose flour gives the cookies structure. Spoon and level it so the dough does not become too heavy.
Baking soda and baking powder both matter here. They help the cookies bake soft and light.
Salt balances the sweetness. It also makes the vanilla and butter flavor stand out.
Unsalted butter should be softened, not melted. Let it sit out for about an hour instead of microwaving if possible.
Granulated sugar gives the cookies their classic sweetness. Creaming it with butter for 2 to 3 minutes helps create the right texture.
The egg is best at room temperature. It blends into the butter mixture more smoothly.
Vanilla extract gives the cookies their warm sugar-cookie flavor. Real vanilla is preferred if available.
Milk keeps the dough soft. Heavy cream can be used for an even softer cookie.
Block-style cream cheese is best for the glaze. Spreadable cream cheese is not the same texture.
Powdered sugar sweetens and thickens the glaze. Sift it if it is lumpy.
Sprinkles should be added right after glazing. The glaze sets quickly, and sprinkles stick best while it is still tacky.
Optional Swaps, Variations, Add-Ins, and Serving Ideas
Classic Soft Sugar Cookies Dressed
Make the cookies with vanilla sugar cookie dough, cream cheese glaze, and festive sprinkles. This gives the full soft, sweet, holiday-style version.
Let the glaze set before stacking. This keeps the decorated tops neat.
Almond Glaze Sugar Cookies
Swap the vanilla in the glaze for ¼ teaspoon almond extract. Almond extract is strong, so a small amount is enough.
This gives the glaze a bakery-style flavor. It pairs beautifully with the soft cookie base.
Cinnamon Sugar Cookies
Add a pinch of cinnamon to the cookie dough. It gives the cookies a cozy flavor.
This works especially well for winter baking. Keep the glaze simple.
Dairy-Free Direction
Use plant-based butter and plant-based cream cheese. Swap the milk for almond milk or oat milk.
The cookies will still be soft. Texture may vary depending on the products used.
Colored Glaze Cookies
Add a drop or two of food coloring to the glaze. Use pastel shades for Easter, pink for Valentine’s Day, or festive colors for holidays.
Stir gently until evenly colored. Add color slowly so the glaze does not become too bright.
Candy Cane Sugar Cookies
Top the glazed cookies with crushed candy canes. Add them while the glaze is still tacky.
This gives the cookies crunch and holiday flavor. Use small pieces so they are easy to bite.
Edible Glitter Cookies
Add edible glitter over the glaze. This makes the cookies sparkle.
Use it with sprinkles for a decorated cookie tray. Add while the glaze is soft.
Mini Chocolate Chip Cookies
Sprinkle mini chocolate chips over the glaze. They add texture and chocolate flavor.
Use a light sprinkle so the glaze still shows. This variation is fun for kids.
White Chocolate Drizzle Cookies
Drizzle melted white chocolate over the set glaze. This gives the cookies a fancier finish.
Let the glaze set first, then drizzle. Allow the chocolate to firm before storing.
Perfect Round Sugar Cookies
Roll the dough into balls and flatten slightly before baking. This creates more even circles.
Keep the dough cool if it feels soft. Warm dough can spread too much.
Holiday Cutout Cookies
Use holiday cookie cutters for fun shapes. Chill the dough first so the shapes hold better.
This variation takes more time but looks festive. Decorate after baking and cooling.
Eggnog Glaze Cookies
Use a splash of eggnog as the liquid in the glaze. It gives the cookies a festive flavor.
Start with a small amount and add more only as needed. The glaze should stay thick but spreadable.
Mascarpone Glaze Cookies
Use mascarpone if you do not have cream cheese. The glaze will taste a little different but still creamy.
Mix until smooth. Adjust powdered sugar and milk as needed.
Powdered Sugar Finish
Skip the cream cheese glaze and dust cooled cookies with powdered sugar. This is a simpler finish.
The cookies will be less rich but still soft and sweet. This is useful when you want less decorating.
Stick Margarine Version
Use stick margarine instead of butter if needed. Avoid tub margarine.
The cookies will not be quite as rich or soft. Add a pinch of extra salt to balance the flavor.
Why This Recipe Works
This recipe works because the cookie dough is simple but balanced. Butter, sugar, egg, vanilla, flour, leaveners, salt, and milk create a soft sugar cookie that holds its shape well enough for glaze.
Creaming the butter and sugar for 2 to 3 minutes builds a lighter texture. This step helps prevent dense cookies.
Using both baking soda and baking powder gives the cookies a soft lift. The result is tender rather than flat.
Milk or heavy cream adds moisture. Heavy cream makes the cookies extra soft.
The cookies are pulled from the oven when the edges are barely golden. This protects their soft centers.
Cooling on the baking sheet for 2 minutes helps them set without overbaking. Moving them to a rack keeps the bottoms from getting too firm.
The cream cheese glaze adds tang and moisture. It also gives the sprinkles something to stick to.
Letting the glaze set before stacking protects the decoration. Parchment between layers keeps the cookies neat.
Directions
Step 1: Preheat the Oven
Preheat the oven to 375°F (190°C). Let it fully heat while you prepare the dough.
The cookies bake quickly, so the oven should be ready before the trays go in. This helps them bake evenly.
Step 2: Prepare the Baking Sheets
Line baking sheets with parchment paper or silicone mats. This prevents sticking and makes cleanup easier.
Use cool baking sheets for each batch. Warm pans can make the dough spread too much.
Step 3: Mix the Dry Ingredients
In a medium bowl, whisk together 2 ¾ cups all-purpose flour, 1 teaspoon baking soda, ½ teaspoon baking powder, and ½ teaspoon salt.
Whisk just until evenly combined. Set the bowl aside.
Step 4: Cream the Butter and Sugar
In a large bowl, beat 1 cup softened unsalted butter with 1 ½ cups granulated sugar. Beat for 2 to 3 minutes, until light and fluffy.
This step helps create the soft texture. Do not rush it.
Step 5: Add Egg, Vanilla, and Milk
Beat in 1 large room-temperature egg, 2 teaspoons vanilla extract, and 3 tablespoons milk or heavy cream. Mix just until combined.
The mixture may look slightly curdled at first. That is normal.
Step 6: Add the Dry Ingredients
Gradually add the dry ingredients to the wet mixture. Mix until just combined.
Do not overmix once the flour is added. Overmixing can make the cookies tough.
Step 7: Chill Sticky Dough if Needed
If the dough feels too sticky to scoop, chill it for 30 minutes. This makes it easier to handle.
Chilling also helps prevent spreading if your kitchen is warm. Keep the dough covered while it chills.
Step 8: Scoop the Dough
Drop the dough by rounded tablespoons onto the prepared baking sheets. Leave about 2 inches between each cookie.
A cookie scoop makes this step faster and helps the cookies bake evenly. Rounded tablespoons work well too.
Step 9: Shape if Desired
For perfect circles, roll the dough into balls and flatten slightly. For cutout shapes, chill the dough first and use cookie cutters.
Keep shapes thick enough to stay soft. Thin cookies may bake faster.
Step 10: Bake the Cookies
Bake for 8 to 10 minutes. The cookies are done when the edges are just barely golden.
Do not wait for the tops to brown. The cookies will continue to set as they cool.
Step 11: Cool the Cookies
Let the cookies cool on the baking sheet for 2 minutes. Then transfer them to a wire rack to cool completely.
Do not glaze warm cookies. The glaze needs cooled cookies so it can set properly.
Step 12: Make the Cream Cheese Glaze
Beat 4 oz softened cream cheese with 1 tablespoon softened butter until smooth. Make sure there are no lumps.
Soft ingredients are important here. Lumpy cream cheese creates lumpy glaze.
Step 13: Add Powdered Sugar, Milk, and Vanilla
Gradually add 1 cup powdered sugar, 1 tablespoon milk, and ½ teaspoon vanilla extract. Beat until smooth.
Add the second tablespoon of milk only if needed. The glaze should be thick but spreadable.
Step 14: Adjust the Glaze Texture
If the glaze is too thick, add milk 1 teaspoon at a time. If it is too thin, beat in more powdered sugar.
Aim for a yogurt-like texture. It should hold its shape when drizzled back into the bowl.
Step 15: Glaze the Cookies
Spread a generous layer of glaze over each cooled cookie. Use the back of a spoon for a soft, rustic look.
Work in small batches if needed. The glaze sets quickly.
Step 16: Add Sprinkles Immediately
Add festive sprinkles while the glaze is still tacky. Press lightly if needed.
Do not wait too long. Once the glaze sets, sprinkles will not stick well.
Step 17: Let the Glaze Set
Let the cookies sit until the glaze sets completely, about 1 hour. This helps prevent smearing.
Do not stack them too soon. The tops can become sticky and messy.
Step 18: Store or Serve
Serve once the glaze has set, or store in an airtight container with parchment between layers. Keep at room temperature for up to 3 days.
If your kitchen is warm, store the cookies in the refrigerator to keep the glaze firm. Let them come to room temperature before serving.
Serving Ideas
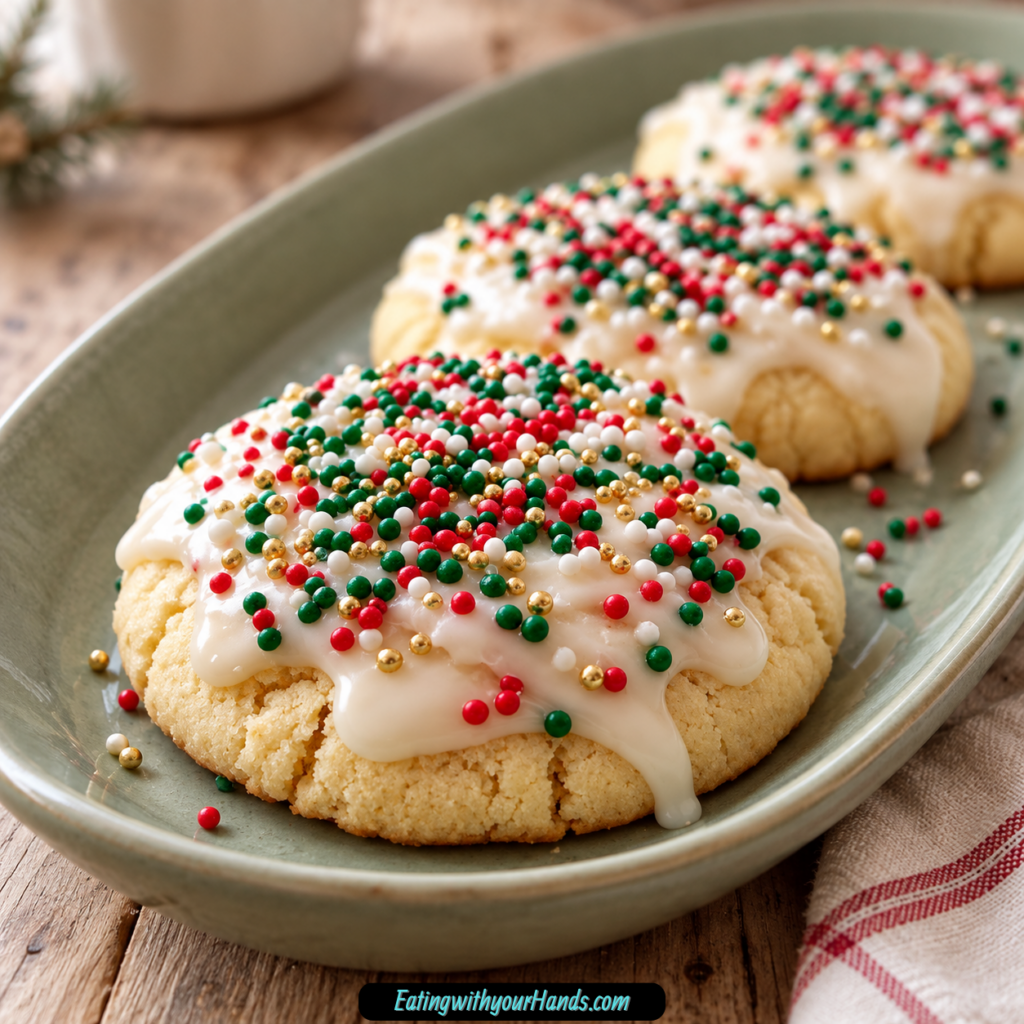
Serve Soft Sugar Cookies Dressed on a holiday cookie tray. Their glaze and sprinkles make them colorful and festive.
Pack them into cookie tins for friends and neighbors. Use parchment between layers to protect the glaze.
Leave them out for Santa on Christmas Eve. Their soft texture and cheerful look make them perfect for the season.
Serve with afternoon coffee or tea. The cream cheese glaze gives them a sweet, tangy finish.
Let kids decorate their own cookies. Set out sprinkles, crushed candy canes, edible glitter, or mini chocolate chips.
Use different sprinkle colors for different holidays. Pink works for Valentine’s Day, pastels work for Easter, and red and green feel classic for Christmas.
Serve them at cookie swaps. They look pretty but are simple to make.
Bring them to family gatherings. They travel well once the glaze has set.
Storage
Let the glaze set completely before storing. This takes about 1 hour.
Store the cookies in an airtight container at room temperature for up to 3 days. Layer them with parchment paper so the glaze does not stick.
If your kitchen is warm, store them in the refrigerator. This keeps the glaze firm.
Let refrigerated cookies come to room temperature before serving. This brings back the best soft bite.
Do not stack warm or unset cookies. The glaze will smear.
Keep the container sealed. Air can dry out the cookies.
For the freshest appearance, glaze cookies the day you plan to serve them. The flavor will still be good after storage, but the decoration looks best fresh.
Freezing
Unglazed cookies freeze well for up to 2 months. Place parchment between layers and store in a freezer bag or container.
Thaw at room temperature before glazing. Decorate once the cookies are fully thawed.
The dough can also be frozen. Scoop it into balls and freeze on a tray first.
Once the dough balls are frozen, transfer them to a bag. This keeps them from sticking together.
Bake dough balls straight from frozen. Add 1 to 2 extra minutes to the baking time.
Do not freeze glazed cookies if you want the neatest look. Glaze and decorate after thawing for best results.
Freezing the dough is helpful for last-minute cookie needs. You can bake only the amount you want.
Make-Ahead
You can bake the cookies ahead and glaze them the day of serving. Unglazed baked cookies keep in an airtight container for 2 days.
For longer make-ahead prep, freeze the unglazed cookies for up to 2 months. Thaw before decorating.
The dough can be portioned into balls and frozen. Bake from frozen with 1 to 2 extra minutes.
You can also mix the dry ingredients ahead. Keep them covered until ready to make dough.
The glaze is best made when you are ready to decorate. Softened cream cheese and butter mix more smoothly.
If making for a party, bake the cookies first, cool completely, then glaze and sprinkle. Let them set for about 1 hour before packing.
Glaze the cookies the day you serve them for the freshest look. The decoration will be brighter and cleaner.
Helpful Notes for Best Results
Use softened butter, not melted butter. Melted butter can make the cookies spread too much.
Use block-style cream cheese for the glaze. Spreadable cream cheese can make the glaze too loose.
Sift powdered sugar if it is lumpy. This helps the glaze become smooth.
Do not overmix after adding flour. Stop when the dough is combined.
Bake only until the edges barely turn golden. Overbaked cookies lose softness.
Use cool baking sheets. Warm pans can cause spreading.
If dough is sticky, chill it for 30 minutes. This makes scooping easier.
Let the glaze set before stacking. Patience protects the decorated tops.
Variations
Classic Soft Sugar Cookies Dressed
Make the cookies with vanilla sugar cookie dough, cream cheese glaze, and festive sprinkles. This is the full holiday version.
Use red and green sprinkles for Christmas. Let the glaze set before storing.
Almond Glaze Cookies
Use ¼ teaspoon almond extract in the glaze instead of vanilla. The flavor is strong, so a little is enough.
This gives the cookies a different bakery-style flavor. Decorate as usual.
Cinnamon Sugar Cookies
Add a pinch of cinnamon to the cookie dough. It gives the cookies cozy warmth.
This is a lovely winter variation. Keep the cream cheese glaze plain.
Dairy-Free Holiday Cookies
Use plant-based butter and plant-based cream cheese. Use almond milk or oat milk instead of milk.
The texture may vary slightly. Decorate with sprinkles while the glaze is tacky.
Colored Glaze Cookies
Add food coloring to the glaze. Use a drop or two at a time.
Make pastel shades for spring or stronger colors for holidays. Stir until smooth.
Crushed Candy Cane Cookies
Top the glaze with crushed candy canes. They add crunch and peppermint-style holiday energy.
Add them right away so they stick. Let the glaze set fully.
Edible Glitter Cookies
Sprinkle edible glitter over the glaze. This makes the cookies sparkle.
Use it alone or with sprinkles. These look great on party trays.
Mini Chocolate Chip Cookies
Add mini chocolate chips on top of the glaze. They give extra texture.
This version is especially fun for kids. Add the chips before the glaze sets.
White Chocolate Drizzle Cookies
Drizzle melted white chocolate over the glazed cookies. Let the glaze set first if you want clean lines.
This gives the cookies a fancier finish. Allow the chocolate to firm before stacking.
Cookie Cutter Shapes
Chill the dough and cut into holiday shapes. This works best when the dough is cool.
Bake carefully because shaped cookies may bake slightly faster. Cool before glazing.
Eggnog Glaze Cookies
Use a splash of eggnog in the glaze. Add only enough to reach the right texture.
This gives a festive flavor. Keep the glaze thick but spreadable.
Powdered Sugar Cookies
Skip the cream cheese glaze and dust cooled cookies with powdered sugar. This is the easiest finish.
The cookies will be simpler but still soft. This works well when you want less sweetness.
Mascarpone Glaze Cookies
Use mascarpone in place of cream cheese. The glaze will be creamy and slightly different in flavor.
Adjust milk and powdered sugar as needed. Spread over cooled cookies.
Troubleshooting
The Cookies Spread Too Much
The butter may have been too soft, or the baking sheets may have been warm. Chill the dough for 30 minutes next time.
Always use cool pans. Warm pans melt the dough before it bakes.
The Cookies Are Too Hard
They may have baked too long. Pull them when the edges are barely golden.
They continue to set as they cool. Do not wait for browned tops.
The Dough Is Too Sticky
Chill the dough for 30 minutes. This makes it easier to scoop.
Sticky dough can also happen in a warm kitchen. Keep the bowl covered while chilling.
The Glaze Is Too Thick
Add milk 1 teaspoon at a time. Mix after each addition.
Stop when the glaze is thick but spreadable. It should not be runny.
The Glaze Is Too Thin
Beat in more powdered sugar, 1 tablespoon at a time. If it is very loose, chill it for 10 minutes.
The glaze should hold its shape when spooned back into the bowl. It should not slide off the cookies.
The Glaze Is Lumpy
The cream cheese or butter may not have been soft enough. Use softened ingredients.
If needed, beat longer before adding powdered sugar. Smooth glaze starts with smooth cream cheese.
The Sprinkles Will Not Stick
The glaze may have set before the sprinkles were added. Decorate immediately after glazing.
Work in small batches if needed. Glaze a few cookies, sprinkle, then continue.
The Cookies Taste Flat
Make sure the salt is included. Salt balances the sweetness.
If using margarine, add a pinch of extra salt. Stick margarine is better than tub margarine.
The Cutout Shapes Spread
The dough may have been too warm. Chill before cutting and baking.
Use cool baking sheets. This helps shapes hold better.
The Glaze Smears in Storage
The glaze may not have set completely. Let it sit about 1 hour before stacking.
Use parchment between layers. Store gently.
Frequently Asked Questions
Can I freeze the dough?
Yes, scoop the dough into balls and freeze on a tray. Once frozen, transfer them to a bag.
Bake straight from frozen and add 1 to 2 extra minutes. This is great for last-minute cookies.
What should I do if my glaze is runny?
Beat in more powdered sugar, 1 tablespoon at a time. Continue until it thickens.
If it is very loose, chill it for 10 minutes. Then stir and use.
Can I use margarine instead of butter?
Yes, but the cookies will not be quite as rich or soft. Use stick margarine, not tub margarine.
Add a pinch of extra salt to balance the flavor. The texture may be different.
The butter may have been too soft, or the baking sheets may have been warm. Chill the dough for 30 minutes next time.
Use cool pans for every batch. This helps the cookies keep their shape.
Can I make these ahead?
Yes, glaze them the day you plan to serve for the freshest look. Unglazed baked cookies keep in an airtight container for 2 days.
You can also freeze unglazed cookies for up to 2 months. Thaw, glaze, and decorate when ready.
Can I use heavy cream instead of milk?
Yes, heavy cream works in the dough and makes the cookies extra tender. Milk also works.
For the glaze, add liquid slowly. You need only enough to make it spreadable.
What if I do not have cream cheese?
Use mascarpone in the glaze, or skip the glaze and dust the cooled cookies with powdered sugar. The result will be different but still delicious.
If skipping cream cheese, you will lose the tangy glaze flavor. Decorate as desired.
How long should the glaze set?
Let the glaze set for about 1 hour before stacking. This keeps the tops from sticking.
Use parchment between layers for storage. This protects the decoration.
Why This Recipe Works So Well
Soft Sugar Cookies Dressed work because they keep the cookie base simple and let the glaze and sprinkles bring the celebration. The dough is tender, lightly sweet, and soft enough to stay pleasant for days.
Creaming butter and sugar gives the dough a lighter texture. The egg, vanilla, and milk bring moisture and flavor.
Both baking soda and baking powder help the cookies bake soft. The edges set while the centers stay tender.
The short bake time is key. Pulling the cookies when the edges are barely golden keeps them from becoming hard.
The cream cheese glaze adds tang and richness. It also keeps the cookies tasting soft and special.
Sprinkles add instant holiday charm. They are simple, colorful, and easy for kids to use.
The recipe also works because it can be made ahead. Dough balls can freeze, cookies can freeze unglazed, and the glaze can be added before serving.
Most of all, these cookies work because they feel joyful without being complicated. They are easy to bake, fun to decorate, and sweet enough to turn an ordinary day into a little celebration.
Final Thoughts
Soft Sugar Cookies Dressed are made with a tender vanilla sugar cookie base, a smooth cream cheese glaze, and festive sprinkles added while the glaze is still tacky. The cookies bake at 375°F for 8 to 10 minutes, cool briefly on the baking sheet, and finish with a thick, tangy glaze that makes them perfect for holidays and cookie trays.
Serve them after the glaze sets, pack them into tins with parchment between layers, or freeze the unglazed cookies and decorate later. With their 3-day room-temperature storage, 2-month freezer option, dough-ball freezer method, and variations like almond glaze, cinnamon dough, dairy-free swaps, colored glaze, crushed candy canes, edible glitter, mini chocolate chips, white chocolate drizzle, cookie cutter shapes, eggnog glaze, and powdered sugar finish, these soft sugar cookies are a cheerful recipe worth making whenever the season calls for something sweet.
Soft Sugar Cookies

Soft, sweet, tender, and finished with a creamy glaze, these Soft Sugar Cookies are classic vanilla sugar cookies topped with cream cheese glaze and festive Christmas sprinkles. The dough uses butter, sugar, vanilla, and milk or heavy cream for extra softness, then bakes into lightly golden cookies that are easy to decorate and share.
Recipe Details
- Prep Time: 15 minutes
- Cook Time: 10 minutes
- Total Time: 25 minutes
- Course: Cookies, Dessert
- Cuisine: American
- Servings: 24 cookies
Ingredients
Topping
- Christmas sprinkles red, green, white, gold, etc.
Cream Cheese Glaze
- ½ teaspoon vanilla extract
- 1-2 tablespoon milk
- 1 cup powdered sugar
- 1 tablespoon butter softened
- 4 oz cream cheese softened
Cookies
- 3 tablespoon milk or heavy cream for extra soft cookies
- 2 teaspoon vanilla extract
- 1 large egg
- 1 ½ cups granulated sugar
- 1 cup unsalted butter softened (2 sticks)
- ½ teaspoon salt
- ½ teaspoon baking powder
- 1 teaspoon baking soda
- 2 ¾ cups all-purpose flour
Instructions
Step 1: Prepare the Oven and Baking Sheets
Preheat the oven to 375°F (190°C). Line baking sheets with parchment paper so the cookie dough has a prepared surface for baking.
Let the oven heat while you mix the dough. These cookies bake quickly, so it helps to have the baking sheets ready before scooping.
Step 2: Combine the Dry Ingredients
In a medium bowl, whisk together the all-purpose flour, baking soda, baking powder, and salt. Stir until the dry ingredients are evenly blended.
This helps the leavening and salt distribute through the flour before the mixture is added to the dough. Set the bowl aside while you prepare the butter mixture.
Step 3: Cream the Butter and Sugar
In a large bowl, cream the softened unsalted butter and granulated sugar until light and fluffy. The mixture should look smooth, pale, and well combined.
Softened butter helps the sugar blend evenly into the dough base. This step gives the cookies their tender texture.
Step 4: Add the Egg, Vanilla, and Milk
Beat in the large egg, vanilla extract, and milk or heavy cream. Mix until the wet ingredients are fully incorporated.
Use milk or heavy cream as listed, with heavy cream giving an extra soft cookie texture. The dough base should look creamy before the dry ingredients are added.
Step 5: Finish the Cookie Dough
Gradually mix the dry ingredients into the wet ingredients until just combined. Stop once the flour mixture disappears into the dough.
Avoid overmixing so the cookies stay soft. The dough should be thick enough to scoop by rounded tablespoons.
Step 6: Scoop and Bake
Drop the dough by rounded tablespoons onto the prepared baking sheets. Bake for 8-10 minutes, or until the edges are lightly golden.
Watch the cookies near the end of the baking time. The edges should be lightly golden while the centers stay soft.
Step 7: Cool the Cookies
Let the cookies cool on the baking sheets for 2 minutes. Then transfer them to a wire rack to cool completely.
The short rest helps the cookies firm up enough to move. Make sure they are fully cooled before adding the glaze.
Step 8: Make the Cream Cheese Glaze
For the glaze, beat the softened cream cheese and softened butter until smooth. Gradually add the powdered sugar, milk, and vanilla extract, mixing until the glaze is smooth.
Use 1-2 tablespoon milk as needed to reach the right consistency. The glaze should be soft enough to spread over the cooled cookies.
Step 9: Glaze and Decorate
Spread the cream cheese glaze over the cooled cookies. Top with Christmas sprinkles in red, green, white, gold, or any festive mix you like.
Decorate after the cookies are completely cool so the glaze stays smooth. Let the glaze settle slightly before storing or serving.
Notes
- Store cookies in an airtight container at room temperature for up to 3 days.
Serving Suggestions
Serve Soft Sugar Cookies after the cream cheese glaze has been spread over the cooled cookies and finished with Christmas sprinkles. The soft vanilla cookie base, creamy glaze, and festive topping make them a simple holiday dessert for cookie trays, parties, gifting, or family baking days.
These cookies make 24 servings, so they are easy to share. Use red, green, white, gold, or other festive sprinkles to match the season or occasion.
For the best texture, let the cookies cool completely before glazing. This keeps the cream cheese glaze from melting and helps the sprinkles stay neatly on top.
Storage
How to Store
Store cookies in an airtight container at room temperature for up to 3 days. Keep the container sealed so the cookies stay soft.
Butter Tip
Use 1 cup unsalted butter softened, equal to 2 sticks. Softened butter creams more easily with the granulated sugar.
Soft Cookie Tip
Use 3 tablespoon milk or heavy cream for extra soft cookies. Either option works in the dough.
Glaze Tip
Beat the softened cream cheese and butter until smooth before adding powdered sugar, milk, and vanilla. This helps create a creamy glaze without lumps.
Sprinkle Tip
Add Christmas sprinkles after spreading the glaze over the cooled cookies. Use red, green, white, gold, or any festive sprinkle mix.
Baking Tip
Bake at 375°F (190°C) for 8-10 minutes. The cookies are ready when the edges are lightly golden but the centers remain soft.

Fernando is the creator and writer behind the food blog Eating with your Hands. Living and working in cities like Paris, Barcelona, and Berlin, and being married to a Canadian foodie, has given Fernando a passion and interest in food and inspired him to run EWYH.