
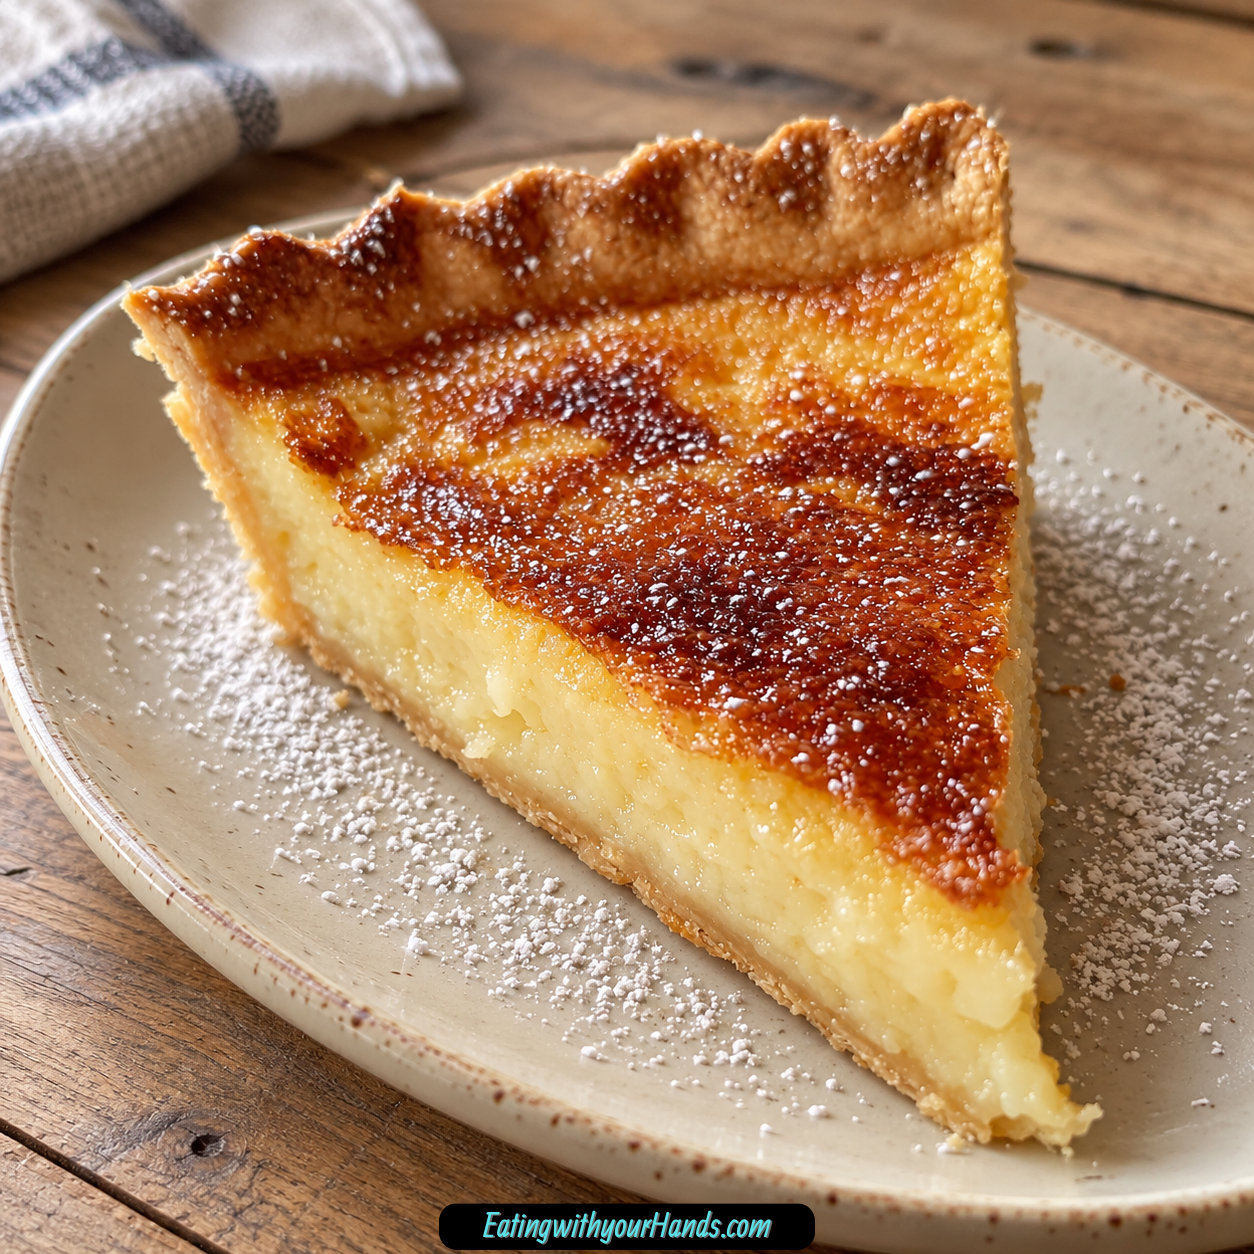
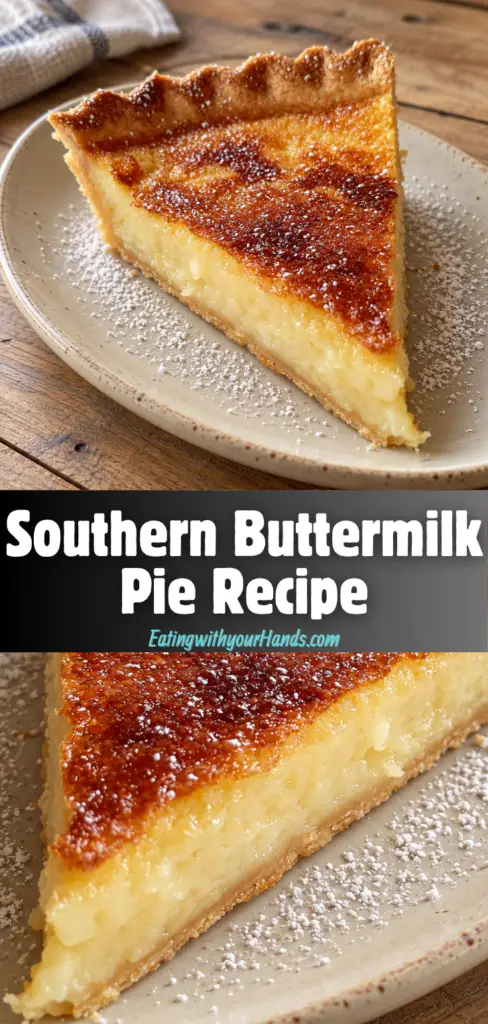
Southern Buttermilk Pie Recipe is the kind of dessert that proves a few humble ingredients can turn into something unforgettable. With melted butter, sugar, flour, eggs, vanilla, buttermilk, and a deep dish pie shell, this pie bakes into a golden custard dessert that is sweet, silky, lightly tangy, and wonderfully comforting.
It is one of those pies that looks simple at first glance. Then you take a bite and realize why it has stayed beloved for so long.
The filling is soft and creamy without feeling heavy. The top bakes into a delicate golden layer, while the center stays tender and custardy with that signature buttermilk brightness.
This is not a complicated pie. There is no pre-baking the crust, no stovetop custard, no tempering, and no fancy equipment.
You whisk the filling together, pour it into the deep dish pie shell, and let the oven do the work. About 40 to 45 minutes later, the pie comes out golden around the edges with a center that jiggles gently as it finishes setting.
The magic is in the balance. Sugar and butter make the pie rich, eggs give structure, flour helps it set, vanilla adds warmth, and buttermilk brings that little tang that keeps every bite from tasting flat.
It is beautiful plain, which is my favorite way to serve it. It can also be dressed up with barely sweetened whipped cream and fresh berries when you want it to feel a little more polished.
Southern Buttermilk Pie feels like a dessert made for family tables, Sunday dinners, church potlucks, and quiet afternoons when a slice of custard pie can make the whole day feel softer. It is honest, nostalgic, and deeply satisfying.
Table of Contents
- Why You’ll Love This Southern Buttermilk Pie
- Recipe Details
- Ingredients
- Ingredient Notes
- Optional Swaps, Variations, Add-Ins, and Serving Ideas
- Why This Recipe Works
- Directions
- Step 1: Bring Ingredients Toward Room Temperature
- Step 2: Preheat the Oven
- Step 3: Prepare the Pie Shell
- Step 4: Melt and Cool the Butter
- Step 5: Mix Butter, Sugar, and Flour
- Step 6: Add the Beaten Eggs
- Step 7: Add Salt and Vanilla
- Step 8: Add the Buttermilk Slowly
- Step 9: Check the Filling
- Step 10: Fill the Pie Shell
- Step 11: Transfer to the Oven
- Step 12: Bake the Pie
- Step 13: Add Extra Time if Needed
- Step 14: Protect the Crust if Needed
- Step 15: Cool Completely
- Step 16: Chill for Cleaner Slices
- Step 17: Slice and Serve
- Step 18: Store Leftovers
- Serving Ideas
- Storage
- Freezing
- Make-Ahead
- Helpful Notes for Best Results
- Variations
- Troubleshooting
- Frequently Asked Questions
- Why This Recipe Works So Well
- Final Thoughts
- Southern Buttermilk Pie
Why You’ll Love This Southern Buttermilk Pie
This pie uses simple pantry-style ingredients. Butter, sugar, eggs, flour, vanilla, buttermilk, and pie crust come together with very little effort.
It has a creamy custard texture. The filling bakes into something smooth, soft, and lush.
The flavor is sweet but balanced. Buttermilk brings a gentle tang that keeps the pie from feeling too sugary.
It is easy enough for beginners. There is no need to pre-bake the crust or cook the filling first.
It is make-ahead friendly. The flavor deepens after chilling, and the pie slices more cleanly once fully cooled.
It works for many occasions. Serve it for family dessert, holidays, potlucks, Sunday dinner, or anytime you want a classic Southern-style pie.
Recipe Details
This pie bakes at 350°F (175°C). The pie shell does not need to be pre-baked.
The recipe uses 1 deep dish pie shell. Homemade or good-quality store-bought both work.
The filling uses ½ cup melted butter. Let the melted butter cool slightly so it does not scramble the eggs.
The sugar amount is 1 ½ cups granulated sugar. Plain white sugar works best.
The flour amount is 3 tablespoons all-purpose flour. It helps give the filling structure.
The recipe uses 3 large eggs, beaten. Crack them into a separate bowl first so it is easier to avoid shell pieces.
A pinch of salt balances the sweetness. It is a small but important flavor booster.
Vanilla extract adds warmth. Use 1 teaspoon.
Full-fat buttermilk gives the best texture and tang. Shake the carton well before measuring because the thicker solids matter.
The pie bakes on the middle rack for about 40 minutes, then may need extra time in 5-minute increments. The center should jiggle like Jell-O, not slosh like liquid.
Ingredients
For the Buttermilk Pie Filling
- ½ cup butter, melted
- 1 ½ cups sugar
- 3 tablespoons all-purpose flour
- 3 large eggs, beaten
- Pinch of salt
- 1 teaspoon vanilla extract
- 1 cup buttermilk
For the Crust
- 1 deep dish pie shell
Optional Serving and Variation Ideas
- Whipped cream
- Fresh berries
- 1 teaspoon lemon zest
- 1 teaspoon orange zest
- 1 tablespoon lemon juice
- 1 tablespoon orange juice
- ½ teaspoon nutmeg
- ½ teaspoon cinnamon
- Regular milk
- 1 tablespoon lemon juice or vinegar
- Foil strips
Ingredient Notes
Melted butter gives the pie richness. Let it cool slightly before mixing so it does not cook the eggs.
Granulated sugar sweetens the custard. It also helps create that classic buttermilk pie flavor.
All-purpose flour gives the filling a little structure. Without it, the custard would be looser.
Eggs help the pie set. Beating them before adding makes the filling smoother.
A pinch of salt sharpens the flavors. It keeps the sweetness from tasting one-note.
Vanilla extract adds warmth and rounds out the custard. It works quietly in the background.
Buttermilk is the key ingredient. It brings the tangy note that makes the pie feel balanced and Southern.
Full-fat buttermilk is ideal because it gives the filling a luscious texture. Low-fat buttermilk can be used, but the pie will not feel quite as rich.
A deep dish pie shell gives the filling enough room. There is no need to pre-bake it.
A store-bought crust works fine. Homemade crust is lovely, but this filling is forgiving either way.
Optional Swaps, Variations, Add-Ins, and Serving Ideas
Classic Southern Buttermilk Pie
Make the pie with melted butter, sugar, flour, eggs, salt, vanilla, buttermilk, and a deep dish pie shell. This gives the traditional custard-style pie.
Serve it plain for the most nostalgic version. The golden top and creamy center are enough on their own.
Lemon Buttermilk Pie
Add 1 teaspoon lemon zest to the filling. The lemon brightens the custard without turning it into a full lemon pie.
If adding 1 tablespoon lemon juice, reduce the buttermilk by the same amount. This keeps the filling from becoming too loose.
Orange Buttermilk Pie
Add 1 teaspoon orange zest for a softer citrus note. Orange adds a subtle, elegant flavor.
You can also add 1 tablespoon orange juice and reduce the buttermilk by the same amount. This keeps the texture balanced.
Nutmeg Buttermilk Pie
Stir ½ teaspoon nutmeg into the filling with the flour. It gives the pie warm, cozy flavor.
You can sprinkle a little extra on top before baking. It toasts slightly in the oven.
Cinnamon Buttermilk Pie
Add ½ teaspoon cinnamon with the flour. This makes the pie feel warmer and more spiced.
Use a gentle amount so the buttermilk tang still comes through. This pie should not become pumpkin-pie-like.
Whipped Cream Buttermilk Pie
Serve slices with barely sweetened whipped cream. The cream makes the pie feel a little more dressed up.
Add it right before serving. It looks especially pretty on cooled slices.
Berry-Topped Buttermilk Pie
Serve with fresh berries. The fruit adds color and freshness.
This is a nice option for guests. The berries balance the rich custard.
Cold Southern Buttermilk Pie
Serve the pie chilled from the refrigerator after it has set. The custard becomes firmer and more luxurious.
Let it sit at room temperature for 10 minutes before serving. This takes off the strongest chill.
Crustless Buttermilk Custard
Bake the filling in a well-greased pie dish without the crust. The result is more like a custard.
Serve it with berries on top. The texture will be different but still delicious.
Buttermilk Substitute Version
In a pinch, mix 1 cup regular milk with 1 tablespoon lemon juice or vinegar. Let it sit for 5 minutes before using.
This can stand in for buttermilk when needed. Full-fat buttermilk still gives the best classic texture.
Gentler Bake Version
If your pie tends to crack, bake at 325°F for about 50 minutes next time. The slower bake can be gentler.
The texture may set more gradually. Watch for the same gentle center jiggle.
Why This Recipe Works
This recipe works because the ingredients create a simple custard. Eggs set the filling, sugar sweetens it, butter enriches it, and flour gives it body.
Buttermilk is what makes the pie special. It cuts through the sweetness with a gentle tang.
The filling is whisked together without cooking first. That makes the recipe simple and approachable.
The deep dish pie shell bakes with the filling. Since the custard is baked long enough to set, there is no need to pre-bake the crust.
The pie should not be baked until completely firm in the oven. A gentle jiggle in the center means it will finish setting as it cools.
Cooling is part of the recipe. The custard needs at least 2 hours, and sometimes 3, to settle properly.
Room-temperature eggs and buttermilk help the filling blend smoothly. Cold ingredients can make the melted butter firm up into little specks.
The pie is even better after chilling. The flavor deepens, and the slices become cleaner.
Directions
Step 1: Bring Ingredients Toward Room Temperature
Let the eggs and buttermilk sit on the counter for about 30 minutes before mixing. This helps the filling blend smoothly.
Cold ingredients can cause melted butter to firm into small specks. Room-temperature ingredients make a creamier custard.
Step 2: Preheat the Oven
Preheat your oven to 350°F (175°C). Place a rack in the middle of the oven.
The middle rack helps the pie bake evenly. Give the oven time to fully heat.
Step 3: Prepare the Pie Shell
Set 1 deep dish pie shell on the counter. There is no need to pre-bake it.
If using a disposable aluminum pie shell, place it on a baking sheet for stability. This makes it easier to move in and out of the oven.
Step 4: Melt and Cool the Butter
Melt ½ cup butter and let it cool slightly. It should still be liquid but not hot.
Hot butter can affect the eggs. Slightly cooled melted butter blends better.
Step 5: Mix Butter, Sugar, and Flour
In a large mixing bowl, combine the melted butter, 1 ½ cups sugar, and 3 tablespoons all-purpose flour. Whisk until combined.
The mixture may look like wet sand at first. Small lumps are fine at this stage.
Step 6: Add the Beaten Eggs
Add the 3 large beaten eggs to the bowl. Whisk well after adding them.
Make sure the eggs are fully incorporated. The filling should begin to look smoother.
Step 7: Add Salt and Vanilla
Add a pinch of salt and 1 teaspoon vanilla extract. Whisk again.
The salt balances the sweetness. The vanilla adds warmth to the custard.
Step 8: Add the Buttermilk Slowly
Slowly pour in 1 cup buttermilk while whisking. Keep the motion steady.
Whisk just until the filling is smooth and evenly combined. Do not overbeat.
Step 9: Check the Filling
Look for streaks of flour, egg, or buttermilk. Whisk gently until they disappear.
The filling should be pourable and smooth. A few tiny bubbles are normal.
Step 10: Fill the Pie Shell
Carefully pour the filling into the deep dish pie shell. Fill it evenly.
Move slowly so the filling does not spill. The pie may be fairly full.
Step 11: Transfer to the Oven
Place the pie on the middle rack of the oven. If it is on a baking sheet, move the whole sheet carefully.
Try not to jostle the filling too much. The pie will set as it bakes.
Step 12: Bake the Pie
Bake for about 40 minutes. Check the pie through the oven window if possible.
The edges should look golden and slightly puffed. The center should still have a gentle jiggle.
Step 13: Add Extra Time if Needed
If the center is too loose, continue baking in 5-minute increments. Check carefully each time.
Many ovens vary, and the pie may take closer to 45 minutes. The goal is a Jell-O-like jiggle, not liquid sloshing.
Step 14: Protect the Crust if Needed
If the crust edges get too dark, wrap them with foil strips. This protects them while the center finishes baking.
If the pie edges are set but the center needs more time, tent foil loosely over the pie. This helps prevent over-browning.
Step 15: Cool Completely
Remove the pie from the oven and place it on a wire rack. Cool completely for at least 2 hours.
If your kitchen is warm, it may need closer to 3 hours. The filling must set before slicing.
Step 16: Chill for Cleaner Slices
For cleaner slices, refrigerate the cooled pie for 1 hour. This firms the custard further.
This step is optional but helpful. Chilled pie slices more neatly.
Step 17: Slice and Serve
Slice the pie once fully cooled and set. Serve plain, or add whipped cream and fresh berries.
Let chilled pie sit out for about 10 minutes before serving. This softens the texture slightly.
Step 18: Store Leftovers
Cover leftover pie tightly with plastic wrap or foil. Refrigerate for up to 3 days.
For longer storage, wrap slices tightly in plastic and foil and freeze. Thaw overnight in the refrigerator.
Serving Ideas
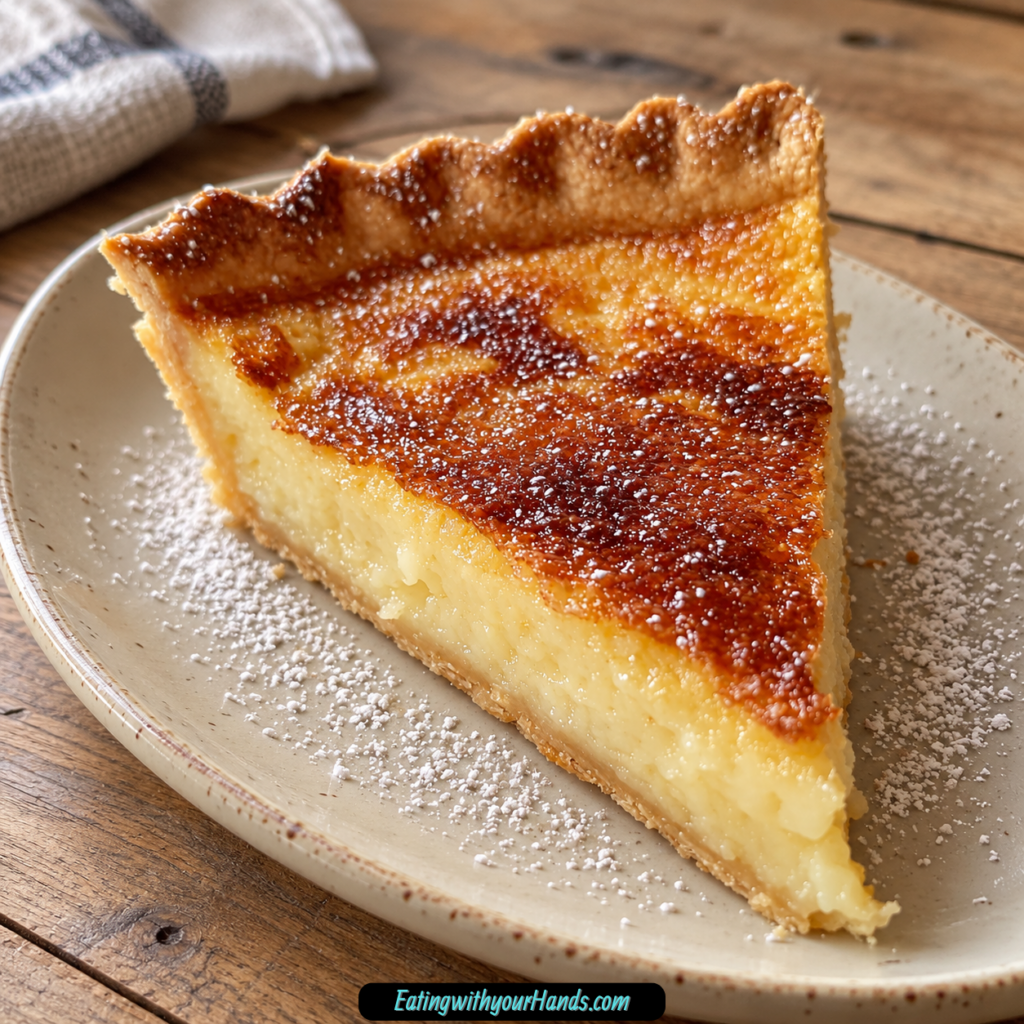
Serve Southern Buttermilk Pie plain for the most classic experience. The golden top and creamy filling do not need much help.
A dollop of barely sweetened whipped cream makes it feel more polished. Add the cream right before serving.
Fresh berries are a lovely addition. They add color and freshness beside the sweet custard.
Serve the pie at room temperature after it cools completely. This gives a soft, tender custard texture.
Serve it chilled if you prefer cleaner slices and a firmer filling. The cold texture feels rich and silky.
Let refrigerated pie sit out for 10 minutes before serving. This takes the chill off and softens the custard slightly.
For a simple family dessert, slice and serve as is. This pie is charming because it is not fussy.
For company, plate each slice with whipped cream and berries. It becomes elegant without changing the recipe.
Storage
Cover leftover pie tightly with plastic wrap or foil. Store it in the refrigerator for up to 3 days.
The filling becomes even more luxurious when cold. The flavor also deepens overnight.
Let refrigerated slices sit at room temperature for about 10 minutes before serving. This takes off the chill.
Keep the pie covered so it does not absorb refrigerator odors. Custard pies can pick up surrounding smells.
Do not leave the pie sitting out for long periods after serving. Return leftovers to the refrigerator.
For clean slices, use a sharp knife and wipe between cuts. Chilled pie slices more neatly.
Store whipped cream or berries separately if using them. Add toppings only when serving.
Freezing
Southern Buttermilk Pie slices can be frozen. Wrap slices tightly in plastic wrap, then foil.
Freeze for later dessert cravings. The texture may become slightly denser after thawing.
Thaw overnight in the refrigerator. Do not rush the thawing process at room temperature.
Serve chilled or let the slice sit for 10 minutes before eating. The custard will soften slightly.
For best results, freeze individual slices rather than the whole pie. Slices thaw more easily.
Use firm wrapping to protect the pie from freezer odors. Custard can absorb surrounding flavors.
Fresh toppings should be added after thawing. Do not freeze whipped cream or berries on the pie.
Make-Ahead
Southern Buttermilk Pie is a great make-ahead dessert. The flavor deepens overnight, and the custard slices more cleanly after chilling.
Bake the pie fully, cool it on a wire rack, then refrigerate it covered. Serve the next day.
If serving chilled, remove it from the fridge about 10 minutes before slicing. This softens the texture slightly.
You can also prepare ingredients ahead by measuring dry ingredients and setting out the pie shell. Keep the buttermilk and eggs chilled until 30 minutes before mixing.
Do not pour the filling into the crust too far ahead before baking. For best texture, mix and bake the filling the same day.
If bringing to a gathering, transport the pie chilled. It will hold its shape better.
Add whipped cream or berries at the destination. This keeps the presentation fresh.
Helpful Notes for Best Results
Use room-temperature eggs and buttermilk. Let them sit on the counter for about 30 minutes before mixing.
Let melted butter cool slightly before adding it. Hot butter can affect the eggs.
Do not overbeat the filling after adding the buttermilk. Mix only until smooth and combined.
Avoid relying on a toothpick test. Buttermilk pie is a custard, not a cake.
Look for a gentle center jiggle. It should wobble like Jell-O, not slosh like liquid.
If the crust browns too quickly, use foil strips. This protects the edges.
If the center needs more time but the top is browning, tent the pie loosely with foil. Continue baking in small increments.
Cool completely before slicing. Cutting too early can make the filling run.
Variations
Classic Southern Buttermilk Pie
Use melted butter, sugar, flour, eggs, salt, vanilla, buttermilk, and a deep dish pie shell. This gives the traditional sweet-tangy custard pie.
Bake until the edges are golden and the center gently jiggles. Cool completely before serving.
Lemon Buttermilk Pie
Add 1 teaspoon lemon zest to the filling. This brightens the flavor.
For stronger citrus flavor, add 1 tablespoon lemon juice and reduce the buttermilk by the same amount. This keeps the filling balanced.
Orange Buttermilk Pie
Add 1 teaspoon orange zest to the filling. It gives the pie a gentle floral citrus note.
If using 1 tablespoon orange juice, reduce the buttermilk by 1 tablespoon. This prevents the filling from becoming too loose.
Nutmeg Buttermilk Pie
Add ½ teaspoon nutmeg with the flour. This gives the pie warmth.
Sprinkle a little extra nutmeg on top before baking if desired. The heat will toast it lightly.
Cinnamon Buttermilk Pie
Add ½ teaspoon cinnamon to the filling. This makes the pie cozy and gently spiced.
Do not add too much. The buttermilk tang should still be the main feature.
Chilled Buttermilk Pie
Cool the pie completely, then refrigerate before serving. Chilling gives cleaner slices.
The filling becomes rich and smooth. Let it sit 10 minutes before serving.
Whipped Cream Buttermilk Pie
Top slices with barely sweetened whipped cream. This adds softness and a little elegance.
Add the cream right before serving. Keep leftovers covered and chilled.
Berry Buttermilk Pie
Serve with fresh berries. The fruit balances the sweetness.
This variation looks beautiful for company. It is simple but polished.
Crustless Buttermilk Custard
Grease a pie dish well and pour the filling directly into it. Bake until set.
This version is more like a custard than a pie. Serve with berries on top.
Low-Fat Buttermilk Version
Low-fat buttermilk can be used if needed. The pie will not be quite as luscious.
Full-fat buttermilk gives the richest texture. Use it when possible.
Milk Substitute Version
Mix 1 cup regular milk with 1 tablespoon lemon juice or vinegar and let it sit for 5 minutes. Use this when buttermilk is unavailable.
The flavor and texture will not be exactly the same. It works in a pinch.
Gentle 325°F Bake
If your pie cracks often, try baking at 325°F for about 50 minutes next time. This slower bake can help.
Look for the same gentle jiggle in the center. Cool slowly and completely.
Troubleshooting
The Pie Cracked
The pie may have baked a little too long or cooled too quickly. Cracks do not affect the flavor.
Next time, try baking at 325°F for about 50 minutes. A slower bake can be gentler.
The Center Is Too Loose
The pie may need more time. Bake in 5-minute increments until the center jiggles gently but does not slosh.
Cool completely before slicing. The center continues setting as it cools.
The Filling Is Grainy
Cold eggs or buttermilk may have caused the melted butter to firm into specks. Let eggs and buttermilk sit out for 30 minutes next time.
Also let the butter cool slightly before mixing. Smooth mixing temperature matters.
The Crust Got Too Dark
Use foil strips around the crust edges. This protects them from over-browning.
Add the foil when the crust looks golden enough. Continue baking until the filling is set.
The Top Is Browning Before the Center Sets
Tent the pie loosely with foil. This protects the top while the center finishes baking.
Keep checking in 5-minute increments. Do not overbake if the center only has a gentle jiggle.
The Filling Ran When Sliced
The pie may not have cooled long enough. Let it cool at least 2 hours, or 3 if the kitchen is warm.
Refrigerating for 1 hour after cooling can help create cleaner slices. Custard pies need patience.
The Pie Tastes Too Sweet
Serve with fresh berries or barely sweetened whipped cream. The fruit helps balance the sugar.
The buttermilk should also provide tang. Full-fat buttermilk gives the best balance.
The Pie Tastes Flat
Do not skip the salt or vanilla. Both help the custard taste complete.
Fresh citrus zest can also brighten the filling. Lemon or orange zest works well.
The Filling Has Bubbles or Cracks
The filling may have been overbeaten after the buttermilk was added. Whisk only until combined.
A few bubbles are harmless. The pie still tastes good.
The Crust Is Soggy
Make sure the pie bakes until the filling is properly set. A loose filling can soften the crust.
Cool fully before slicing. Cutting too soon releases moisture.
Frequently Asked Questions
Can I use low-fat buttermilk?
Yes, but the pie will not be as luscious. Full-fat buttermilk gives the richest texture and best tang.
Low-fat can work in a pinch. The filling may feel slightly lighter.
What can I use if I do not have buttermilk?
Mix 1 cup regular milk with 1 tablespoon lemon juice or vinegar. Let it sit for 5 minutes before using.
This works as a substitute when needed. The flavor may not be exactly the same as full-fat buttermilk.
Why did my pie crack?
It was probably baked a little too long or cooled too fast. Cracks do not affect the taste.
Next time, try baking at 325°F for about 50 minutes. A lower temperature can be gentler.
Can I freeze leftovers?
Yes, wrap slices tightly in plastic wrap, then foil. Thaw overnight in the refrigerator.
The texture may become slightly denser. It will still taste delicious.
Can I bake it without a crust?
Yes, grease a pie dish well and pour the filling directly into it. It will bake more like a custard.
Serve it with berries on top. The texture will be different but still lovely.
Do I need to pre-bake the crust?
No, the deep dish pie shell does not need to be pre-baked. The filling bakes directly in the crust.
This keeps the recipe simple. The crust and filling bake together.
How do I know when buttermilk pie is done?
Look for golden, slightly puffed edges and a center that jiggles gently like Jell-O. It should not slosh like liquid.
Do not use a cake-style toothpick test. This is a custard pie.
How long does it keep?
It keeps covered in the refrigerator for up to 3 days. Let slices sit out for about 10 minutes before serving.
The flavor can deepen overnight. Chilled slices are especially smooth.
Why This Recipe Works So Well
Southern Buttermilk Pie works so well because it transforms basic ingredients into a custard that feels far richer than the effort required. Butter, sugar, eggs, flour, vanilla, and buttermilk come together in one bowl and bake into a silky pie.
The buttermilk is the heart of the dessert. Its tang balances the sugar and gives the pie its distinct flavor.
The butter adds richness. It makes the filling taste smooth and comforting.
The eggs set the custard. They give the pie structure while keeping it soft.
The flour helps stabilize the filling. Just a few tablespoons are enough.
The vanilla rounds out the flavor. It adds warmth without taking over.
The deep dish pie shell makes the dessert feel complete. It holds the creamy filling and gives each slice a tender crust.
The cooling time is just as important as the baking time. As the pie rests, the custard firms into a sliceable texture.
Most of all, this pie works because it is simple and memorable. It does not need layers, frosting, or decoration to feel special.
Final Thoughts
Southern Buttermilk Pie Recipe is made with melted butter, granulated sugar, all-purpose flour, beaten eggs, a pinch of salt, vanilla extract, full-fat buttermilk, and a deep dish pie shell. The filling is whisked together, poured into the unbaked crust, baked at 350°F until golden with a gentle center jiggle, then cooled completely before slicing.
Serve it plain, chilled, topped with whipped cream, or finished with fresh berries. With its silky custard filling, sweet-tangy flavor, no pre-bake crust method, make-ahead convenience, 3-day refrigerator storage, and freezer-friendly slices, this Southern classic is the kind of pie that turns simple ingredients into a dessert worth remembering.
Southern Buttermilk Pie
Smooth, sweet, rich, and old-fashioned in the best way, Southern Buttermilk Pie is a classic Southern dessert with a custard-like filling made from butter, sugar, eggs, vanilla, flour, salt, and buttermilk. Baked in a deep dish pie shell until lightly golden on top, this simple pie cools into tender slices with a creamy center and a comforting homemade flavor.
Recipe Details
- Prep Time: 15 minutes
- Cook Time: 45 minutes
- Total Time: 1 hour
- Course: Dessert
- Cuisine: Southern
- Servings: 8 slices
Equipment
- Mixing bowl
- Whisk
- deep-dish pie pan
Ingredients
Crust
- 1 deep dish pie shell (homemade or store-bought)
Filling
- 1 cup buttermilk
- 1 teaspoon vanilla extract
- 1 pinch salt
- 3 eggs, beaten
- 3 tablespoons flour
- 1 ½ cups sugar
- ½ cup butter, melted
Instructions
Step 1: Preheat the Oven
Preheat the oven to 350°F (175°C). Let it heat fully while you prepare the buttermilk filling.
A steady oven temperature helps the pie bake evenly. Keep the deep dish pie shell ready before mixing the filling.
Step 2: Start the Filling Base
In a large mixing bowl, combine the melted butter, sugar, and flour. Stir until the mixture is well blended.
This first mixture creates the sweet, rich base of the custard-style filling. Make sure the flour is worked in evenly before adding the remaining ingredients.
Step 3: Add the Eggs, Buttermilk, and Flavoring
Add the beaten eggs, salt, vanilla extract, and buttermilk to the bowl. Whisk until the filling is smooth.
The mixture should look evenly combined with no dry pockets of flour. Whisk gently but thoroughly so the filling bakes into a creamy texture.
Step 4: Fill the Pie Shell
Pour the filling into the deep dish pie shell. Use a homemade or store-bought shell as listed.
Set the filled pie in the deep-dish pie pan if needed. Keep the filling level so the pie bakes evenly.
Step 5: Bake Until Set
Bake for 40-45 minutes, or until the center is set and the top is lightly golden. Check the pie near the end of the baking time so it does not overbake.
The top should have a soft golden color, and the center should no longer look loose. Once it is set, remove the pie from the oven.
Step 6: Cool Before Serving
Cool the pie completely before serving. This gives the custard-like filling time to firm up into clean slices.
Slice into 8 servings once fully cooled. Serve the pie after it has set for the best texture.
Notes
- Store leftovers covered in the refrigerator for up to 3 days.
Serving Suggestions
Serve Southern Buttermilk Pie after it has cooled completely. The custard-like filling needs that cooling time so each slice holds its shape.
This pie makes 8 slices and works well as a simple Southern dessert for family dinners, holiday tables, or anytime you want a sweet baked pie with a creamy center. The lightly golden top and smooth buttermilk filling make it easy to serve on its own.
Use a homemade or store-bought deep dish pie shell, depending on what you have available. Keep the filling smooth before baking so the finished slices have the classic tender texture.
Storage
How to Store
Store leftovers covered in the refrigerator for up to 3 days. Keep the pie chilled after serving.
Crust Tip
Use 1 deep dish pie shell, either homemade or store-bought. Keep it ready before pouring in the filling.
Filling Tip
Whisk the beaten eggs, salt, vanilla extract, and buttermilk into the butter, sugar, and flour mixture until smooth. This helps the pie bake into a custard-like texture.
Baking Tip
Bake at 350°F (175°C) for 40-45 minutes. The pie is ready when the center is set and the top is lightly golden.
Cooling Tip
Cool completely before serving. This helps the filling firm up so the pie slices more cleanly.
Refrigerator Tip
Cover leftovers before refrigerating. Use within the provided storage time of up to 3 days.

Fernando is the creator and writer behind the food blog Eating with your Hands. Living and working in cities like Paris, Barcelona, and Berlin, and being married to a Canadian foodie, has given Fernando a passion and interest in food and inspired him to run EWYH.