


Some recipes feel like they belong to the quiet, comforting moments of the day. Spinach and Feta Quesadillas are exactly that kind of recipe.
They are warm, crisp, cheesy, and full of simple flavor. A soft tortilla turns golden in the skillet, fresh spinach softens inside, and crumbled feta adds a creamy, tangy bite that makes every wedge feel satisfying.
This is the kind of meal that works when you want something quick but still homemade. It can be lunch, an after-school snack, a light dinner, or a simple appetizer for friends gathered around the table.
What makes these quesadillas so special is how little effort they require. With tortillas, spinach, feta, and a little olive oil or butter, you can create something warm and comforting in just 20 minutes.
Table of Contents
- What Are Spinach and Feta Quesadillas?
- Why This Recipe Feels So Comforting
- Recipe Overview
- Why You’ll Love Spinach and Feta Quesadillas
- Ingredients You’ll Need
- Ingredient Notes
- Directions
- Step 1: Gather Your Ingredients
- Step 2: Wash the Spinach
- Step 3: Dry the Spinach
- Step 4: Chop the Spinach
- Step 5: Prepare the Feta
- Step 6: Prepare Optional Add-Ins
- Step 7: Heat the Skillet
- Step 8: Adjust the Heat
- Step 9: Place the First Tortilla in the Skillet
- Step 10: Add the Spinach
- Step 11: Add the Feta Cheese
- Step 12: Add Optional Fillings
- Step 13: Fold the Tortilla
- Step 14: Cook the First Side
- Step 15: Flip Carefully
- Step 16: Cook the Second Side
- Step 17: Cool Briefly Before Cutting
- Step 18: Cut Into Wedges
- Step 19: Serve Warm
- Pro Tips for the Best Spinach and Feta Quesadillas
- Variations
- Serving Suggestions
- Storage Tips
- Freezing Instructions
- Make-Ahead Instructions
- Common Mistakes to Avoid
- Helpful Notes
- Frequently Asked Questions
- Final Thoughts
- Spinach and Feta Quesadillas
What Are Spinach and Feta Quesadillas?
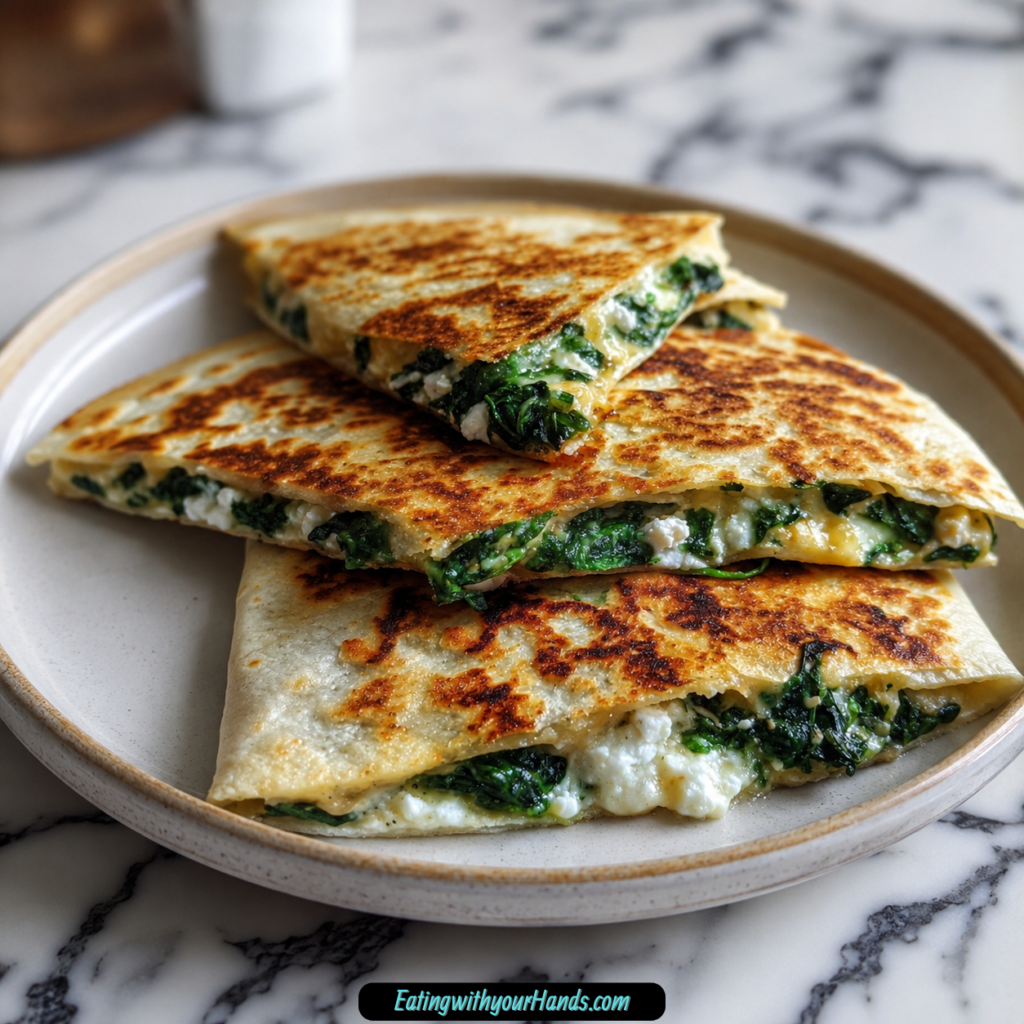
Spinach and Feta Quesadillas are crispy folded tortillas filled with chopped fresh spinach and crumbled feta cheese. They are cooked in a skillet until the outside becomes golden and crisp while the inside turns warm, soft, and flavorful.
The recipe is simple, but the flavors feel bright and satisfying. The spinach brings freshness, while the feta gives the quesadillas a creamy, salty, tangy flavor.
You can keep them classic with just spinach and feta, or add sun-dried tomatoes, black olives, or grilled chicken for more texture and flavor. They are easy to adjust based on what you have in your kitchen.
These quesadillas are perfect for busy days because they come together quickly. They are also great for gatherings because they can be sliced into wedges and served with dips like salsa, guacamole, or sour cream.
Why This Recipe Feels So Comforting
There is something comforting about a hot quesadilla straight from the skillet. The tortilla is crisp on the outside, the filling is warm, and every bite feels familiar and satisfying.
Spinach and feta create a beautiful balance. The spinach is fresh and earthy, while the feta is creamy, salty, and slightly tangy.
The skillet gives the tortilla that golden finish that makes the whole dish feel cozy. A little olive oil adds flavor, while butter brings extra richness.
This recipe also feels comforting because it is simple. You do not need a long ingredient list or complicated steps to make something that tastes warm and homemade.
Recipe Overview
Prep Time: 10 minutes
Cook Time: 10 minutes
Total Time: 20 minutes
Servings: 4 quesadillas
This recipe is ready in only 20 minutes. The ingredients are easy to prepare, and each quesadilla cooks quickly in a skillet.
The recipe makes 4 quesadillas, which can be served as a light meal, snack, appetizer, or lunch. You can cut them into wedges for sharing or serve each one whole.
Why You’ll Love Spinach and Feta Quesadillas
You will love this recipe because it is quick. In just 20 minutes, you can have warm, crispy quesadillas ready to serve.
The ingredients are simple. Tortillas, fresh spinach, feta cheese, and olive oil or butter are all you need for the basic version.
This recipe is beginner-friendly. The steps are easy to follow, and the cooking method is straightforward.
It is perfect for gatherings because quesadillas are easy to slice and share. They make a fun appetizer or light meal.
It is also make-ahead friendly. You can prepare the filling ahead of time, then cook the quesadillas when you are ready.
Ingredients You’ll Need
4 medium tortillas: Choose flour, whole wheat, or gluten-free based on your preference.
2 cups fresh spinach: Chop it for better distribution inside the quesadillas.
1 cup feta cheese: Crumbled for creamy, tangy flavor.
2 tablespoons olive oil or butter: Use for cooking. Olive oil adds flavor, while butter offers richness.
Optional Add-Ins
¼ cup sun-dried tomatoes, chopped: Adds a sweet and tangy twist.
¼ cup black olives, sliced: Adds a briny flavor.
½ cup cooked grilled chicken, diced: Makes the quesadillas heartier.
Ingredient Notes
Tortillas create the crisp outer layer. Flour tortillas are soft and easy to fold, while whole wheat tortillas add a heartier flavor.
Gluten-free tortillas can also be used if needed. Choose a tortilla that folds well without cracking.
Fresh spinach gives the filling color and freshness. Chopping it helps the spinach spread evenly through the quesadilla.
Feta cheese is the main flavor. It adds saltiness, creaminess, and a tangy bite that pairs beautifully with spinach.
Olive oil gives the tortilla a crisp, lightly savory finish. Butter makes the quesadilla richer and more golden.
Sun-dried tomatoes are optional, but they add sweetness and tang. Black olives bring a salty, briny flavor.
Grilled chicken can make the dish more filling. It is a good option when you want the quesadillas to feel more like a complete meal.
Directions
Step 1: Gather Your Ingredients
Start by gathering the tortillas, fresh spinach, feta cheese, olive oil or butter, and any optional add-ins you plan to use. Having everything ready will make the cooking process smooth.
This recipe cooks quickly, so it helps to prepare the filling before heating the skillet. Once the tortilla is in the pan, you will want to assemble and cook without delay.
Set out a cutting board, knife, skillet, spatula, and serving plate. A simple setup is all you need.
Step 2: Wash the Spinach
Place the fresh spinach under cold running water and rinse it thoroughly. This removes any dirt or grit.
Even if the spinach looks clean, rinsing it is a good habit. Fresh greens can sometimes hold small bits of soil.
After washing, gently shake off the excess water. Too much moisture can make the quesadillas soggy.
Step 3: Dry the Spinach
Pat the spinach dry with a clean kitchen towel or paper towel. Try to remove as much moisture as possible.
Dry spinach cooks better and keeps the tortilla crisp. Wet spinach can release steam inside the quesadilla.
Take a moment with this step. A dry filling makes a better final texture.
Step 4: Chop the Spinach
Chop the spinach into smaller pieces. This makes it easier to distribute evenly inside the quesadillas.
Large spinach leaves can pull out when you bite into the quesadilla. Chopped spinach stays tucked inside more neatly.
Aim for small, manageable pieces. They will soften quickly in the hot tortilla.
Step 5: Prepare the Feta
Measure 1 cup crumbled feta cheese and set it aside. If your feta is in a block, crumble it with your fingers or a fork.
Smaller crumbles melt and soften more evenly. They also spread better throughout the filling.
Feta does not melt exactly like mozzarella or cheddar, but it becomes warm and creamy. That texture is part of what makes these quesadillas delicious.
Step 6: Prepare Optional Add-Ins
If using sun-dried tomatoes, chop ¼ cup into small pieces. If using black olives, slice ¼ cup.
If adding grilled chicken, dice ½ cup cooked grilled chicken into small pieces. Smaller pieces fit better inside the tortilla.
Keep add-ins moderate. Too much filling can make the quesadilla hard to flip and may cause it to break apart.
Step 7: Heat the Skillet
Place a skillet over medium heat. Add 1 tablespoon olive oil or butter and let it melt or warm.
The skillet should be hot enough to crisp the tortilla, but not so hot that it burns before the filling warms. Medium heat is best.
If using butter, let it melt and coat the bottom of the pan. If using olive oil, tilt the skillet slightly to spread it around.
Step 8: Adjust the Heat
Once the oil is hot or the butter is melted, reduce the heat slightly if needed. This helps prevent burning.
Quesadillas need enough time for the inside to warm while the outside turns golden. Heat that is too high can brown the tortilla too quickly.
A steady medium heat gives you the best balance of crispness and melted filling.
Step 9: Place the First Tortilla in the Skillet
Lay one tortilla flat in the skillet. Let it warm for a few seconds before adding the filling.
Warming the tortilla slightly makes it more flexible. It also helps the bottom begin to crisp.
Make sure the tortilla sits flat in the pan. This makes the folding and cooking easier.
Step 10: Add the Spinach
Place a generous handful of chopped spinach over half of the tortilla. Spread it evenly.
Only filling half the tortilla makes it easier to fold. It also keeps the quesadilla neat.
Do not pile the spinach too high. It will soften, but too much filling can make the tortilla difficult to close.
Step 11: Add the Feta Cheese
Sprinkle crumbled feta over the spinach. Use enough to give the quesadilla creamy, tangy flavor.
Try to distribute the feta evenly so every bite has cheese. This is what ties the filling together.
The feta will warm as the quesadilla cooks. It will soften into the spinach and create a flavorful filling.
Step 12: Add Optional Fillings
If using sun-dried tomatoes, black olives, or grilled chicken, layer them over the spinach and feta. Keep the layer even and not too thick.
Sun-dried tomatoes add sweetness and tang. Black olives add a briny bite.
Grilled chicken makes the quesadilla more filling. It is a great choice when serving this as lunch or dinner.
Step 13: Fold the Tortilla
Fold the empty half of the tortilla over the filling. Gently press down with a spatula.
The folded shape keeps the filling tucked inside and makes the quesadilla easier to flip. Pressing lightly helps everything settle.
Do not press too hard. You want the filling to stay inside without squeezing it out.
Step 14: Cook the First Side
Cook the quesadilla for about 3 to 4 minutes on the first side. The bottom should become golden brown and crispy.
Watch the heat as it cooks. If it browns too quickly, lower the heat slightly.
The goal is a crisp tortilla with a warm filling. Give it enough time so the cheese softens.
Step 15: Flip Carefully
Slide a spatula under the quesadilla and carefully flip it over. Hold the top lightly if needed to keep the filling inside.
Flip slowly and confidently. A gentle motion prevents the quesadilla from opening.
If a little filling slips out, tuck it back in with the spatula. This recipe is forgiving.
Step 16: Cook the Second Side
Cook the second side for another 3 to 4 minutes. The tortilla should be golden and crisp.
For an extra crispy quesadilla, add a small amount of additional olive oil or butter before cooking the second side. This gives the tortilla more color and crunch.
Once both sides are golden, the quesadilla is ready to remove from the skillet.
Step 17: Cool Briefly Before Cutting
Transfer the cooked quesadilla to a cutting board or plate. Let it cool for about 1 minute before slicing.
This short rest helps the filling settle. It also makes cutting cleaner and less messy.
Do not wait too long, though. These quesadillas are best served warm.
Step 18: Cut Into Wedges
Use a sharp knife or pizza cutter to slice the quesadilla into wedges. Two to four wedges per quesadilla works well.
Wedges are easier to dip and share. They also make the quesadillas look more inviting on a plate.
Repeat the process with the remaining tortillas and filling until all 4 quesadillas are cooked.
Step 19: Serve Warm
Serve the quesadillas warm with your favorite dipping sauces. Salsa, guacamole, or sour cream all pair well.
The crisp tortilla, tangy feta, and fresh spinach taste best when hot from the skillet. Add a fresh salad or tortilla chips if you want a fuller meal.
Serve immediately for the best texture. The longer they sit, the softer the tortilla may become.
Pro Tips for the Best Spinach and Feta Quesadillas
Dry the spinach well before using it. Excess moisture can make the tortilla soggy.
Use a moderate amount of filling. Overstuffing makes the quesadilla harder to flip and cut.
Cook over medium heat. High heat can burn the tortilla before the filling warms through.
Let the quesadilla cool for a minute before slicing. This helps create cleaner wedges.
Add a little more oil or butter when cooking the second side if you want extra crispiness.
Variations
Add fresh basil or dill for an aromatic twist. These herbs pair beautifully with feta.
Incorporate seasonal vegetables like bell peppers or mushrooms. They add flavor, texture, and nutrition.
Try different cheeses like mozzarella or cheddar for a unique taste. Mozzarella gives more melt, while cheddar adds sharper flavor.
Use a dairy-free cheese substitute to make the quesadillas vegan-friendly. Choose one that softens well when heated.
Cook the quesadillas in an air fryer for a healthier, crispy finish. This gives the tortilla crunch with less oil.
Add a pinch of red pepper flakes if you want heat. It gives the filling a gentle spicy kick.
Serving Suggestions
Serve Spinach and Feta Quesadillas warm, cut into wedges. They are delicious on their own, but dips make them even better.
Salsa adds freshness and acidity. Guacamole gives creaminess and richness.
Sour cream adds a cool, tangy contrast. It works especially well with the salty feta.
For a complete meal, pair the quesadillas with a fresh salad. A simple side of tortilla chips also works nicely.
For gatherings, arrange the wedges on a platter with small bowls of dips. They are easy for guests to grab and enjoy.
Storage Tips
Store leftover quesadillas in an airtight container in the refrigerator for up to 3 days. Let them cool to room temperature before sealing.
Cooling first helps reduce excess moisture inside the container. This can help maintain a better texture.
The tortillas may soften after refrigeration, but they can be crisped again when reheated. A skillet works best.
Avoid stacking hot quesadillas directly on top of each other. Steam can make them soggy.
Freezing Instructions
You can freeze Spinach and Feta Quesadillas for up to 2 months. Let them cool completely first.
Place the quesadillas in a single layer on a baking sheet and freeze until firm. Then transfer them to a freezer bag or airtight container.
Freezing them individually first helps prevent sticking. It also makes it easier to remove only what you need.
Reheat from frozen or thawed until warmed through. A skillet or air fryer can help restore crispiness.
Make-Ahead Instructions
You can prepare the filling ahead of time. Wash and chop the spinach, crumble the feta, and prepare any add-ins.
Store the filling ingredients separately or together in the refrigerator. Assemble the quesadillas just before cooking for the best texture.
You can also fully cook the quesadillas in advance and reheat them later. This is helpful for quick snacks or meal prep.
For best results, reheat in a skillet. This brings back the crisp outside better than the microwave.
Common Mistakes to Avoid
Using too much filling can make the quesadilla break apart. Keep the amount moderate.
Cooking on too high heat can burn the tortilla before the cheese warms. Medium heat works best.
Not drying the spinach can make the filling watery. Always pat it dry after washing.
Cutting immediately after cooking can make the filling spill out. Let the quesadilla rest for a minute first.
Skipping oil or butter can reduce crispiness. A small amount helps the tortilla brown beautifully.
Helpful Notes
Use whole grain tortillas for a healthier option. Gluten-free tortillas can also be used if needed.
Substitute goat cheese for feta if you want a creamier texture. It gives a softer, tangier filling.
Add shredded carrots or zucchini for more nutrition and texture. Keep the amount moderate to avoid excess moisture.
Make the recipe nut-free by avoiding add-ins like pesto that may contain nuts. Always check labels if needed.
If using vegetables like mushrooms or bell peppers, sauté them first if they contain a lot of moisture. This helps keep the quesadilla crisp.
Frequently Asked Questions
Can Spinach and Feta Quesadillas Be Frozen?
Yes, these quesadillas can be frozen. Let them cool completely, then place them in a single layer on a baking sheet.
Once frozen, transfer them to a freezer bag or airtight container. They can be stored for up to 2 months.
Can Ingredients Be Substituted?
Yes, this recipe is very flexible. Feta can be substituted with goat cheese, mozzarella, or another cheese you enjoy.
You can also use whole wheat, flour, gluten-free, or other tortillas. Add or omit vegetables based on your preference.
How Should I Store Leftovers?
Store leftovers in an airtight container in the refrigerator for up to 3 days. Make sure they are cooled before sealing.
Reheat in a skillet for the best crispiness. The microwave will warm them but may soften the tortilla.
Can This Recipe Be Made Ahead?
Yes, you can prepare the filling ahead of time by washing and chopping the spinach and crumbling the feta. Assemble just before cooking for the best results.
You can also fully cook the quesadillas in advance. Reheat them when ready to serve.
How Do I Keep Quesadillas Crispy?
Use medium heat and a little olive oil or butter. Do not overfill the tortilla.
Also avoid wet fillings. Dry the spinach well and keep add-ins moderate.
What Can I Add to Make Them Heartier?
Cooked grilled chicken is a great add-in. It makes the quesadillas more filling.
You can also add mushrooms, bell peppers, black olives, or sun-dried tomatoes. Just avoid overstuffing.
What Dips Go Best With Spinach and Feta Quesadillas?
Salsa, guacamole, and sour cream all work well. Each dip adds a different flavor.
You can also serve them with a fresh salad or tortilla chips for a complete meal.
Final Thoughts
Spinach and Feta Quesadillas are the kind of recipe that proves simple ingredients can create something warm, flavorful, and satisfying. With crispy tortillas, fresh spinach, tangy feta, and a little olive oil or butter, you can make a quick meal that feels comforting any time of day.
They are easy enough for busy weekdays and tasty enough to serve at gatherings. The filling is fresh and creamy, the outside is golden and crisp, and the optional add-ins let you make the recipe your own.
What makes these quesadillas special is their balance. They are light but satisfying, quick but homemade, simple but full of flavor.
Serve them warm with salsa, guacamole, or sour cream, and enjoy each crisp, cheesy bite. Whether you make them for lunch, a snack, or a casual meal with people you love, these Spinach and Feta Quesadillas are a cozy little dish worth keeping in your regular rotation.
Spinach and Feta Quesadillas

These Spinach and Feta Quesadillas are quick, savory, and easy to make with fresh spinach, crumbled feta, and crisp tortillas. They work well as a light lunch, snack, or simple meal, and you can add extra ingredients like sun-dried tomatoes, olives, or grilled chicken for more flavor.
Recipe Information
- Prep Time: 10 minutes
- Cook Time: 10 minutes
- Total Time: 20 minutes
- Course: Lunch, Snack
- Cuisine: Mexican
- Servings: 4 quesadillas
Equipment
- Skillet
- Spatula
Ingredients
For the Quesadillas
- 1 cup feta cheese, crumbled
Adds a salty, tangy flavor that pairs well with the spinach. - 4 medium tortillas, flour, whole wheat, or gluten-free
Create the crisp outer layer for the quesadillas. - 2 tablespoons olive oil or butter, for cooking
Helps the tortillas turn golden and crisp in the skillet. - 2 cups fresh spinach, chopped
Adds freshness, color, and a tender green filling.
Optional Add-ins
- ½ cup cooked grilled chicken, diced
Makes the quesadillas more filling with extra protein. - ¼ cup sun-dried tomatoes, chopped
Adds a rich, sweet-tangy flavor. - ¼ cup black olives, sliced
Adds a briny, savory bite.
Instructions
- Heat a skillet over medium heat.
- Add a little olive oil or butter to the skillet.
- Place one tortilla in the skillet.
- Add spinach, crumbled feta cheese, and any optional add-ins to one half of the tortilla.
- Fold the tortilla in half over the filling.
- Cook for about 3 to 4 minutes on one side, or until golden brown.
- Flip carefully with a spatula and cook the other side until crisp and golden.
- Repeat with the remaining tortillas and filling.
- Serve warm while the quesadillas are crisp and the filling is heated through.
Notes
- Customize the quesadillas with your favorite add-ins for more flavor.
- Use butter for a richer taste or olive oil for a lighter option.
- Serve with salsa, Greek yogurt, sour cream, or a simple side salad.

Fernando is the creator and writer behind the food blog Eating with your Hands. Living and working in cities like Paris, Barcelona, and Berlin, and being married to a Canadian foodie, has given Fernando a passion and interest in food and inspired him to run EWYH.