
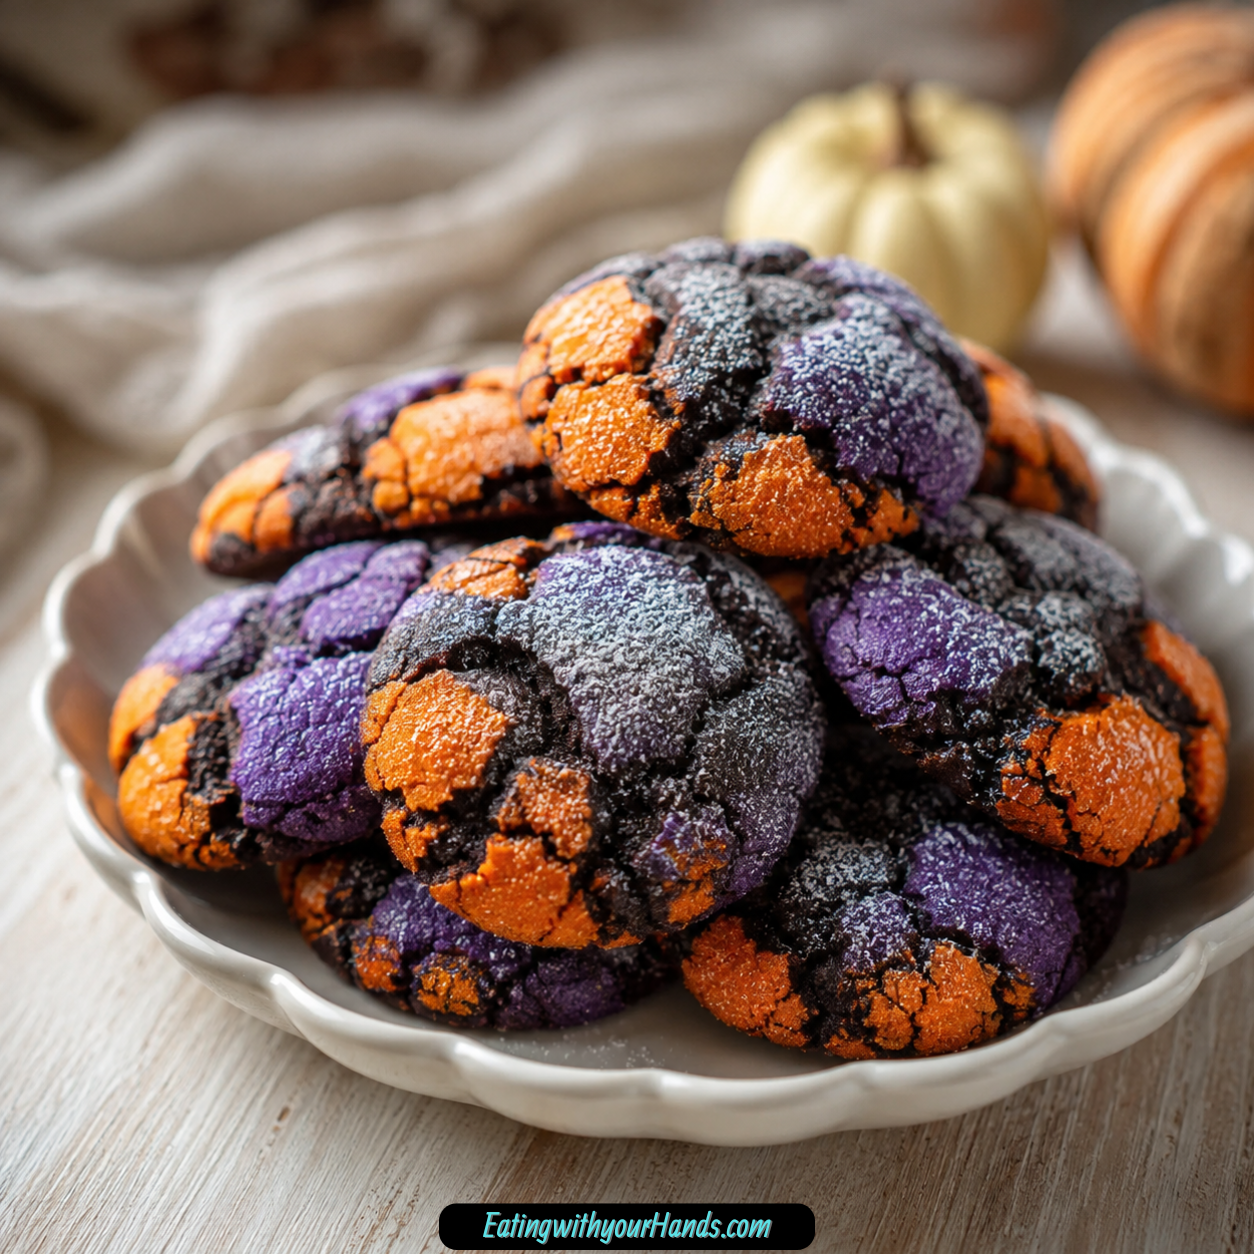
Halloween baking has a way of turning even the simplest cookie into something that feels a little mysterious. These Spooky Halloween Crinkle Cookies are exactly that kind of treat: easy enough for a last-minute party panic, but dramatic enough to look like they came from a witchy dessert table.
They are soft and fudgy in the center, lightly crackly on the outside, and rolled in powdered sugar so they bake into that classic crinkle-cookie look. With gel food coloring, you can make them orange, purple, black, red, green, or any spooky shade that fits your Halloween mood.
The beauty of these cookies is how little effort they need. You mix the dough, color it, chill it, roll it into balls, coat the dough in powdered sugar, and let the oven create the cracked pattern.
The texture is what makes them especially fun. The outside has a delicate powdered sugar crust, while the inside stays soft, chocolatey, and almost brownie-like.
They are perfect for school parties, Halloween movie nights, dessert trays, trick-or-treat gatherings, or grown-up Halloween parties with coffee or espresso. They also freeze well, which makes them a lifesaver when you want festive cookies ready before the rush begins.
Table of Contents
- Why You’ll Love Halloween Crinkle Cookies
- Recipe Details
- Ingredients
- Optional Variations and Add-Ins
- The Halloween Magic Behind Crinkle Cookies
- Why Chilling the Dough Matters
- Why Gel Food Coloring Works Best
- Directions
- Step 1: Preheat the Oven
- Step 2: Line the Baking Sheets
- Step 3: Measure the Dry Ingredients
- Step 4: Whisk the Dry Ingredients
- Step 5: Combine the Sugar and Oil
- Step 6: Add the Eggs
- Step 7: Add the Vanilla Extract
- Step 8: Add the Dry Ingredients to the Wet Ingredients
- Step 9: Add the Gel Food Coloring
- Step 10: Cover the Dough
- Step 11: Chill the Dough
- Step 12: Prepare the Powdered Sugar
- Step 13: Scoop the Chilled Dough
- Step 14: Roll Into Balls
- Step 15: Coat Generously in Powdered Sugar
- Step 16: Arrange on Baking Sheets
- Step 17: Bake the Cookies
- Step 18: Cool on the Baking Sheet
- Step 19: Transfer to a Wire Rack
- Step 20: Freshen the Coating Before Serving
- Serving Tips
- Storage
- Freezing Baked Cookies
- Freezing the Dough
- Helpful Notes for Best Results
- Variations
- Troubleshooting
- Frequently Asked Questions
- Why These Cookies Are Perfect for Last-Minute Halloween Baking
- Why This Recipe Works So Well
- Final Thoughts
- Halloween Crinkle Cookies
Why You’ll Love Halloween Crinkle Cookies
These cookies are quick to prepare. The dough takes about 15 minutes of prep before chilling, which makes them practical for busy Halloween days.
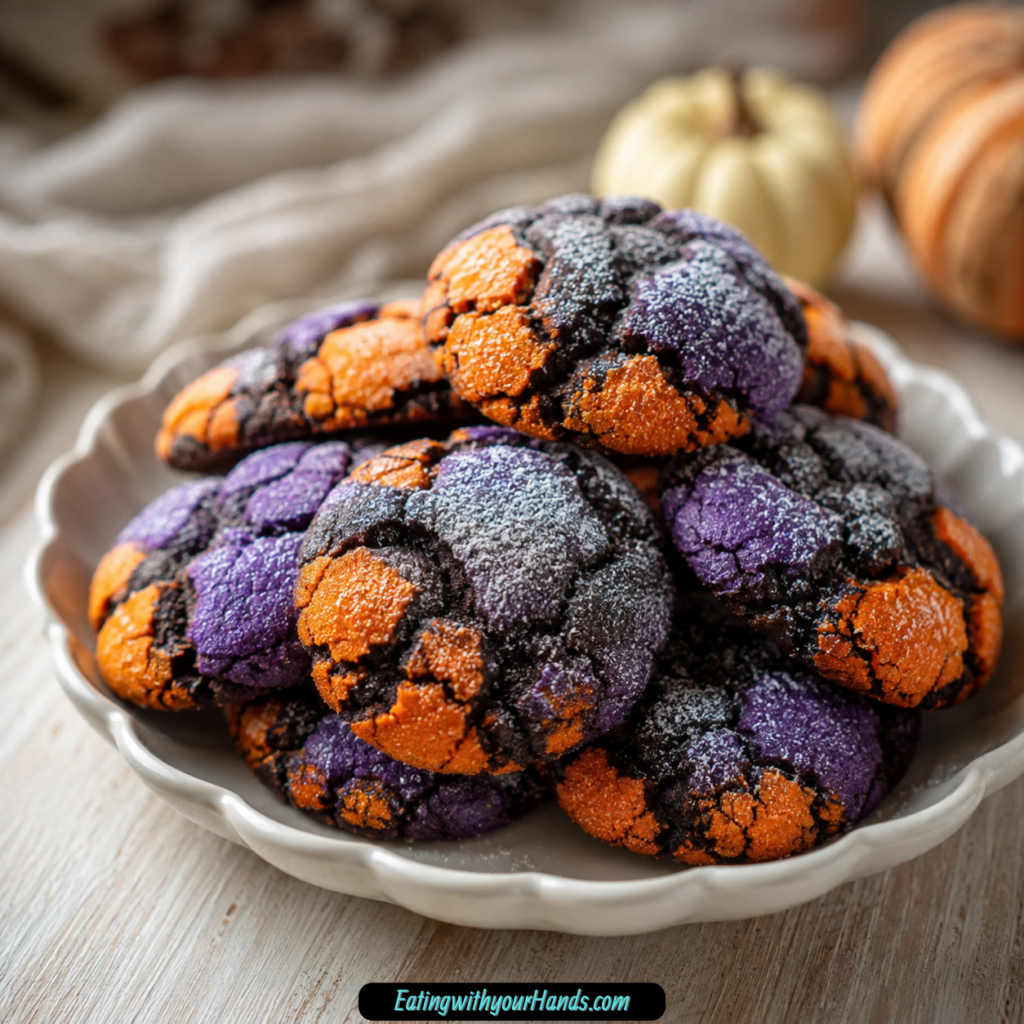
The crinkle effect happens naturally in the oven. A generous powdered sugar coating creates dramatic cracks as the cookies spread and bake.
They are easy to color for Halloween. Orange, purple, black, green, or red gel food coloring can turn the dough into a spooky party treat.
The texture is soft and fudgy inside. The edges set gently, while the centers stay rich and tender.
They are kid-friendly but still fun for adults. Their playful look makes them great for children, while the cocoa flavor makes them satisfying for everyone.
They are also flexible. You can add peppermint extract, sanding sugar, cinnamon, pumpkin spice, chocolate chips, chocolate chunks, or edible glitter for different Halloween versions.
Recipe Details
- Recipe name: Spooky Halloween Crinkle Cookies
- Prep time: About 15 minutes
- Oven temperature: 350°F (175°C)
- Dough chill time: 1 hour
- Minimum chill time if rushed: 30 minutes
- Dough portion size: Tablespoon-sized portions
- Baking time: 10 to 12 minutes
- Cooling time on baking sheet: 5 minutes
- Main texture: Crisp crackly outside with a fudgy, brownie-like center
- Room temperature storage: Up to 5 days
- Freezer storage for baked cookies: Up to 2 months
- Frozen dough baking: Add 1 to 2 extra minutes
- Quick thaw for frozen baked cookies: Let thaw for 10 minutes
- Quick warm-up: Microwave for 8 seconds
Ingredients
Dry Ingredients
- 1 cup all-purpose flour
- ½ cup unsweetened cocoa powder
- 1 teaspoon baking powder
- ¼ teaspoon salt
Wet Ingredients
- 1 cup granulated sugar
- ¼ cup vegetable oil
- 2 large eggs, room temperature
- 1 teaspoon vanilla extract
Additional Items
- Gel food coloring, such as orange, purple, or black
- ½ cup powdered sugar
Optional Variations and Add-Ins
- 1:1 gluten-free flour blend
- Dutch-process cocoa powder
- Melted coconut oil, cooled slightly
- Green food coloring
- Red food coloring
- ½ teaspoon peppermint extract
- Orange sanding sugar
- Purple sanding sugar
- Black sanding sugar
- ½ teaspoon cinnamon
- ½ teaspoon pumpkin spice
- ½ cup chocolate chips
- ½ cup chocolate chunks
- Edible glitter
- Extra powdered sugar for dusting before serving
- Extra 1 teaspoon oil if dough is too dry
The Halloween Magic Behind Crinkle Cookies
Crinkle cookies are already dramatic before adding Halloween colors. Their cracked powdered sugar coating gives them a playful, spooky look that fits the season perfectly.
The cocoa dough creates a dark base, which makes the powdered sugar cracks stand out. When colored with gel food coloring, the cookies can become orange, purple, black, green, or deep red.
The dough is thick and sticky before chilling. That stickiness is normal and helps create the fudgy texture in the finished cookies.
Once the dough chills, it becomes firm enough to roll into balls. Those dough balls are then coated generously in powdered sugar, which is what creates the ghostly crackle.
As the cookies bake, the dough expands and the powdered sugar splits across the surface. That natural cracking effect gives every cookie a different spooky pattern.
No two cookies look exactly the same. Some crack like little monster scales, some look like smoky potion stones, and some simply look like fudgy Halloween treats dusted in sugar.
Why Chilling the Dough Matters
Chilling is essential for these cookies. The dough is sticky after mixing, and it needs time in the refrigerator to become rollable.
The full chill time is 1 hour. That gives the dough enough firmness to shape into tablespoon-sized balls.
If you are in a rush, 30 minutes is the minimum. However, 1 hour gives a better texture and helps the cookies hold shape.
Chilled dough also prevents the cookies from spreading too much. Without chilling, the cookies can flatten and lose that thick, fudgy center.
The powdered sugar coating also works better when the dough is chilled. Firm dough is easier to roll generously without making a sticky mess.
This is one step worth respecting. It is the difference between spooky crinkle cookies and thin chocolate pancakes.
Why Gel Food Coloring Works Best
Gel food coloring is the best choice because it is concentrated. It gives bold color without making the dough too wet.
Liquid food coloring can thin the dough and make it sticky. That can affect both spreading and crinkling.
Start with a small amount of gel color, about ¼ teaspoon. Add more until the dough reaches the Halloween shade you want.
The dough will darken slightly as it bakes. Keep that in mind when choosing your color.
Orange and purple are classic Halloween choices. Black gives a gothic look, while green can make the cookies feel like little monster treats.
Red can create a vampire-inspired cookie. The same dough can shift into many Halloween moods just by changing the color.
Directions
Step 1: Preheat the Oven
Preheat your oven to 350°F (175°C). Let it fully heat before the cookies go in.
A fully heated oven helps the cookies spread and crack properly. The crinkle effect depends on steady heat.
While the oven warms, gather your bowls, mixer or whisk, spatula, parchment paper, baking sheets, plastic wrap, cookie scoop, and cooling rack. Having everything ready makes the process calm and easy.
Step 2: Line the Baking Sheets
Line two baking sheets with parchment paper. This prevents sticking and makes cleanup much easier.
Parchment is especially helpful because the powdered sugar coating can be delicate. It also keeps the cookies from gripping the pan as they bake.
Do not use wax paper for baking. Wax paper can stick and create a frustrating mess.
Step 3: Measure the Dry Ingredients
Measure 1 cup all-purpose flour, ½ cup unsweetened cocoa powder, 1 teaspoon baking powder, and ¼ teaspoon salt. Place them in a medium bowl.
If using a 1:1 gluten-free flour blend, use it in place of the all-purpose flour. The rest of the method stays the same.
Use dark cocoa or Dutch-process cocoa if you want a deeper, spookier look. Regular unsweetened cocoa also works well.
Step 4: Whisk the Dry Ingredients
Whisk the flour, cocoa powder, baking powder, and salt together until evenly combined. Break up any visible cocoa lumps.
Cocoa powder can hide in little pockets, so whisk thoroughly. This helps the dough mix more smoothly.
Baking powder gives the cookies their lift. Salt balances the sweetness and makes the chocolate flavor clearer.
Step 5: Combine the Sugar and Oil
In a large bowl, add 1 cup granulated sugar and ¼ cup vegetable oil. Mix until the sugar is moistened.
The oil helps create the soft, fudgy texture. It also keeps the cookie centers tender.
If using melted coconut oil, make sure it is cooled slightly first. Hot oil can affect the eggs when they are added.
Step 6: Add the Eggs
Add 2 large room-temperature eggs to the sugar and oil mixture. Beat until the mixture looks smooth and slightly frothy, about 1 minute.
Room-temperature eggs blend more easily into the dough. If the eggs are cold, place them in warm water for 5 minutes before using.
The eggs give the cookies structure and help create that brownie-like center. Mix until they are fully incorporated.
Step 7: Add the Vanilla Extract
Add 1 teaspoon vanilla extract. Mix until combined.
Vanilla deepens the chocolate flavor and gives the cookies a warmer taste. It is a small ingredient, but it matters.
If making a peppermint version, replace the vanilla with ½ teaspoon peppermint extract. That gives the cookies a cool, minty flavor.
Step 8: Add the Dry Ingredients to the Wet Ingredients
Gradually add the dry ingredients to the wet mixture. Stir just until combined.
The dough will be thick and sticky. That is the correct texture.
Do not overmix. Overmixing can make the cookies tougher instead of fudgy.
Step 9: Add the Gel Food Coloring
Add gel food coloring a little at a time. Start with about ¼ teaspoon and mix until the color is evenly distributed.
Choose orange, purple, black, red, green, or any Halloween color you like. Gel coloring gives stronger color without thinning the dough.
Add more gel color if needed. Remember that the dough will darken slightly in the oven.
Step 10: Cover the Dough
Cover the bowl with plastic wrap. Make sure the dough is protected before chilling.
The dough needs to firm up before rolling. At this stage, it is too sticky to shape cleanly.
Covering also prevents the dough from drying on the surface. Keep it sealed while it rests.
Step 11: Chill the Dough
Place the covered bowl in the refrigerator for 1 hour. This chill time is non-negotiable for the best result.
The dough will become firmer and easier to scoop. It will also spread less while baking.
If you are in a hurry, chill for at least 30 minutes. One full hour is better for clean rolling and thick cookies.
Step 12: Prepare the Powdered Sugar
Place ½ cup powdered sugar in a small bowl. Sift it first if it looks lumpy.
The powdered sugar coating creates the crinkle effect. A smooth, generous coating gives the most dramatic cracks.
Keep the bowl close to your chilled dough. Once rolling begins, you will coat each dough ball right away.
Step 13: Scoop the Chilled Dough
Remove the chilled dough from the refrigerator. Scoop tablespoon-sized portions with a small cookie scoop or spoon.
Try to keep the portions even. Similar cookie sizes bake more evenly.
If the dough softens while you work, return it to the refrigerator for a few minutes. Cold dough is easier to handle.
Step 14: Roll Into Balls
Roll each scoop of dough between your palms to form a ball. The balls do not need to be perfect.
A rustic shape can look even more Halloween-friendly. The cracked coating will create its own design during baking.
If the dough sticks to your hands, work quickly and keep the dough cold. You can also lightly dust your fingers with powdered sugar.
Step 15: Coat Generously in Powdered Sugar
Roll each dough ball generously in powdered sugar. Make sure the surface is fully coated.
For extra dramatic cracks, roll each ball twice. More powdered sugar creates a stronger contrast after baking.
Do not shake off too much sugar. A thick coating helps create the ghostly crinkle look.
Step 16: Arrange on Baking Sheets
Place the coated dough balls on the parchment-lined baking sheets. Space them about 2 inches apart.
They will spread as they bake. Proper spacing keeps them from touching.
Bake one sheet at a time for the most even cooking. This helps the cookies bake consistently.
Step 17: Bake the Cookies
Bake at 350°F (175°C) for 10 to 12 minutes. The cookies are ready when the edges look set and the centers still look soft.
Do not overbake. They will continue to firm as they cool.
The centers should remain fudgy. Pulling them while they still look slightly soft is the key.
Step 18: Cool on the Baking Sheet
Let the cookies cool on the baking sheet for 5 minutes. They are fragile when hot.
This short rest helps them set without breaking. The crinkle pattern also becomes more stable as they cool.
Do not move them right away. Give them time to firm up.
Step 19: Transfer to a Wire Rack
After 5 minutes, transfer the cookies to a wire rack. Let them cool completely before storing.
If you eat one warm, the center will be soft and fudgy. That is part of the fun.
For storage, wait until the cookies are fully cool. Stacking warm cookies can make them stick together.
Step 20: Freshen the Coating Before Serving
If the powdered sugar coating fades during storage, dust the cookies lightly with fresh powdered sugar before serving. This makes them look prettier.
A fresh dusting is especially useful for party trays. It restores the ghostly, crackled look.
Do not add too much if the cookies are already well coated. A light finish is enough.
Serving Tips
These cookies are fun at room temperature because the crinkle pattern is fully set. They look best once cooled.
Serve them on a Halloween platter with different colors mixed together. Orange, purple, black, and green cookies look especially festive side by side.
They also pair well with cold milk. The soft, fudgy center and powdered sugar coating make them feel like a playful dessert.
For grown-up Halloween gatherings, serve them with espresso shots. The cocoa flavor works nicely with coffee.
If using edible glitter, mix it with the powdered sugar or sprinkle lightly for shimmer. This is especially fun under party lights.
Storage
Let the cookies cool completely before storing. Warm cookies can stick together and damage the powdered sugar coating.
Place them in an airtight container at room temperature. Layer parchment paper between the cookies.
They will stay fudgy for up to 5 days. Keep the container closed tightly so they do not dry out.
If the powdered sugar looks less bright after storage, add a fresh dusting before serving. This keeps them looking party-ready.
Freezing Baked Cookies
Cooled baked cookies can be frozen in a freezer bag. Squeeze out as much air as possible before sealing.
They will keep for up to 2 months. Thaw for about 10 minutes before serving.
You can also microwave one for about 8 seconds if you want it quickly softened. Do not overheat it.
The powdered sugar coating may look less fresh after freezing. Add a light dusting before serving if needed.
Freezing the Dough
You can freeze the dough before baking. Roll the dough into balls first.
Freeze the dough balls on a tray until solid. Then transfer them to a freezer bag.
When ready to bake, roll the frozen or slightly thawed dough balls in powdered sugar and bake. Add 1 to 2 extra minutes to the baking time.
Freezing dough is perfect for make-ahead Halloween treats. It lets you bake fresh crinkle cookies when you need them.
Helpful Notes for Best Results
Do not overbake the cookies. They should still look slightly underdone in the center when removed from the oven.
Use gel food coloring instead of liquid. Liquid coloring can make the dough too sticky and affect the texture.
For gluten-free cookies, use a 1:1 gluten-free flour blend. The cookies should still turn out fudgy.
If the dough cracks too much because it seems dry, add 1 teaspoon oil. This helps restore moisture.
If the cookies do not crack enough, use more powdered sugar. A generous coating is the secret.
Always use parchment paper. It prevents sticking and protects the cookie bottoms.
Variations
Orange Halloween Crinkle Cookies
Use orange gel food coloring for a classic Halloween look. The cocoa dough will make the orange deeper after baking.
Roll generously in powdered sugar for dramatic cracks. The contrast looks festive and bright.
These are perfect for school parties and Halloween trays. They feel playful without extra decoration.
Purple Halloween Crinkle Cookies
Use purple gel food coloring for a witchy, magical look. Purple works beautifully with the powdered sugar coating.
The cracks create a spooky marbled effect. Each cookie looks a little different.
This color is especially fun when paired with orange cookies on a platter. The combination feels very Halloween.
Black Crinkle Cookies
Use black gel food coloring for a darker, gothic-style cookie. The powdered sugar cracks stand out strongly against the dark dough.
Black cookies look dramatic on a dessert table. They can feel like little cracked stones or monster treats.
Use gel coloring carefully because black can stain. Gloves are helpful.
Frankenstein Mint Cookies
Replace vanilla with ½ teaspoon peppermint extract. Add green gel food coloring.
This gives the cookies a cool mint flavor and a monster-inspired look. The powdered sugar cracks make them extra playful.
Do not use too much peppermint extract. A little is enough.
Colored Sanding Sugar Cookies
Instead of plain powdered sugar, roll the dough balls in orange, purple, or black sanding sugar. This adds sparkle.
The texture will be different from the classic powdered sugar crinkle. It gives a more glittery Halloween finish.
This is a fun variation for party trays. Use colors that match your Halloween theme.
Spiced Halloween Crinkle Cookies
Add ½ teaspoon cinnamon or pumpkin spice to the dough. This gives the cookies a cozy fall flavor.
The spice pairs well with cocoa. It makes the cookies feel warmer and more seasonal.
Keep the amount modest so the chocolate flavor still comes through. The cookie should remain fudgy and cocoa-rich.
Double Chocolate Crinkle Cookies
Add ½ cup chocolate chips or chunks to the dough. This makes the cookies extra indulgent.
The chocolate pieces create melty pockets inside the fudgy center. This is a good choice for serious chocolate lovers.
Fold them in gently after the dough comes together. Do not overmix.
Glitter Crinkle Cookies
Use edible glitter in the powdered sugar for shimmer. These cookies can sparkle under blacklights at a Halloween party.
Use food-safe edible glitter only. A little goes a long way.
This variation is more decorative but still simple. It keeps the same soft crinkle cookie texture.
Troubleshooting
Why Is My Dough Too Sticky?
The dough is naturally sticky before chilling. Chill it for 1 hour so it firms up.
If you are rushed, chill at least 30 minutes. Anything less may make rolling difficult.
Sticky dough can create flatter cookies. Keep it cold while shaping.
Why Did My Cookies Spread Too Much?
The dough may not have chilled long enough. Chilling prevents pancake-shaped cookies.
Liquid food coloring can also make the dough too wet. Use gel food coloring instead.
Make sure the baking sheets are not hot when adding dough. Warm pans can cause early spreading.
Why Did My Cookies Not Crack Enough?
The powdered sugar coating may have been too thin. Roll the dough balls generously, or roll them twice.
The dough may also have been too wet on the surface. Make sure the coating covers every side.
Powdered sugar creates the crinkle effect. More coverage means more visible cracks.
Why Did My Cookies Crack Too Much?
The dough may be too dry. Add 1 teaspoon oil if needed.
Overbaking can also make cracks look too dry. Pull the cookies when the centers are still soft.
A few dramatic cracks are normal. Crinkle cookies are meant to look rustic and spooky.
Why Are My Cookies Sticking to the Pan?
Use parchment paper. These cookies can stick if baked directly on an unprepared pan.
Do not use wax paper. It is not the same as parchment for baking.
If baking without parchment, grease the pan very well. Parchment is still the better choice.
Why Are My Cookies Tough?
The dough may have been overmixed after adding the dry ingredients. Stir only until combined.
Overbaking can also make them tougher. Bake until the edges are set and the centers are soft.
The desired texture is fudgy, not dry. Pull them before they look fully firm.
Frequently Asked Questions
Can I Use Liquid Food Coloring Instead of Gel?
Gel food coloring is strongly recommended. It gives vibrant color without making the dough too wet.
Liquid food coloring can lead to sticky dough and flat cookies. For the best texture and color, use gel.
Why Do My Cookies Crack Too Much or Not Enough?
If they crack too much and seem dry, add 1 teaspoon oil. If they do not crack enough, roll them in more powdered sugar.
The powdered sugar coating is the key to the crinkle effect. A generous coating creates better contrast.
Can I Skip the Chilling Step?
No, chilling is important. It keeps the dough from spreading too much and makes it easier to roll.
If you are in a rush, chill for 30 minutes minimum. One hour is better.
Why Are Mine Sticking to the Pan?
Use parchment paper. It prevents sticking and makes cleanup easier.
Wax paper should not be used for baking. If you do not use parchment, grease the pan very well.
Can I Make These Ahead and Freeze the Dough?
Yes, roll the dough balls first, freeze them on a tray, then transfer them to a bag. Bake from frozen.
Add 1 to 2 extra minutes to the baking time. Roll in powdered sugar before baking for the best crinkle effect.
Can I Make These Gluten-Free?
Yes, use a 1:1 gluten-free flour blend. The original notes mention success with Bob’s Red Mill.
The cookies should still be fudgy. Watch the texture and avoid overbaking.
Can I Use Coconut Oil?
Yes, melted coconut oil can be used instead of vegetable oil. Let it cool slightly before mixing.
Coconut oil may add a hint of flavor. Make sure it is not hot when added to the eggs.
How Do I Keep the Powdered Sugar Looking Pretty?
Let cookies cool completely before stacking. Layer them with parchment paper.
For the freshest look, dust them lightly with powdered sugar right before serving. This refreshes the coating after storage or freezing.
Why These Cookies Are Perfect for Last-Minute Halloween Baking
These cookies work well when you need a festive treat without a complicated decorating plan. The powdered sugar coating creates the visual effect for you.
The dough prep is quick, and the ingredients are simple. Most of the time is chilling, which is hands-off.
They are also easy to customize with color. One dough can become several different Halloween looks.
Because they are soft and fudgy, they feel more special than plain sugar cookies. The cocoa flavor gives them richness.
They also travel well once cooled. That makes them useful for school parties, potlucks, and Halloween dessert tables.
Why This Recipe Works So Well
This recipe works because the oil-based cocoa dough stays fudgy. Sugar, oil, eggs, vanilla, flour, cocoa, baking powder, and salt create a thick dough that bakes into soft centers.
The baking powder helps the cookies lift and crack. As the dough expands, the powdered sugar coating splits into dramatic crinkles.
Chilling controls the spread. It makes the dough easier to roll and helps the cookies stay thick.
Gel food coloring adds festive color without changing the dough texture too much. Powdered sugar adds the ghostly outside.
The cookies are baked just until the edges set. This keeps the centers soft and brownie-like.
Final Thoughts
Spooky Halloween Crinkle Cookies are fun, fudgy, colorful cookies with a crackly powdered sugar finish. With flour, cocoa powder, baking powder, salt, granulated sugar, oil, eggs, vanilla, gel food coloring, and powdered sugar, they turn simple ingredients into a festive Halloween dessert.
The method is easy but the details matter. Mix the dough just until combined, use gel food coloring, chill the dough for 1 hour, roll tablespoon-sized portions, coat them generously in powdered sugar, and bake at 350°F (175°C) for 10 to 12 minutes.
Let the cookies cool on the baking sheet for 5 minutes before moving them. This helps the soft centers set while keeping the texture fudgy.
Serve them at parties, pack them for school treats, store them for up to 5 days, freeze baked cookies for up to 2 months, or freeze dough balls for later. However you color them, these crinkle cookies bring spooky charm, chocolate flavor, and Halloween fun to every bite.
Halloween Crinkle Cookies
These Halloween crinkle cookies are soft, chocolatey, and finished with a dramatic crackled powdered sugar coating. The cocoa-rich dough can be tinted with orange, purple, or black gel food coloring for a spooky seasonal look. They are easy to make and perfect for Halloween dessert trays, party platters, school treats, or a fun fall baking project with bold color and a classic crinkle-cookie texture.
Recipe Details
- Prep Time: 15 minutes
- Cook Time: 10 minutes
- Total Time: 25 minutes
- Course: Dessert
- Cuisine: American
- Servings: 24 cookies
Ingredients
Additional
- Gel food coloring (orange, purple, or black)
- ½ cup powdered sugar (for rolling)
Wet Ingredients
- 1 cup granulated sugar
- ¼ cup vegetable oil (or melted coconut oil)
- 2 large eggs (room temp)
- 1 teaspoon vanilla extract
Dry Ingredients
- 1 cup all-purpose flour (or 1:1 GF blend)
- ½ cup unsweetened cocoa powder
- 1 teaspoon baking powder
- ¼ teaspoon salt
Instructions
Step 1: Prepare the Baking Sheet
Line a baking sheet with parchment paper. Prepare the oven according to the temperature from your original recipe source, since the provided recipe does not include a specific baking temperature.
Step 2: Mix the Dry Ingredients
In a bowl, whisk together the all-purpose flour (or 1:1 GF blend), unsweetened cocoa powder, baking powder, and salt until evenly combined.
Step 3: Combine the Wet Ingredients
In a separate bowl, mix the granulated sugar, vegetable oil (or melted coconut oil), room temperature eggs, and vanilla extract until smooth.
Step 4: Add the Halloween Color
Mix in gel food coloring in orange, purple, or black until the wet mixture reaches the color you want.
Step 5: Make the Cookie Dough
Gradually add the dry ingredients to the wet ingredients. Mix until a soft chocolate cookie dough forms.
Step 6: Roll in Powdered Sugar
Scoop the dough into 24 portions. Roll each portion generously in powdered sugar so the outside is fully coated.
Step 7: Bake the Cookies
Place the coated dough balls on the prepared baking sheet with space between each cookie.
Bake for 10 minutes, or until the cookies are set around the edges and crinkled on top.
Step 8: Cool Before Serving
Let the cookies cool briefly on the baking sheet before transferring them to a wire rack to cool further.
Serving Suggestions
- Serve on a Halloween dessert tray.
- Pair with hot cocoa or cold milk.
- Package in treat bags for parties or school events.
- Add to a spooky cookie platter with brownies or cupcakes.
- Serve after a fall dinner as a fun themed dessert.
Storage
How to Store
Store the completely cooled cookies in an airtight container at room temperature.
How to Freeze
Place cooled cookies in a freezer-safe airtight container and freeze for longer storage. Thaw before serving.
Best Texture Tip
Coat the dough balls generously with powdered sugar before baking. A thick coating helps create a more visible crinkle pattern as the cookies spread and set.

Fernando is the creator and writer behind the food blog Eating with your Hands. Living and working in cities like Paris, Barcelona, and Berlin, and being married to a Canadian foodie, has given Fernando a passion and interest in food and inspired him to run EWYH.