
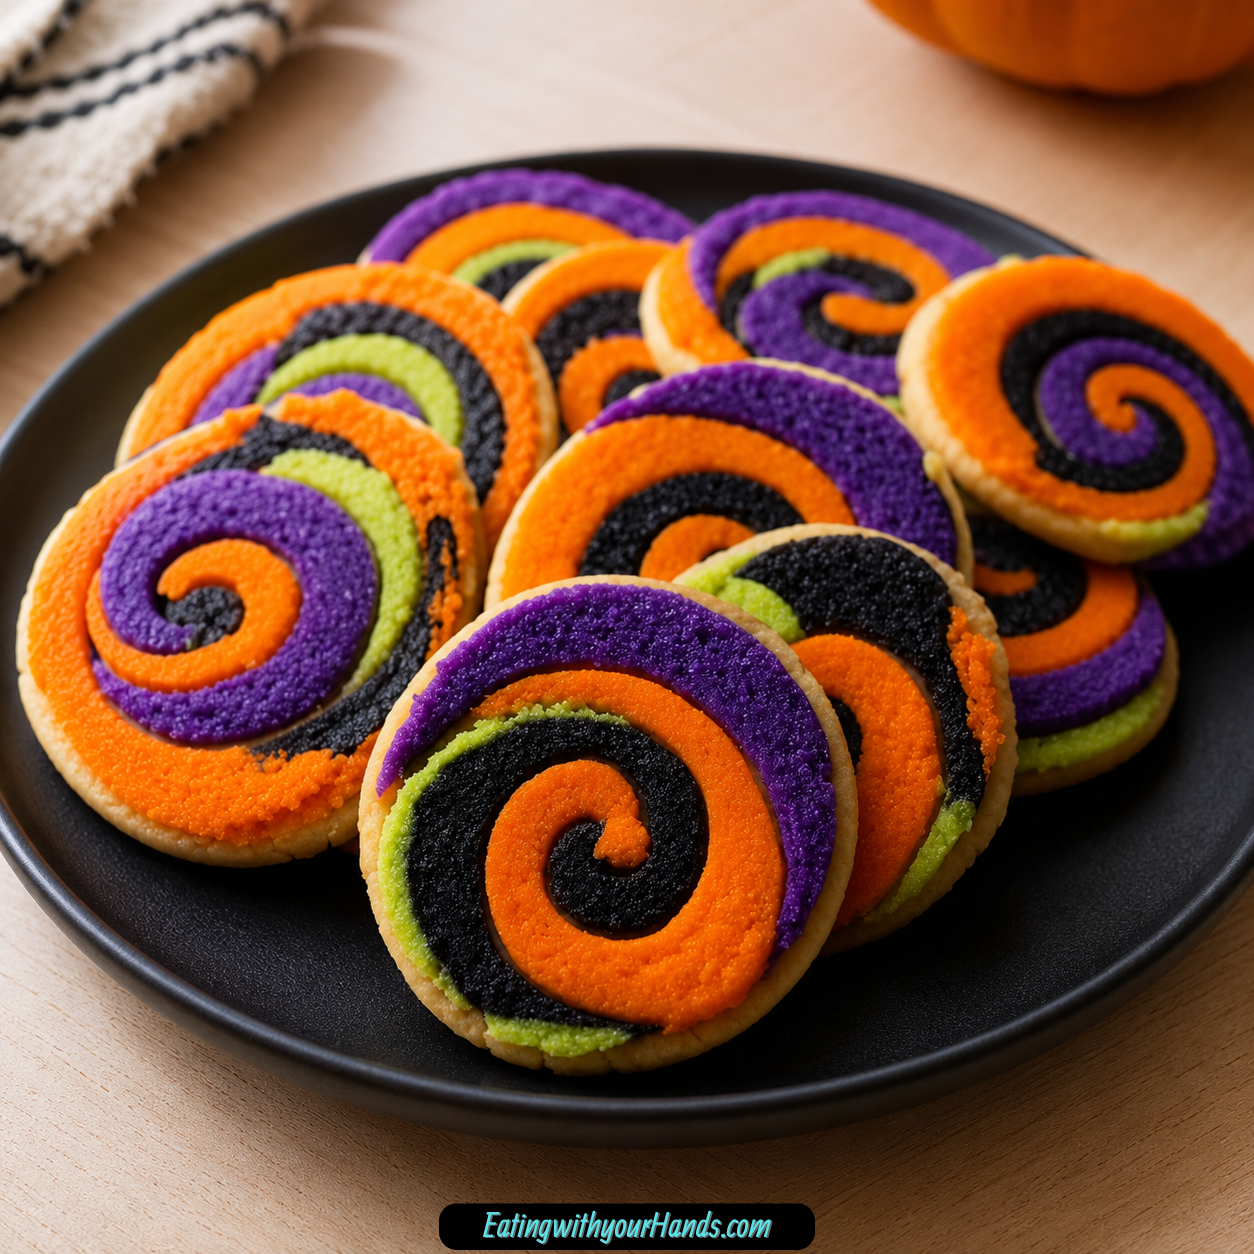
Halloween baking has a special kind of joy to it. It is the season when cookie dough can become orange, purple, black, green, red, or anything a little strange and playful, and somehow the messier the kitchen gets, the more fun the whole afternoon feels.
These Spooky Halloween Pinwheel Sugar Cookies Delight bring that festive feeling into a buttery, vanilla-scented sugar cookie with bold colorful swirls. They look like tiny edible spirals of Halloween magic, but the method is much easier than the final cookies suggest.
The dough starts as a classic sugar cookie base made with flour, baking powder, salt, softened butter, sugar, egg, and vanilla. Then it is divided into three portions, tinted with gel food coloring, rolled into layers, stacked, shaped into a log, chilled, sliced, and baked.
The result is a tray of cookies that feels perfect for Halloween parties, cookie jars, classroom treats, spooky movie nights, or little edible gifts tied up in cellophane bags. They have the familiar buttery taste of sugar cookies, but the pinwheel design makes them feel extra festive.
What I love most about these cookies is that they invite a little creativity. The orange, purple, and black colors are classic for Halloween, but the recipe also leaves room for neon green, blood red, black and white, pink and teal, sprinkles, almond extract, cinnamon, orange zest, marbled cookies, or even cookie-cutter shapes.
Table of Contents
- Why You’ll Love Halloween Pinwheel Sugar Cookies
- Recipe Details
- Ingredients
- Optional Flavor and Color Variations
- The Fun Behind These Halloween Pinwheel Cookies
- Why Gel Food Coloring Works Best
- Why Chilling Is So Important
- Directions
- Step 1: Prepare Your Workspace
- Step 2: Sift the Flour
- Step 3: Whisk the Dry Ingredients
- Step 4: Soften the Butter Correctly
- Step 5: Cream the Butter and Sugar
- Step 6: Add the Egg
- Step 7: Add the Vanilla Extract
- Step 8: Add the Dry Ingredients Gradually
- Step 9: Divide the Dough
- Step 10: Color the Dough
- Step 11: Chill Briefly if the Dough Softens
- Step 12: Roll the First Color
- Step 13: Roll the Other Colors
- Step 14: Stack the Dough Layers
- Step 15: Press the Layers Gently
- Step 16: Roll Into a Log
- Step 17: Wrap and Chill the Log
- Step 18: Preheat the Oven
- Step 19: Slice the Dough
- Step 20: Arrange on the Baking Sheet
- Step 21: Add Optional Sprinkles or Sanding Sugar
- Step 22: Bake the Cookies
- Step 23: Cool on the Baking Sheet
- Step 24: Admire the Swirls
- Serving Tips
- Storage
- Freezing Baked Cookies
- Freezing the Dough Log
- Helpful Notes for Best Results
- Variations
- Troubleshooting
- Frequently Asked Questions
- Why These Cookies Are Great for Halloween Parties
- Why This Recipe Works So Well
- Final Thoughts
- Halloween Pinwheel Sugar Cookies
Why You’ll Love Halloween Pinwheel Sugar Cookies
These cookies are playful and eye-catching. The layered dough creates swirls of color in every slice, so each cookie looks like a small Halloween design.
They taste like classic sugar cookies. The base is buttery, lightly sweet, and flavored with vanilla, with the option to use almond extract for a different twist.
They look harder than they are. Once the dough is layered and rolled into a log, the pinwheel effect appears when you slice it.
They are perfect for Halloween gatherings. A plate of orange, purple, and black cookies instantly feels festive without needing frosting or complicated decorations.
They are easy to customize. You can change the colors, add sanding sugar, use Halloween sprinkles, try cinnamon, add orange zest, or make marbled cookies instead of pinwheels.
They also store and freeze well. The baked cookies stay fresh at room temperature, and the unbaked dough log can be frozen for future slice-and-bake Halloween cookies.
Recipe Details
- Recipe name: Spooky Halloween Pinwheel Sugar Cookies Delight
- Cookie style: Colorful Halloween pinwheel sugar cookies
- Main colors: Orange, purple, and black
- Oven temperature: 350°F (175°C)
- Dough thickness before stacking: About ¼ inch
- Slice thickness: ¼-inch rounds
- Chill time for dough log: At least 2 hours or overnight
- Quick chill option: 30 minutes in the freezer instead of 2 hours in the refrigerator
- Baking time: 8 to 10 minutes
- Cooling time on baking sheet: 5 minutes
- Room temperature storage: Up to 5 days
- Freezer storage for baked cookies: Up to 3 months
- Freezer storage for unbaked dough log: Up to 2 months
- Frozen dough baking: Slice and bake from frozen, adding 1 to 2 extra minutes
Ingredients
Dry Ingredients
- 2 ½ cups all-purpose flour (315g)
- ¾ teaspoon baking powder
- ¼ teaspoon fine salt
Wet Ingredients
- 1 cup unsalted butter (226g), softened
- 1 cup granulated sugar (200g)
- 1 large egg, room temperature
- 2 teaspoons vanilla extract
Decorations
- Gel food coloring, such as orange, purple, and black
- Colored sanding sugar or Halloween sprinkles, optional
Optional Flavor and Color Variations
- Almond extract
- Neon green gel food coloring
- Blood red gel food coloring
- Black and white dough
- Pink and teal dough
- A pinch of cinnamon
- Orange zest
- Colored sanding sugar
- Halloween sprinkles
- Bat-shaped sprinkles
- Beet powder for pink or purple color
- Activated charcoal for black color
- 1:1 gluten-free flour blend
- ½ teaspoon xanthan gum if the gluten-free blend does not include it
- Vegan butter sticks
- Flax egg made with 1 tablespoon ground flaxseed and 3 tablespoons water
The Fun Behind These Halloween Pinwheel Cookies
Halloween cookies do not have to be scary to be memorable. Sometimes the best ones are simply colorful, swirly, buttery, and fun to make.
These cookies begin with a sugar cookie dough that is soft enough to roll but sturdy enough to hold its shape. That balance is important because the layers need to stack, roll, chill, slice, and bake without losing their design.
The colors are what make the cookies feel festive. Orange, purple, and black create a classic Halloween look, but the same method works with any color combination you like.
Gel food coloring is important because it gives strong color without watering down the dough. Liquid coloring can make the dough too soft or sticky, which can affect the swirl.
The pinwheel pattern comes from layering the colored doughs and rolling them tightly into a log. Once sliced, each round reveals a spiral of color.
The cookies are sweet and simple in flavor, which makes them great for kids and adults. They look bold, but the taste stays familiar and comforting.
Why Gel Food Coloring Works Best
Gel food coloring is the best choice for these cookies because it creates vibrant color without adding too much liquid. That matters because sugar cookie dough needs to stay firm enough to roll.
Liquid food coloring can thin the dough and make it harder to handle. If the dough becomes too wet, the layers can smear or stick too much.
Gel coloring also gives stronger Halloween shades. Orange, purple, and black look more dramatic when the color is concentrated.
Start with a small amount, such as a toothpick’s worth. You can always add more color, but it is harder to fix dough that becomes too dark or sticky.
Black coloring can stain hands, counters, and clothes. Gloves are helpful, and it is smart not to wear a favorite shirt while kneading the colors.
If avoiding artificial food coloring, beet powder and activated charcoal are mentioned as natural options. The colors will be more muted, but they can still create a spooky look.
Why Chilling Is So Important
Chilling is not just a suggestion in this recipe. It is what keeps the pinwheels from spreading into messy shapes in the oven.
The dough log needs to chill for at least 2 hours. Overnight is even better if you want cleaner slices and stronger shape.
If you are short on time, the notes allow a 30-minute freezer chill instead. This firms the log faster, but the dough still needs to be cold before slicing.
Warm dough is harder to handle. It can smear when rolled, flatten when sliced, and spread too much during baking.
Chilling also helps the colors stay more defined. Firm dough keeps the layers from blending together too much.
If your kitchen is warm, you can also chill the sliced cookies on the baking sheet for 10 minutes before baking. This helps them hold their shape even better.
Directions
Step 1: Prepare Your Workspace
Set out your mixing bowls, electric mixer, spatula, parchment paper, rolling pin, plastic wrap, baking sheets, sharp knife, and cooling rack. Having everything ready makes the process much easier.
Pinwheel cookies involve more handling than simple drop cookies. A prepared workspace helps you move from mixing to coloring to layering without stress.
If using black gel food coloring, consider wearing gloves. It can stain fingers and surfaces.
Step 2: Sift the Flour
Measure 2 ½ cups all-purpose flour (315g), then sift it. Sifting helps create a smoother dough.
A smoother dough is easier to roll into even layers. It also helps prevent lumps in the finished cookies.
Place the sifted flour into a medium bowl. You will add the rest of the dry ingredients next.
Step 3: Whisk the Dry Ingredients
Add ¾ teaspoon baking powder and ¼ teaspoon fine salt to the sifted flour. Whisk until evenly combined.
Baking powder gives the cookies a little tenderness without making them puff too much. Fine salt balances the sweetness.
If you only have coarse salt, crush it lightly between your fingers first. Smaller salt crystals mix more evenly into the dough.
Step 4: Soften the Butter Correctly
Use 1 cup unsalted butter (226g), softened. The butter should be spreadable but still able to hold its shape.
If softening in the microwave, use 5-second bursts. Stop before the butter melts.
Melted butter can make the dough too soft. Properly softened butter helps create the classic sugar cookie texture.
Step 5: Cream the Butter and Sugar
In a large bowl, beat the softened butter with 1 cup granulated sugar (200g). Mix on medium speed for about 2 minutes.
The mixture should become light and fluffy. It should look pale and creamy.
Do not rush this step. Creaming the butter and sugar helps create a tender cookie texture.
Step 6: Add the Egg
Add 1 large room-temperature egg. Mix just until combined.
A room-temperature egg blends more smoothly into the butter mixture. If you forgot to set it out, place it in a bowl of warm water for 5 minutes first.
Do not overmix after adding the egg. Too much mixing can make the dough tougher.
Step 7: Add the Vanilla Extract
Add 2 teaspoons vanilla extract. Mix until the vanilla is evenly incorporated.
Vanilla gives the cookies their classic sugar cookie flavor. You can use almond extract instead if you want a subtle marzipan-style flavor.
If using almond extract, the original notes suggest using 1 teaspoon because it is potent. Keep the flavor gentle so it does not overpower the cookie.
Step 8: Add the Dry Ingredients Gradually
Gradually add the dry ingredients to the wet ingredients. Mix on low speed until just combined.
The dough may look slightly shaggy at first, but it should hold together when pinched. Do not overmix.
If the dough seems too sticky, add 1 tablespoon more flour. If it is too dry, a drizzle of milk can help bring it together.
Step 9: Divide the Dough
Split the dough into three equal portions. Eyeballing is fine, but keeping the portions close in size helps the layers look balanced.
Place each portion in its own small bowl or on separate pieces of parchment. This keeps the colors from mixing too soon.
The three portions will become orange, purple, and black dough. You can also choose other colors if desired.
Step 10: Color the Dough
Add gel food coloring to each portion of dough. Use orange for one portion, purple for another, and black for the third.
Start with a small amount of color and knead it in with clean hands. Add more as needed until the color looks vibrant.
Gloves are helpful, especially with black food coloring. Knead gently so the dough does not become overly warm.
Step 11: Chill Briefly if the Dough Softens
If the dough becomes too soft while coloring, place it in the refrigerator for 10 minutes. Warm dough is difficult to roll cleanly.
This quick chill helps the butter firm up again. It also prevents the colors from smearing too much.
Do not skip chilling if the dough feels sticky. It will make the layering process much easier.
Step 12: Roll the First Color
Place one colored dough portion between two sheets of parchment paper. Roll it to about ¼-inch thickness.
Using parchment on both sides keeps the dough from sticking to the rolling pin. It also makes it easier to move the layer.
Try to keep the layer as even as possible. Even thickness helps the pinwheel roll neatly.
Step 13: Roll the Other Colors
Repeat the same process with the remaining two dough colors. Roll each one between parchment sheets to about ¼-inch thickness.
Keep the shapes similar if you can. They do not have to be perfect, but similar size helps the layers stack more evenly.
If any layer becomes too soft, chill it for 10 minutes. Firm dough is easier to lift and stack.
Step 14: Stack the Dough Layers
Carefully peel off the top parchment from one color. Flip that dough layer onto another color.
Gently press the edges together. Do not smash the layers flat.
Add the third color the same way. You should now have a tri-color dough stack.
Step 15: Press the Layers Gently
Once stacked, press the layers gently so they stick together. Use your hands or a rolling pin with very light pressure.
Do not roll aggressively. The goal is to attach the layers, not blend the colors.
If the edges are uneven, press or trim gently. Imperfect edges are fine because the dough will be rolled into a log.
Step 16: Roll Into a Log
Starting from one long edge, roll the layered dough tightly into a log. Keep the roll snug so the swirl appears clearly when sliced.
If the dough cracks, press it back together with your fingers. Small cracks can be fixed easily.
Roll slowly and evenly. A tight log gives a better pinwheel shape.
Step 17: Wrap and Chill the Log
Wrap the dough log tightly in plastic wrap. Chill for at least 2 hours, or overnight if possible.
This chill is essential for clean slices and defined spirals. It also helps prevent spreading in the oven.
If you are short on time, freeze the log for 30 minutes instead. Do not skip chilling completely.
Step 18: Preheat the Oven
When ready to bake, preheat your oven to 350°F (175°C). Let it fully heat.
Line baking sheets with parchment paper. The cookies will release more easily and cleanup will be simple.
Keep the chilled log cold until you are ready to slice. Warm dough can lose its shape.
Step 19: Slice the Dough
Unwrap the chilled log and use a sharp knife to slice ¼-inch rounds. A sharp, thin-bladed knife works better than a serrated knife.
Wipe the knife clean between cuts for cleaner edges. This helps keep the colors from smearing.
If an end piece looks squished, roll it into a bonus marbled cookie. It will still taste delicious.
Step 20: Arrange on the Baking Sheet
Place the sliced cookies on the parchment-lined baking sheet. Space them about 2 inches apart.
They will spread a little as they bake. Proper spacing keeps the pinwheels from touching.
If your kitchen is warm, chill the sliced cookies on the baking sheet for 10 minutes before baking. This helps them hold their shape.
Step 21: Add Optional Sprinkles or Sanding Sugar
If using colored sanding sugar or Halloween sprinkles, add them before baking. Press lightly if needed so they stick.
Do not overload the cookies. A small amount gives sparkle without hiding the swirl.
This step is optional. The pinwheel colors are already festive on their own.
Step 22: Bake the Cookies
Bake at 350°F (175°C) for 8 to 10 minutes. Watch the edges carefully.
The cookies are done when the edges are just barely golden. The centers may look slightly underdone, which is correct.
Do not overbake. Overbaking can dull the colors and make the cookies less tender.
Step 23: Cool on the Baking Sheet
Let the cookies cool on the baking sheet for 5 minutes. They need time to firm up.
Do not move them immediately. Warm sugar cookies can be delicate.
After 5 minutes, transfer them to a wire rack. Let them cool completely before serving or storing.
Step 24: Admire the Swirls
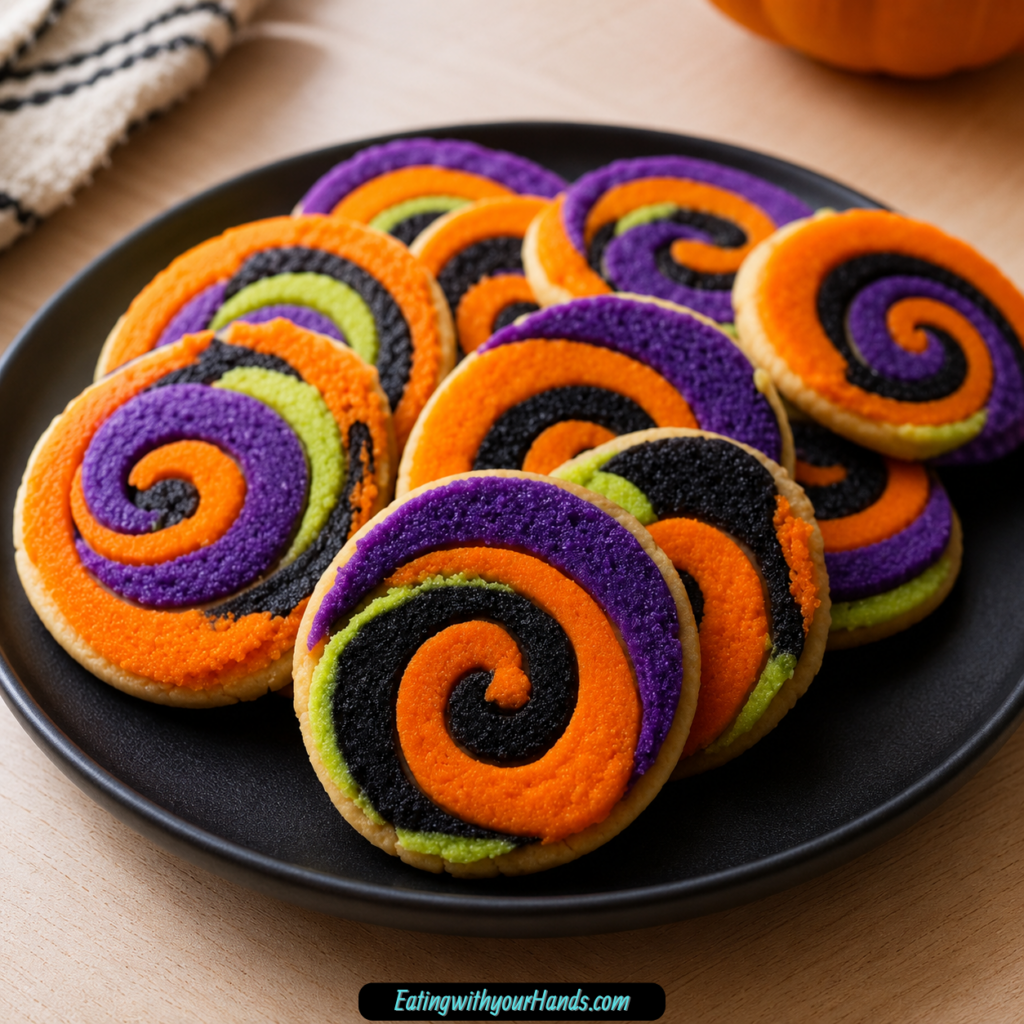
Once the cookies cool, the swirl pattern should look set and colorful. Each cookie will be a little different.
Some may be more even, while others may look marbled or slightly spooky. That is part of the charm.
The flavor will be classic sugar cookie: buttery, sweet, and vanilla-kissed. The colors simply make them Halloween-ready.
Serving Tips
These cookies are best served at room temperature. The flavor comes through clearly once they have cooled completely.
Arrange them on a Halloween platter for a festive dessert table. The pinwheel colors make them stand out without extra frosting.
They also make fun party favors. Bundle a few in cellophane bags and tie them with orange ribbon.
For kids’ parties, let guests pick their favorite swirl. Each cookie looks a little different, which makes them more fun.
If using sprinkles or sanding sugar, let the cookies cool fully before packaging. This helps protect the decorations.
Storage
Store cooled cookies in an airtight container at room temperature. They will stay soft and delicious for up to 5 days.
Layer the cookies with parchment paper. This helps prevent the colors from smudging and keeps the cookies from sticking.
Keep the container sealed. Air can make sugar cookies stale faster.
Avoid storing warm cookies. They should be completely cool before they go into a container.
Freezing Baked Cookies
Freeze baked cookies in a single layer first so they do not stick together. Then transfer them to a freezer bag.
They will keep for up to 3 months. Thaw at room temperature when ready to serve.
Use parchment between layers if stacking frozen cookies. This protects the swirls and any sprinkles.
Freezing is useful if you want to prepare Halloween treats ahead of time. The cookies can be ready long before the party.
Freezing the Dough Log
The unbaked dough log freezes very well. Wrap it tightly in plastic wrap, then wrap it again in foil.
Freeze for up to 2 months. This gives you a slice-and-bake Halloween cookie option whenever you need it.
Slice and bake straight from frozen. Add 1 to 2 extra minutes to the baking time.
Use a sharp knife when slicing frozen dough. If it is too hard, let it sit briefly until it is firm but sliceable.
Helpful Notes for Best Results
Chilling the dough log is non-negotiable. It keeps the cookies from spreading and protects the pinwheel shape.
Use gel food coloring, not liquid coloring. Gel creates bold color without adding too much moisture.
If the dough is too sticky, chill it for 20 minutes. You can also dust your hands and rolling pin lightly with flour.
Use a sharp, thin-bladed knife for slicing. Wipe the knife between cuts for cleaner edges.
If the dough cracks while rolling, press it back together gently. A little flour on your fingers can help.
If colors bleed a little, do not panic. Chilling helps, and slightly smudged swirls can look perfectly spooky for Halloween.
Variations
Green and Black Halloween Cookies
Use green and black gel food coloring for a ghoulish look. This creates a different Halloween style from orange and purple.
The same rolling and slicing method applies. Keep the dough chilled for clean layers.
This version is especially fun for spooky party themes. It looks bold without needing extra decoration.
Black and White Creepy Chic Cookies
Use only black and white dough for a more dramatic look. The result feels simple, graphic, and Halloween-ready.
This version works well if you want a less colorful cookie tray. It still looks festive because of the strong contrast.
Be careful with black food coloring. Gloves can help prevent staining.
Kid-Chosen Color Cookies
Let kids choose the dough colors. Halloween does not have to be limited to orange, purple, and black.
Pink, teal, green, red, or any bright color combination can work. The pinwheel method stays the same.
This variation turns baking into an activity. The cookies become part treat, part craft.
Almond Sugar Cookie Pinwheels
Swap the vanilla for almond extract. Use 1 teaspoon because almond extract is strong.
This gives the cookies a subtle marzipan-style flavor. It changes the cookie from classic vanilla sugar cookie to something a little deeper.
Do not use too much almond extract. A small amount is enough.
Cinnamon Pinwheel Cookies
Add a pinch of cinnamon to the dough for a warm spice twist. This gives the cookies a little autumn flavor.
The cinnamon should be subtle. The cookie should still taste like a sugar cookie.
This variation works especially well with orange and black dough. It feels cozy and seasonal.
Orange Zest Pinwheels
Add orange zest for a citrusy punch. This brightens the flavor and gives the cookies a fresh note.
The zest pairs nicely with vanilla or almond extract. It also fits the orange Halloween color theme.
Use a light amount so it does not overpower the cookie. The sugar cookie base should remain the focus.
Marbled Halloween Cookies
If pinwheels feel like too much rolling, combine pieces of colored dough into a ball and flatten slightly. This creates marbled cookies.
The look is still spooky and colorful. It is easier and requires less precise layering.
Do not overmix the colors. Keep the marbled effect visible.
Cookie Cutter Pinwheel Shapes
Slice the dough log thicker, about ½ inch. Then stamp out bats, pumpkins, or ghosts before baking.
This creates shaped cookies with colorful patterns. It is a fun party variation.
Watch the bake time carefully because thicker cookies may bake differently. Use the edge color and center texture as your guide.
Gluten-Free Halloween Pinwheels
Use a 1:1 gluten-free flour blend. Add ½ teaspoon xanthan gum if the mix does not include it.
The dough texture may be slightly different. Keep it chilled so it is easier to roll and slice.
Handle the layers gently. Gluten-free dough can be more delicate.
Dairy-Free Halloween Pinwheels
Use vegan butter sticks instead of regular butter. Avoid tub spreads because the fat content is different.
Vegan butter sticks give a better dough texture for rolling and slicing. The cookies should still taste sweet and festive.
For a vegan version, use a flax egg made with 1 tablespoon ground flaxseed and 3 tablespoons water. Let it sit for 5 minutes before using.
Troubleshooting
Why Is My Dough Too Sticky?
The dough may be too warm, or the coloring may have softened it. Chill it for 20 minutes.
You can also dust your hands and rolling pin lightly with flour. Use only a little, because too much flour can make the cookies tough.
Sticky dough is much easier to fix with chilling than with extra flour. Start with the refrigerator first.
Why Are My Colors Bleeding?
Colors can bleed if the dough is too warm or if liquid food coloring was used. Gel food coloring helps prevent this.
Chill the layered dough before rolling it into a log. This sets the colors and keeps the layers cleaner.
If the colors still smudge a little, the cookies will still fit the Halloween theme. Slightly ghostly swirls can look intentional.
Why Did My Pinwheels Spread?
The dough log may not have chilled long enough. It needs at least 2 hours in the refrigerator or a 30-minute freezer chill.
Warm dough spreads more in the oven. Cold dough holds the design better.
You can also chill the sliced cookies on the baking sheet for 10 minutes before baking. This is helpful in warm kitchens.
Why Are My Pinwheels Lopsided?
The dough may have been rolled unevenly, or the log may have been shaped unevenly. Press the log gently against the counter to even it out before slicing.
Lopsided pinwheels still taste good. Halloween cookies can look quirky and still be charming.
Next time, try to keep each dough layer close in size and thickness. This helps create a neater spiral.
Why Is My Dough Cracking?
The dough may be too cold or too dry. If it cracks while rolling, press it back together gently.
If it is too dry, a small drizzle of milk can help during the dough-mixing stage. If it cracks after chilling, let it sit briefly before rolling or slicing.
Do not force stiff dough. A few minutes at room temperature can make it easier to handle.
Why Are My Cookies Tough?
Too much flour or overmixing can make sugar cookies tough. Mix only until the dough comes together.
If dusting with flour during rolling, use a light touch. Too much extra flour can change the texture.
Bake only until the edges are barely golden. Overbaking can also make the cookies harder.
Frequently Asked Questions
Can I Freeze the Dough?
Yes, the unbaked dough log freezes well. Wrap it tightly in plastic wrap, then foil, and freeze for up to 2 months.
Slice and bake straight from frozen. Add 1 to 2 extra minutes to the baking time.
How Do I Prevent the Colors From Bleeding?
Use gel food coloring instead of liquid food coloring. Gel gives strong color without adding too much moisture.
Chill the layered dough before rolling it into a log. Cold dough helps set the colors and keeps the swirls more defined.
My Dough Is Too Sticky. What Should I Do?
Chill it in the refrigerator for 20 minutes. This firms the butter and makes the dough easier to handle.
If needed, dust your hands and rolling pin lightly with flour. Do not add too much flour, or the cookies may become tough.
Can I Make These Gluten-Free?
Yes, use a 1:1 gluten-free flour blend. Add ½ teaspoon xanthan gum if the blend does not already include it.
The texture may be slightly different. Keep the dough chilled so it stays easier to roll and slice.
Can I Make These Vegan?
Yes, use vegan butter sticks instead of dairy butter and use a flax egg. The flax egg is 1 tablespoon ground flaxseed plus 3 tablespoons water, rested for 5 minutes.
Avoid vegan tub spreads because they do not have the same fat content. Sticks work better for this kind of shaped cookie.
Why Are My Pinwheels Lopsided?
The dough may have been rolled unevenly. Before slicing, gently press the log against the counter to even it out.
Do not worry too much about imperfect shapes. Halloween cookies can be whimsical and still look fun.
Can I Use Cookie Cutters?
Yes, slice the log thicker, about ½ inch, then stamp out shapes like bats, pumpkins, or ghosts before baking. This creates colorful shaped cookies.
Watch the baking closely because thicker cookies may need slightly different timing. Bake until the edges are just barely golden.
Can I Use Natural Colors?
Yes, beet powder can be used for pink or purple, and activated charcoal can be used for black. The colors will be more muted.
This is a fun option if you want to avoid food coloring. The cookies will still have a festive look, just softer in color.
Why These Cookies Are Great for Halloween Parties
Halloween Pinwheel Sugar Cookies are perfect for parties because they look festive without frosting. The colors do most of the decorating.
They are easy to serve by hand. Guests can pick up a cookie without needing plates, forks, or messy toppings.
They also make great party favors. A few cookies in a clear bag with ribbon feel cheerful and thoughtful.
Because the dough log can be frozen, the recipe is helpful for planning ahead. You can prepare the dough before the busy party week.
The cookies are also kid-friendly. The bright swirls feel fun, and the flavor is classic sugar cookie.
Why This Recipe Works So Well
This recipe works because the sugar cookie base is simple and sturdy. Butter and sugar create tenderness, the egg binds the dough, and vanilla gives the classic flavor.
Flour gives structure, baking powder gives lightness, and salt balances the sweetness. The dough is soft enough to roll but firm enough to hold shape after chilling.
Gel coloring gives bold color without thinning the dough. That helps the layers stay clear.
The long chill is what protects the design. Cold dough slices cleaner and spreads less.
Baking only until the edges are barely golden keeps the cookies tender. The 5-minute rest on the sheet helps them firm up before moving.
Final Thoughts
Spooky Halloween Pinwheel Sugar Cookies Delight are colorful, buttery sugar cookies made for festive baking. With all-purpose flour, baking powder, fine salt, softened unsalted butter, granulated sugar, egg, vanilla, gel food coloring, and optional sanding sugar or sprinkles, they turn simple dough into bright Halloween swirls.
The key steps are simple but important. Make the dough, divide it into three portions, color each portion with gel food coloring, roll each color to about ¼-inch thickness, stack the layers, roll them tightly into a log, and chill for at least 2 hours.
Slice the chilled log into ¼-inch rounds and bake at 350°F (175°C) for 8 to 10 minutes. Let the cookies cool on the baking sheet for 5 minutes before moving them to a rack.
Serve them at room temperature, pack them as party favors, store them for up to 5 days, freeze baked cookies for up to 3 months, or freeze the dough log for up to 2 months. However you decorate or color them, these cookies bring Halloween fun, classic sugar cookie flavor, and bright swirly charm to every bite.
Halloween Pinwheel Sugar Cookies
These Halloween pinwheel sugar cookies are buttery, colorful, and fun to slice and bake. Orange, purple, and black dough layers create a festive spiral design, while the cookie itself stays soft, sweet, and classic. They are perfect for Halloween parties, themed dessert trays, classroom treats, or a seasonal baking project that looks playful without being overly complicated.
Recipe Details
- Prep Time: 30 minutes
- Cook Time: 10 minutes
- Total Time: 40 minutes
- Course: Cookies, Dessert
- Cuisine: American
- Servings: 24 cookies
Equipment
- Mixing bowl
- electric mixer
- Rolling pin
- Cookie cutters
Ingredients
Decorations
- Gel food coloring orange, purple, and black
- Colored sanding sugar or Halloween sprinkles optional
Wet Ingredients
- 1 cup unsalted butter softened (226g)
- 1 cup granulated sugar (200g)
- 1 large egg room temperature
- 2 teaspoons vanilla extract or almond extract for a twist
Dry Ingredients
- 2 ½ cups all-purpose flour sifted (315g)
- ¾ teaspoon baking powder
- ¼ teaspoon fine salt
Instructions
Step 1: Mix the Dry Ingredients
In a bowl, whisk together the sifted all-purpose flour, baking powder, and fine salt until evenly combined.
Step 2: Cream the Butter and Sugar
In a separate mixing bowl, use an electric mixer to cream the softened unsalted butter and granulated sugar until light and fluffy.
Step 3: Add the Egg and Extract
Beat in the room temperature egg and vanilla extract, or almond extract if using that option.
Step 4: Make the Cookie Dough
Gradually mix the dry ingredients into the wet ingredients until the dough is fully combined.
Step 5: Color the Dough
Divide the dough into portions. Tint each portion with orange, purple, and black gel food coloring.
Step 6: Roll and Layer the Dough
Roll out the colored dough portions with a rolling pin. Layer the dough sheets together to create the pinwheel design.
Step 7: Shape and Chill
Roll the layered dough into a log. Chill the dough before slicing so the colors stay neat and the spirals cut cleanly.
Step 8: Slice and Bake
Slice the chilled dough into cookies. Bake at 350°F (175°C) for 8-10 minutes.
Step 9: Decorate If Desired
Decorate the cookies with colored sanding sugar or Halloween sprinkles, if desired.
Notes
Chill the dough before slicing for cleaner cuts and a sharper pinwheel pattern.
Serving Suggestions
- Serve on Halloween party dessert trays.
- Pair with hot cocoa or cold milk.
- Package in treat bags for seasonal gifting.
- Add to a Halloween cookie platter with brownies or cupcakes.
- Serve after a fall dinner as a colorful themed dessert.
Storage
How to Store
Store the completely cooled cookies in an airtight container at room temperature.
How to Freeze
Freeze baked cookies in a freezer-safe airtight container. Thaw before serving.
Best Texture Tip
Keep the dough well chilled before slicing. This helps the pinwheel shape stay defined and prevents the cookies from spreading too much as they bake.

Fernando is the creator and writer behind the food blog Eating with your Hands. Living and working in cities like Paris, Barcelona, and Berlin, and being married to a Canadian foodie, has given Fernando a passion and interest in food and inspired him to run EWYH.