
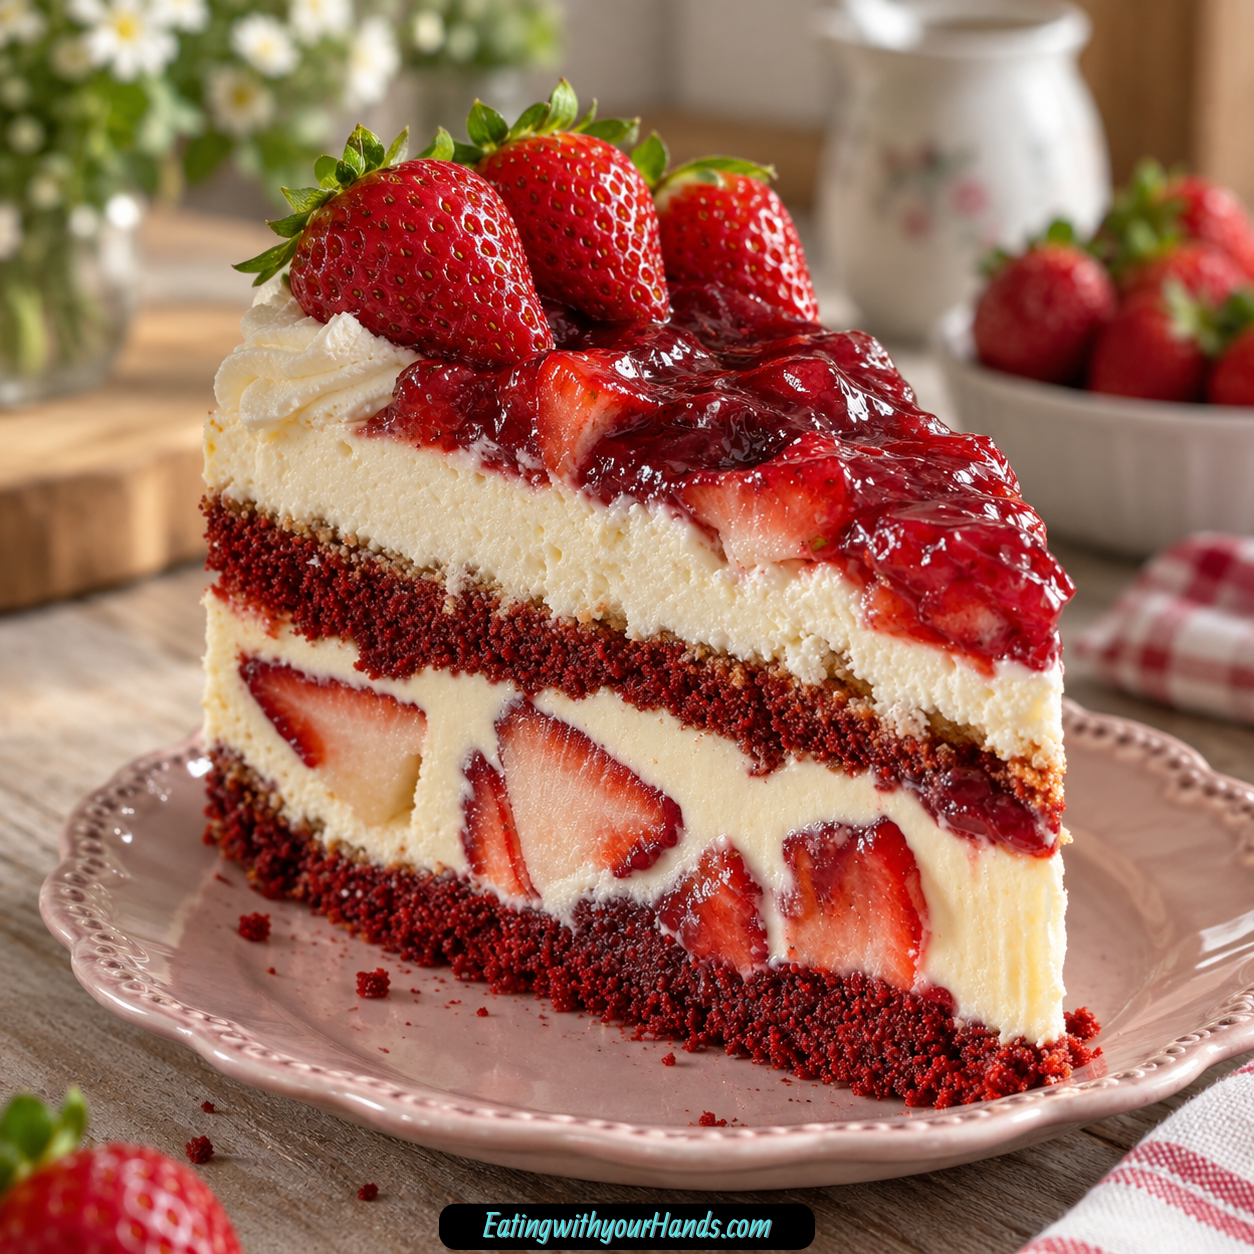
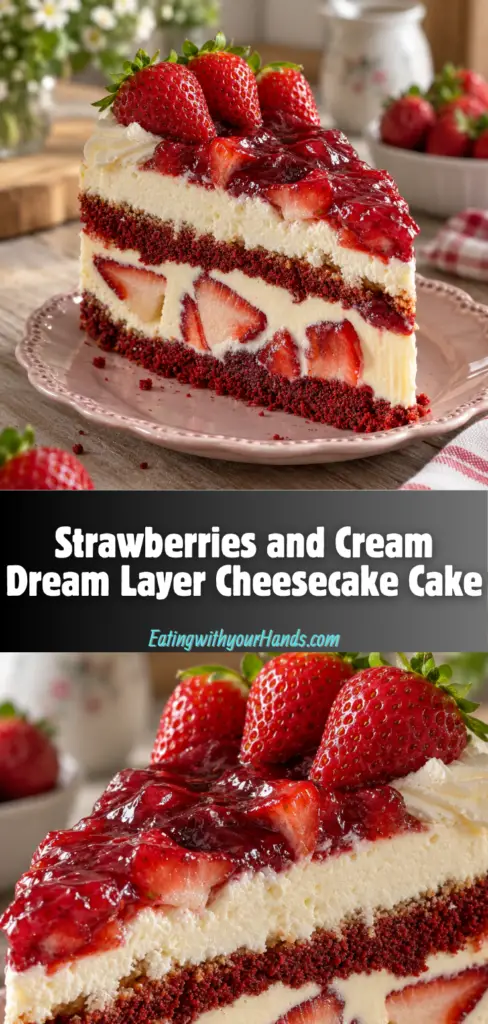
Strawberries and Cream Dream Layer Cheesecake Cake is the kind of dessert that feels like a celebration before the first slice is even served. It has tender cake layers, a fluffy no-bake cheesecake filling, fresh strawberries, a glossy strawberry compote, and a beautiful cream-and-fruit finish that makes the whole cake look dreamy without needing complicated decorating skills.
This cake brings together several dessert favorites in one tall, generous slice. There is soft cake, creamy cheesecake, juicy strawberries, and a sweet-tart strawberry glaze layered in a way that feels indulgent but still bright.
It is a wonderful dessert for birthdays, holidays, bridal showers, summer dinners, and any gathering where you want something memorable at the center of the table. Every slice feels special because it gives you cake, cheesecake, and fruit together in one forkful.
The cake layers begin with a boxed red velvet cake mix, though vanilla, white, or strawberry cake can also be used if you prefer. The ingredients listed on the box are used to prepare the batter, and a little vanilla extract can be added for extra flavor depth.
The no-bake cheesecake filling keeps the cake light and creamy. Softened full-fat cream cheese is beaten smooth, then mixed with sugar, lemon juice, and vanilla before cold whipped heavy cream is folded in.
Fresh strawberries bring the cake brightness and natural sweetness. The sliced berries are tossed with sugar and left to sit until they soften and release their juices.
The strawberry compote adds a glossy, fruit-forward finish. Diced strawberries cook with sugar and lemon juice, then thicken with a cornstarch slurry until the mixture looks shiny and spoonable.
This cake does need chilling time, and that rest is part of what makes it so good. Several hours in the refrigerator, or overnight if possible, allows the cheesecake layer to set and the flavors to come together beautifully.
Strawberries and Cream Dream Layer Cheesecake Cake is impressive, creamy, fruity, and make-ahead friendly. It is the kind of homemade dessert that looks like it took more decorating skill than it really did, and that is part of its charm.
Table of Contents
- Why You’ll Love This Strawberries and Cream Dream Layer Cheesecake Cake
- Recipe Details
- Ingredients
- For the Cake Layers
- For the No-Bake Cheesecake Filling
- For the Fresh Strawberry Layer
- For the Strawberry Compote or Glaze Layer
- For Topping and Decoration
- Ingredient Notes
- Optional Swaps, Variations, Add-Ins, and Serving Ideas
- Red Velvet Strawberry Cheesecake Cake
- Vanilla Strawberries and Cream Cheesecake Cake
- White Cake Strawberry Cheesecake Cake
- Strawberry Cake Cheesecake Cake
- Homemade Cake Version
- Fresh Strawberry Layer
- Frozen Strawberry Compote
- Stabilized Whipped Cream Topping
- Cream Cheese Frosting Touches
- Gelatin-Stabilized Whipped Cream
- Springform Pan Assembly
- Birthday Dessert
- Bridal Shower Dessert
- Holiday Dessert
- Summer Celebration Cake
- Why This Recipe Works
- Directions
- Step 1: Prepare the Oven and Cake Pans
- Step 2: Make the Cake Batter
- Step 3: Divide and Bake the Cake Layers
- Step 4: Cool the Cake Layers
- Step 5: Level the Cake Layers
- Step 6: Macerate the Sliced Strawberries
- Step 7: Start the Strawberry Compote
- Step 8: Thicken the Compote
- Step 9: Beat the Cream Cheese
- Step 10: Add Sugar, Lemon Juice, and Vanilla
- Step 11: Whip the Heavy Cream
- Step 12: Fold the Whipped Cream into the Cream Cheese Mixture
- Step 13: Chill the Cheesecake Filling
- Step 14: Begin Assembling the Cake
- Step 15: Add the Macerated Strawberry Layer
- Step 16: Add the Second Cake Layer and More Filling
- Step 17: Add the Strawberry Compote and Decorations
- Step 18: Chill, Slice, and Serve
- Serving Ideas
- Storage
- Freezing
- Make-Ahead
- Helpful Notes for Best Results
- Variations
- Red Velvet Strawberries and Cream Cheesecake Cake
- Vanilla Strawberries and Cream Cheesecake Cake
- White Cake Cheesecake Cake
- Strawberry Cake Cheesecake Cake
- Chocolate Cake Cheesecake Cake
- Homemade Cake Version
- Frozen Strawberry Compote
- Stabilized Whipped Cream Decoration
- Cream Cheese Frosting Decoration
- Springform Layer Cake
- Troubleshooting
- Frequently Asked Questions
- Why This Recipe Works So Well
- Final Thoughts
- Strawberries and Cream Dream Layer Cheesecake Cake
- Recipe Details
- Ingredients
- Instructions
- Step 1: Bake the Cake Layers
- Step 2: Macerate the Strawberries
- Step 3: Make the Strawberry Compote
- Step 4: Cool the Compote
- Step 5: Beat the Cream Cheese
- Step 6: Fold in the Whipped Cream
- Step 7: Start Assembling the Cake
- Step 8: Add the Second Layer
- Step 9: Add the Strawberry Topping
- Step 10: Chill Before Slicing
- Notes
- Serving Suggestions
- Storage
Why You’ll Love This Strawberries and Cream Dream Layer Cheesecake Cake
This dessert combines cake and cheesecake in one impressive dessert. Each slice has soft cake, creamy filling, and fruit.
The no-bake cheesecake filling keeps the cake light and creamy. It adds richness without needing another baked layer.
Fresh strawberries add brightness and natural sweetness. They make the cake feel fresh and colorful.
It is a perfect make-ahead dessert for entertaining. The cake needs time to chill and set, which makes it ideal to prepare before a gathering.
It is customizable with different cake flavors. Red velvet, vanilla, white, or strawberry cake can all be used.
It has a beautiful presentation with minimal decorating skills. Fresh strawberries, compote, optional whipped cream, and optional frosting touches make it look finished and festive.
Recipe Details
Strawberries and Cream Dream Layer Cheesecake Cake begins with cake layers made from 1 box red velvet cake mix. Vanilla, white, or strawberry cake mix can be used instead if preferred.
The cake batter is prepared according to the box instructions. The ingredients listed on the box are typically eggs, oil, and water.
One teaspoon vanilla extract can be added to the cake batter if desired. This optional addition enhances flavor depth.
The cake is baked in two 8-inch or 9-inch round cake pans. The pans should be greased and lined with parchment circles.
The cake layers are baked until a toothpick inserted into the center comes out clean. After baking, they cool in the pans for 10 minutes.
The cake layers are then turned out onto a wire rack to cool completely. Once cooled, the tops are leveled with a serrated knife for even layers.
The fresh strawberry layer uses 2 cups fresh strawberries, hulled and sliced, plus 2 tablespoons sugar. The berries sit for 10 to 15 minutes so they can soften and release flavorful juices.
The strawberry compote uses 2 cups diced strawberries, ⅓ cup sugar, 1 tablespoon lemon juice, and 1 tablespoon cornstarch mixed with 2 tablespoons water. It cooks until thick and glossy, then cools completely before use.
The no-bake cheesecake filling uses 24 ounces softened full-fat cream cheese, 1 cup granulated sugar, 1 tablespoon lemon juice, 1 teaspoon vanilla extract, and 2 cups cold heavy cream. The heavy cream is whipped to stiff peaks before being folded into the cream cheese mixture.
The cake can be assembled on a serving plate or inside a springform pan. A springform pan helps keep the layers neat and tall.
The finished cake should be refrigerated for several hours or overnight. It needs at least 3 to 4 hours to chill, but overnight is best.
Ingredients
For the Cake Layers
- 1 box red velvet cake mix – Or use vanilla, white, or strawberry cake if preferred
- Ingredients listed on the box – Typically eggs, oil, and water
- 1 teaspoon vanilla extract (optional) – Enhances flavor depth
For the No-Bake Cheesecake Filling
- 24 ounces cream cheese, softened – Full-fat for best texture
- 1 cup granulated sugar – Sweetens without overpowering
- 1 tablespoon lemon juice – Balances richness
- 1 teaspoon vanilla extract – Adds warmth
- 2 cups heavy cream, cold – Whipped for lightness
For the Fresh Strawberry Layer
- 2 cups fresh strawberries, hulled and sliced
- 2 tablespoons sugar – Helps release juices
For the Strawberry Compote or Glaze Layer
- 2 cups diced strawberries
- ⅓ cup sugar
- 1 tablespoon lemon juice
- 1 tablespoon cornstarch mixed with 2 tablespoons water
For Topping and Decoration
- Fresh sliced strawberries
- Optional whipped cream – Homemade or stabilized
- Optional cream cheese frosting touches
Ingredient Notes
Red velvet cake mix gives this dessert a striking color and soft cake base. Vanilla, white, or strawberry cake can be used if you want a different flavor.
The ingredients listed on the cake box should be used to prepare the batter. These are typically eggs, oil, and water.
Vanilla extract can be added to the cake batter. This optional teaspoon adds more flavor depth.
Softened cream cheese is important for the no-bake cheesecake filling. Full-fat cream cheese gives the best texture.
Granulated sugar sweetens the cheesecake layer without overpowering the strawberries. It should be mixed until fully combined with the cream cheese.
Lemon juice balances the richness of the cream cheese. It also brings a little brightness to the filling.
Vanilla extract adds warmth to the cheesecake layer. It helps the filling taste rounded and smooth.
Cold heavy cream is whipped to stiff peaks before being folded into the cream cheese mixture. This gives the filling its light, fluffy texture.
Fresh strawberries are best for the sliced strawberry layer. They bring natural sweetness, color, and freshness.
Sugar helps the sliced strawberries release their juices. This process softens the berries and makes the layer more flavorful.
Diced strawberries are used for the compote. They cook with sugar and lemon juice before being thickened with cornstarch slurry.
Cornstarch mixed with water thickens the compote into a glossy glaze. The compote should be cooled completely before it is added to the cake.
Optional Swaps, Variations, Add-Ins, and Serving Ideas
Red Velvet Strawberry Cheesecake Cake
Use red velvet cake mix for the cake layers. This gives the dessert a beautiful color and a dramatic slice.
The red velvet base works well with cheesecake filling and strawberries. It creates a celebration-style presentation.
Vanilla Strawberries and Cream Cheesecake Cake
Use vanilla cake mix instead of red velvet. This gives the cake a softer, classic flavor.
Vanilla cake lets the strawberry and cheesecake layers stand out. It is a good choice for a lighter-looking dessert.
White Cake Strawberry Cheesecake Cake
Use white cake mix if preferred. This makes the layers simple and elegant.
White cake pairs beautifully with fresh strawberries. It also makes the red strawberry glaze look especially bright.
Strawberry Cake Cheesecake Cake
Use strawberry cake mix for an extra strawberry-forward version. This gives the dessert more fruit-style flavor.
The cake, fresh strawberry layer, and compote all work together. It is a good option for strawberry lovers.
Homemade Cake Version
A homemade sturdy cake recipe can be used instead of a box mix. The cake should be strong enough to hold the cheesecake filling and fruit layers.
The assembly stays the same. The cake layers still need to cool completely before filling.
Fresh Strawberry Layer
Fresh strawberries are best for the sliced strawberry layer. They hold their shape and bring brightness to each slice.
The strawberries should be hulled and sliced. Tossing them with sugar helps release juices.
Frozen Strawberry Compote
Frozen strawberries can work well for the compote. Fresh strawberries are still best for layering.
The compote should cook until thick and glossy. It must cool completely before being spread over the cake.
Stabilized Whipped Cream Topping
Optional whipped cream can be homemade or stabilized. This adds a soft, creamy decoration.
Stabilized whipped cream can be helpful if the cake needs to hold its look longer. Use it as a finishing touch.
Cream Cheese Frosting Touches
Optional cream cheese frosting touches can be added for decoration. This gives the cake a bakery-style finish.
Use only as much as desired. The no-bake cheesecake filling is already creamy and rich.
Gelatin-Stabilized Whipped Cream
For extra stability, add 1 teaspoon bloomed gelatin to the whipped cream if needed. This helps the whipped cream hold its shape.
This step is optional. It can be useful for presentation or warmer serving situations.
Springform Pan Assembly
Assemble the cake inside a springform pan if you want neater, taller layers. The pan helps hold the filling in place while the cake chills.
This trick is especially helpful for layered cheesecake cakes. It makes removal easier after the cake sets.
Birthday Dessert
Serve this cake for birthdays. The layers make it feel special without needing difficult decoration.
Fresh strawberries and optional whipped cream are enough to make it celebration-ready. Each slice looks impressive.
Bridal Shower Dessert
This cake works beautifully for bridal showers. It is pretty, fruity, creamy, and easy to make ahead.
The presentation feels elegant. Fresh strawberries on top make it look bright and romantic.
Holiday Dessert
Serve this cake for holidays when you want a showstopping dessert. The make-ahead nature helps reduce stress.
The cake can chill overnight. Then it only needs topping and slicing before serving.
Summer Celebration Cake
This cake is perfect for summer celebrations. The fresh strawberry layer and chilled cheesecake filling make it feel cool and bright.
Serve smaller slices after a summer dinner. The cake is indulgent but balanced by fruit.
Why This Recipe Works
Strawberries and Cream Dream Layer Cheesecake Cake works because it layers familiar textures in a way that feels special. Cake, cheesecake filling, sliced strawberries, compote, and toppings each bring something different.
The cake layers give structure. They hold the cheesecake filling and strawberry layers while giving each slice a soft base.
The no-bake cheesecake filling adds creaminess without requiring another bake. Whipped heavy cream makes it lighter and fluffier.
The fresh strawberry layer adds juicy sweetness. Macerating the berries helps them soften and release flavorful juices.
The strawberry compote adds a glossy fruit finish. Cooking and thickening the diced berries creates a topping that feels polished.
The lemon juice in the filling and compote balances richness and sweetness. It keeps the dessert from feeling too heavy.
The chilling time matters. Several hours or overnight allows the cheesecake filling to set and the flavors to meld.
The dessert also works because it is flexible. Different cake flavors, optional whipped cream, optional cream cheese frosting touches, and springform assembly all make it adaptable.
Directions
Step 1: Prepare the Oven and Cake Pans
Preheat the oven according to the cake mix instructions. The cake layers should bake at the temperature directed on the box.
Grease two 8-inch or 9-inch round cake pans and line them with parchment circles. This helps the cake layers release cleanly after baking.
Step 2: Make the Cake Batter
Prepare the red velvet cake batter as directed on the box. Use the ingredients listed on the box, typically eggs, oil, and water.
Add 1 teaspoon vanilla extract if using. This optional addition enhances the flavor depth of the cake.
Step 3: Divide and Bake the Cake Layers
Divide the batter evenly between the prepared cake pans. Smooth the tops gently so the layers bake evenly.
Bake until a toothpick inserted into the center comes out clean. Follow the cake mix instructions for timing.
Step 4: Cool the Cake Layers
Let the baked cake layers cool in the pans for 10 minutes. Then turn them out onto a wire rack.
Allow the cake layers to cool completely before assembling. Warm cake layers can melt the cheesecake filling.
Step 5: Level the Cake Layers
Once the cake layers are completely cool, level the tops with a serrated knife. This helps the layers sit evenly.
Work gently so the cakes stay intact. Even layers make the finished cheesecake cake look cleaner and taller.
Step 6: Macerate the Sliced Strawberries
Place 2 cups hulled and sliced fresh strawberries in a bowl. Toss them with 2 tablespoons sugar.
Let the strawberries sit for 10 to 15 minutes. This softens the berries and draws out flavorful juices.
Step 7: Start the Strawberry Compote
In a saucepan, combine 2 cups diced strawberries, ⅓ cup sugar, and 1 tablespoon lemon juice. Place the saucepan over medium heat.
Cook for 5 to 7 minutes, or until the berries soften. Stir as needed while they cook.
Step 8: Thicken the Compote
Mix 1 tablespoon cornstarch with 2 tablespoons water to make a slurry. Stir the slurry into the softened strawberry mixture.
Continue cooking until the compote becomes thick and glossy. Remove it from the heat and let it cool completely before using.
Step 9: Beat the Cream Cheese
In a large bowl, beat 24 ounces softened full-fat cream cheese until smooth and lump-free. Scrape the bowl as needed.
Softened cream cheese is important for a smooth filling. Cold cream cheese can leave lumps.
Step 10: Add Sugar, Lemon Juice, and Vanilla
Add 1 cup granulated sugar, 1 tablespoon lemon juice, and 1 teaspoon vanilla extract to the cream cheese. Mix until fully combined.
The sugar sweetens, the lemon juice balances richness, and the vanilla adds warmth. The filling should look smooth before the whipped cream is added.
Step 11: Whip the Heavy Cream
In a separate bowl, whip 2 cups cold heavy cream to stiff peaks. The cream must be cold so it whips properly.
The whipped cream gives the cheesecake filling lightness. It helps create a fluffy no-bake texture.
Step 12: Fold the Whipped Cream into the Cream Cheese Mixture
Gently fold the whipped cream into the cream cheese mixture in batches. Use a spatula and fold carefully.
Do not stir aggressively. Gentle folding keeps the filling fluffy.
Step 13: Chill the Cheesecake Filling
Chill the no-bake cheesecake filling until ready to assemble. This helps it stay thick and easier to spread.
Make sure the cake layers and compote are completely cool before assembly. Cool components keep the filling stable.
Step 14: Begin Assembling the Cake
Place the first cake layer on a serving plate or inside a springform pan. A springform pan helps keep the layers neat and tall.
Spread a generous layer of cheesecake filling evenly over the first cake layer. Smooth it carefully from edge to edge.
Step 15: Add the Macerated Strawberry Layer
Spoon the macerated strawberries over the cheesecake filling. Spread them evenly so each slice gets fruit.
Try not to add too much loose juice at once if it makes the layer difficult to manage. The strawberries should sit nicely over the filling.
Step 16: Add the Second Cake Layer and More Filling
Place the second cake layer on top. Press gently so it sits evenly.
Cover the top with the remaining cheesecake filling. Smooth the filling so the top looks soft and even.
Step 17: Add the Strawberry Compote and Decorations
Spread the cooled strawberry compote evenly over the top. The compote should be thick, glossy, and completely cooled.
Decorate with fresh sliced strawberries. Add optional whipped cream or cream cheese frosting touches if desired.
Step 18: Chill, Slice, and Serve
Refrigerate the cake for several hours or overnight. It needs at least 3 to 4 hours, but overnight is best.
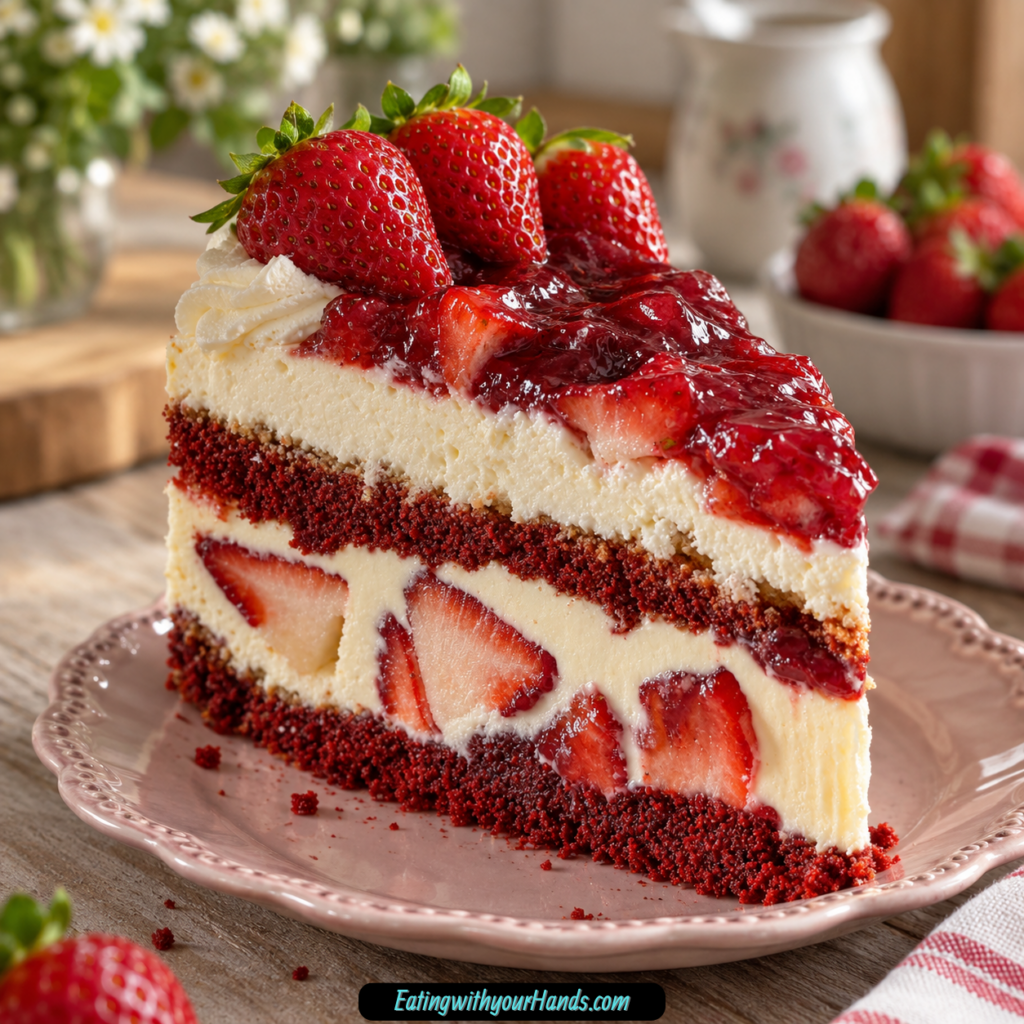
For clean slices, use a serrated knife dipped in hot water and wiped dry between cuts. Serve chilled for the best texture.
Serving Ideas
Strawberries and Cream Dream Layer Cheesecake Cake is best served chilled. The cheesecake filling sets better, the slices cut cleaner, and the fruit layers taste fresh.
Use a serrated knife dipped in hot water for clean slices. Wipe the knife dry between cuts for a bakery-style presentation.
This cake makes a beautiful centerpiece dessert. It is perfect for celebrations where you want one dessert to feel special.
Serve it at birthdays when you want something beyond a simple cake. The cheesecake filling makes it feel extra memorable.
It is also lovely for bridal showers. Fresh strawberries and creamy layers create a soft, elegant look.
For holidays, this cake is a helpful make-ahead choice. It can chill overnight and be decorated before serving.
After a summer dinner, serve smaller slices. The cake is indulgent, but the fresh strawberries keep it bright.
Optional whipped cream gives the top a soft finish. Optional cream cheese frosting touches can make the cake feel more decorated.
Storage
Store leftovers covered in the refrigerator for up to 4 days. Because of the cheesecake filling, the cake should stay chilled.
Do not leave the cake at room temperature for extended periods. Refrigeration helps protect the creamy filling and fruit layers.
Cover the cake carefully so it does not dry out. A covered cake keeper or careful wrapping works well.
Because the layers are soft and creamy, avoid pressing directly into the top. Protect the strawberry compote and decorations as much as possible.
Serve leftovers chilled. The cake will hold its texture best when kept cold.
Freezing
Freezing is possible, but the texture of the cheesecake layer is best enjoyed fresh or refrigerated. The creamy filling may change after freezing and thawing.
For the best experience, store the cake in the refrigerator and enjoy it within 4 days. This keeps the layers soft, fresh, and creamy.
If you choose to freeze, expect some texture change. The fresh fruit and cheesecake layer may not be exactly the same after thawing.
This cake is strongest as a make-ahead refrigerator dessert. Chilling overnight gives the best set and flavor.
Make-Ahead
Strawberries and Cream Dream Layer Cheesecake Cake is ideal to make a day ahead. Overnight chilling allows the cheesecake layer to set fully.
Making it ahead also gives the flavors time to meld. The cake, cheesecake filling, strawberries, and compote become more connected after resting.
Bake the cake layers, cool them completely, prepare the strawberry layers, make the cheesecake filling, and assemble. Then chill the cake until ready to decorate or serve.
If using fresh decorations, add them close to serving time if desired. The cake should remain covered and refrigerated until slicing.
This make-ahead quality makes the cake wonderful for entertaining. You can prepare the dessert before guests arrive and focus on serving it beautifully.
Helpful Notes for Best Results
Cool the cake layers completely before assembling. Warm cake can melt the cheesecake filling.
Use softened cream cheese for a smooth no-bake filling. Full-fat cream cheese gives the best texture.
Whip the cold heavy cream to stiff peaks. This gives the filling its light, creamy structure.
Fold the whipped cream into the cream cheese mixture gently and in batches. This keeps the filling fluffy.
Cool the strawberry compote completely before spreading it over the cake. Warm compote can soften the cheesecake layer.
Using a springform pan helps keep the cake layers neat and tall. It is optional but very helpful for assembly.
Add 1 teaspoon bloomed gelatin to the whipped cream if extra stability is needed. This is optional.
Use a hot serrated knife for clean slices. Dip the knife in hot water and wipe dry between cuts.
Variations
Red Velvet Strawberries and Cream Cheesecake Cake
Use red velvet cake mix for the cake layers. This gives the cake a dramatic color and a beautiful slice.
The red cake looks striking against the creamy cheesecake filling and strawberries. It is a great choice for special occasions.
Vanilla Strawberries and Cream Cheesecake Cake
Use vanilla cake mix instead of red velvet. This creates a classic, soft flavor.
The vanilla cake lets the strawberries and cheesecake filling shine. It is simple and elegant.
White Cake Cheesecake Cake
Use white cake mix if preferred. This gives the dessert a clean, light appearance.
The strawberry compote looks especially pretty on top. White cake also works well with whipped cream decorations.
Strawberry Cake Cheesecake Cake
Use strawberry cake mix for a stronger strawberry flavor. This makes the dessert even fruitier.
The strawberry cake pairs with the fresh strawberry layer and compote. It is a good choice for strawberry fans.
Chocolate Cake Cheesecake Cake
Chocolate cake can be used as a flavor swap. This creates a richer version.
The chocolate cake works with strawberries and cream. It gives the dessert a deeper flavor.
Homemade Cake Version
Use a homemade sturdy cake recipe instead of box mix if desired. Any sturdy cake recipe works.
The cake should be strong enough to layer with cheesecake filling and strawberries. Cool it completely before assembly.
Frozen Strawberry Compote
Use frozen strawberries for the compote if needed. Fresh strawberries are best for the sliced layer, but frozen work well for the cooked topping.
Cook the compote until thick and glossy. Let it cool completely before using.
Stabilized Whipped Cream Decoration
Use stabilized whipped cream for topping if you want extra hold. Add 1 teaspoon bloomed gelatin to the whipped cream if needed.
This helps the whipped cream keep its shape. It is optional but useful for presentation.
Cream Cheese Frosting Decoration
Add optional cream cheese frosting touches. This gives the cake a more decorated look.
Use small touches so the cheesecake filling and strawberries remain the focus. It makes the cake feel bakery-style.
Springform Layer Cake
Assemble the cake inside a springform pan. This helps keep the sides neat and the layers tall.
Chill the cake until set before removing the ring. This trick makes assembly easier.
Troubleshooting
The Cheesecake Filling Is Lumpy
The cream cheese may not have been soft enough. Use softened cream cheese and beat until smooth and lump-free.
Scrape the bowl as needed. This helps the filling become creamy before the whipped cream is folded in.
The Cheesecake Filling Is Too Loose
Make sure the heavy cream is whipped to stiff peaks. The whipped cream gives the filling structure.
Chill the filling until ready to assemble. For extra stability, add 1 teaspoon bloomed gelatin to the whipped cream if needed.
The Cake Layers Melted the Filling
The cake layers were likely too warm. Cool them completely before assembling.
Warm cake can soften or melt the cheesecake filling. Patience during cooling makes the layers neater.
The Compote Made the Top Runny
The compote may not have been thickened enough or cooled completely. Cook it with the cornstarch slurry until thick and glossy.
Let it cool fully before spreading. Warm compote can loosen the cheesecake layer.
The Layers Slide
A springform pan can help keep the layers neat and tall. Chilling also helps the cheesecake filling set.
Make sure the cake layers are level. Uneven layers can cause slipping.
The Slices Look Messy
Use a serrated knife dipped in hot water and wiped dry between cuts. This gives cleaner slices.
Serve the cake chilled. Warm or soft cake is harder to slice neatly.
The Cake Needs More Strawberry Flavor
Use strawberry cake mix or add the strawberry compote layer generously. Fresh sliced strawberries and compote already bring fruit flavor.
Make sure the strawberries are macerated for 10 to 15 minutes. This helps release flavorful juices.
The Cake Needs a Different Flavor
Use vanilla, white, strawberry, or chocolate cake mix. These flavor swaps are all noted options.
Keep the cheesecake filling and strawberry layers the same. The cake will have a new personality while staying creamy and fruity.
The Cake Needs to Be Made Ahead
Make it a day ahead. This cake is ideal after chilling overnight.
The cheesecake layer sets fully, and the flavors meld beautifully. Keep it covered in the refrigerator.
The Cake Was Left Out Too Long
Because of the cheesecake filling, this cake should not be left at room temperature for extended periods. Keep it chilled whenever possible.
Store leftovers covered in the refrigerator. Serve cold for the best texture.
Frequently Asked Questions
Can I make this cake ahead of time?
Yes, this cake is ideal to make a day ahead. It needs time to chill and set fully.
Overnight chilling is best. The flavors also meld beautifully as it rests.
Can I use frozen strawberries?
Fresh strawberries are best for layering. They hold their shape and give the best fresh texture.
Frozen strawberries work well for the compote. Cook them until thick and glossy, then cool completely.
Do I need a springform pan?
No, a springform pan is not required. However, it makes assembly and removal easier.
Using one helps keep the layers neat and tall. It is a helpful trick for this kind of cake.
Can I use homemade cake instead of box mix?
Yes, homemade cake can be used instead of box mix. Any sturdy cake recipe works.
Make sure the cake layers are completely cool before assembling. Level them with a serrated knife if needed.
How long does it need to chill?
The cake should chill for at least 3 to 4 hours. Overnight is best.
Chilling allows the cheesecake layer to set. It also helps the flavors come together.
What cake flavors can I use?
Red velvet cake mix is the main option. Vanilla, white, or strawberry cake can also be used.
Chocolate cake is also mentioned as a flavor swap. Choose the flavor that fits your celebration.
How long do leftovers last?
Store leftovers covered in the refrigerator for up to 4 days. Keep the cake chilled because of the cheesecake filling.
Do not leave it at room temperature for extended periods. Serve chilled for the best texture.
Can I freeze this cake?
Freezing is possible, but the cheesecake layer is best enjoyed fresh or refrigerated. The texture may change after freezing.
For the best result, make the cake ahead and refrigerate it. Enjoy within 4 days.
Why This Recipe Works So Well
Strawberries and Cream Dream Layer Cheesecake Cake works so well because it combines three beloved dessert ideas in one slice. Cake, no-bake cheesecake, and strawberries each bring a different kind of sweetness and texture.
The cake layers give the dessert structure. They make the cheesecake cake sliceable and sturdy enough for serving.
The no-bake cheesecake filling adds a creamy middle layer. Cream cheese gives richness, while whipped heavy cream makes it lighter.
Lemon juice balances the richness of the cream cheese. Vanilla adds warmth and makes the filling taste smooth.
The fresh strawberry layer brings brightness. Macerating the sliced berries with sugar helps them soften and release flavorful juices.
The strawberry compote adds a glossy finish. Diced strawberries, sugar, lemon juice, and cornstarch slurry cook into a thick topping that looks beautiful.
The dessert also works because all warm components are cooled before assembly. Cool cake layers and cooled compote protect the cheesecake filling.
Chilling is another key part of the recipe. Several hours in the refrigerator allow the cheesecake layer to set and the flavors to meld.
The cake is also flexible. Red velvet, vanilla, white, strawberry, or chocolate cake can be used, and the top can be decorated with fresh strawberries, whipped cream, or cream cheese frosting touches.
Most of all, this cake works because it looks impressive but still feels homemade and approachable. It is creamy, fruity, soft, beautiful, and made for celebrations that deserve a dessert people remember.
Final Thoughts
Strawberries and Cream Dream Layer Cheesecake Cake is a stunning layered dessert made with cake layers, no-bake cheesecake filling, fresh sliced strawberries, strawberry compote, and optional whipped cream or cream cheese frosting decorations. The cake layers are baked in two 8-inch or 9-inch pans, cooled completely, leveled, filled with creamy cheesecake filling, layered with macerated strawberries, topped with glossy compote, and chilled until fully set.
Serve this cake chilled for clean slices and the best texture. With its make-ahead convenience, fresh strawberry brightness, creamy cheesecake layer, customizable cake flavors, and beautiful presentation, Strawberries and Cream Dream Layer Cheesecake Cake is a dreamy dessert for birthdays, holidays, bridal showers, summer dinners, and unforgettable gatherings.
Strawberries and Cream Dream Layer Cheesecake Cake
Soft, creamy, fruity, and beautifully layered, this Strawberries and Cream Dream Layer Cheesecake Cake combines tender cake layers with fluffy no-bake cheesecake filling, fresh sliced strawberries, and a glossy strawberry compote topping. With cream cheese, whipped heavy cream, lemon juice, vanilla, and plenty of strawberries, it makes a stunning chilled dessert for celebrations, gatherings, or special dessert tables.
Recipe Details
- Prep Time: 30 minutes
- Cook Time: 30 minutes
- Chilling Time: 3 hours
- Total Time: 4 hours
- Servings: 12
- Calories: 450 kcal
Ingredients
Topping
- Fresh sliced strawberries
- Optional whipped cream or cream cheese frosting
Strawberry Compote / Glaze
- 2 cups diced strawberries
- ⅓ cup sugar
- 1 tablespoon lemon juice
- 1 tablespoon cornstarch + 2 tablespoons water
Fresh Strawberry Layer
- 2 cups fresh strawberries hulled and sliced
- 2 tablespoons sugar
No-Bake Cheesecake Filling
- 24 oz cream cheese softened
- 1 cup granulated sugar
- 1 tablespoon lemon juice
- 1 teaspoon vanilla extract
- 2 cups heavy cream cold
Cake Layers
- 1 box red velvet cake mix or preferred flavor
- Ingredients listed on cake mix box eggs, oil, water
- 1 teaspoon vanilla extract optional
Instructions
Step 1: Bake the Cake Layers
Prepare and bake cake layers according to package directions. Cool completely and level tops.
Step 2: Macerate the Strawberries
Toss sliced strawberries with sugar and let macerate 10-15 minutes. This gives the fresh strawberry layer time to soften slightly and release its juices.
Step 3: Make the Strawberry Compote
Cook diced strawberries, sugar, and lemon juice over medium heat until softened. Stir in cornstarch slurry and cook until thick.
Step 4: Cool the Compote
Cool the strawberry compote before using it on the cake. This keeps the topping glossy and prevents it from melting into the cheesecake filling too quickly.
Step 5: Beat the Cream Cheese
Beat cream cheese until smooth. Add sugar, lemon juice, and vanilla, then mix until the cheesecake base is creamy and combined.
Step 6: Fold in the Whipped Cream
Whip heavy cream to stiff peaks and gently fold into cream cheese mixture. Chill briefly.
Step 7: Start Assembling the Cake
Place first cake layer on serving plate or springform pan. Spread cheesecake filling over the cake layer and add macerated strawberries.
Step 8: Add the Second Layer
Top with second cake layer and remaining cheesecake filling. Spread the filling evenly so the cake has a smooth, creamy top.
Step 9: Add the Strawberry Topping
Spread cooled strawberry compote on top and decorate as desired. Use fresh sliced strawberries, optional whipped cream, or cream cheese frosting for the topping.
Step 10: Chill Before Slicing
Refrigerate several hours or overnight before slicing and serving.
Notes
- Allow cake layers to cool fully before assembling.
- Chill cake overnight for the cleanest slices and best texture.
- Use a hot, serrated knife for neat cuts.
Serving Suggestions
Serve this Strawberries and Cream Dream Layer Cheesecake Cake chilled after it has refrigerated for several hours or overnight. The cake layers, fluffy no-bake cheesecake filling, macerated strawberries, and strawberry compote topping make each slice creamy, fruity, and celebration-ready.
This dessert works well for birthdays, holidays, spring gatherings, summer parties, or any table that needs a tall layered cake with fresh strawberry flavor. Decorate as desired with fresh sliced strawberries, optional whipped cream, or cream cheese frosting.
Storage
How to Store
The recipe does not provide a specific refrigerator storage duration, so no exact number of days is added here.
Chill Time Tip
Refrigerate the cake several hours or overnight before slicing and serving. The listed Chilling Time is 3 hours, and the Notes also recommend chilling overnight for the cleanest slices and best texture.
Cake Layer Tip
Allow cake layers to cool fully before assembling. Level the tops after the layers have cooled so the cheesecake filling and strawberry layers sit more evenly.
Cheesecake Filling Tip
Whip the cold heavy cream to stiff peaks before folding it into the cream cheese mixture. Chill the filling briefly so it stays fluffy and easier to layer.
Strawberry Tip
Let the sliced strawberries macerate with sugar for 10-15 minutes. Cool the strawberry compote completely before spreading it on top of the cake.
Slicing Tip
Use a hot, serrated knife for neat cuts. This helps slice through the chilled cake layers, cheesecake filling, strawberries, and compote topping more cleanly.

Fernando is the creator and writer behind the food blog Eating with your Hands. Living and working in cities like Paris, Barcelona, and Berlin, and being married to a Canadian foodie, has given Fernando a passion and interest in food and inspired him to run EWYH.